 Advanced Book/Album Page
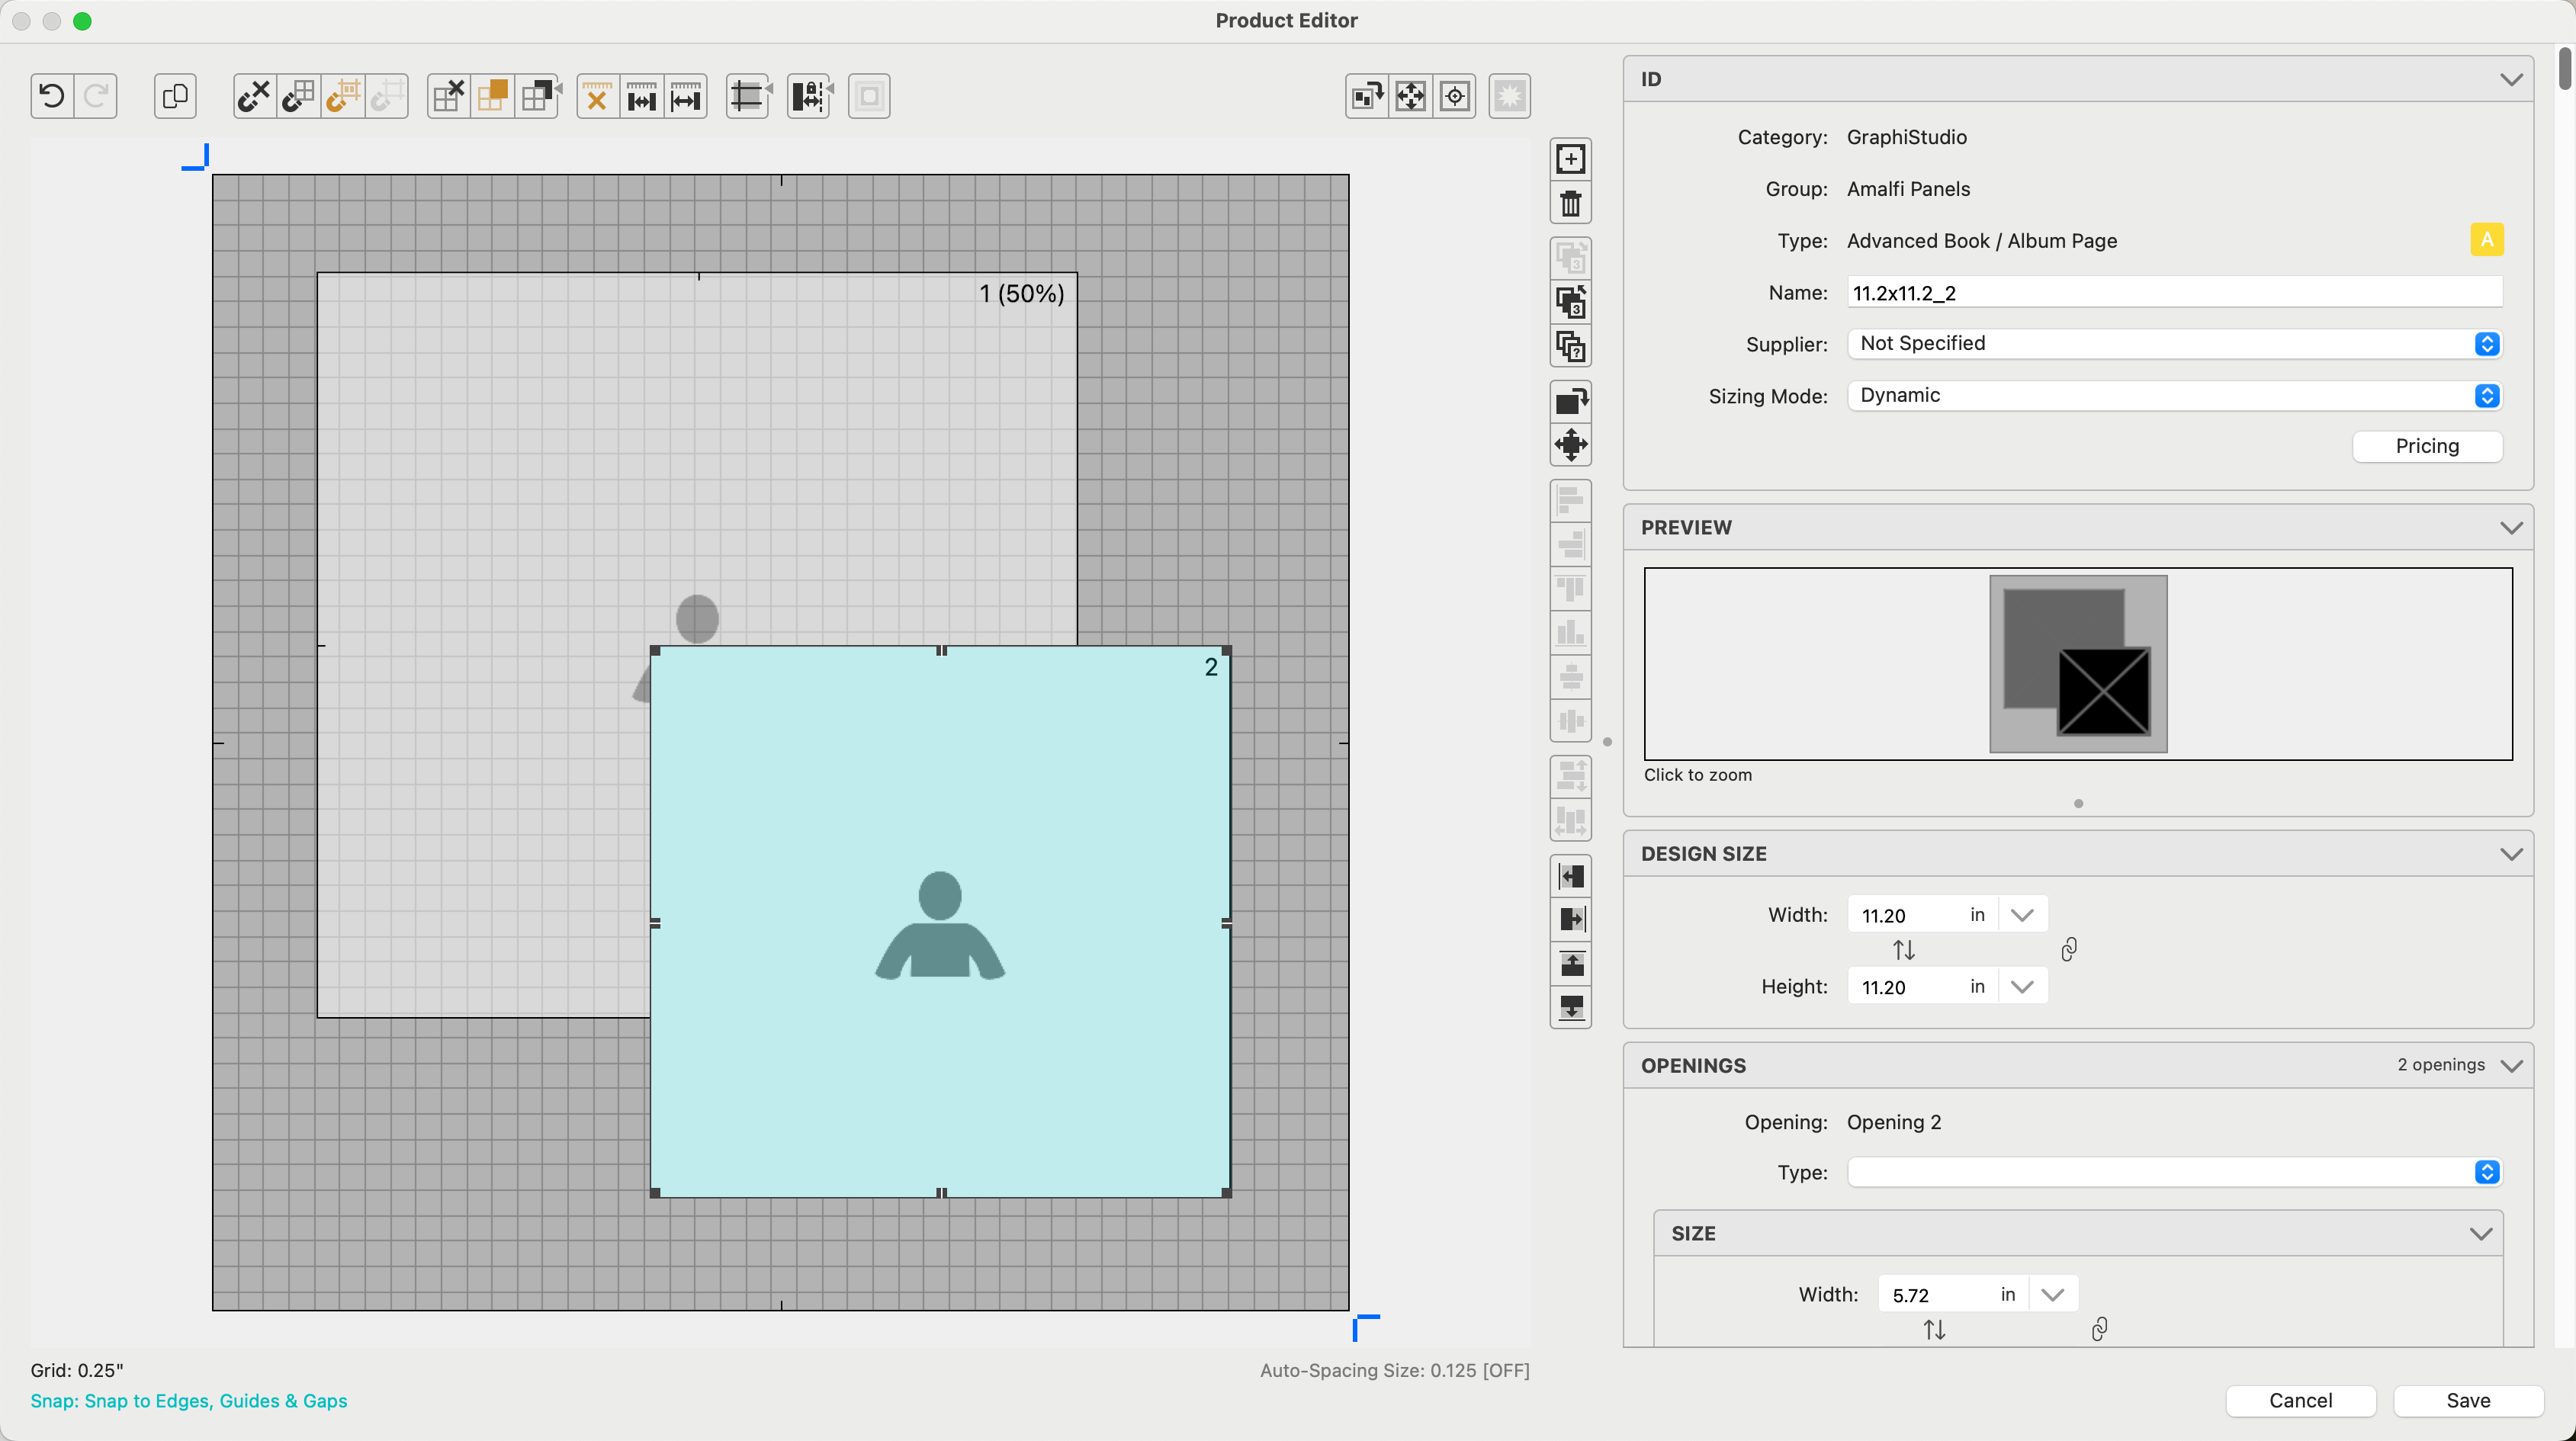
Advanced Book/Album Pages contain all of the options of the Basic Book/Album Page, with the additional ability to use overlay images, shapes, and drop rotation.
To access Book/Album Page templates, you need to go to Products > Book Page Manager. This is different from other template types which are accessed through the Product & Pricing Manager.
The ID Box:
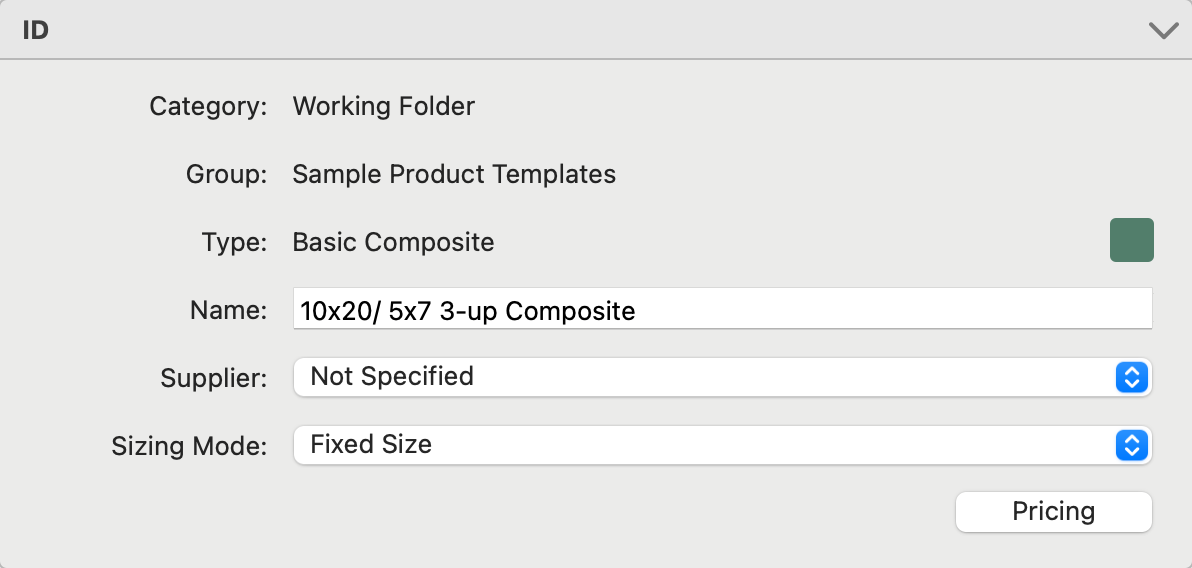
- Category, Group, and Type are listed at the top.
- Name: For fixed-size templates, It is helpful to name your templates using the overall size (10x20), then the size of your openings (5x7), followed by how many are in the template (3-up). For a dynamically sized template, don't use the size (as it may change). Instead, use "3-up" or something else to describe the product.
- Supplier: Optionally attach a Supplier to the product template.
- Sizing Mode:
- Fixed Size: A single template of one size.
- Stacked - Fixed: Two or more templates with the same number of openings and the same opening type. These are typically similar with varied sizes.
- Dynamic: This is the same template scaled to fit paper sizes that match the ratio of the template. If there are five paper sizes of matching ratios, five sizes will be available.
- Pricing: Click on the Pricing button to open the Price List Items dialog. *Pricing is not enabled for Book Pages. They are priced as a Reference Product or an Order Adjustment.
- Dynamic Sizing is not available for Traditional Matted, Wall Grouping, or Specialty Products. Use Stacked Sizing as an alternative.
- Pre-Framed Prints always use dynamic sizing. They reference your paper sizes.
- Sizing is not available for Reference Products.
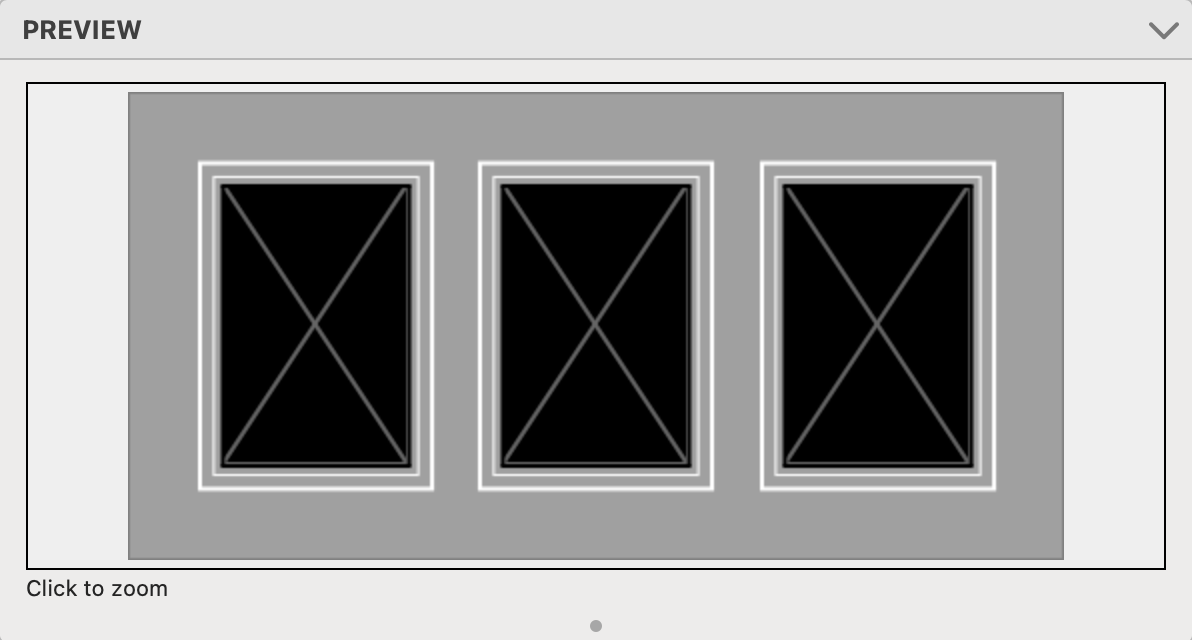
The Preview Box reflects how the template will look with added mats, frames, etc. Click on the preview image to zoom.
The Design Size box allows you to adjust the size of the overall template as well as add a bleed if required.
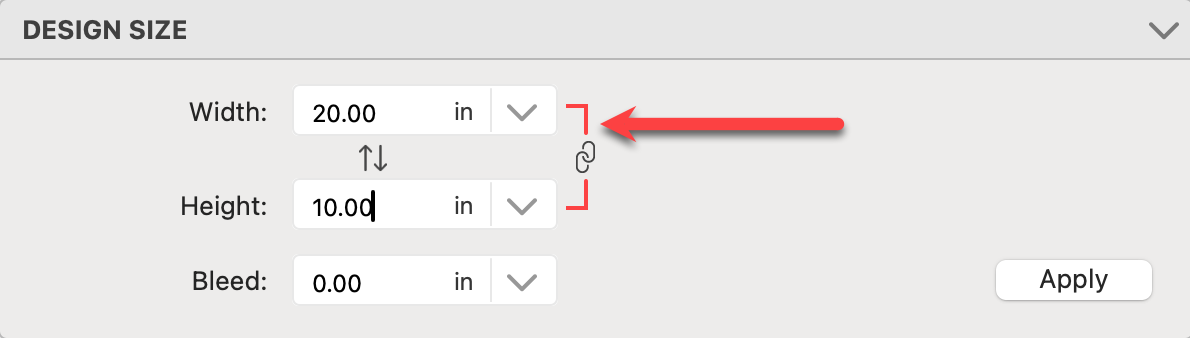
- Type in the desired width and height and click the Apply button.
- Alternatively, use the drop-down arrow
 to access paper sizes. Select one from the list.
  Swap Sizes Around: You have the ability to swap the width and height around using the swap sizes button. Click the Apply button to apply the change.
 Constrain Aspect Ratio: When constraining (locking) the aspect ratio, any adjustment to the width of the template will automatically change the height in order to keep the same aspect ratio, or vice versa. When this feature is turned on, red lines appear to link the width and height boxes together. As with Swap Sizes, click the Apply button to apply any changes to the design size. Click on Locked Aspect Ratio to learn more.
- Bleed: If applicable, type a bleed amount into the box, or select from a list of commonly used bleed amounts using the drop-down arrow. This is the additional amount added to the design size.
Select an opening first to enable the options within the Openings box.
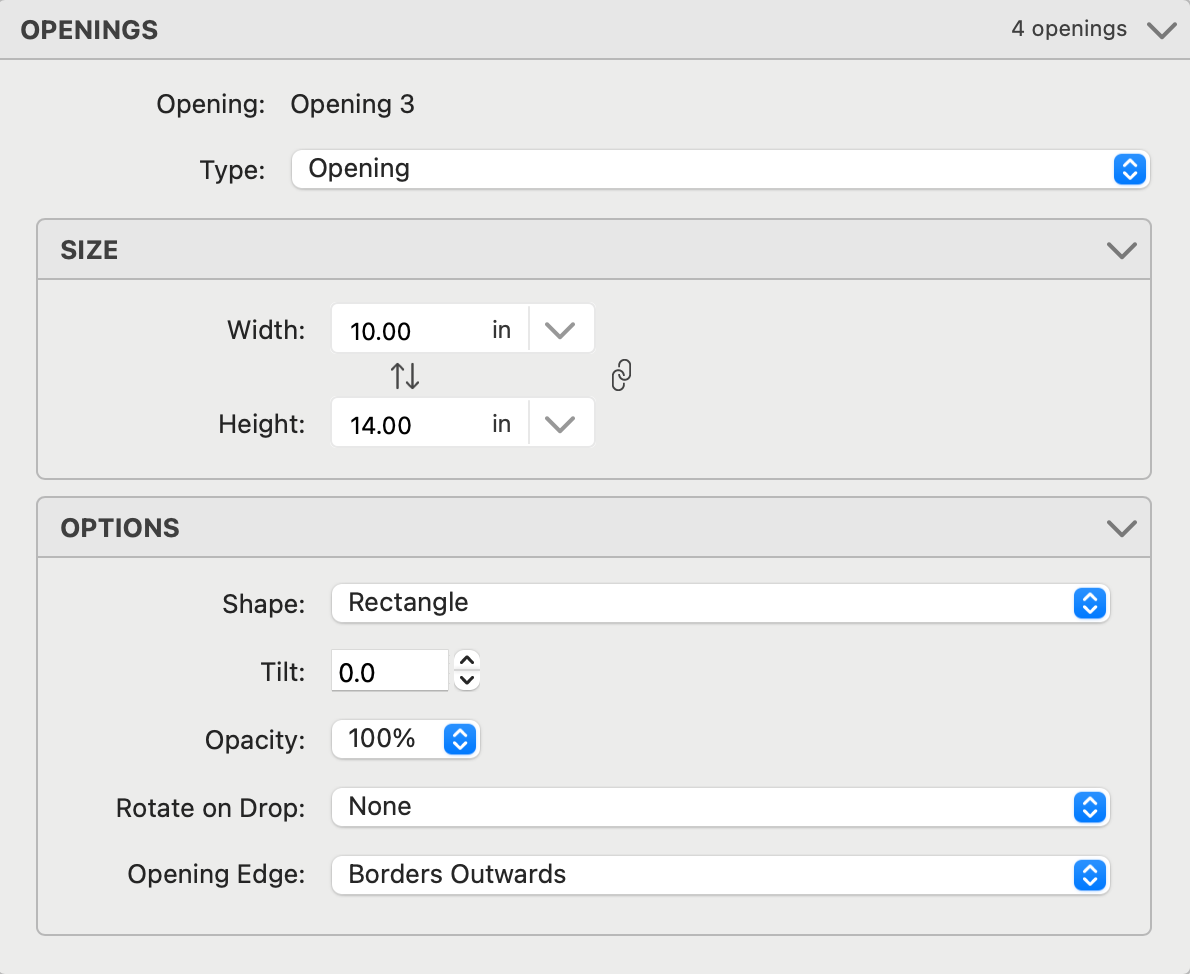
- The upper-right corner of the Openings box will tell you how many openings are in the template.
- Opening: The selected opening will be listed here. If you have multiple openings selected, that will be reflected.
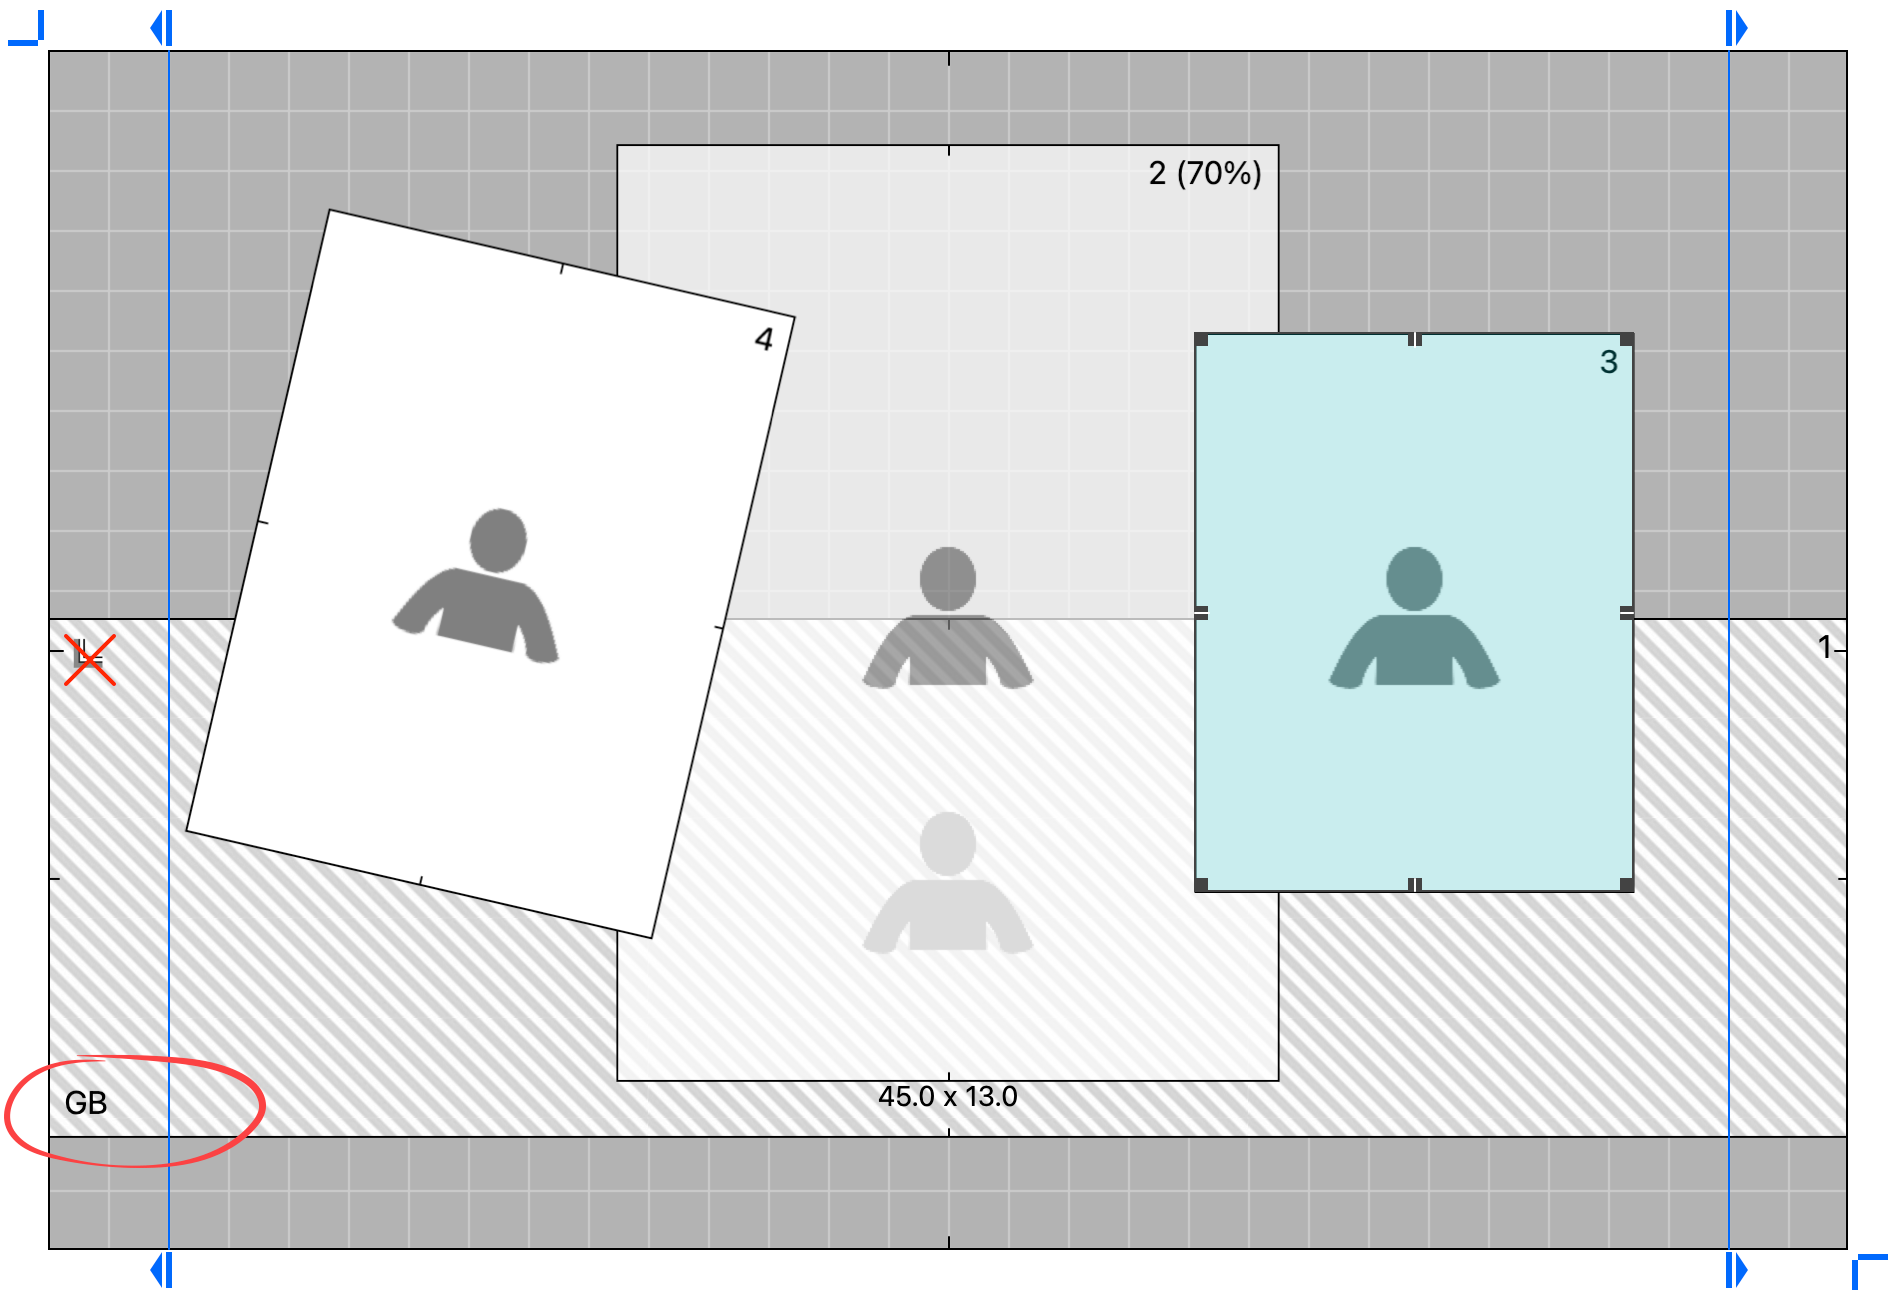
- Type: Some product templates allow openings to be made into a graphic block using the drop-down menu. Please note, graphic blocks by default have no edge treatment selected. Graphic block openings appear with diagonal gray lines in the Template Editing Area as well as a "GB" in the bottom left corner of the opening. This is to differentiate the graphic block from a regular opening.
Size
Sizing openings works in much the same way as sizing the whole template (Design Size Box).
- Type in the desired width and height and click the Apply button.
- Alternatively, use the drop-down arrow to access paper sizes. Select one from the list. Note: sizes that are larger than the overall design size of the product template will be grayed out (disabled).
- Openings can also be re-sized in the template editing area. Adjust the opening(s) by dragging them using the re-size handles in each corner or mid-way along each side.
- Swap Sizes Around: You have the ability to swap the width and height around by clicking the swap sizes button. Click the Apply button to apply the change.
- Constrain Aspect Ratio: When constraining the aspect ratio, any adjustment to the width of the opening will automatically change the height in order to keep the same aspect ratio, or vice versa. When you click the button, red lines will appear to link the width and height boxes together. As with Swap Sizes, click the Apply button to apply any changes to the design size. Click on Locked Aspect Ratio to learn more.
Options
- Shape: Click on the drop-down menu to change the shape of an opening.
- Tilt: Openings can be tilted up to 45 degrees each way. Use the tilt arrows (up for clockwise, and down for counter-clockwise) or type in a specific tilt degree number into the tilt box. Click the Apply button if manually typing in a tilt degree. Each time you click the tilt arrows, the opening will tilt by 1 degree. If you hold the OptionAlt key while clicking the tilt arrows, the opening will rotate by 0.25 degrees with each click. Tilted openings can be positioned to partially hang over the edges of a template.
- Mat Overlap: If applicable, select a mat overlap amount here.
- Opacity: Use the drop-down menu to change the opacity of the opening or graphic block. With the opacity set to anything other than 100%, you will see through the opening to whatever is behind. This is normally the mat color, but it could be other openings. The minimum Opacity of an image is 10%, while a graphic block can be 0%. Once you set the opacity of an opening, the % will appear in brackets next to the opening in the Template Editing Area.
- Rotate on Drop: Use the drop-down menu to set an opening to automatically rotate when an image is added. This feature can be used when designing a template for a card with a horizontal fold. Images on the back of the fold will be the right way up. The image icon will be rotated within the opening, so you can easily see what the final orientation will be.
- Opening Edge: Use the drop-down menu to select the opening edge. Click on Edge Treatments to learn more.
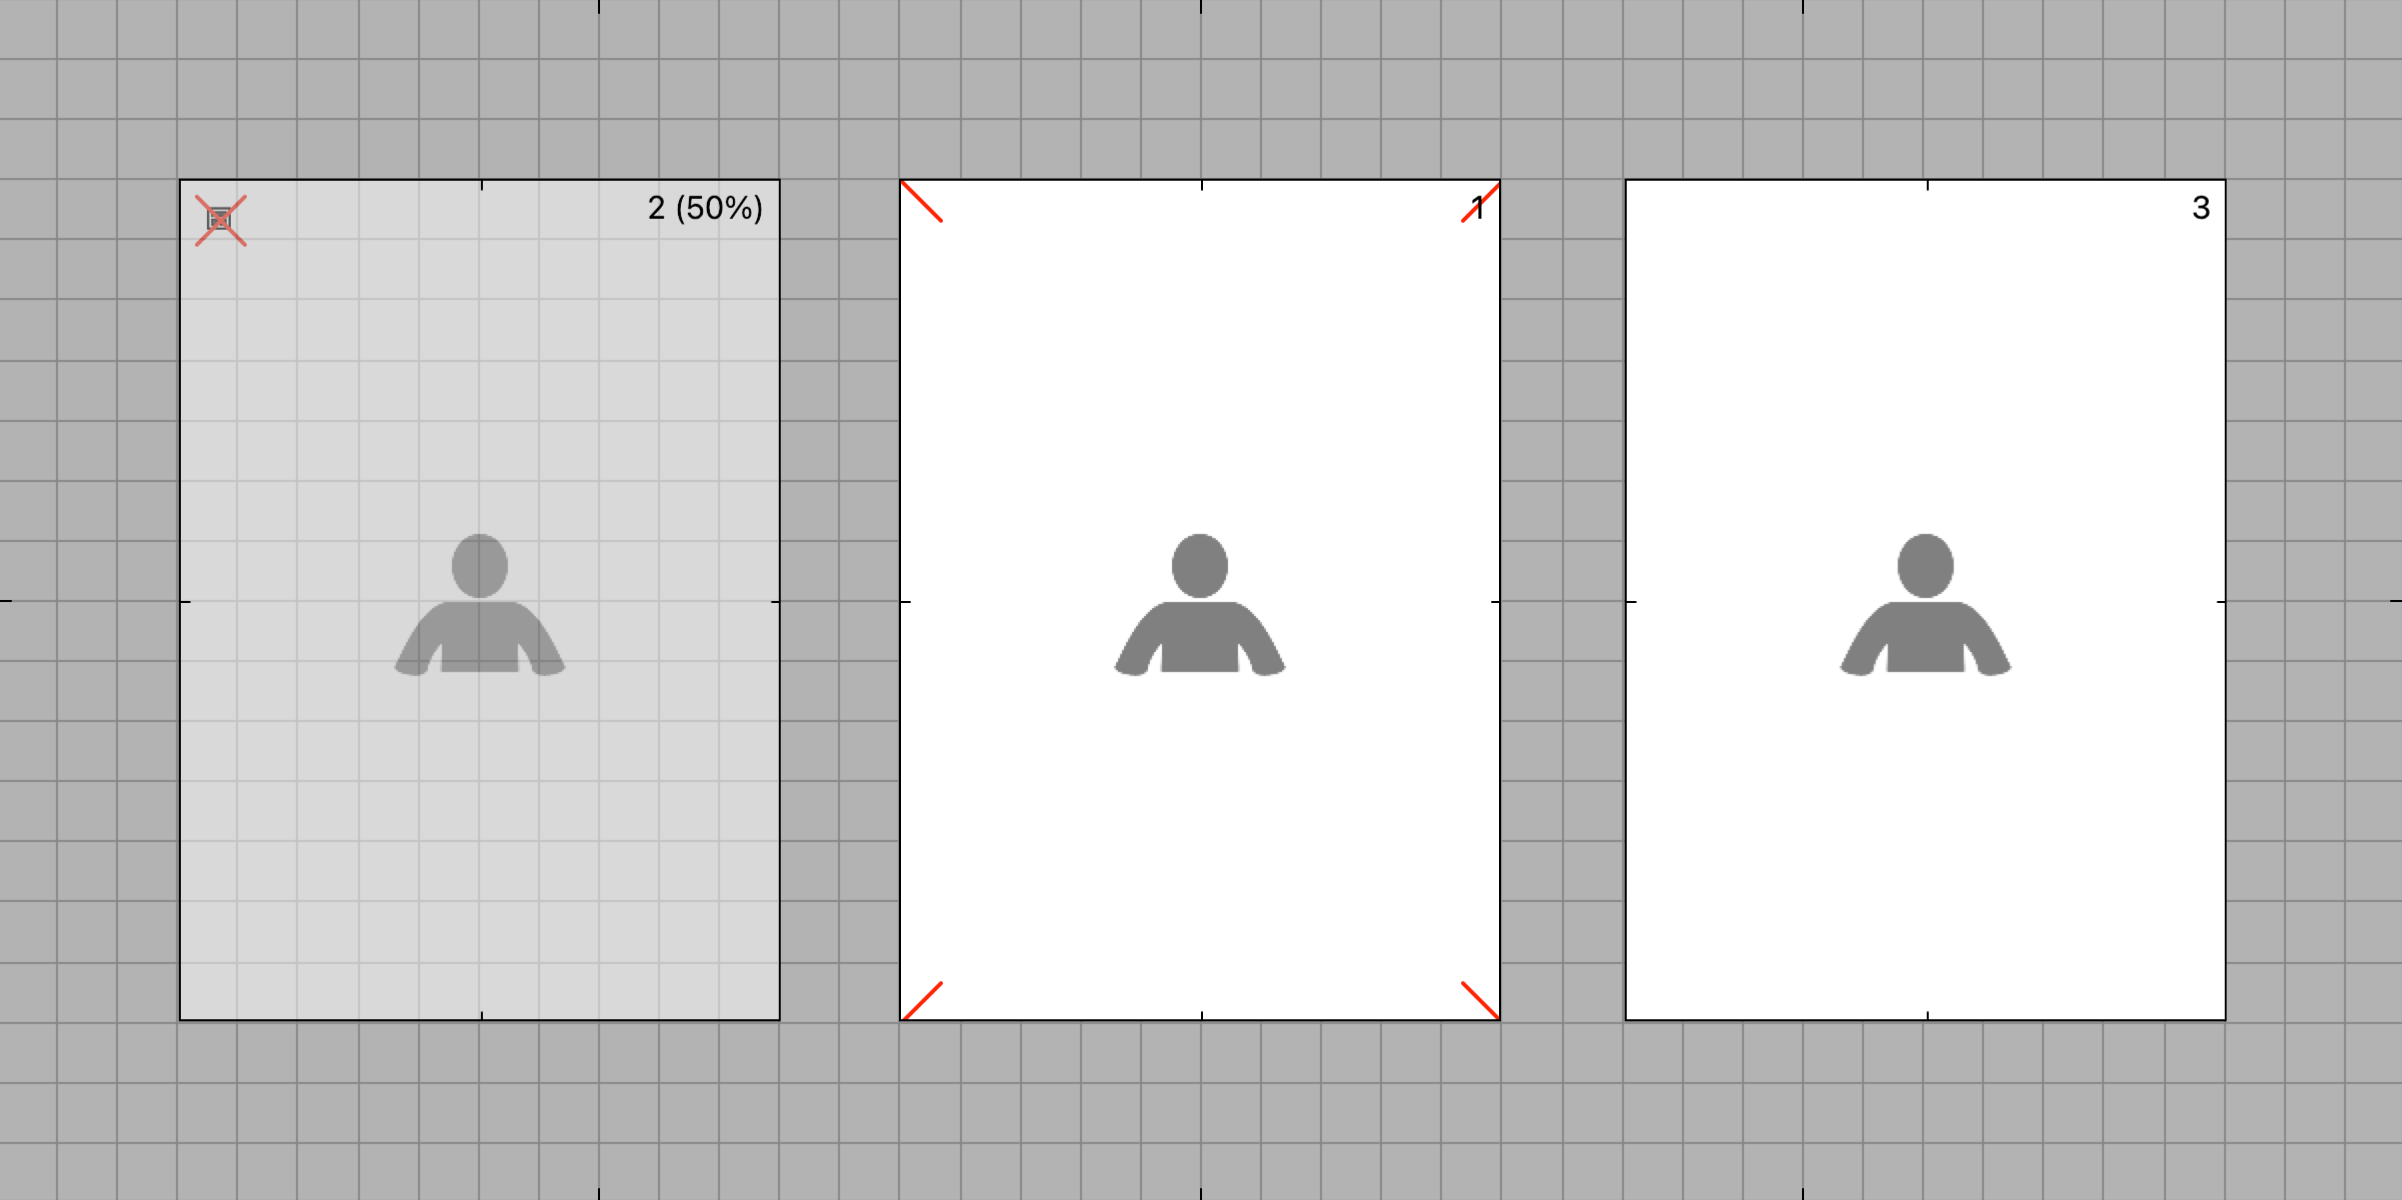
- No Edge Treatment: A red X will appear in the upper left corner of the opening. (Opening #2 - left)
- Borders Inwards: When Borders Inwards is selected, the opening will appear with diagonal red lines in the corners. (Opening #1 - middle)
- Borders Outwards: The default setting. (Opening #3 - right)
You have the option of creating a Double Spread.

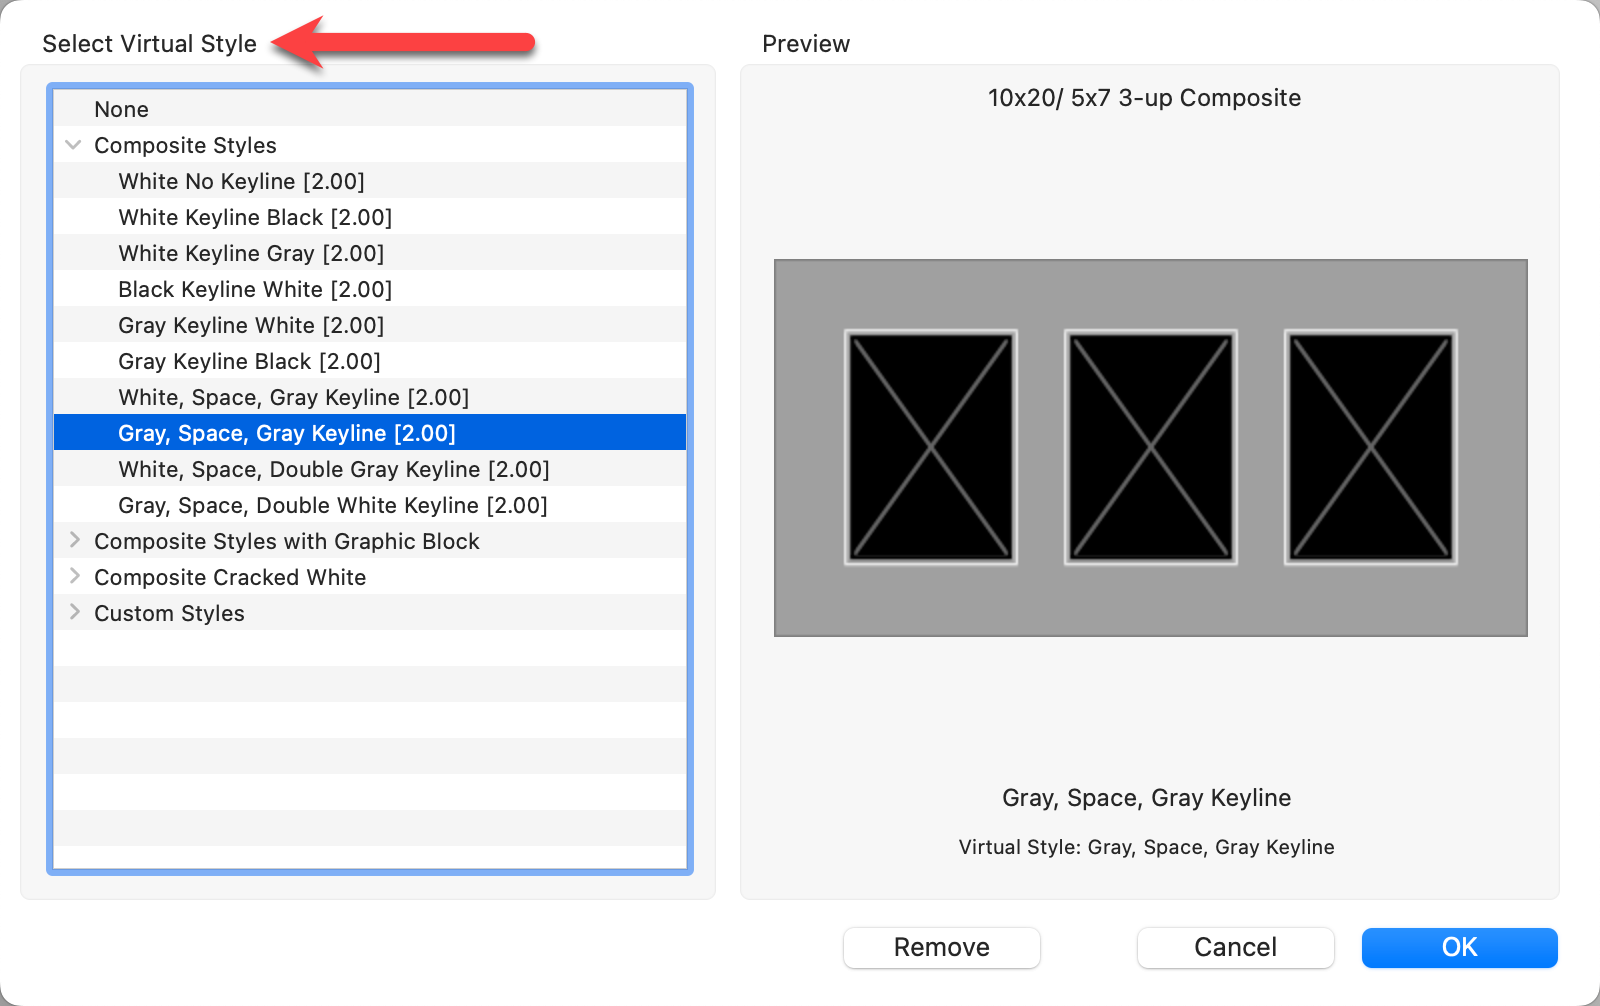
The Appearance box allows you to apply a virtual style or overlay image (Advanced only) to your book page template.
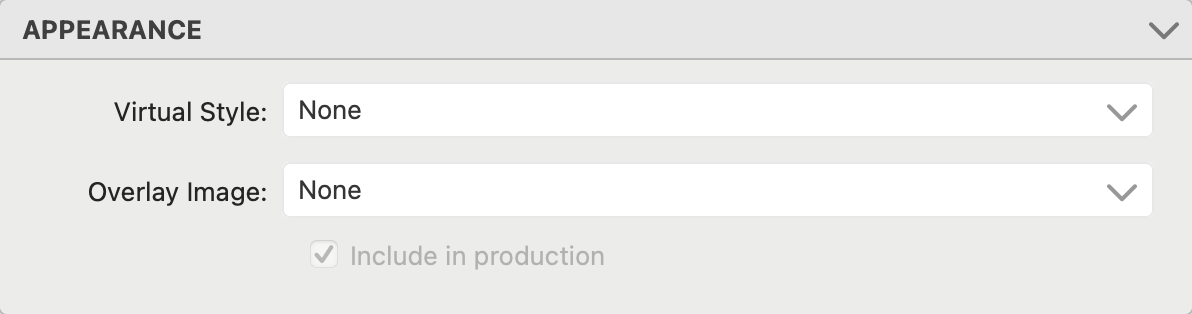
- Use the drop-down menus to select a virtual style to add to your template.
- Select "manage" from the list if the required option isn't listed. This will take you to the designer where you can create the option you want.
- To remove a style select "Remove" from the list of options.
-
Overlay Image: *Advanced only: Click on the drop-down menu to Select an Overlay Image. You will be directed to the Template Overlays dialog. From here you can select an image to use in your product template. Template Overlays are found in the ProSelect Resources folder. For more information click on Overlay Images. You can choose whether or not to include the overlay image in production or not, by checking the Include in Production box.
 Quick Tip - Virtual Styles
While frames and traditional mats are applied to the template as a whole, virtual styles are applied to each opening in your template. You can choose to remove the virtual style edge treatment around specific openings in the Openings box.