 Cropping View
When Working with Images, Cropping view allows you to experiment with different croppings on your images. Any cropping is not permanently applied and can be changed or removed at any time.
How to Access Cropping View
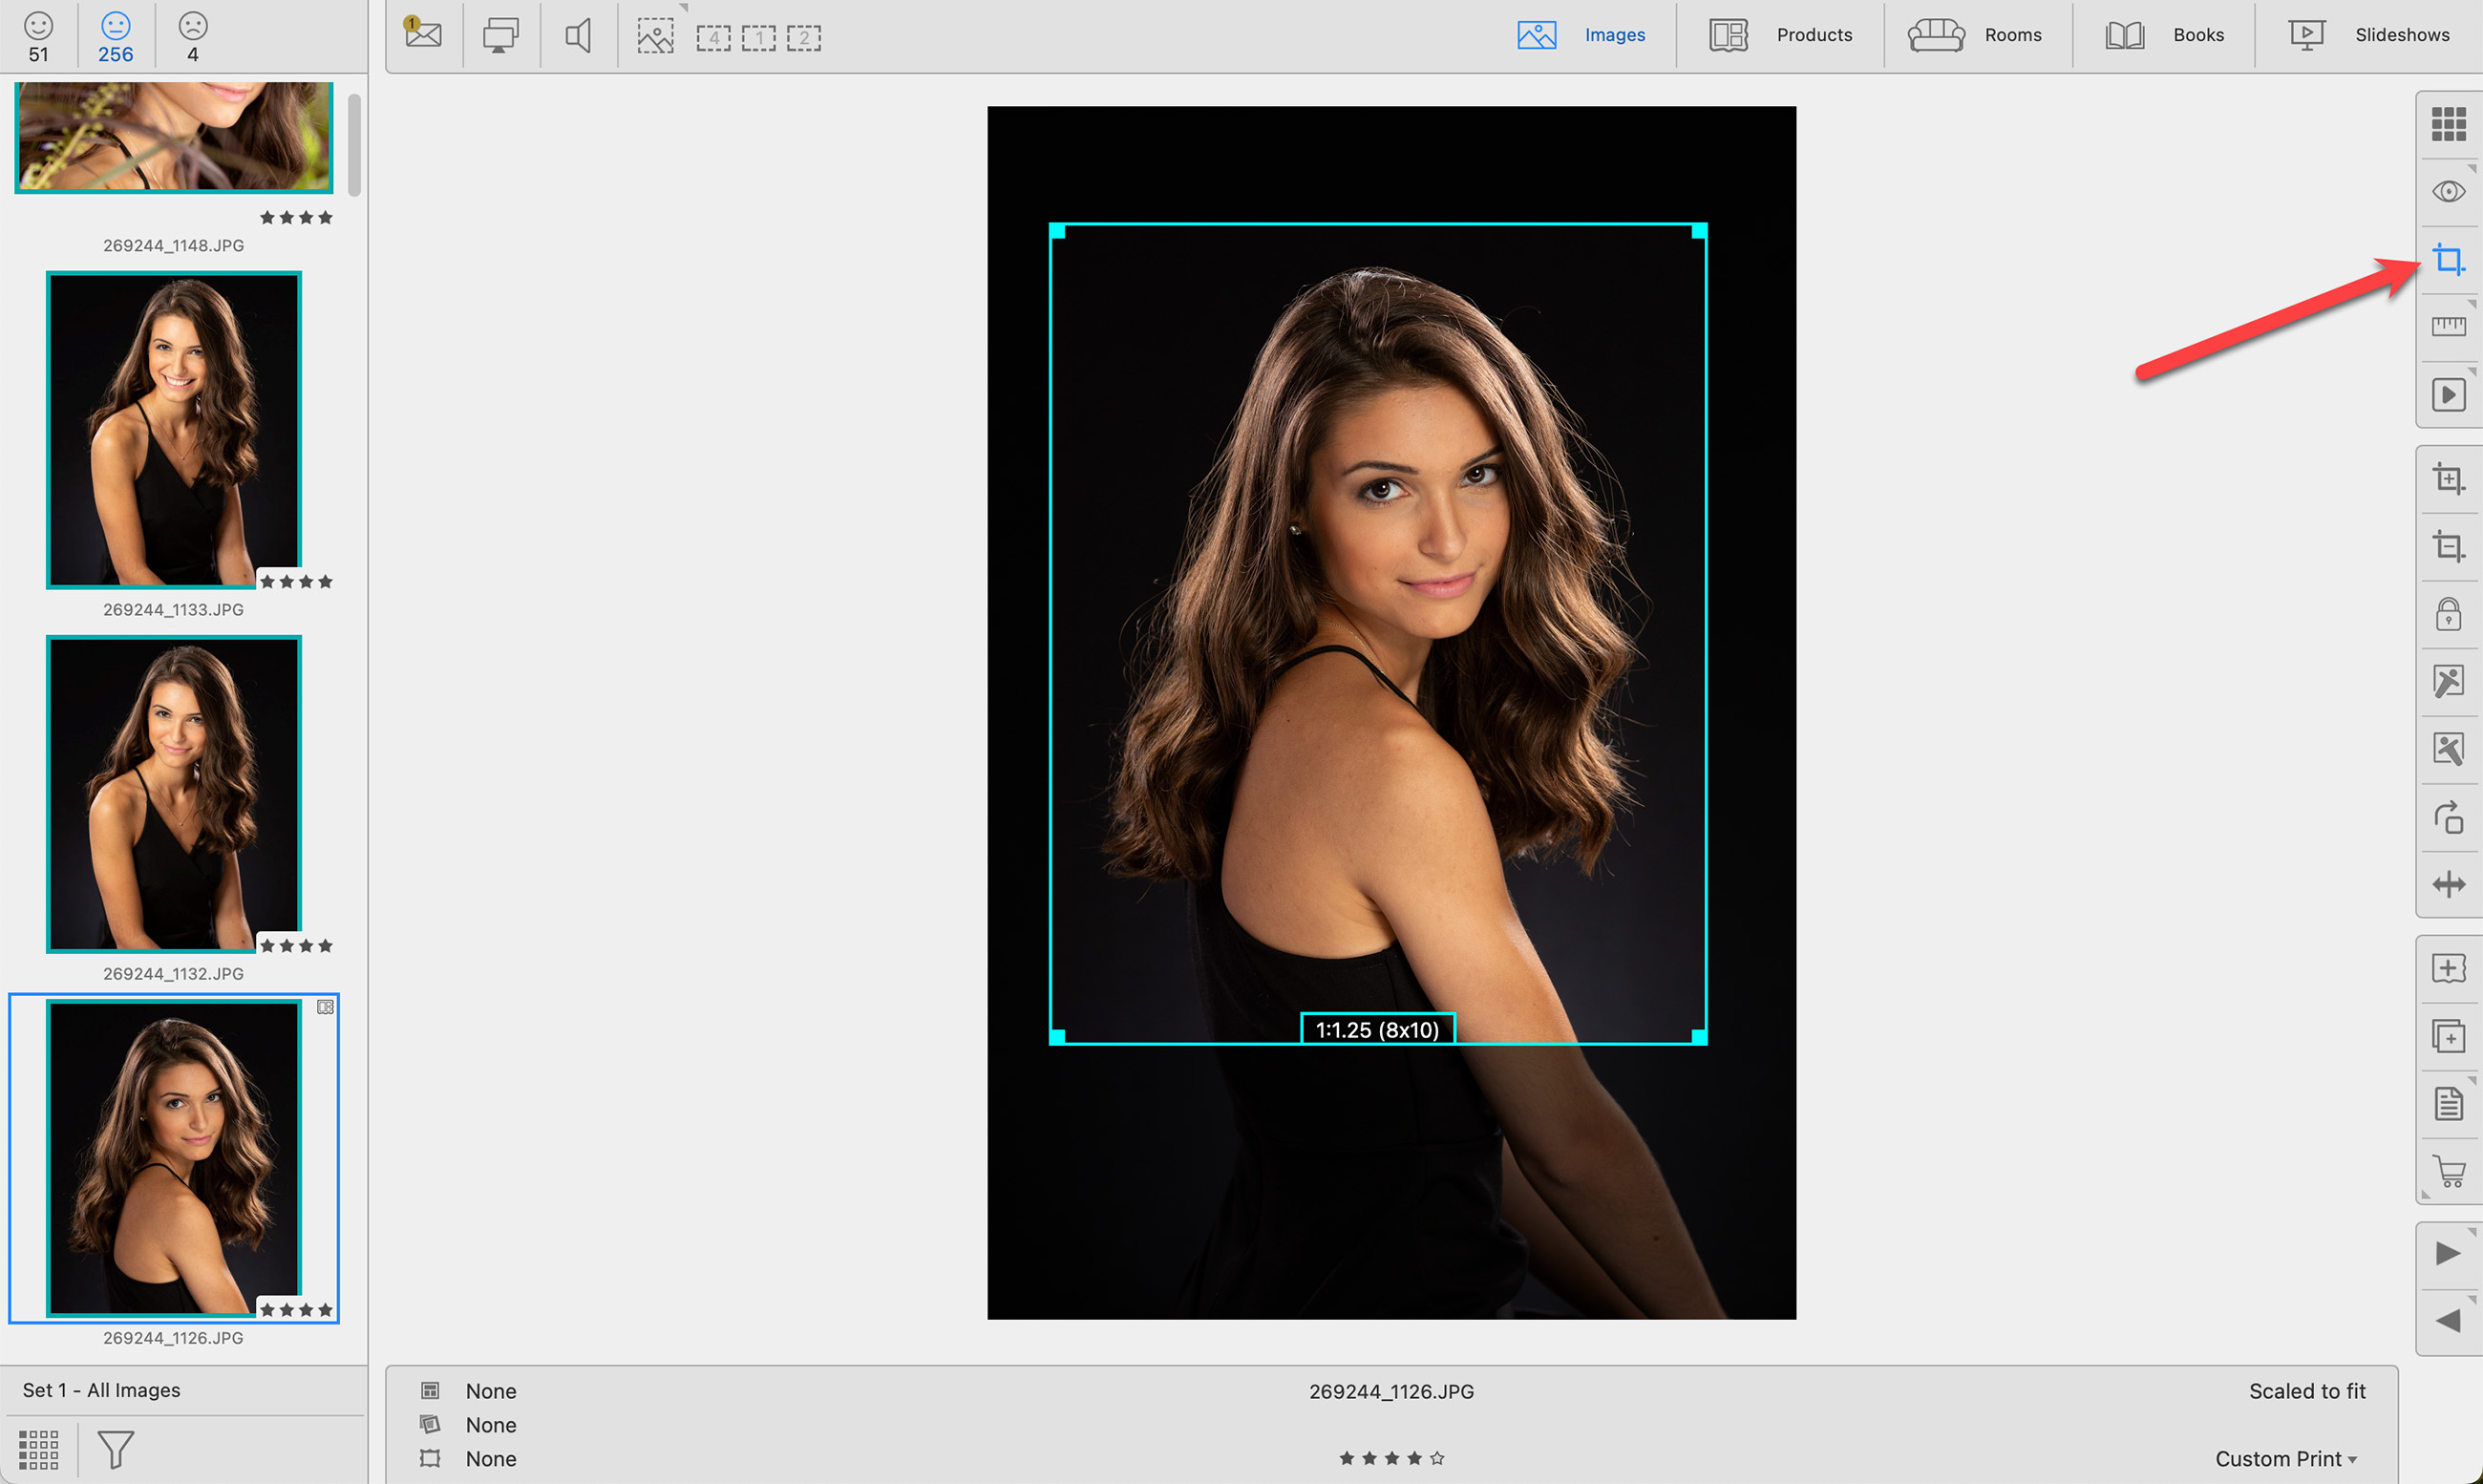
- Select an image(s) in Thumbnail view (or from the Image List) and click on the Cropping view button
 . It is located on the right-hand side under the Show Image view button.
 - Select an image(s) in Thumbnail view (or from the Image List) and press the "C" key on your keyboard. Pressing "C" will toggle between Show Images view and Cropping view.
- With an image selected, go to the top menu, View > Cropping.
- When in Show Images view, click on the Cropping view button, or press the "C" key on your keyboard.
Using Cropping View
- Crop multiple images at once by dragging images into the Cropping view display area from the Image list. Pressing the "A" key on your keyboard will add the image to those already on display. Holding down the OptionAlt key while dragging or pressing the “V” key will replace the products already on display.
- Images will appear with a cyan cropping rectangle.
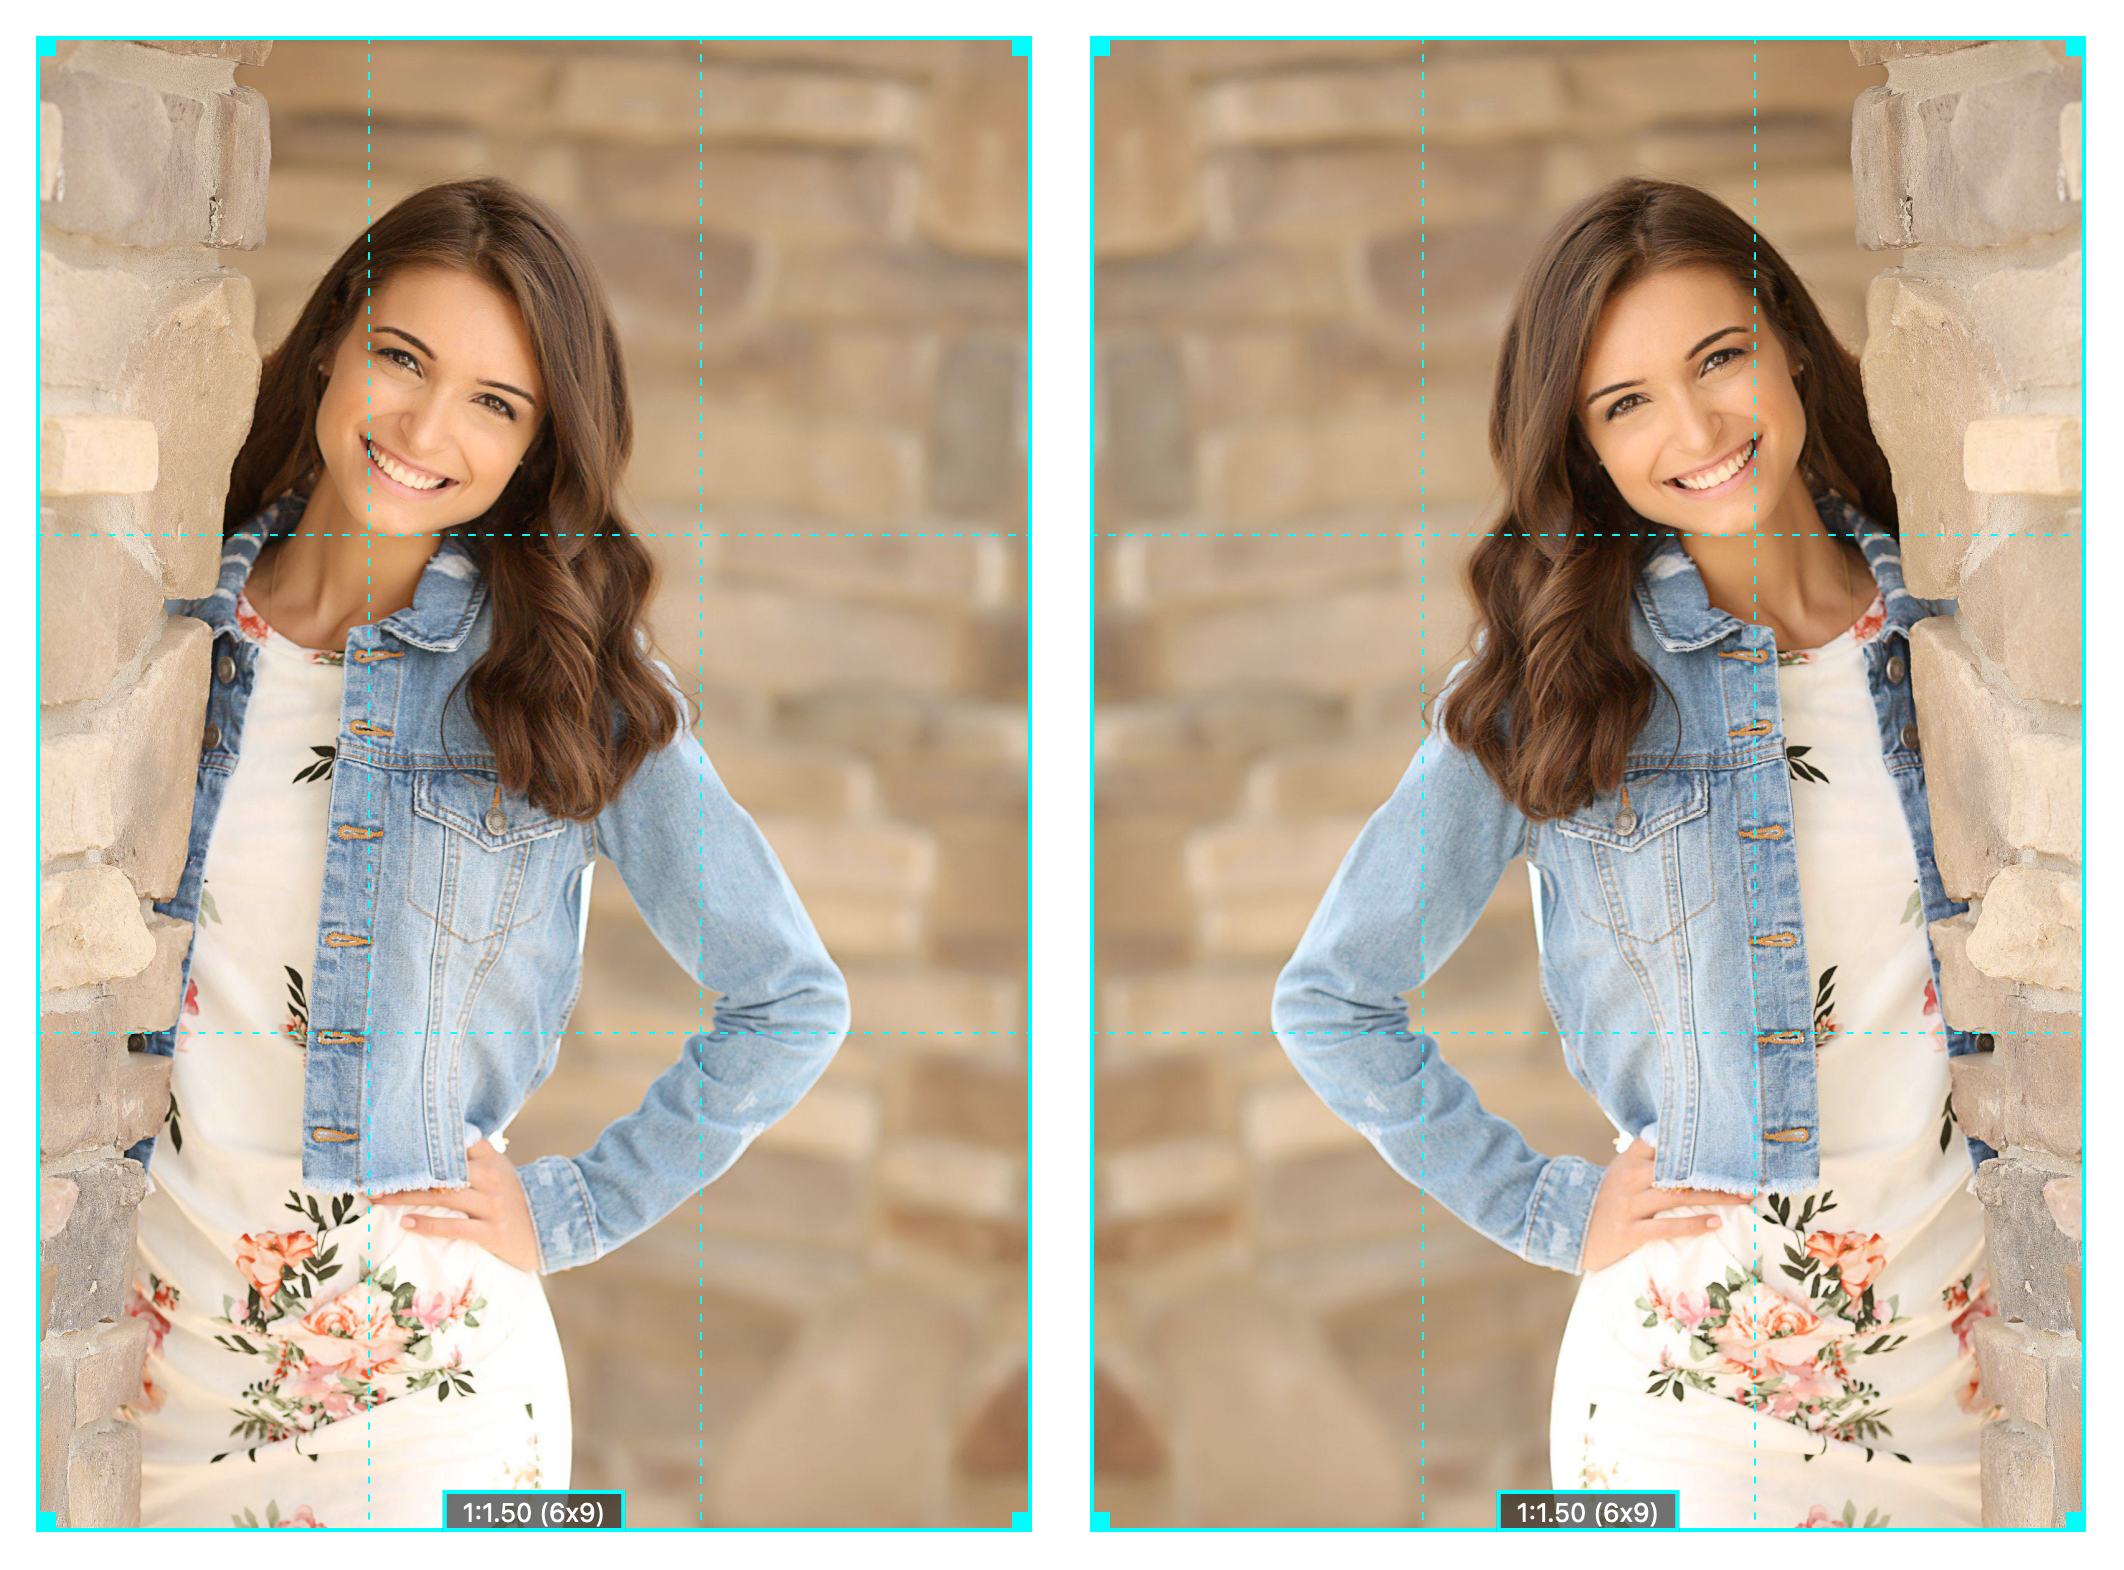
- You can tilt, flip, or rotate your crops using the toolbar buttons.
- You have the ability to lock your crop ratio. Locked Crops are used to apply a non-standard aspect ratio crops to override the automatic fitting of an image to a paper size.
- To remove applied cropping, right-click on the image and select "Remove Crop" from the list.
There are many ways to make cropping adjustments on images in ProSelect. Switch to Show Images view by tapping the "C" key to see the cropping result.
Using the Cropping Rectangle
- Adjust the size of the cropping rectangle by clicking and dragging on the corner handles. The cropping rectangle snaps to standard ratios like 1:3, 1:2, 1:1.5 (6x9), 1:1.4 (5x7), 1:1.33 (3x4), 1:1.25 (8x10), or 1:1.
- To disable snapping to standard ratios, hold down the OptionAlt key while adjusting the corner handles.
- Click and drag the cropping rectangle to reposition it.
- To maintain the selected crop ratio while adjusting the corner handles, hold the Shift key while dragging.
Toolbar Tools
- Refine your crop using the Crop In
 and Crop Out
  tools on the toolbar.
 - For more significant adjustments, hold the OptionAlt key while clicking these tools to modify the crop in coarser increments.
Keyboard Shortcuts
- Use the Up/Down Arrow keys or the +/- keys to fine-tune the crop.
Removing an Applied Crop
- Right-click on the image and select "Remove Crop". This is also available by going to the top menu, Edit > Remove Crop.
You can apply a specific crop ratio to an image if desired.
- Right-click on the image and select a ratio to apply from the list.
- On the top menu, go to Edit > Crop To, and select a crop ratio.
- Rotated Crops: To apply a landscape crop to a portrait-oriented image, hold the Shift key while selecting the crop ratio.
- For additional crop ratio options, navigate to Edit > Crop To > Other Crop Ratios. From here you can access numerous different crop ratios.
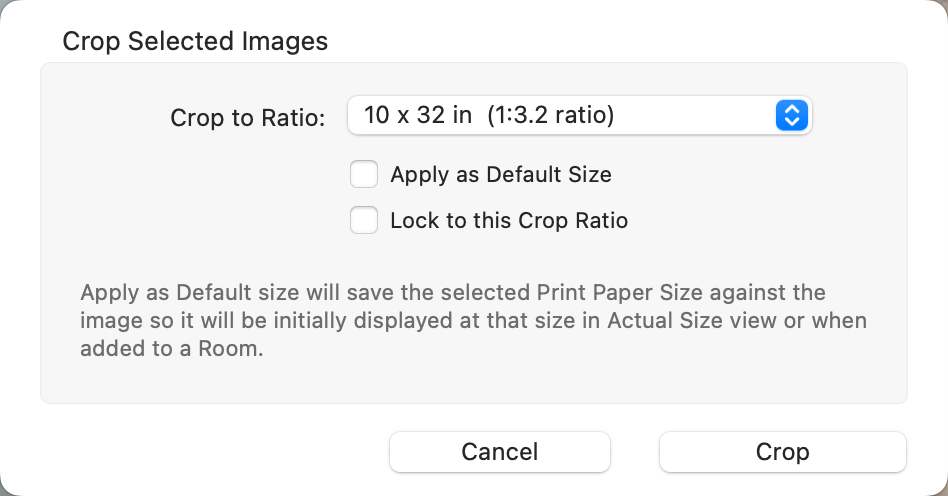
- You have the option of applying this crop ratio as the default size for the image. This will override the default set for all images when they are first placed in a Room or shown in Actual Size view.
- You also have the option to lock the crop ratio. Click on Using Locked Crops to learn more.
- Once you apply the "Other Crop Ratio", ProSelect automatically stores it as a saved crop, which can be applied to other images.
- To maintain the selected crop ratio while adjusting the corner handles, hold the Shift key while dragging.
In ProSelect, you can apply a standard crop across multiple images at the same time.
- Select Images: Choose one or more images in either Thumbnail view or Show Images view.
- On the top menu, go to Edit > Crop To and select a crop ratio. The chosen crop will center on all selected images initially.
- For individual adjustments, open each image in Cropping view and manually adjust the crop position as needed.
Additional Cropping Options
- Rotated Crops: To apply a landscape crop to a portrait-oriented image, hold the Shift key while selecting the crop size.
- Other Crop Ratios: Choose a crop based on standard Print Paper Sizes by going to the top menu, Edit > Crop To > Other Crop Ratio.
Removing Crops
There are two options to revert multiple images back to their original, uncropped state.
- Select the images and go to the top menu, Edit > Remove Crop.
- Select the images and right-click on one. Select "Remove Crop" from the drop-down list.
You have the ability to save a custom crop ratio and apply it to other images.
- Create a custom crop on one image by disabling the "Snap to Crop" feature in the Edit Menu or holding down the OptionAlt key while dragging the corner crop handles.
- Save this crop by going to the top menu, Edit > Save Selected Image Crop.
- Apply the saved crop to other images by selecting another image and going to the top menu, Edit > Crop To > Saved Crop.
- To save the custom crop, use the keyboard shortcut Shift + Cmd + CShift + Ctrl + C
- To apply a saved crop to other images, use the keyboard shortcut: Shift + Cmd + VShift + Ctrl + V
Tools Available in Cropping View
Use the Crop In tool to enlarge the image size. The Crop In tool causes a small change in image size with each click. To make coarser changes, hold the OptionAlt key down while clicking the tool. You can also use the Up Arrow or + key.
Use the Crop Out tool to reduce the image size. The Crop Out tool causes a small change in image size with each click. To make coarser changes, hold the OptionAlt key down while clicking the tool. You can also use the Down Arrow or - key.
Use this tool to lock or unlock a crop ratio. Locked Crops are used to apply non-standard aspect ratio crops to override the automatic fitting of an image to a paper size. Locked crop ratios appear with a red border around them.
See Using Locked Crop Ratios for more information.
You can adjust the tilt of a selected image using the Tilt tools.
- Tilt up to 45 degrees either way.
- Hold the OptionAlt key down to tilt by smaller amounts.
- To remove the tilt, go to the top menu, Edit > Remove Tilt.
When using this tool, the image may tilt off the page. You can set a specific background color to easily see which parts of the image are off the page. Go to the top menu, ProSelectEdit > Settings > Display > Display Options.

This will rotate the selected Image/Product/Crop/Item 90 degrees clockwise.
- When rotating a product, the images in the template are NOT rotated. By Right-clicking on the Rotate tool, you have the option of rotating the images as well as the product template.
- Hold OptionAlt when rotating to rotate counterclockwise.
Use the shortcut Cmd + RControl + R to rotate an image or product.
You can mirror an image using the Flip Horizontal tool.
Select an image or images and click on the Create Print Product tool (or right-click on the image and select "Create Print Product"). You will be redirected to Working with Products, and the selected image(s) will now be added as a print product. When prints are created, they are sized according to your "Starting Product". To configure your Starting Product, go to the top menu, ProSelectEdit > Settings > Importing Images > Adding Images.
You can duplicate an image, product, or room using the Duplicate tool.
- When duplicating images, each copy retains the original filename but has its own thumbnail.
- This feature is particularly useful when you want to view or order the same image/product with different effects.
- Simply duplicate the item and apply distinct effects to each copy. You can then select and display both copies, allowing for easy comparison of the different effects applied.
You have the option to add notes to images, products, books, or rooms. Notes are used as a reminder of any special changes that need to be applied to the images in a product, general product notes, or order requests. Click on Notes to learn more about where notes appear throughout ProSelect.
- Select an image, product, or room and click on the Notes tool.
- The Notes dialog will open.
- You can manually add your own notes or add a note from your Notes Library.
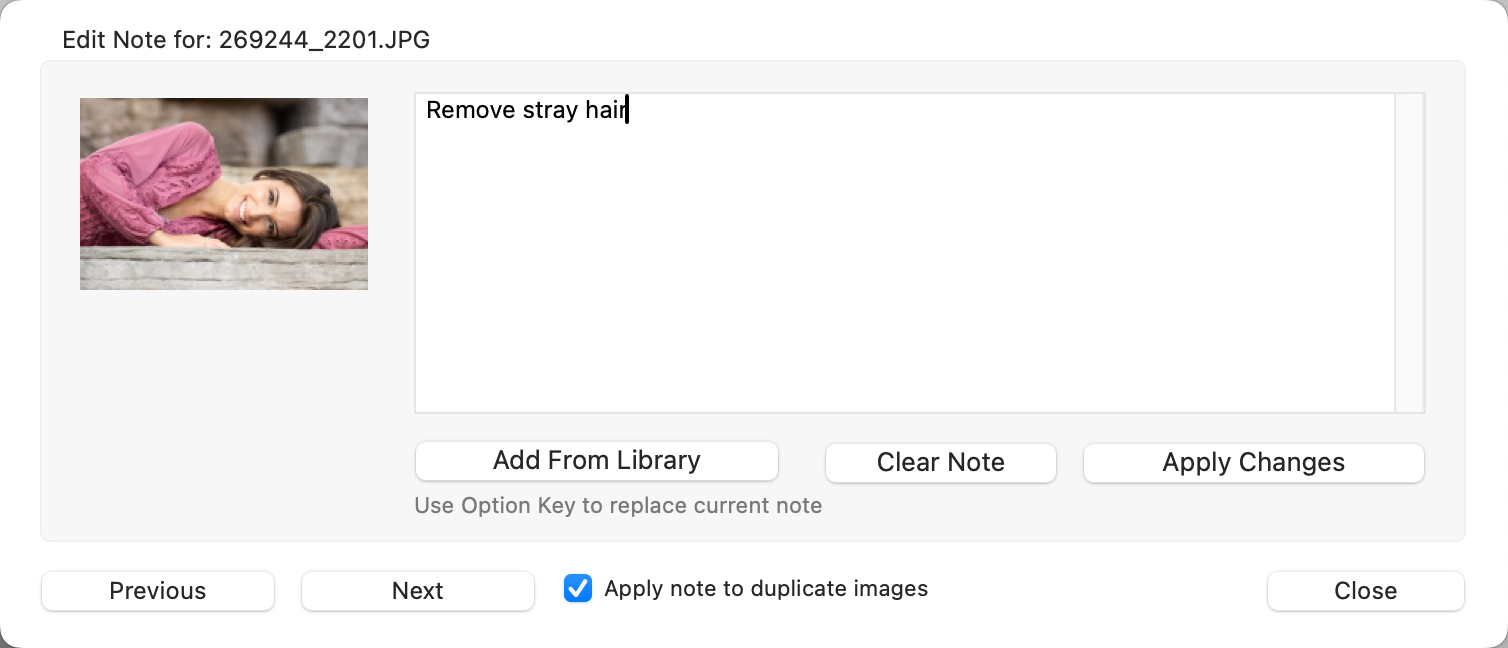
- Use the Previous and Next buttons to scroll through and add notes to other images/items within the set.
- If duplicate images appear, check this box to apply the note to duplicates as well.
- Use the Clear Note button to remove any notes.
- Click the Apply Changes button when you have finished adding or editing the note.
- You can add the same note to more than one image at a time by selecting all the relevant images before clicking on the Note tool.
- Notes added in Working with Images are applied to the individual image.
- Notes added in Working with Products or Working with Rooms are applied to the whole product or whole room. Not the individual image.
Right-Click
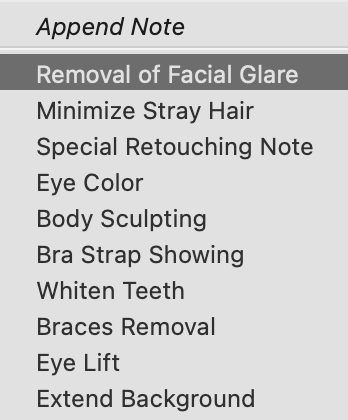
The Notes tool also has a right-click option. When you right-click, a drop-down menu of the Library Notes appears. You can select a commonly used note and add it. In this case, the note will be added without opening the Notes dialog.
Notes Tag
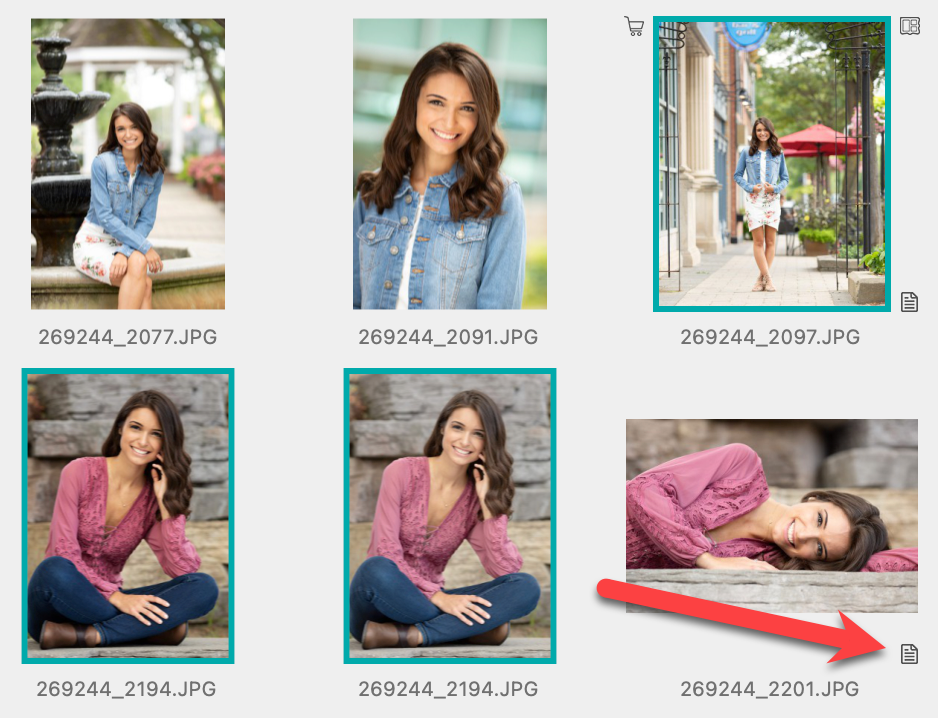
All items with notes attached will have a small Notes tag ![]() at the bottom-right corner of the thumbnail image.
at the bottom-right corner of the thumbnail image.
The Order Product tool (shopping cart) allows you to add the selected product(s) to an order. Ordering can be done from any View mode. You can order products one at a time, or multiple products at a time. Once you click on the Order Product tool, a menu will appear that includes the product(s) you wish to order and other options associated with that product.
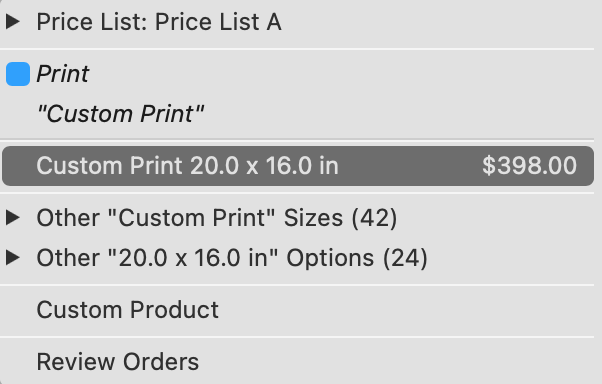
Click on the product you wish to order from the list. The product will be added to the Client's order.
Click on Ordering for more information.
Use the Next and Previous tools to navigate through your images, products, or rooms.
- Use the Left and Right Arrow keys on your keyboard to navigate through your images and products.
- Use Shift + Left and Right Arrow keys to navigate through your rooms.
Jump in Groups
If you hold the OptionAlt key while clicking on the Next or Previous tool, the next group of items will be displayed. This group can be between 2 and 30 items. You can select the group size by right-clicking on the Next or Previous tools. This feature is only available in Show view and Cropping view.