 Pro Production
Access Pro Production Settings by going to the top menu, ProSelectEdit > Settings. The Pro Production area provides access to the Output Settings, Workflow & Production Extras, General Actions, and Custom Effects Actions tabs. Each tab contains options that will allow you to customize ProSelect to your personal preferences.
Output Settings
For each Album, you can specify a default destination output folder for your high-res images. You can override this location in the Pro Production window if required.
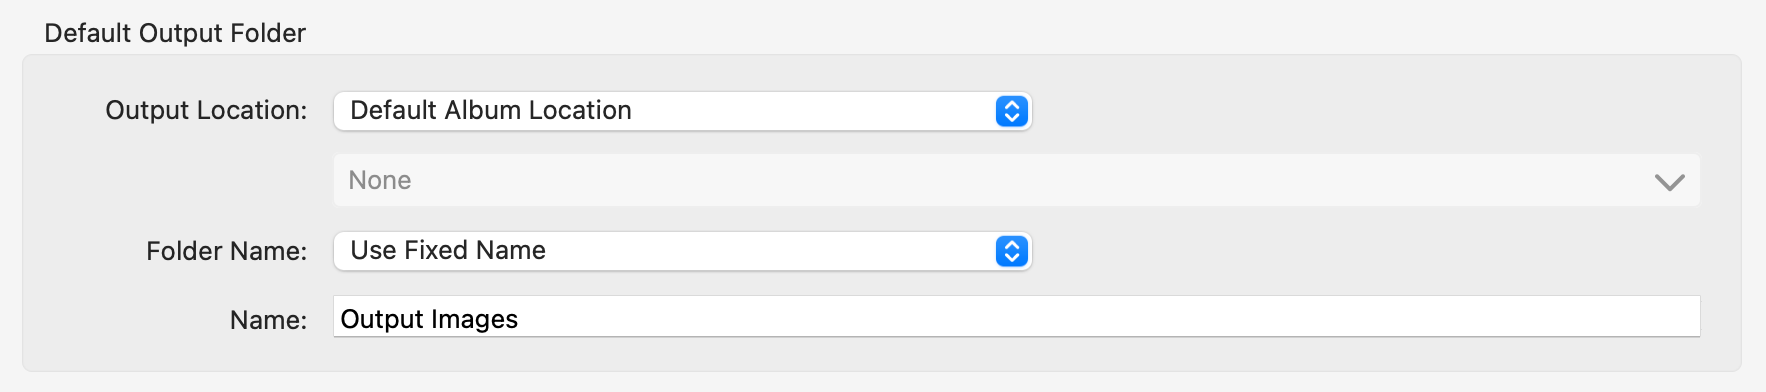
Output Location
- Default Album Location: This will either be the folder that you loaded the original images from or the folder above that. This depends on your Images Folder is the Jobs Folder setting.
- Fixed Output Location: If selected, you can set a base folder for all your output High-Res files for all your jobs. This can be on your computer or another networked drive.
Output Folder Name Options
- Use Fixed Name: The images will go into a newly created folder with the specified name (use the "Name" line below to type in a fixed name, eg: Output Images).
- Do not make a separate folder: The images go directly into the folder that you have selected above.
- Use Album Name: The images will go into a newly created folder with the same name as the Album within the folder that you have selected above.
- Use Album Name with Prefix/Suffix: Same as above but with specified extra characters added before or after.
- Album Name with Date Prefix: The date is formatted as YYYY-MM-DD so that it can be easily sorted in Finder (Mac) or File Explorer (Windows).

- Use sub-folders: When selected, the images will be further subdivided into sub-folders (in the Output Folder) for each print size or Presentation Option. This is an easy way to place lab orders.
The "Use sub-folders" setting does not affect the output location of digital files and composite book pages generated through Production. These are always grouped into a subfolder for each digital file order group and each book respectively.
If you are using Display Names for any of your Presentation Options, note that when Production is run, the Presentation Option sub-folder will revert back to the original name provided by the Supplier, not the Display Name. This is to aid in placing lab orders.

Enable Production Reports: Check the box to enable Production Reports.
Workflow & Production Extras
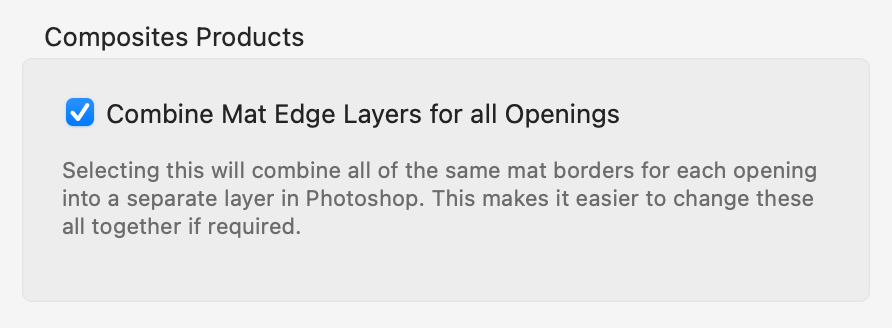
Combine Mat Edge Layers for All Openings
- If you are building composite images, any virtual styles you have applied to the product will also be reproduced in the high-resolution output files. The final images will look exactly the same as they do in ProSelect. The mat color is put on a separate layer as are any border effects around each opening in the product template unless you select "Combine Mat Edge Layers for All Openings". If checked, they will all be on one layer.
- Checking the box makes it easy to select and edit all borders in Photoshop and apply changes to them together. If you wish any borders to appear above an Overlay Image, then you should also make sure this option is selected.
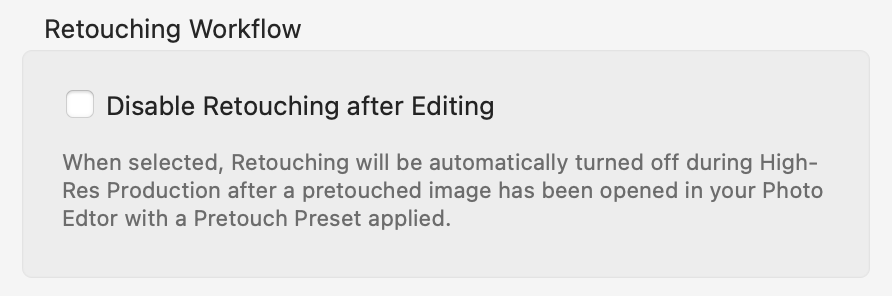
Disable Retouching after Editing
- Check this box to prevent automatic retouching from being applied during production to any images you open in your Photo Editor for manual retouching, if they already have pretouching effects applied. See Manual Retouching for more information.
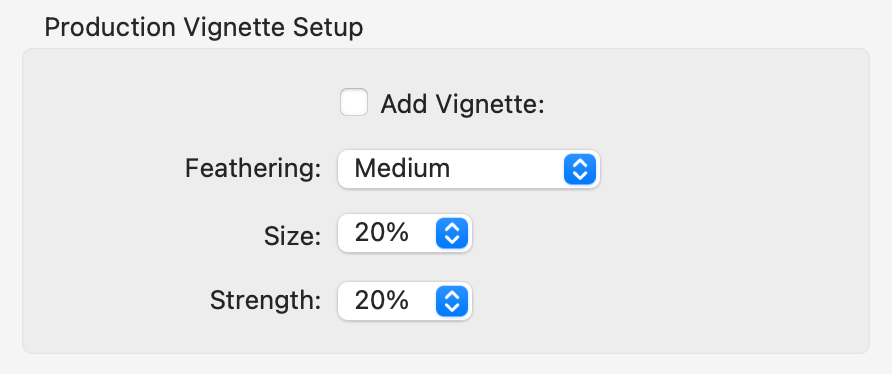
Add Vignette: You can automatically add a vignette to high-resolution images by checking this box.
- Vignette settings are automatically scaled with the size of the image.
- Since vignettes are added as a separate Photoshop layer in the output image (if you output your images as Layered Photoshop files), you can adjust the strength (opacity) of the layer or remove the layer later if you wish.
- Adjust the Feathering, Size, and Strength of the vignette using the drop-down lists.
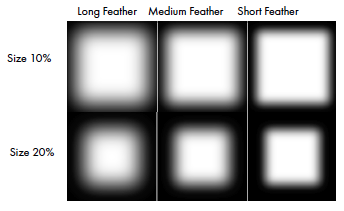
The above image shows the effect of different vignette settings. For clarity, they are shown at 100% opacity (strength). Normally, you would use them with a strength range of 10-30%.
Set your default preference here for applying stamps or watermarks to High-Res Images.
Apply to Production
- Checking the Apply to Production checkboxes will automatically turn on this option in Pro Production.
- You can do this for each of the selected output types:
- Image Prints
- Gallery Wraps
- Traditional Matted Prints
- Composite Products - Select whether any stamps should be applied to the entire image or to each individual image in the product. Checking the "Apply to each Image" checkbox is useful if you are using the product as a unit template to bunch together a package of images which will later be cut up into separate prints.
- You can still override these settings in the Pro Production window by turning stamps on or off or changing to a different stamp on an item-by-item basis. See Applying a Stamp for more information.
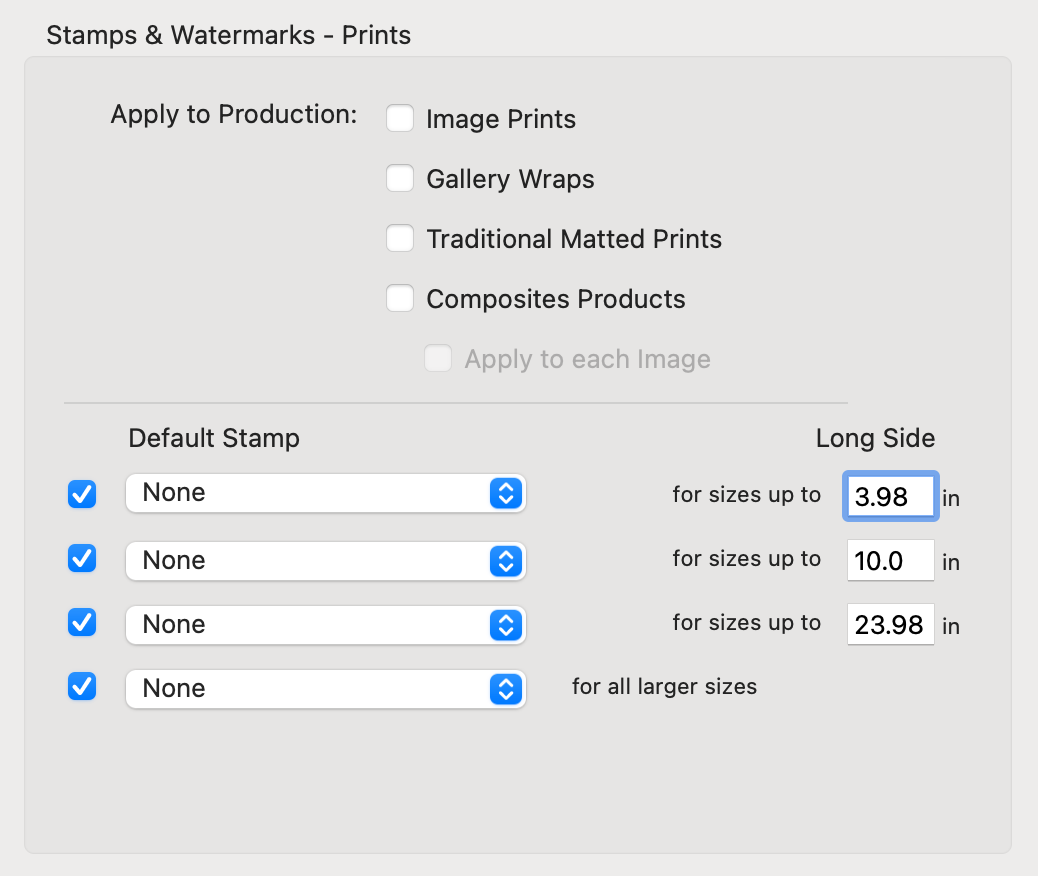
Default Stamps
- Select various stamps created in Stamps, Watermarks & Logos for different print sizes, allowing for proportionally larger stamps on bigger items.
- The sizes you enter must increase from the top of the list to the bottom. If the sizes are out of order, a warning message and an Adjust Sizes button will appear. Click the button to sort your sizes into the correct order.
Once you have set up a stamp, you can use the Duplicate Stamp button in Setup Stamps, Watermarks & Logos to make multiple copies of that stamp. For each copy, adjust the size. If you name the copies according to their size it will make it easier to identify which stamp to use for each size range.

Applying a stamp to a digital file works much in the same way as a print.
Check the "Apply to Production" checkbox, and choose the stamp you wish to use. The default stamp will then be applied to all digital file orders during Pro Production.
General Actions
This section allows you to set up the Actions that are applied to images during Production. These Actions are executed both when producing individual prints and when using images as part of a Composite Print.
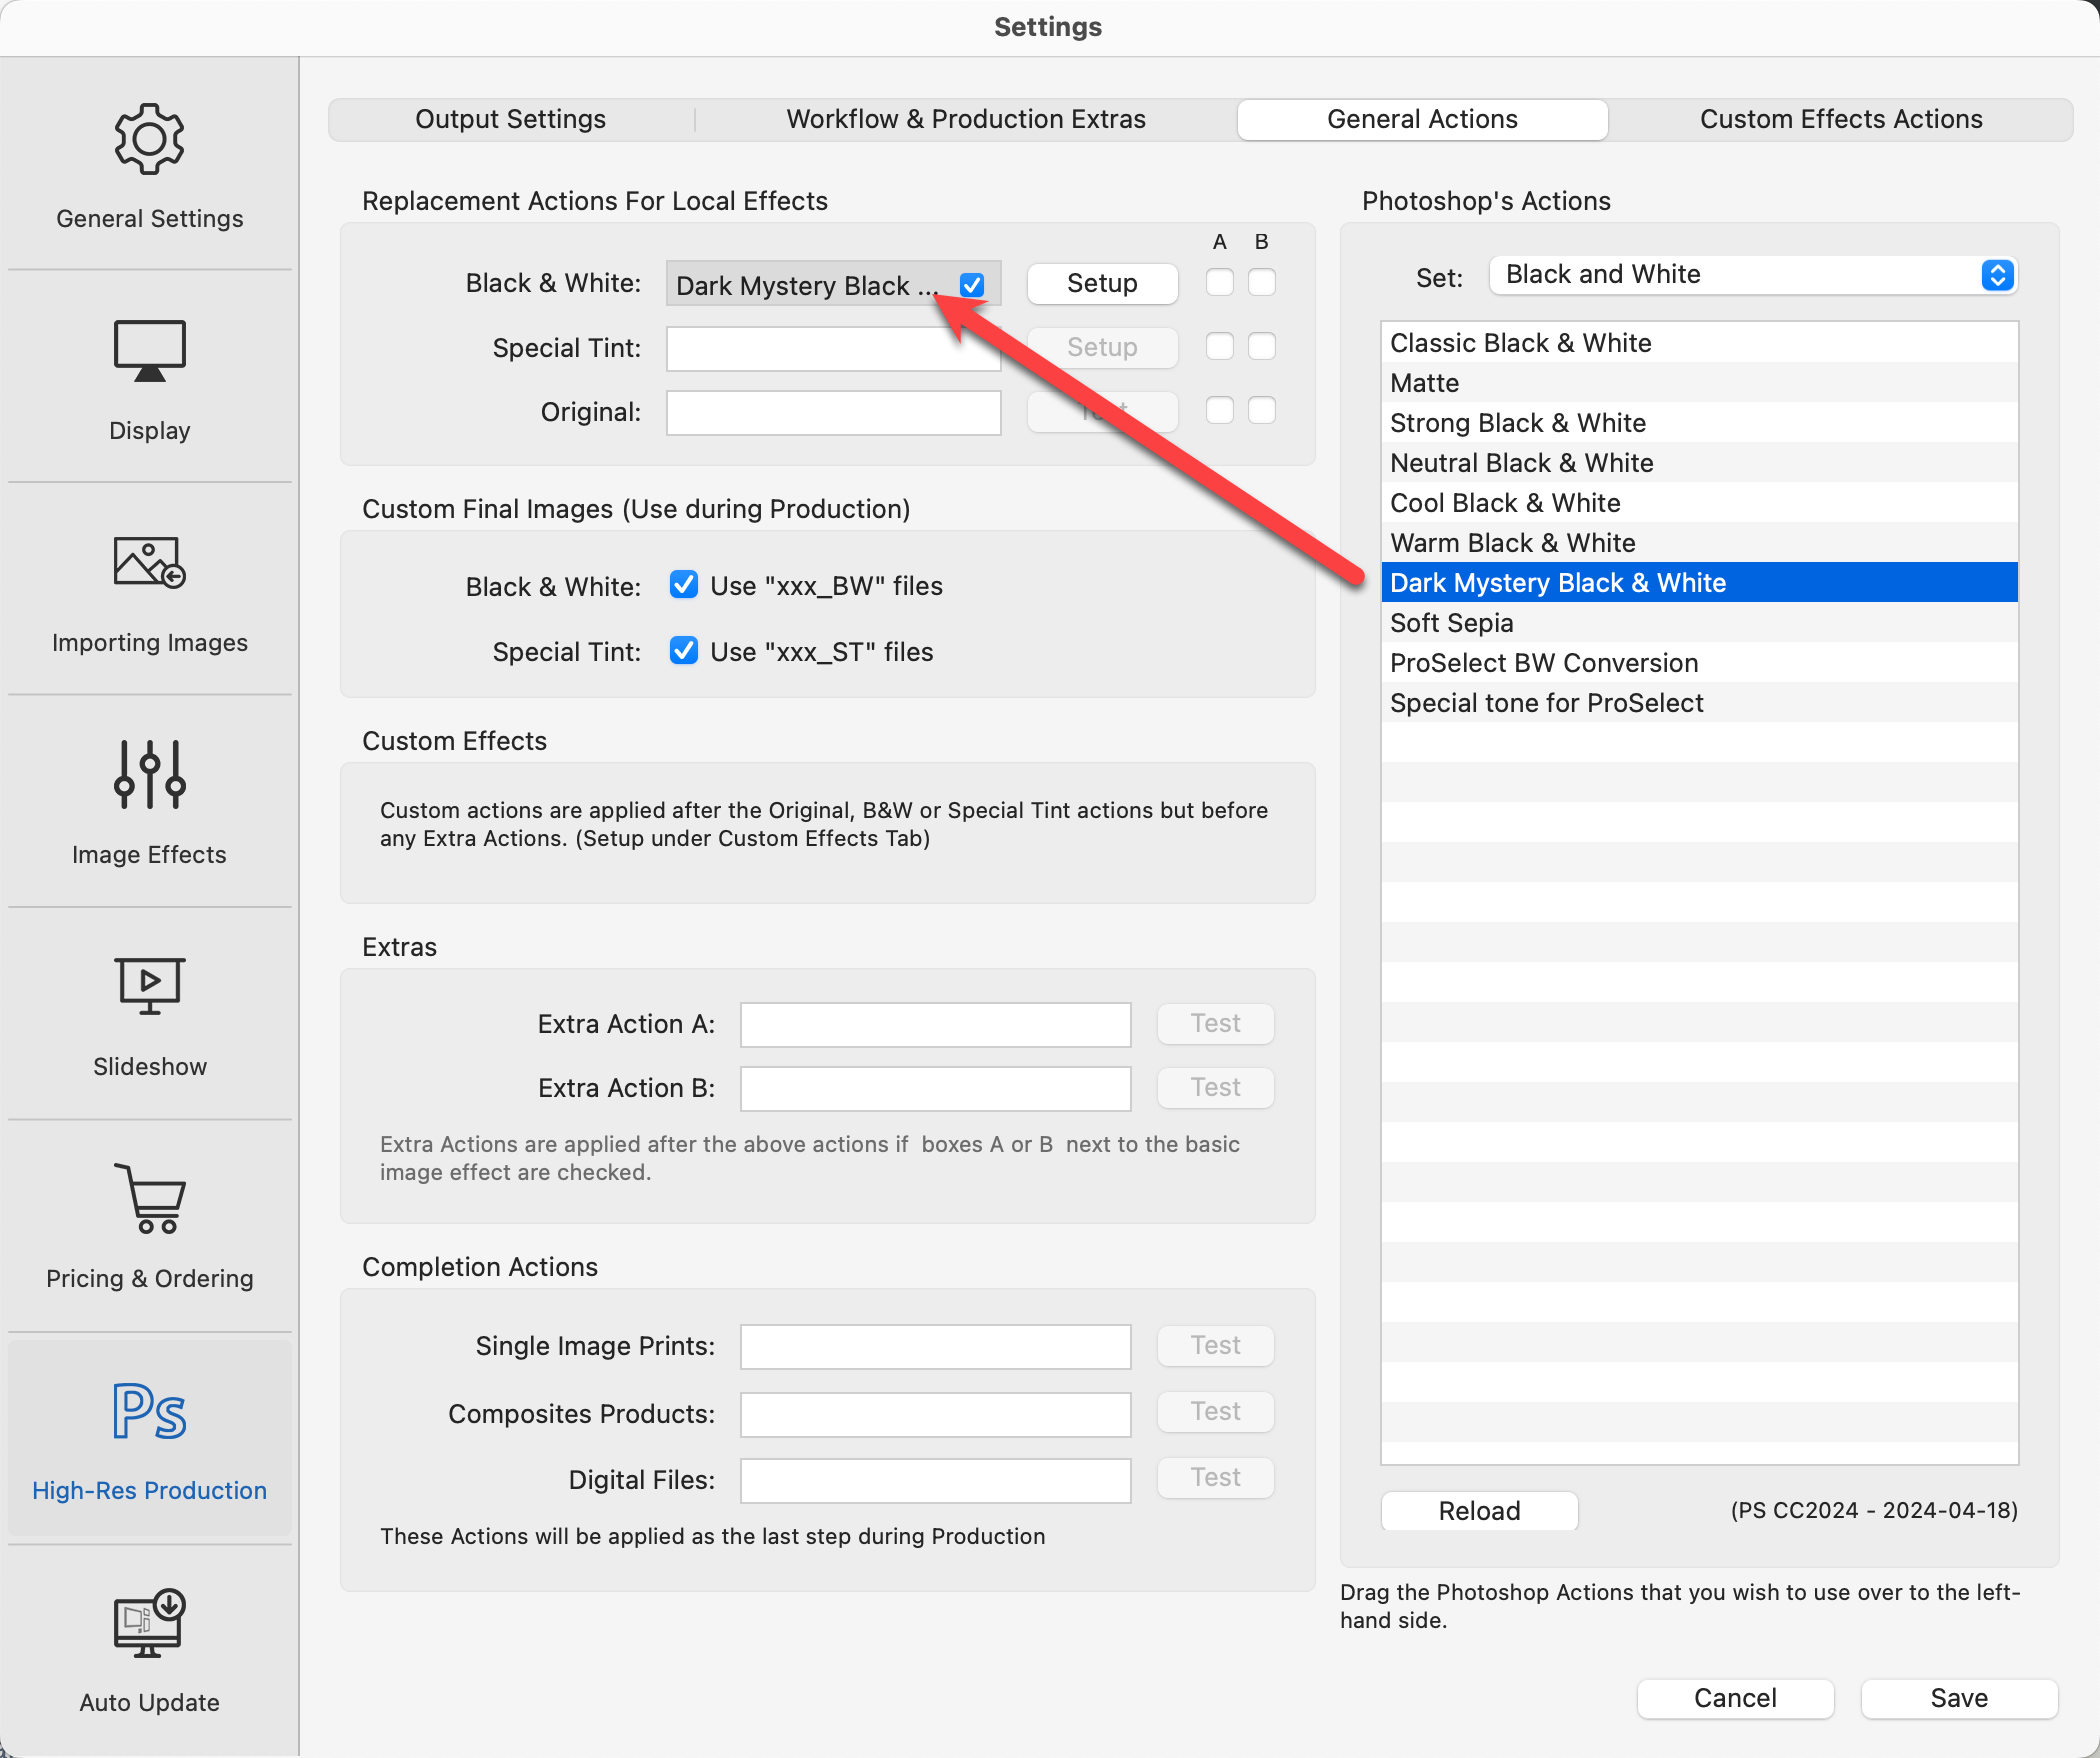
Replacement Actions for Local Effects
- Actions are set up by dragging them from the Photoshop Action list on the right-hand side into the appropriate box on the left-hand side.
- Leaving a box empty or unchecking the checkbox next to the Action name will result in no action being run at that stage of production.
- If you leave the action boxes for B&W or Special Tint empty, then ProSelect will use its built in Local Effects.
- You can preview each action by using the Setup button. Click on Automated B&W Using a Customized Photoshop Action to learn more about replacement actions.
Completion Actions
- These actions are run just before the final image is saved. You can set a different one for Single Image Prints, Composite Prints, and Digital Files.
- Actions are set up by dragging them from the Photoshop Action list on the right-hand side into the appropriate box on the left-hand side.
- You can use these to perform actions such as sharpening final images, adding metadata, changing to a different color space - anything that you can automate using Actions in Photoshop.
Completion Action Example:
A good example of a completion action is embedding copyright metadata into digital files.
- Create a customized Photoshop Action to embed metadata.
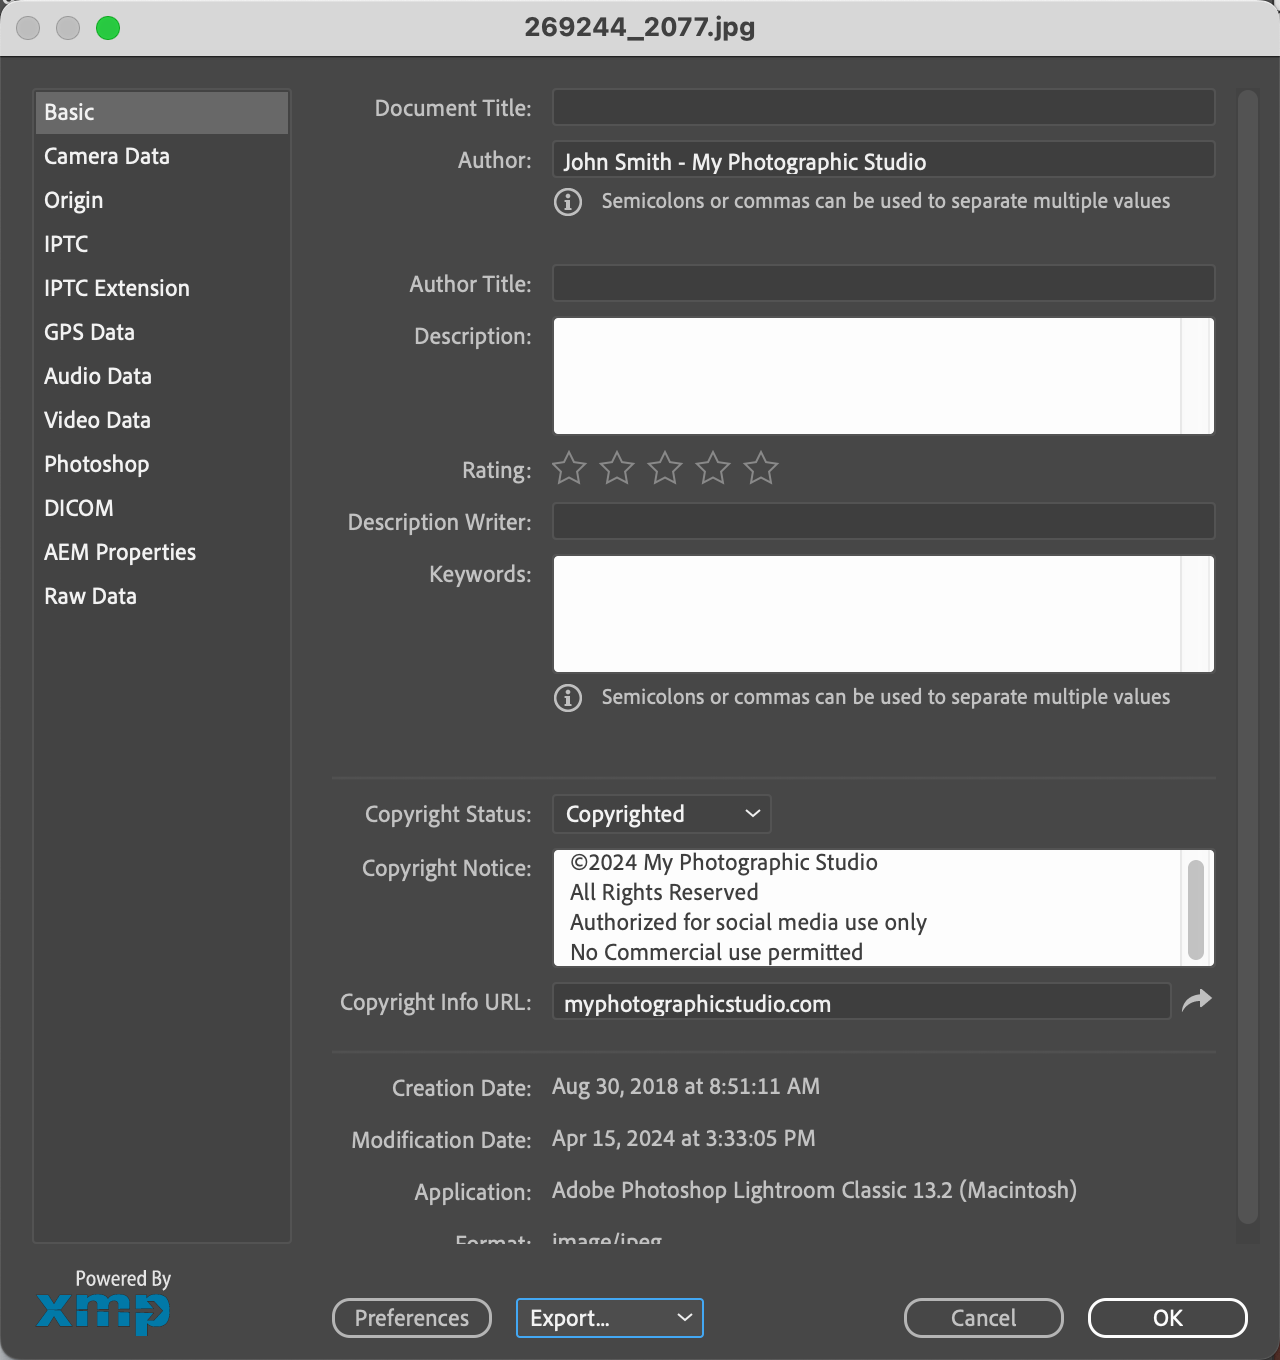
- In ProSelect, drag the action you created into the box next to Digital Files in the Completion Action area.
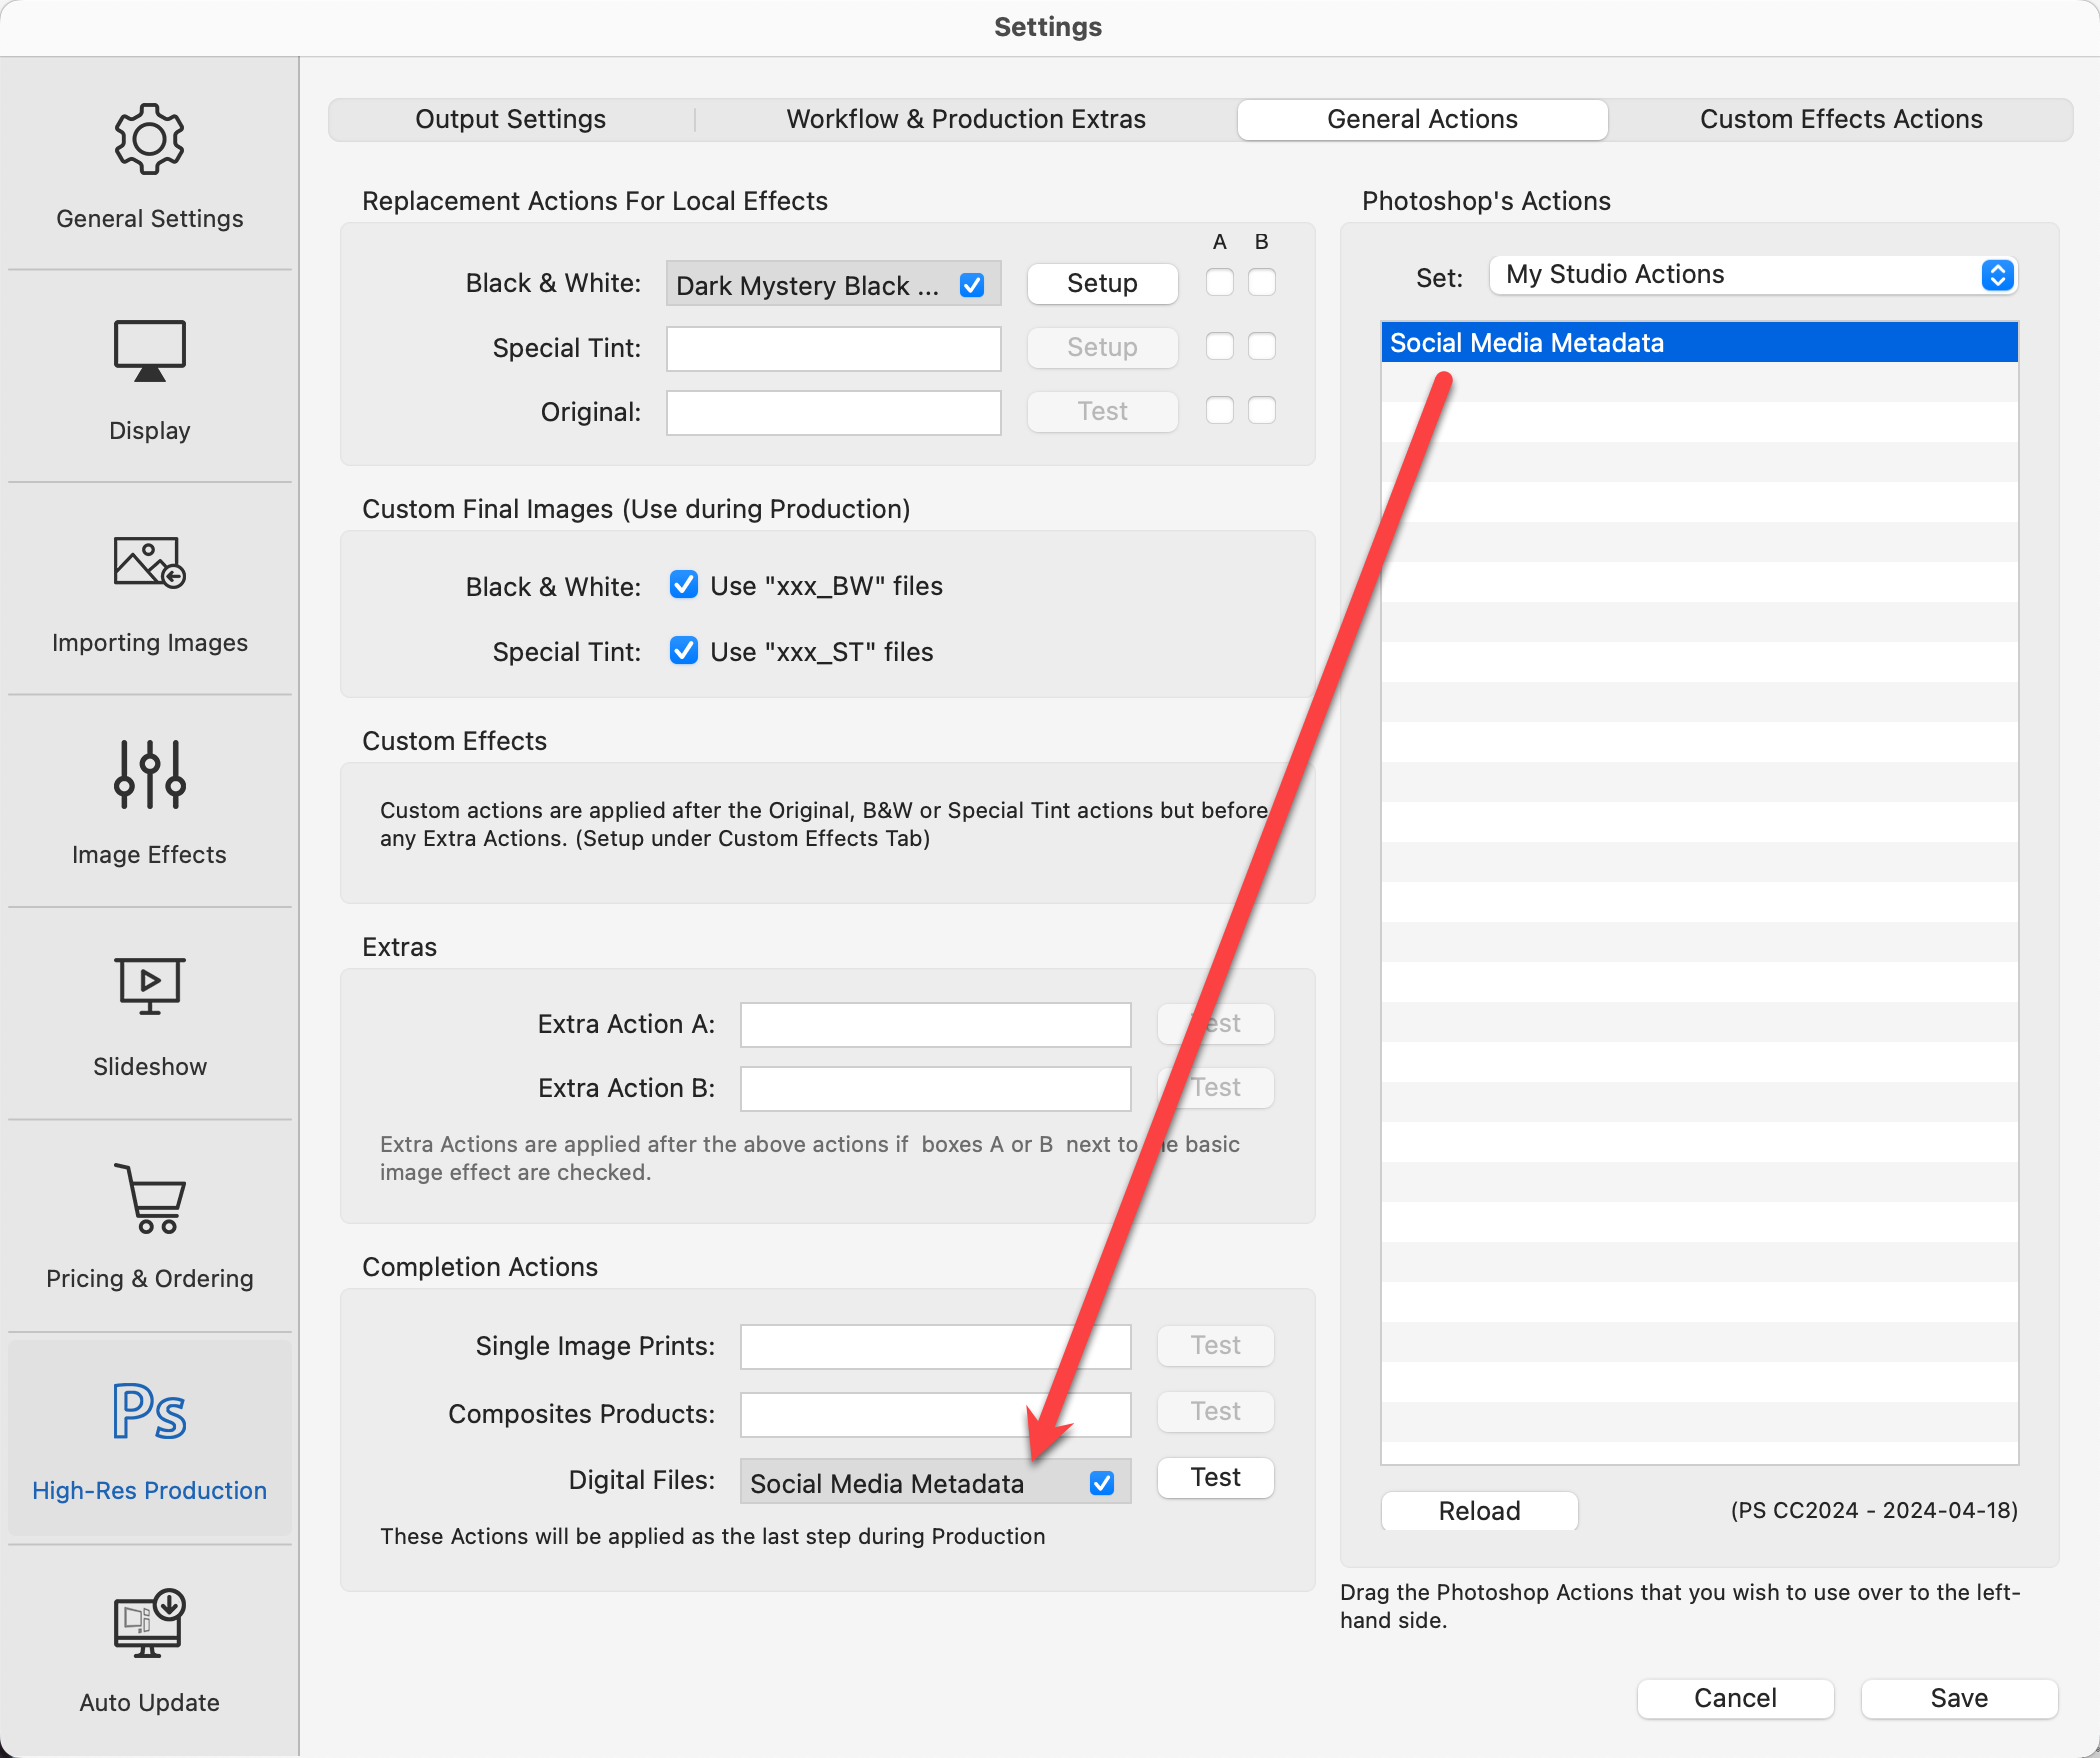
- When running production, this specific Photoshop action will be applied to each digital file that is produced.
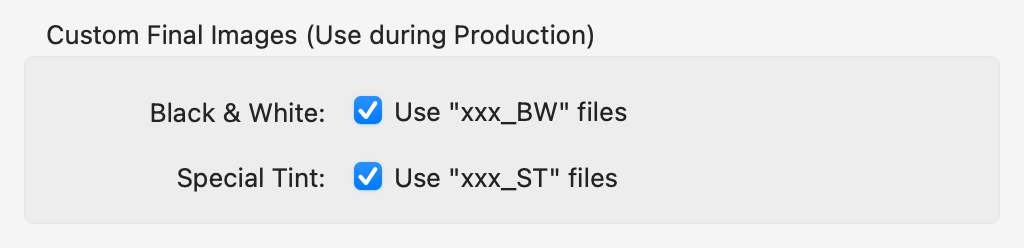
Custom Final Images
- With these options selected (they are, by default), you can manually customize and save your B&W or Special Tint images and let ProSelect work with these when building your final ordered products.
- You can uncheck these options if you are always using Replacement Actions for your B&W or Special Tint images rather than using the Customized B&W Workflow.
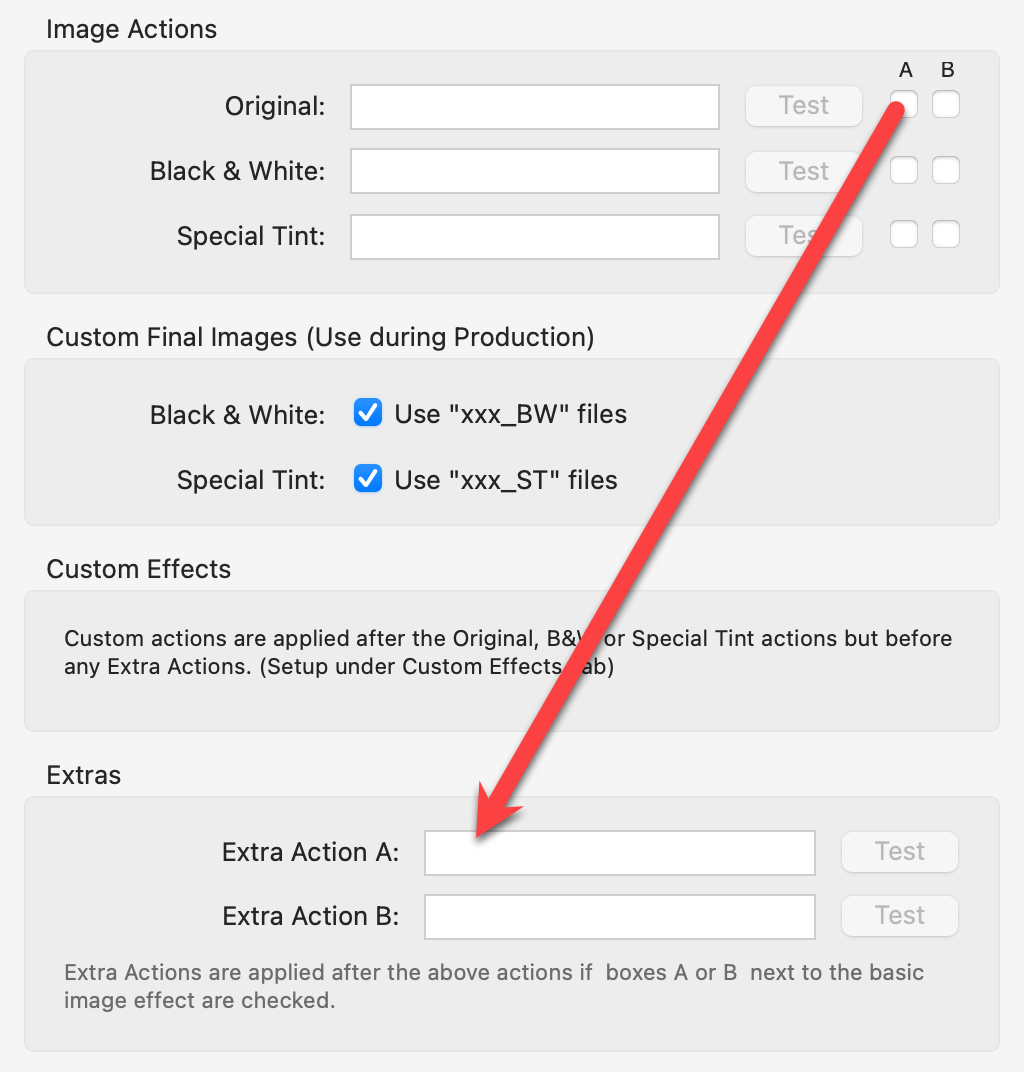
Extras
- Either one or both of the Extra Actions can be run after Original, B&W, or Special Tint actions have run. Check the A & B boxes to determine which ones apply.
Custom Effects Actions
This area is used to set up Photoshop Actions which can be selected and run with the Apply Effects tool ![]() .
.
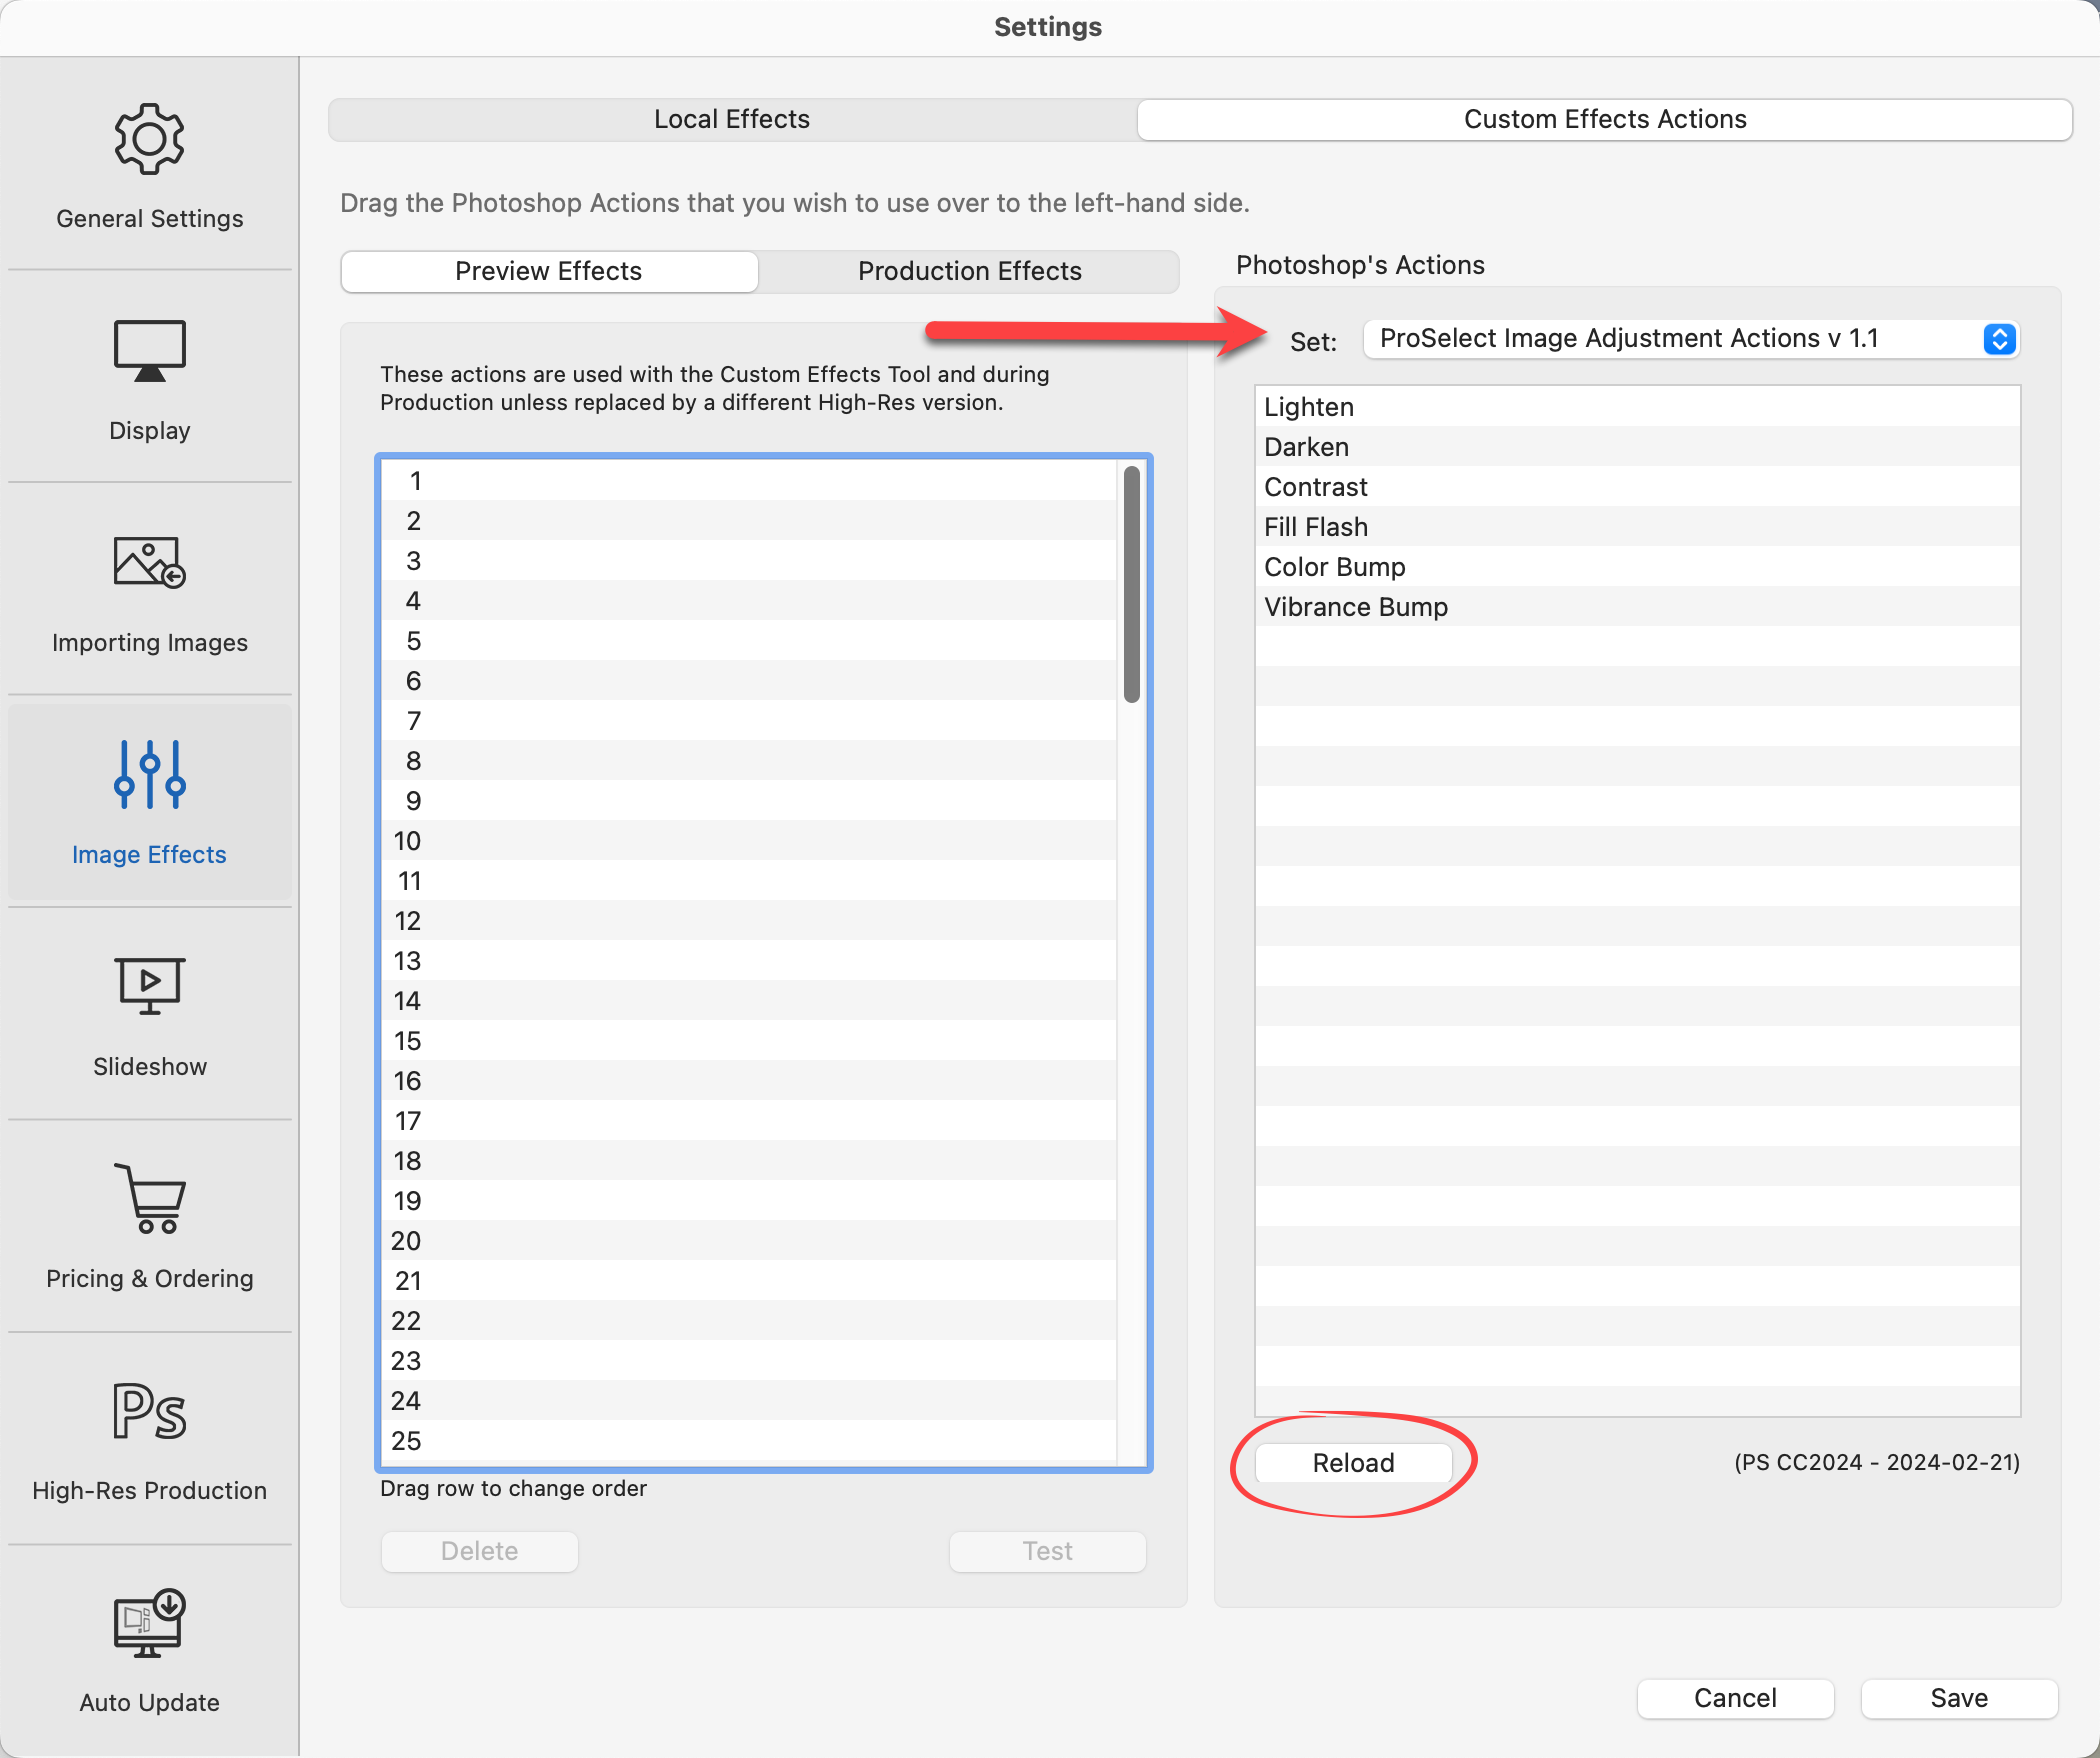
Importing Available Photoshop Actions into ProSelect
- Make sure Photoshop CS6 or newer is running.
- Click the Reload button in the Photoshop Actions box on the right-hand side. This will import all of Photoshop’s current action sets into the right-hand Set popup.
- Select an Action Set in the drop-down menu to see all the actions in that set.
- Click and drag actions from the right-hand list over to the Custom Effects list on the left-hand side.
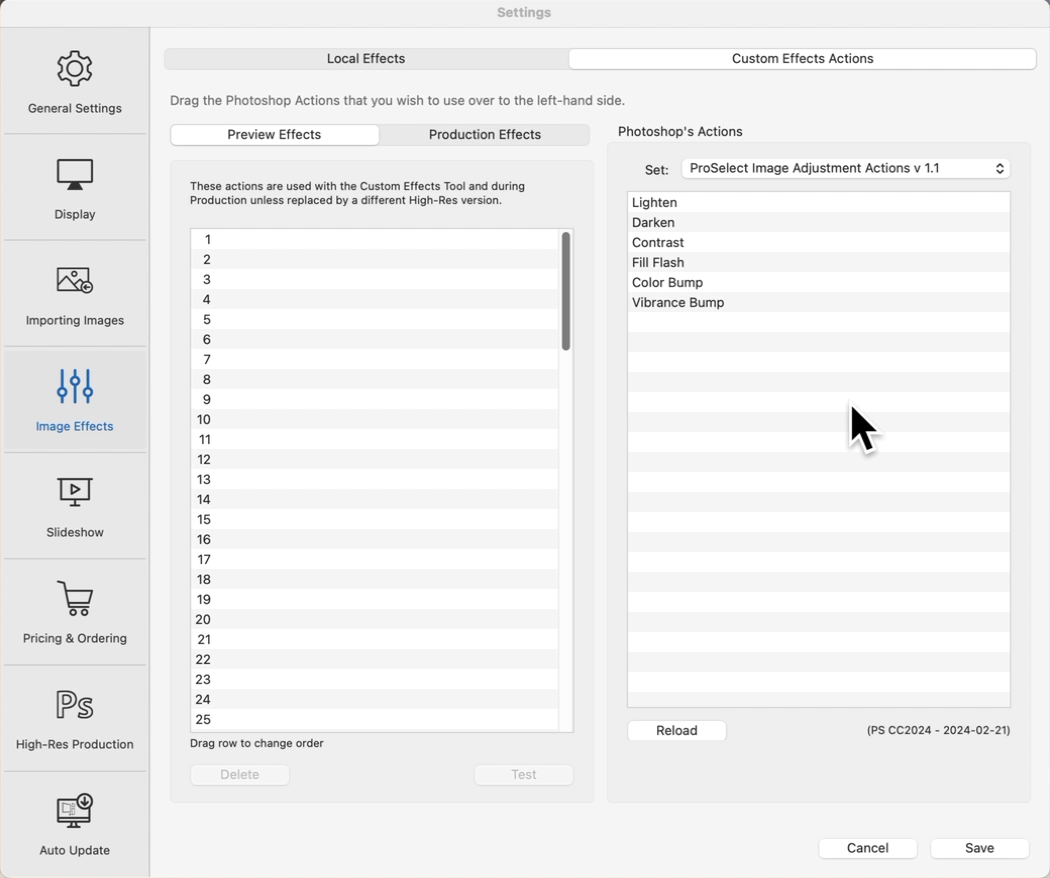
- You can select multiple actions from the right-hand side and drag them all to the Preview Effects list on the left-hand side. Note: This will replace any overlapping actions in this list.
- You can remove one or more selected actions in the Preview Effects list by clicking the Delete button or using the DeleteBackspace key.
- You can drag the positions of one or more selected actions in the Preview Effects list to change the order of the actions in the list.
- Use the Test button to see what the selected action looks like when applied to an image.
- With ProSelect Basic you can setup up to 5 Custom Effects Actions. With ProSelect Pro you can setup up to 100 Custom Effects Actions.
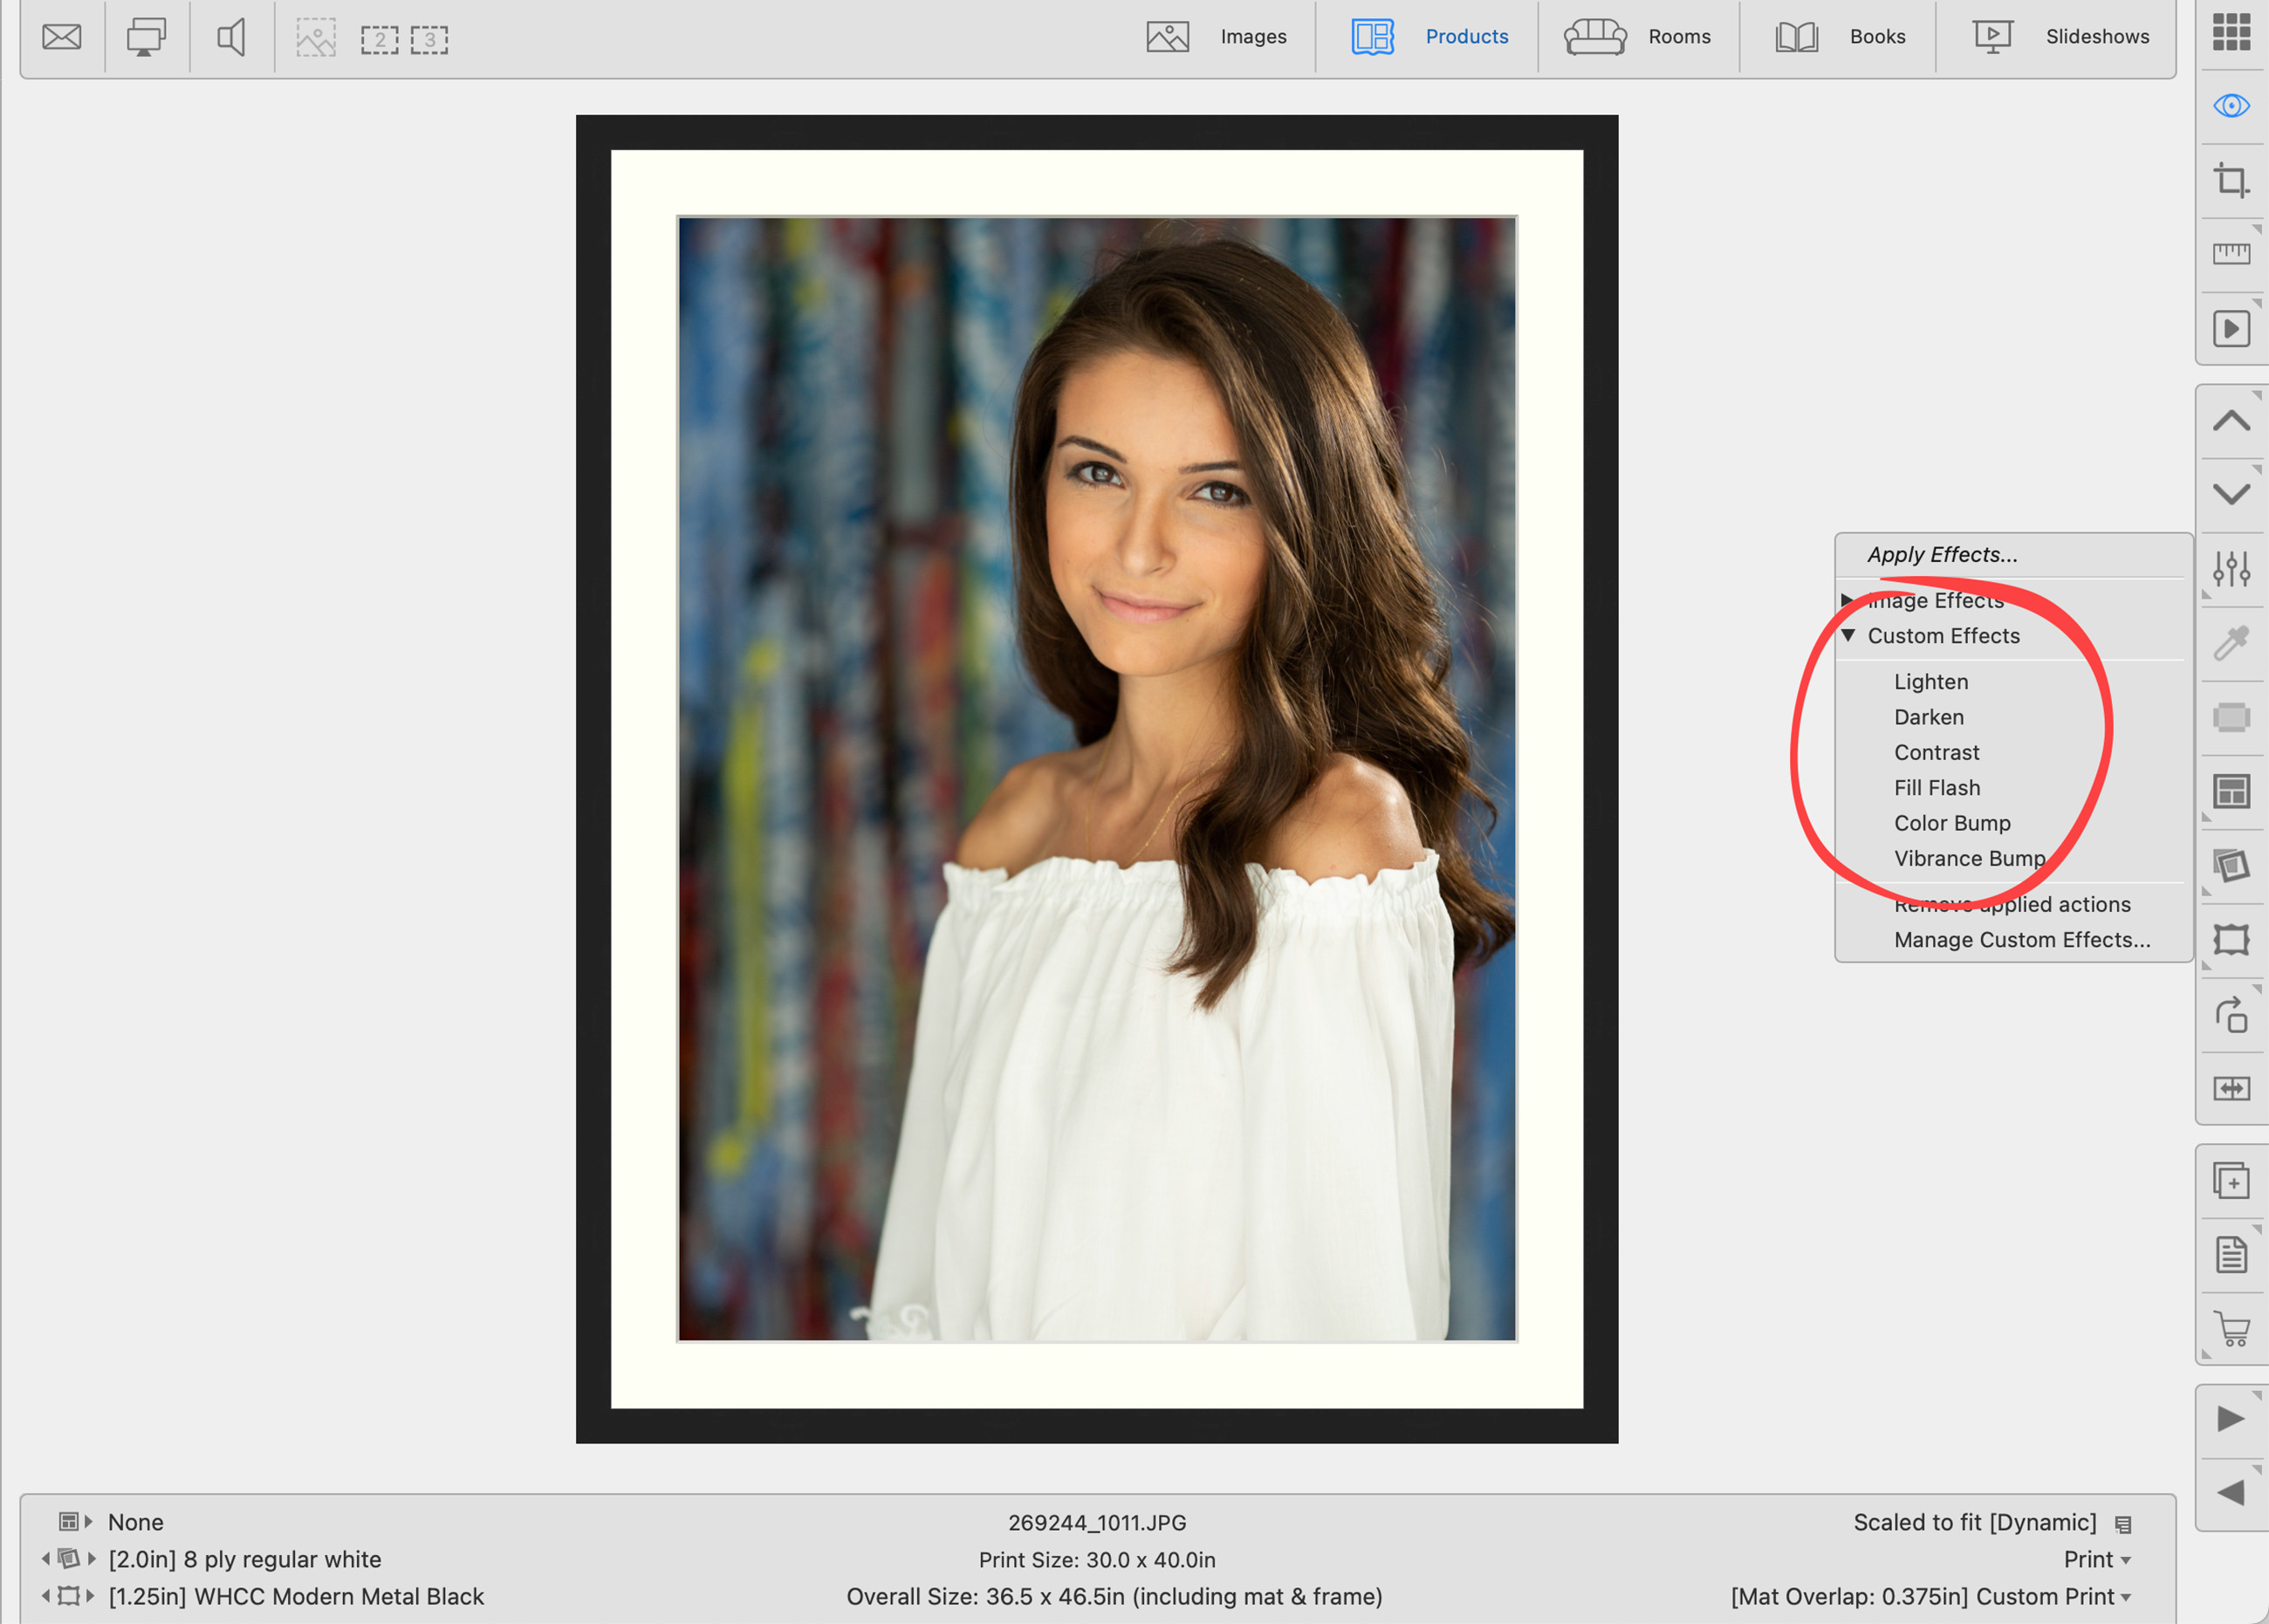
Once you have your Custom Effects set up, they will appear as options when you click on the Apply Effects tool ![]() in the ProSelect Main Working Area.
in the ProSelect Main Working Area.
The Preview and Production Effects tabs can be found in both the Image Effects Tab and the Pro Production Tab. Generally, the same action is used for Custom Effects in ProSelect and Pro Production. For ease of use, these tabs are duplicated, and changes made in one area will appear in both. If you access this page through a secondary entry point, the Pro Production Tab will be selected by default.
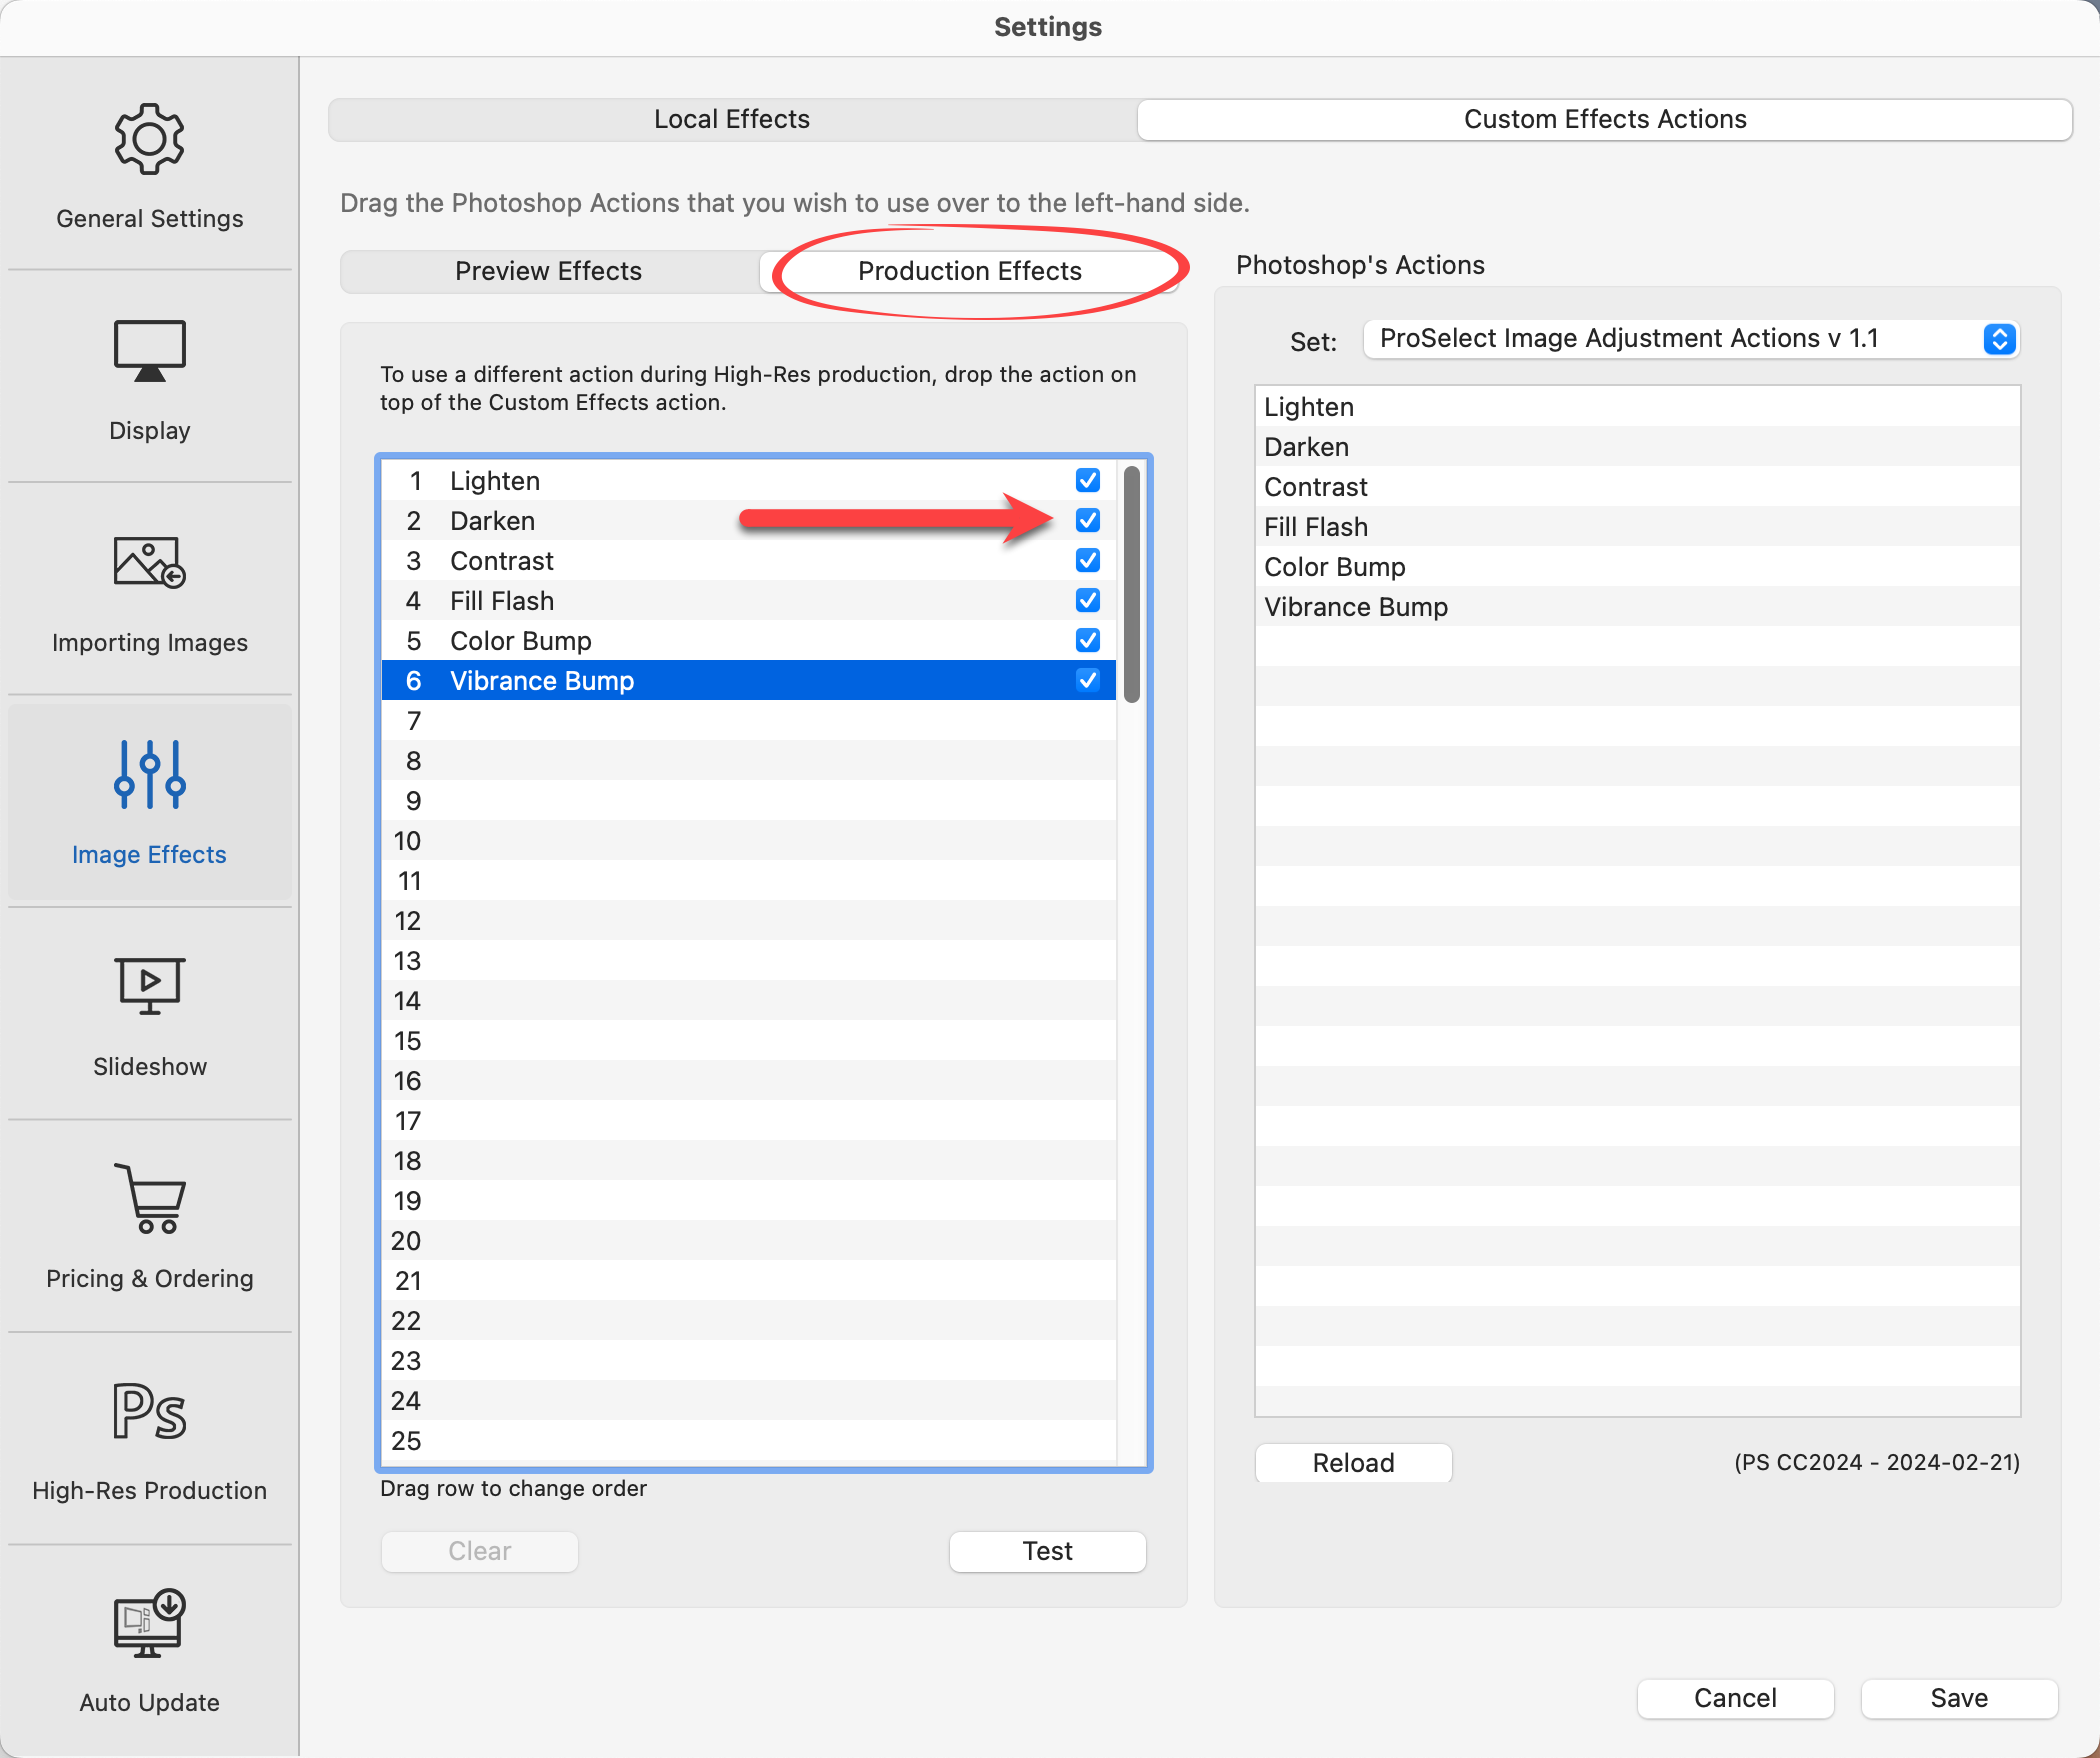
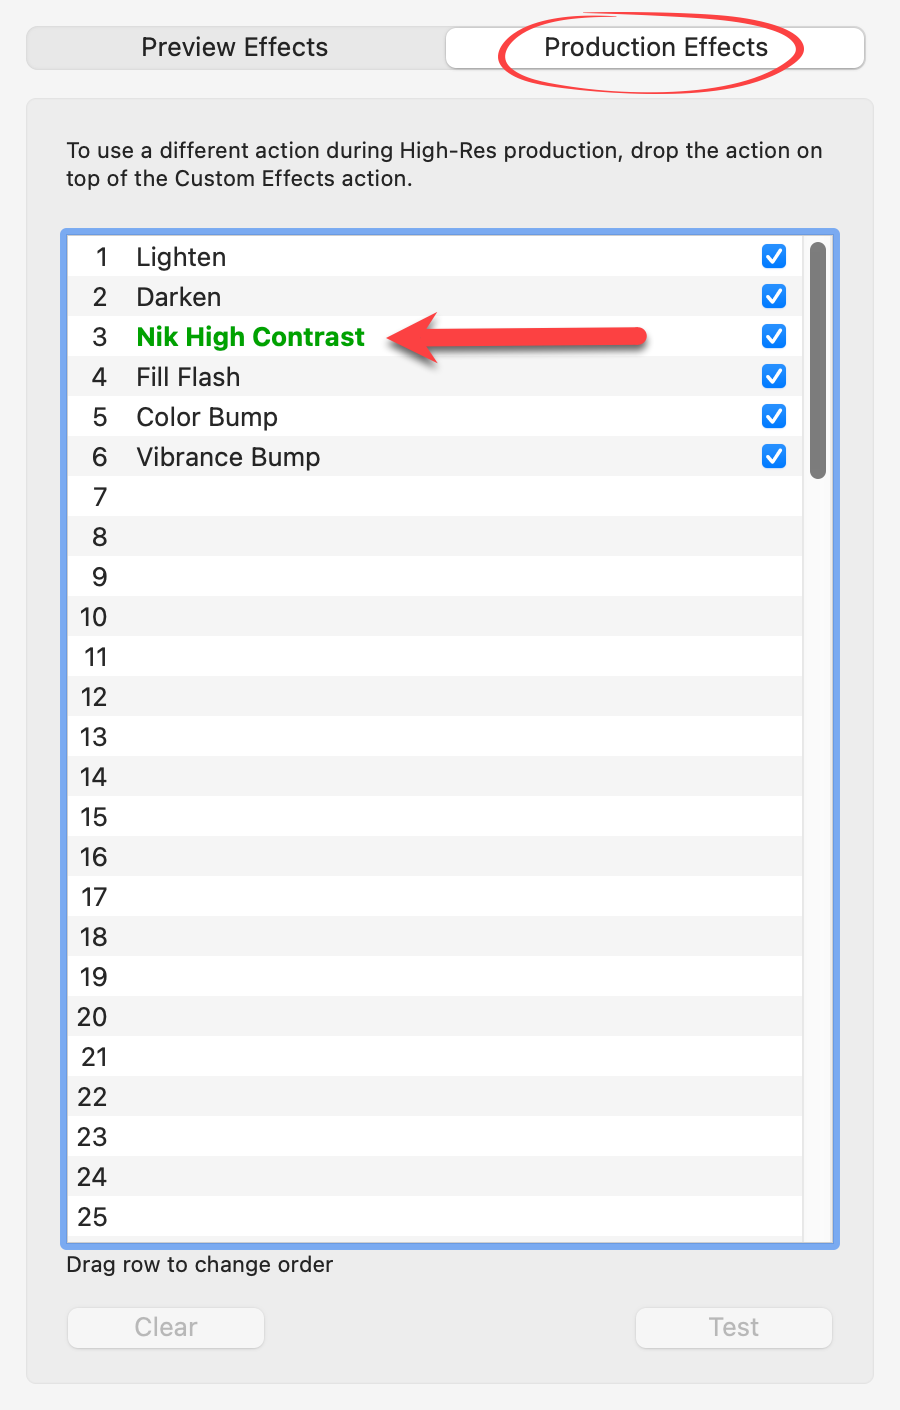
When you run one or more actions on an image, ProSelect records the action set and name with the image and can run the same actions on the original image during Pro Production. To have this happen, make sure that you have checked the checkbox in the Production Effects list for those actions.
- Click on the Production Effects tab
- Check the boxes of all custom effect actions you wish to include
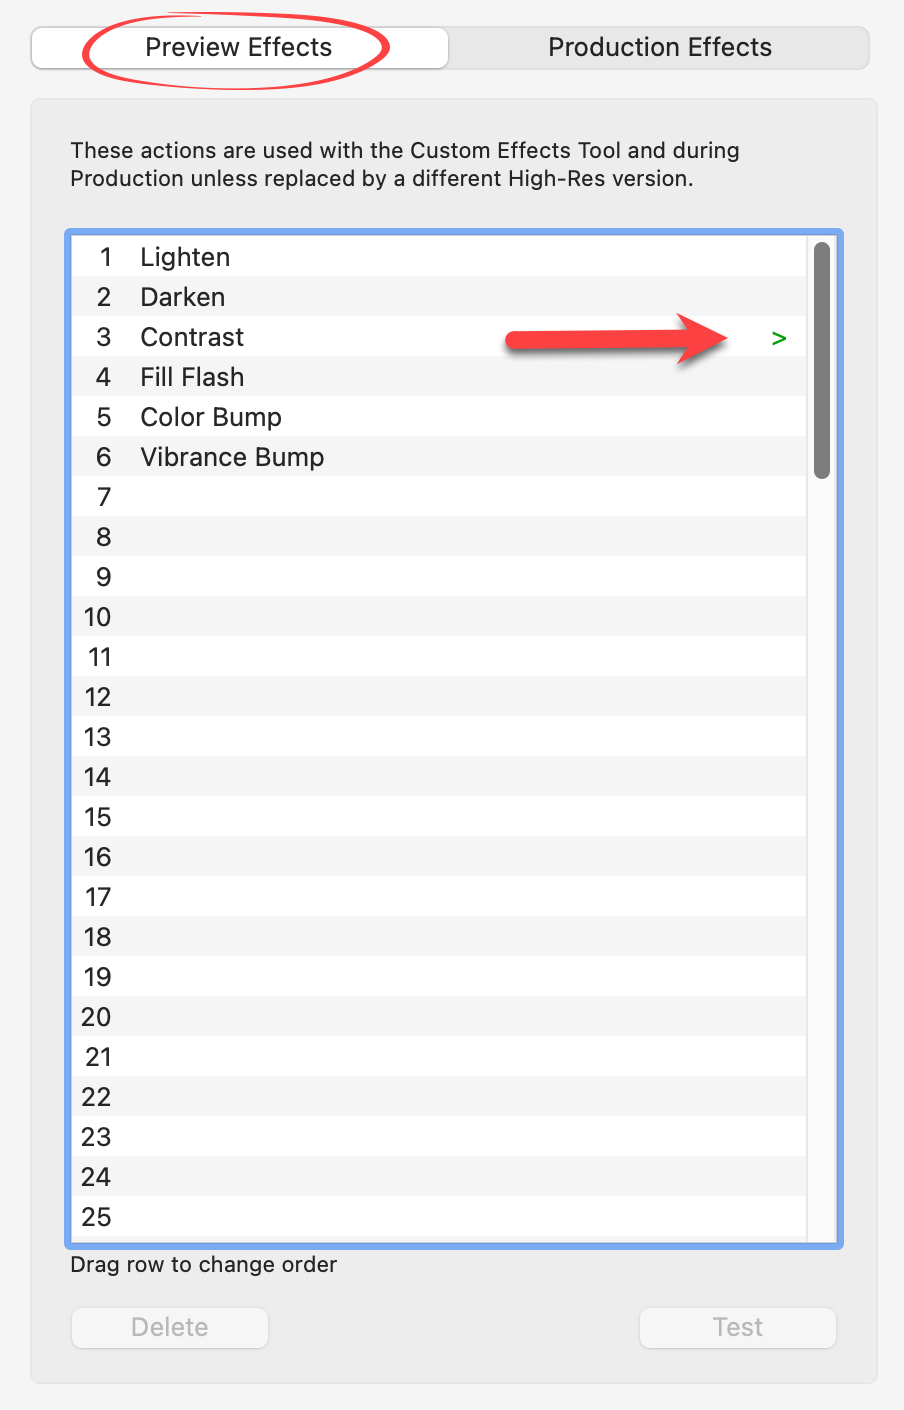
In most cases, using the same action for both the low-res images stored in ProSelect (used when you use the Apply Effects tool) and the original images (when you run Production) is fine unless the action is resolution-dependent. One example of this is a noise action that requires different settings for low and high-resolution images. In this case, you could create two different versions of the action.
- Drag the low-res version into the Preview Effects side of the list.
- Drag the High-Res version into the Production Effects side.
Low-Res actions that have different High-Res versions display with a green "greater than" tag (>) next to the name. If you switch to the Production side, the replacement High-Res action will be shown in green.
- You can remove an action by selecting it in the list and clicking the Delete button or using the DeleteBackspace key.
- If you do not wish to have an action run during Pro Production on images with custom effects then uncheck the checkbox on the Production side.
- You can use any action that normally works on an image open in Photoshop. The action must not display any dialog boxes, save, or close boxes after running because this will prevent ProSelect from automatically receiving the resulting image.
- You can use the Test button to try your selected actions on a sample image.
The Preview and Production Effects tabs can be found in both the Image Effects Tab and the Pro Production Tab. Generally, the same action is used for Custom Effects in ProSelect and Pro Production. For ease of use, these tabs are duplicated, and changes made in one area will appear in both. If you access this page through a secondary entry point, the Pro Production Tab will be selected by default.