Using Video
In ProSelect Pro, you can enhance your slideshows by incorporating album videos, a capability managed through the Setup Videos window accessible from the Slideshow menu. There are two types of video content:
- Library Videos: These are general-use videos stored in the Videos subfolder within your ProSelect Resources folder. You can use them anywhere in your slideshow, commonly at the beginning or end.
-
Album Videos: These are videos specific to a session or client. Unlike library videos, album videos are not stored within your ProSelect Album file - this is to prevent album files from being too large to manage. Instead, only the path to the video file is saved. It’s advisable to store these videos in the same folder as your ProSelect album to simplify file management and ensure links remain intact when moving files.
Using Album Video in slideshows is a ProSelect Pro feature. Upgrade your subscription to Pro on the Pro Studio Software website.
The "Library" tab lists the general use videos available to all albums (not just a specific client). The list of videos directly reflects what is in the ProSelect Video Resources folder. To add Library Videos, go to the top menu, Slideshows > Setup Video. Select the "Library" tab.
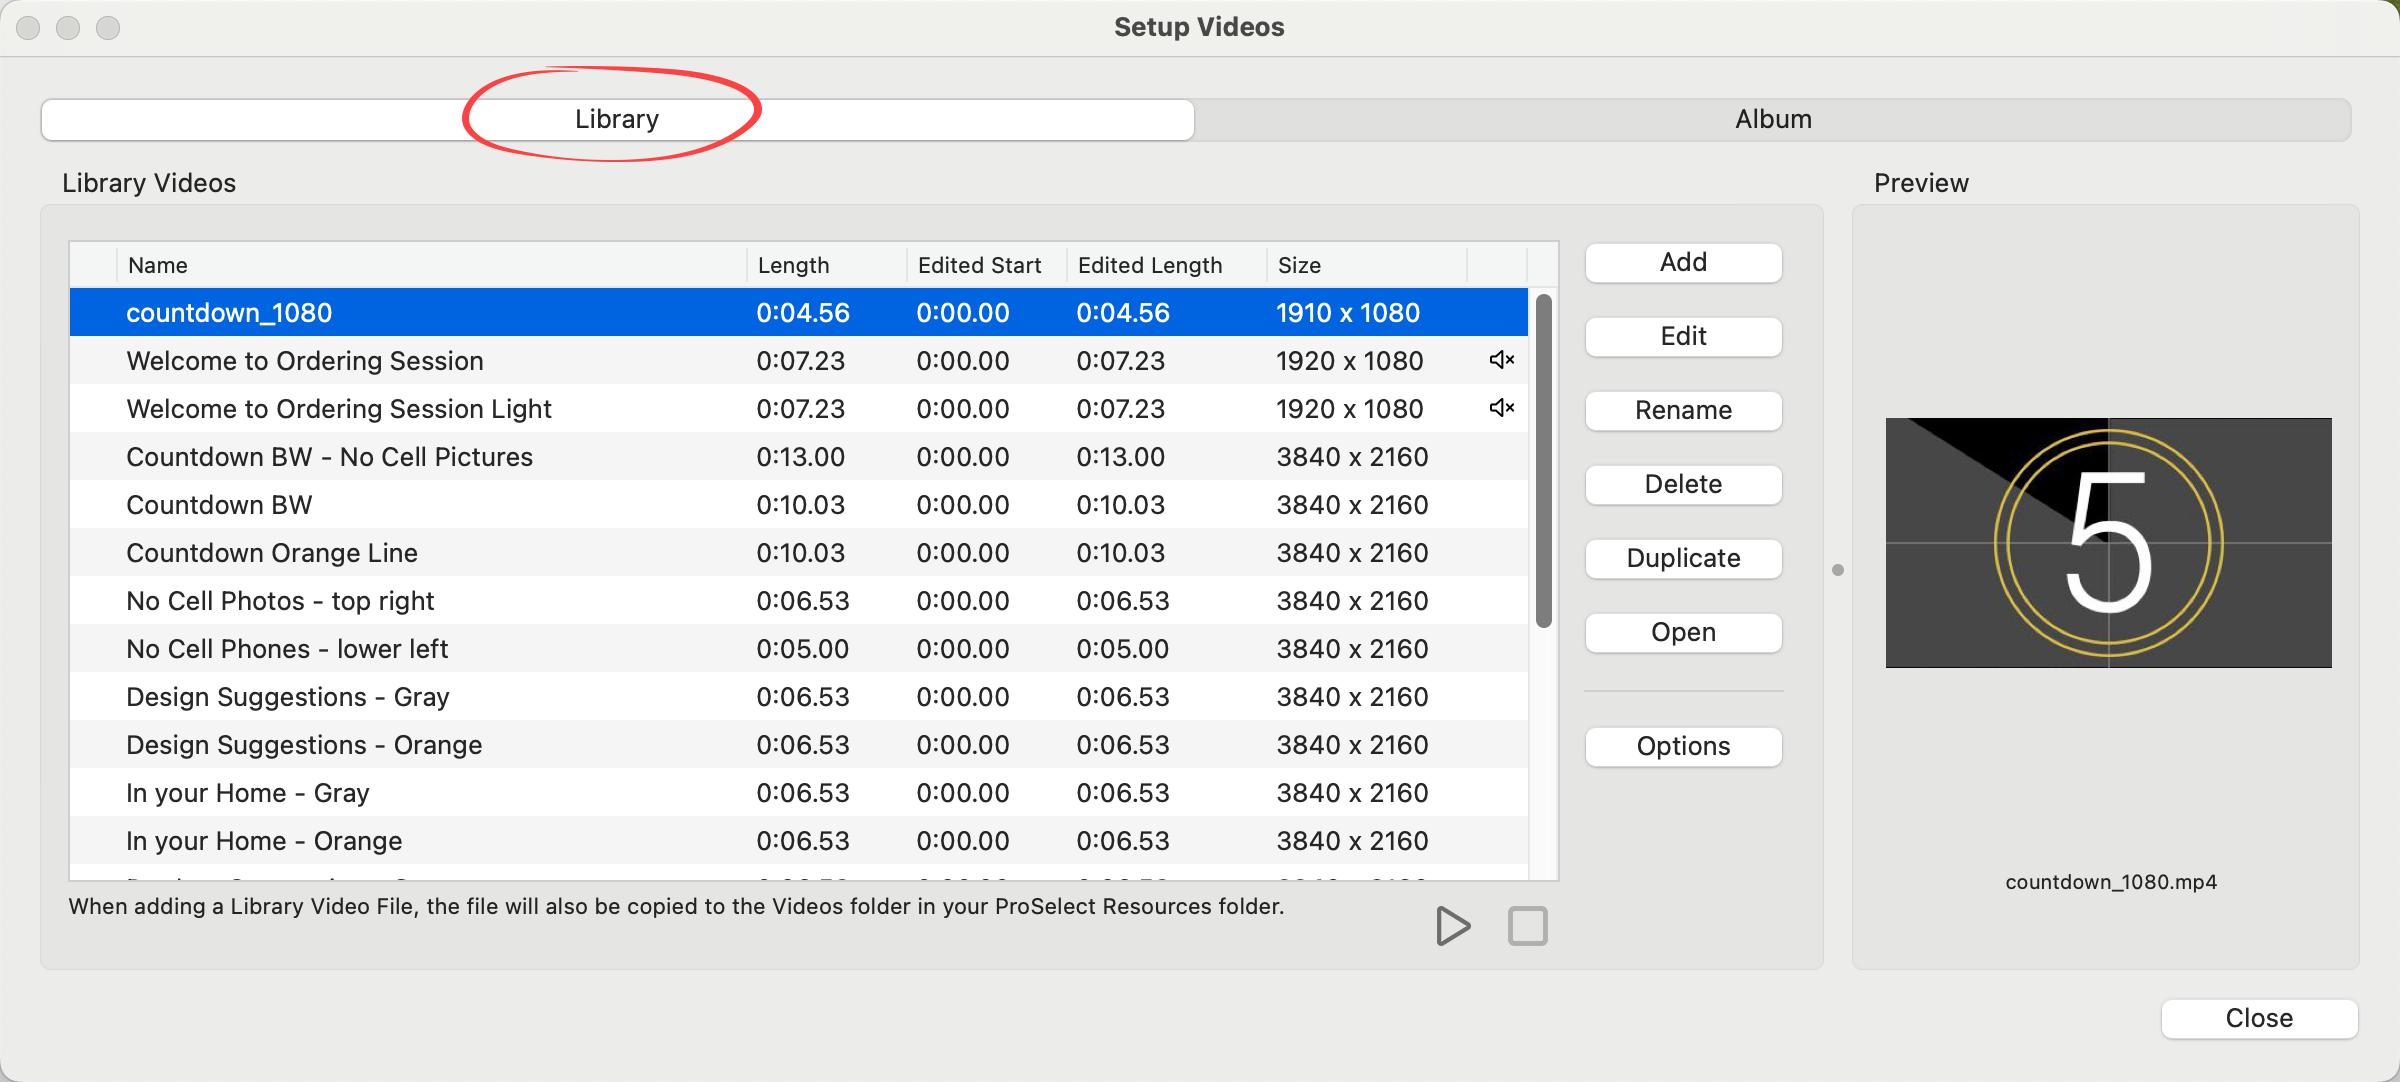
Option 1: Drag and Drop
- Make sure the "Library" tab is selected.
- Drag and drop a video file from your computer directly into the list.
- A copy of the video will be added to your ProSelect Video Resources folder.
Option 2: Use the Add button
- Click on the Add button.
- Select "Video File" from the list.
- Locate the video file, select it, and click "open."
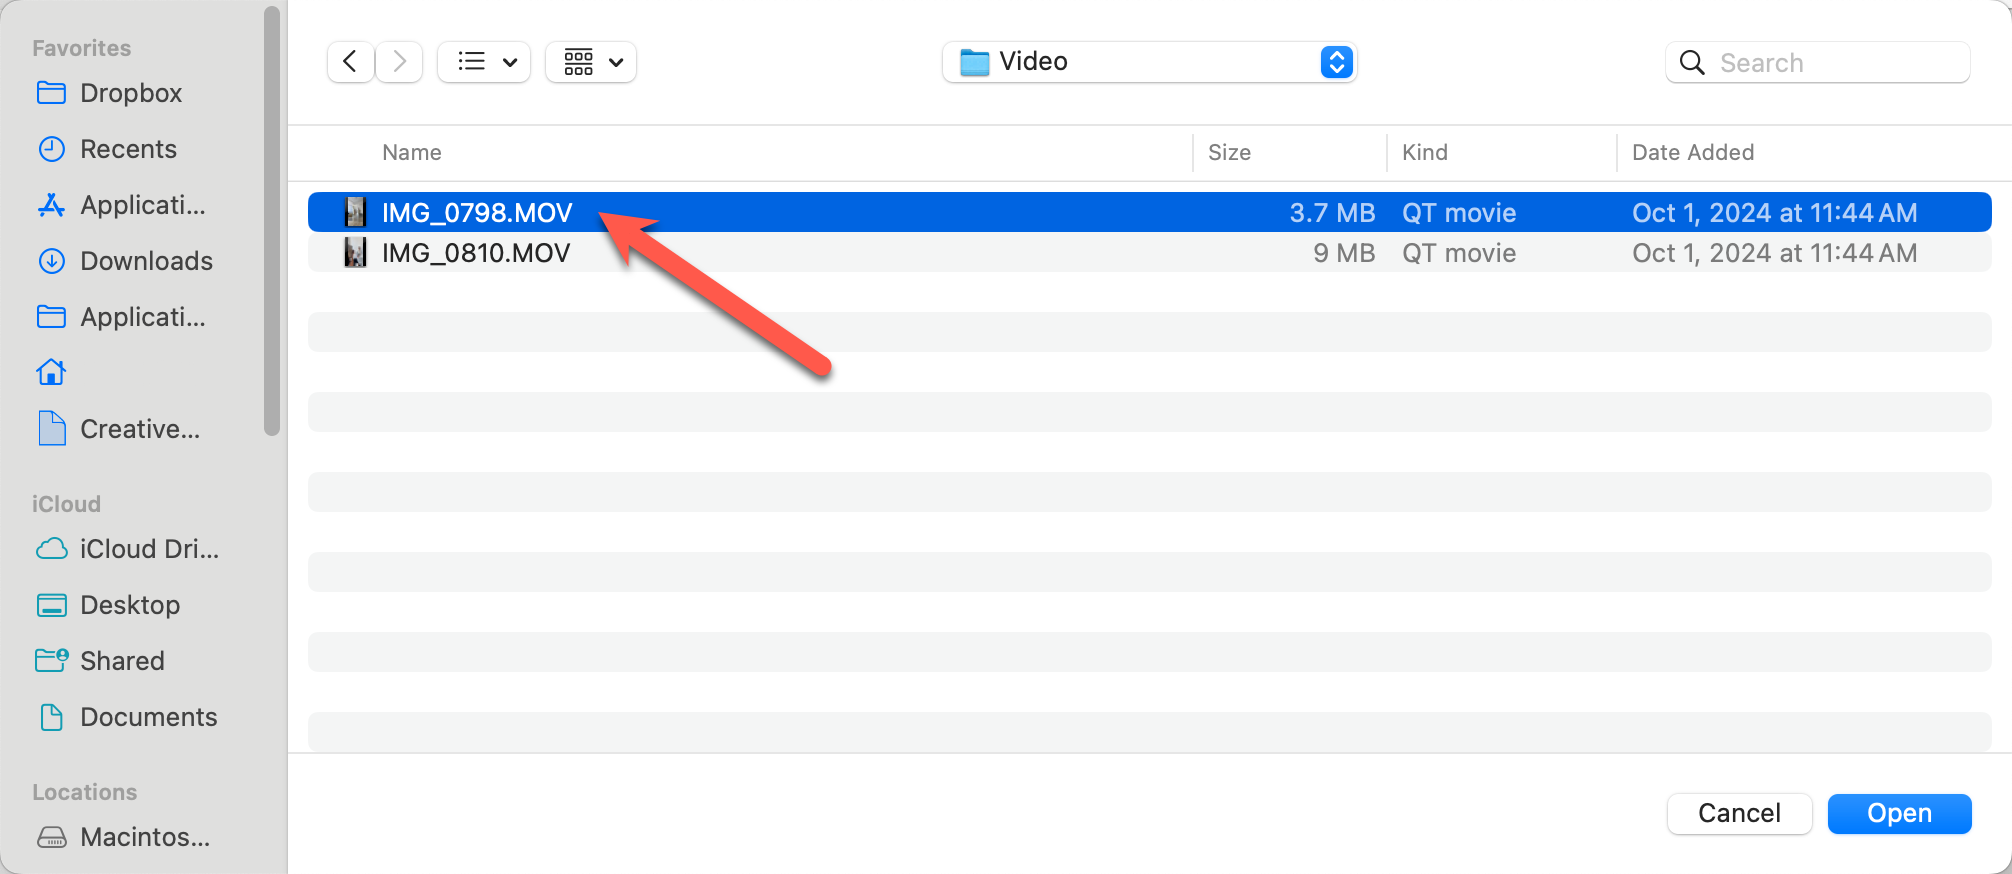
- The video has been added to the Library Videos. A copy of the video will also be added to the ProSelect Video Resources folder.
Option 3: Add a Video From the Resources folder.
- Click on the Add button.
- Select "Resources" from the list.
- Select a video from the list to add.
- If the video you want is not listed, drag and drop the video into the list, or import it from your computer (use the Import File button).
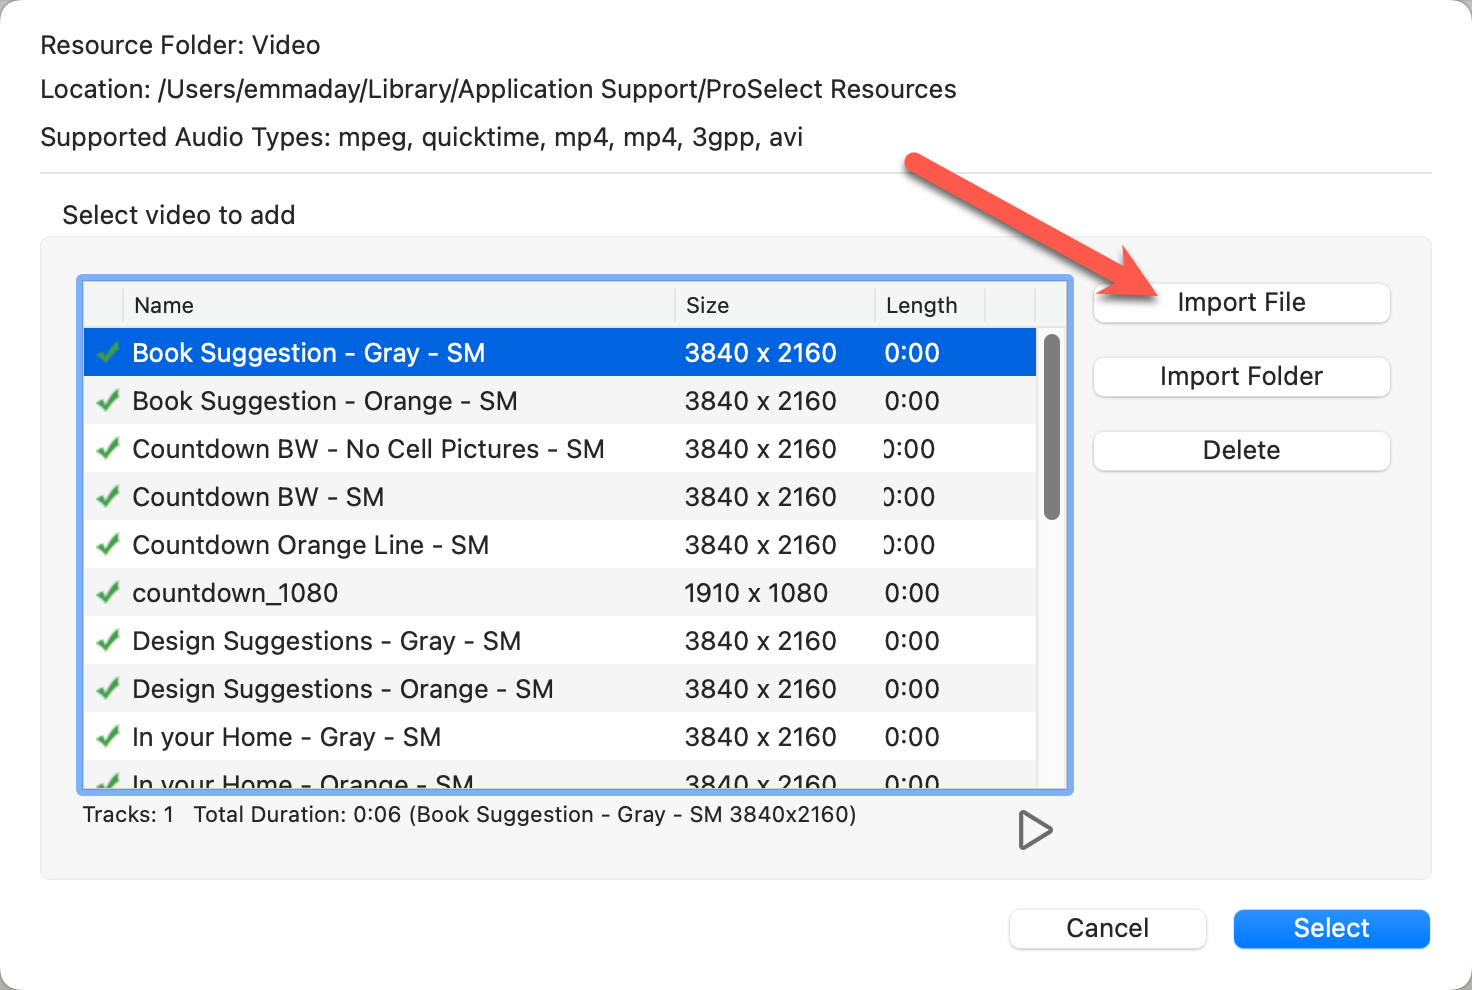
- Click the Select button.
- The video has now been added to the Library Videos. It can be used across all albums.
There are a few different methods available for adding album videos. To begin, go to the top menu, Slideshows > Setup Video. Select the "Album" tab.
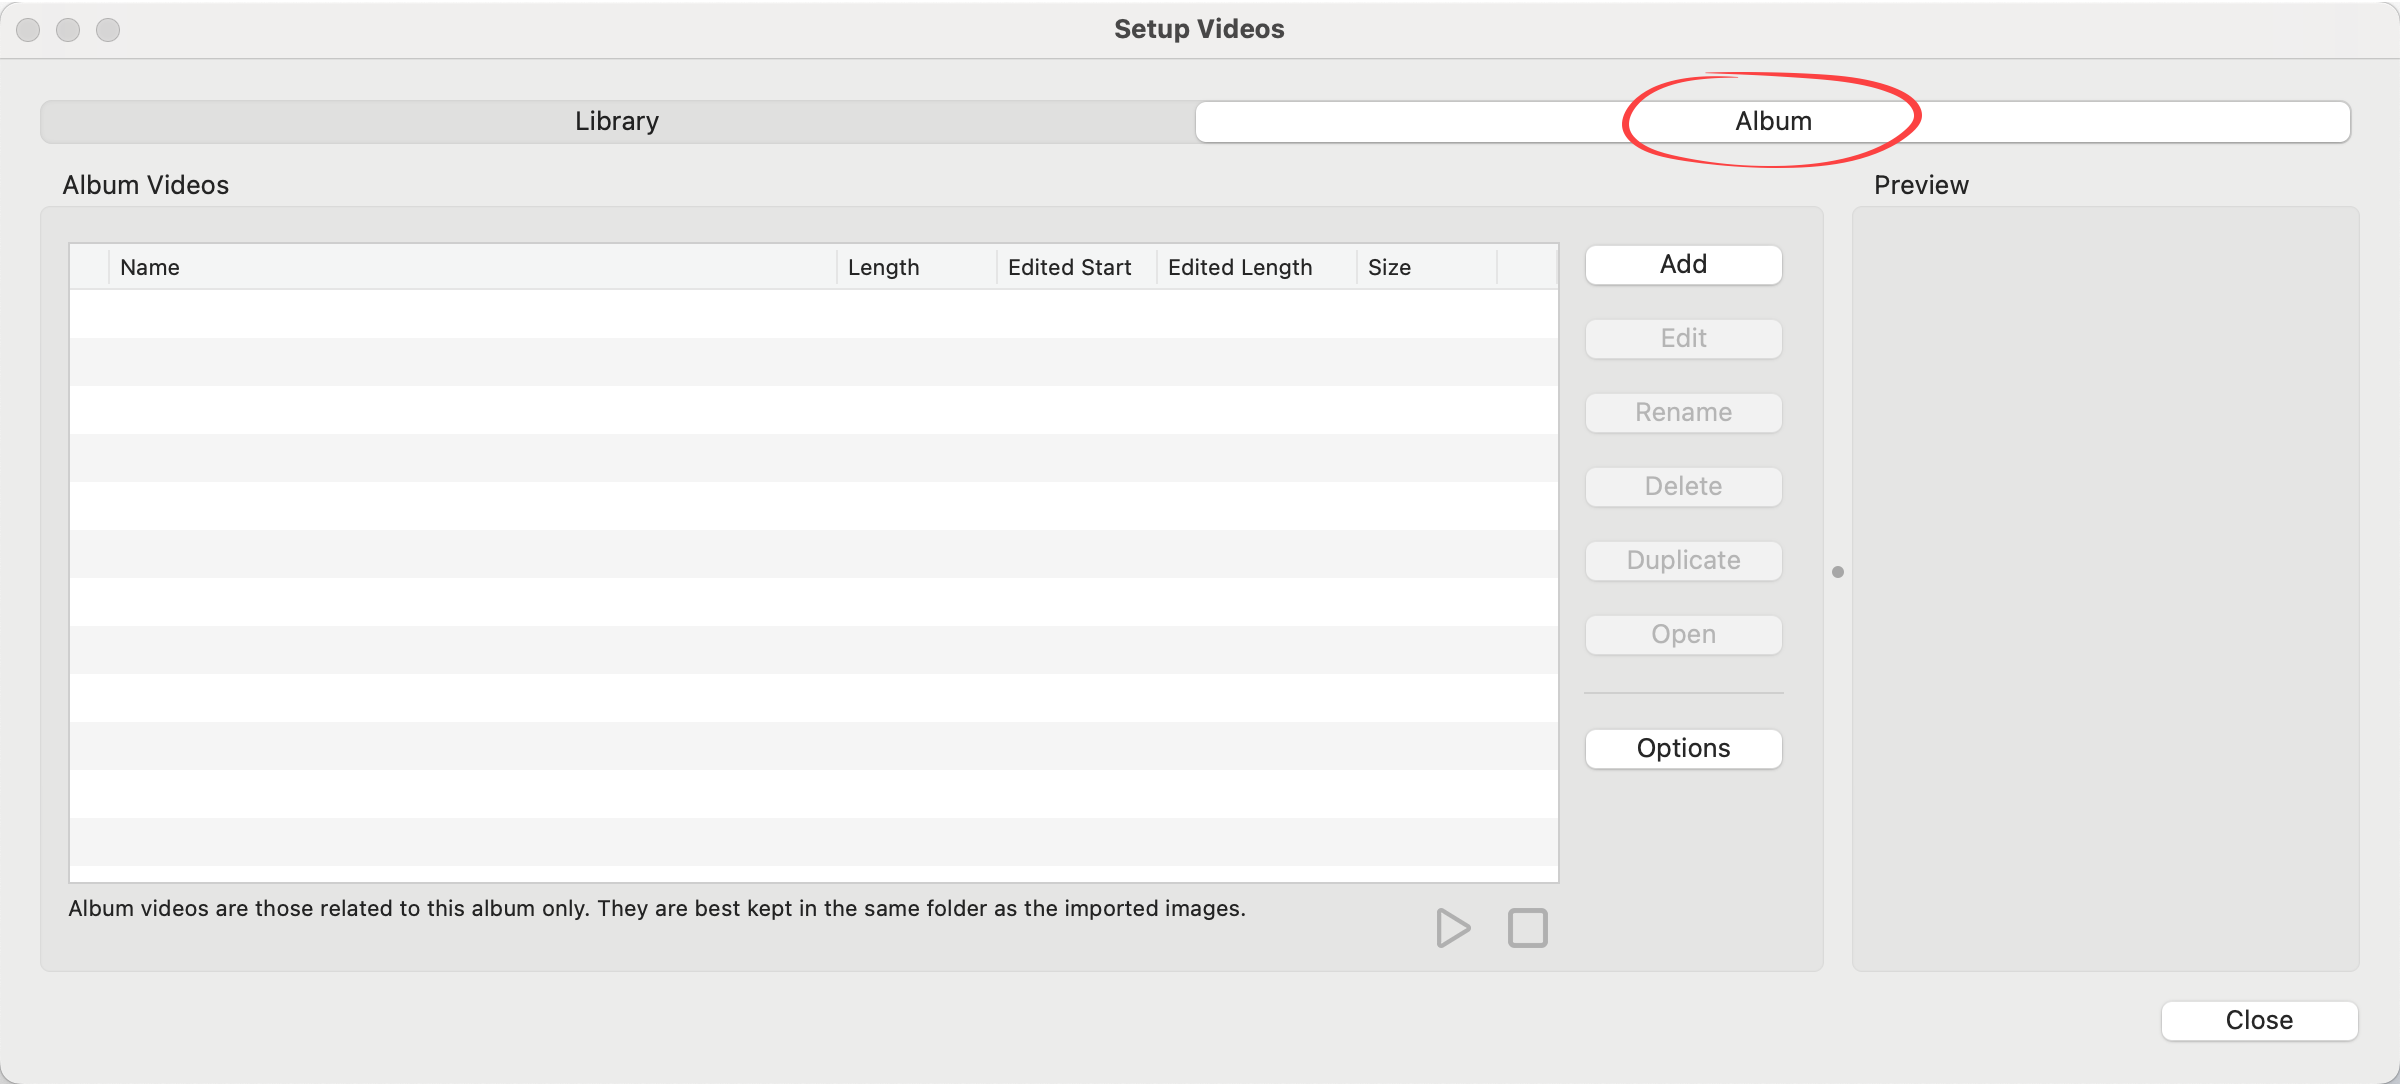
Option 1: Use the Add button
- Click on the Add button.
- Select "Video File" from the list.
- Locate the video file, select it, and click "open."

- The video has been added to the album.
Option 2: Drag and Drop
- Make sure the "Album" tab is selected.
- Drag and drop a video file from your computer directly into the list.
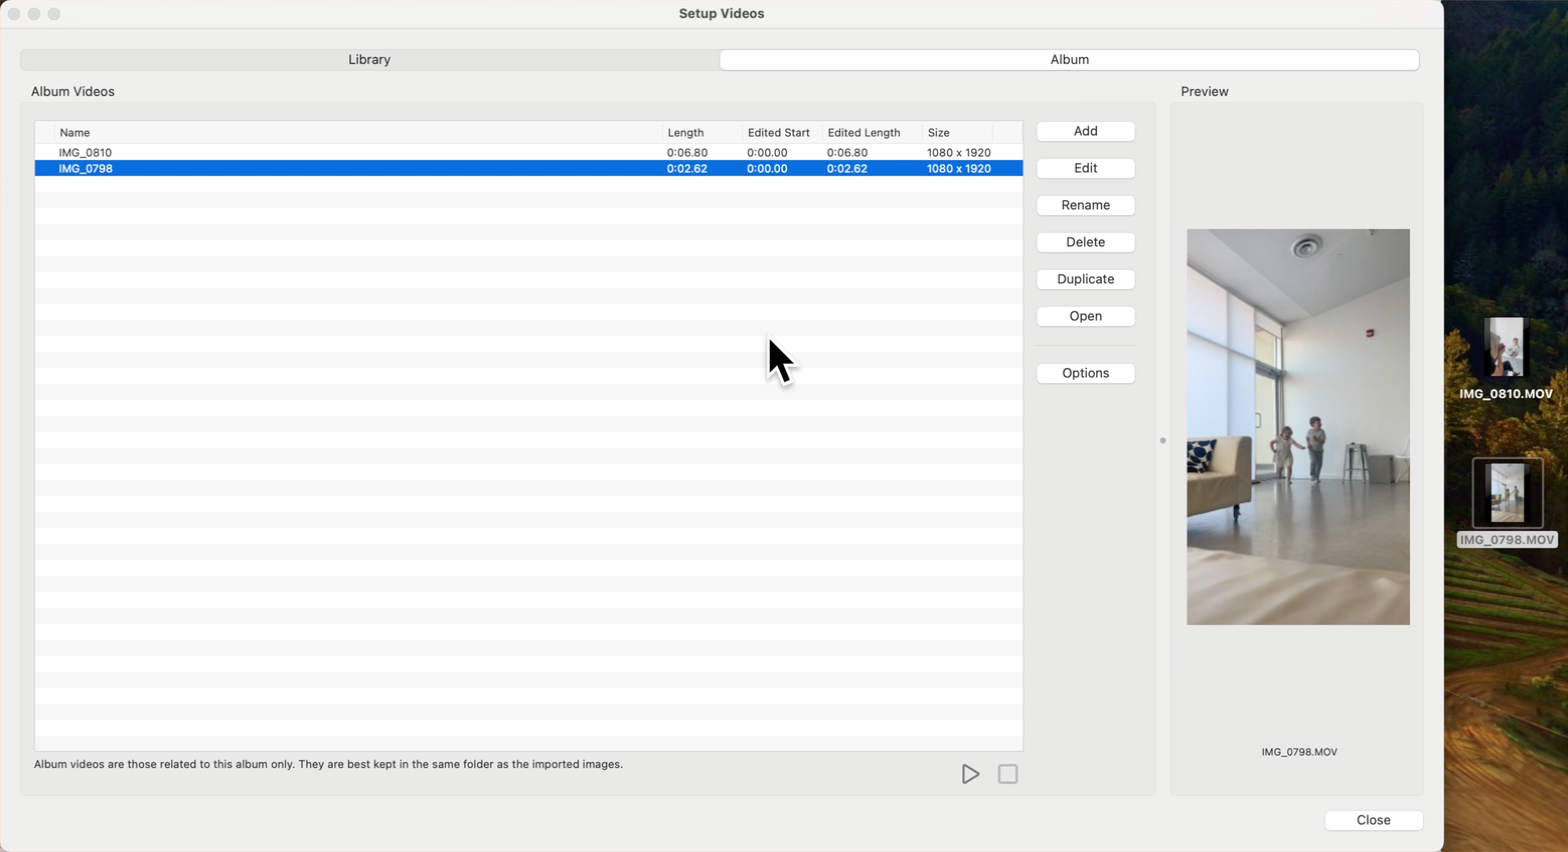
Option 3: Automatically Include Video Files *this must be done on the initial import
- Go to the top menu, ProSelectEdit > Settings > Importing Images > Import Options.
- Check the box "Import Videos in Images Folder."
- Checking this option will automatically add any video found in the images folder as album videos. Note: ProSelect only checks this setting on the initial import. If a video is added to the images folder at a later time, use a different method to add the video.
Option 4: Drag and Drop into the Image List
- Open your ProSelect album.
- Drag the video file from your computer and drop it onto the image list on the main display.
- The video file will be added as an album video.
- Keep videos in the same folder as the ProSelect Album file.
- If you move the album, make sure to move the video files with it to maintain link integrity.
- If a link breaks, you can relink the videos using the Find Album Videos function.
Once video has been added, you can preview, rename, update, and edit videos within ProSelect.
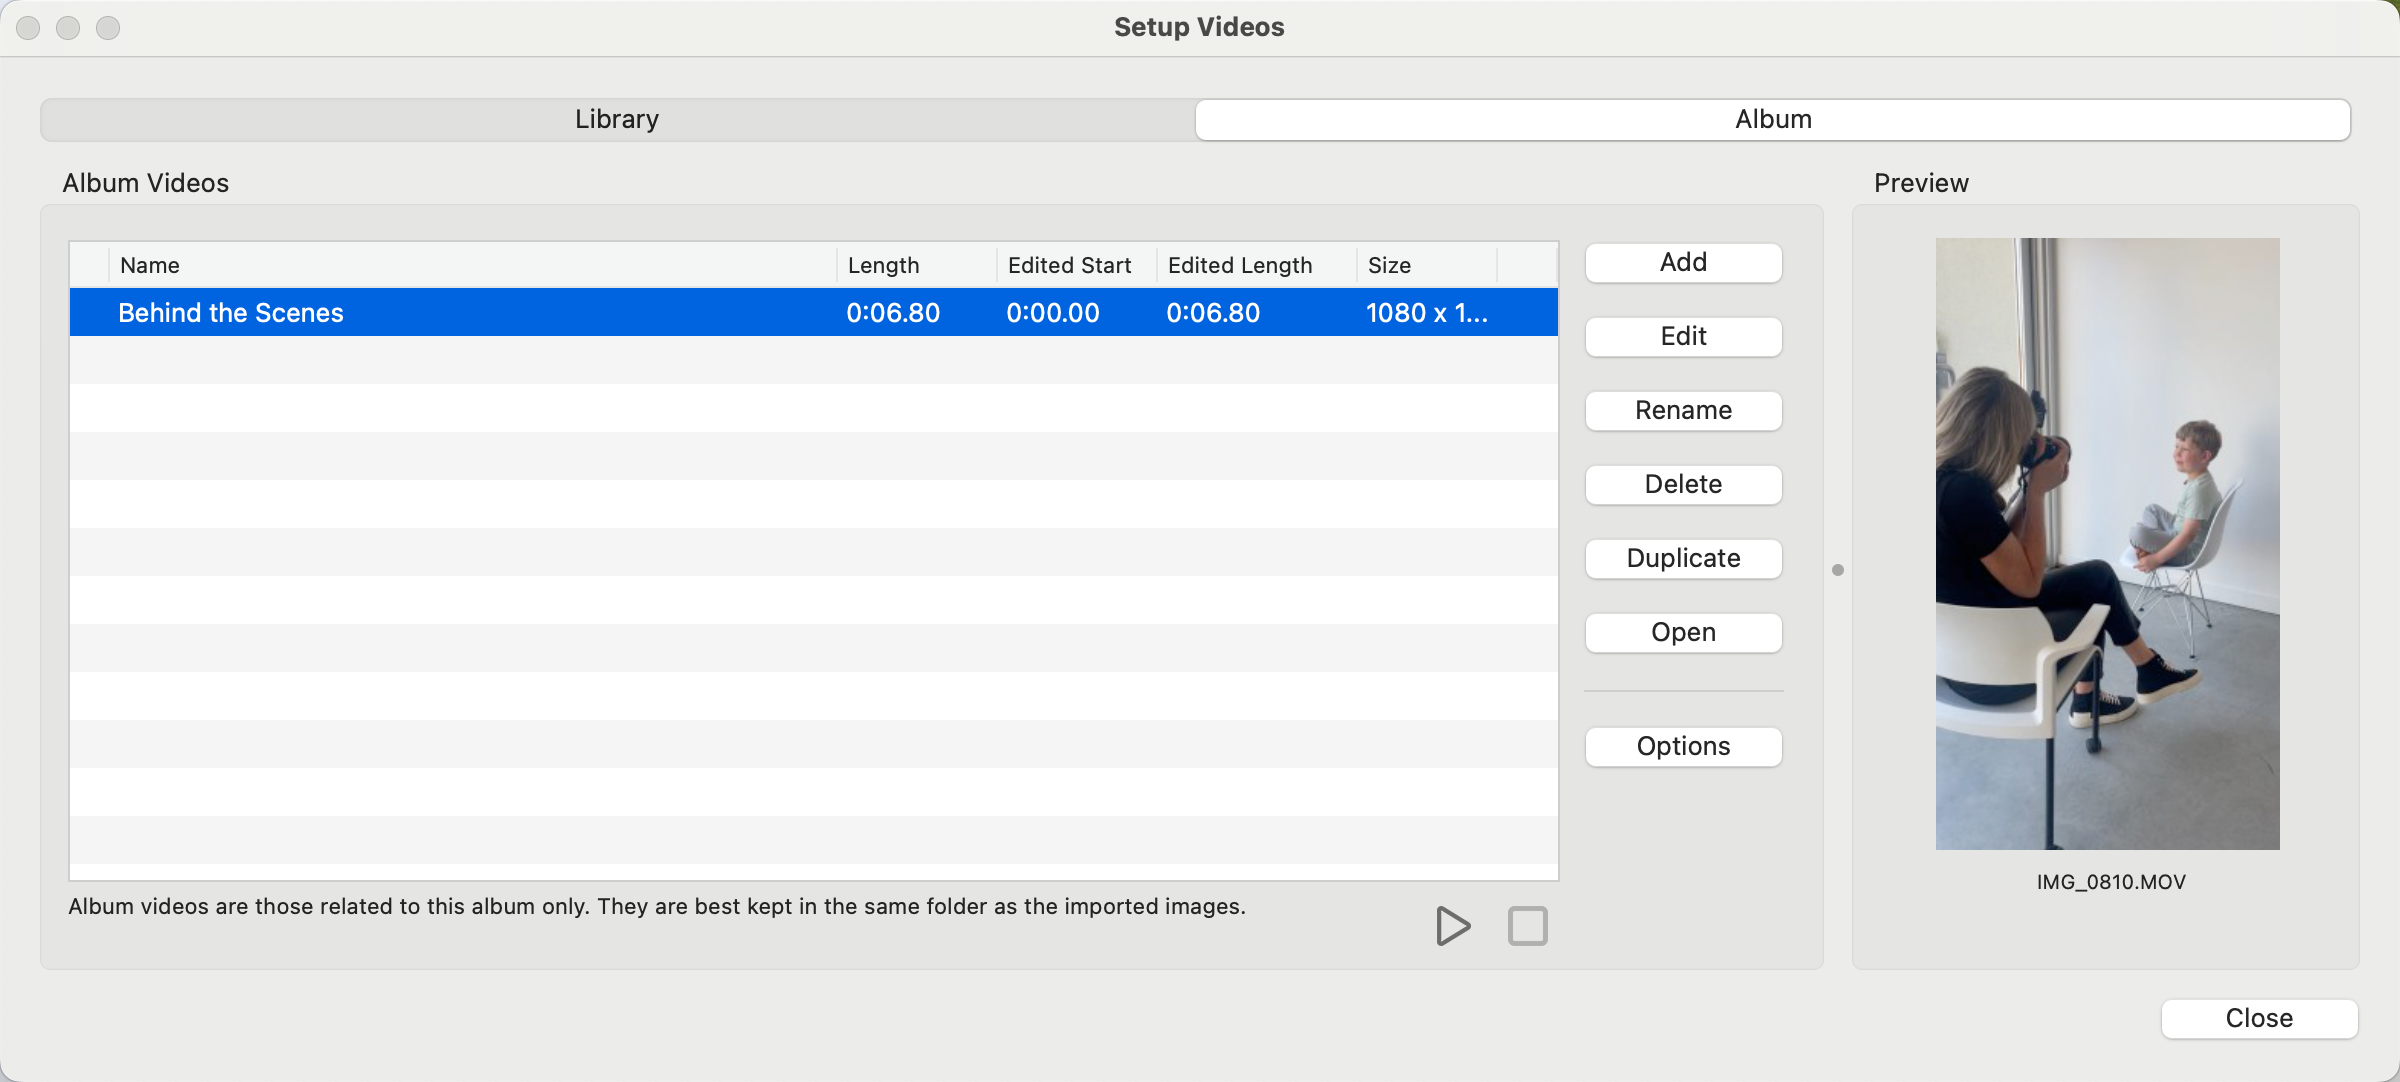
Play Video
Use the Play ![]() and Stop
and Stop ![]() buttons in the Setup Videos window to preview your selected video within ProSelect.
buttons in the Setup Videos window to preview your selected video within ProSelect.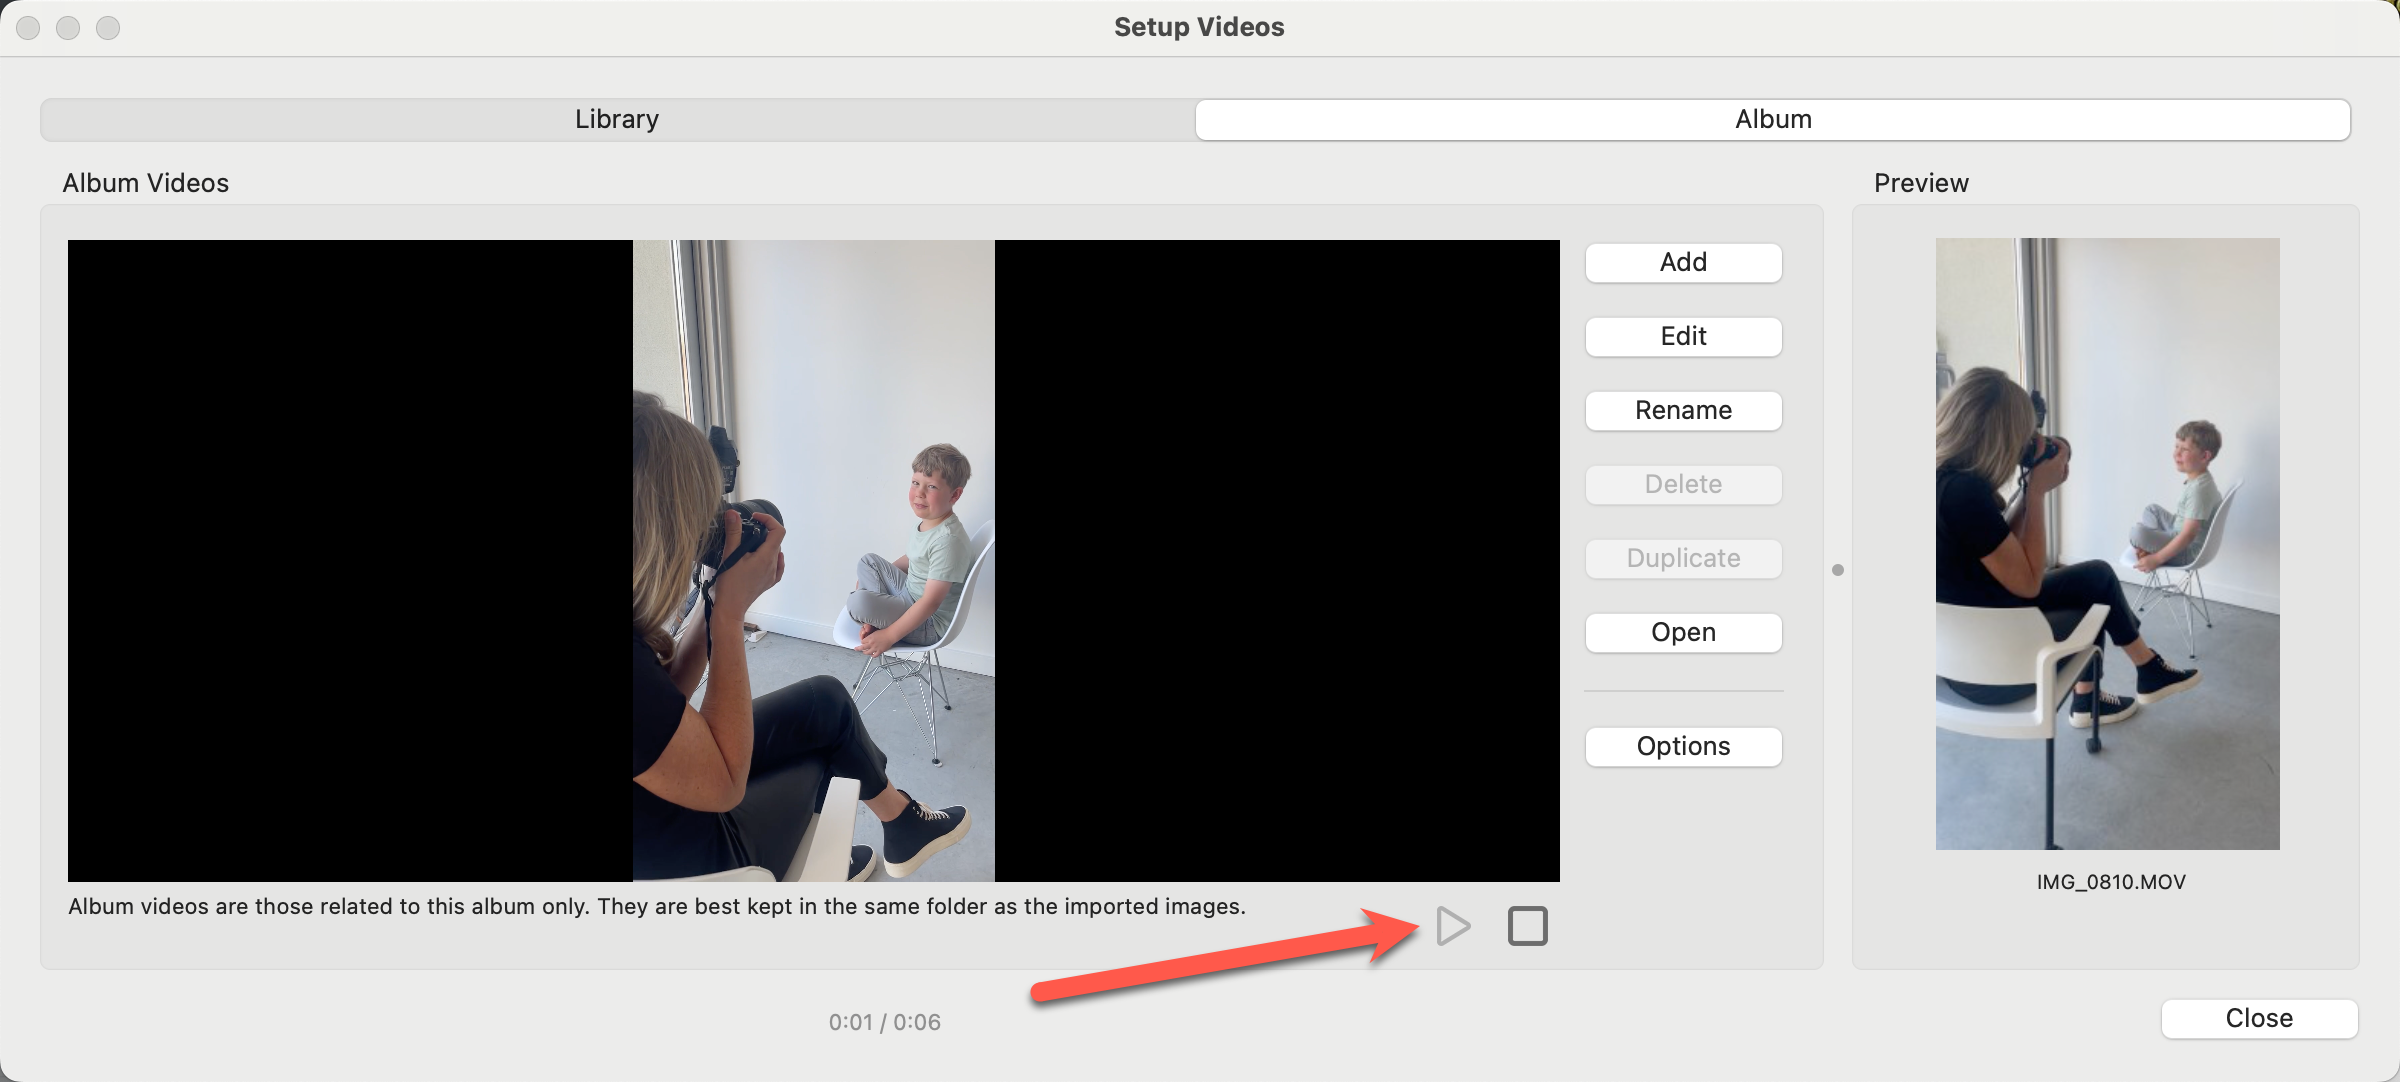
Rename Videos
You can rename any video for easier identification by clicking the Rename button. Alternatively, double-click on the name to rename it. This name appears beneath the video thumbnail in the slideshow setup, replacing the original file name.
Duplicate Video
The Duplicate button creates virtual copies of the video without copying the video file itself. Each copy acts as a separate entity in your slideshow and can have distinct start and end times, names, and thumbnails. This allows you to break down a single video into multiple segments for various parts of your slideshow.
Edit a Video
You can tighten up video clips by trimming the beginning and end of the clip. Longer video clips can also be divided into shorter clips to use in multiple places in your slideshow. Note: edited video clips must be at least 4 seconds long.
- Select the video clip you wish to modify.
- To divide the clip into multiple clips, Duplicate the clip first. Make as many copies as you want clips. Each copy can then be edited individually in the Edit Video Clip window to specify different start and end times.
- Click the Edit button.
- The Edit Video Clip window will appear.
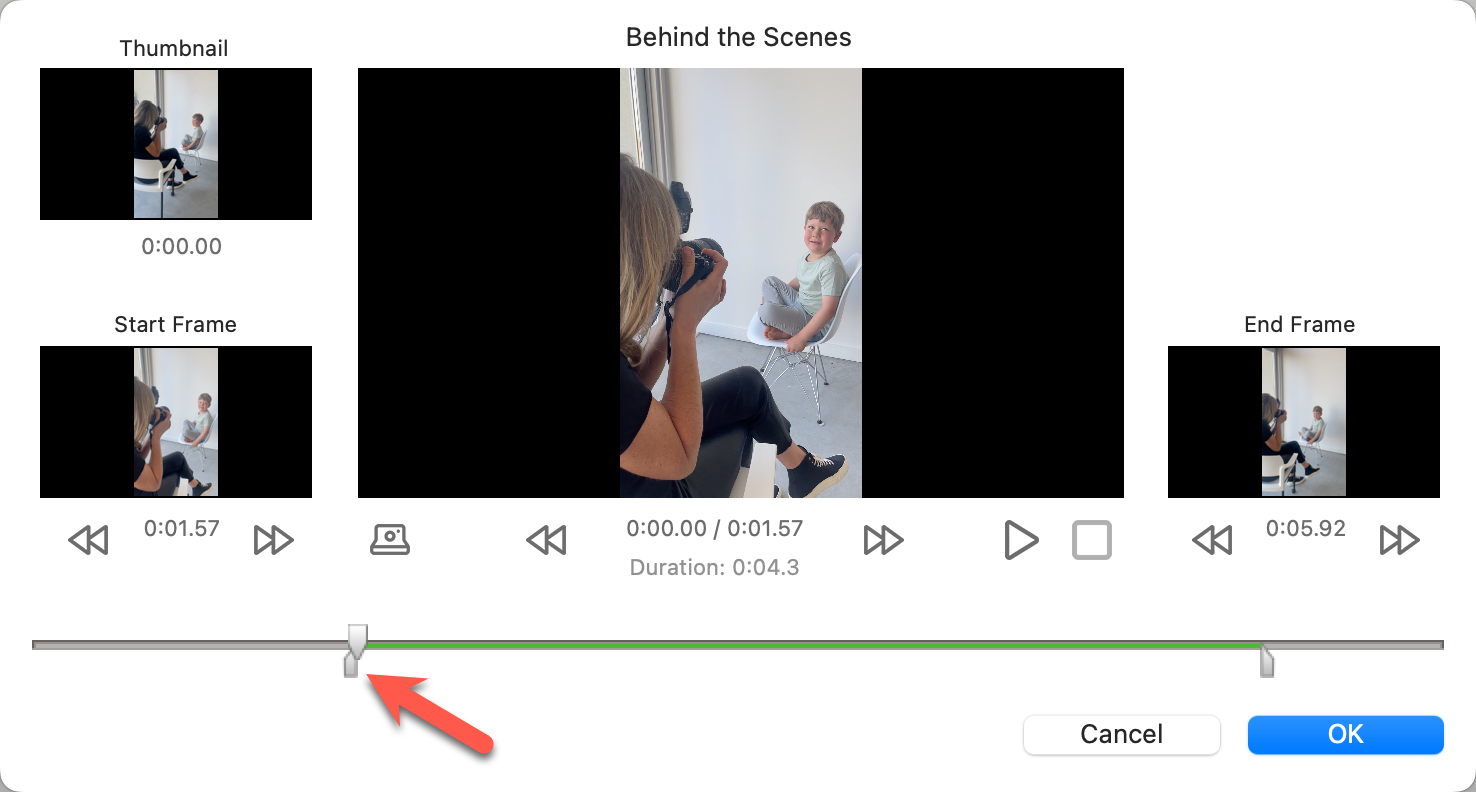
- Adjust the start and end times by dragging the markers on the slider or making finer adjustments with the arrow buttons.
- Preview adjustments using the Play
 and Stop
  buttons or the space bar.
 - Set the thumbnail image using the Capture button
 . This can be useful if you are dividing a long clip into many, as it will help differentiate the clips.
 - Click OK when finished.
Update Library Videos
If a library video has been altered externally, use the Options button and select "Update Library Videos" to refresh its metadata in ProSelect.
Find Missing Videos
If a video is not found at its expected location, a warning icon ![]() appears. You can either restore the video to its original location OR update its path by going to the top menu, Slideshow > Videos > Find Album Videos.
appears. You can either restore the video to its original location OR update its path by going to the top menu, Slideshow > Videos > Find Album Videos.
Delete a Video
Remove a video by selecting it and clicking on the Delete button. This action will only remove the video from the album or library. It will not permanently delete the video.
- Navigate to Working with Slideshows, Thumbnail view.
- Select the "Video" category on the Resource Selection bar.
- Choose either "Library Videos" or "Album Videos."
- Drag your chosen video directly into the slideshow timeline.
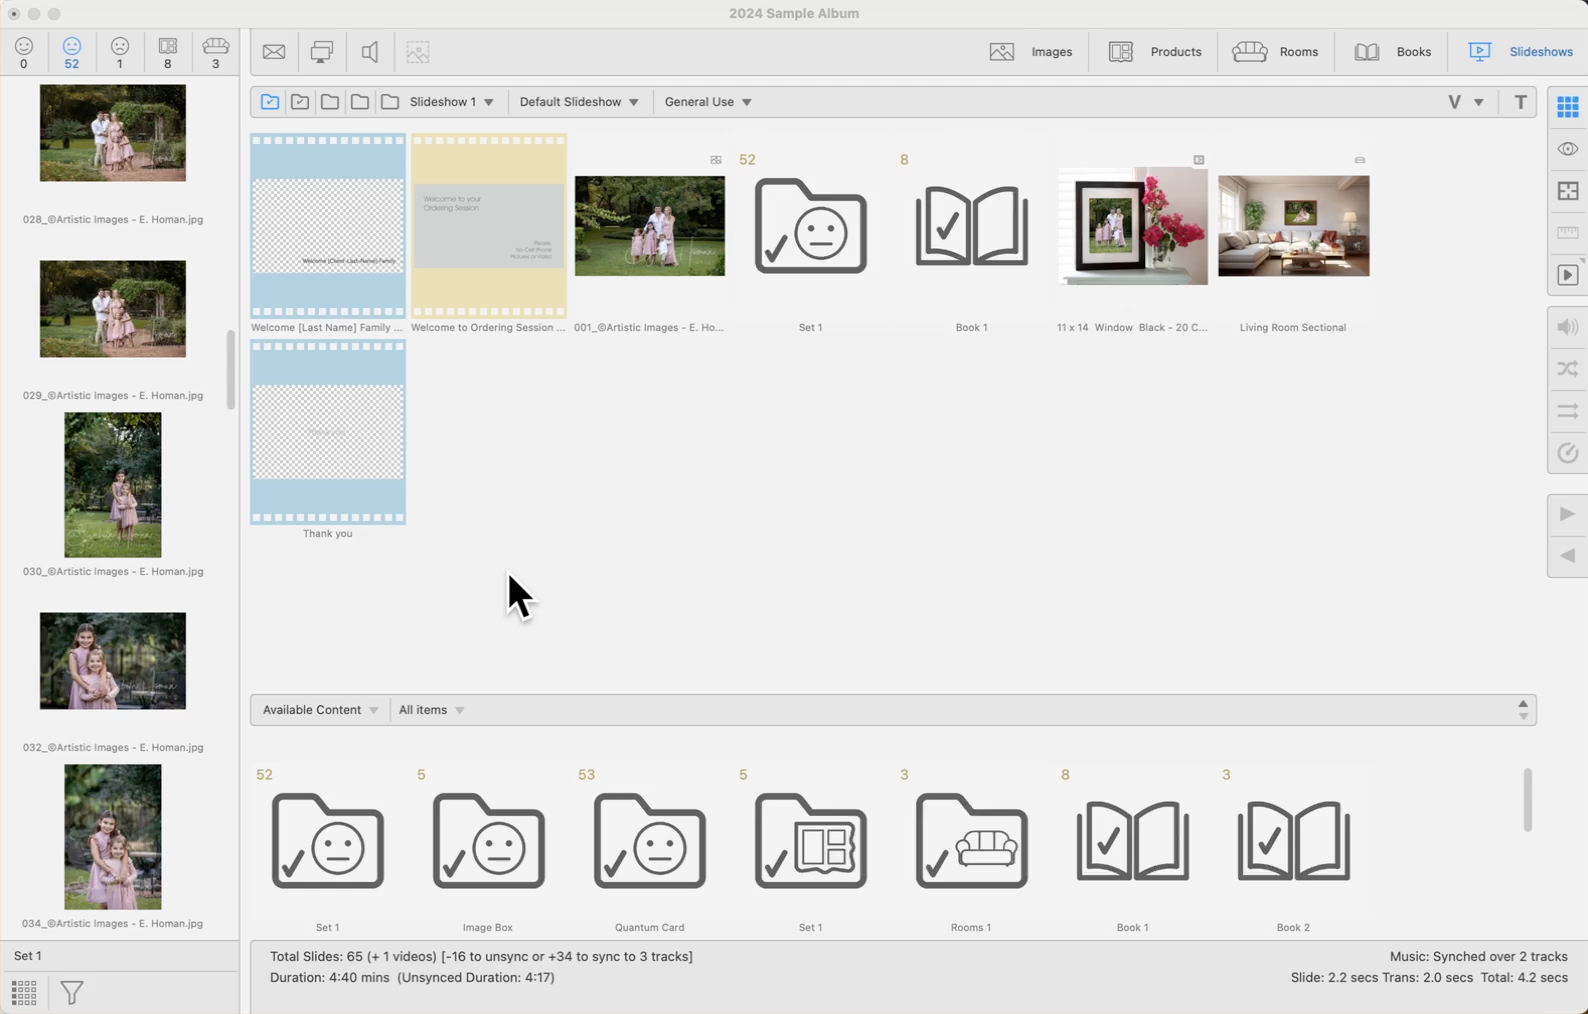
- If transitions are desired, ensure the "Video Transitions" option is enabled in your Slideshow Style settings.
- Right-click on a video clip and select "Open in Setup Videos" to navigate to the Setup Video window.
- Right-click on a video clip and select "Edit Selected Video" to navigate directly to the edit area in the Setup Video window.
When playing video clips within a slideshow, you have several audio options. Clicking on the Background Music Level tool ![]() will allow you to adjust the background music level.
will allow you to adjust the background music level.
Background Music Level
- High (No Video Sound): This option will mute the video sound completely. The slideshow backgroud music will be played.
- Medium (Video Sound On): The slideshow background music will combine with the video sound at a medium level.
- Medium-Low (Video Sound On): The slideshow background music will combine with the video sound at a medium-low level.
- Low (Video Sound On): The slideshow background music will combine with the video sound at a low level.
- Off (Video Sound Only): This option will play the video’s soundtrack, overriding the slideshow background music.
If you choose to play both video sound and slideshow background music, the slideshow background music will automatically fade to your selected volume level when the video starts and will fade back up once the video ends. The volume level selected is indicated on the thumbnail tags for each video.
![]() Video sound off.
Video sound off.
![]() Video sound on.
Video sound on.
![]() H Slideshow background music level high.
H Slideshow background music level high.
![]() M Slideshow background music level medium.
M Slideshow background music level medium.
![]() ML Slideshow background music level medium-low.
ML Slideshow background music level medium-low.
![]() L Slideshow background music level low.
L Slideshow background music level low.
![]() X Slideshow background music off.
X Slideshow background music off.

In ProSelect, the Edit Slideshow Video settings allow you to manage how audio is handled within your slideshow, particularly when videos are included. Click on the Edit Slideshow Video Options ![]() button on the top bar to access slideshow video settings.
button on the top bar to access slideshow video settings.
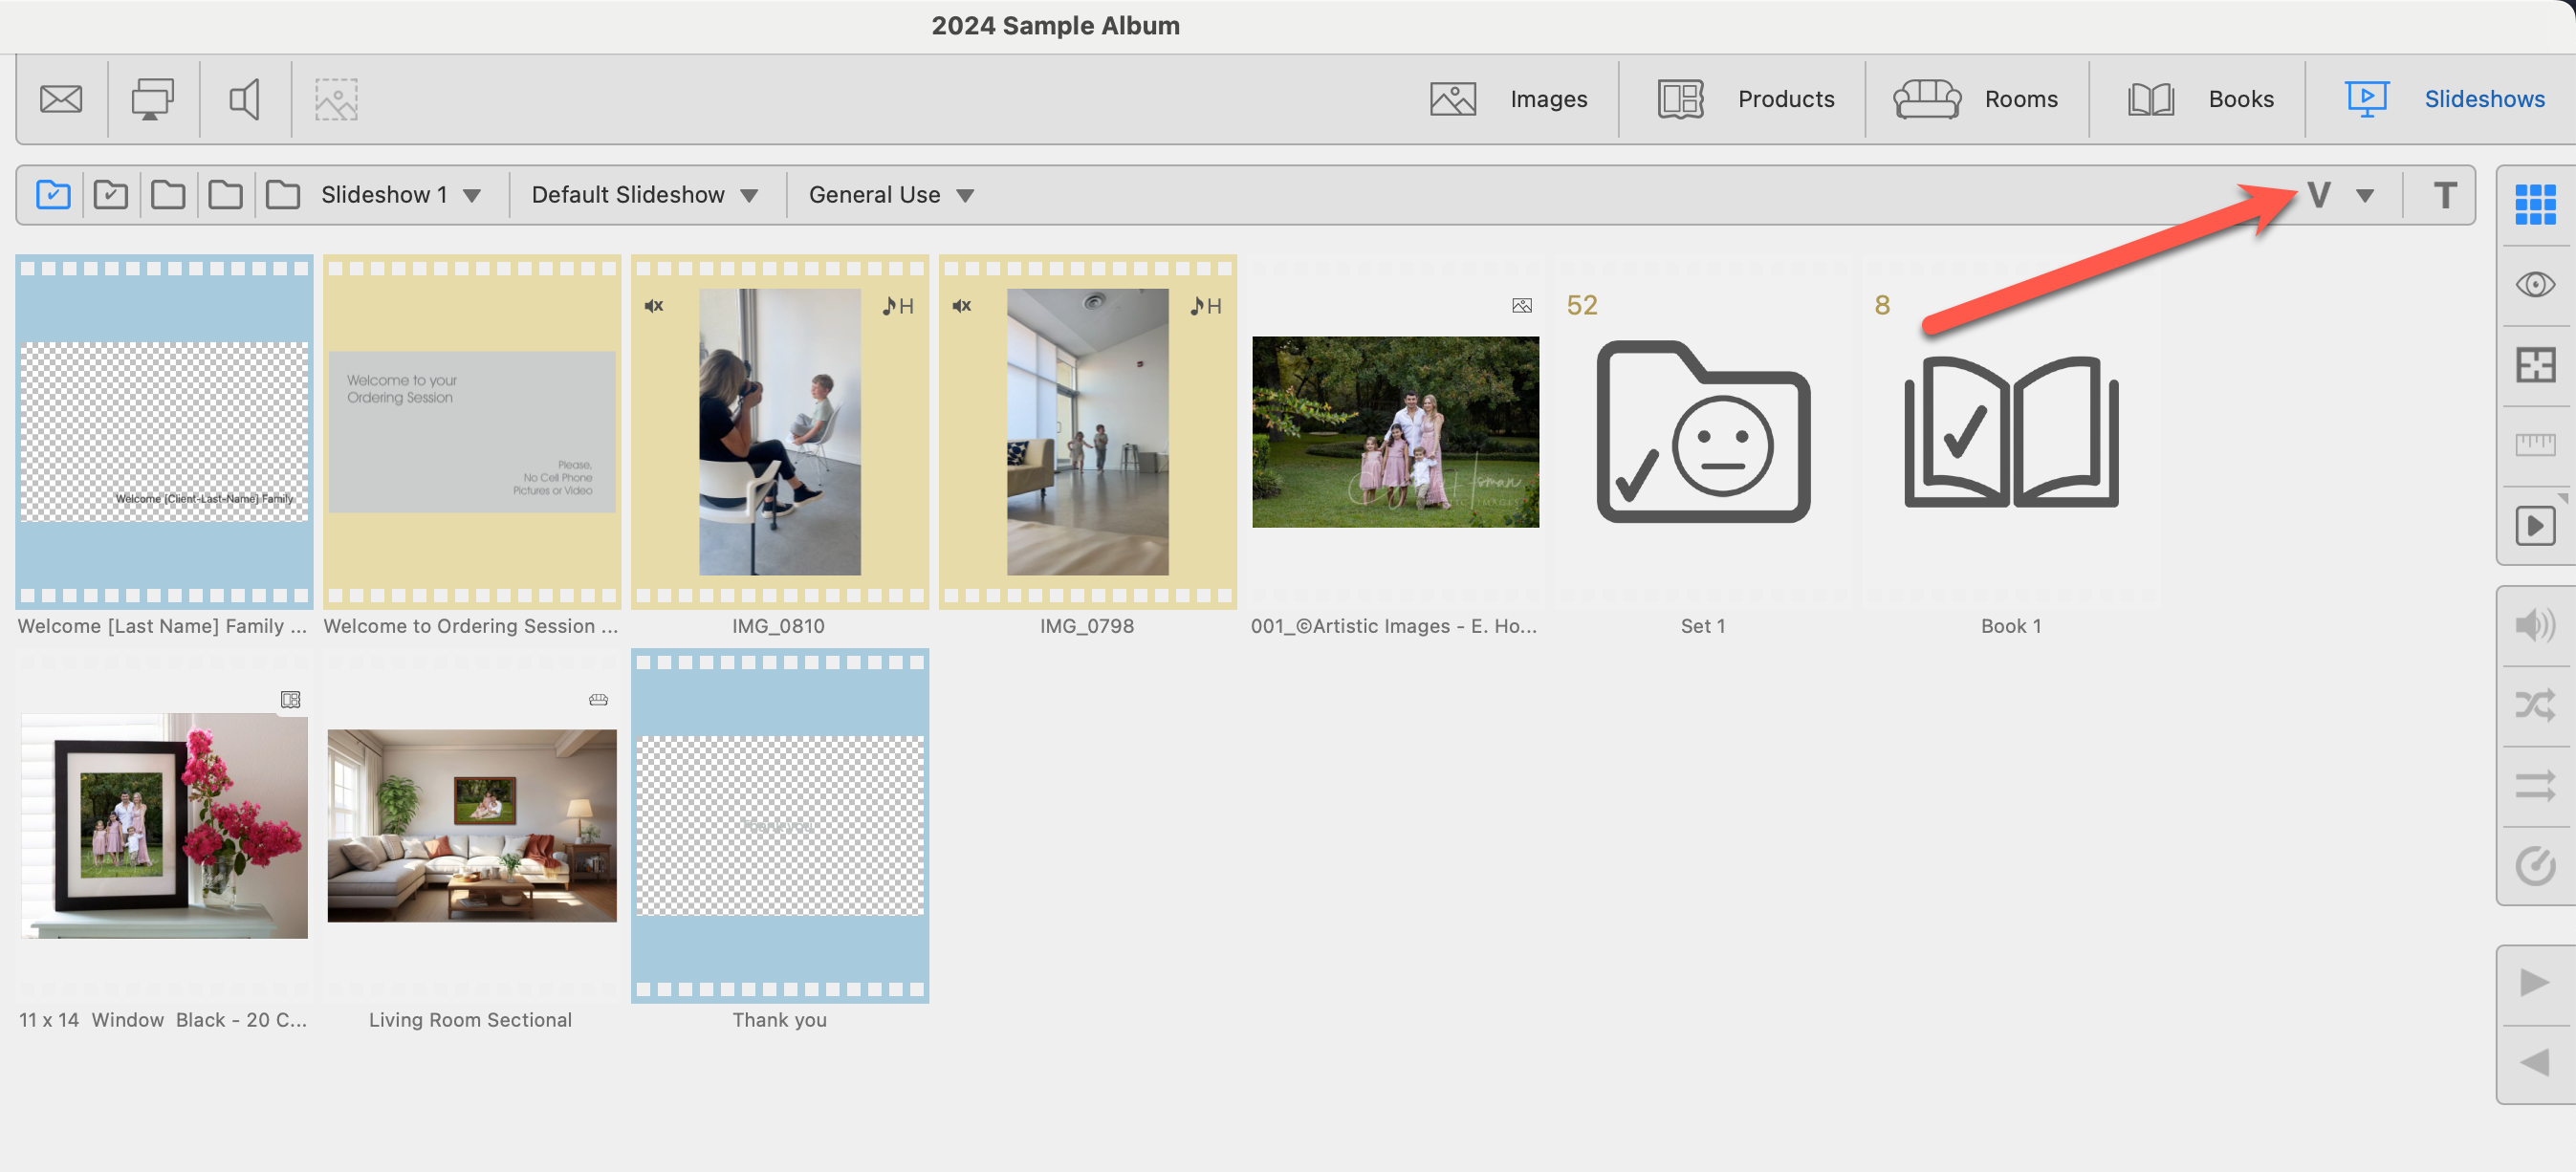
- Align Audio Between End Videos: If your slideshow begins or ends with a video that includes its own soundtrack, you can choose to synchronize the slideshow music to start after the first video and end before the last video. This adjustment can impact the overall music synchronization, as the music is now set to fit between these videos rather than spanning the entire slideshow duration.
-
Cross-Fade Audio into Video: This option enables a smooth transition between the slideshow music and the video’s sound.
If you're using Photoshop CS6 or newer, you can edit video clips for your ProSelect slideshows.
Opening the Video in Photoshop
- In ProSelect, go to Working with Slideshows, Thumbnail view.
- Select your video, and go to the top menu, Slideshow > Videos > Open Video in Photoshop (or use the shortcut CmdCtrl + T).
- Alternatively, you can access Photoshop from the Setup Videos window. Select the video and click on the Open button. Choose "Open in Photoshop".
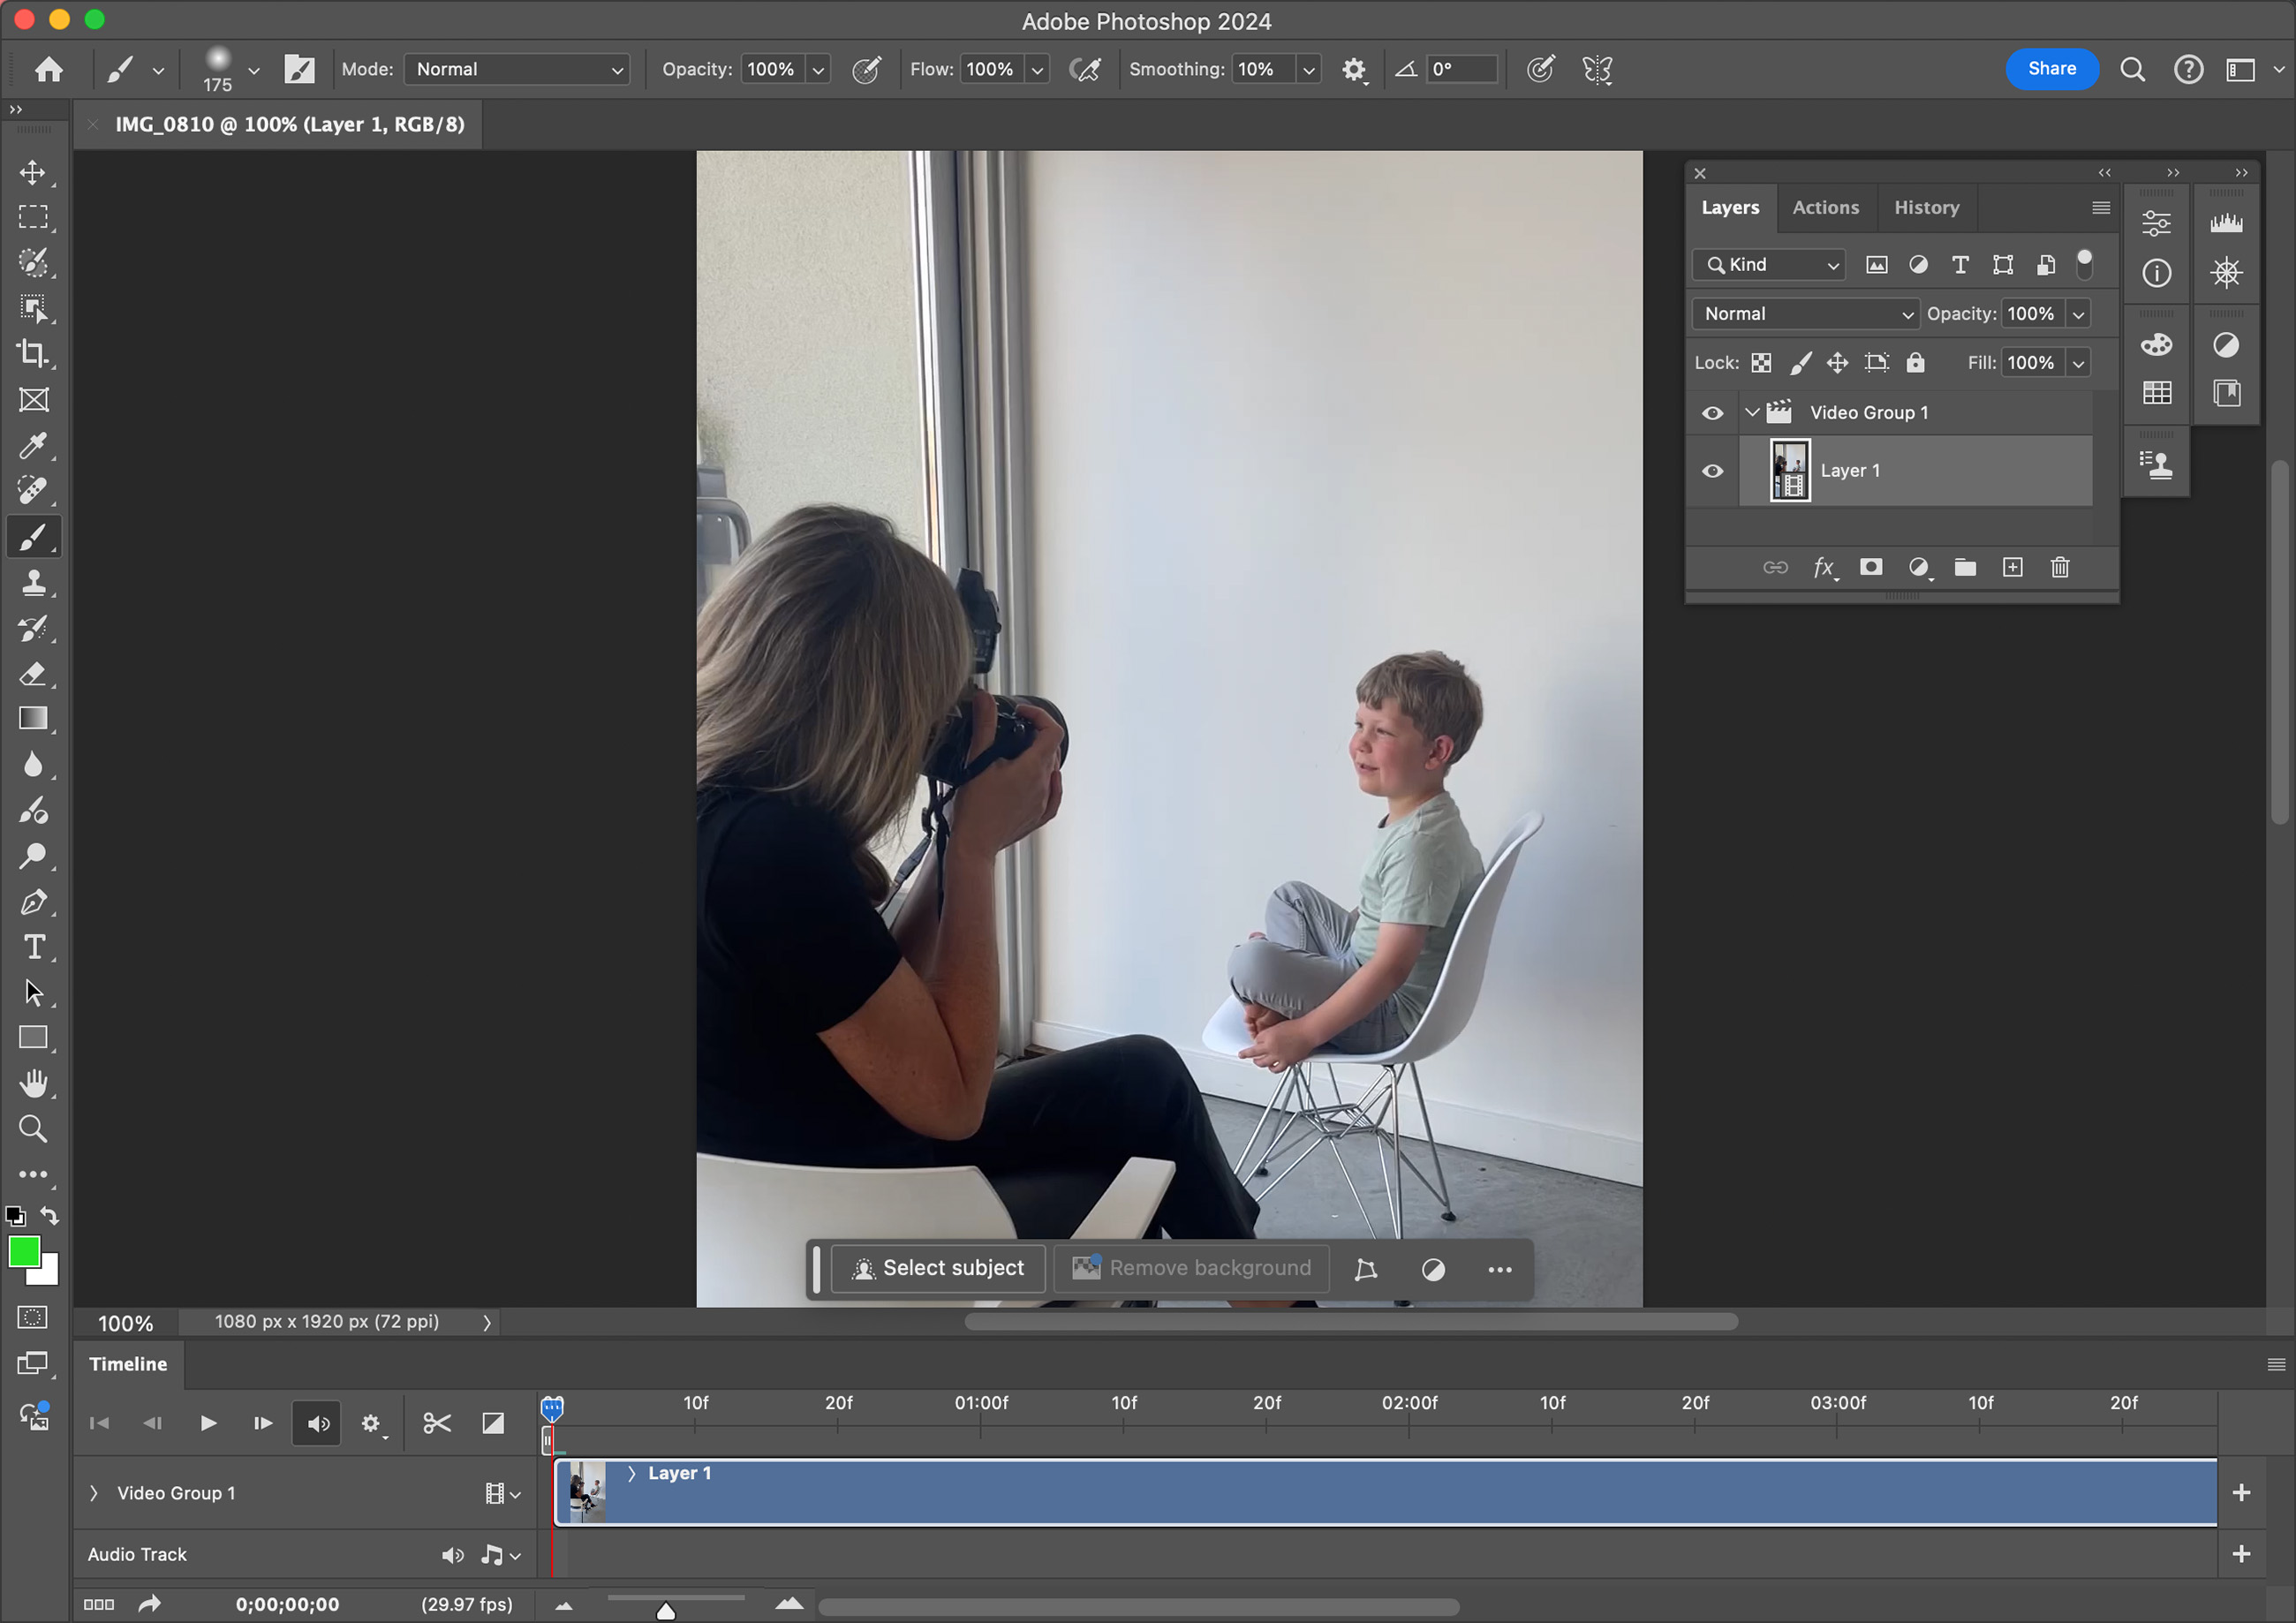
Editing and Saving Your Video:
- After editing, save your video as a .psd file to preserve any layers or changes. This file will be stored alongside your original video file.
- To continue editing this .psd later, you can reopen it in Photoshop directly from ProSelect by going to the top menu, Slideshow > Videos > Open PSD version in Photoshop.
Exporting the Edited Video
ProSelect cannot directly use a PSD version of a video. You will need to export your edited video by using Photoshop’s "Export > Render Video" command. This will create an .mp4 which can be used in ProSelect.
- In Photoshop, go to the top menu, File > Export > Render Video.
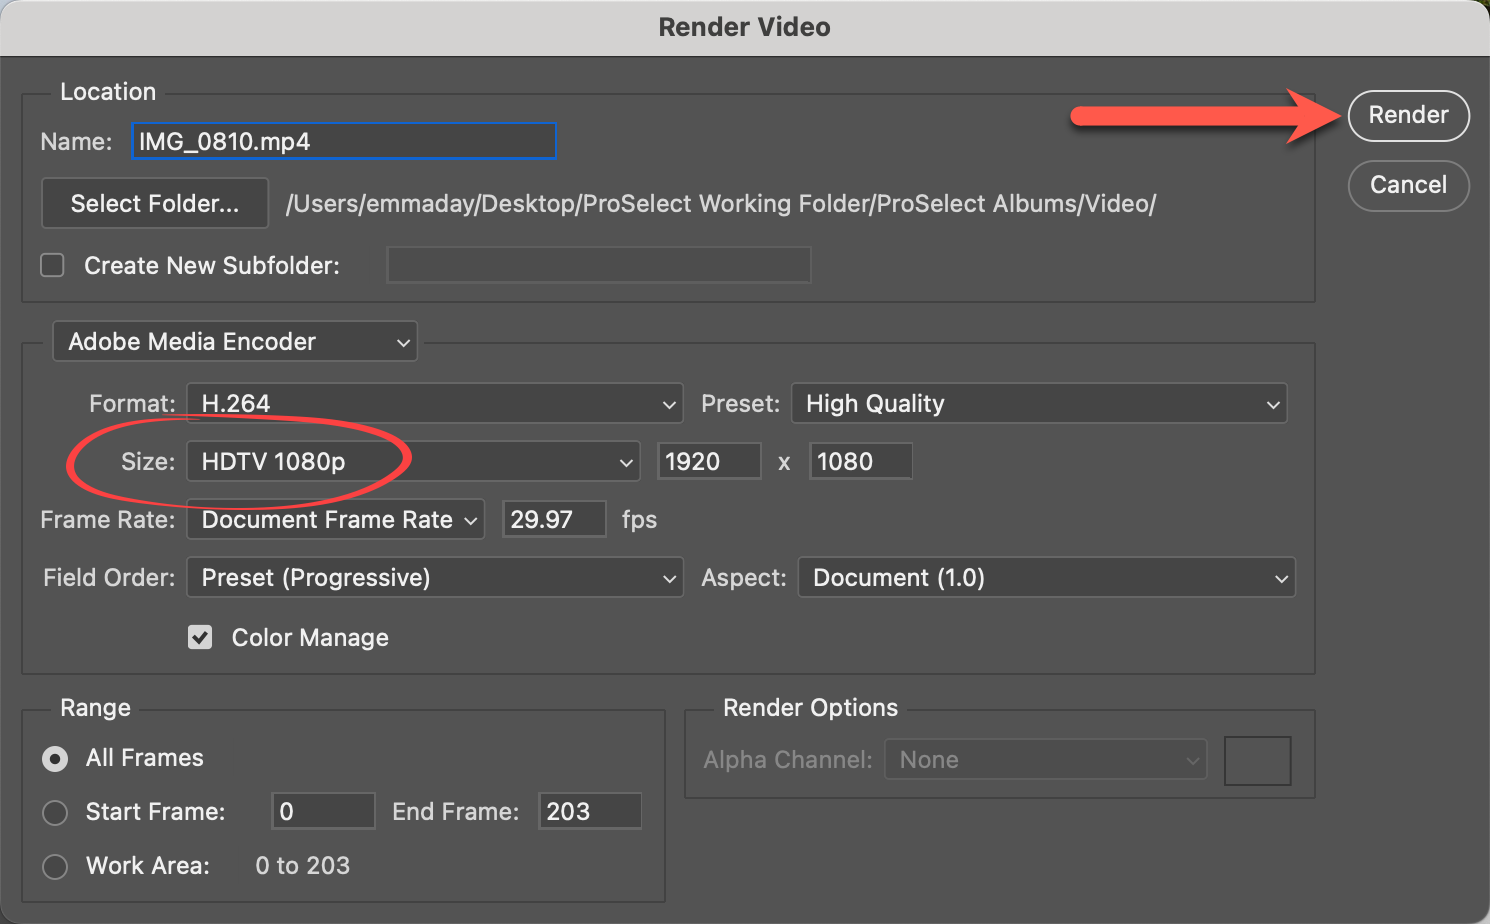
- Save the rendered video in the same folder as the original to replace it, or with a new name to create a different version.
- Choose the appropriate size - we recommend HDTV 1080p.
- Use the "Range" area to specify if you want to render the entire video or just a trimmed section.
- Click the Render button.
Importing the Video Back into ProSelect
- Replacing the Original Video: If you saved the video using the same name, in the same folder, ProSelect will automatically link to the new file for use in your slideshow.
- Creating a New Version: If you saved the video with a different name, you will need to add the video again to your ProSelect Album.
If your videos aren't playing correctly in a slideshow, and you're seeing warning messages, the issue might be that the videos are too short to support the transitions defined in your Slideshow Style. A warning tag will appear on a thumbnail if this is the case. The Info Bar will explain the warning.
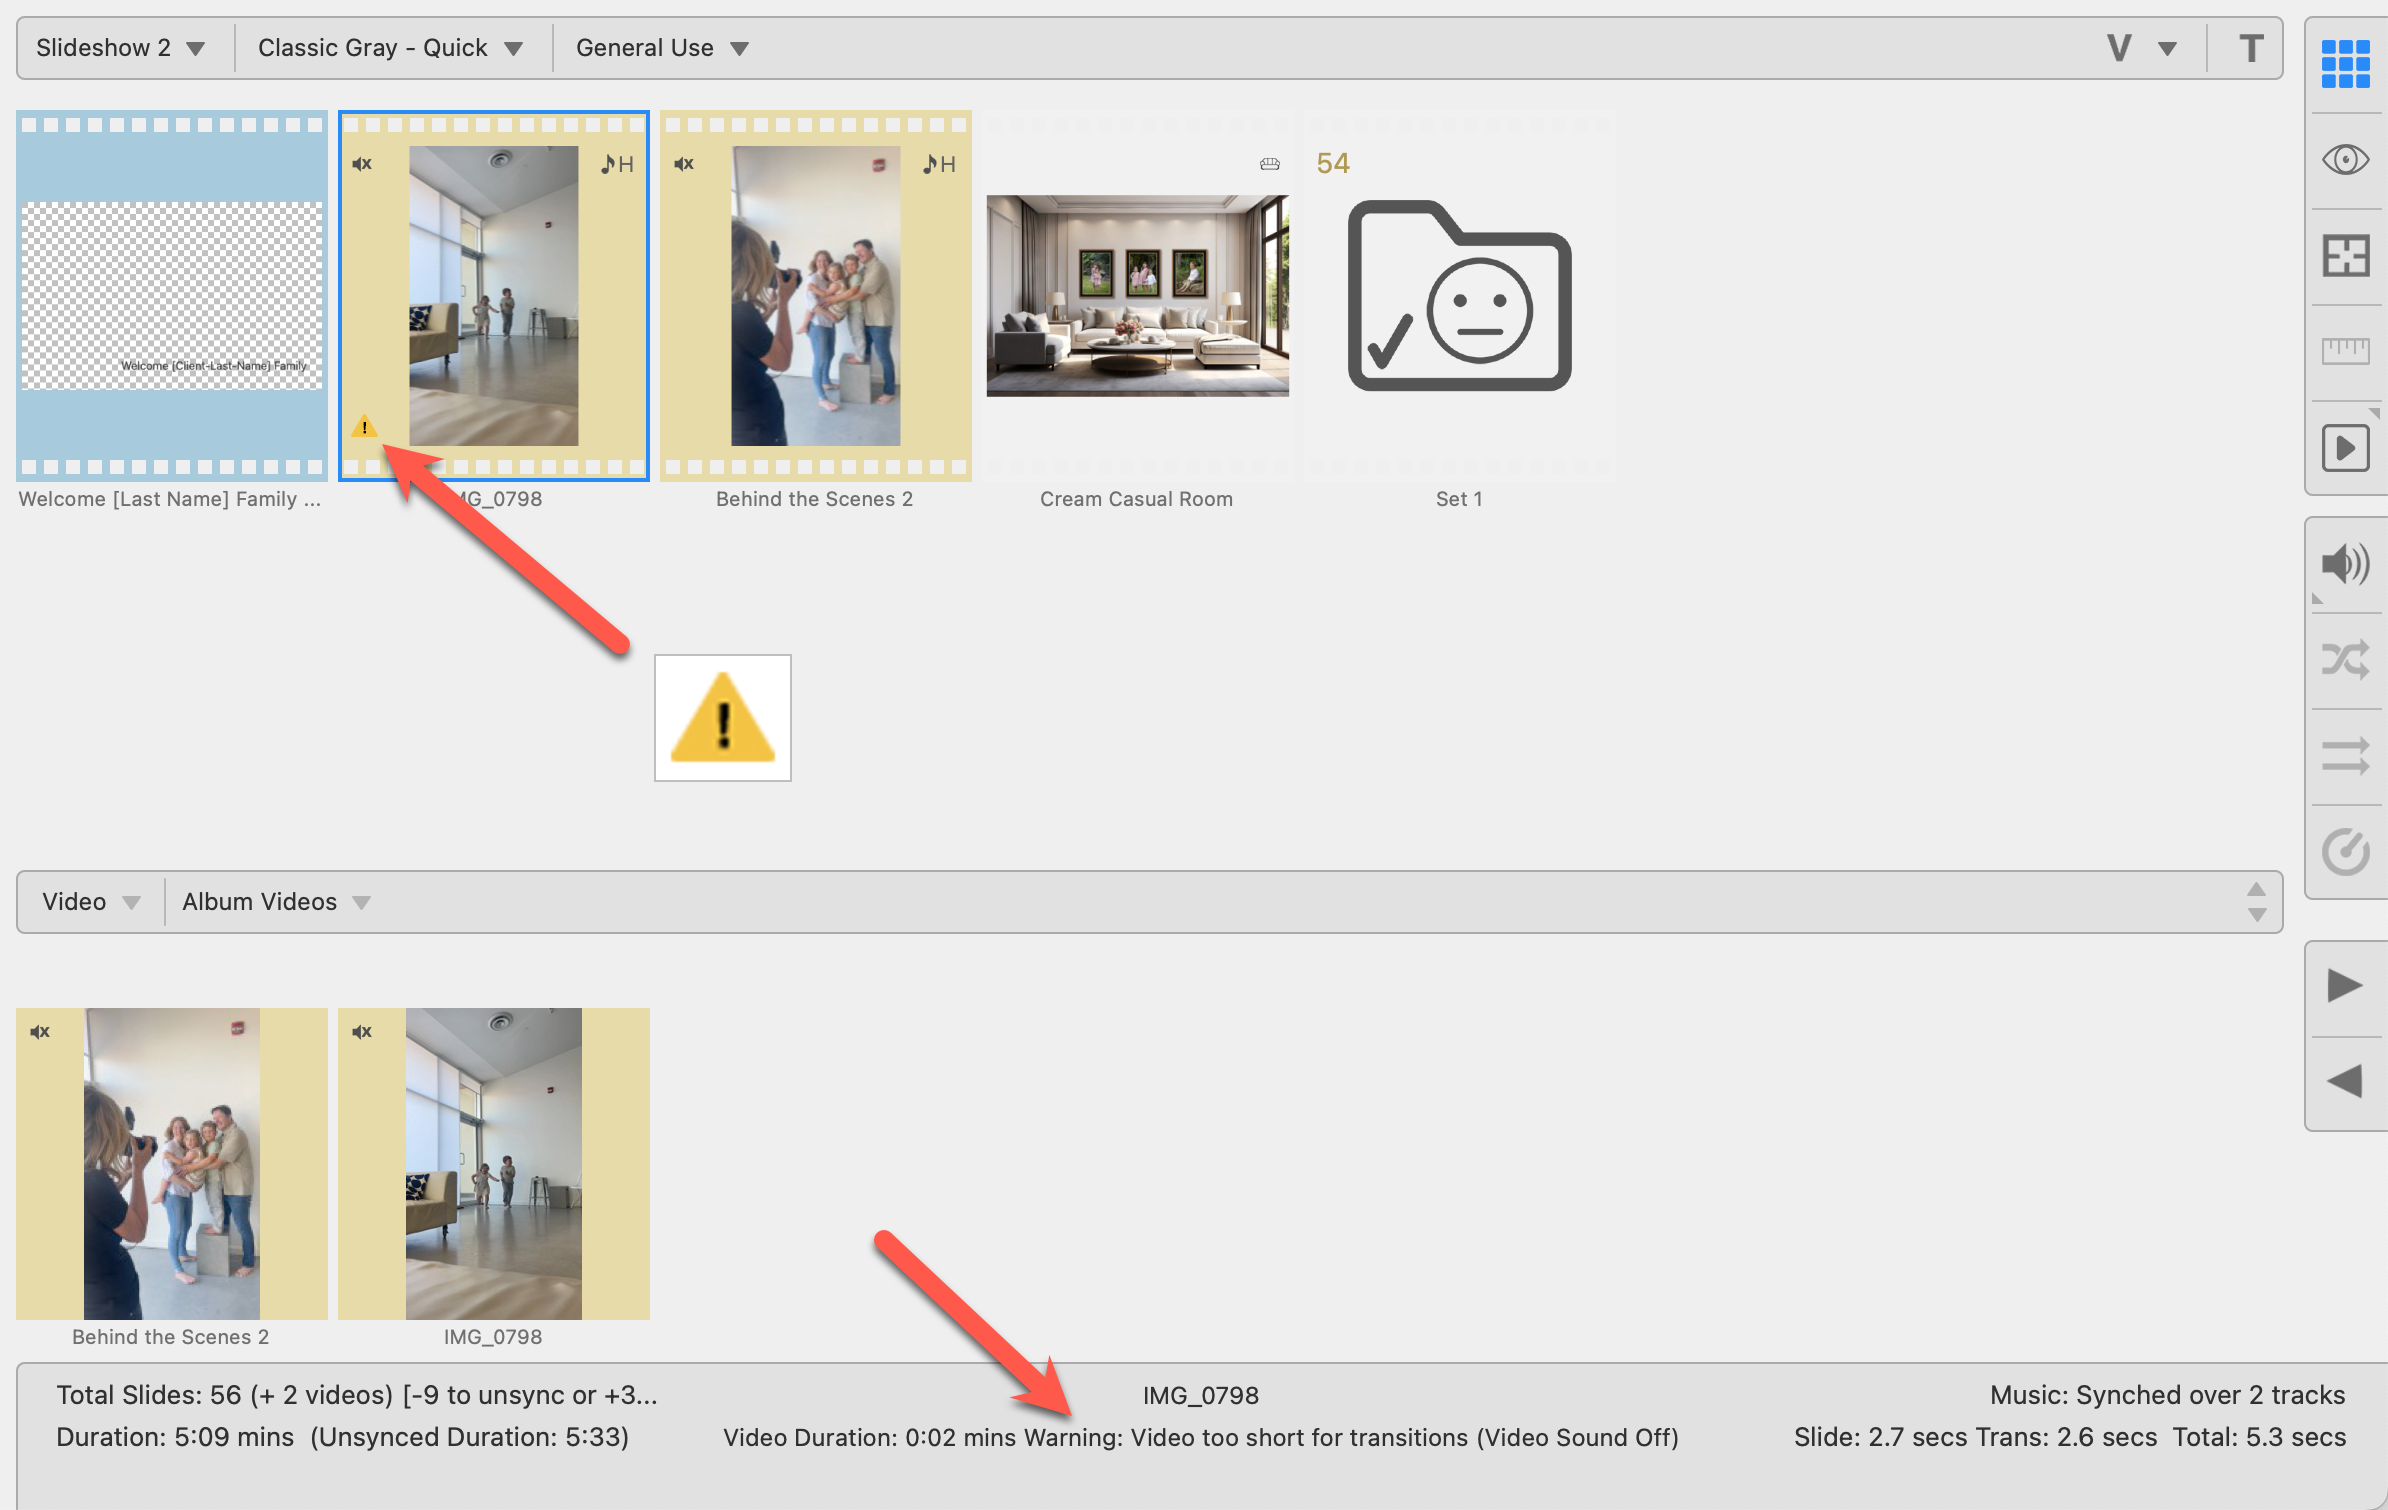
Solution
Adjusting the length of the videos or modifying the transition settings may resolve this issue.
Option 1: If the video has been edited to be shorter, try using the longer version of the video clip to allow for transition time.
Option 2: Adjust the transition time of the slideshow style.
- From Thumbnail view, click on the Slideshow Style you currently have selected.
- With the drop-down list open, select "Setup Slideshow Styles" from the list.
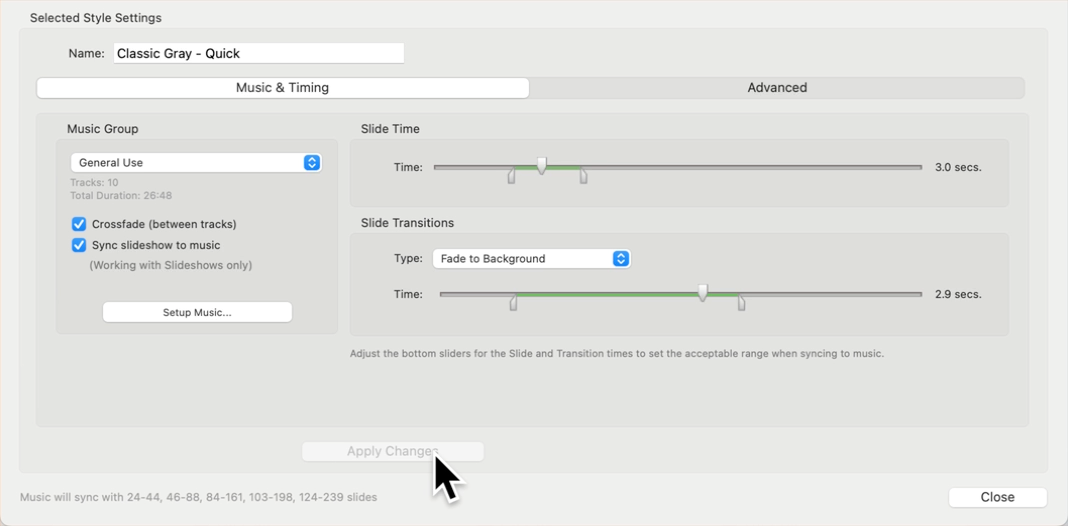
- In the Slide Transitions box, set the slide transition type to "Fade to Background."
- Next, adjust the leftmost slider to allow for a quicker transition on your video clip.
- For example, instead of a minimum 2.6 second transition, try a 1 second transition.
- Apply Changes and Close the window.
