 Image Effects
Access Image Effects Settings by going to the top menu, ProSelectEdit > Settings. The image effects area provides access to the Local Effects and Custom Effects Actions tabs. Each tab contains options that will allow you to customize ProSelect to your personal preferences.
Pro Studio Software offers a downloadable set of custom effect actions, including Image Effects, Image Adjustments, Pretouching (which requires the Portraiture or Portraiture 3 skin retouching plugin from Imagenomic), and black & white conversions using Silver Efex (which requires the Silver Efex Pro plugin from the Nik Collection). Click on Photoshop Actions to access the download.
Local Effects
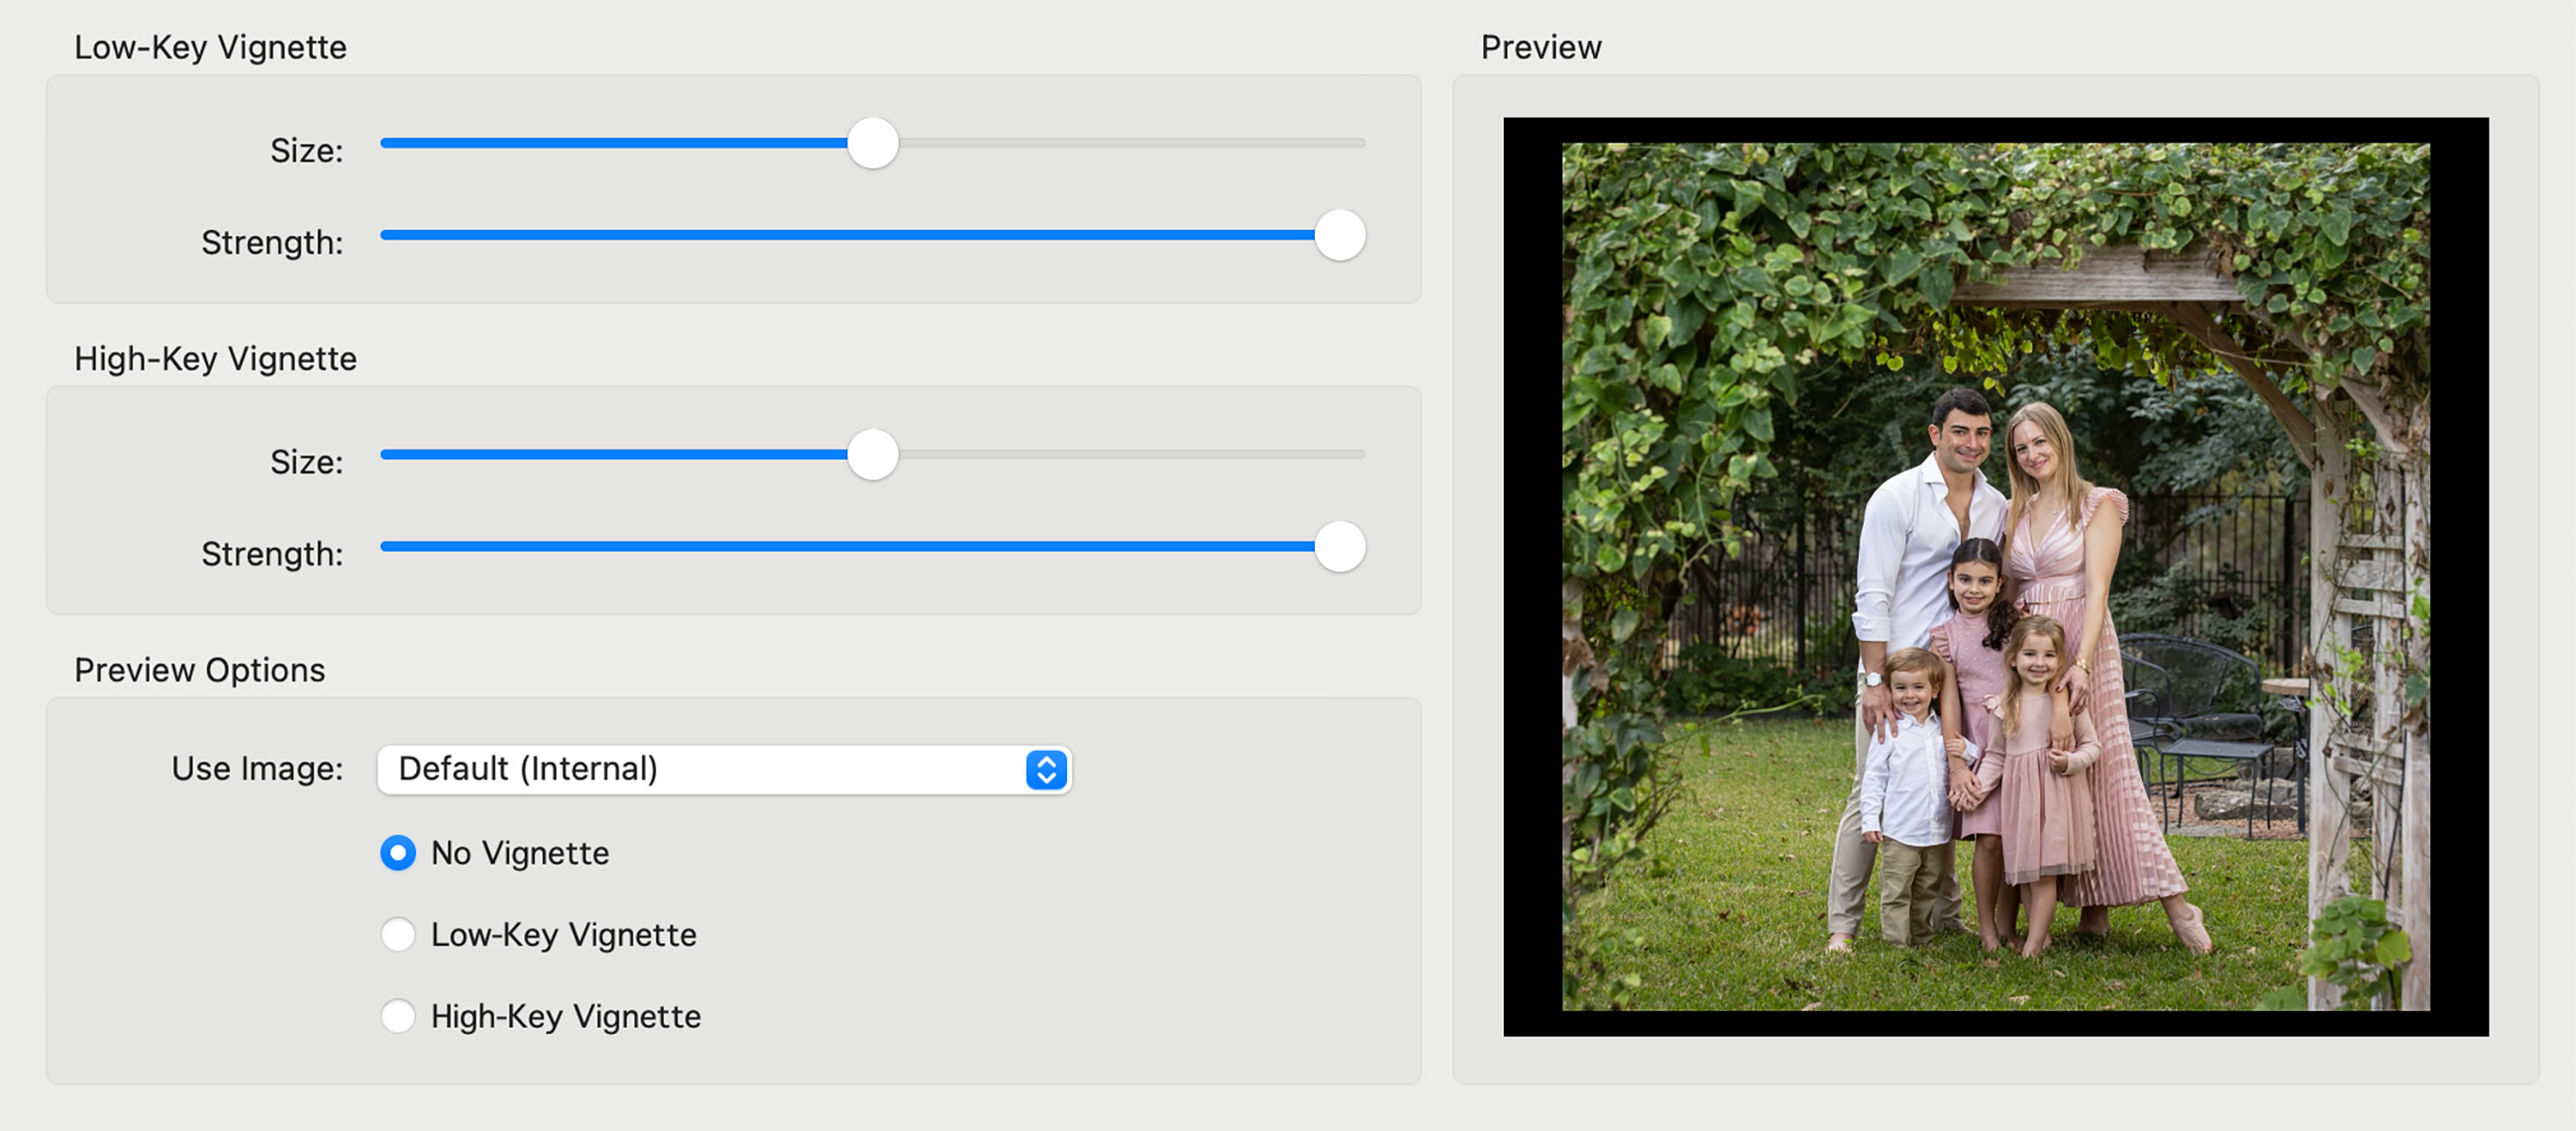
- You can set the size and strength of both the low and high-key vignettes with the sliders.
- Vignettes can be applied to one or more selected images when using the Apply Effect
 tool.
tool.
You can preview the results of your vignette settings in the preview window on the right side. If you have any album images selected, the preview will use the first selected one by default. Alternatively, choose the default internal image or another from the currently open album using the drop-down menu.
Custom Effects Actions
This area is used to set up Photoshop Actions which can be selected and run with the Apply Effects tool ![]() .
.
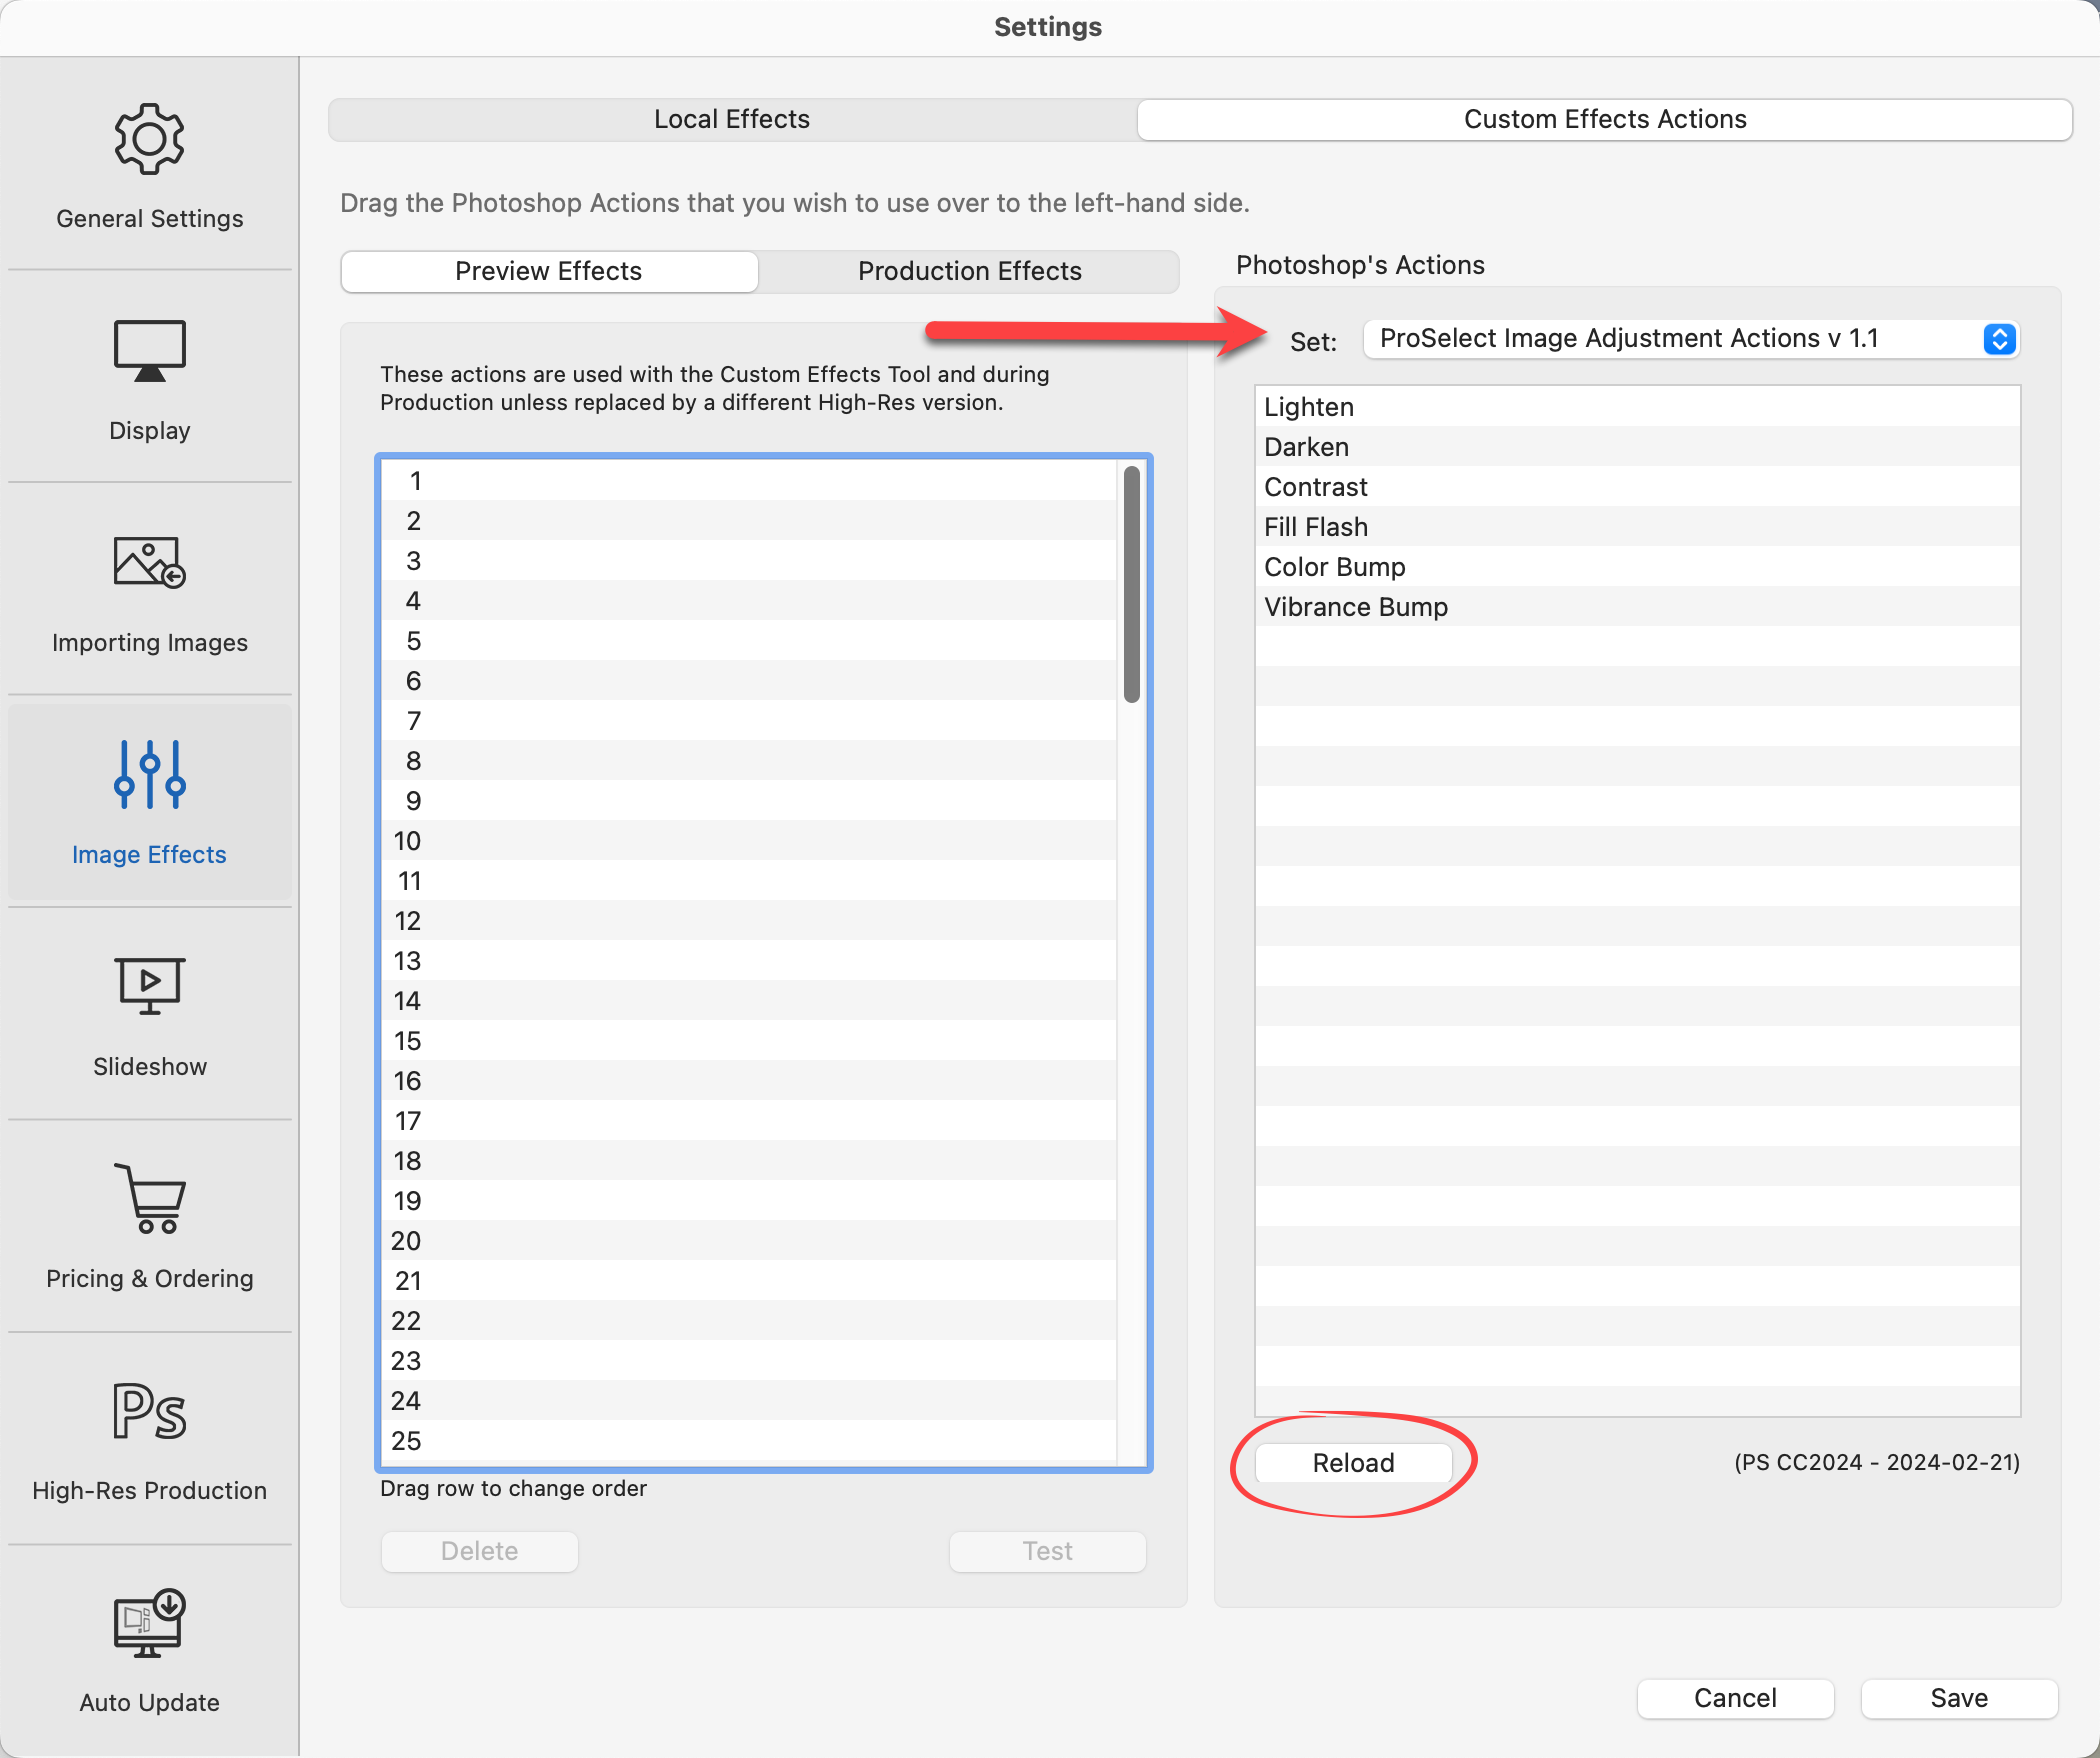
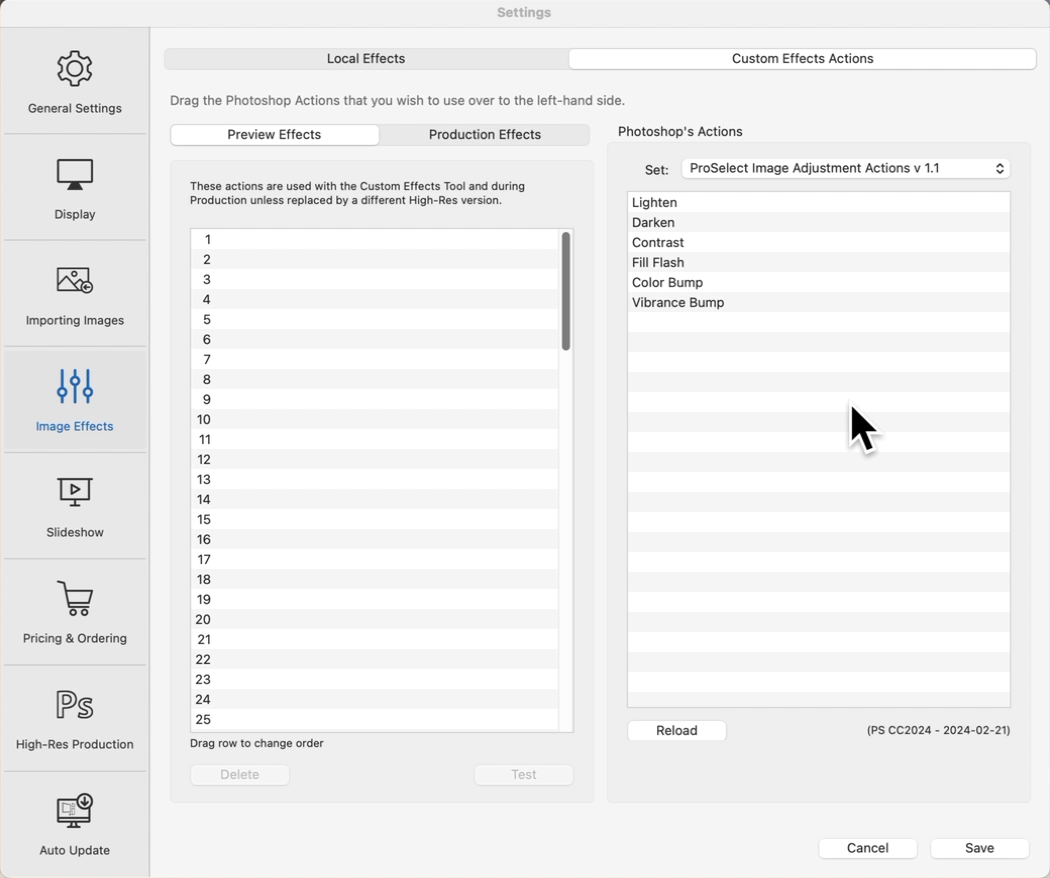
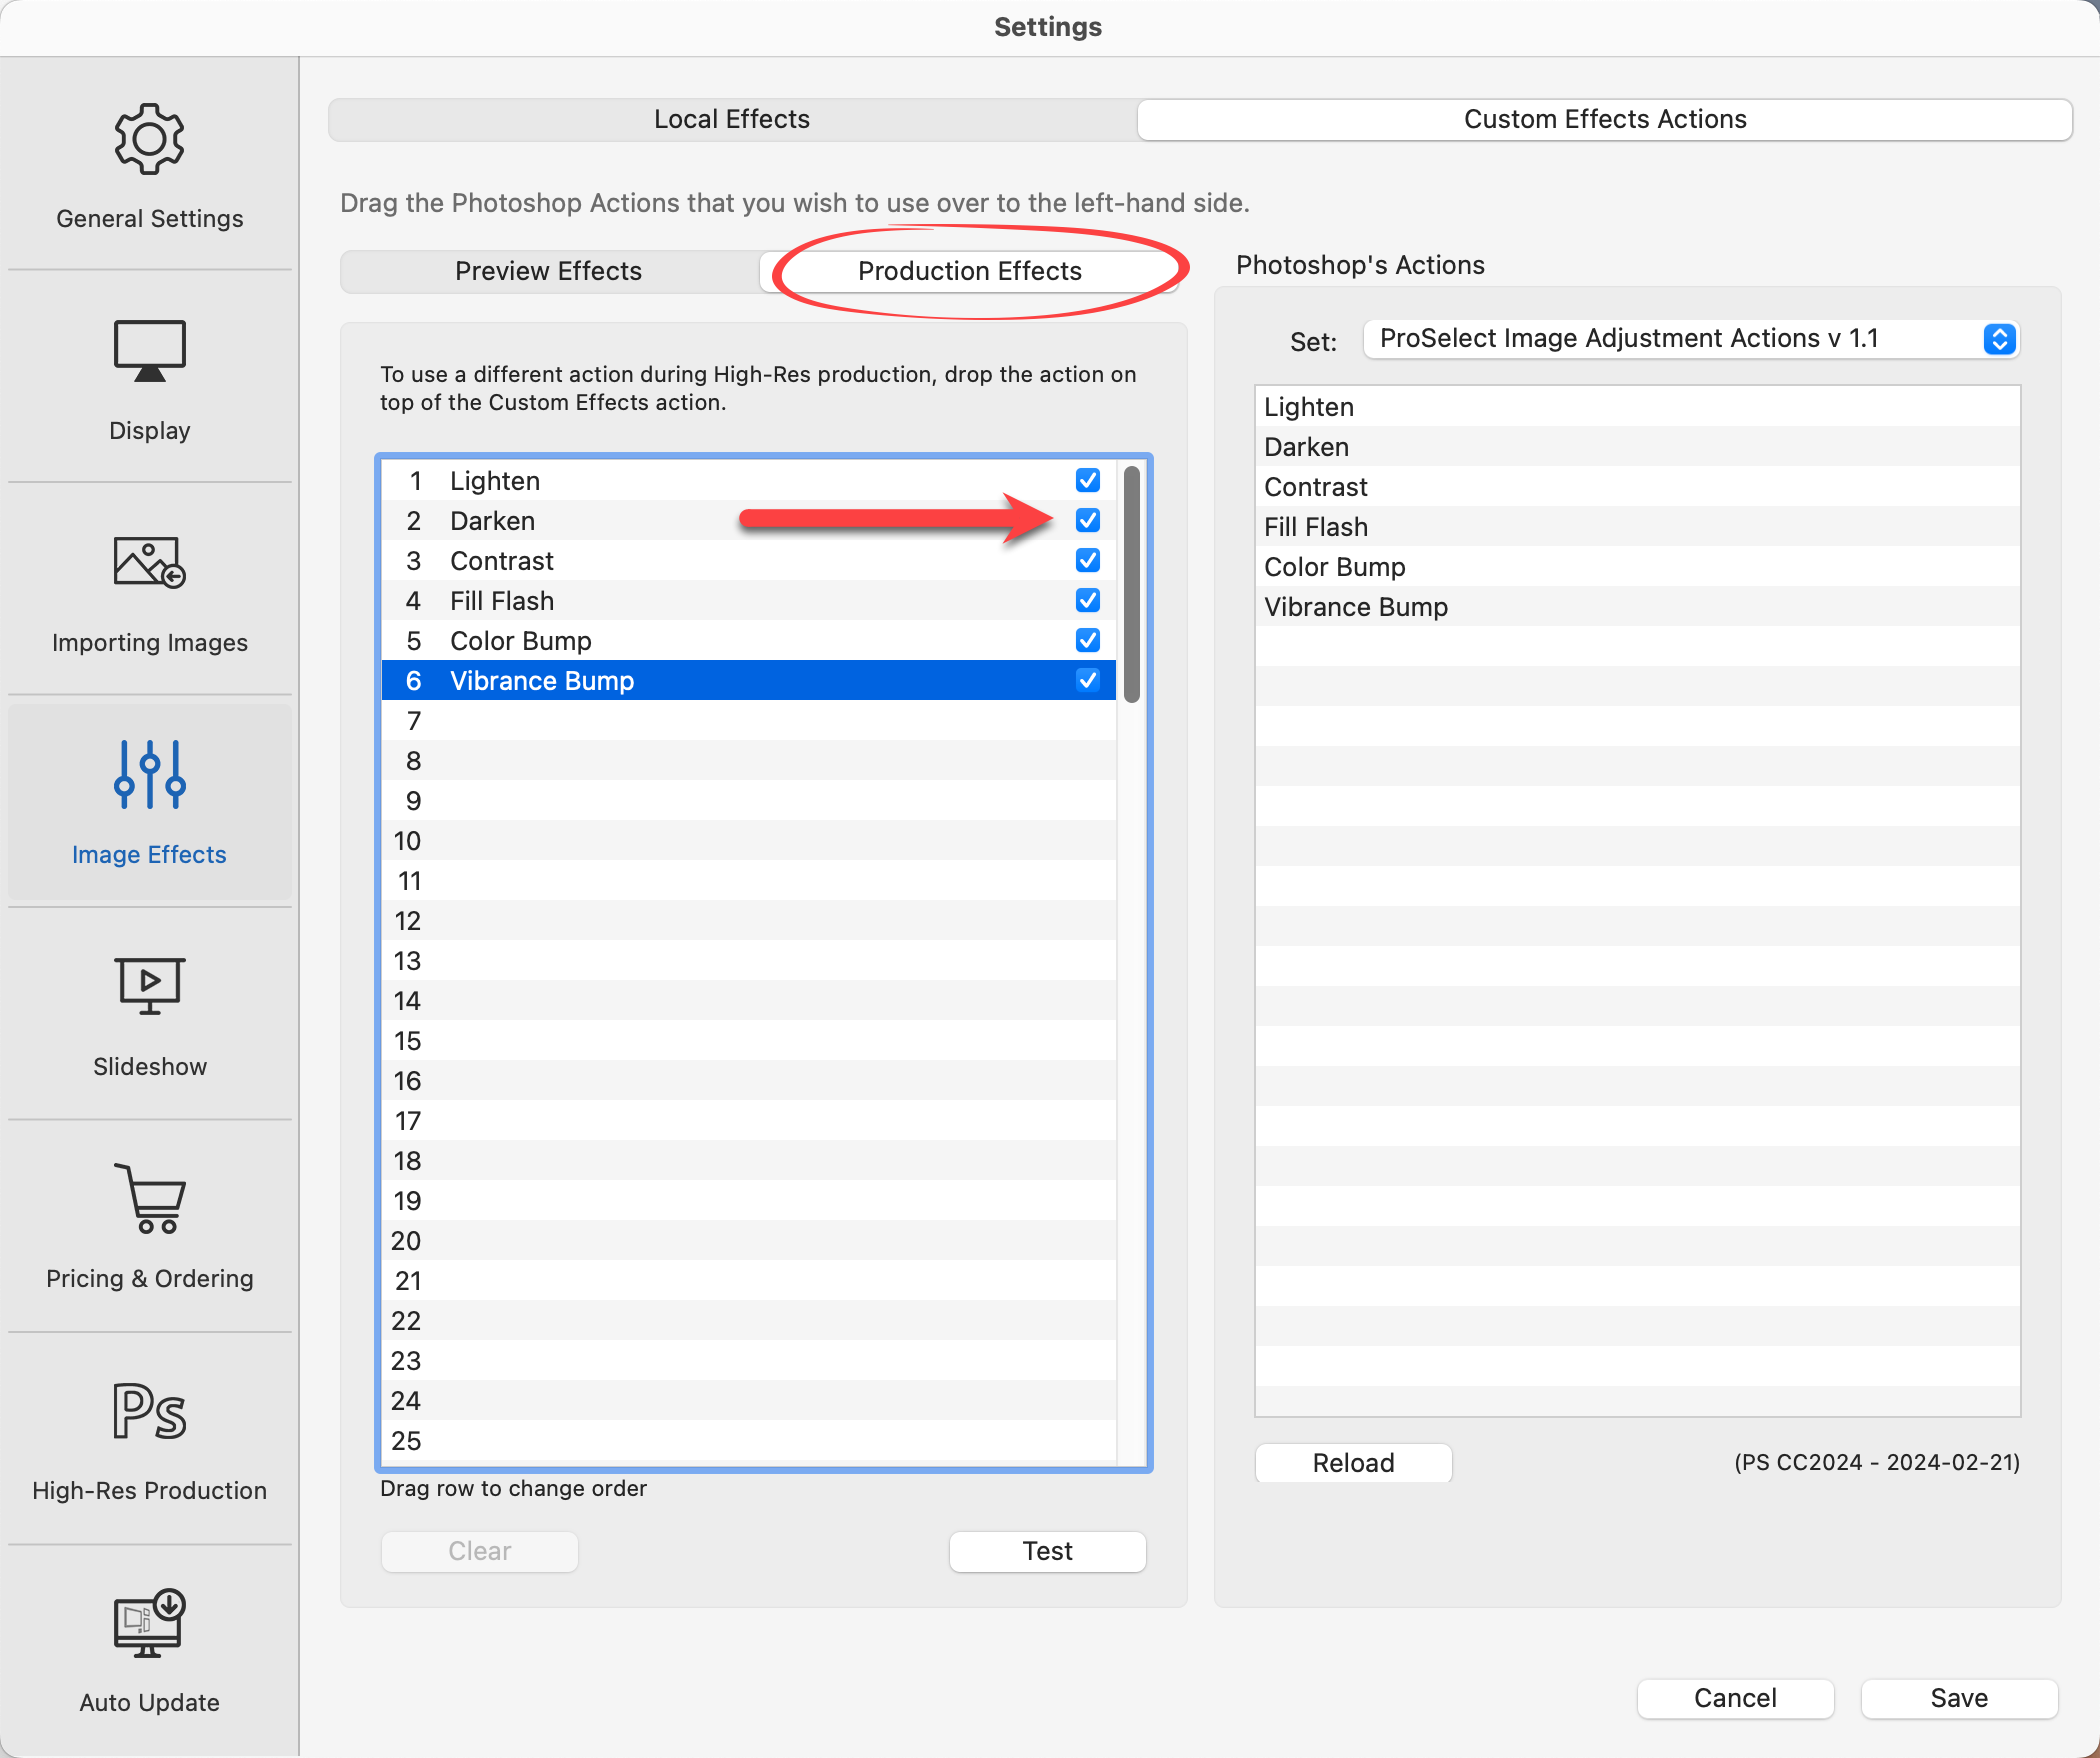
Importing Available Photoshop Actions into ProSelect
- Make sure Photoshop CS6 or newer is running.
- Click the Reload button in the Photoshop Actions box on the right-hand side. This will import all of Photoshop’s current action sets into the right-hand Set popup.
- Select an Action Set in the drop-down menu to see all the actions in that set.
- Click and drag actions from the right-hand list over to the Custom Effects list on the left-hand side.
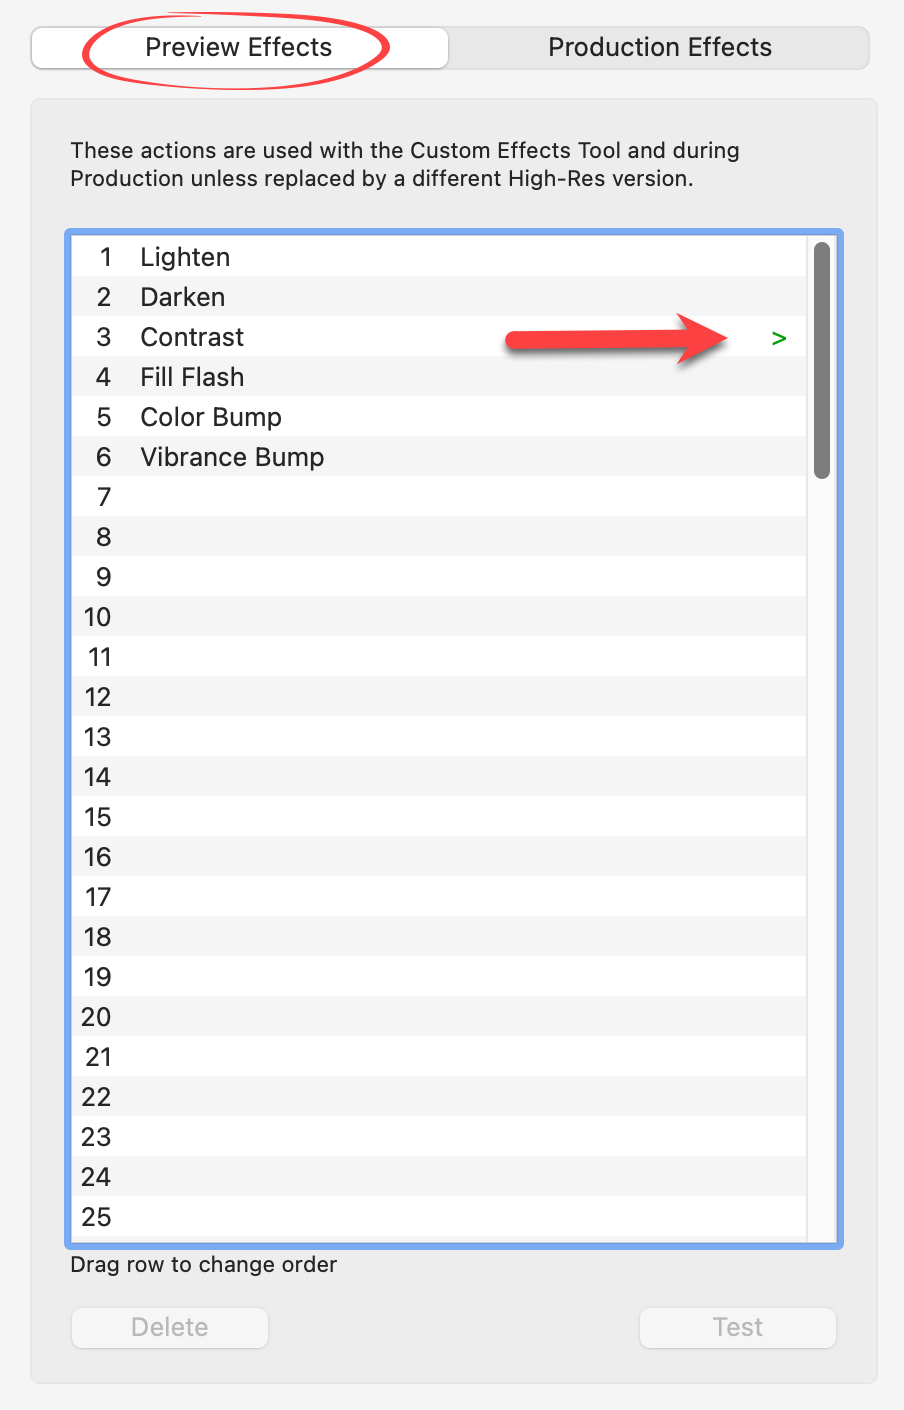
- You can select multiple actions from the right-hand side and drag them all to the Preview Effects list on the left-hand side. Note: This will replace any overlapping actions in this list.
- You can remove one or more selected actions in the Preview Effects list by clicking the Delete button or using the DeleteBackspace key.
- You can drag the positions of one or more selected actions in the Preview Effects list to change the order of the actions in the list.
- Use the Test button to see what the selected action looks like when applied to an image.
- With ProSelect Basic you can setup up to 5 Custom Effects Actions. With ProSelect Pro you can setup up to 100 Custom Effects Actions.
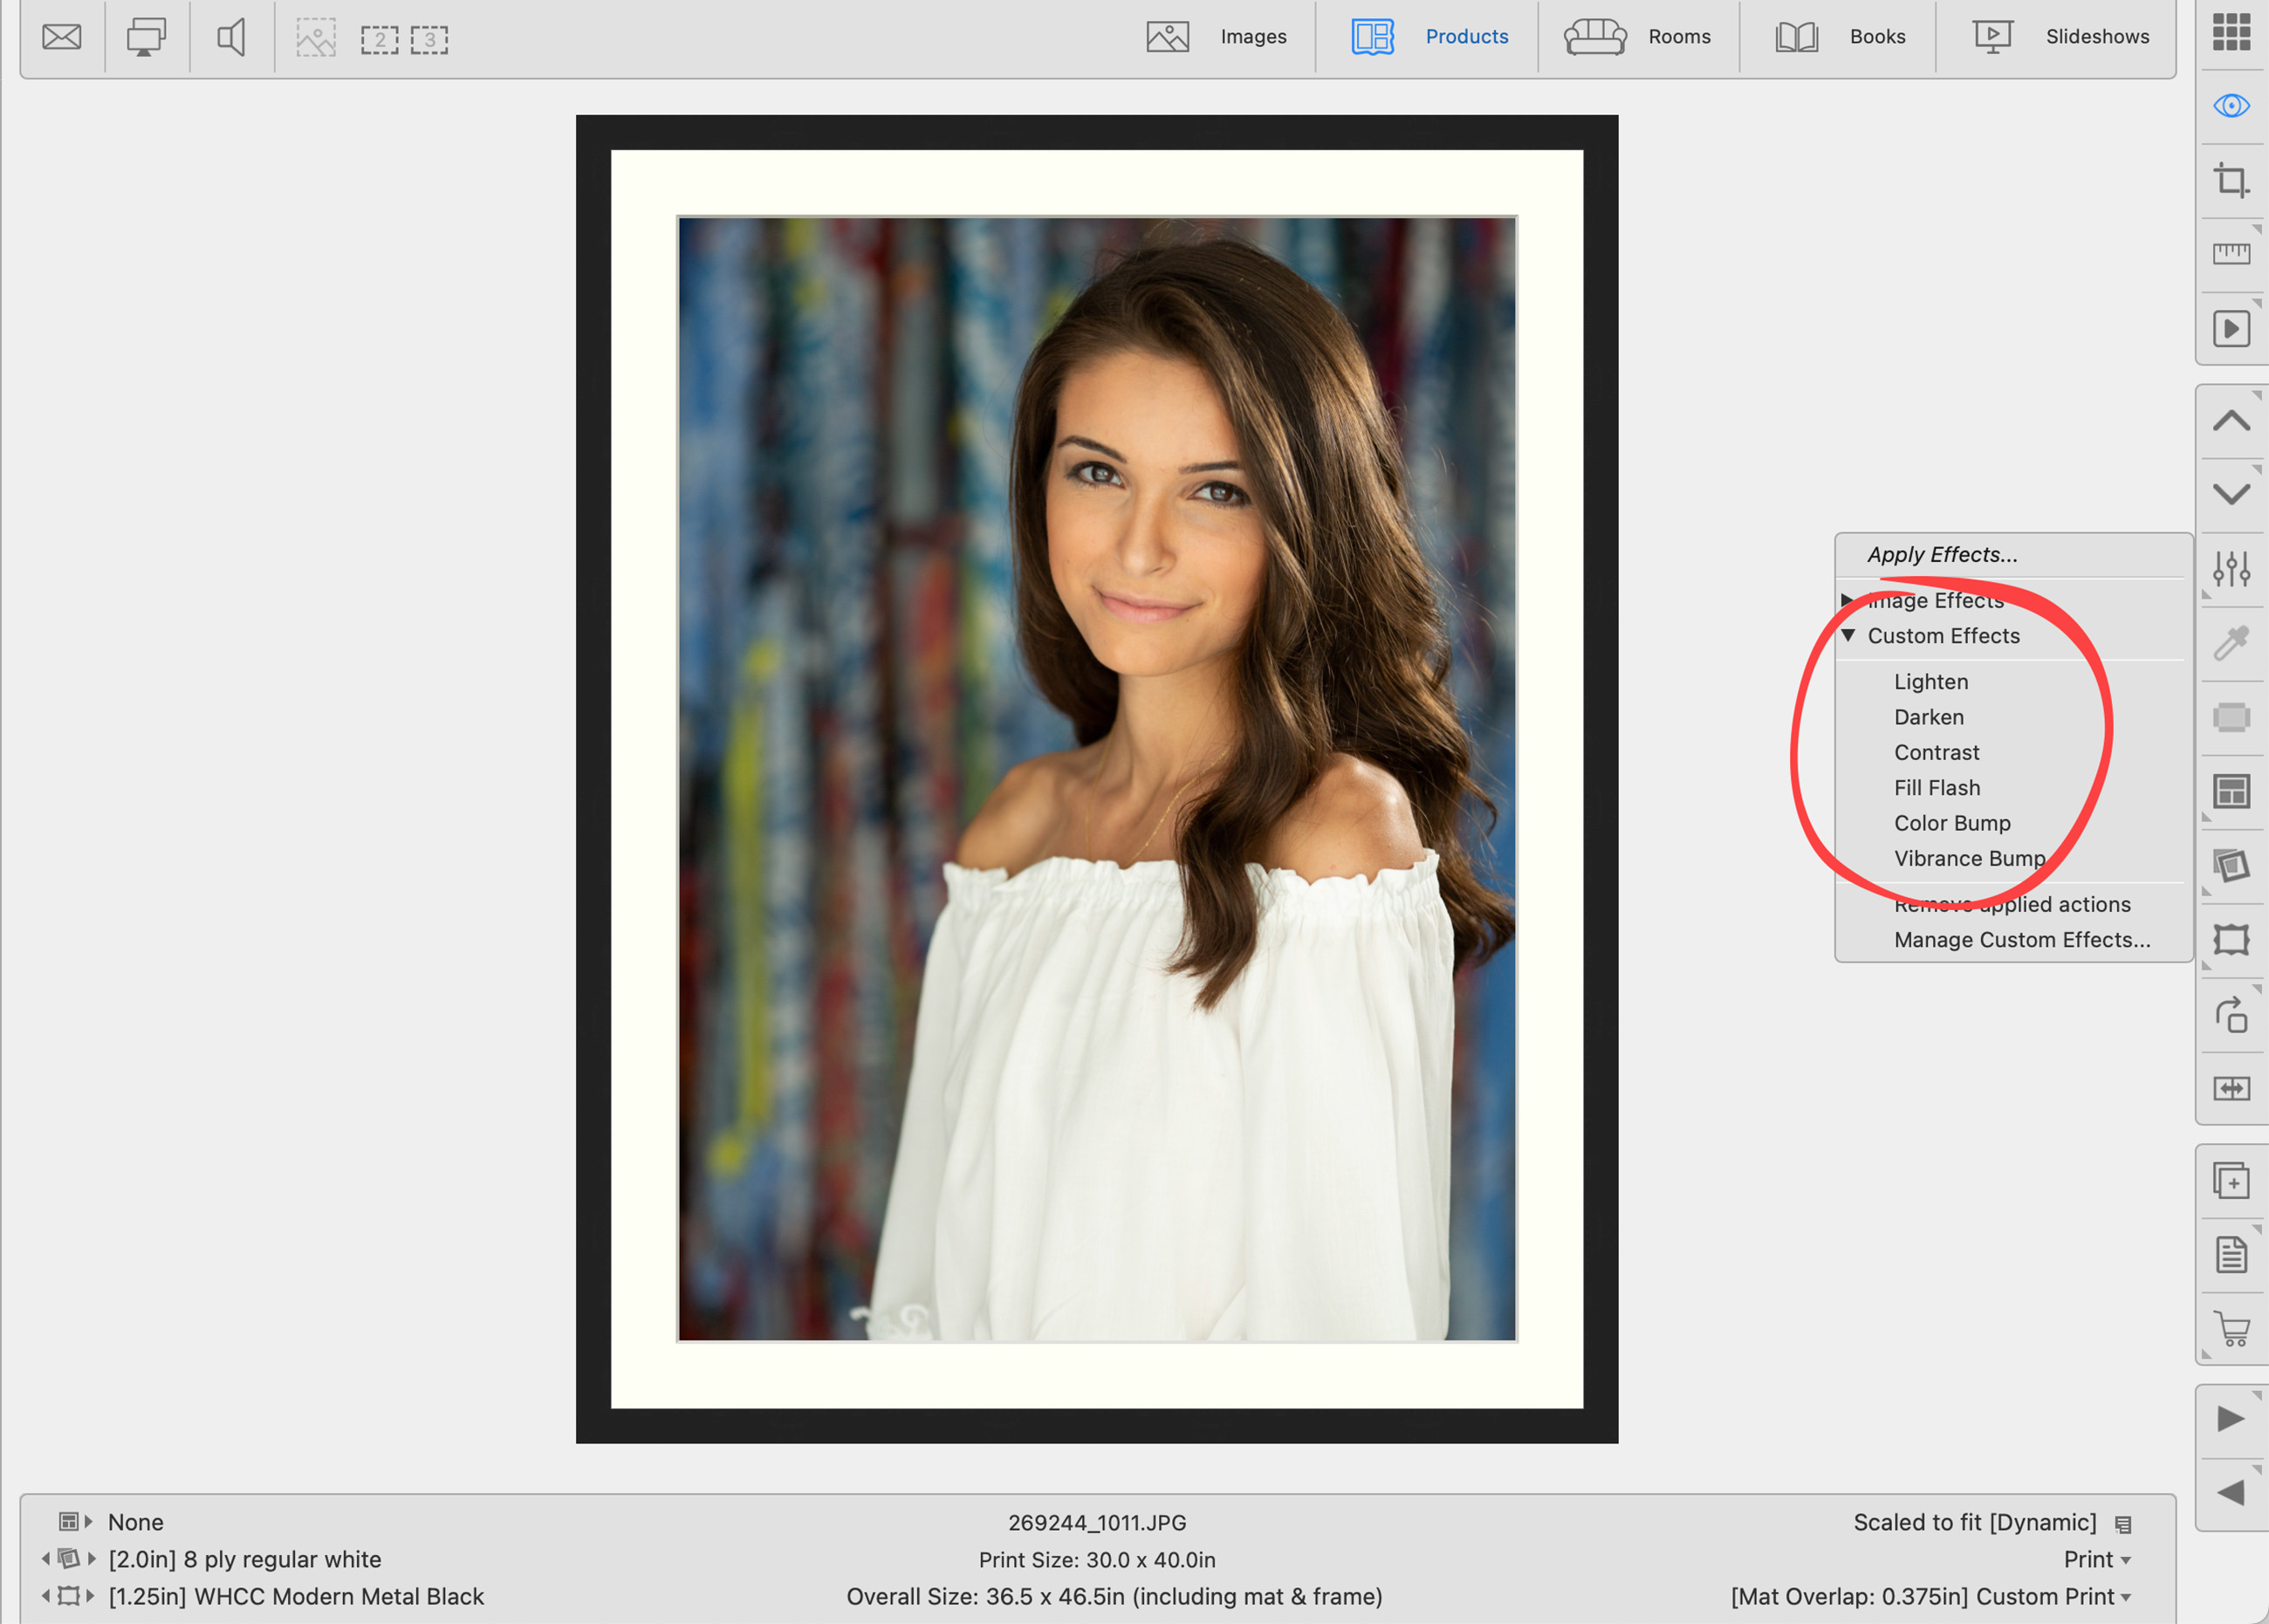
Once you have your Custom Effects set up, they will appear as options when you click on the Apply Effects tool ![]() in the ProSelect Main Working Area.
in the ProSelect Main Working Area.
The Preview and Production Effects tabs can be found in both the Image Effects Tab and the Pro Production Tab. Generally, the same action is used for Custom Effects in ProSelect and Pro Production. For ease of use, these tabs are duplicated, and changes made in one area will appear in both. If you access this page through a secondary entry point, the Pro Production Tab will be selected by default.
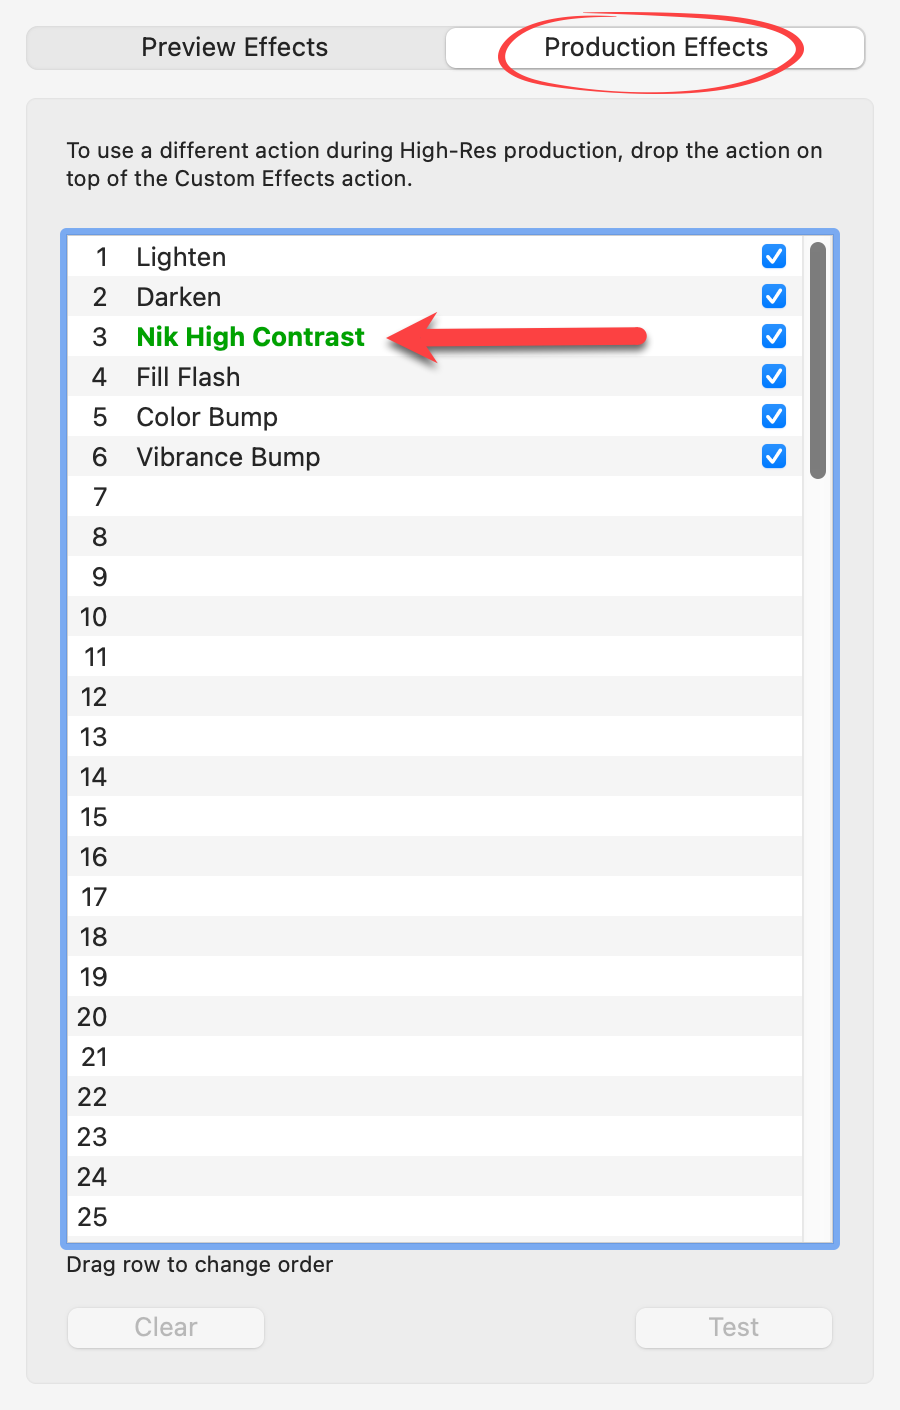
When you run one or more actions on an image, ProSelect records the action set and name with the image and can run the same actions on the original image during Pro Production. To have this happen, make sure that you have checked the checkbox in the Production Effects list for those actions.
- Click on the Production Effects tab
- Check the boxes of all custom effect actions you wish to include
In most cases, using the same action for both the low-res images stored in ProSelect (used when you use the Apply Effects tool) and the original images (when you run Production) is fine unless the action is resolution-dependent. One example of this is a noise action that requires different settings for low and high-resolution images. In this case, you could create two different versions of the action.
- Drag the low-res version into the Preview Effects side of the list.
- Drag the High-Res version into the Production Effects side.
Low-Res actions that have different High-Res versions display with a green "greater than" tag (>) next to the name. If you switch to the Production side, the replacement High-Res action will be shown in green.
- You can remove an action by selecting it in the list and clicking the Delete button or using the DeleteBackspace key.
- If you do not wish to have an action run during Pro Production on images with custom effects then uncheck the checkbox on the Production side.
- You can use any action that normally works on an image open in Photoshop. The action must not display any dialog boxes, save, or close boxes after running because this will prevent ProSelect from automatically receiving the resulting image.
- You can use the Test button to try your selected actions on a sample image.
The Preview and Production Effects tabs can be found in both the Image Effects Tab and the Pro Production Tab. Generally, the same action is used for Custom Effects in ProSelect and Pro Production. For ease of use, these tabs are duplicated, and changes made in one area will appear in both. If you access this page through a secondary entry point, the Pro Production Tab will be selected by default.