Managing Standard Frames
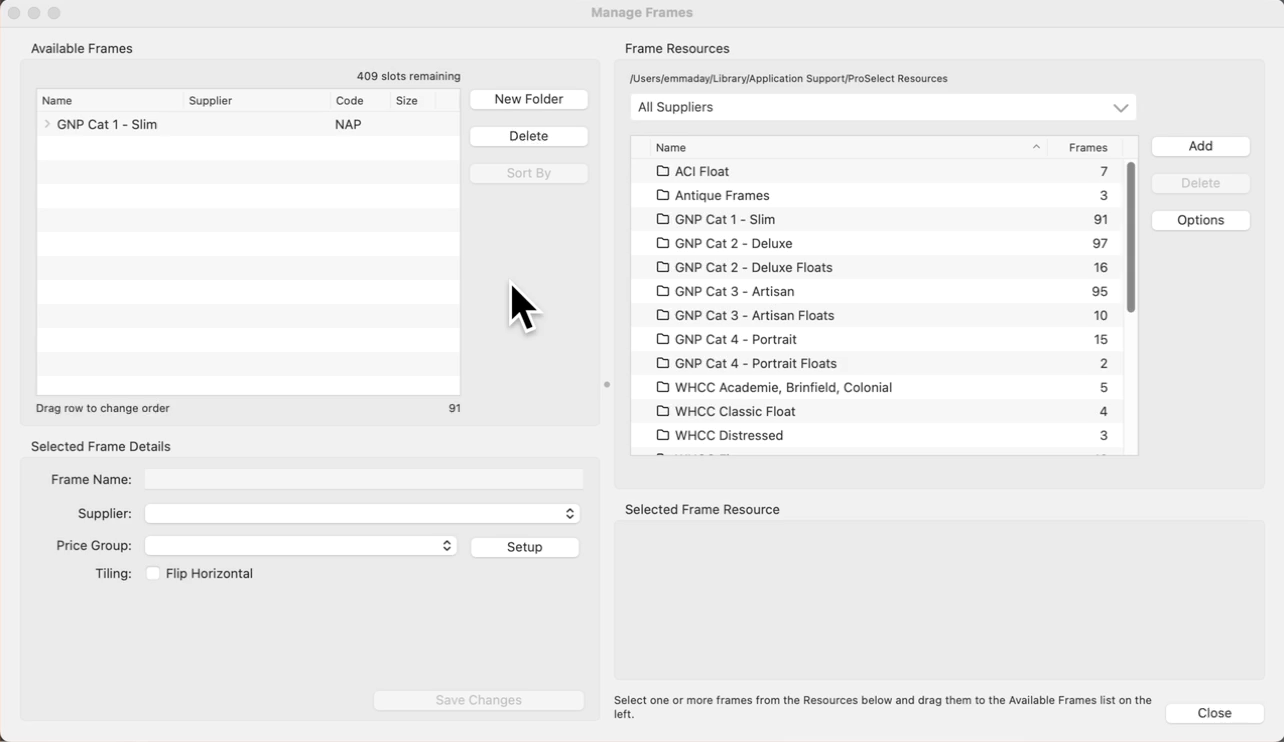
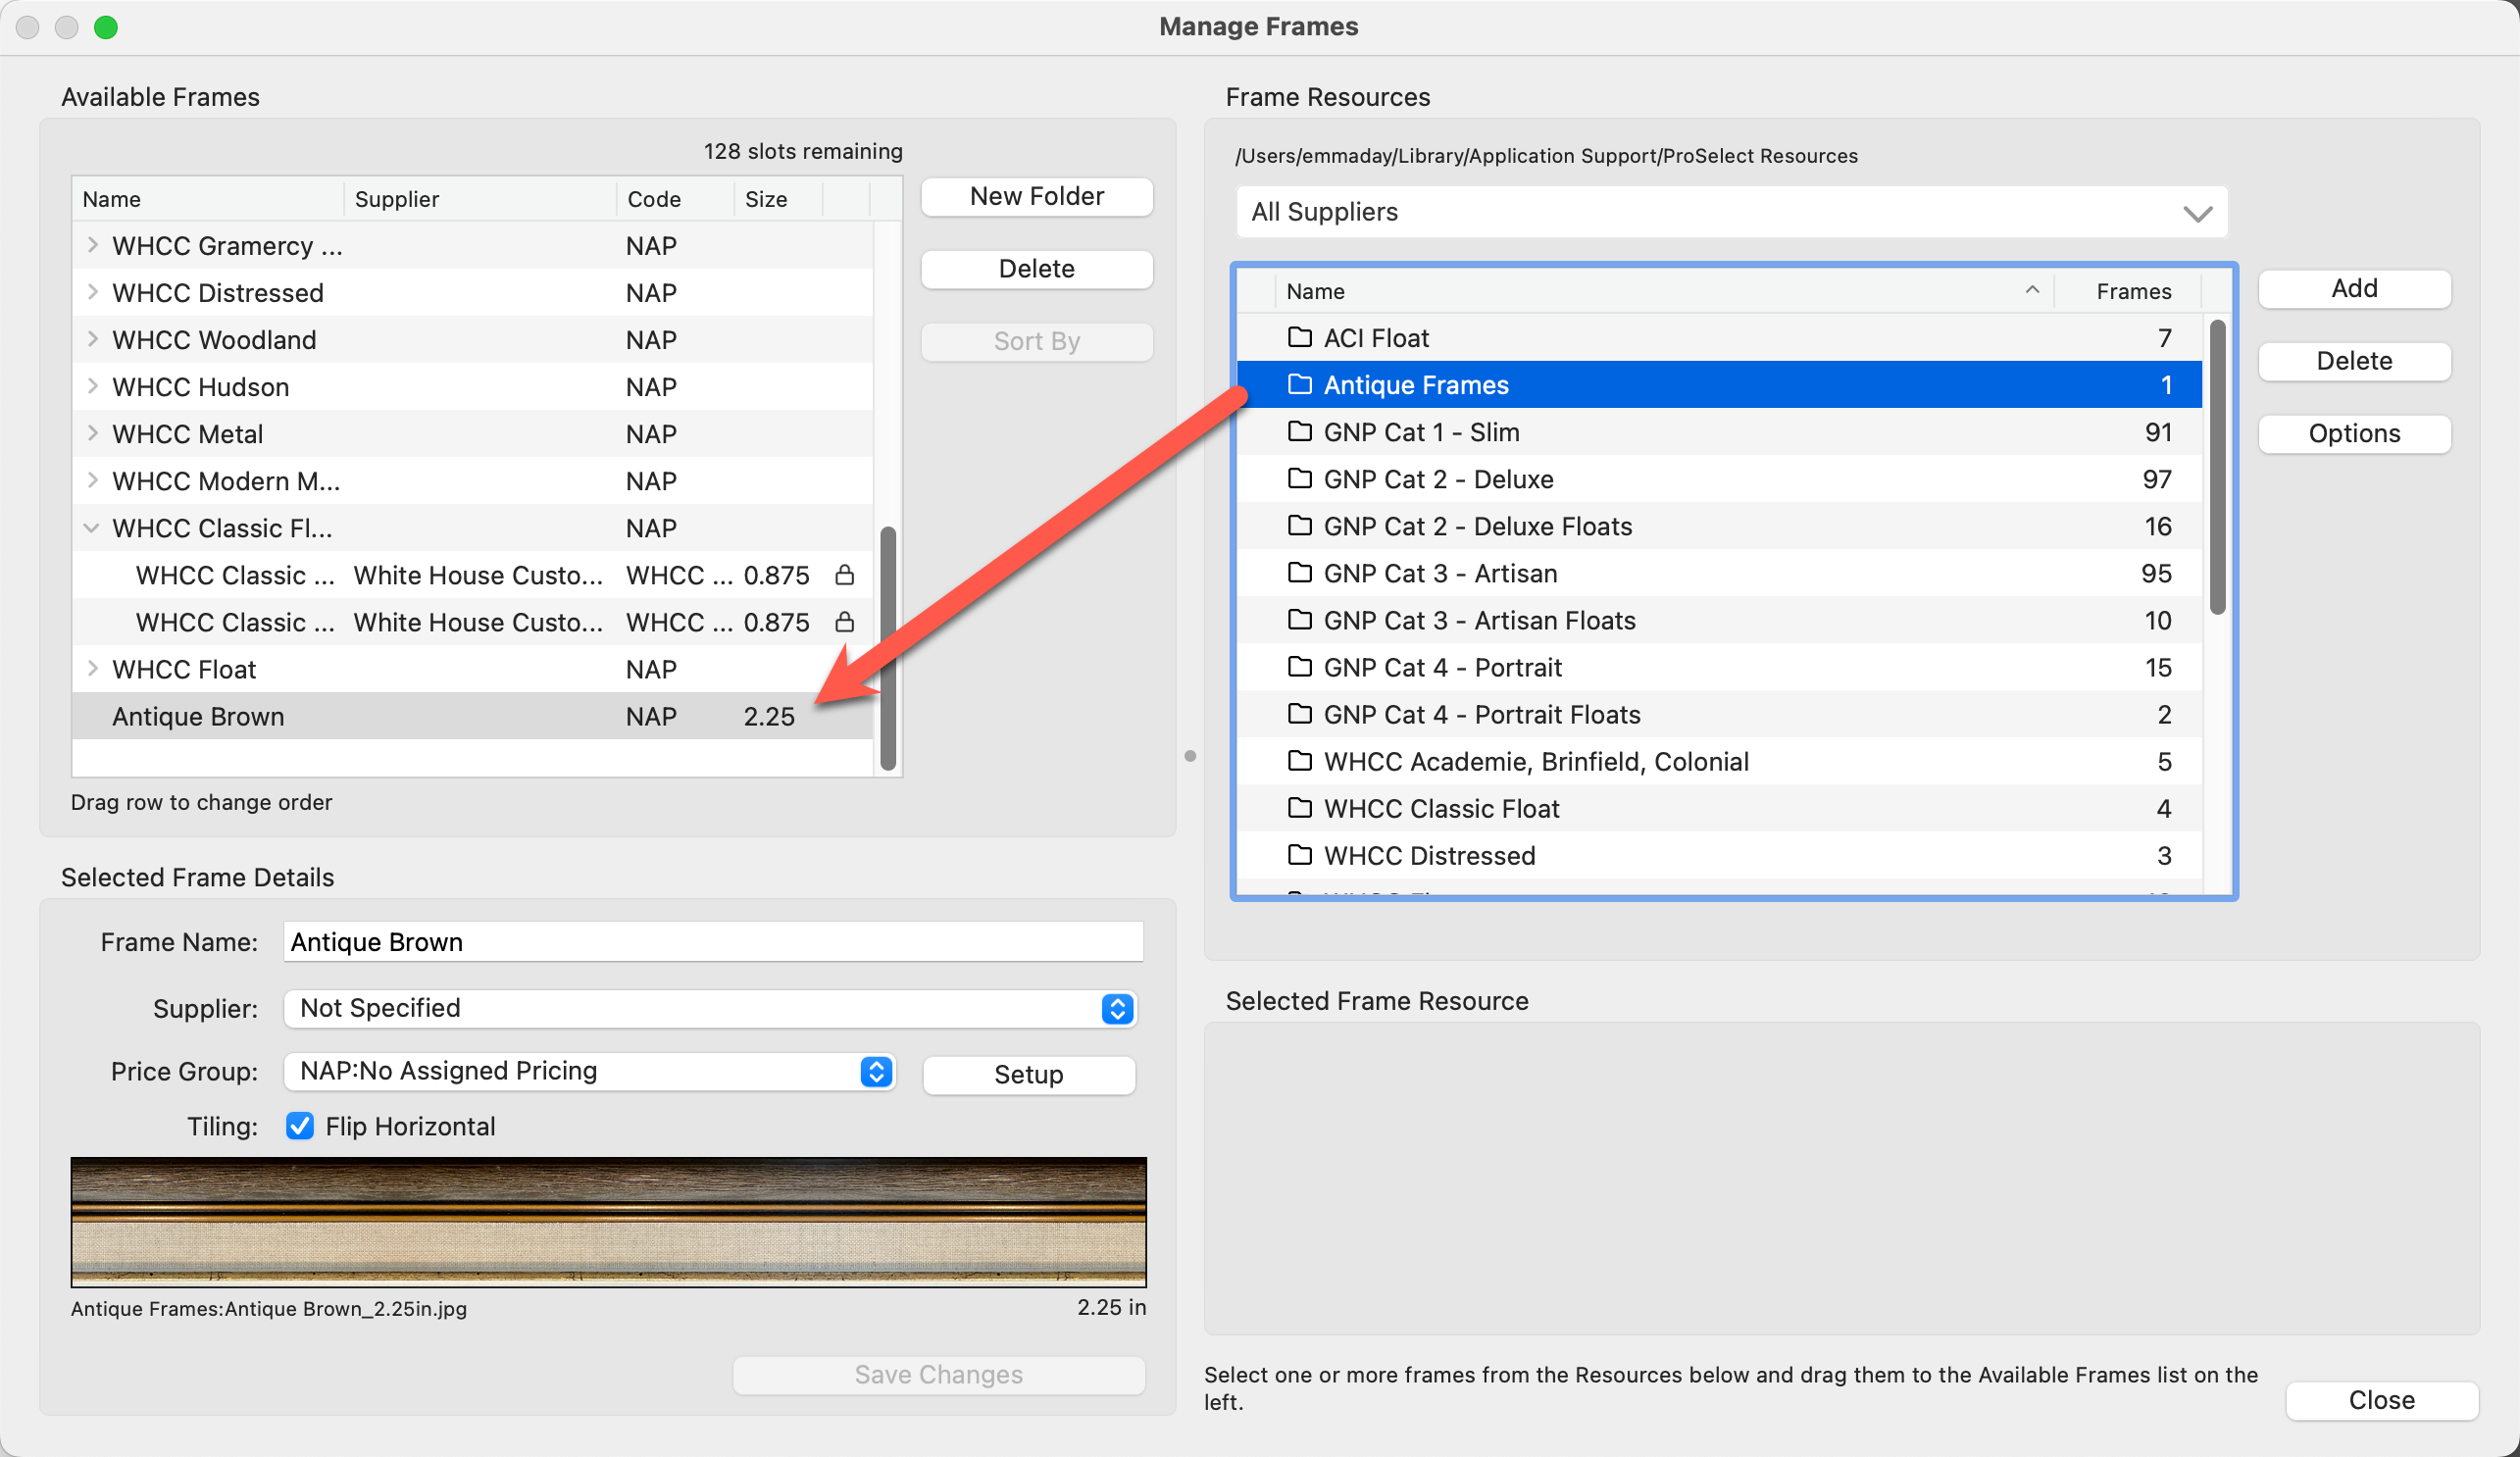
The Manage Frames window is designed for selecting and organizing segmented frames that you want to use within the software. Go to the top menu, Products > Frames > Manage Frames. Here's how it works:
- Frame Resources and Available Frames: The right-hand side of the window, labeled "Frame Resources," contains potentially thousands of frame options. To use the frames in ProSelect, drag individual frames or entire frame folders from this area into the "Available Frames" list on the left, which is your active selection of frames to use in albums. ProSelect Basic users can choose 12 frames from the resource area to use in ProSelect. ProSelect Pro users can choose up to 500 frames.
- Frames are often organized into folders (groups). You can group your frames by supplier, type, size, price, color, etc.
- Selected Frame Details: When you select a frame from your list, its details will be displayed in the "Selected Frame Details" section below. This includes an image of the frame and its pricing group assignment.
- Default and Locked Frames: ProSelect comes with a significant number of default frame options, which are collections sourced from specific suppliers. These default frames are locked, meaning they cannot be edited.
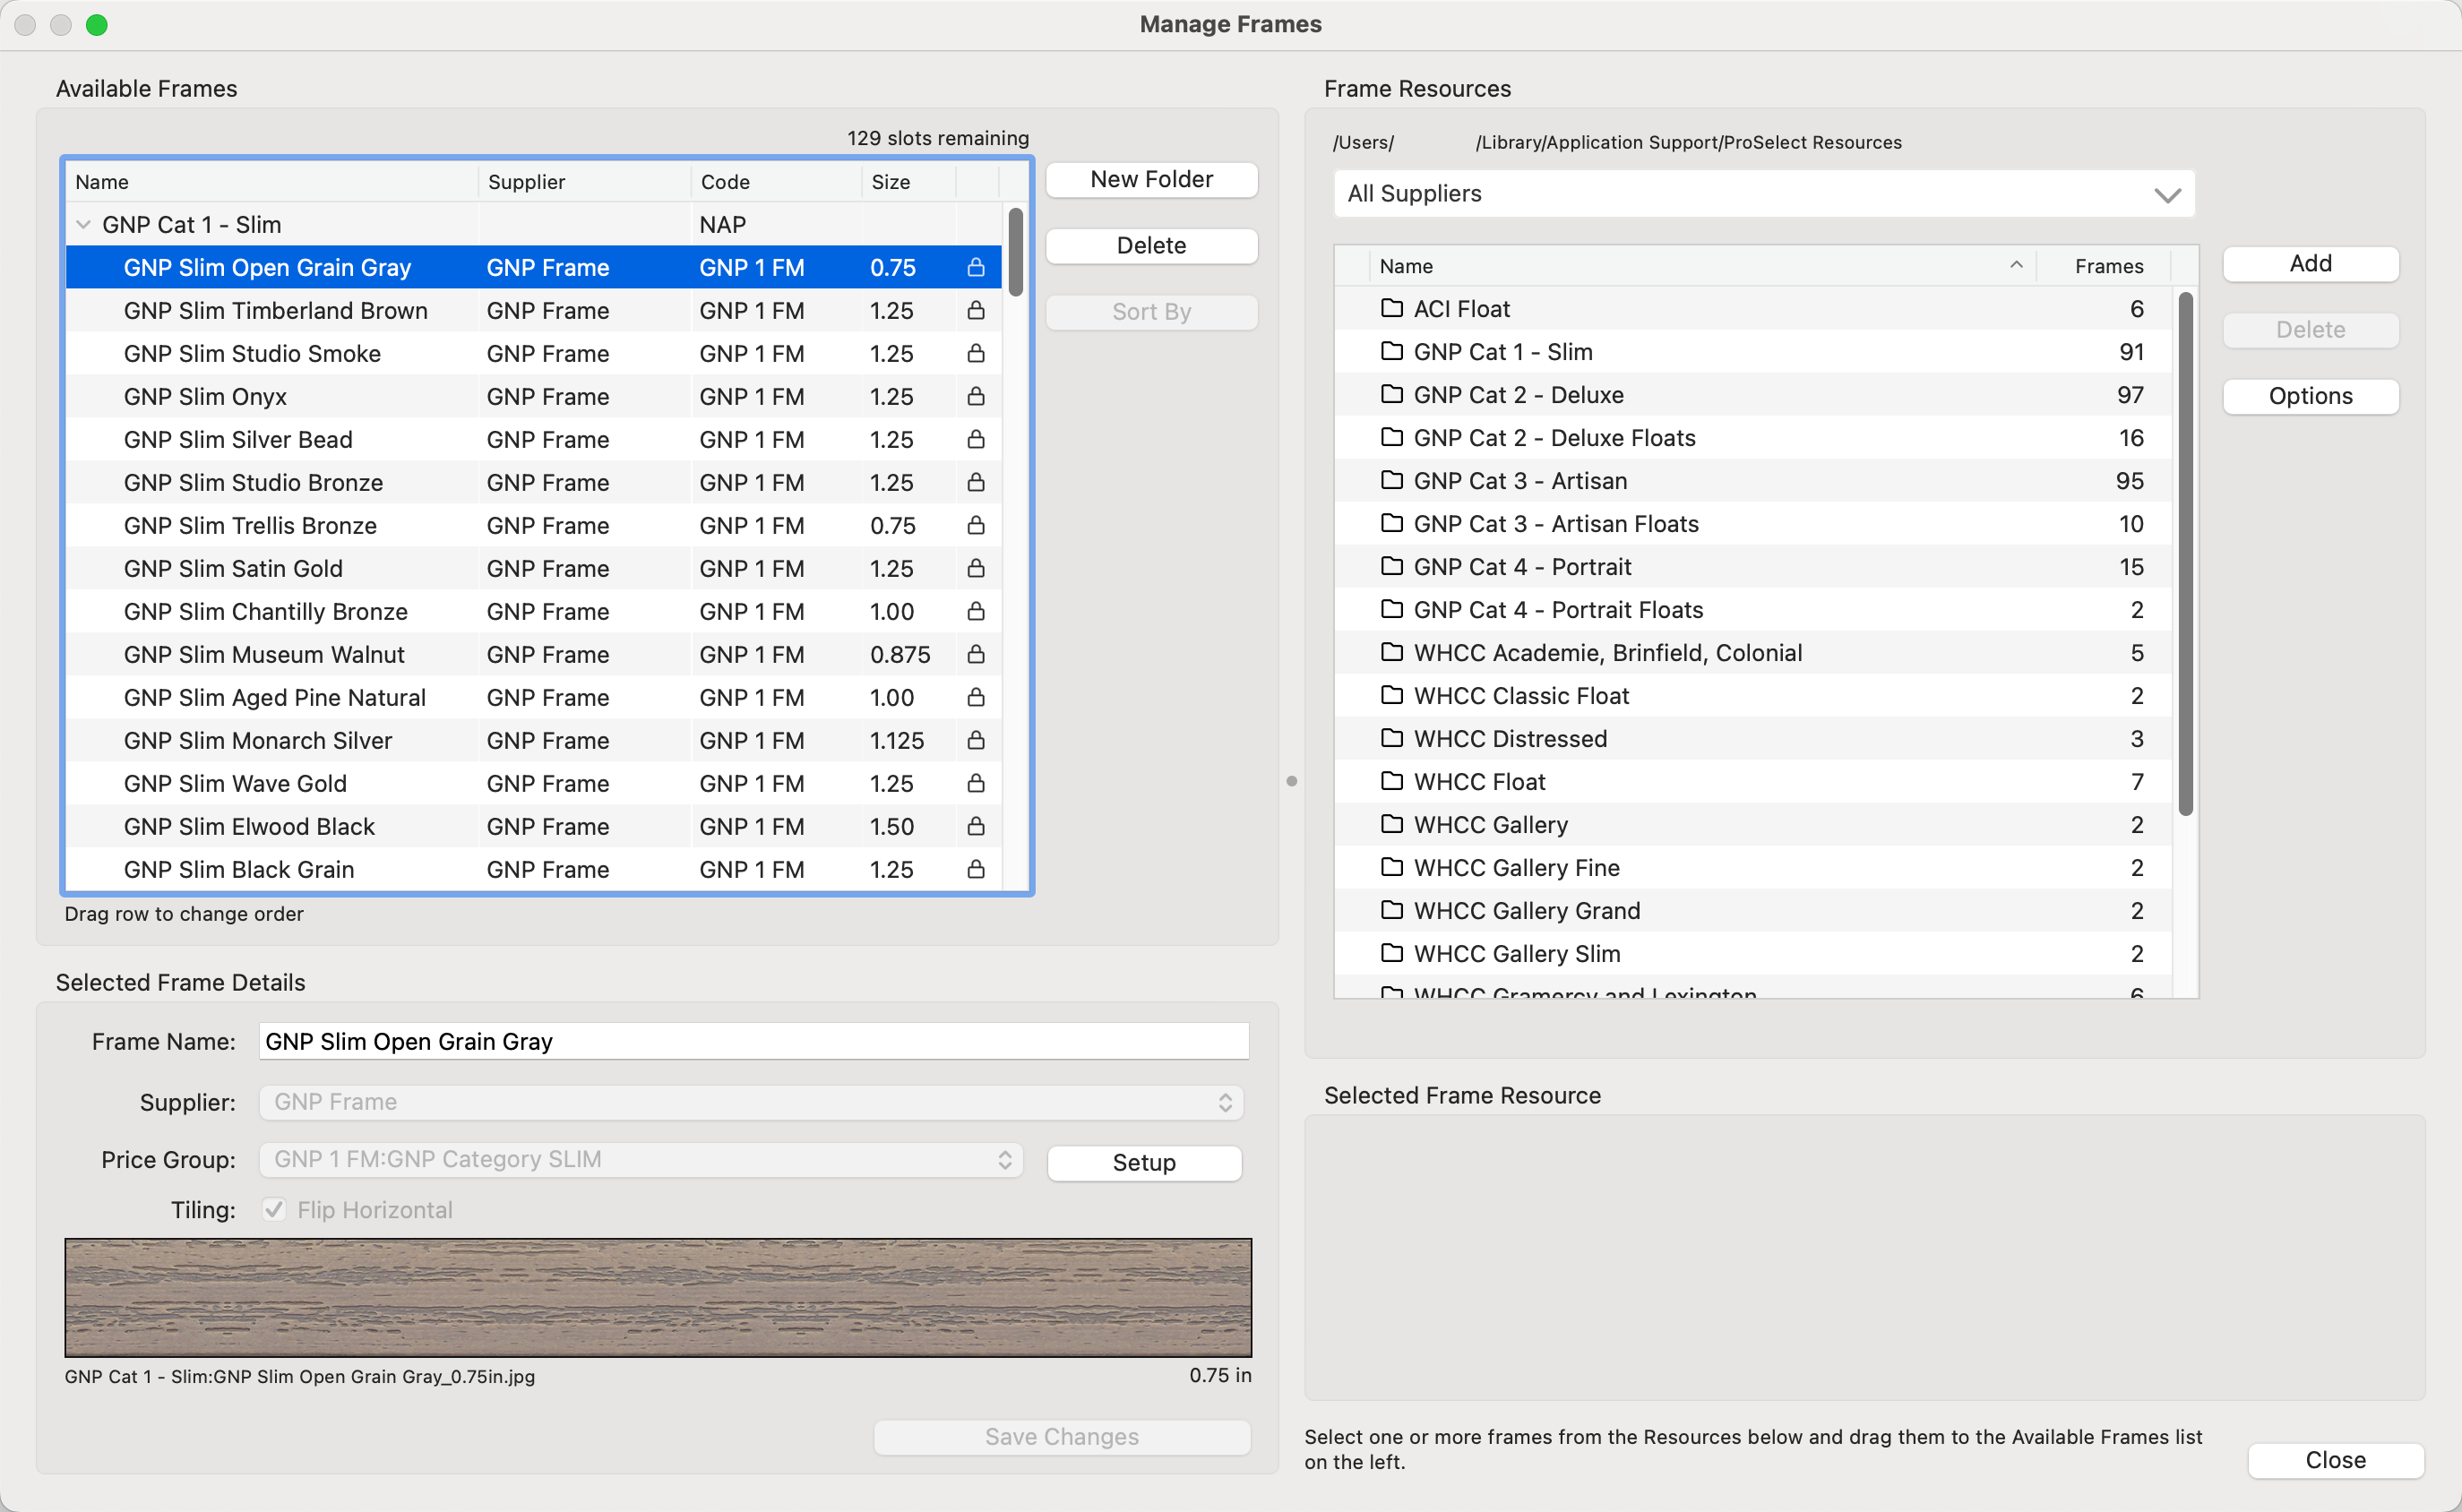
The "Available Frames" list contains the frames available for to you use in ProSelect. Just above the "Available Frames" list, there's an indicator that shows how many frame slots you have left. Basic users are allocated 12 slots, while Pro users can utilize up to 500 slots.
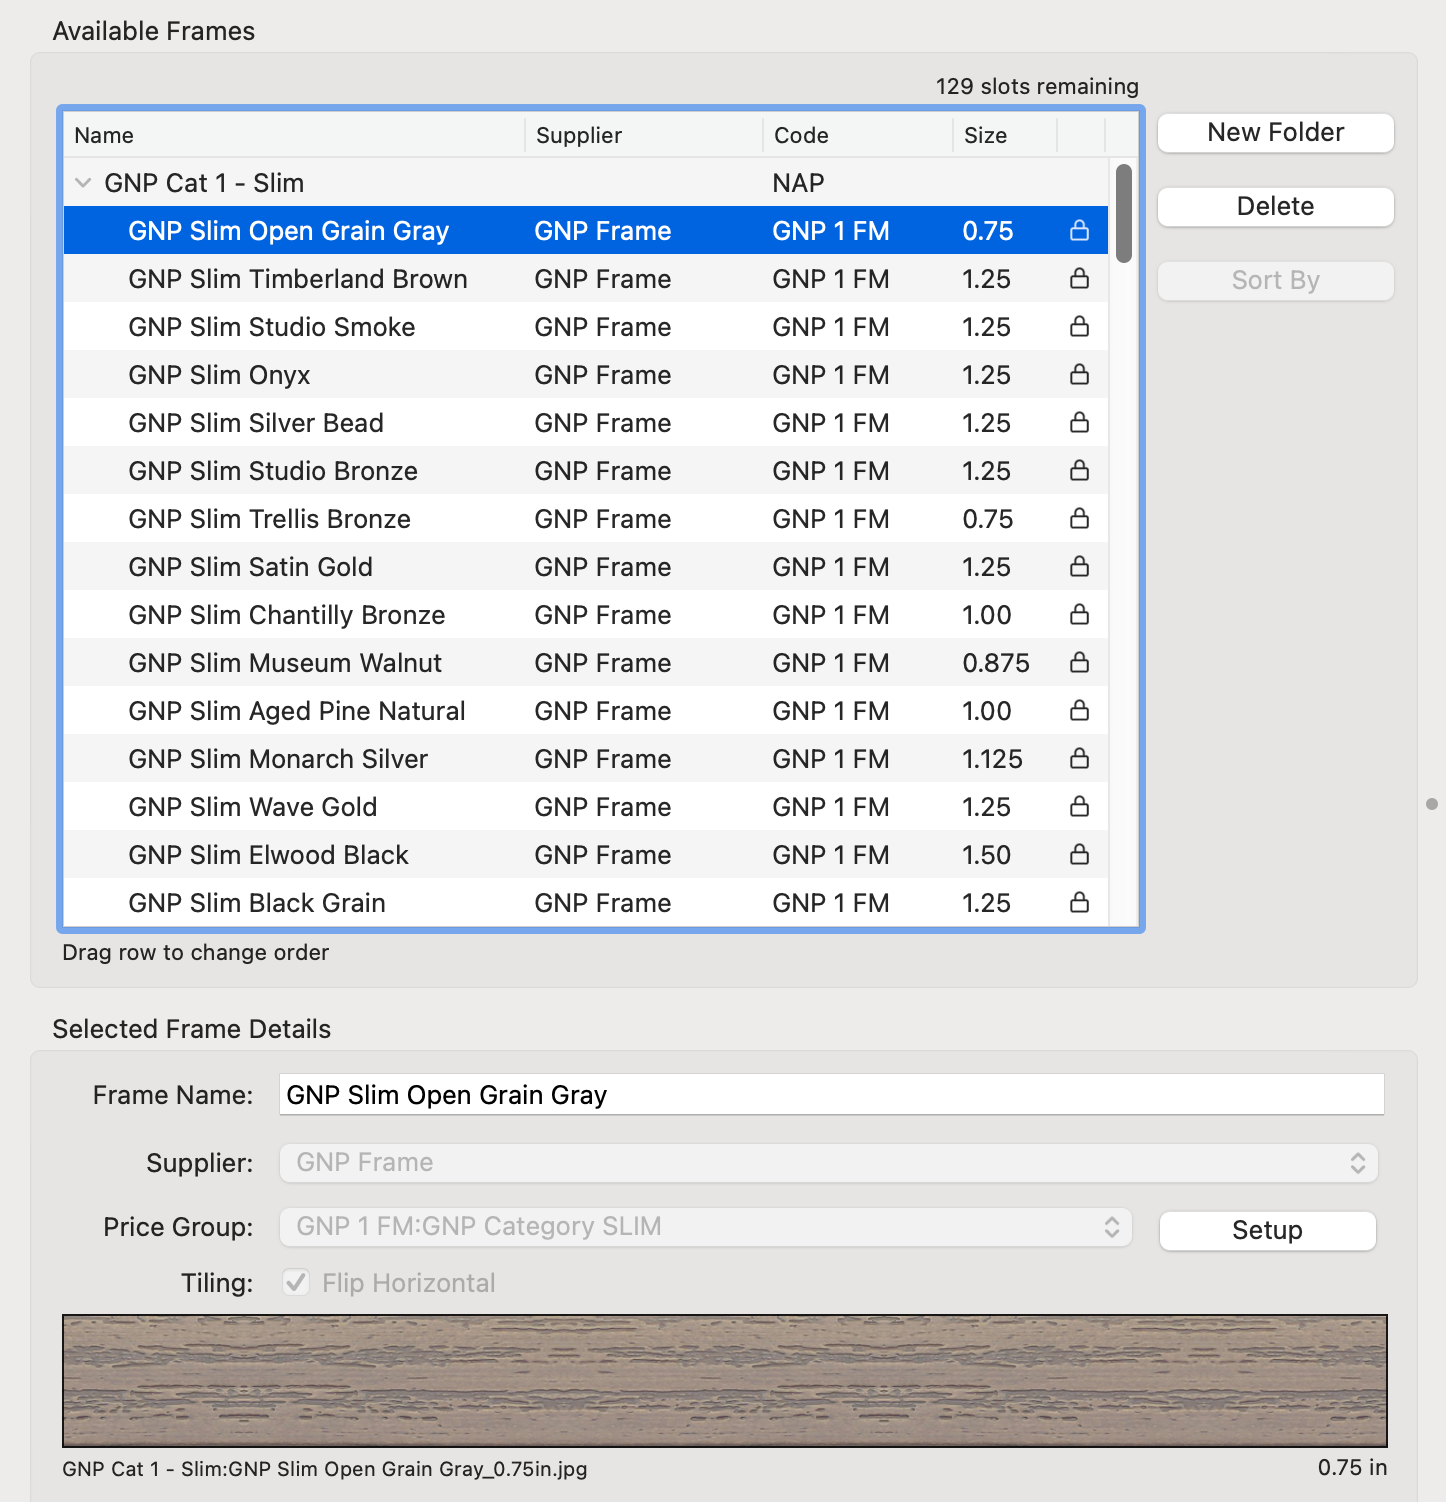
 Drop-Down Arrow: This allows you to expand or collapse frame folders.
- Name: The frame name.
- Supplier: This column indicates the Supplier if one has been assigned.
- Code: This code refers to the assigned price group.
- Size: This column lists the width of the frame.
 Lock: This particular frame is from a Supplier Collection and cannot be modified.
- Drag the frames to reposition them in the list. Alternatively, select a folder and use the Sort By button.
Selected Frame Details
When you select a frame from the list, the details regarding that frame appear below in the "Selected Frame Details" area. A preview of the frame image appears here. If the frame is part of a Supplier Collection, it will be locked, only the name can be modified. If the frame is not part of a Supplier Collection, you can modify the Supplier, Price Group, and Tiling preference.
Create New Folder
- Click on the New Folder button.
- Type in a name for the group (folder).
- Optionally assign a Supplier and a Price Group.
- Once the folder is set up, you can drag frames into it from the resources area.
Deleting Frames
Deleting a frame in the "Available Frames" area only removes it from the list. It does not delete the frame resource on the right-hand side.
This side of the window displays all the frames and folders containing frames located in your ProSelect Resources folder.
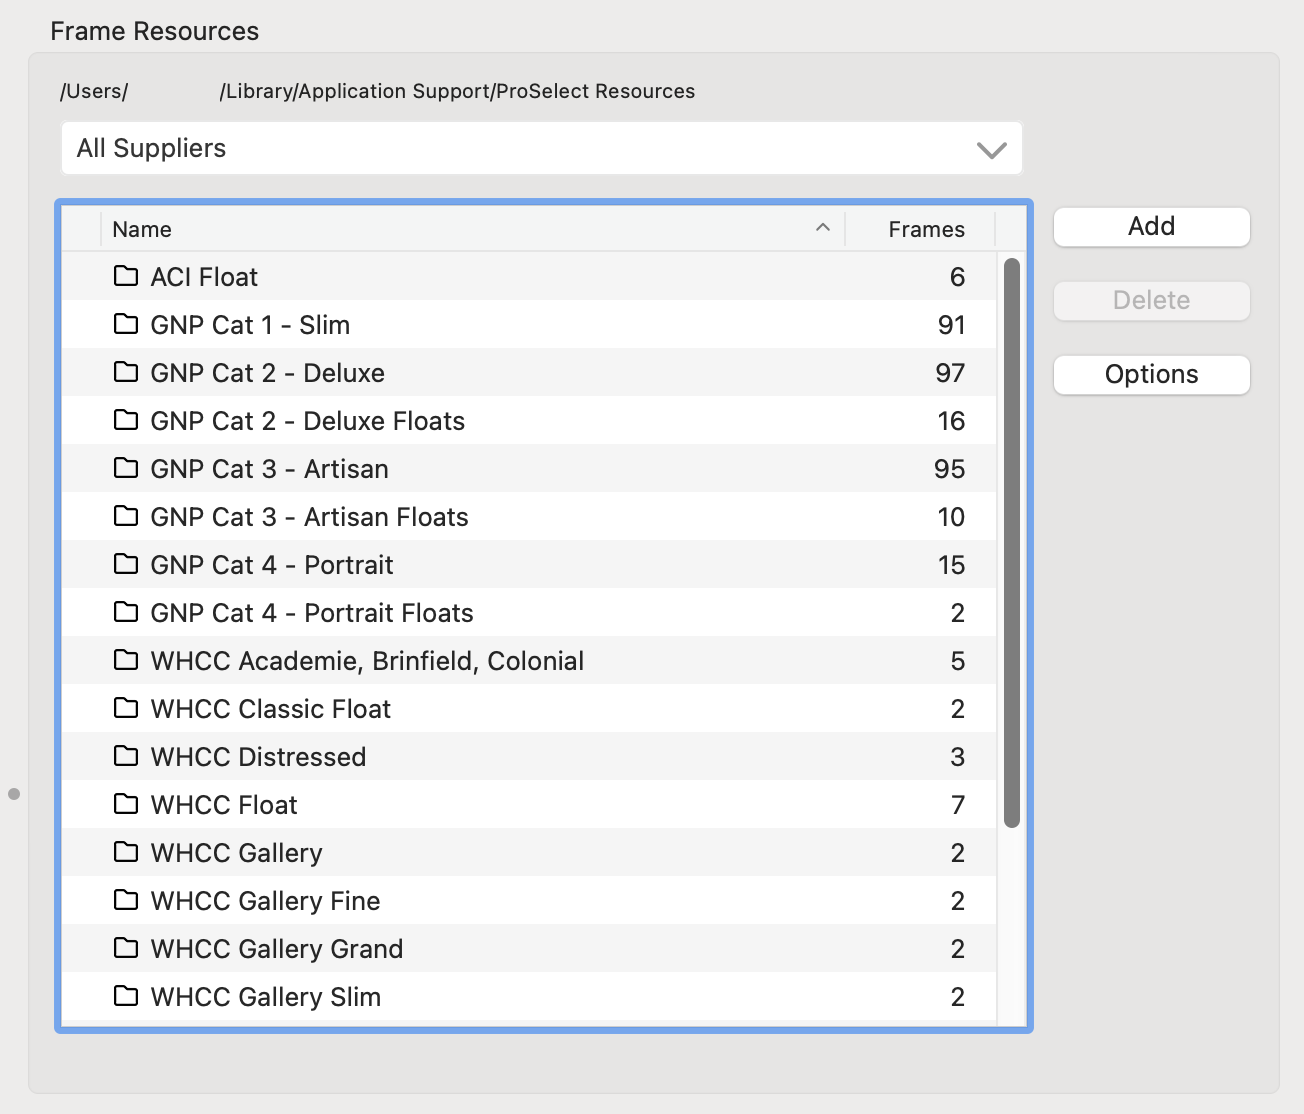
- Use the Supplier drop-down list at the top to view the frames within a specific folder, or double-click on the folder to reveal the frames.
- Use the Add button to Import a Frame Collection or Frames Folder.
- You can re-install the default frames using the Options button.
- Deleting Frame Resources: If you need to remove frames or a folder of frames, select them and click the Delete button. This action will delete the selected frames from your disk and also remove them from the "Available Frames" list.
Selected Frame Resource
When you select a frame, the resource image details appear below.
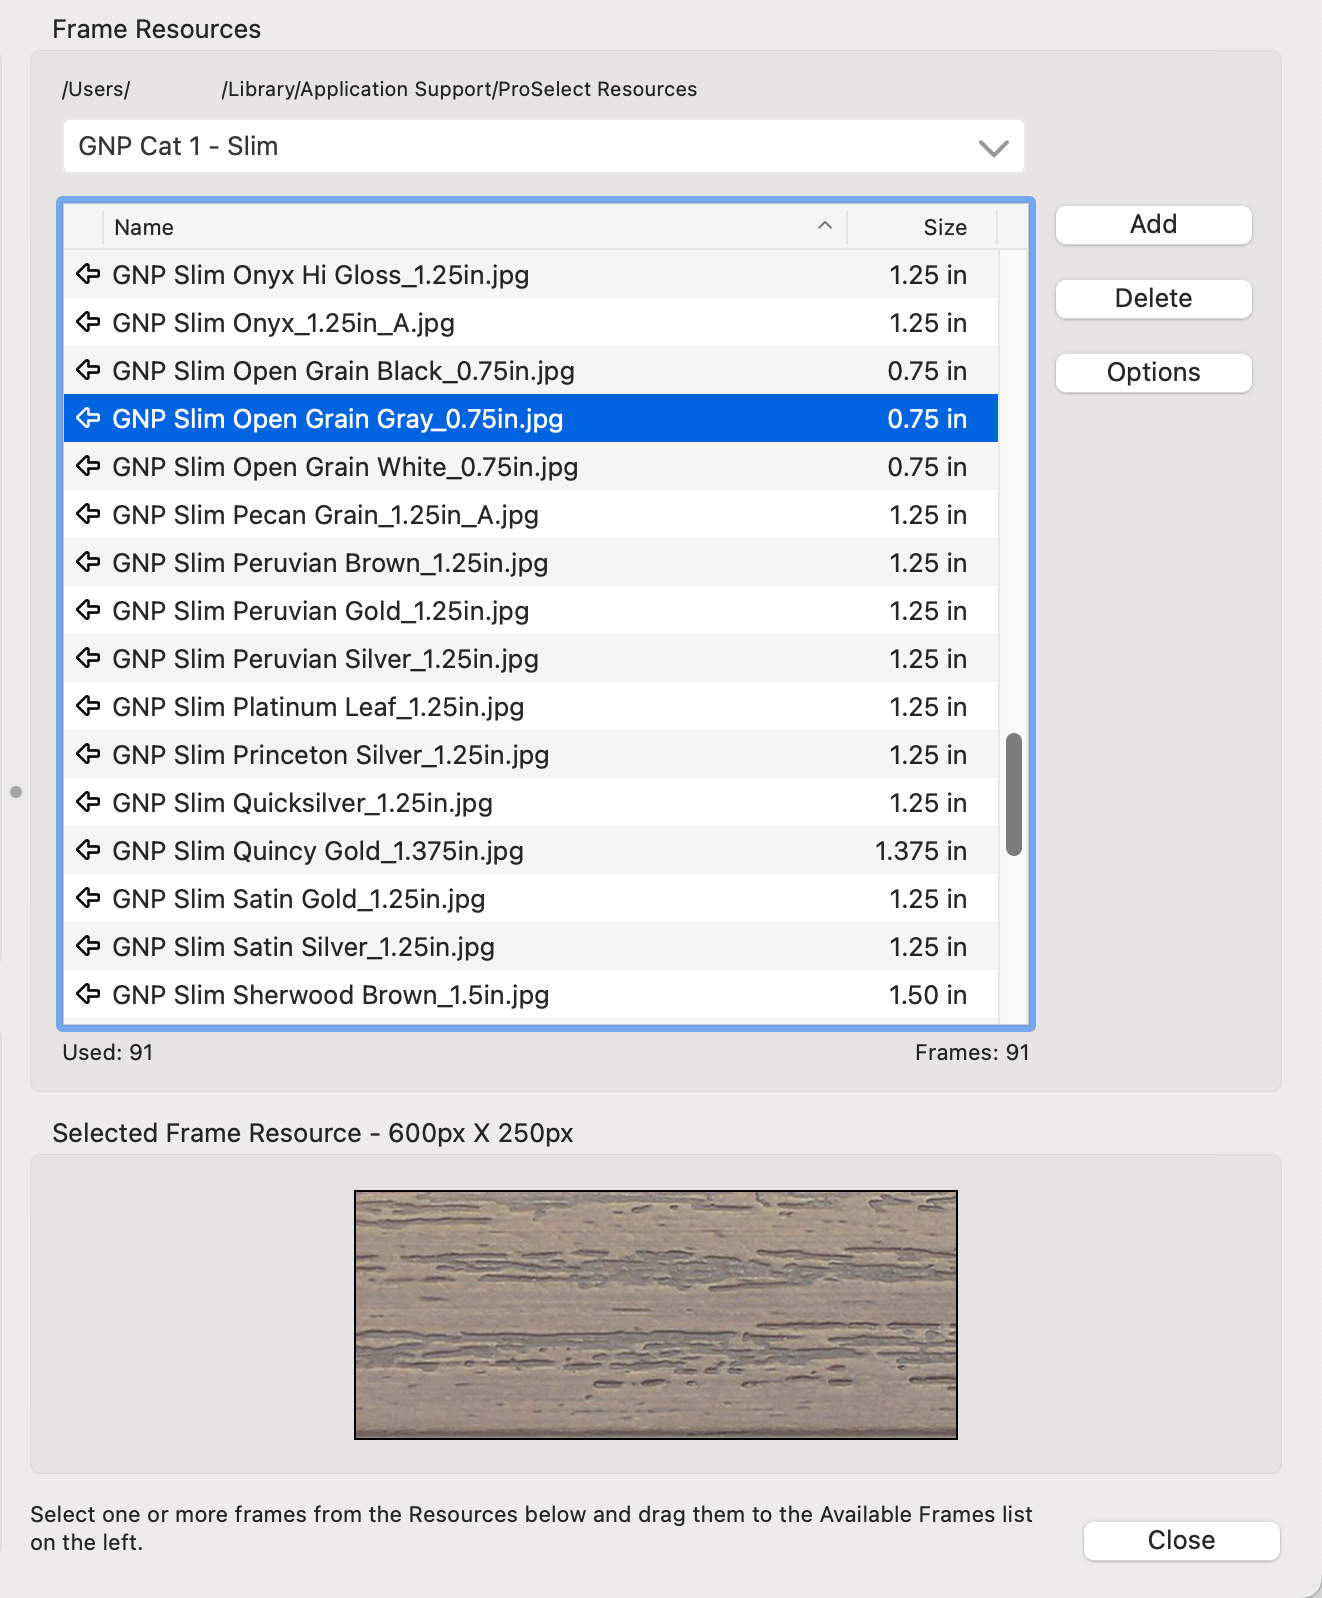
 Frame Used Indicator: This arrow indicates that the frame has been added to the "Available Frames" list.
 - At the bottom of the "Frame Resources" section, the number of frames listed as "Used" indicates how many frames from that folder are currently included in the "Available Frames" area.
- The frame resource image is used to create the overall look of the frame in ProSelect.
When you add a new frame to the list of available frames in the Manage Frames window, the price group assigned will be "NAP: No Assigned Price"
- Select the frame or a folder of frames from the "Available Frames" list.
- Optionally choose a Supplier from the drop-down list.
- Click on the Price Group list and select a price group. If you don't have your price group set up yet, click on the Setup button. You can create it in the Frame & Mat Pricing Manager.
- Click Save Changes to apply the new settings.
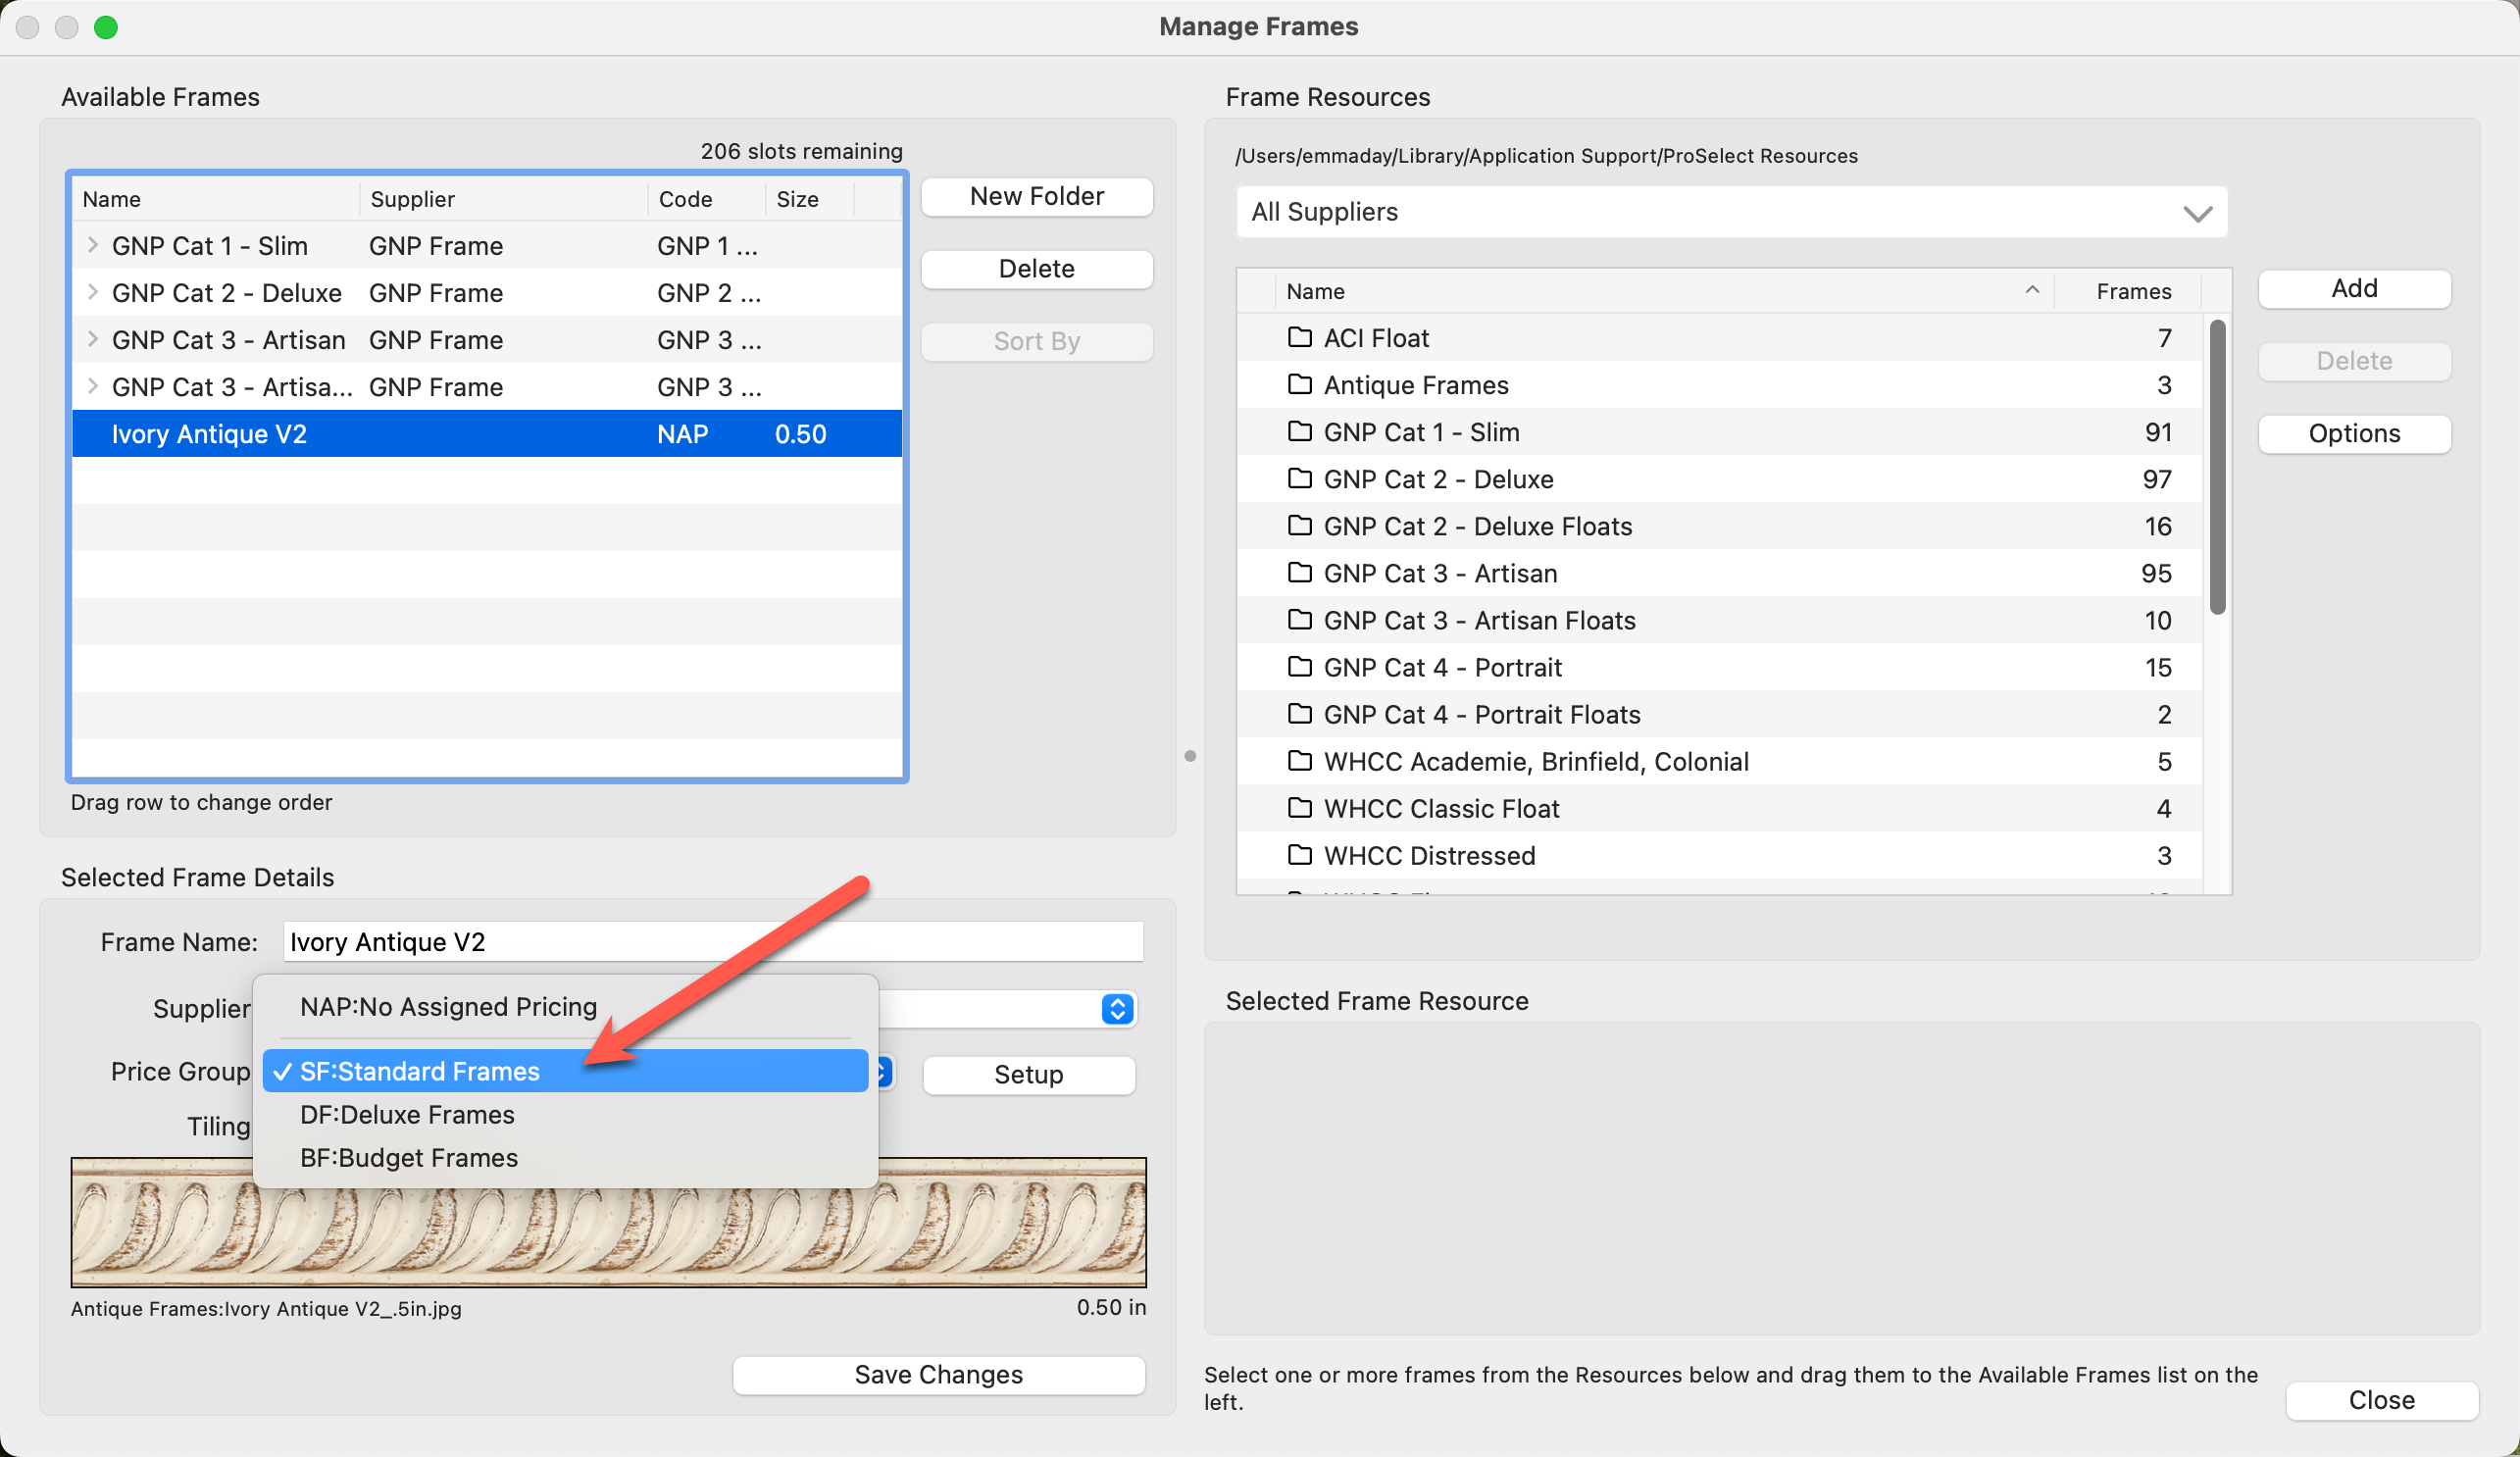
- If you need to update the price group for all frames within a specific frame group, simply select that entire group, choose the desired price group for the group, and then click "Save Changes" to update all included frames at once.
ProSelect includes an extensive list of default frames that are automatically installed when you first run the software. If these frames are missing, you can reinstall them.
- Click the Options button.
- Select "Install Default Frames."
- This action will place them back into your Resources folder.
- Drag the frames into the "Available Frames" list on the left-hand side to use them.
To add a Supplier Collection of frames, see Supplier Collections for more information. To manually add frames to ProSelect, follow these steps:
- Organize your frame images into folders, separating them by supplier or frame type as needed.
- In ProSelect, navigate to the Manage Frames window.
- You can add these folders to ProSelect's Frame Resources folder in two different ways:
- Option 1: Drag the folder of frame images into the Frame Resources list.
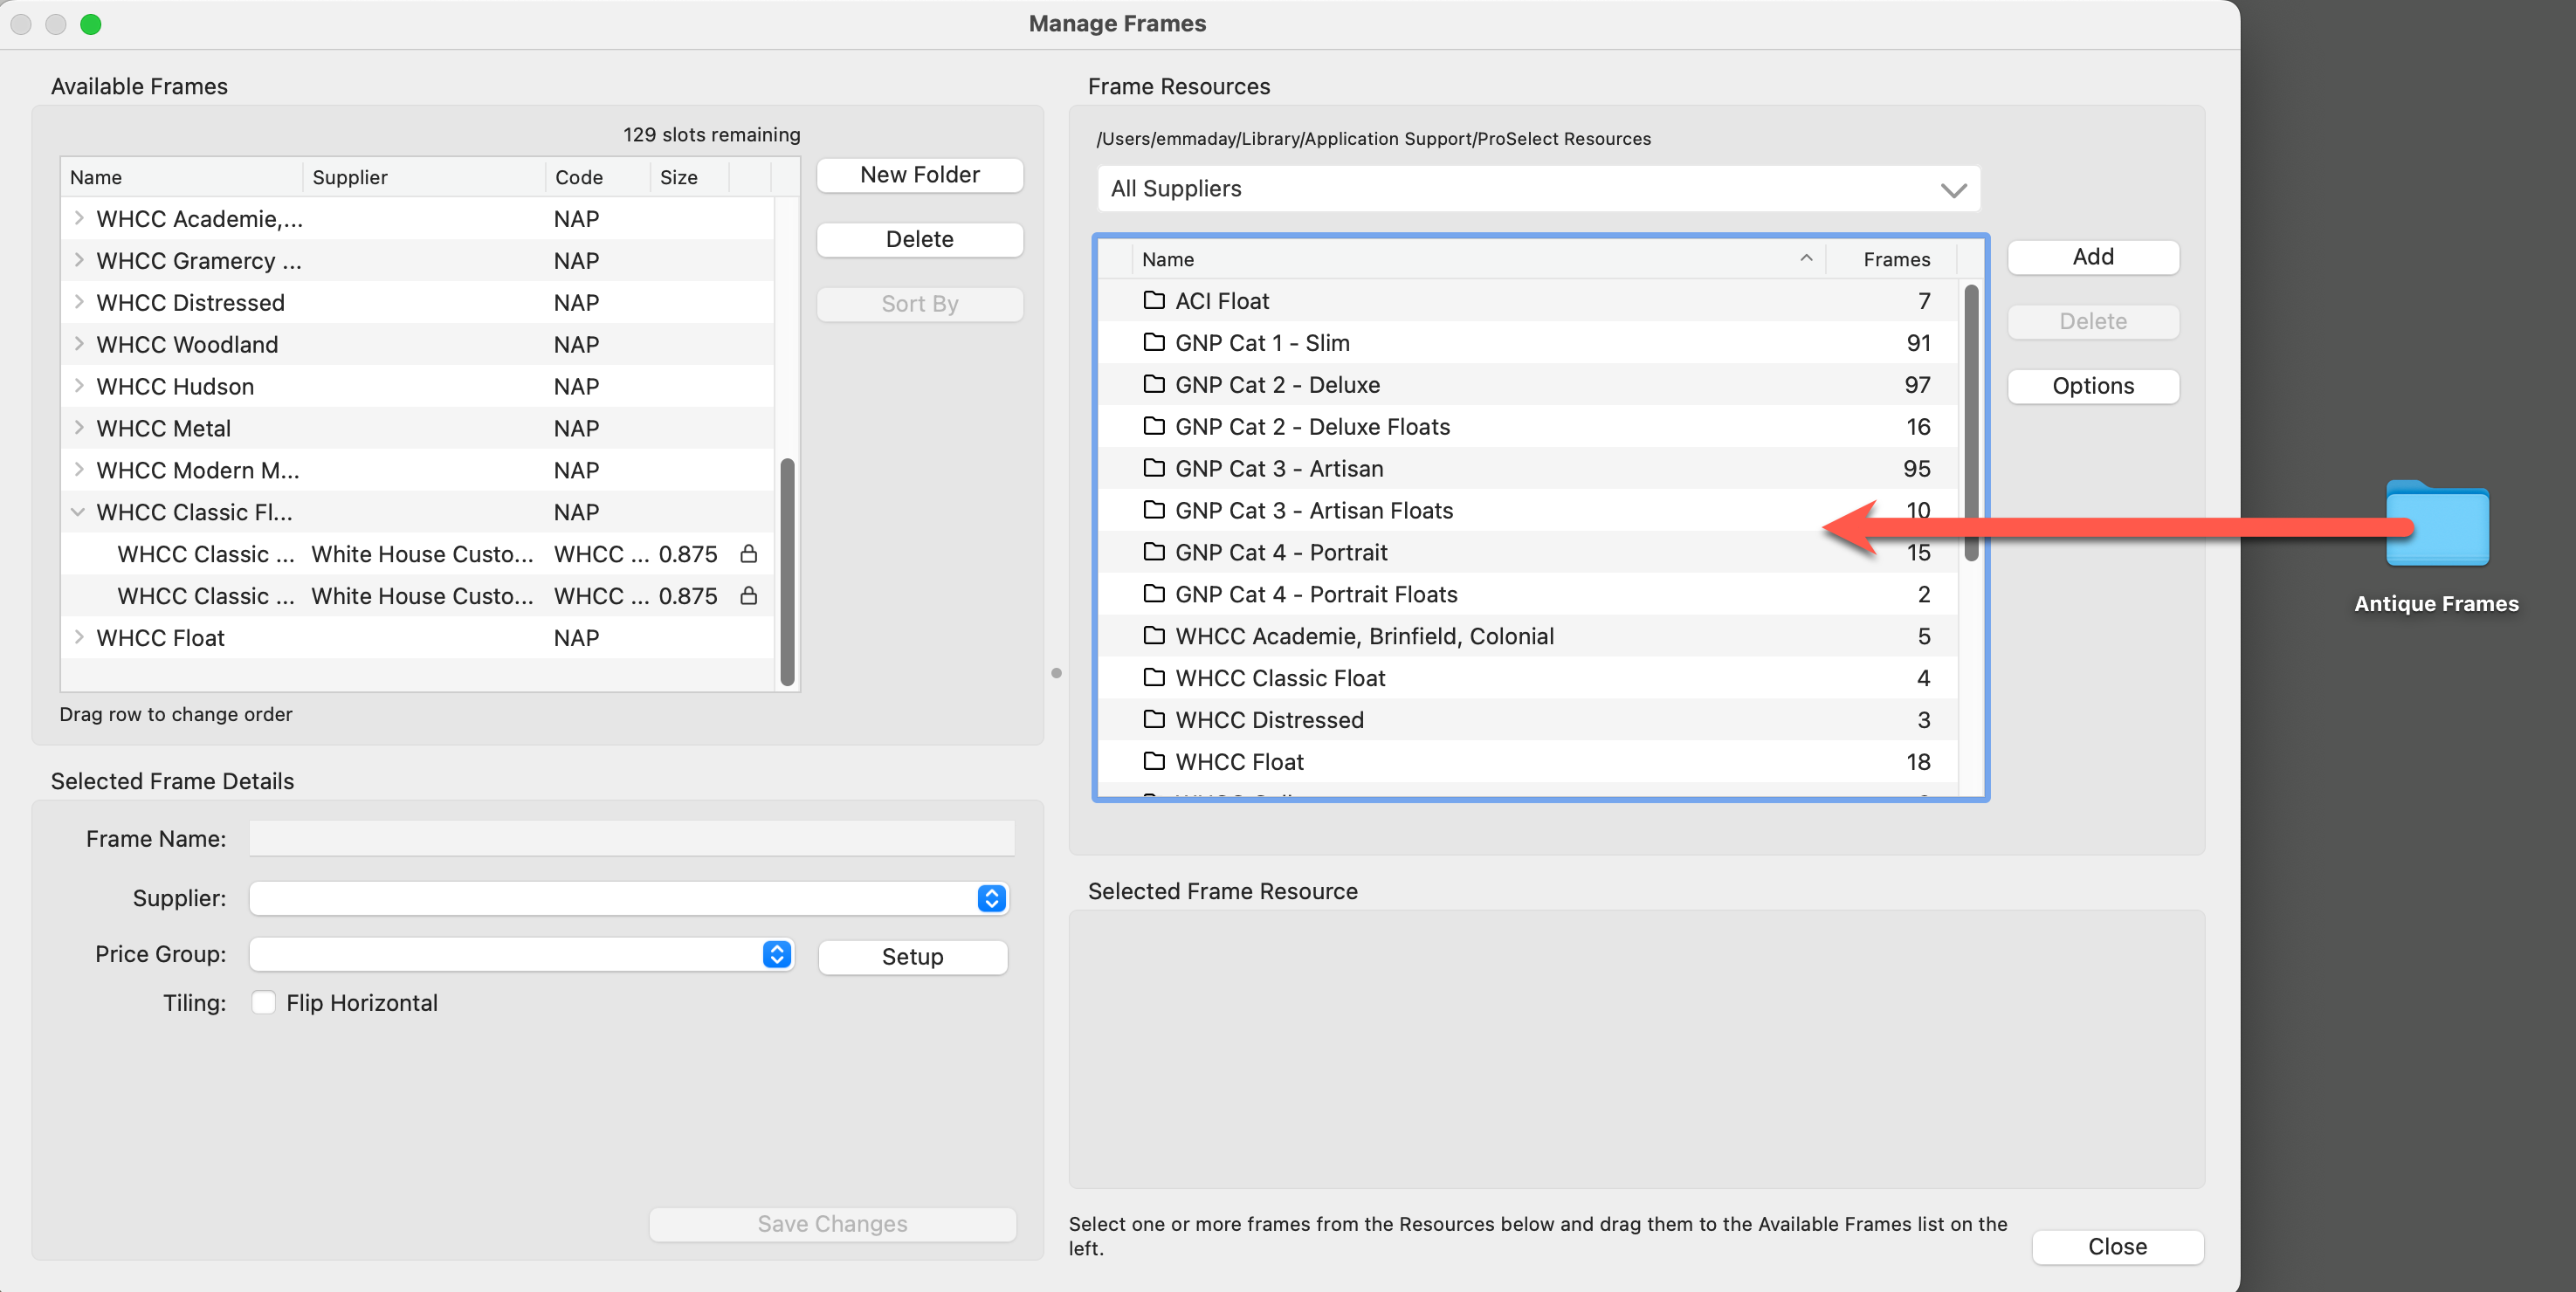
- Option 2: Click the Add button, and select "Import Frames Folder."
- Option 1: Drag the folder of frame images into the Frame Resources list.
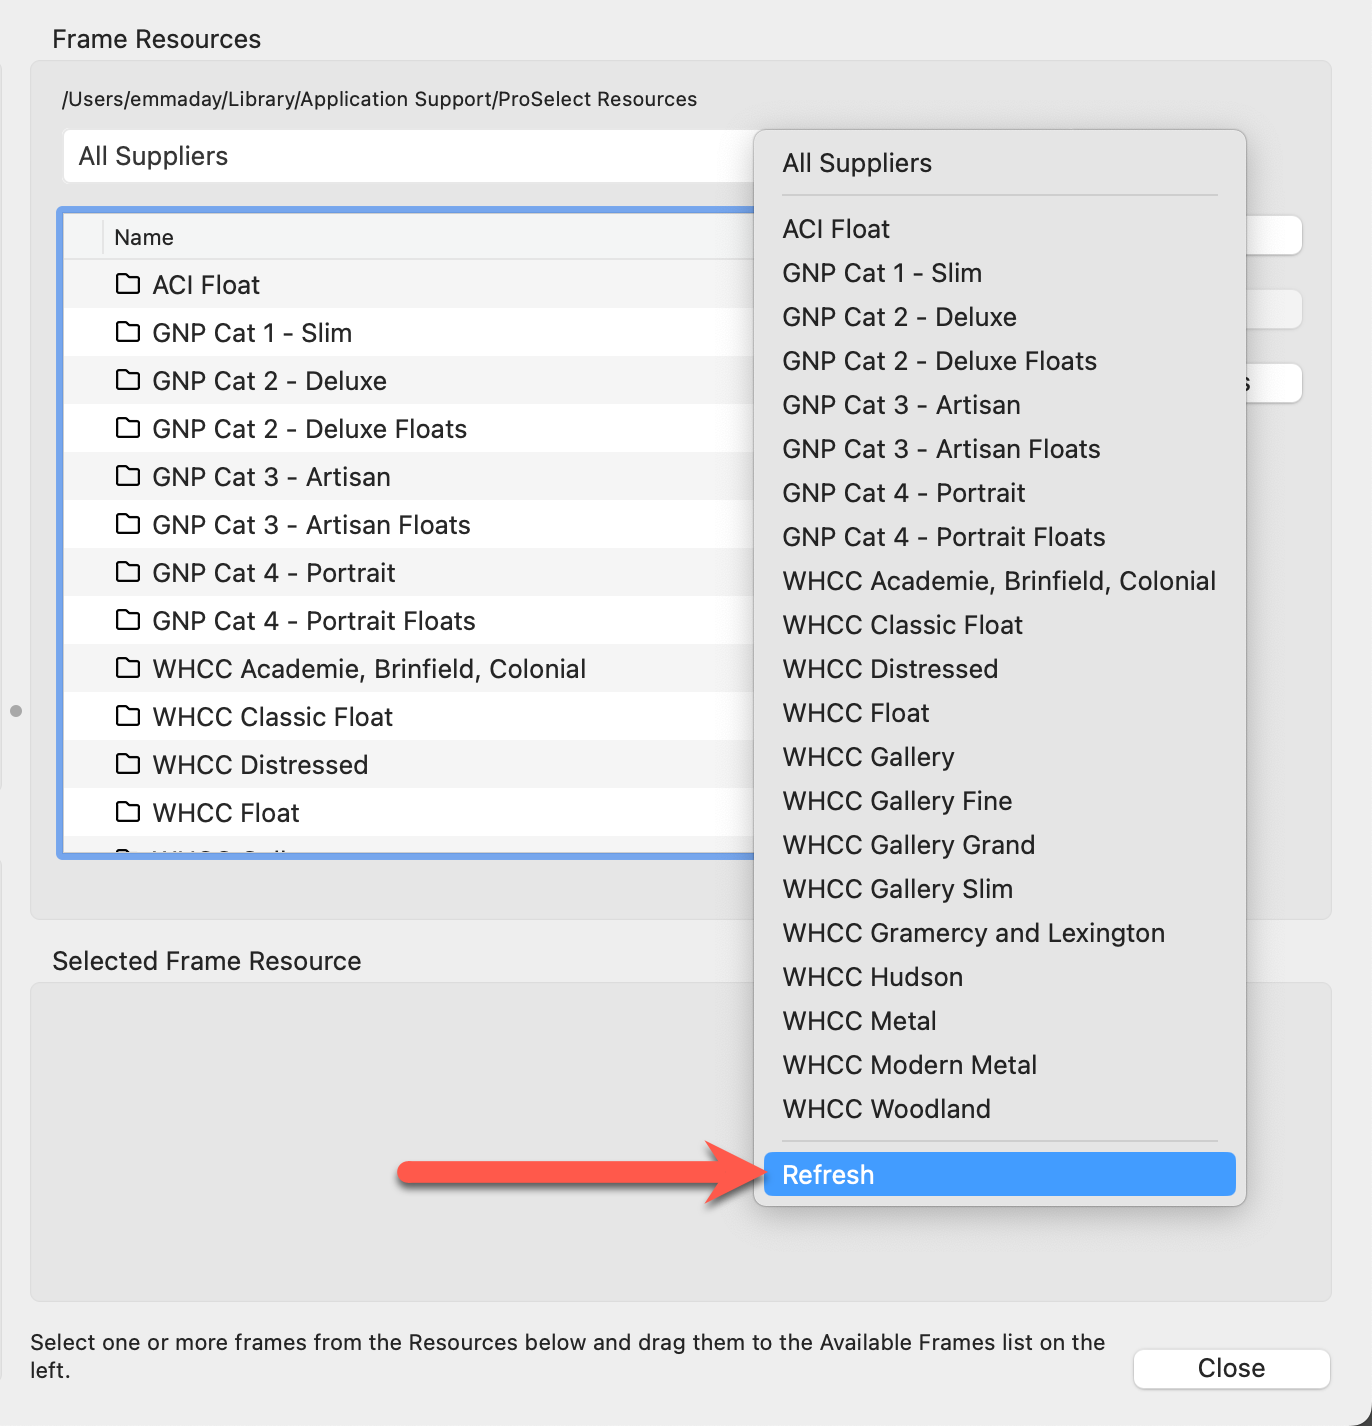
- Once you have added your folder, refresh the Frame Resources list by going to the Supplier drop-down at the top, and selecting "Refresh."
- Locate the newly added frames folder. You can either drag the entire folder across to the "Available Frames" area or open the folder and only move across the frames you wish to utilize.
- Be sure to select a price group for the frames. See Pricing Frames for more details.
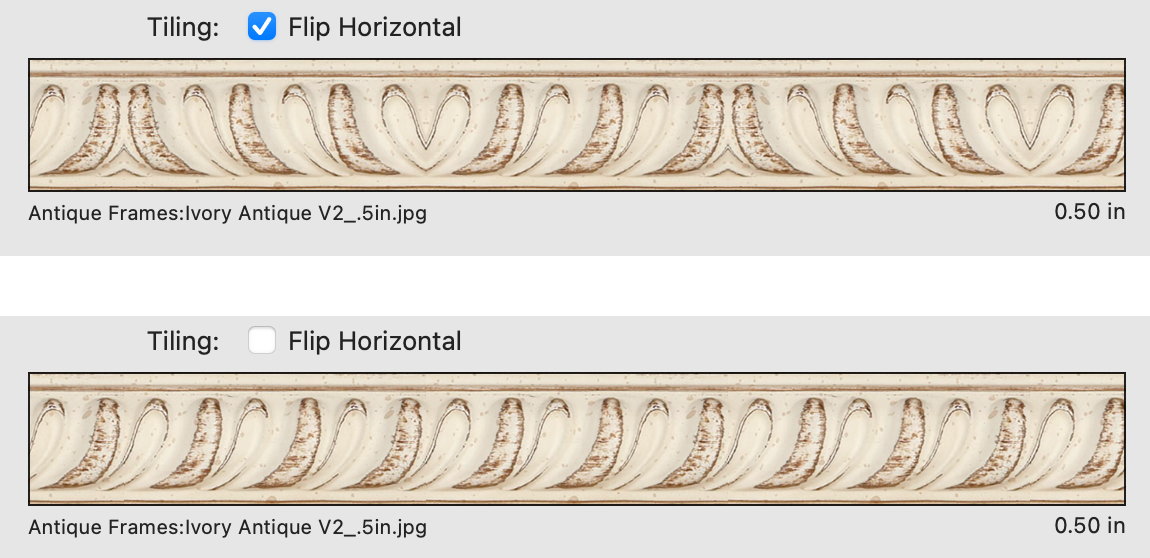
- By default, the tiling is set to "Flip Horizontal." This results in a nearly invisible join, particularly when the frame's pattern lacks a specific orientation. There are certain cases when flipping horizontally is not recommended. For example, the frame below has a pattern that goes in one direction. If the segment is flipped horizontally, the pattern is disrupted. In this case, uncheck "Flip Horizontal."
When your frame supplier updates their collection, you can download the latest set of frames and install them using the methods previously described in the Adding Frames page.
- If you already have a frame folder from the same supplier installed, the new frames will replace the existing ones in your collection.
- Frames no longer offered by the supplier will be removed from your "Available Frames" list and moved to a designated "Discontinued" folder within your Frame Resources area.
To ensure all frame files in ProSelect are error-free, double-click on a frame folder, and click the Check Frames button. If there are any issues, a warning symbol ![]() will appear next to the affected frame names. Click on these frames to view the error information displayed at the bottom of the window.
will appear next to the affected frame names. Click on these frames to view the error information displayed at the bottom of the window.
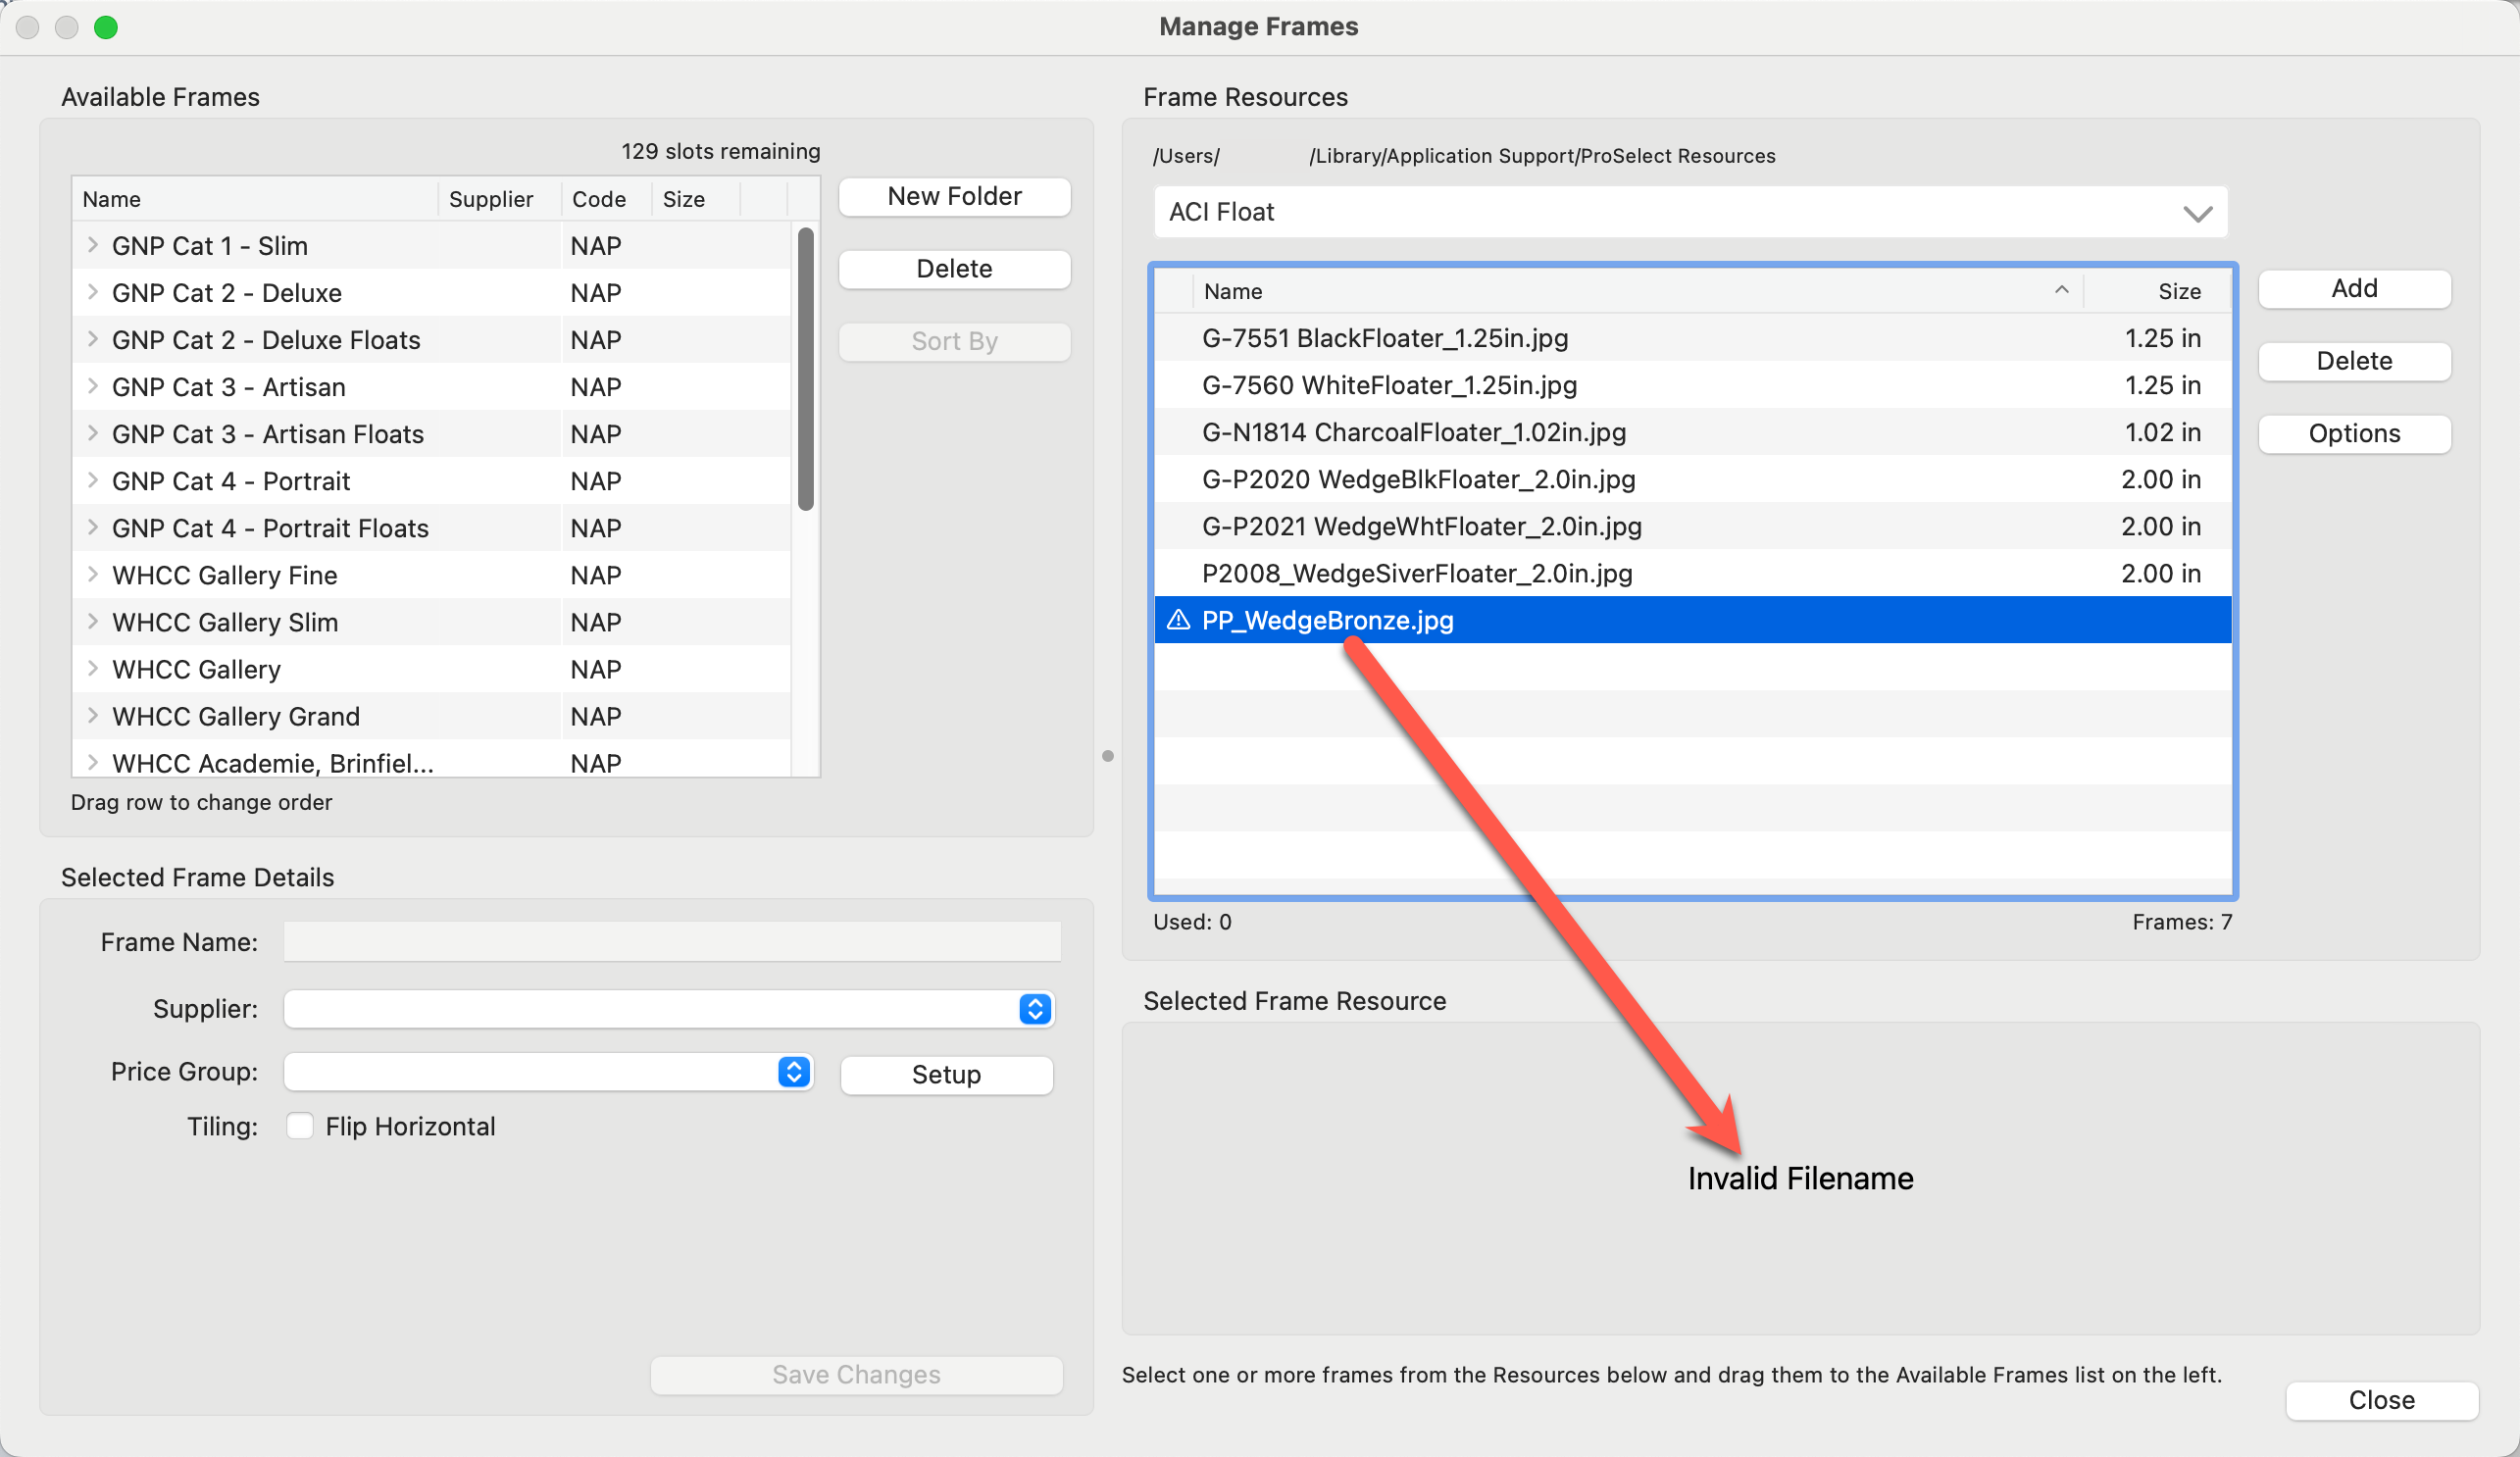
- Invalid Filename error: See the section Naming Frame Images if you have an invalid filename error.
- Invalid Picture Size: See the section Creating Frame Images if you have an invalid picture size error.
- Once you have remedied the error, select "Refresh" from the drop-down list at the top. The warning symbol will disappear.