Adding an Order Adjustment or Discount
Order Adjustments can be applied to the entire order and are set up in the Product & Pricing Manager. Discounts can be applied either to individual products or to the entire order.
- From the Review Order window, click on the Add button.
- Select "New Order Adjustment" from the list.
- Use the drop-down arrows to reveal a list of order adjustments available. This list is directly related to the Order Adjustments created in the Product & Pricing Manager.
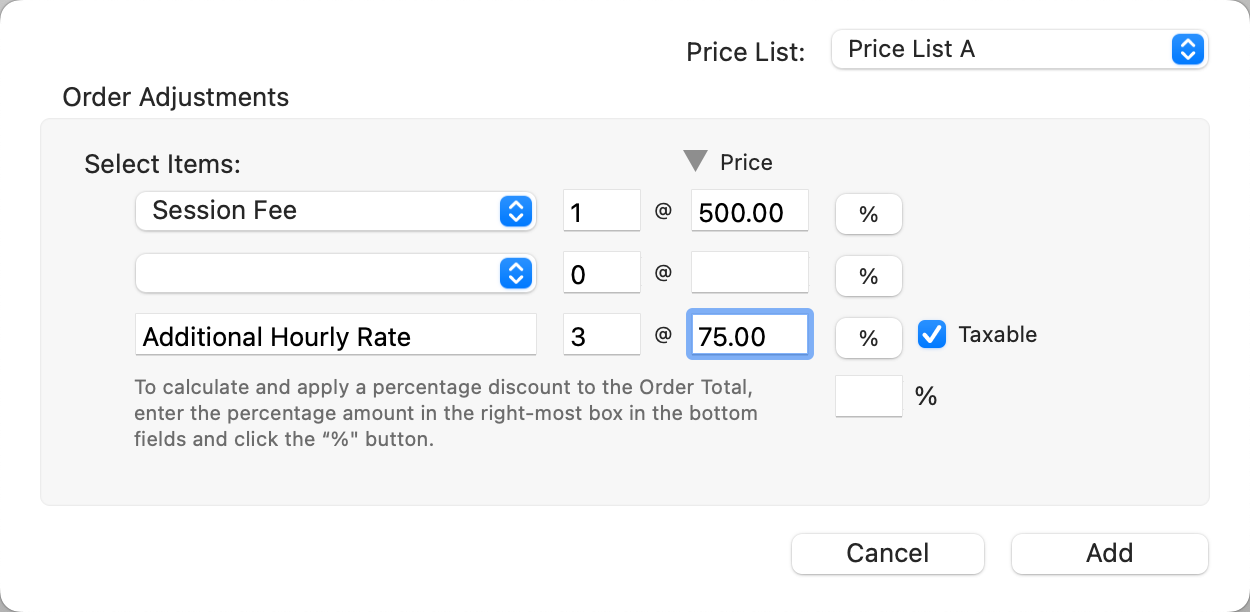
- If you want to create a unique order adjustment, use the bottom row and manually type in a description, quantity, and price. This line can also be used to apply a discount.
- Click the Add button to add the Order Adjustment(s) to the order.
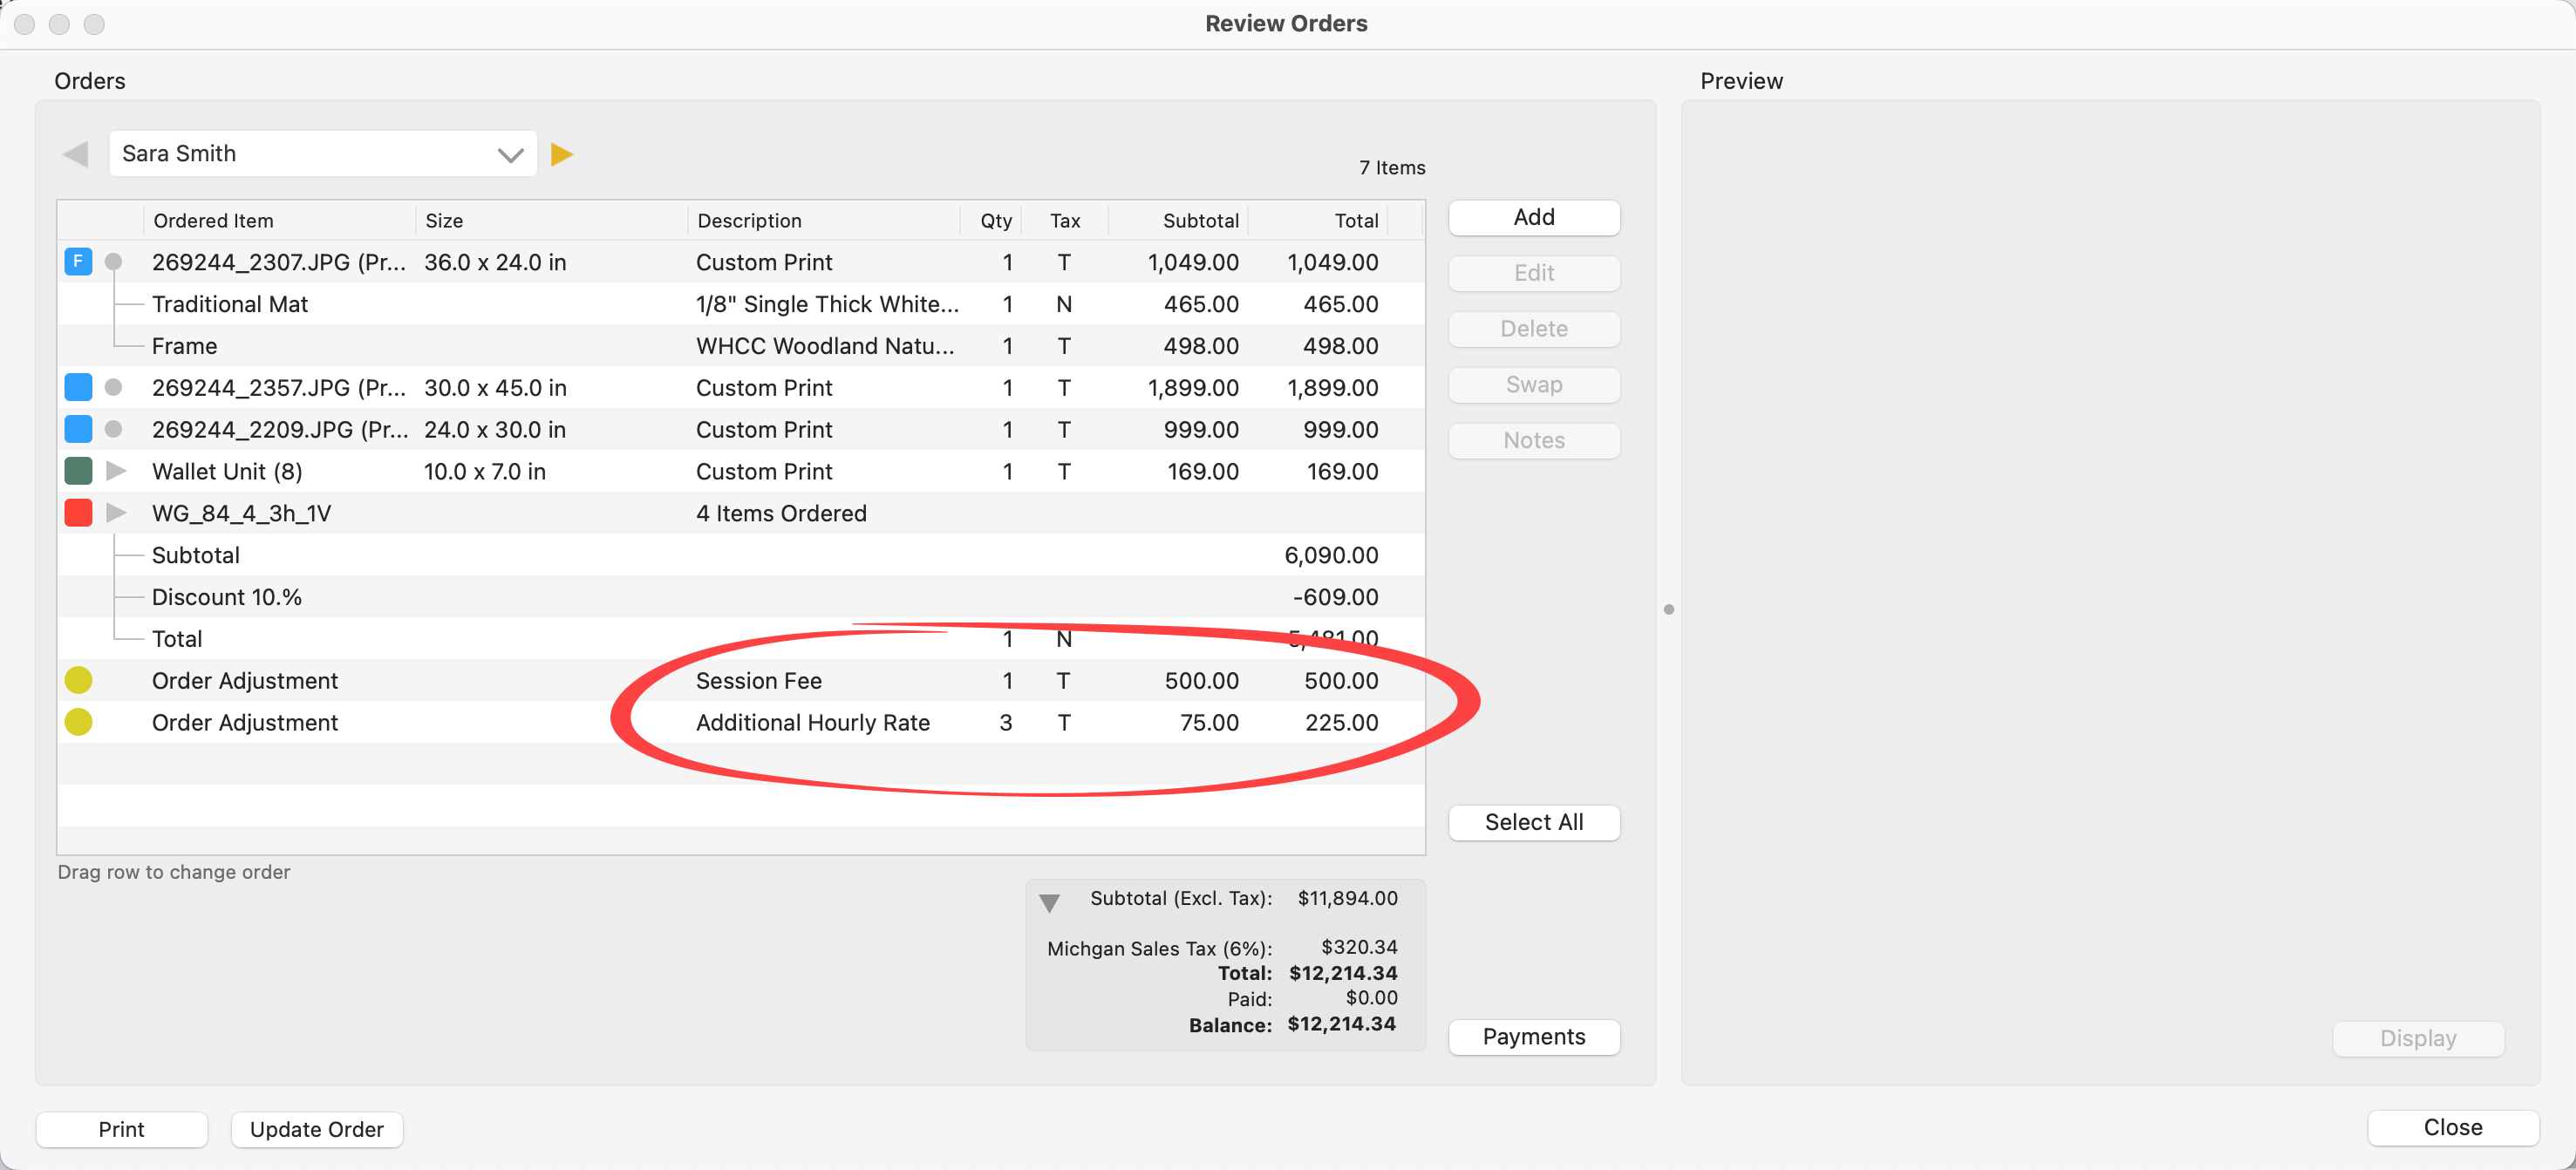
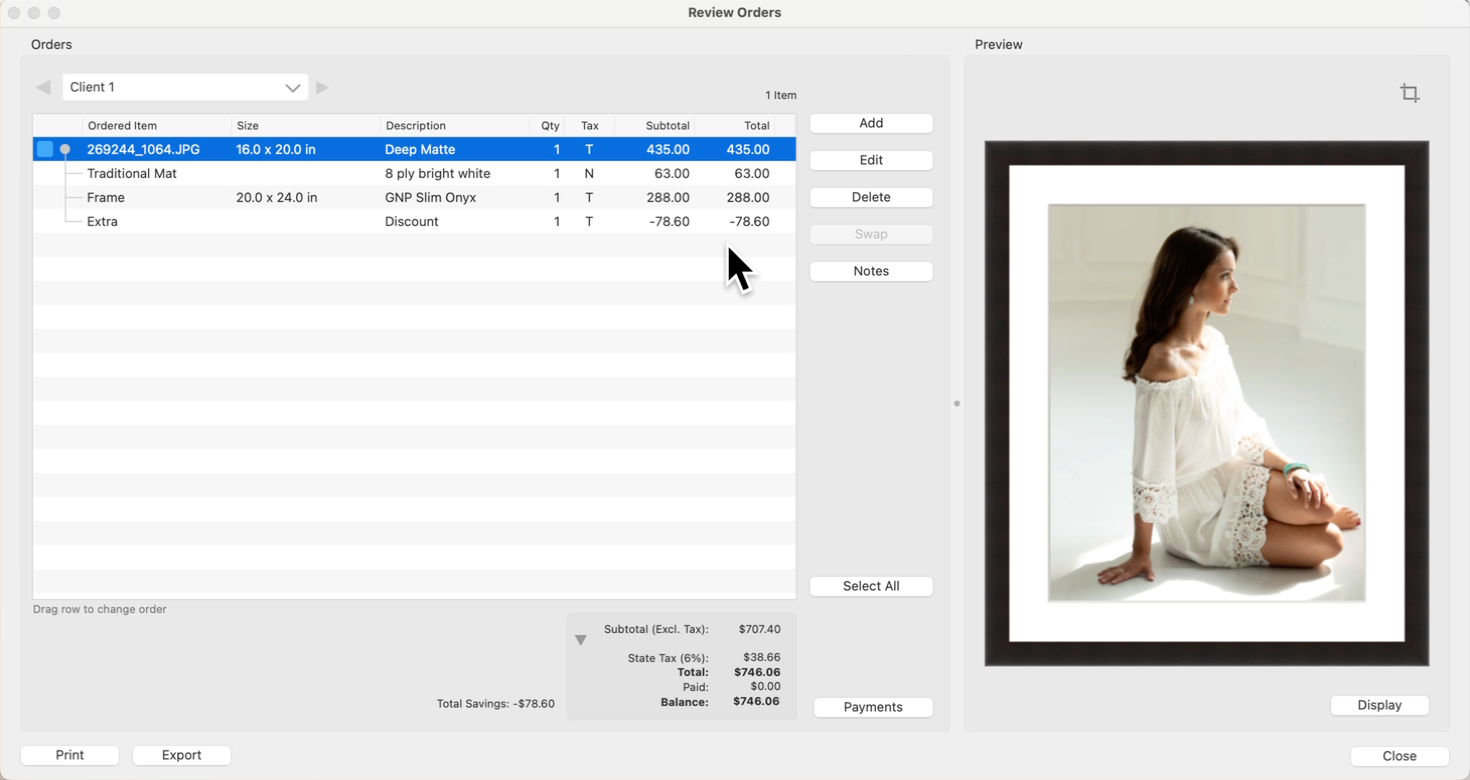
- After applying order adjustments, they will appear as line items in the Review Order window.
You have the ability to automatically add an order adjustment to each new order by default. This is done in the Product & Pricing Manager. When creating an Order Adjustment, be sure to check the box "Automatically Add to New Orders." This can be especially useful for Order Adjustments such as "Session Fee," Order Handling Fee," or "CC Processing Fee." Back in the Order Adjustments panel, a shopping cart tag ![]() will appear next to the line item.
will appear next to the line item.

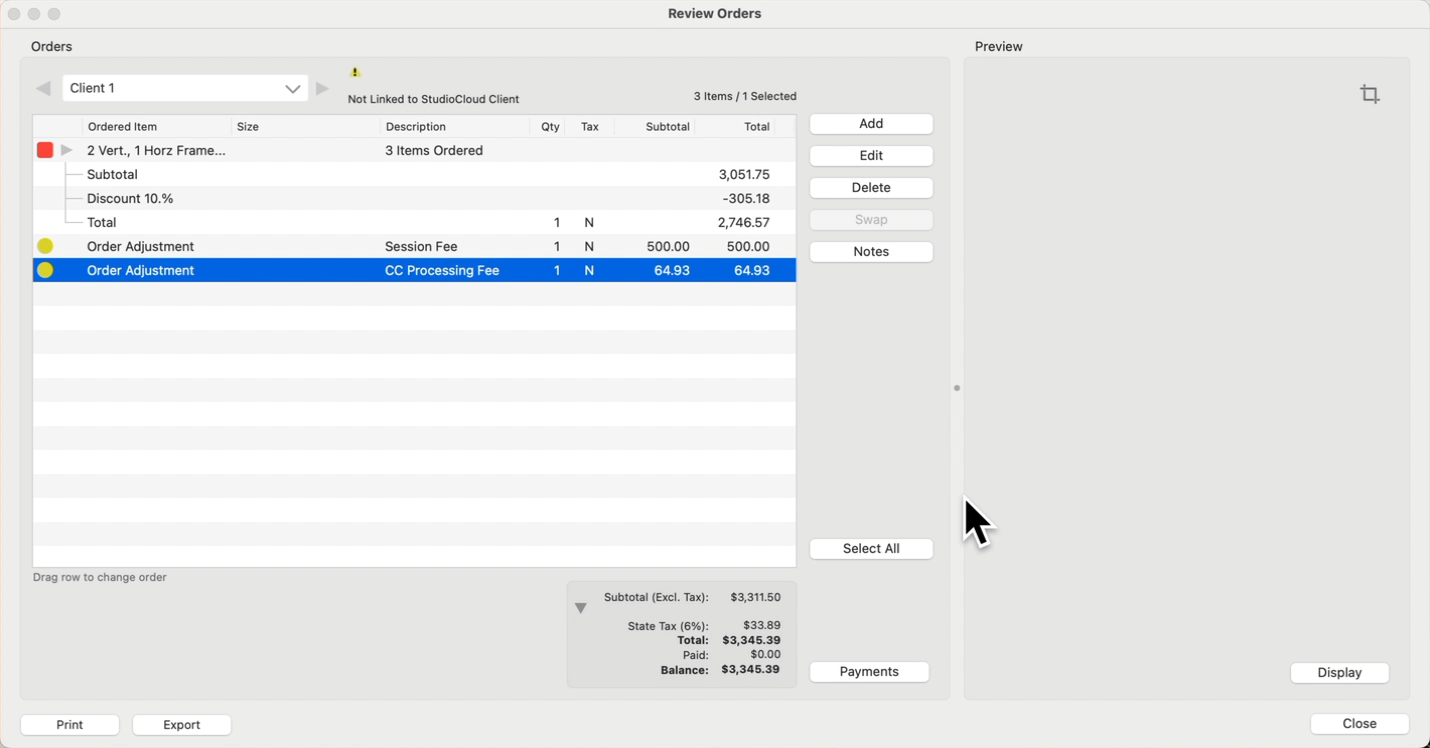
If you charge credit card processing fees, you can add this as an automatic order adjustment on new orders. This will serve as a reminder to charge the appropriate fee. There is no need to assign a price in the Product & Pricing Manager, as it will be based on the total order cost.
- Set up your CC Processing Fee as an order adjustment in the Product & Pricing Manager. Be sure to check the "Automatically Add to New Orders" box. Do not assign a price.
- Once the order has been completed, open the Review Order window.
- Edit the "CC Processing Fee" line item.
- Type in the percentage charged by your credit card processor in the % box at the bottom of the dialog.
- Hold the OptionAlt key while clicking the % button next to "CC Processing Fee."
- This action will ADD a dollar value to the specific line item, calculated as a percentage of the total order amount.
- Click Save.
- From the Review Order window, select the product you wish to apply a discount to.
- Click the Edit button. *Alternatively, you could have ordered this product as a Custom Product.
- At the bottom of the Edit Order dialog, type in a percentage in the box next to the % sign.
- Click the % button to calculate the percentage dollar value.
- The line item description will automatically appear as "discount." You can manually change this.
- Instead of a percentage discount, you have the option of manually typing in a dollar amount (in this case, do not use the % button).
- Click the Save button to apply the discount.
The percentage discount will be applied to all items attached to the product. If there is a frame or mat applied, it will also be discounted.
If you change the word “Discount” to “Customer Loyalty” or another term, ProSelect will remember the last used entry and add it the next time.
- From the Review Order window, click on the Add button.
- Select "New Order Adjustment" from the list.

- At the very bottom of the dialog, in the box next to the %, type in the percentage to discount (in this example, 10).
- Click on the % button in the line above. The dollar value of that percentage will be displayed.
- The description "Discount" will automatically appear. You can manually change this if you wish.
- Alternatively, you can manually enter a discount amount instead of a percentage (do not use the % button in this case).
- Click the Add button to apply the discount.
- The total discount will appear in the Price column (in this example, $420.90).
- Once the discount has been applied, it shows up as an Order Adjustment in the Review Order window. The "Total Savings" is listed next to the Balance.
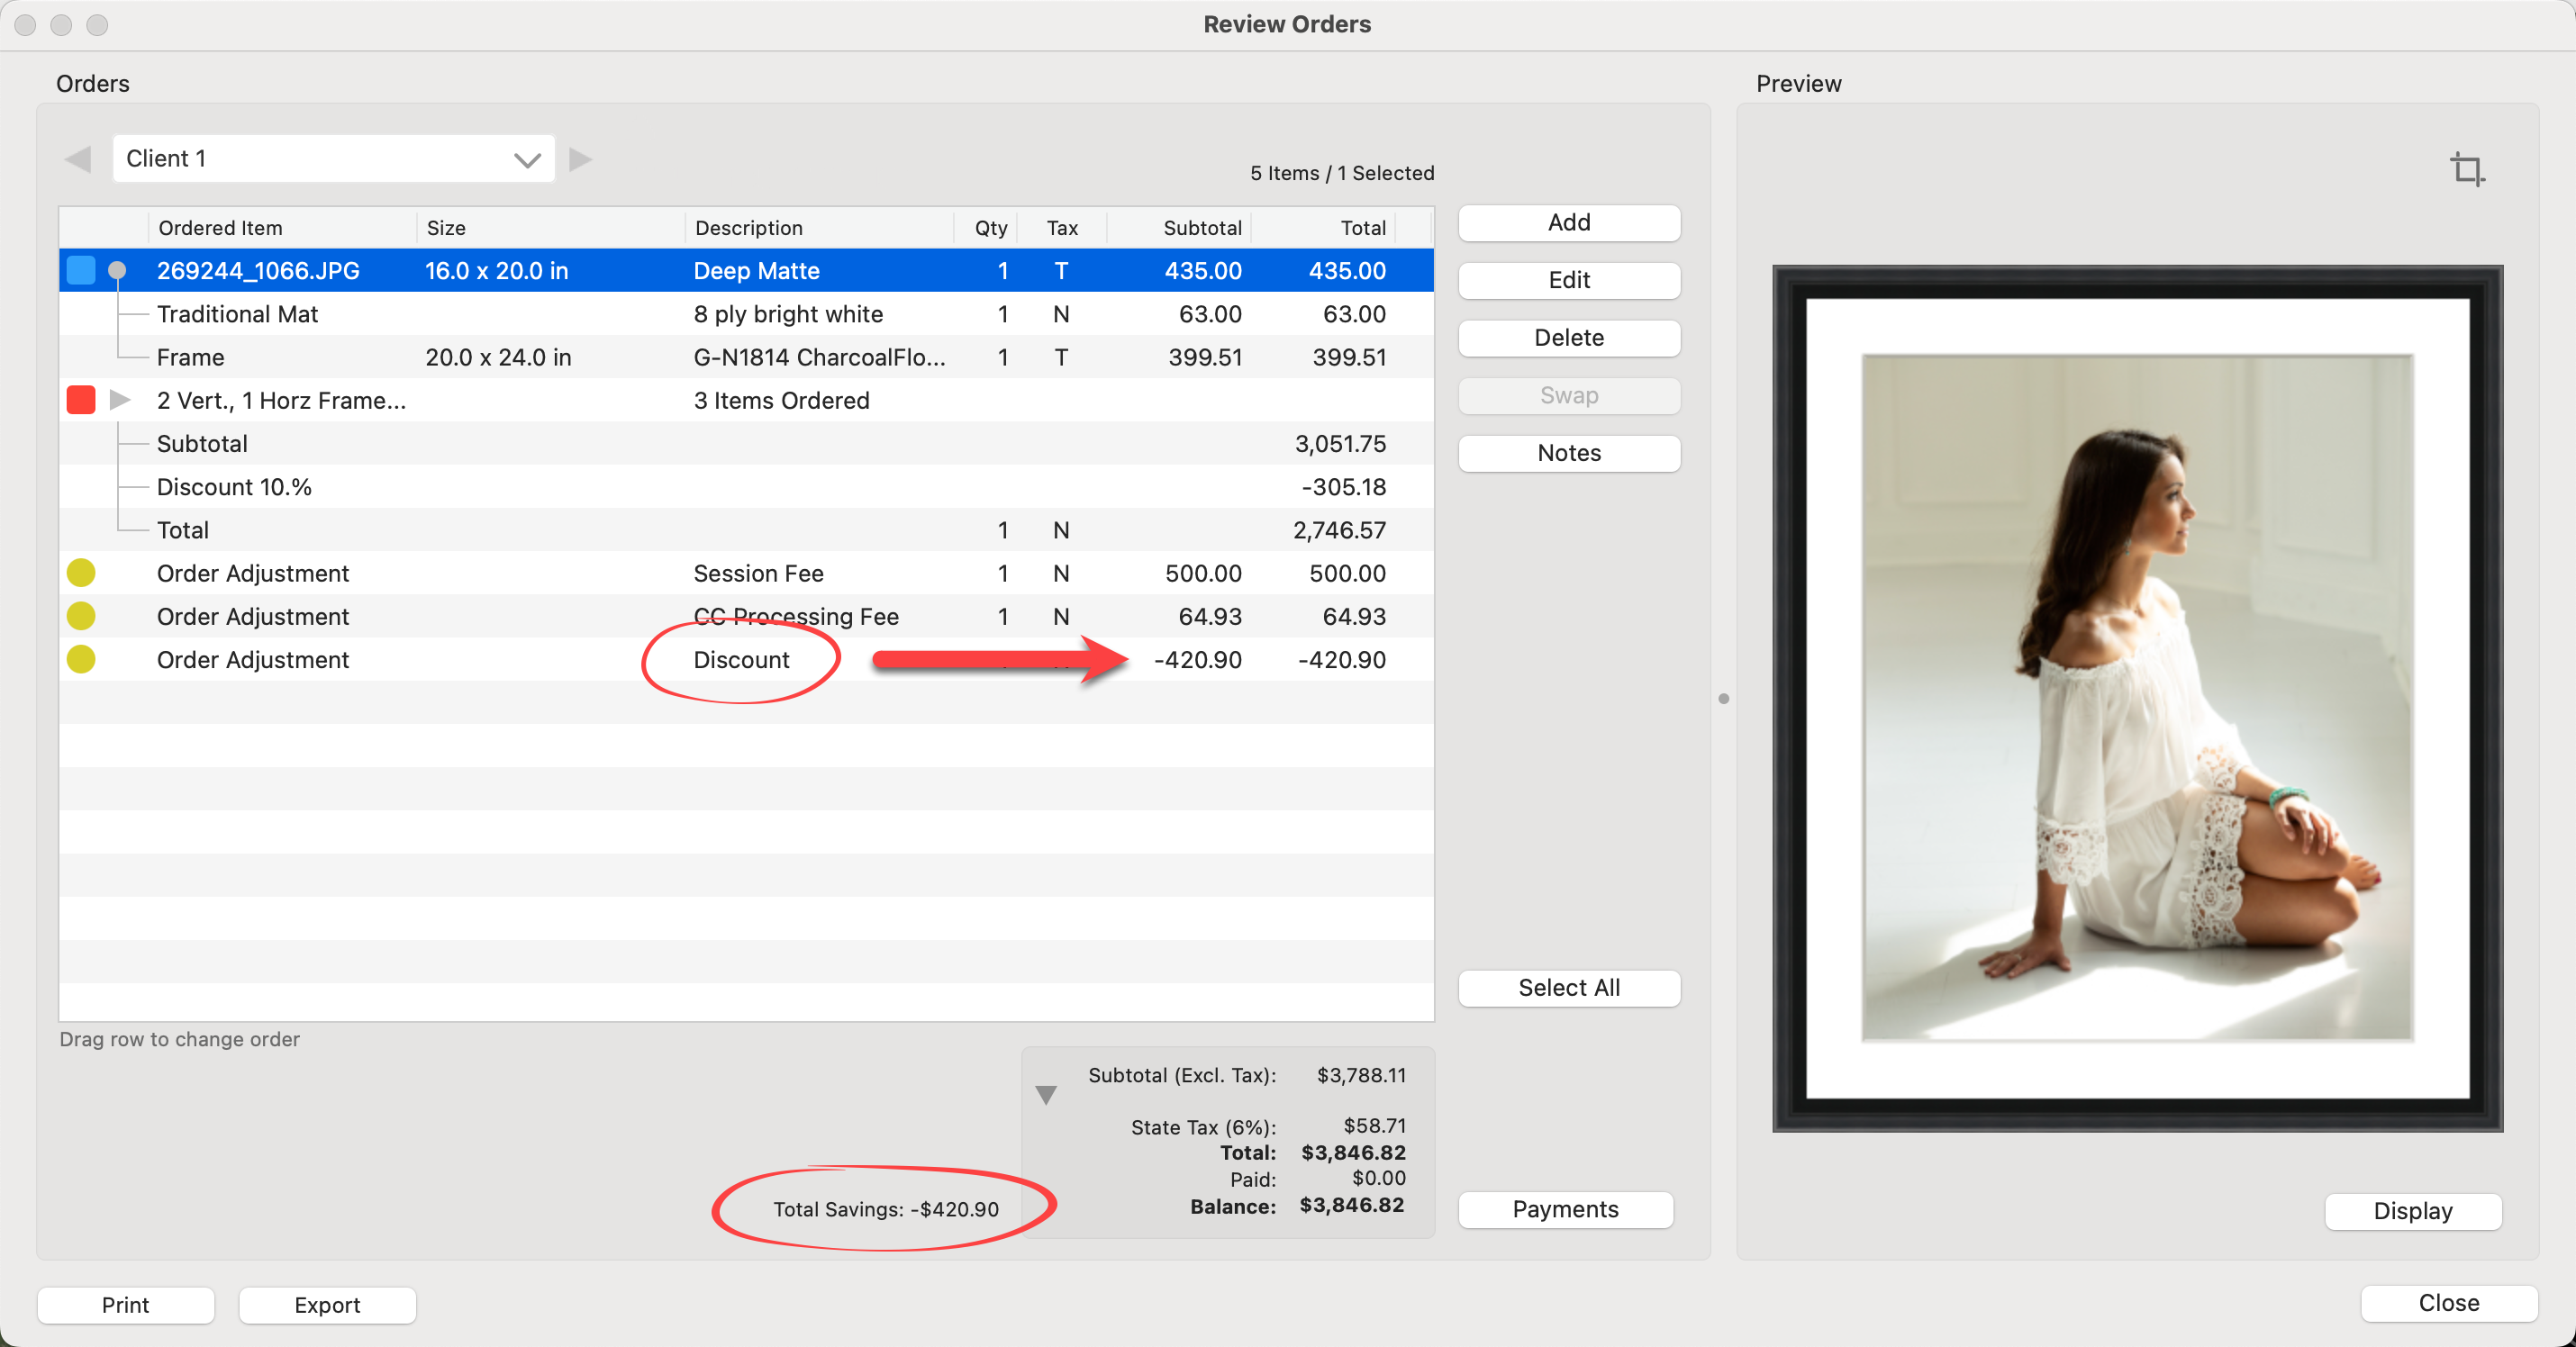
If you change the word “Discount” to “Customer Loyalty” or another term, ProSelect will remember the last used entry and add it the next time.
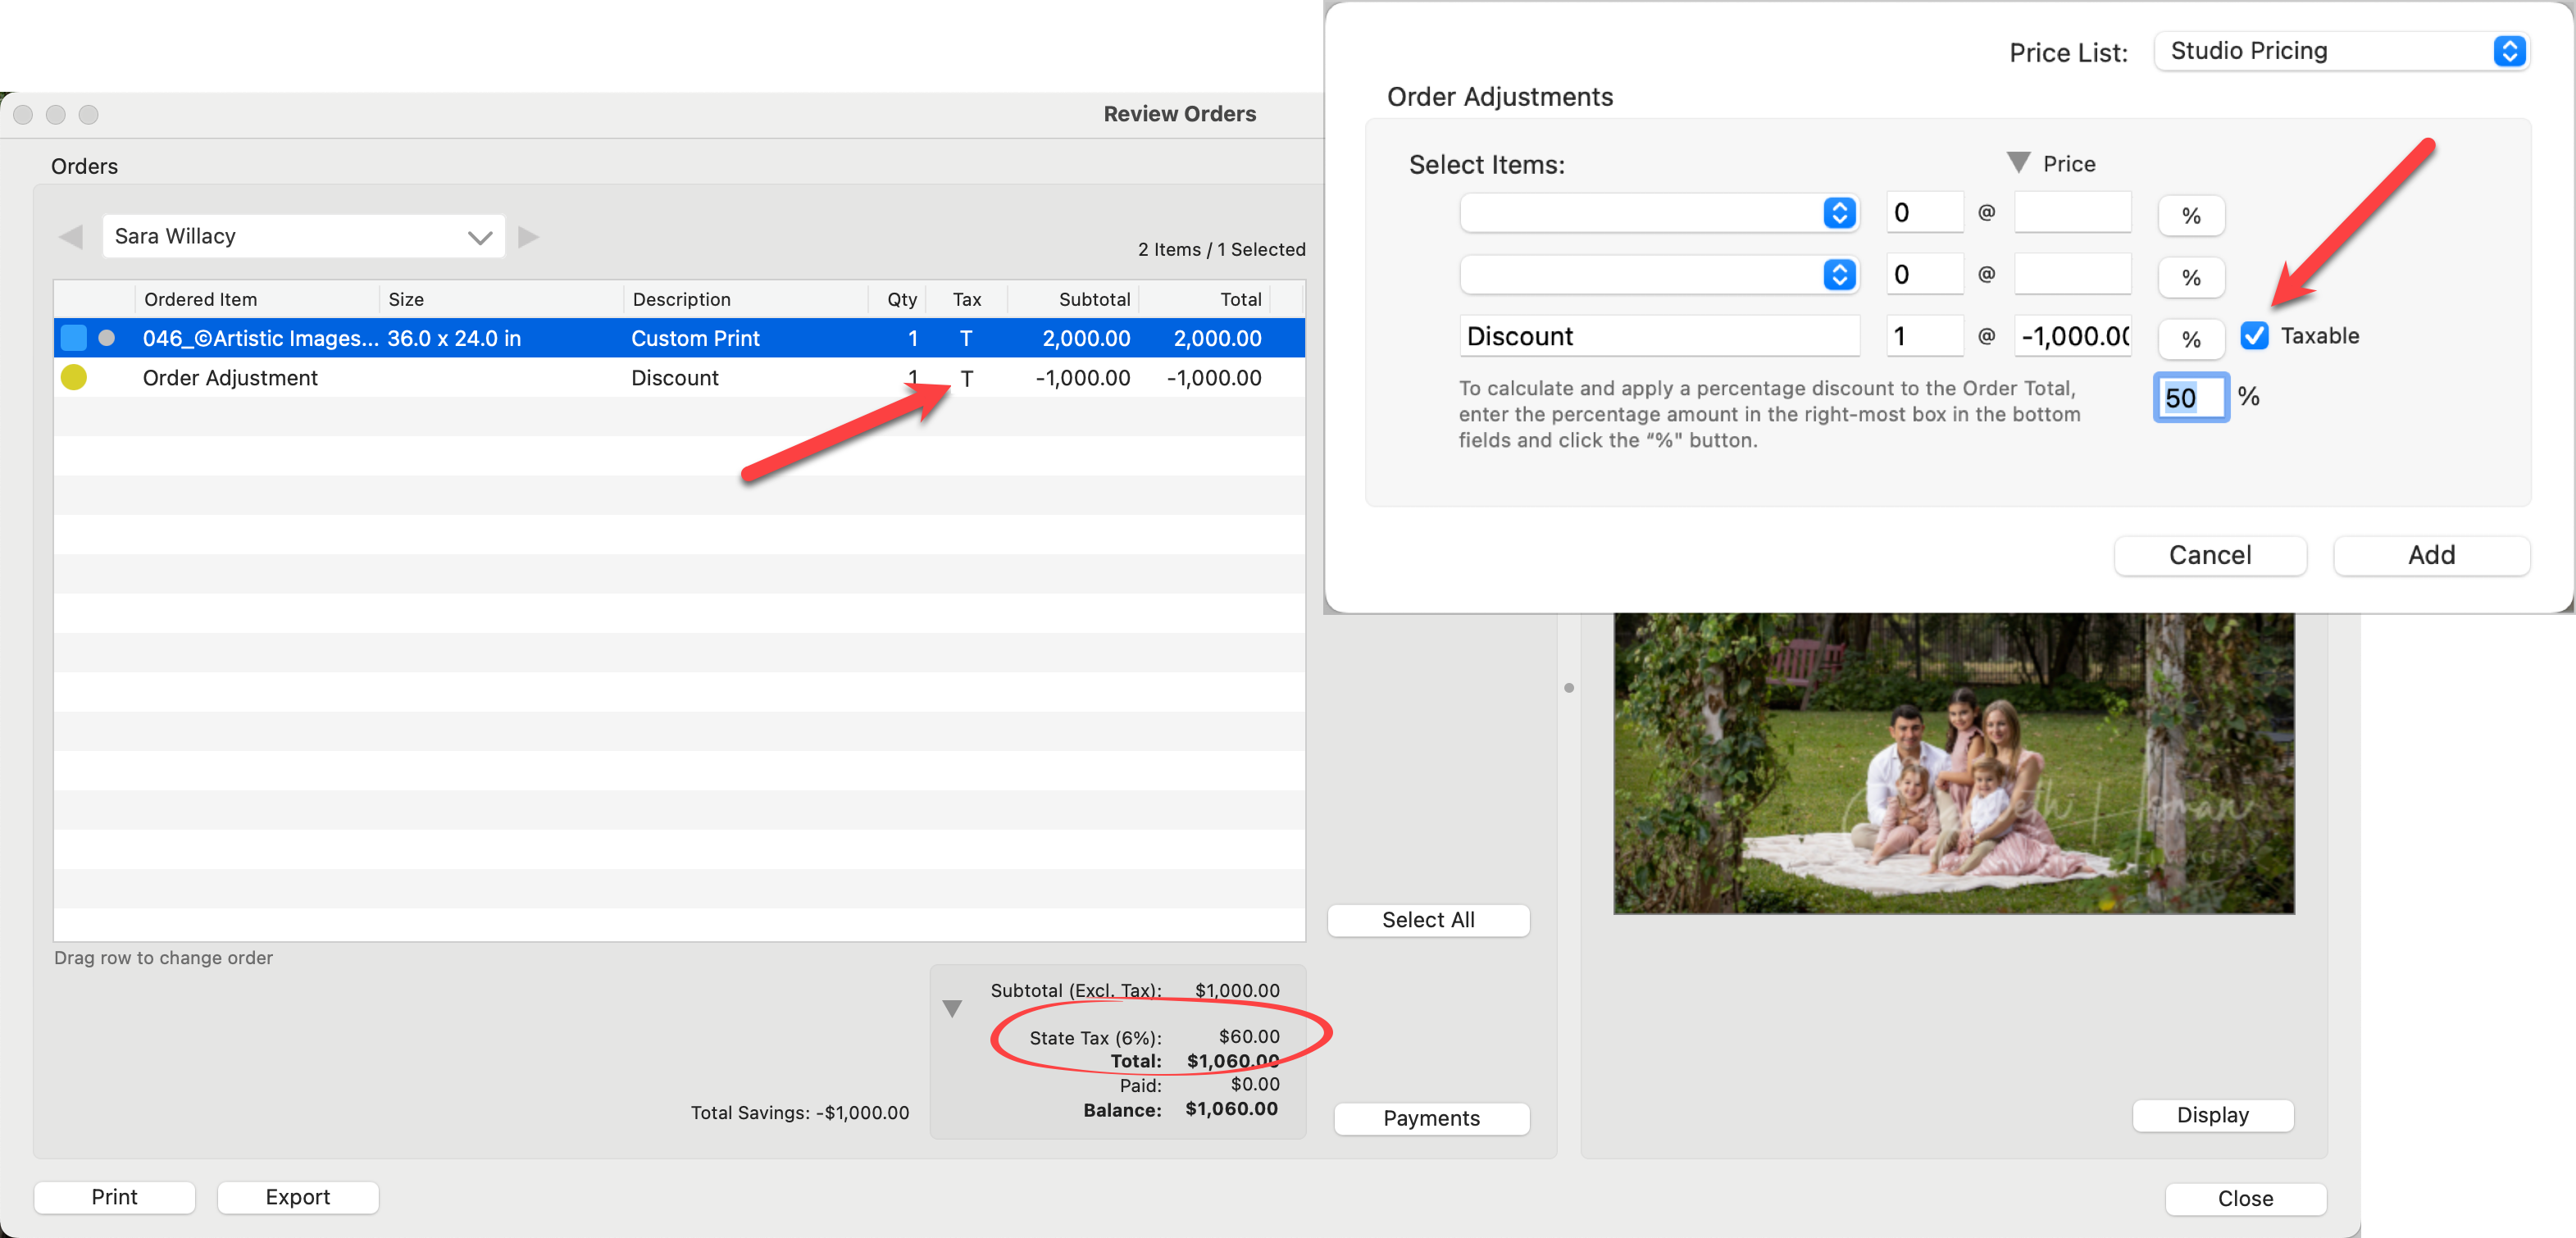
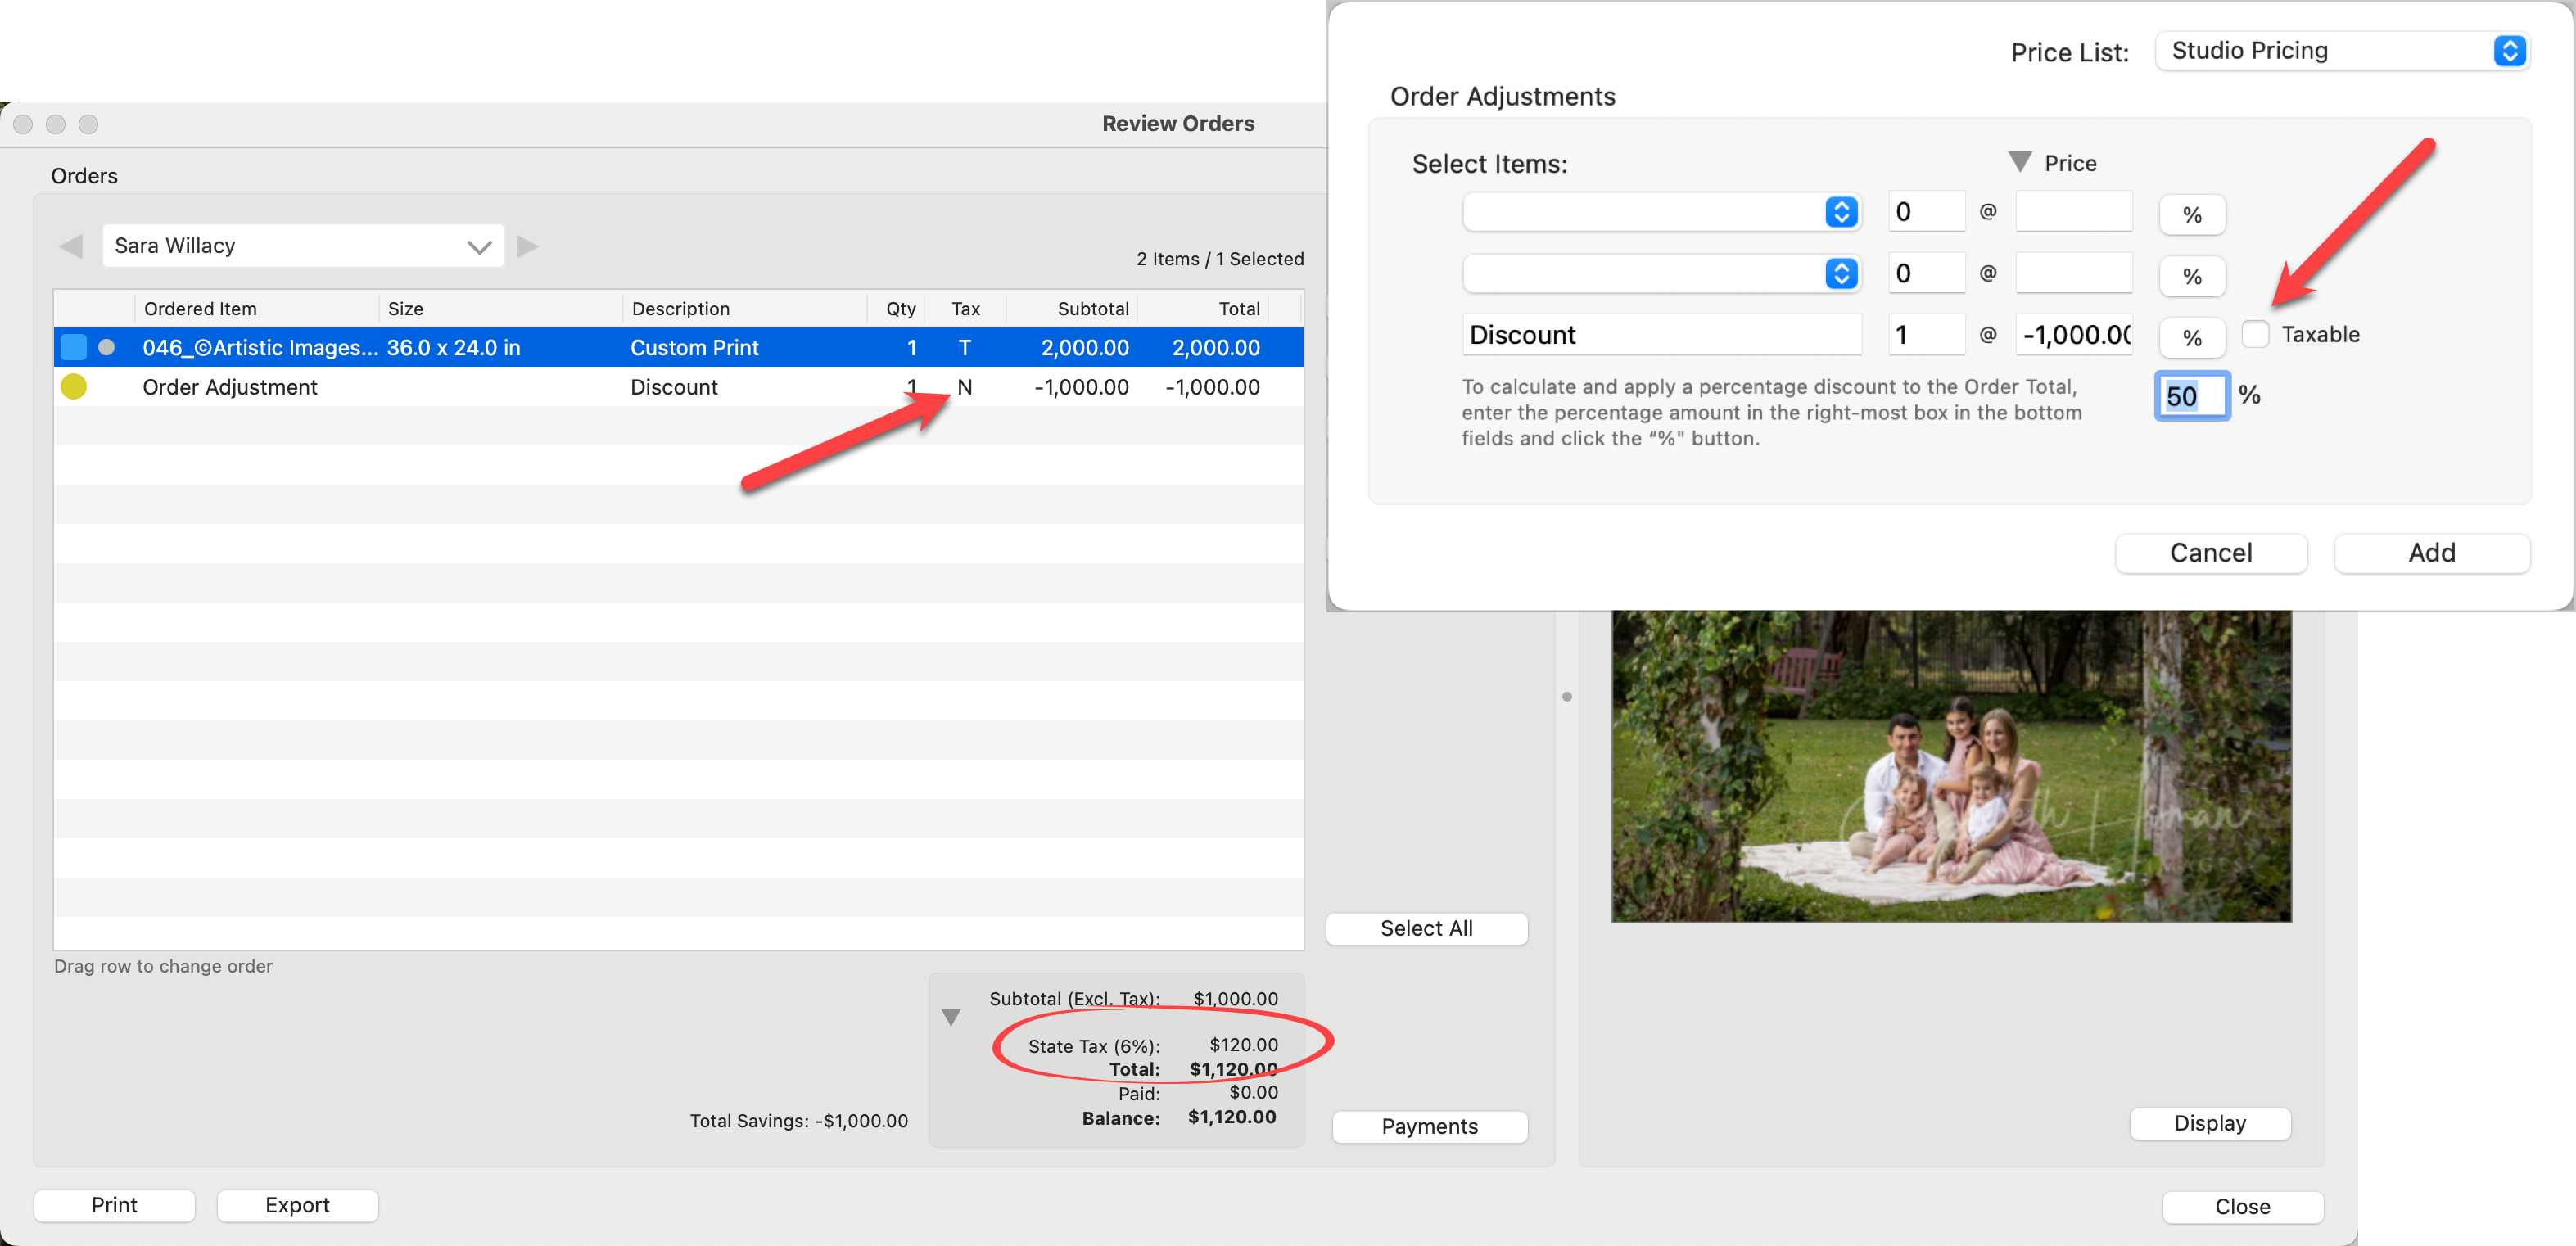
When setting up taxes in ProSelect, if you enable "Selected Price List Items" in the Tax Setup, you’ll see a Taxable flag (T) when adding a discount. This setting can be confusing because it suggests a discount can also be taxed, which is a bit counterintuitive. When the tax setup is for “All Price List items”, the taxes are based on the final sale amount. There are two options available when offering discounts. For the majority of users, option 2 is the most common.
- Taxes on the Prediscount Amount:
- In some jurisdictions, taxes are calculated based on the original price of the product before any discounts are applied.
- In this case, ensure the discount is set to "Non-Taxable" (i.e., the "Taxable" option is turned off). This way, the discount won't affect the taxable amount, and taxes are collected on the full, prediscount price.
- In the example below, despite the 50% discount, tax is being charged on the full $2,000 amount - which equals $120.00.
- Taxes on the Final Sale Amount:
- In other jurisdictions, taxes are applied to the final sale price after the discount is applied.
- In this case, set the discount to "Taxable." Since the discount reduces the total amount, the taxable amount will be based on the final, discounted price. In this case, the tax on the discount (which is a negative value) is subtracted from the total.
- In the example below, tax is being charged on the discounted final price of $1,000 - which equals $60.00.