Managing Product Templates
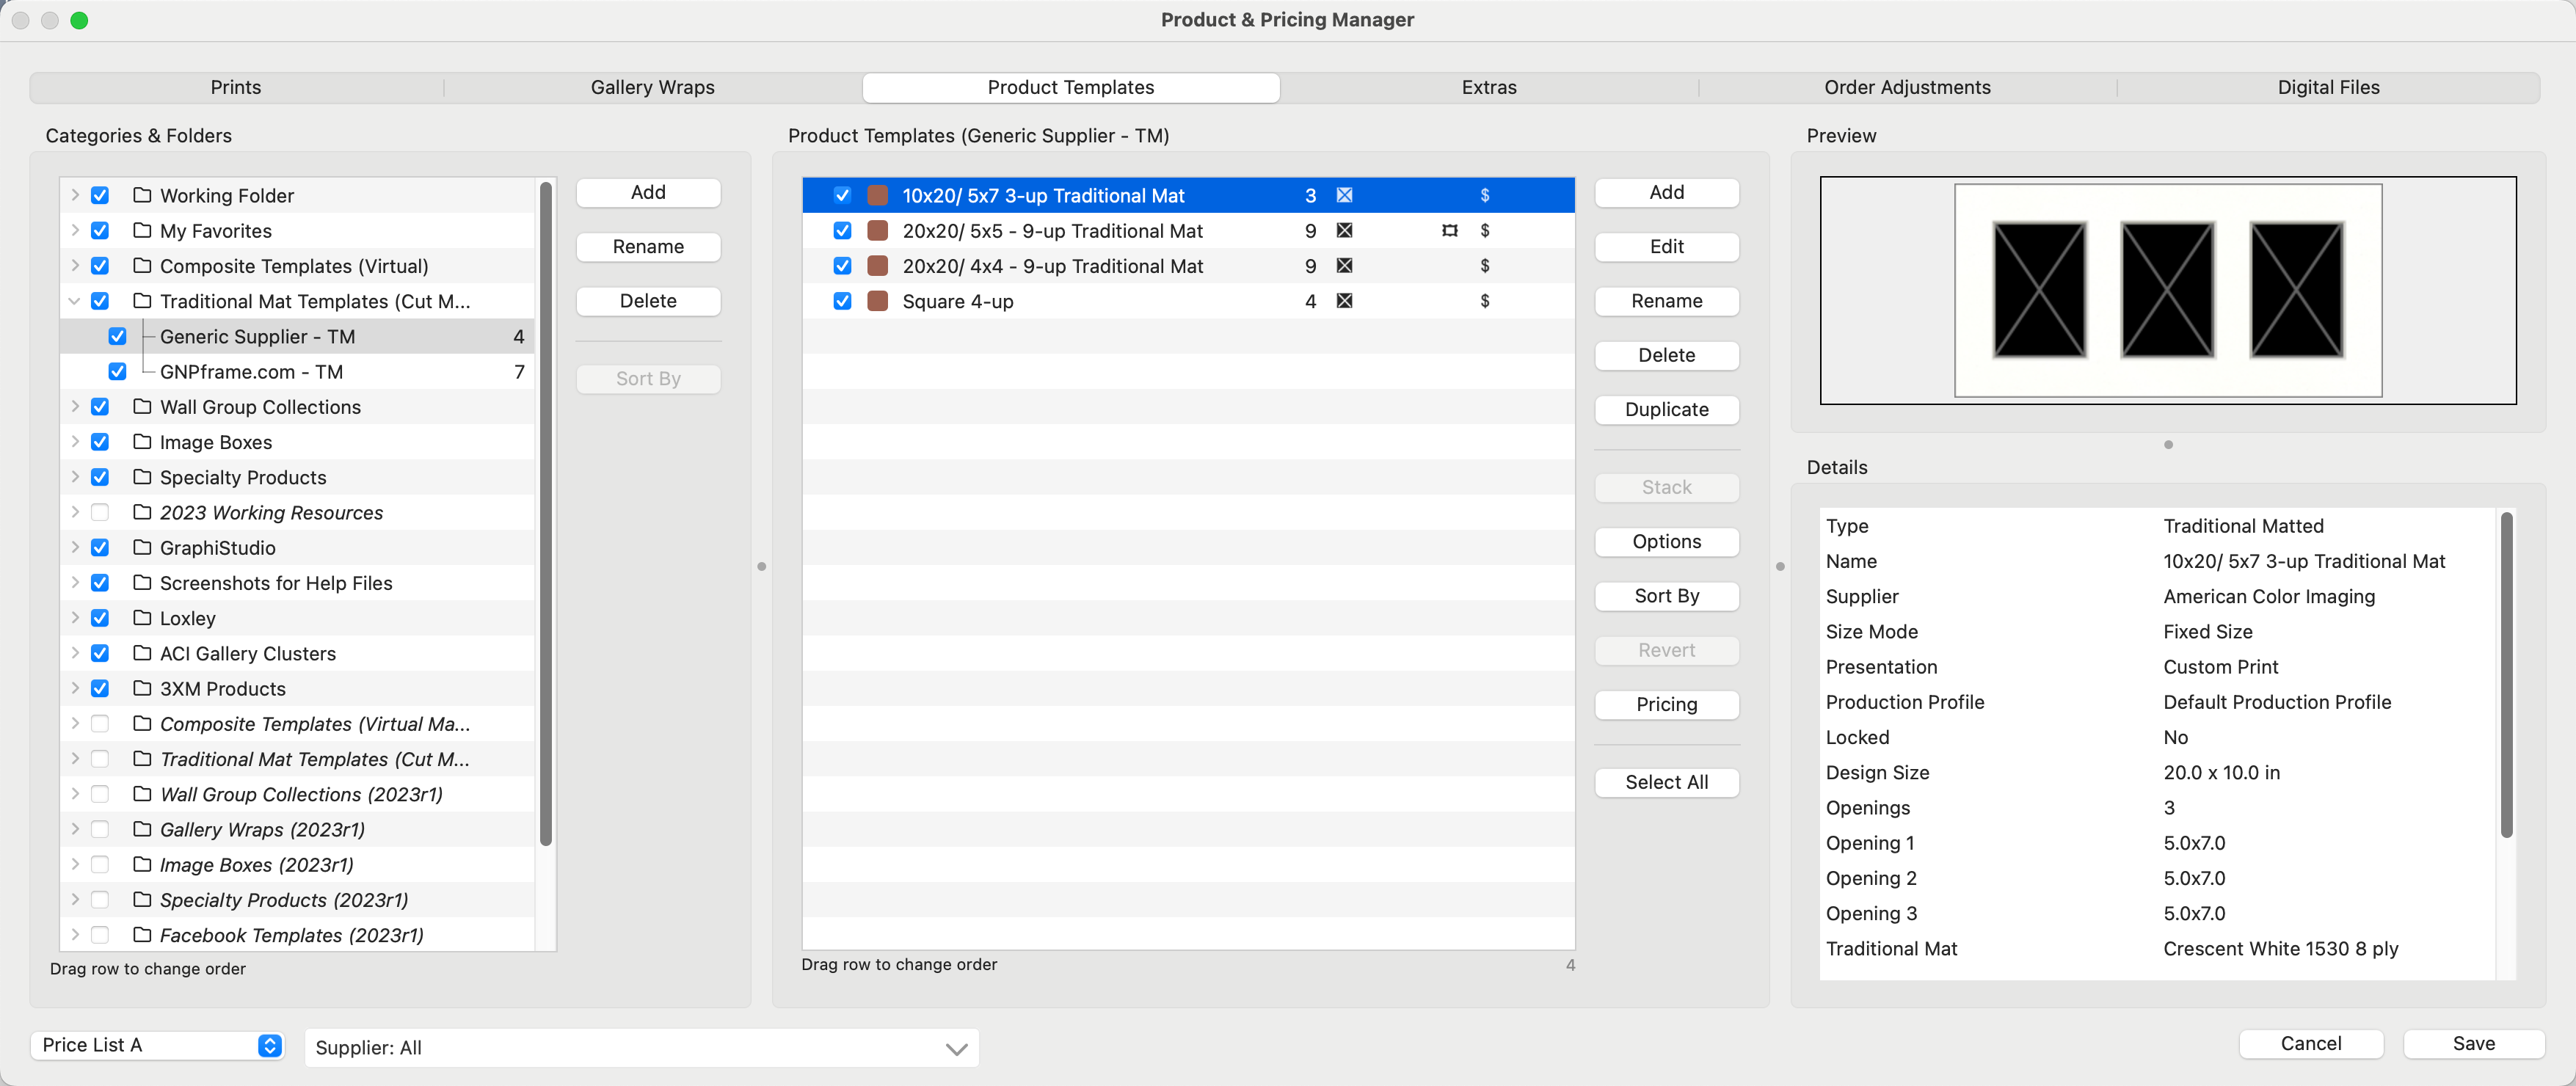
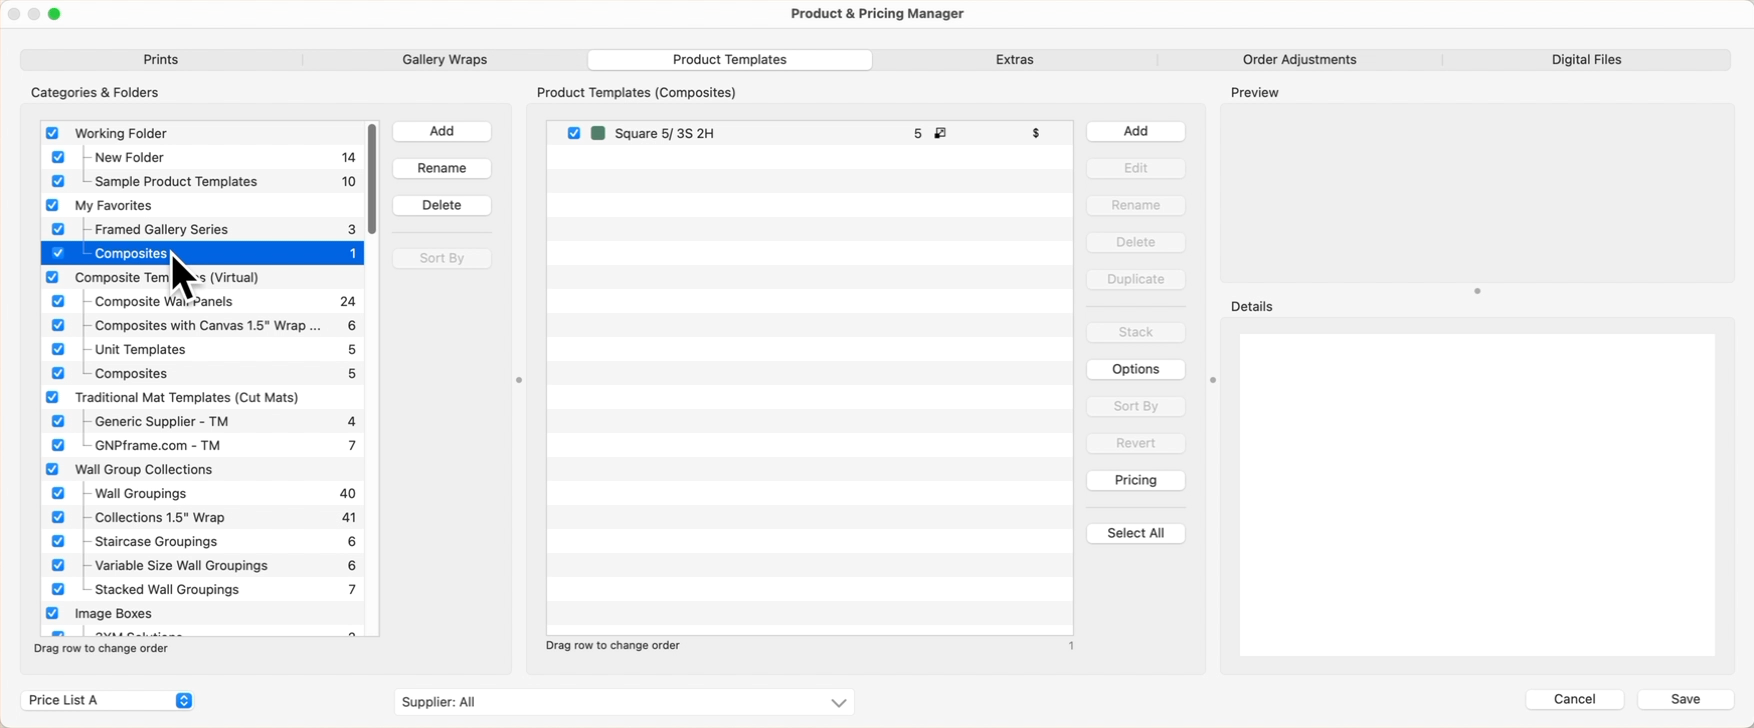
The layout for Product Templates looks a little different than Prints, Gallery Wraps, Extras, Order Adjustments, and Digital Files. Product Templates have:
- A direct link to the Product Editor (by clicking the Edit button in the Product Templates panel or double-clicking on the product template).
- A Details Panel that lists specific attributes about the product template.
- A Preview Panel.
- The Pricing button will access the pricing dialog.
The size of each section within the Product Templates working area can be adjusted.
- Drag the bottom corner of the window to create a larger working area.
- Click and drag the gray dots midway between each section.
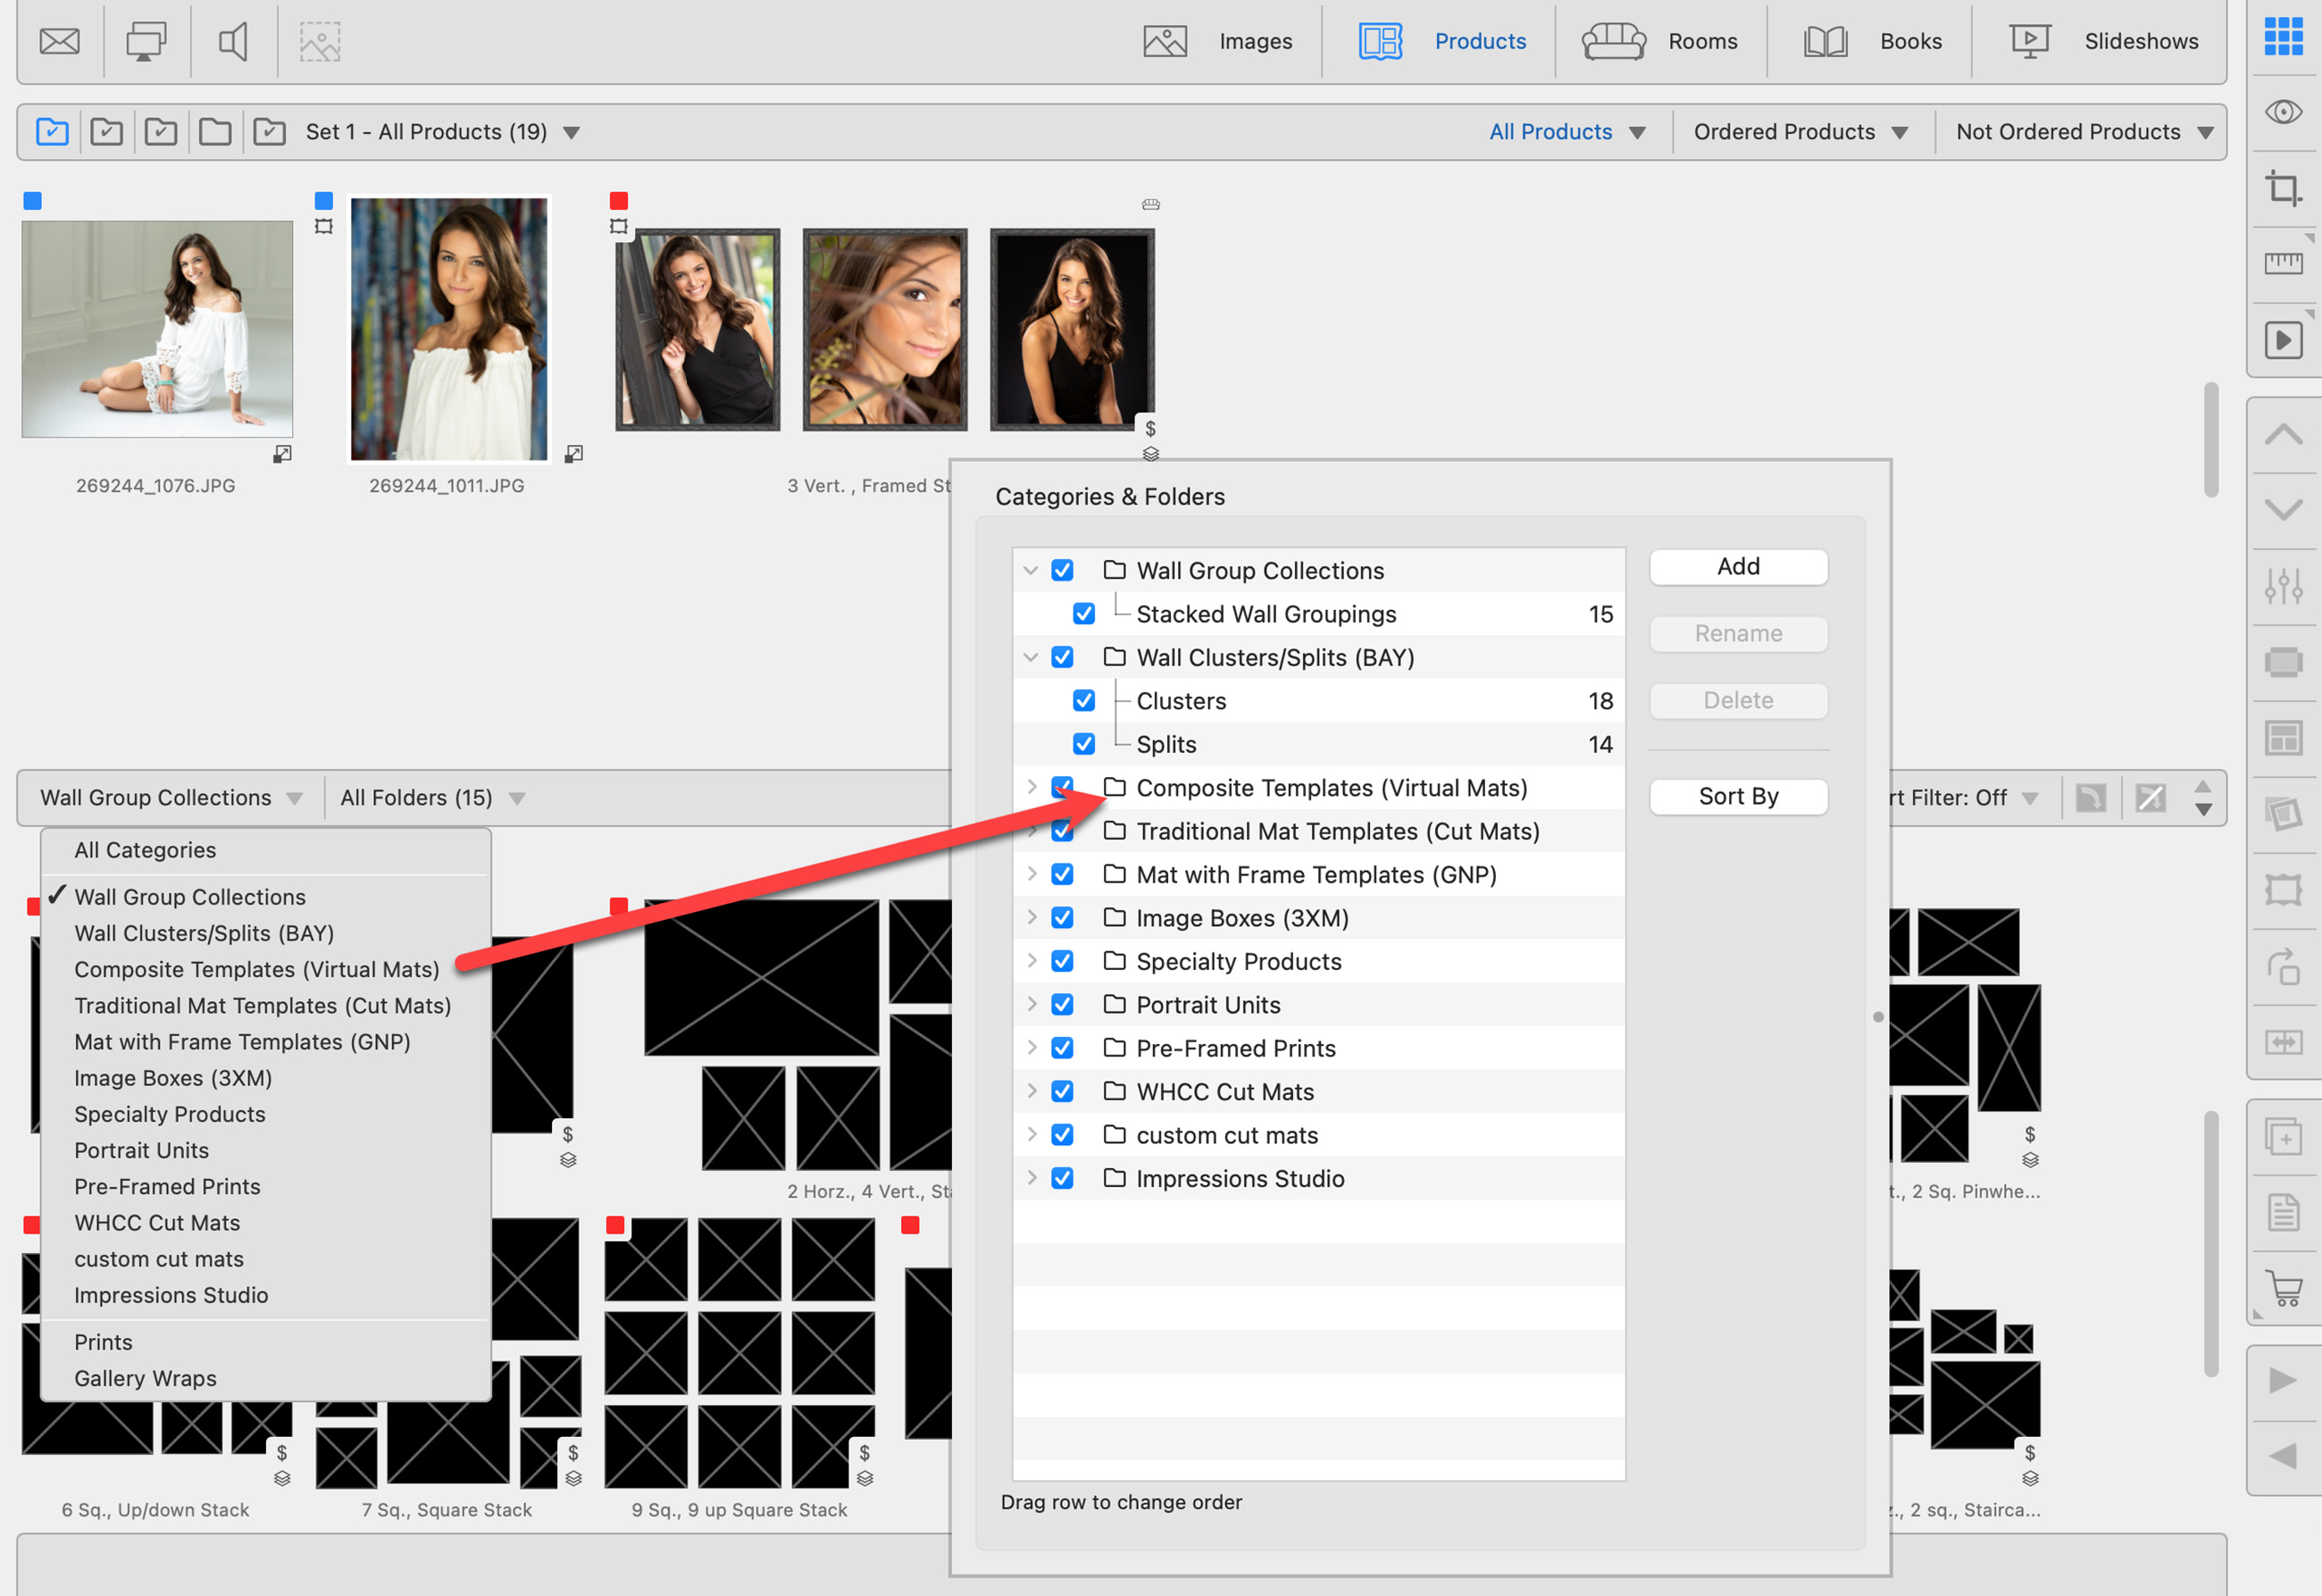
The Categories and Folders section allows you to group together certain product types. You can create folders and organize your products however you want. The Category comes first, then you can create folders within each category. The number of products in each folder is listed on the right-hand side of the folder name.

 Use the drop-down arrow to reveal the folders within a category.
 The checkbox on the left-hand side indicates that the folders are "turned on" and available in the currently selected price list. Uncheck any product folders you do not wish to use.
- To add a new Category or Folder, click the Add button. The new item will appear at the bottom of the list by default. Click and drag it to where you want it. You can also drag folders between categories.
- You can rename a Folder by selecting it, and then clicking Rename.
- You can delete a Category or Folder by selecting it, and then clicking Delete.
- Use the Sort By button to sort your folders either by Name, or Folder Count.
- If you want to change the order of the Categories or Folders, you can select and drag them to where you want them.
- Uncheck the boxes if you are not using a particular folder or category.
The Order of Products
The order of your products in the Categories and Folders panel is the order in which they appear in the Template Resource area. Unchecked folders will not appear.
Click on a folder to expand out all of the product templates that have been placed in that folder.
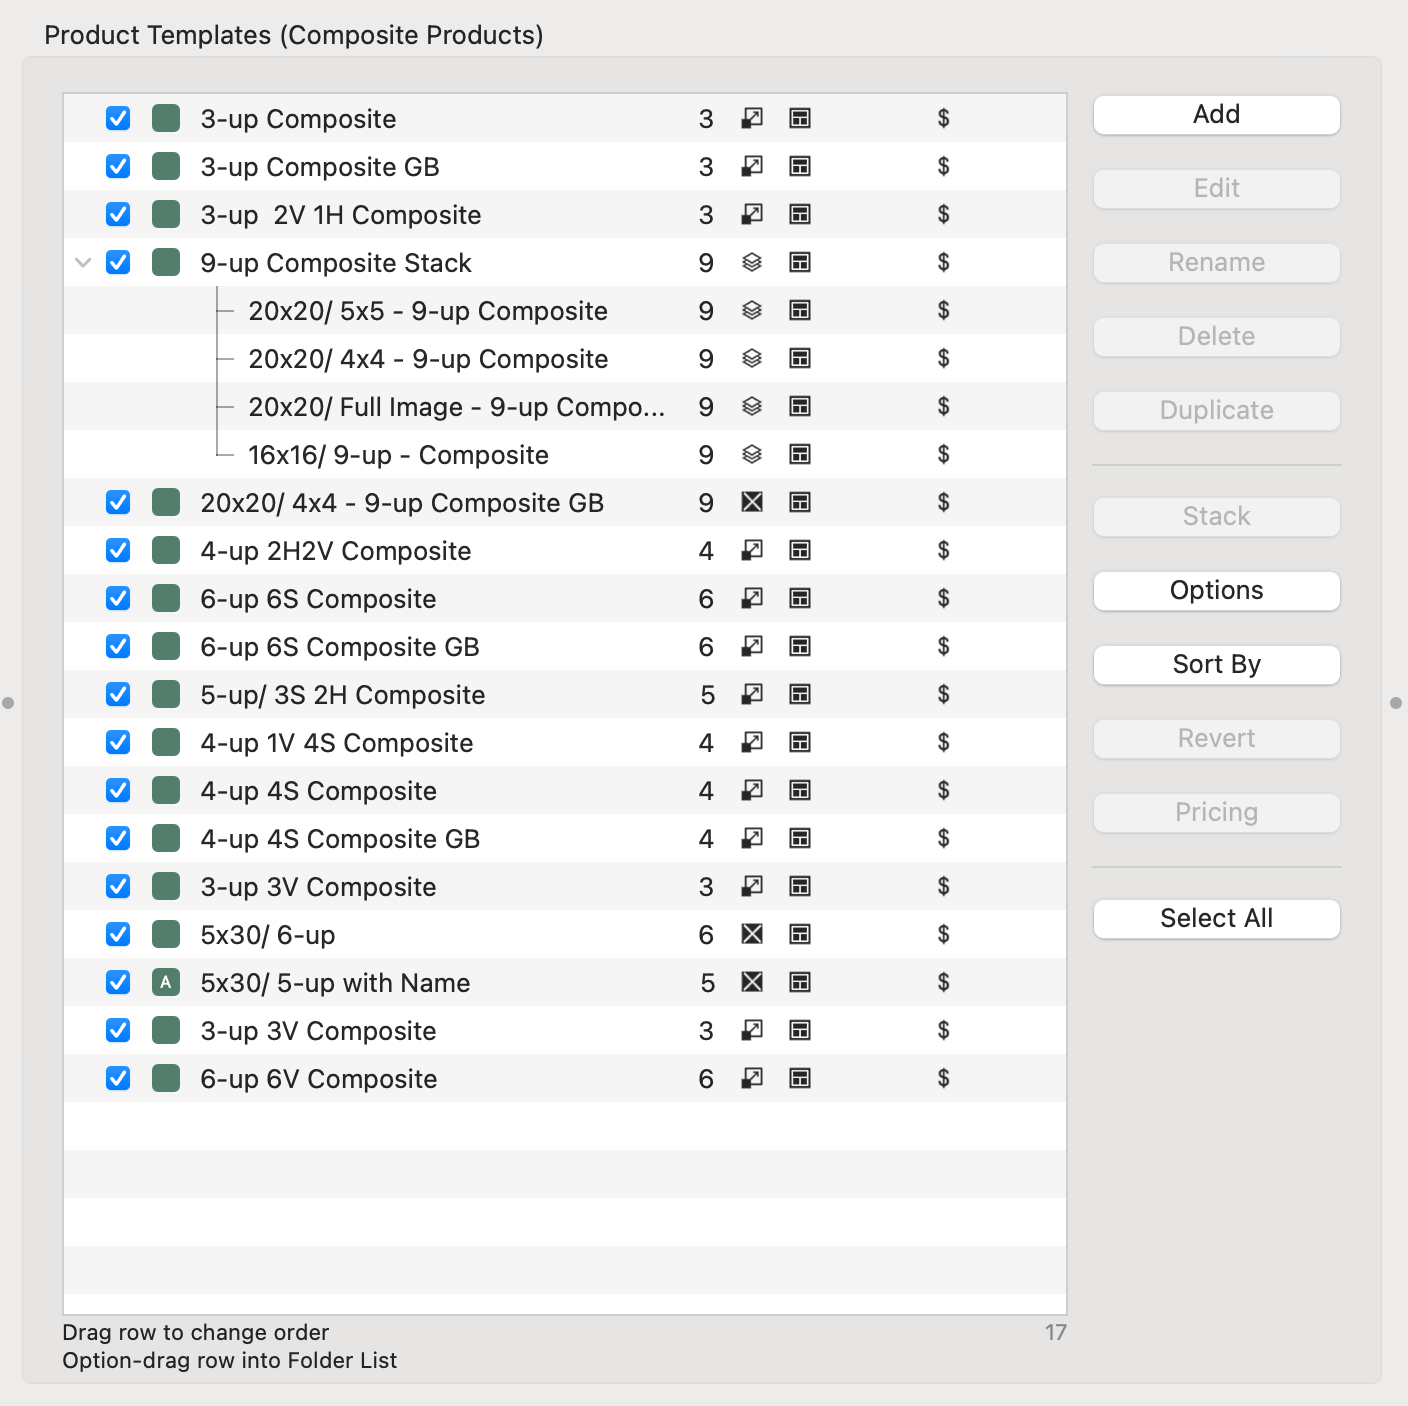
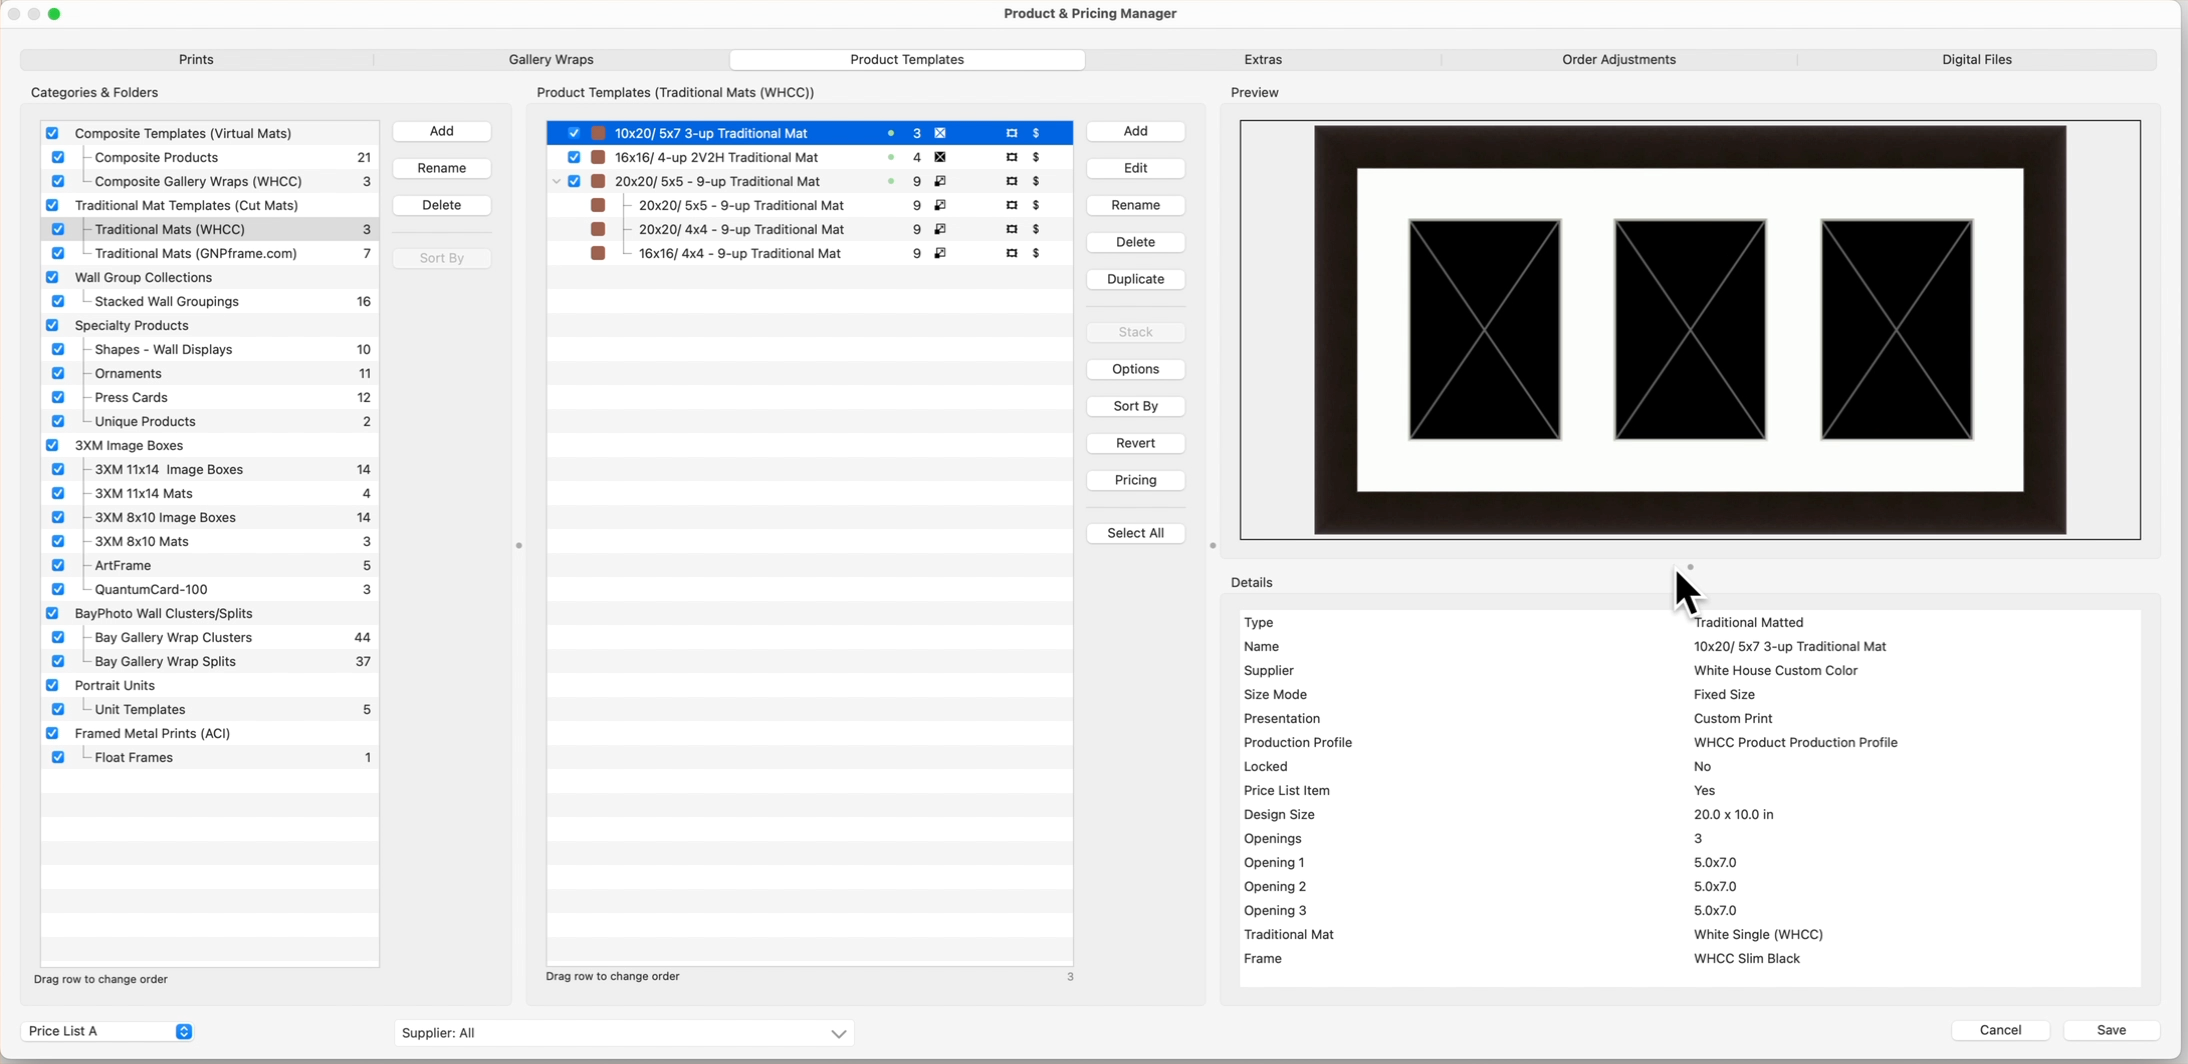
The following bullet point list explains what appears in each column from left to right:
 Drop-Down Arrow: This allows you to expand or collapse items. The drop-down arrows only appear when stacked sizing is being used.
- : This checkbox indicates that the product is "turned on" and available in the current price list. Uncheck this box if you do not want a particular product to appear.
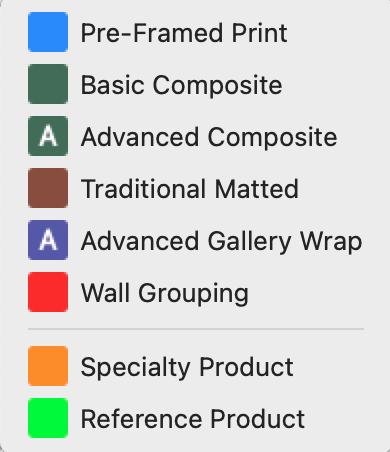
- Color Box: This is associated with the product type.
- Template Name: The template name is listed here. Often the name includes the size, number of openings, and template type.
 Green Dot: A green dot will appear when the product template has been modified, but changes have not yet been saved. You have the option to use the "Revert" button if a green dot appears.
- Number: This is the number of openings in the template.
 Fixed Size: This tag appears when the product is set to be a fixed size.
 Dynamic Size: This tag appears when the product is set to be dynamically sized.
 Stacked: This tag appears when your product has stacked sizing and pricing.
 Virtual Style: This tag appears when a virtual style has been assigned to the product. The name of the virtual style will appear if you move your mouse over the tag.
 Traditional Mat: This tag appears when a traditional mat has been assigned to the product. The name of the traditional mat will appear if you move your mouse over the tag. If the mat tag is red, the applied mat is not available at that size from the supplier. Click on Frame and Mat Selection Tags to learn more.
 Frame: This tag appears when a frame has been assigned to the product. The name of the frame will appear if you move your mouse over the tag. If the frame tag is red, the applied frame is not available at that size from the supplier. Click on Frame and Mat Selection Tags to learn more.
 Price Item Setup: This tag appears when the product has a price attached to it.
  Lock: This particular product is from a Supplier Collection and cannot be modified (except for the price).
 Warning: Warnings appear to alert you if a mismatch has occurred with a Supplier. Click on Troubleshooting Suppliers for more information.
Double-click on the name of the template to open the Product Editor.
To move a Product Template into a different Folder, hold down the OptionAlt key when dragging. Drop the Product Template into the desired Folder.
- To create a new product template, click the Add button.
- A drop-down will appear. Choose the product type you would like to add.
- ProSelect will automatically launch the Product Editor.
- Create the new product template and save it.
- Once saved, the newly created product will appear at the bottom of the list. You can select and drag it to another position in the list.
Instead of creating a product template from scratch, you could duplicate a similar template, modify it, and save it as a new product template.
Edit
The Edit button will take you to the Product Editor. Once there, you can make changes to the template. Double-clicking on a template will also take you to the Product Editor. Please note: you cannot edit locked collections.
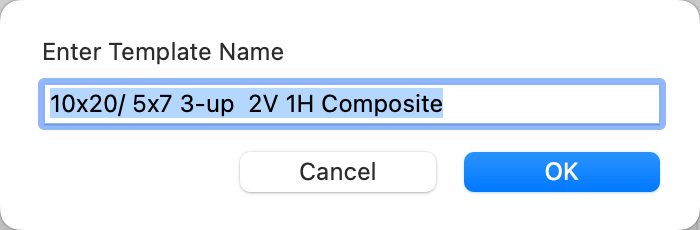
Rename
To rename the template, click on the Rename button. Once you have made changes, click OK.
Delete
You can delete a template by clicking the Delete button. A warning window will appear, click Yes to continue with the delete.
Hold the OptionAlt key down while clicking the Delete button. This will delete the template immediately without asking for confirmation first.
You can duplicate a product template by using the Duplicate button. This is commonly used if you want to change the Product Type.
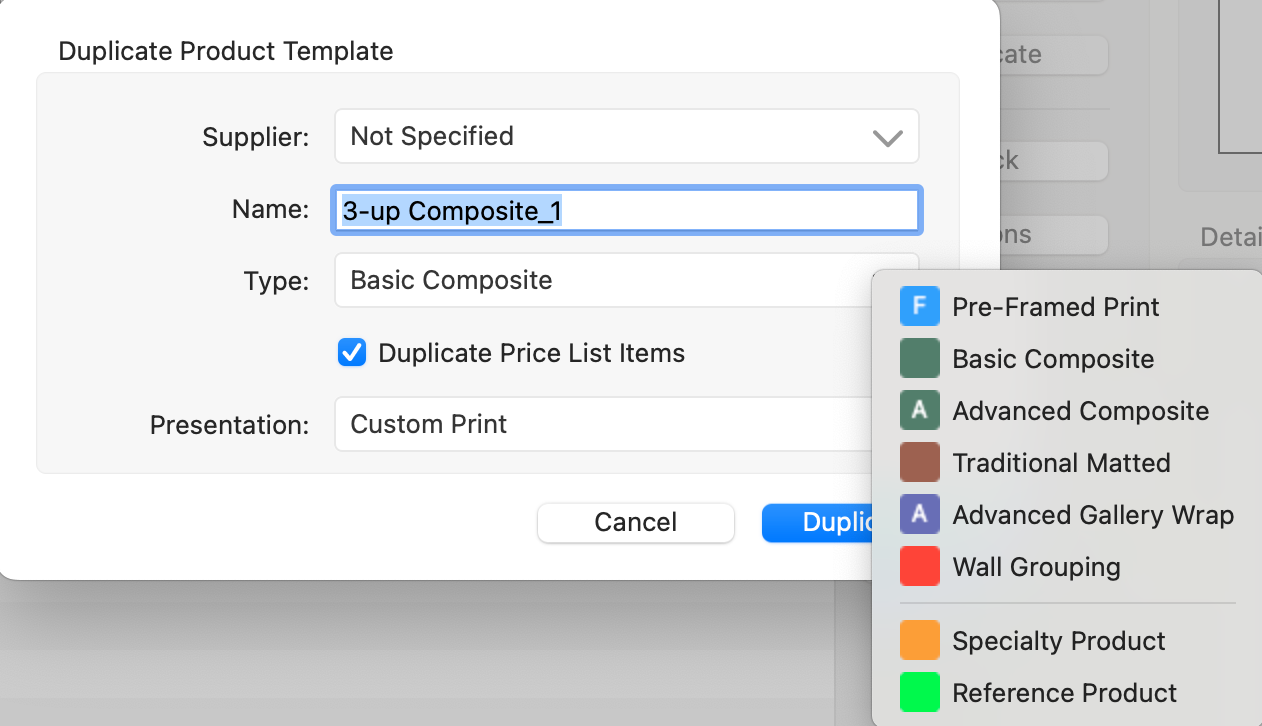
- Supplier: Optionally assign a Supplier to the new product template.
- Name: Choose a new name for your product template. By default, ProSelect will add "_1" to the end of the name.
- Type: The duplicate button allows the opportunity to choose a new product type. For instance, if you initially create a basic composite but later decide you require the features of an advanced composite, you have the option to duplicate the existing product template and create an advanced composite.
- Duplicate Price List Items Checkbox: When applicable, check this box to duplicate any pricing associated with the product template.
- Presentation: The presentation option used for the original product template will be listed here. Select a new presentation option if required.
- Edge Depth: For Gallery Wraps, an Edge Depth will be required.
Be aware when changing product types that the presentation option applied needs to match the new product template type. If you are duplicating a composite template and creating a gallery wrap, you must select a presentation option that applies to Gallery Wraps.
Use the Stack button to group together two or more templates that have the same number of openings.
- Select the templates, and click the Stack button.
- When templates have been stacked, a grey drop-down arrow will appear on the left-hand side. Click on the arrow to expand out and view the stacked templates.
- An "Unstack" option will appear if you have selected a stacked template.
Click on Using Stacked Templates to learn more.
Depending on the product type you are working with, different options will be enabled when you click on the Options button. Options can include:
- Swap Borders Direction.
- Select Virtual Style, Traditional Mat, or Frame.
- Assign a Supplier.
- Assign a Presentation Option. *This option assigns the Presentation Option at the Product Template level. It will not affect any price list items already set up.
- Manage Production Profiles.
- Move/Copy to book pages.
- Add New Price Item. *This option is available for "Fixed-Sized" items only.
- Export Prices.
- Update Prices.
The Sort By button is contextual. Depending on which type of template you are working with, different options will appear in your sort button. Some common ways of sorting are:
- Name
- Number of Openings
- Template Type
- Template Type and Fixed Size
- Width
Holding down the OptionAlt key while sorting will reverse the sorting order.
If you have manually moved your products around by dragging them, the Sort By button will override this. In case you accidentally sort your products and wish to reverse it, click the Cancel button. Using the Undo button will not undo sorting.
The Revert button can be used if you have made changes (and applied them) to a product template, but need to revert back to the original. If you have made changes to numerous templates and not clicked Save yet, you can revert any of the changes you have made without having to cancel the entirety of your changes.
Use the Pricing button to open the Pricing dialog. This is where you establish price list items for each product. A single product template can have numerous different sizes or presentation options available. Each combination needs to be priced. See the product type page for specifics on pricing.
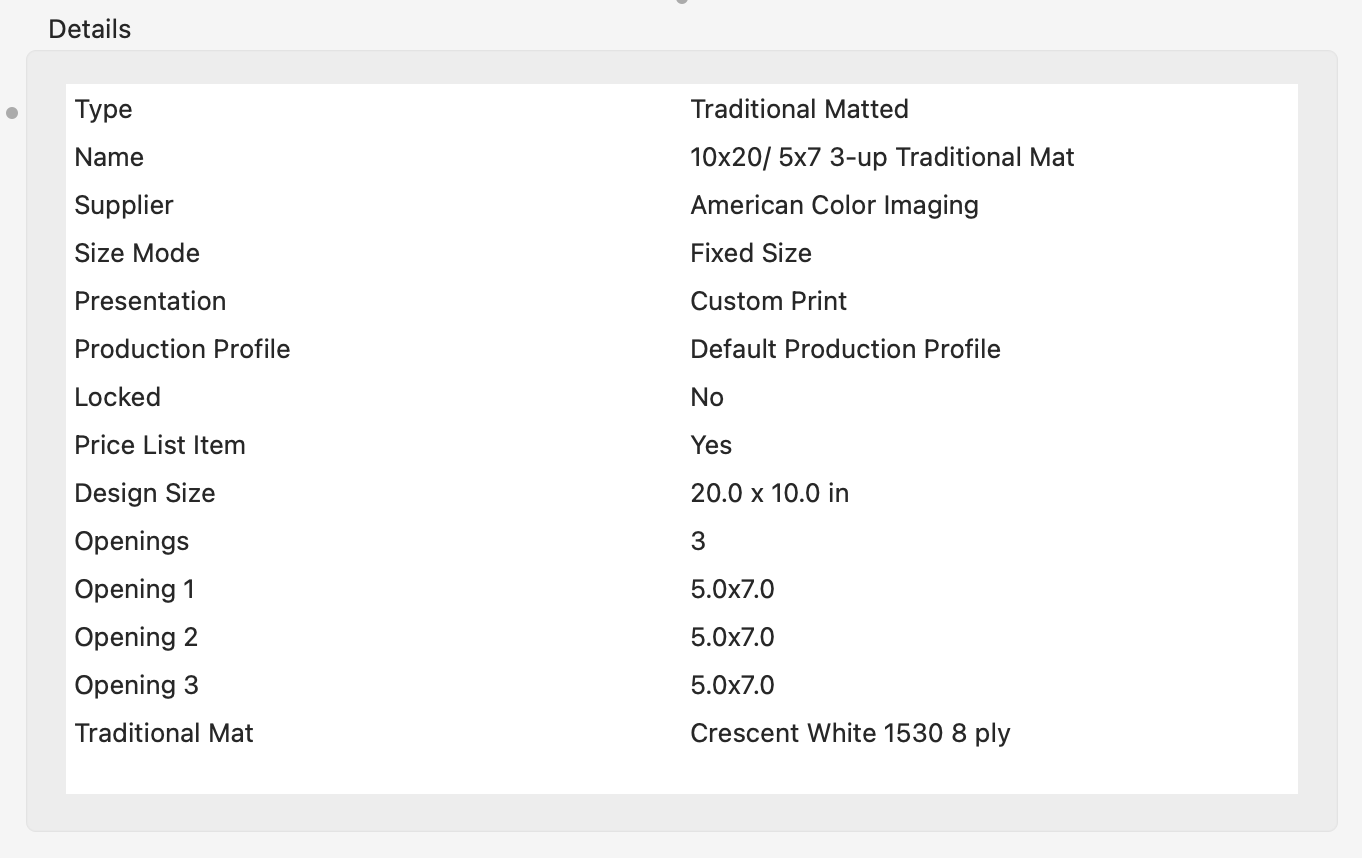
The Details panel lists specific attributes of the selected product template.
The Preview Panel reflects how the template looks. If mats and frames have been added, they will be reflected in the Preview panel.