Template Resource Area
Product Templates are created and organized in the Product & Pricing Manager. The categories and groups you create for your templates are reflected here.
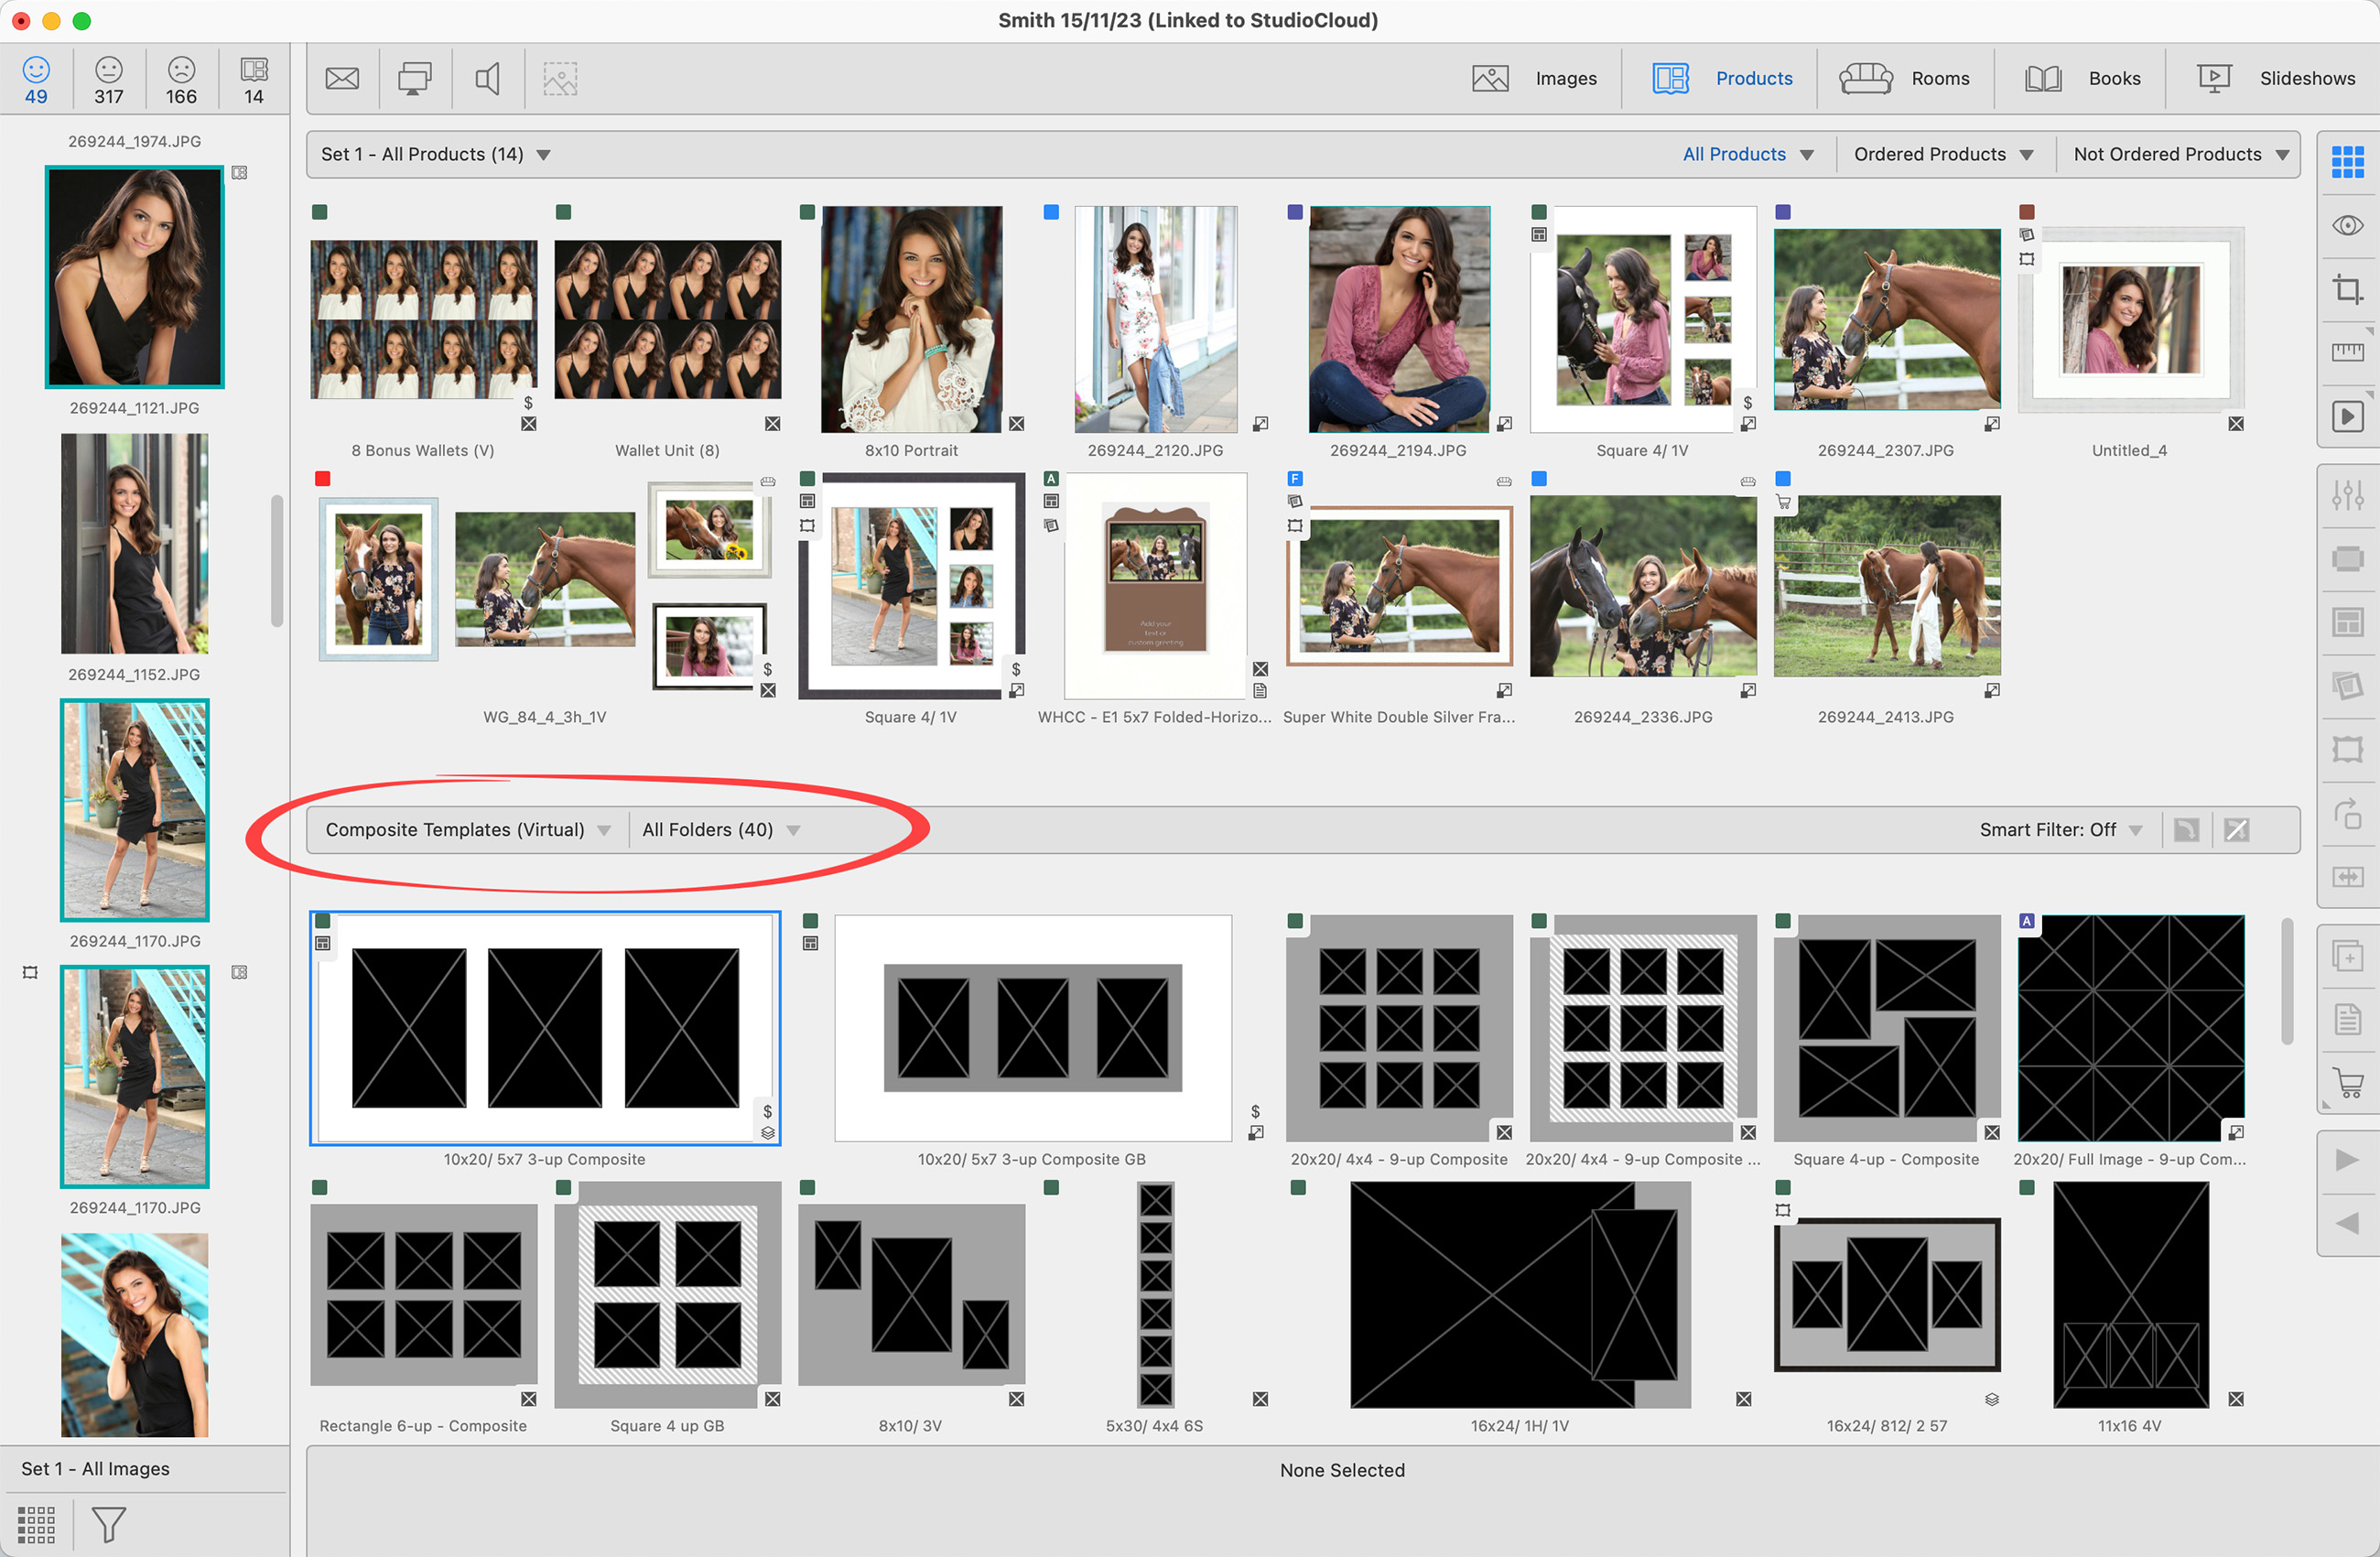
Right-clicking on a template provides a shortcut to:
- Edit Template: This will open the template in the Product Editor.
- Delete Selected Products: This will delete the product template from the Resource Area as well as the Product & Pricing Manager.
- Show in Product & Pricing Manager: This will open the template in the Product & Pricing Manager.
- Pricing: Go directly to the Price List Item dialog.
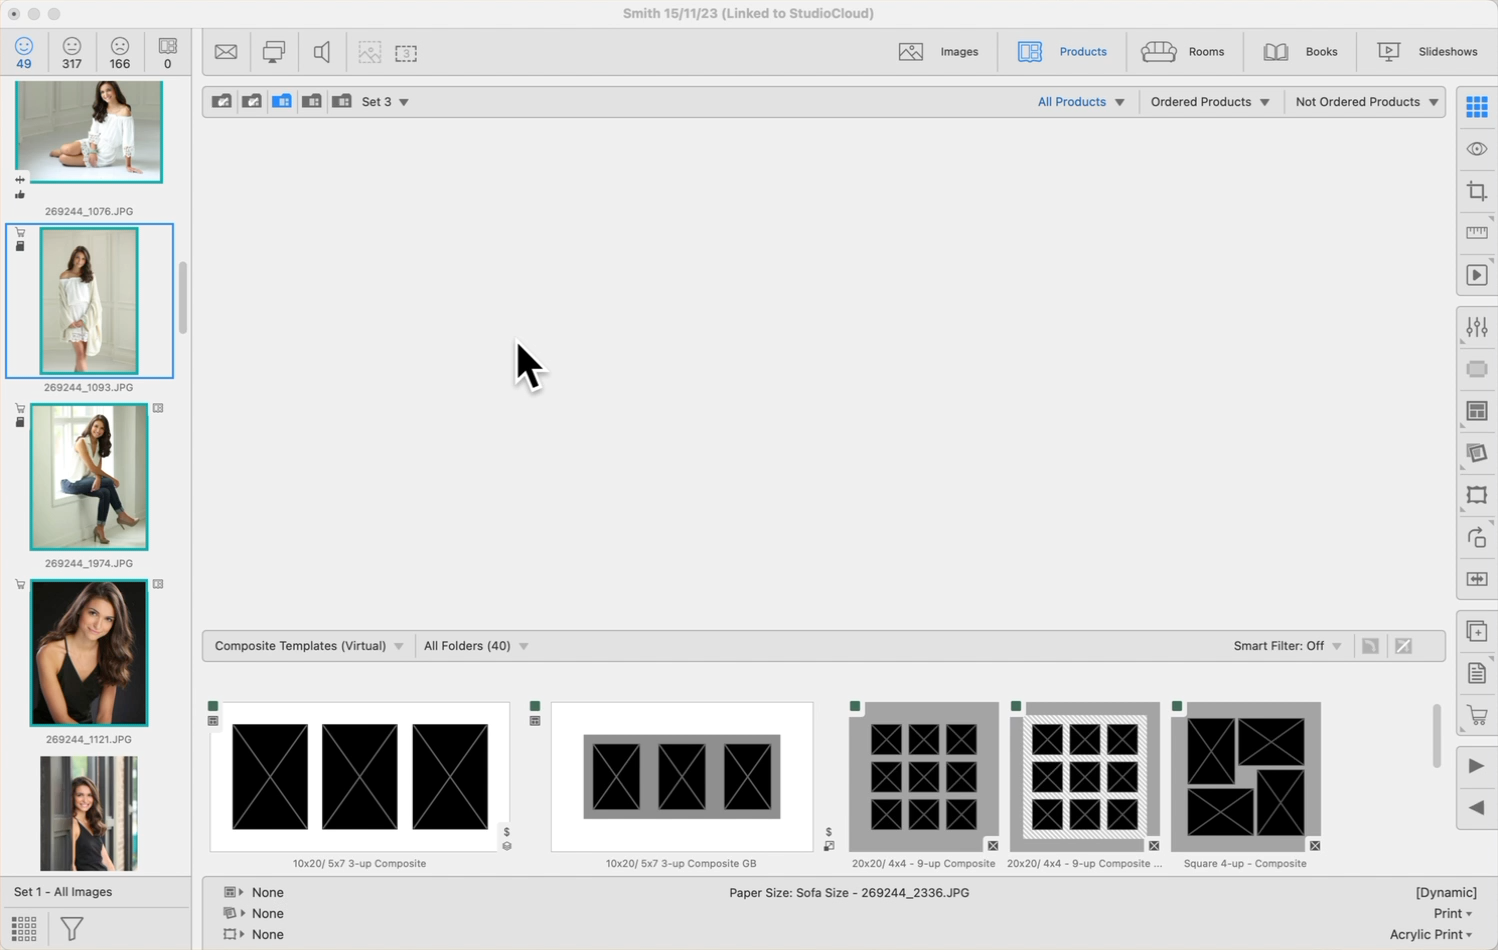
The Resource Selection Bar in ProSelect is designed to efficiently organize the available product templates, making it easy to navigate through the various options.

- Use the "All Categories" drop-down list to select which category of product templates you wish to display.
- Once a Category has been selected, use the "All Folders" drop-down list to select which folder to view.
Categories and Folders Match What is Setup in the Product & Pricing Manager
The order in which product templates appear within the Categories and Folders is directly mirrored from the order you have set up in the Product & Pricing Manager. If you change the order in which templates appear in the Product & Pricing Manager, the resource selection bar with reflect that change.
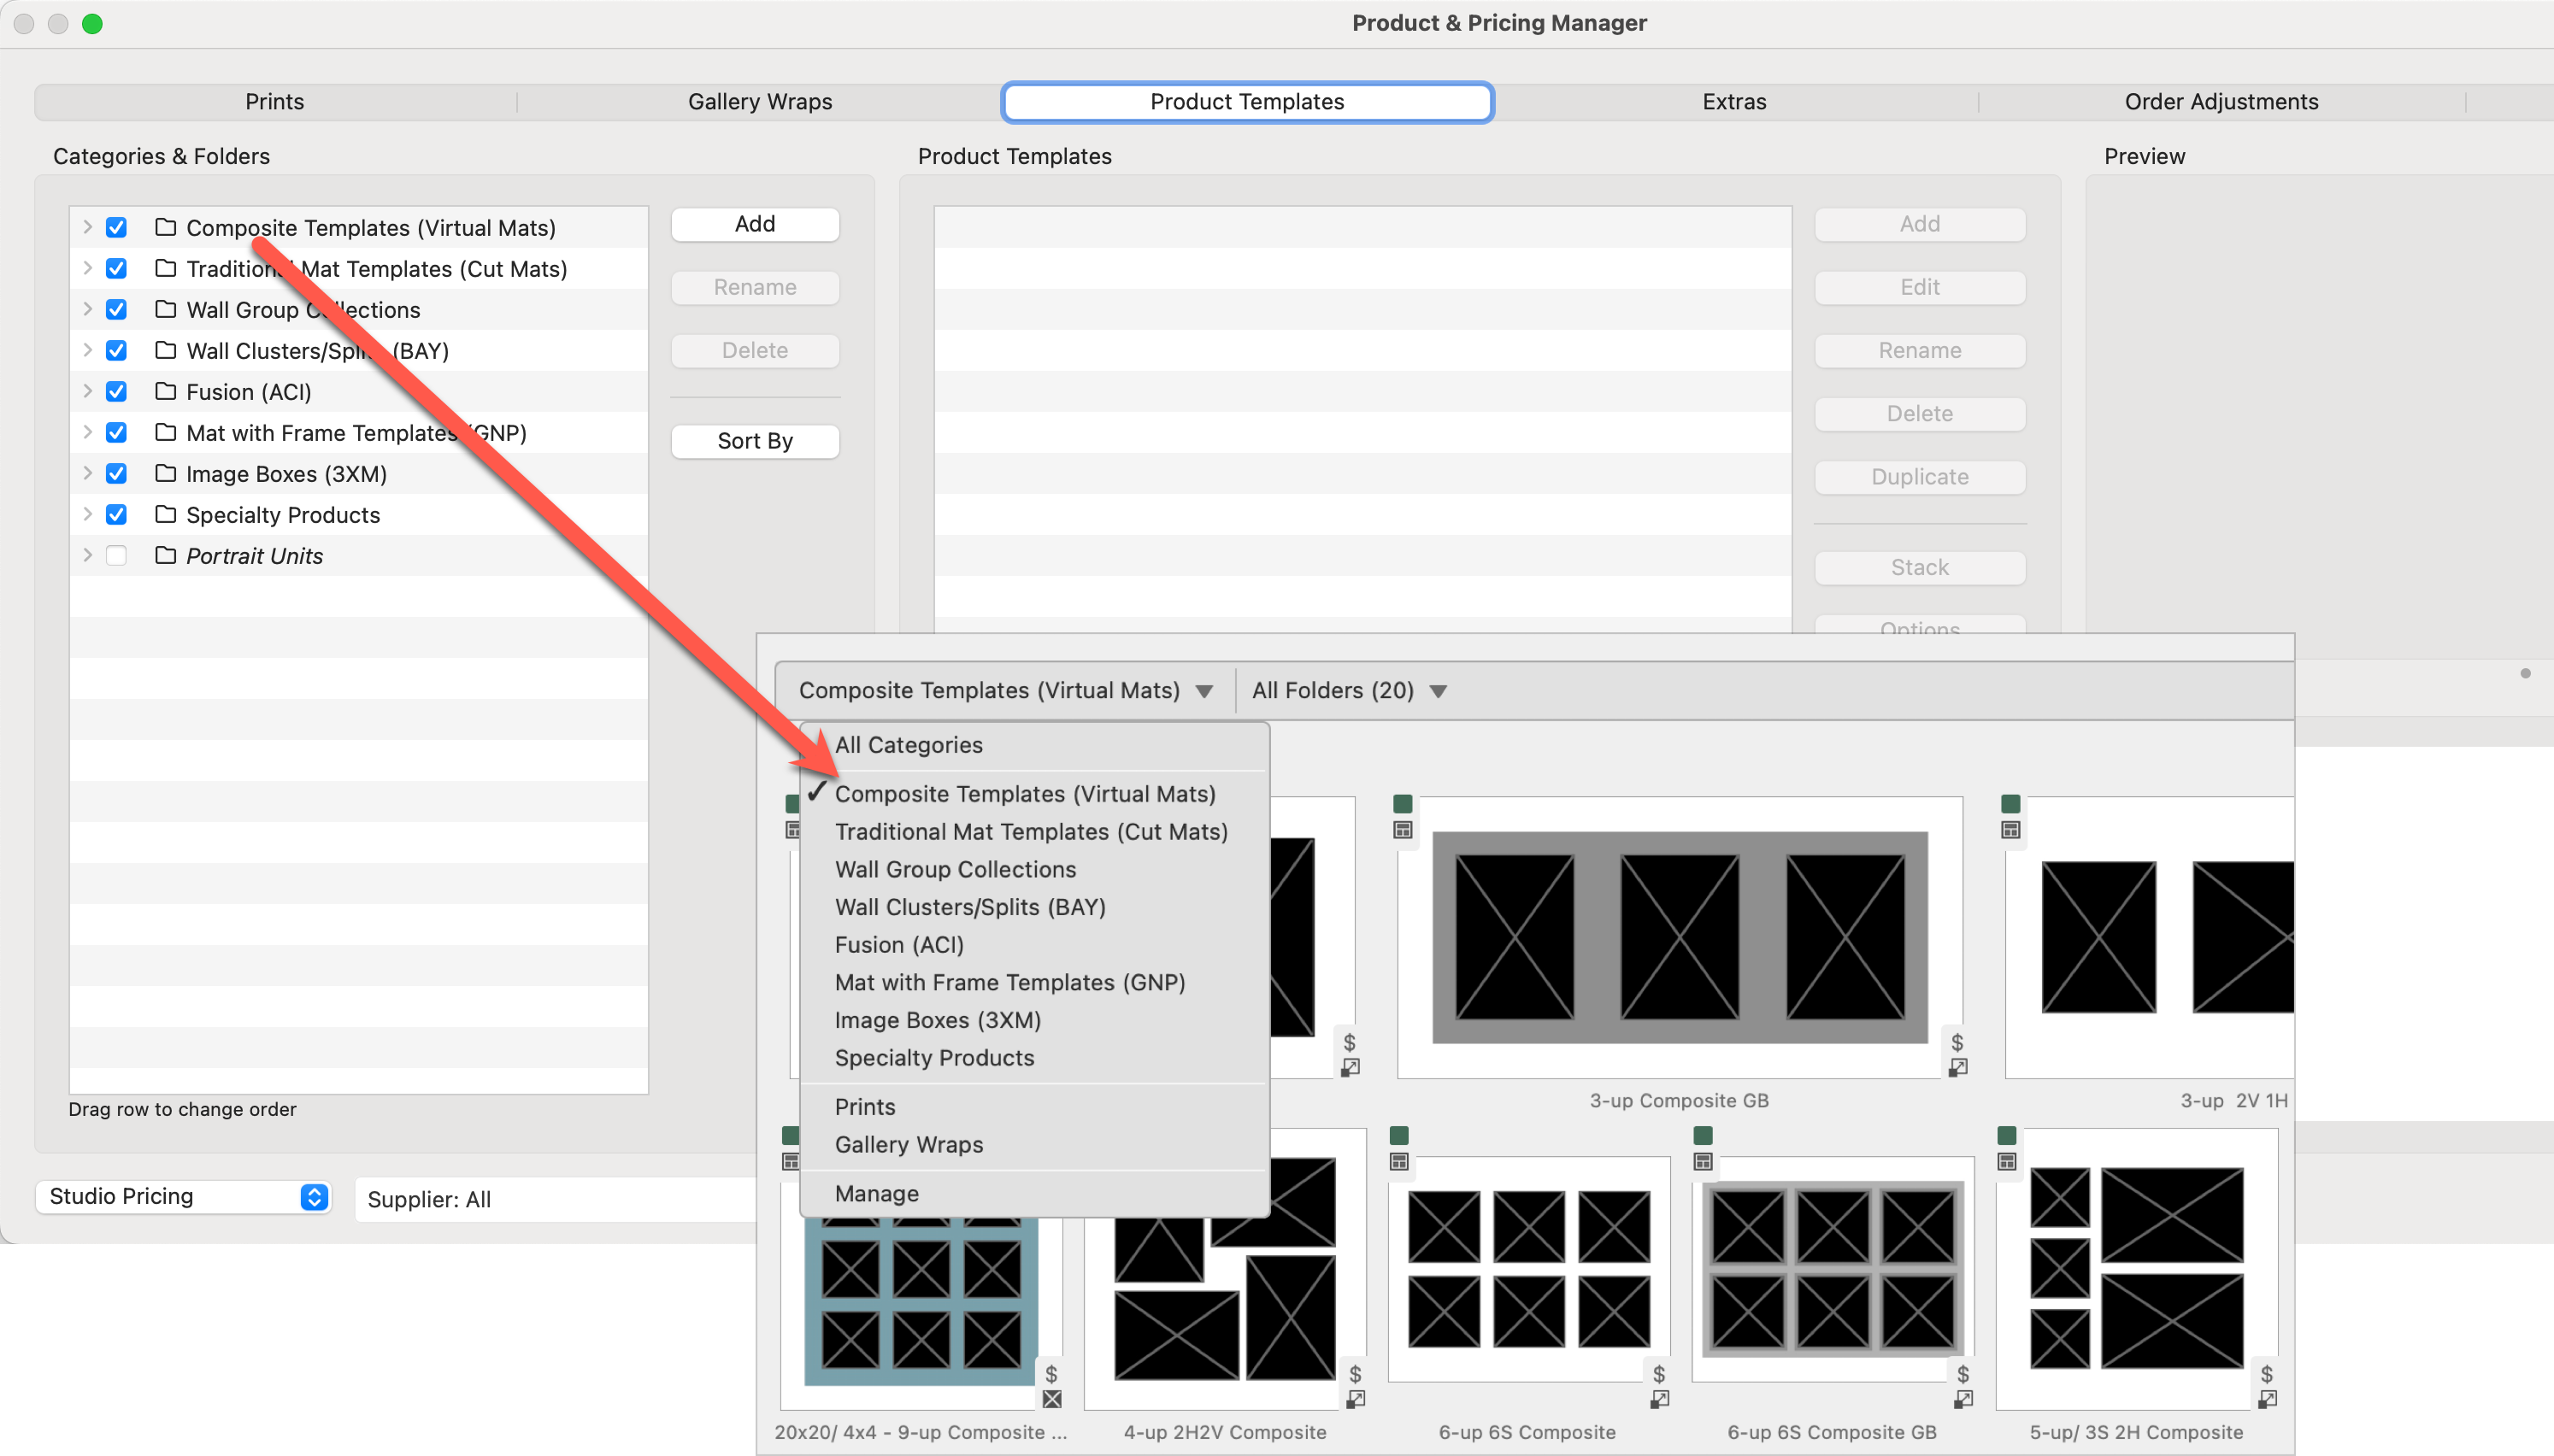
- Unchecked categories and Folders (grayed out) will not appear in the Resource Selection Bar.
- Select "Manage" to go to the Product & Pricing Manager.
Selecting a Template
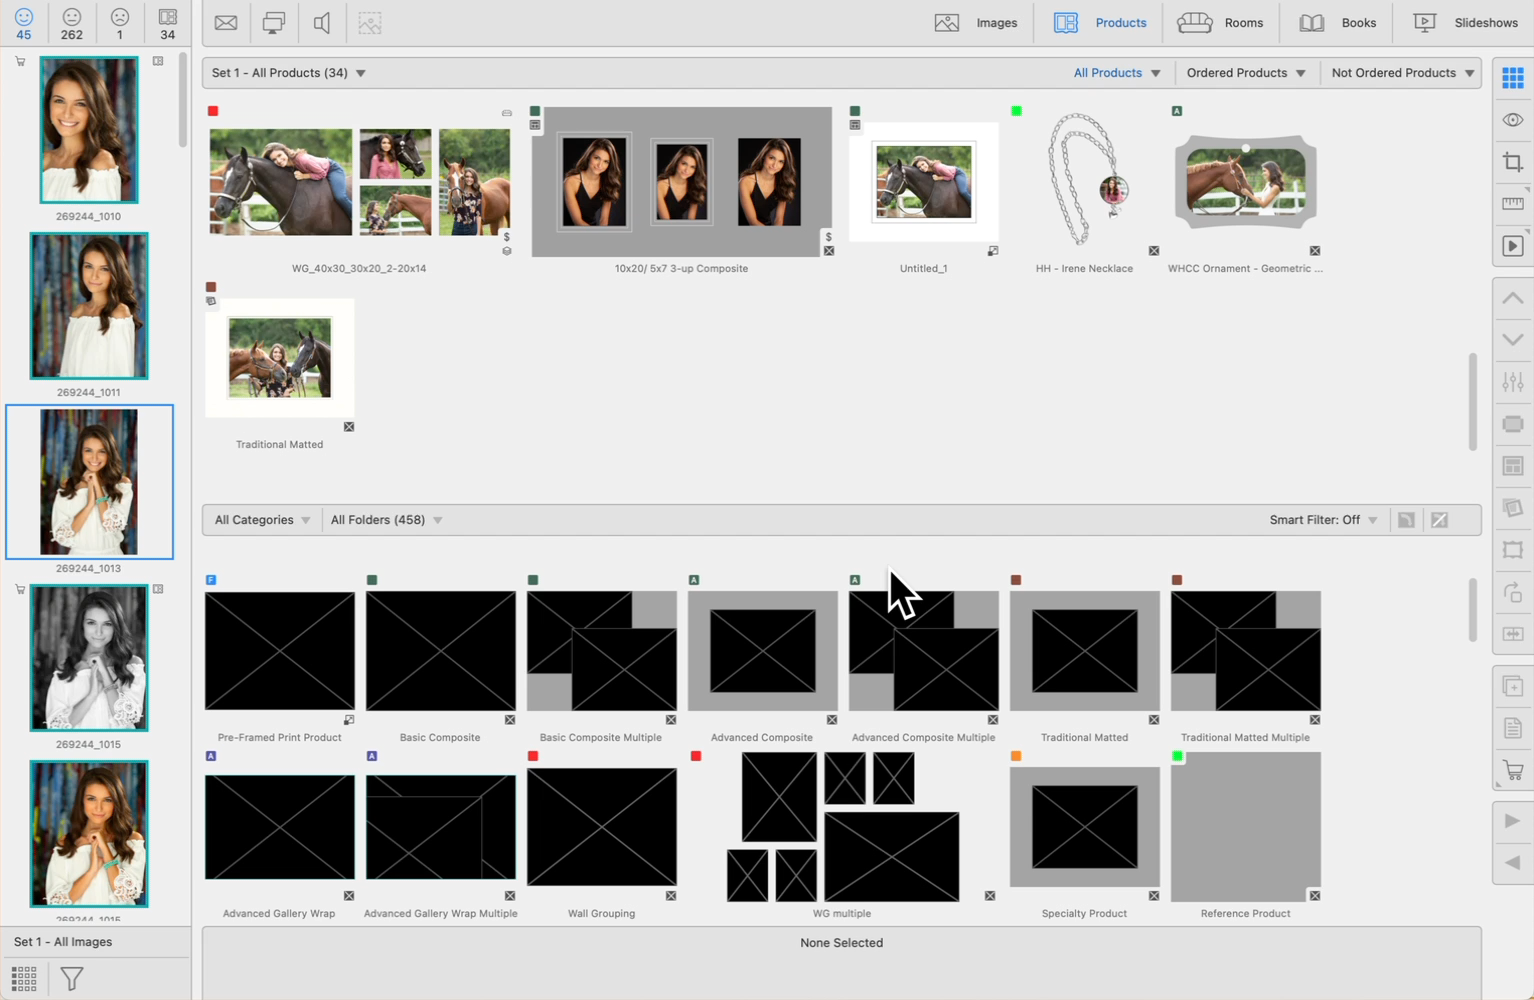
If you can't find a product template in the Resource Area, ensure that it's set to be visible. To do this, visit the Product & Pricing Manager and check if the boxes next to the Category, Folder, and Product Template are marked. These need to be checked for the template to appear in the Resource Area.
Selecting Multiple Groups
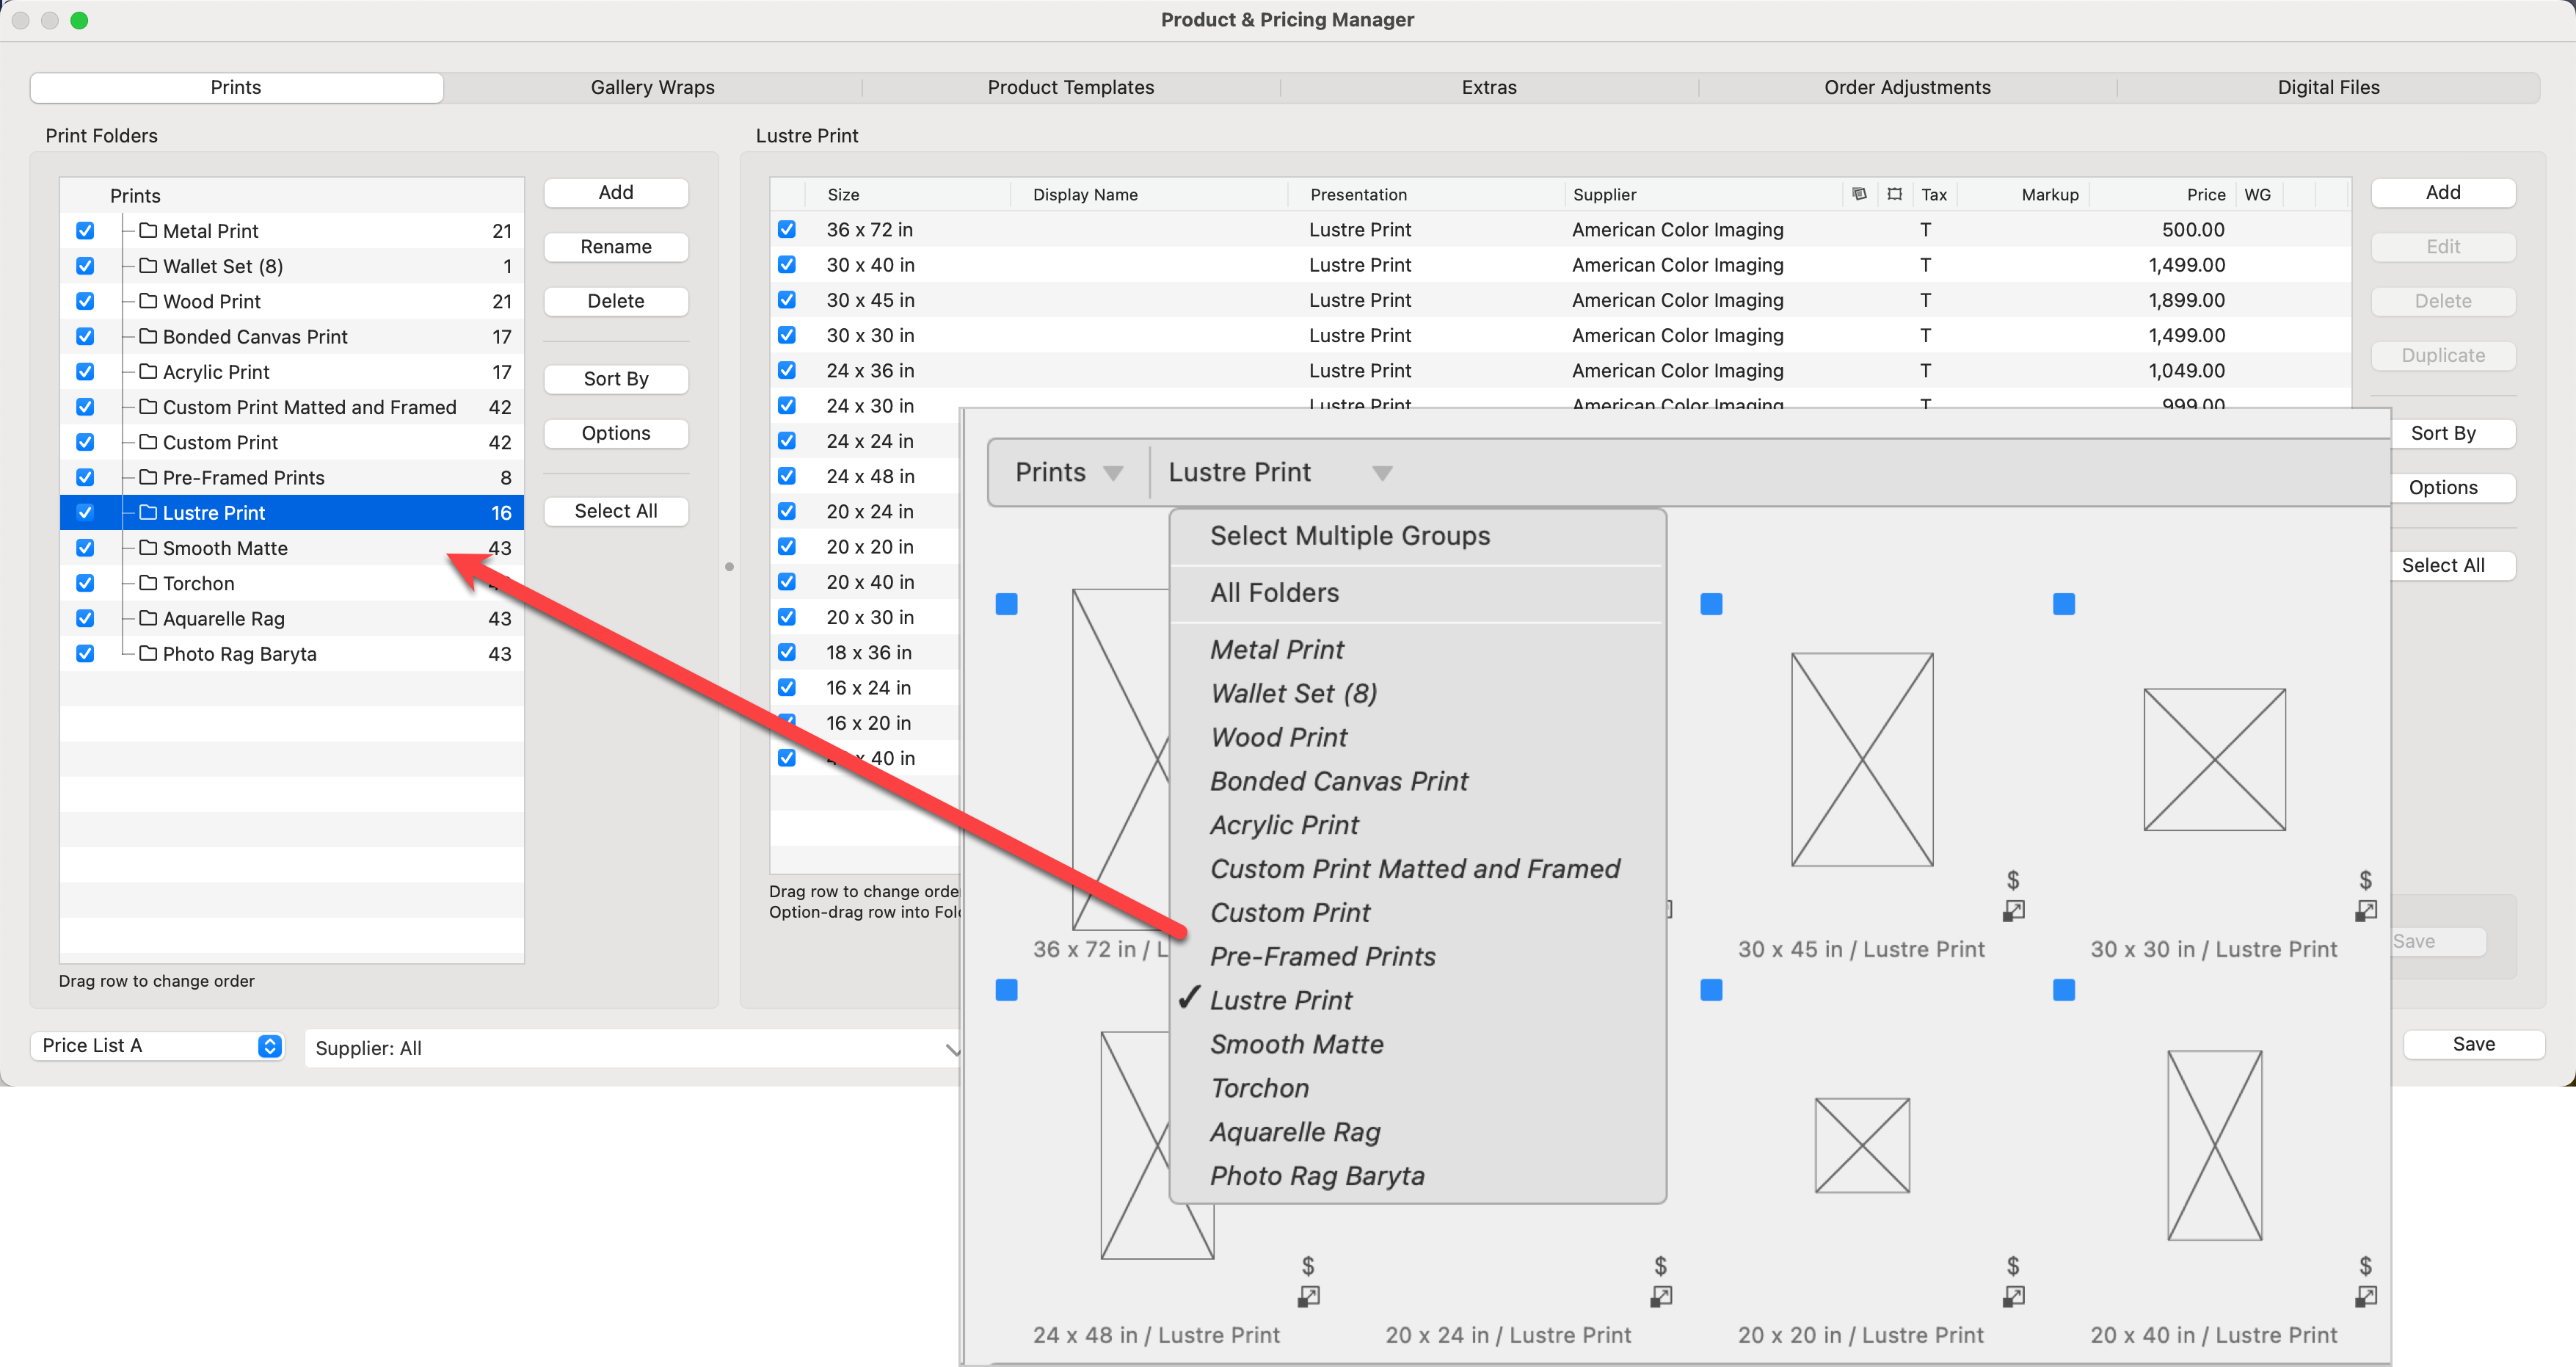
To display all the product templates in more than one group, choose Select Multiple Groups from the All Folders dropdown menu. You can then check the boxes of the templates to display.
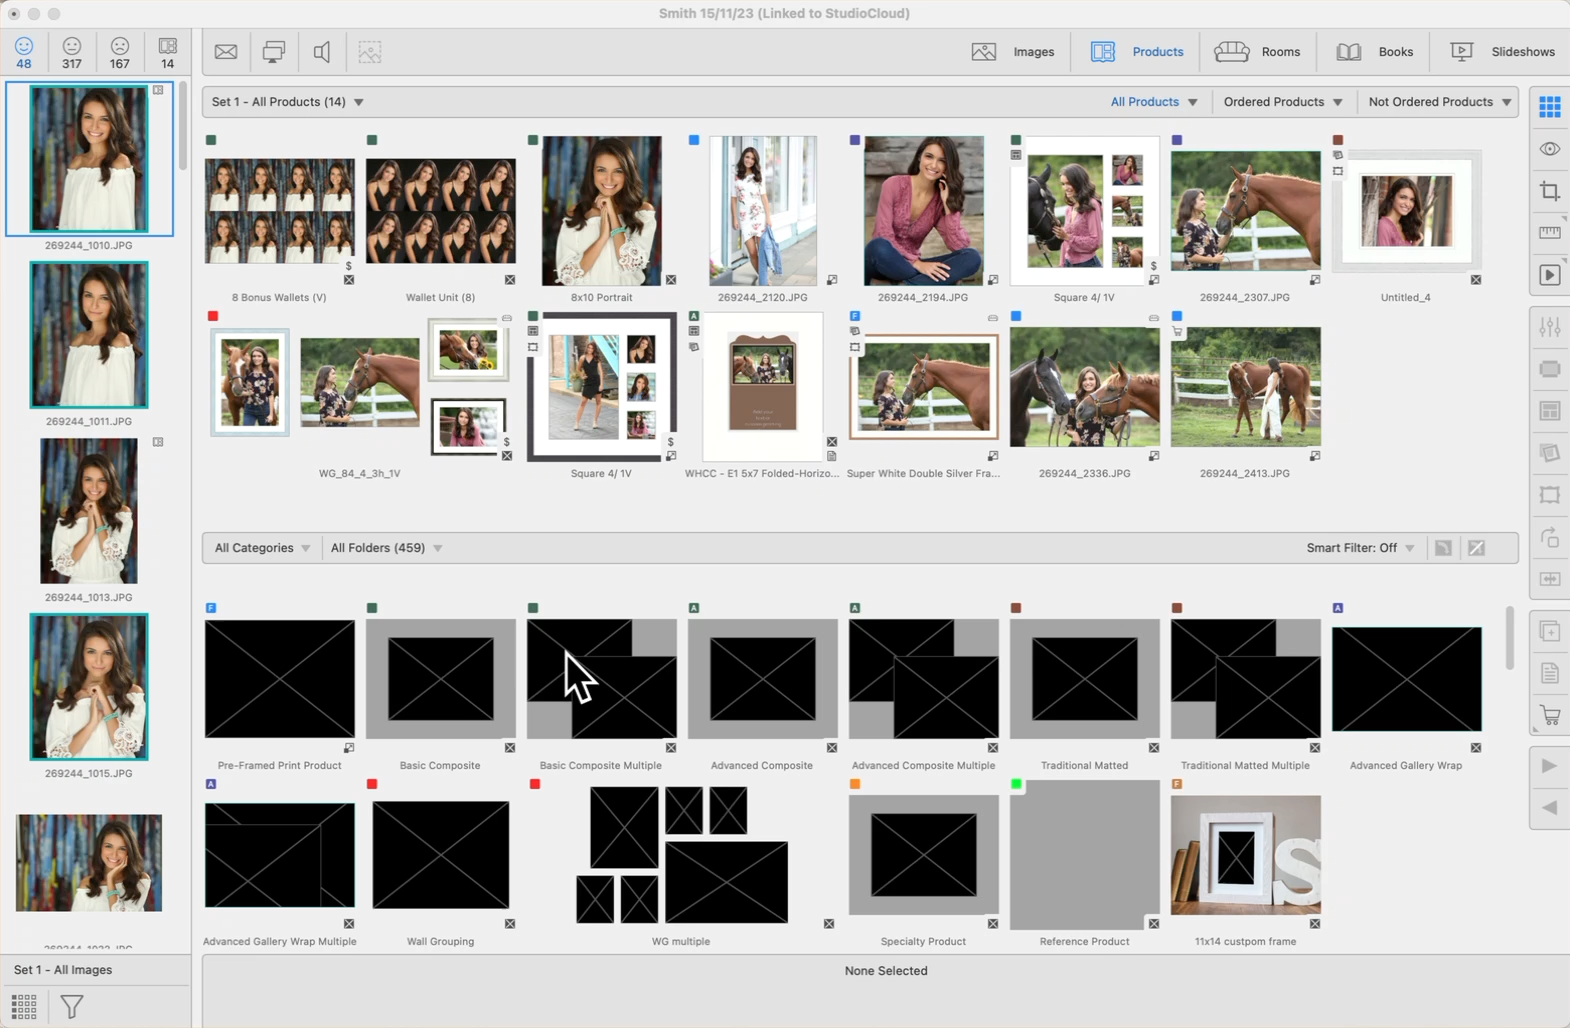
There are a variety of different ways to create products. Products are created by adding images to templates.
- Select a template from the Resource Area and drag it up to the Display Area. A new product based on that template will be added to the album. You can then drag images from the Image List into the product's thumbnail.
- Double-clicking on a template in the Resource Area will take you directly to Show view. From there, you can drag and add images to the selected template.
- You can drag and drop one or multiple images from the image list into a template in the Resource Area. This will automatically add the images to the template in the Display Area.
To remove a product from the album, select the product in Thumbnail view, and press the DeleteBackspace key.
If you make a mistake, go to the top menu, Edit > Undo. Or use the shortcut Cmd + z.Ctrl + z.
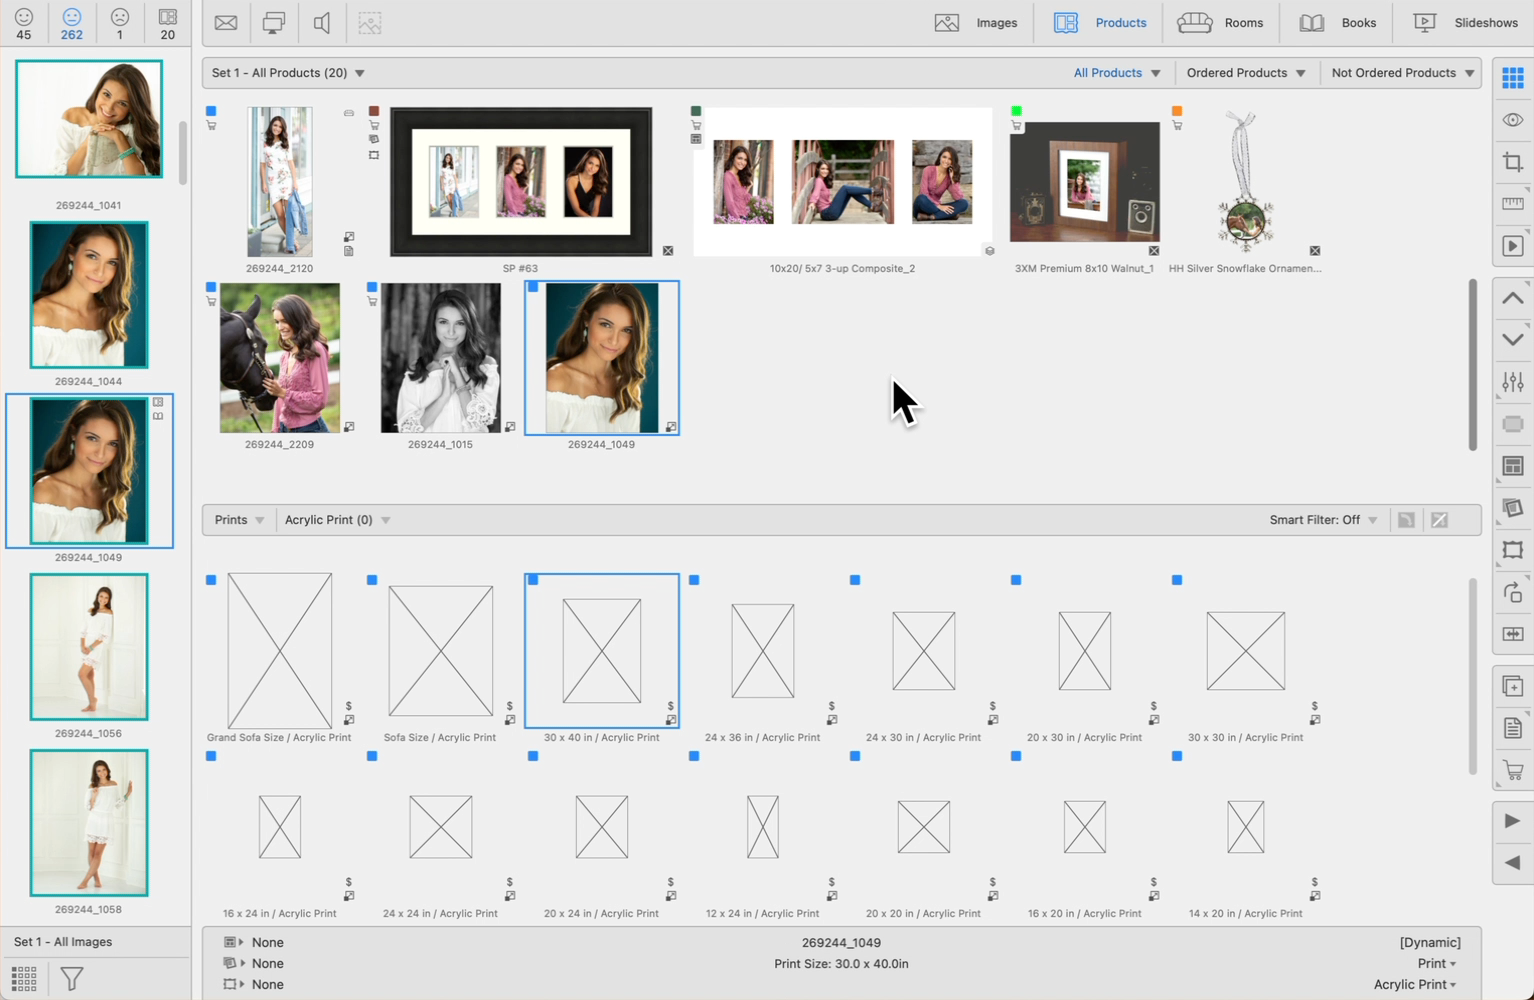
Once your Prints are priced and set up in the Product & Pricing Manager, they will also appear in the Template Resource Area. This also applies to Gallery Wraps.
- On the Resource Selection Bar, choose "Prints" as the Category.
- When you click on the Folder drop-down arrow, all of your Print Folders will appear. These Folders directly mirror what you have set up in the Product & Pricing Manager. All of the sizes you have set up will appear.
- Select a Print Template and drag it up into the Display Area to use.
When Working with Products, Thumbnail View, there are several tricks for quickly making changes to products and templates. These will also work when Working with Books.
- If you drag a product with images from the Display Area and drop it onto a template in the Resource Area, a new product is created (alongside the original one) and will contain the same images as the original product. If you have Mats or Frames assigned to the template they will appear on the new Product as well.
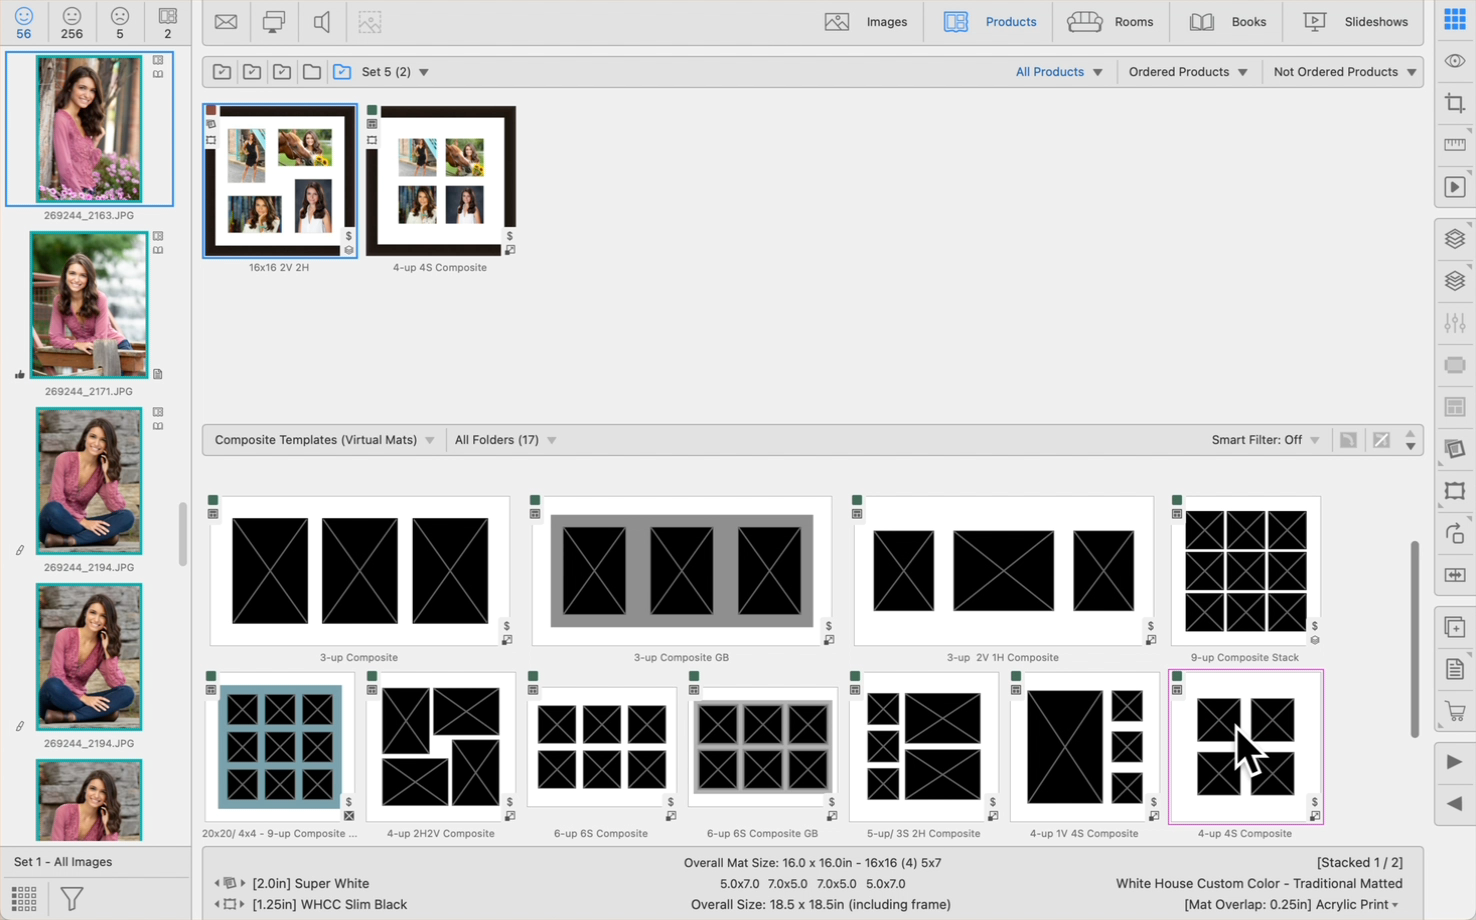
- If you hold the OptionAlt key while dragging a product template from the Resource Area and dropping it onto a product in the Display Area, the new template will replace the existing product instead of creating a new one.
- You can rearrange the order of your products by dragging them.
- You can also use most of the Fast Book Building Techniques for selecting and creating products when Working with Products.
When changing the template used in a product to a different one, the images in the current product are moved into the openings of the new template in opening number order. That is, the image in opening #1 in the current product template goes into opening #1 in the new template, #2 to #2, etc. Keeping the order of the openings in your templates consistent (e.g. starting in the top-left corner) will make this transfer predictable. You can use the Opening Order Tools in the Product Editor to do this.
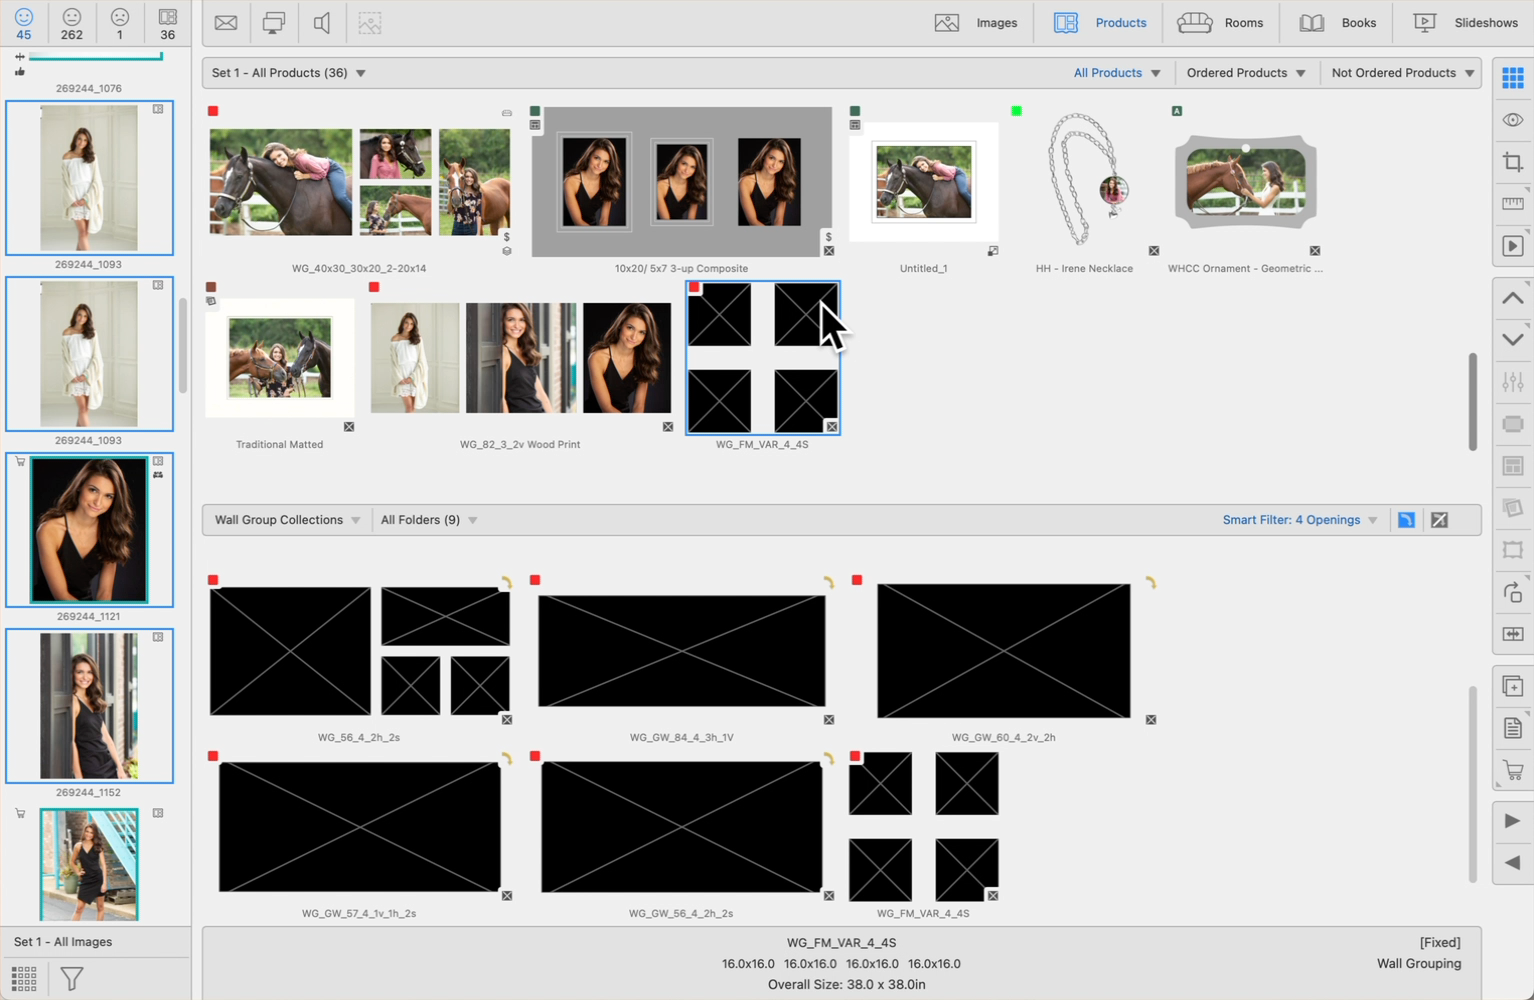
The Smart Filter is located on the right-hand side of the Resource Selection Bar.
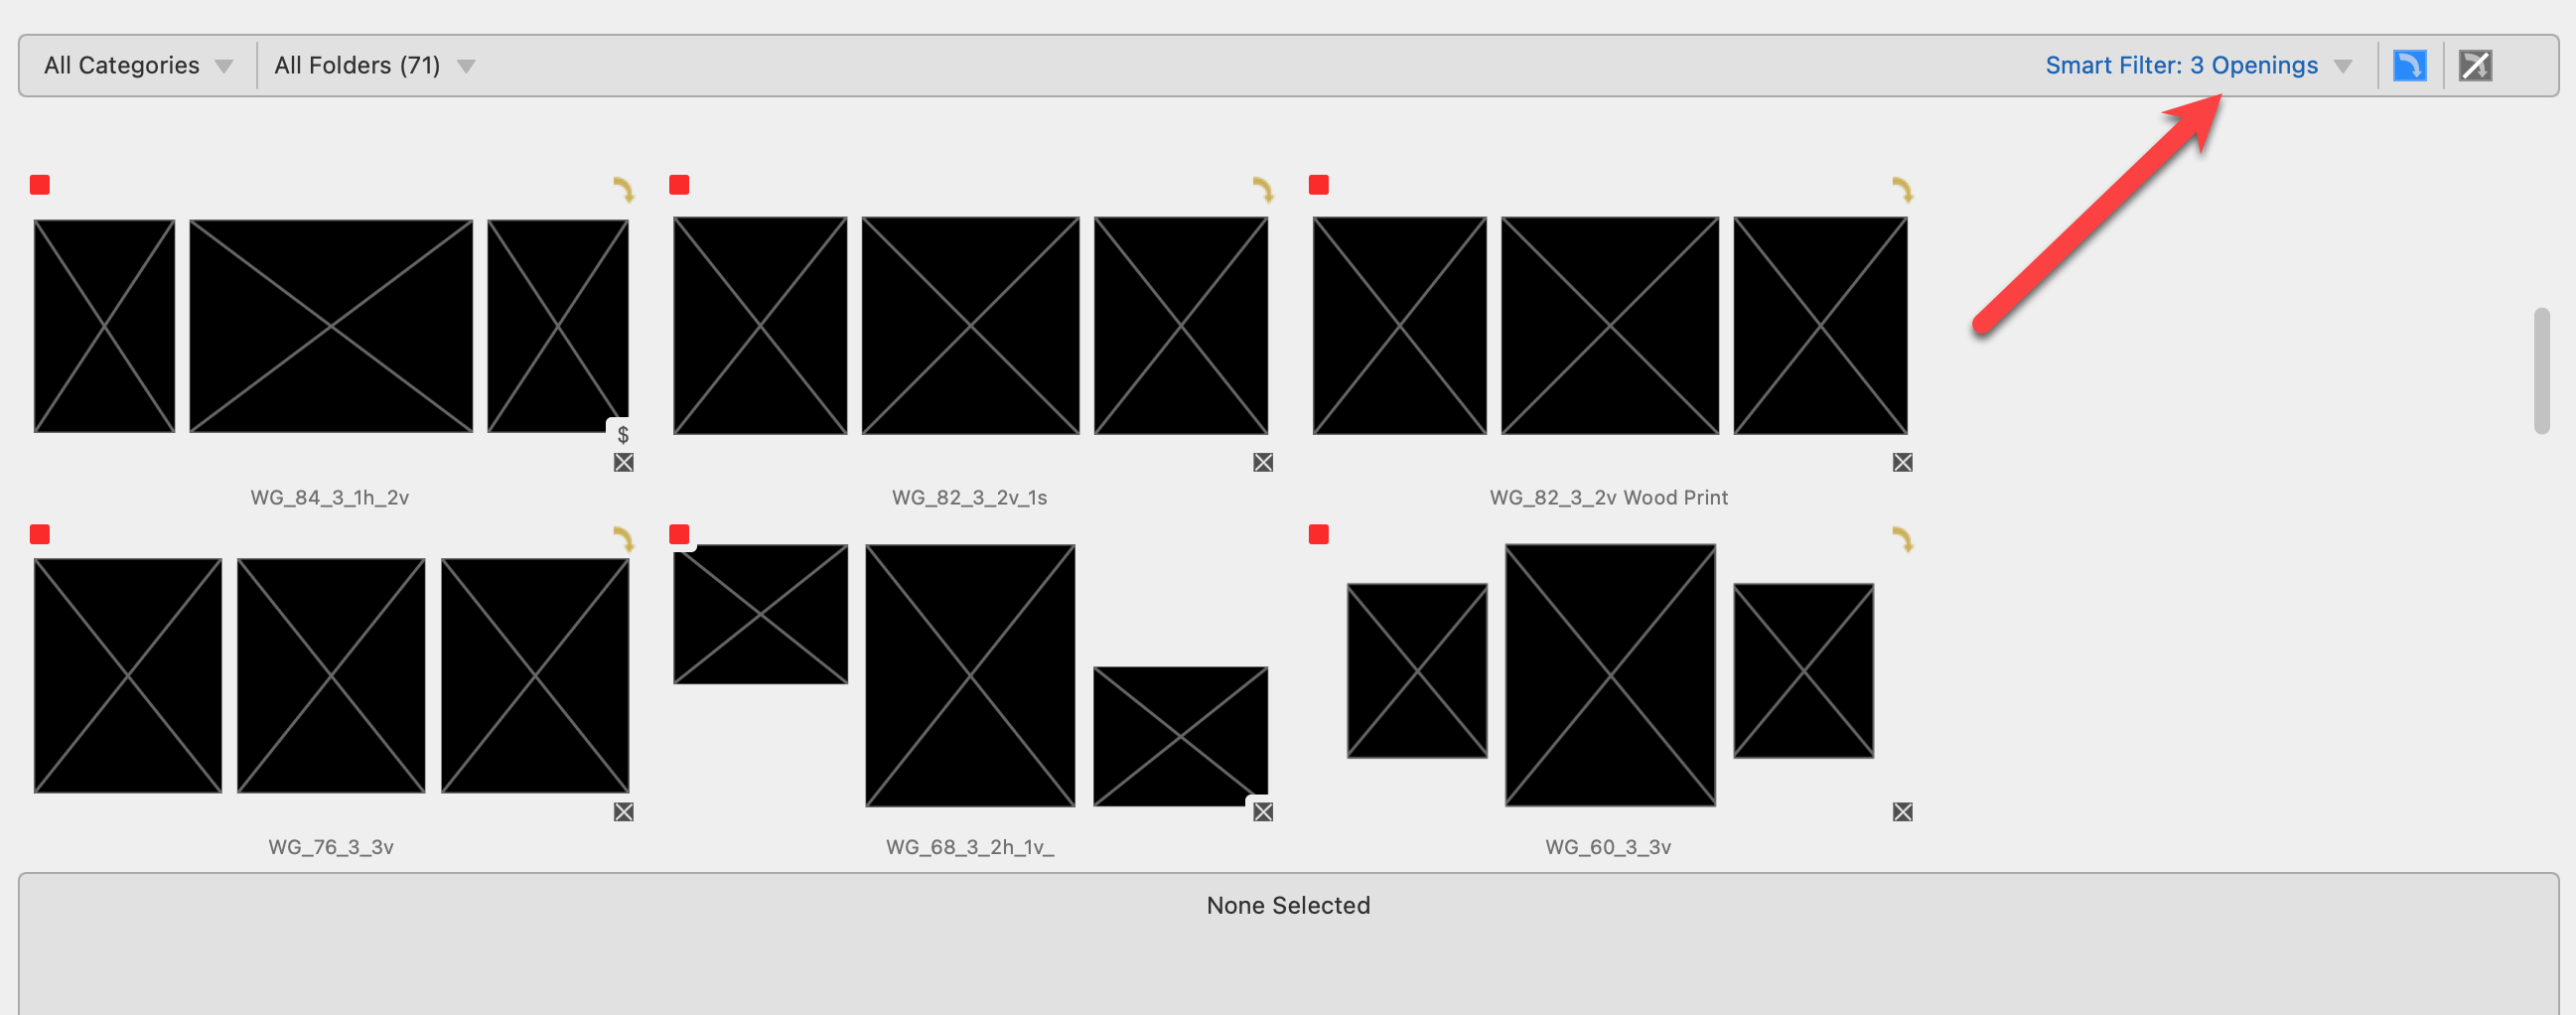
The Smart Filter displays templates from the selected Category that match the number of openings—and optionally the same orientation—as the number of images you have currently selected in the image list. This ensures that you are only shown product templates that are applicable to your current selection, streamlining the process of matching images to templates.
- Auto Rotate
 : By default the auto-rotate feature is turned on. Templates will rotate automatically to match the orientation of the images dropped in.
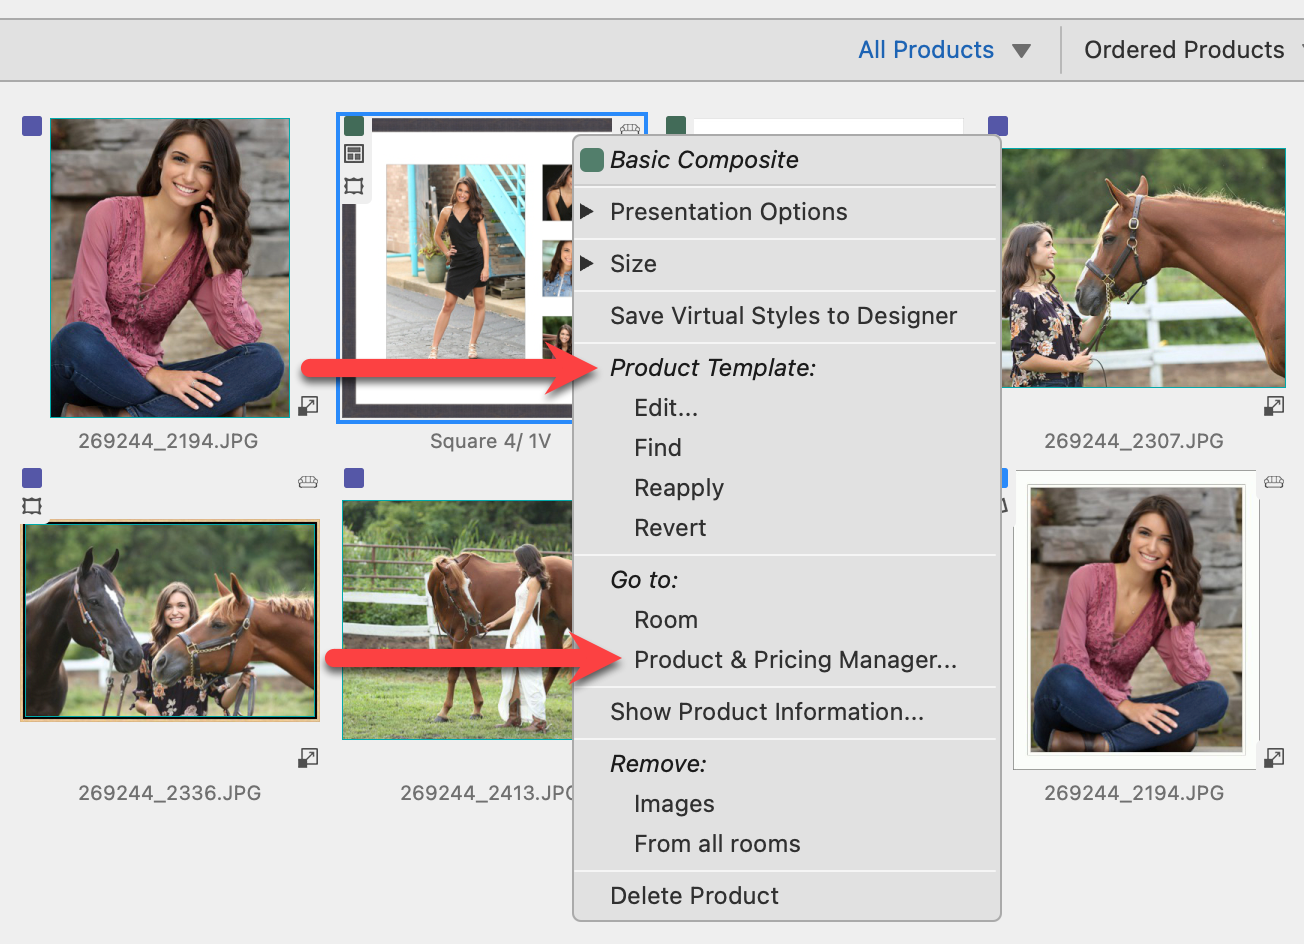
Similarly, once a Product Template has been populated with images, you have the following options when right-clicking on a Product Thumbnail in Thumbnail view:
- Product Template:
- Edit: This will open the product template in the Product Editor.
- Find: This option will locate the currently used product template in the Template Resource Area and highlight it for you.
- Reapply: If changes have been made to the template, you need to reapply the template to the current product.
- Revert: This will reload the original template created in the Product Editor. Any applied frames, mats, etc. will be removed.
- Go To:
- Show in Product & Pricing Manager: This will open the template in the Product & Pricing Manager.
Even after you populate a template with images, you can make adjustments to the product template.
- Right-click on the product and select Edit. This will open the Product Editor with that product template selected. This feature is available when Working with Products and when Working with Rooms.
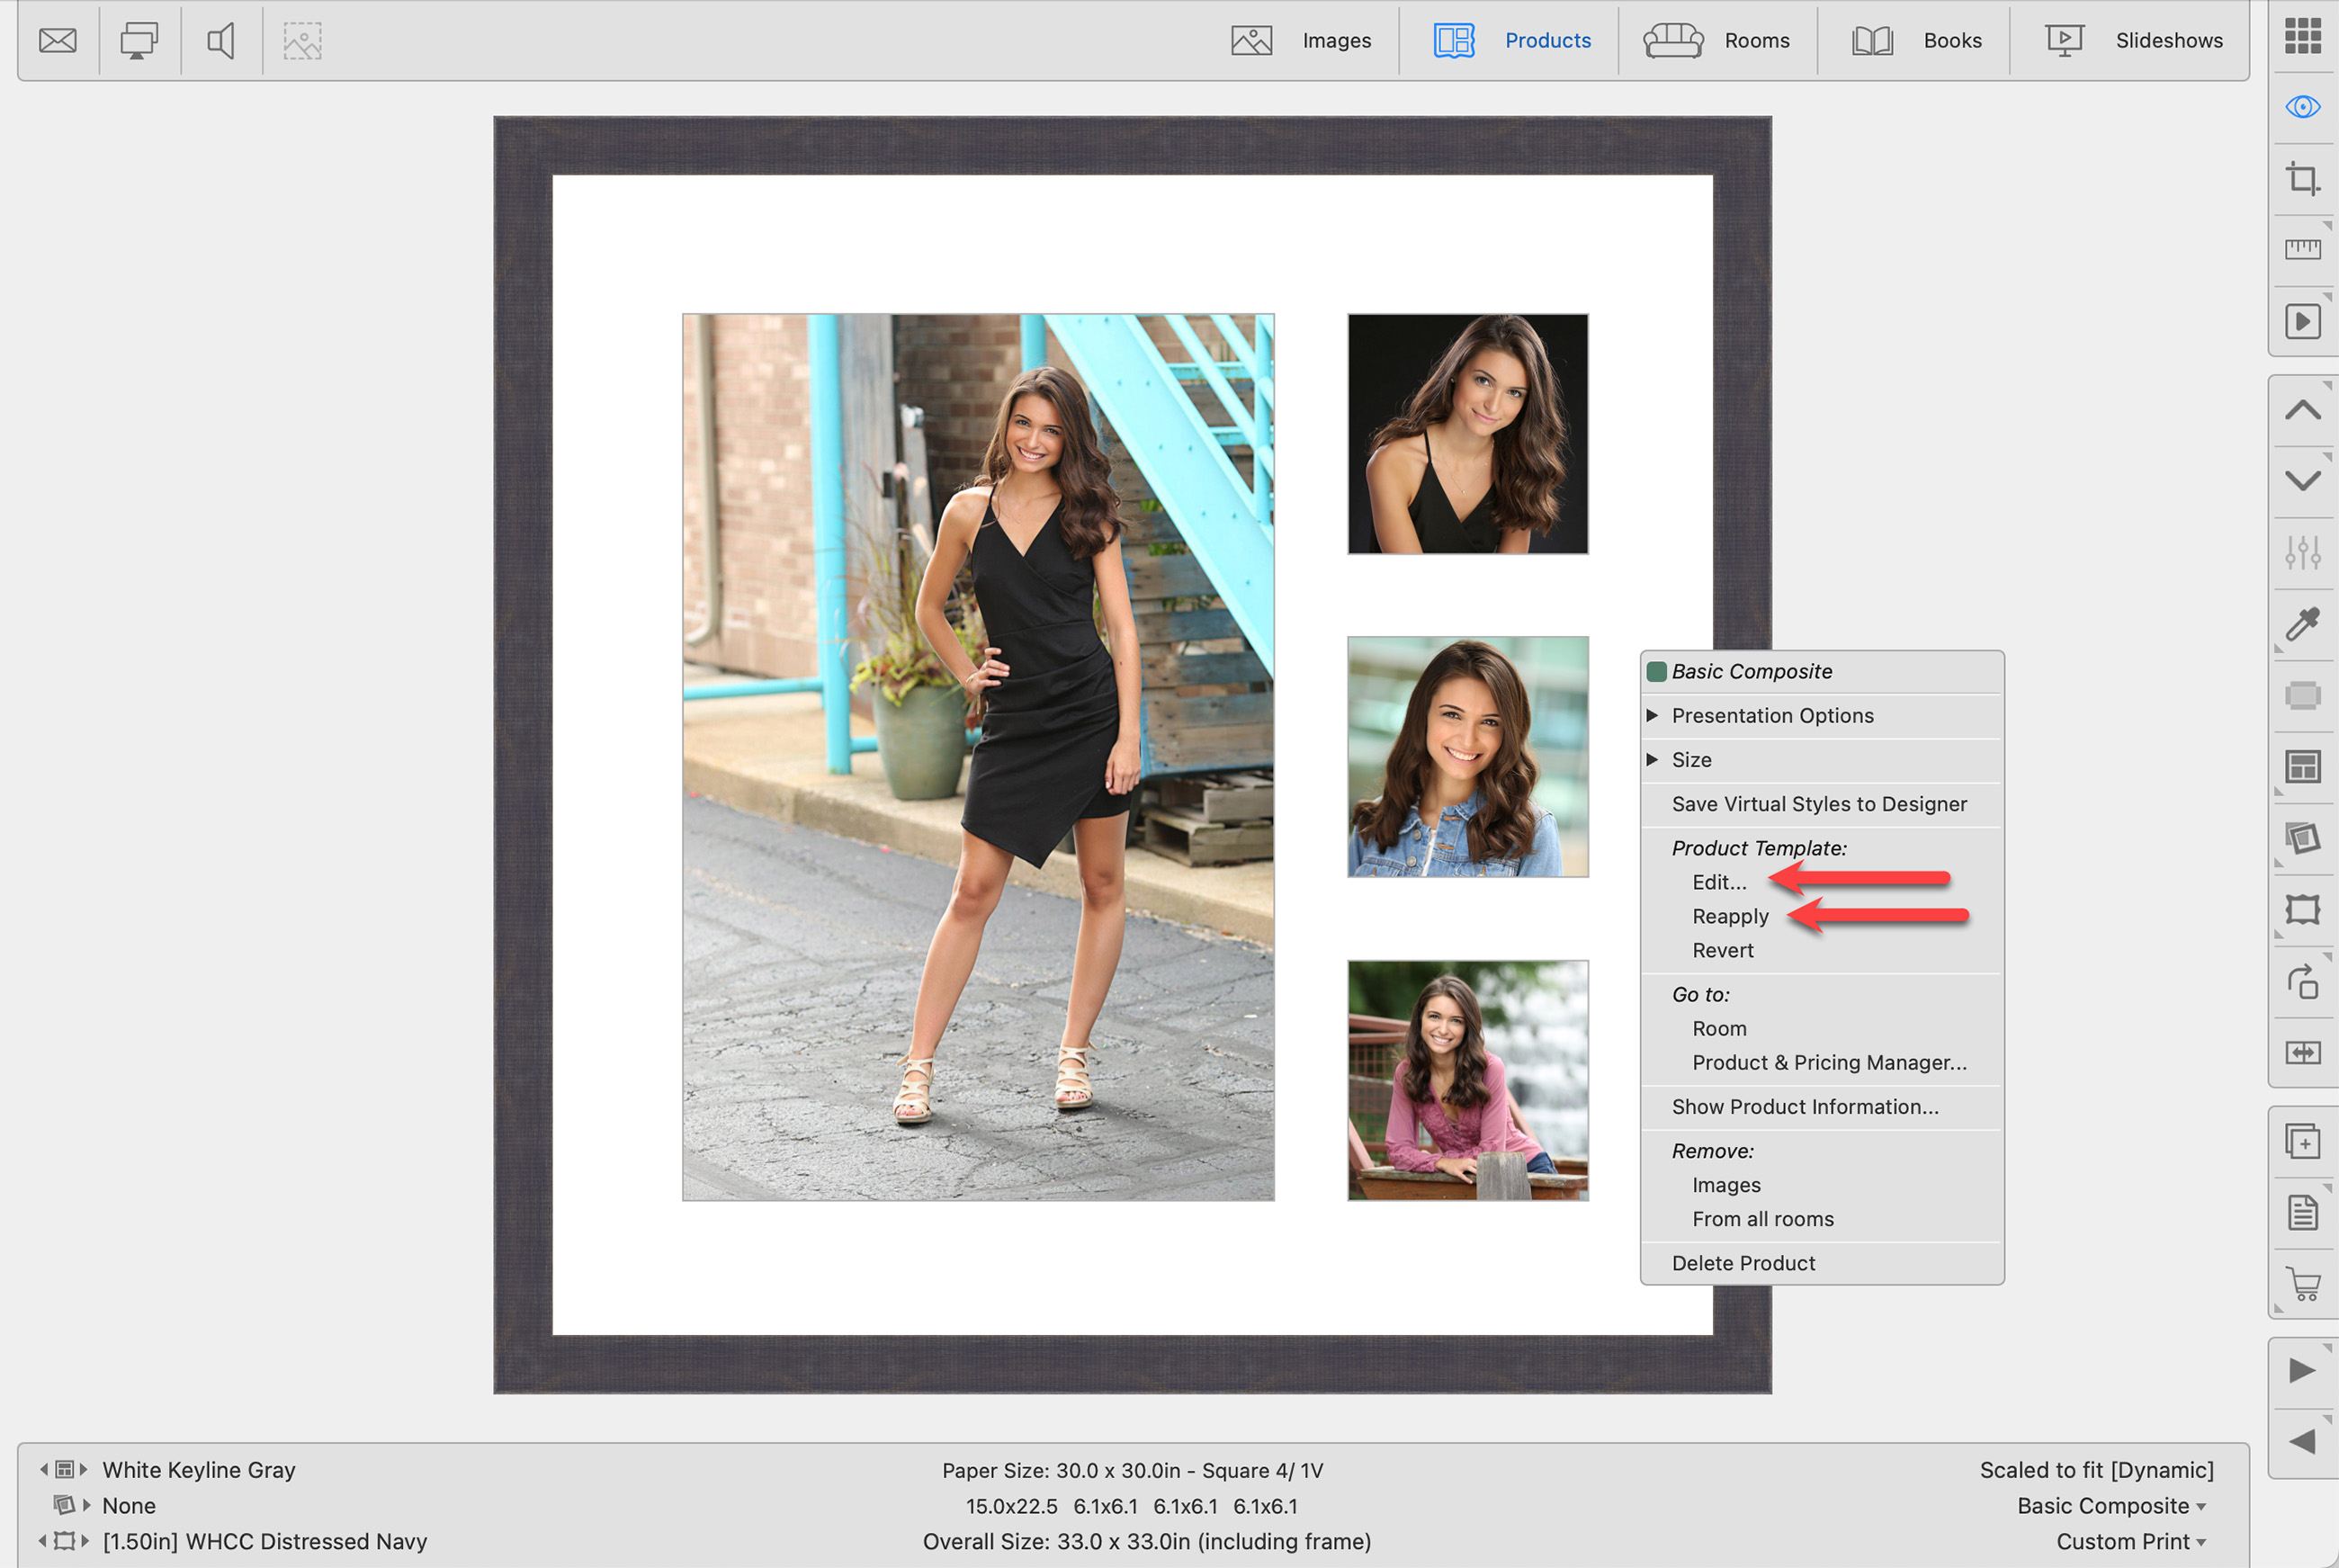
- Make any changes required to the template. Save the changes and close the Product Editor window.
- Right-click on the product once again and select Reapply to update the product with your modified product template.
You may want to make changes to the Product Template without modifying the existing one. In this case, before you make any changes to the existing product template, duplicate it first. You can rename the product template and save the changes. In this case, you wouldn't Reapply the product template, but rather locate it in the Resources Area and OptionAlt + drop it onto the existing product.