Workflow Overview
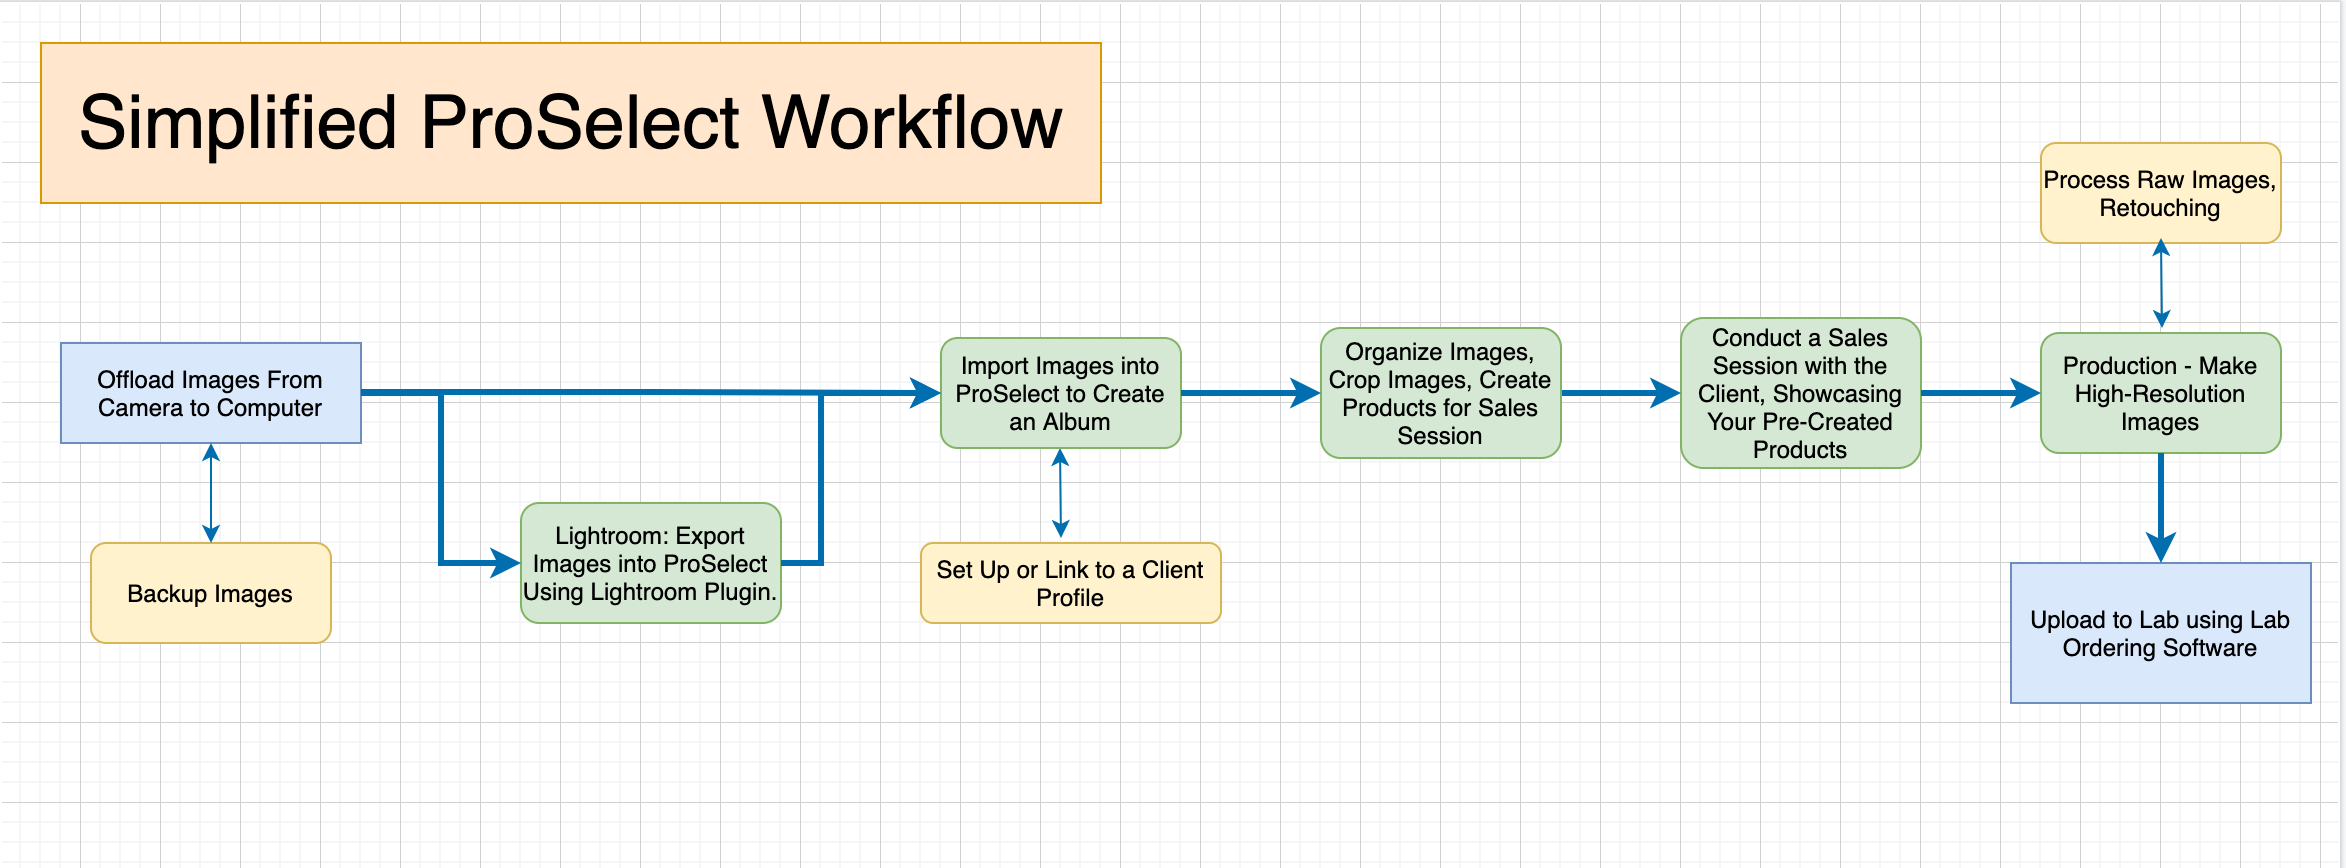
ProSelect provides workflow options tailored to deliver a personalized and high-quality in-person sales session to your client. These workflow options are a guide. You can customize and create your own process based on your specific needs.
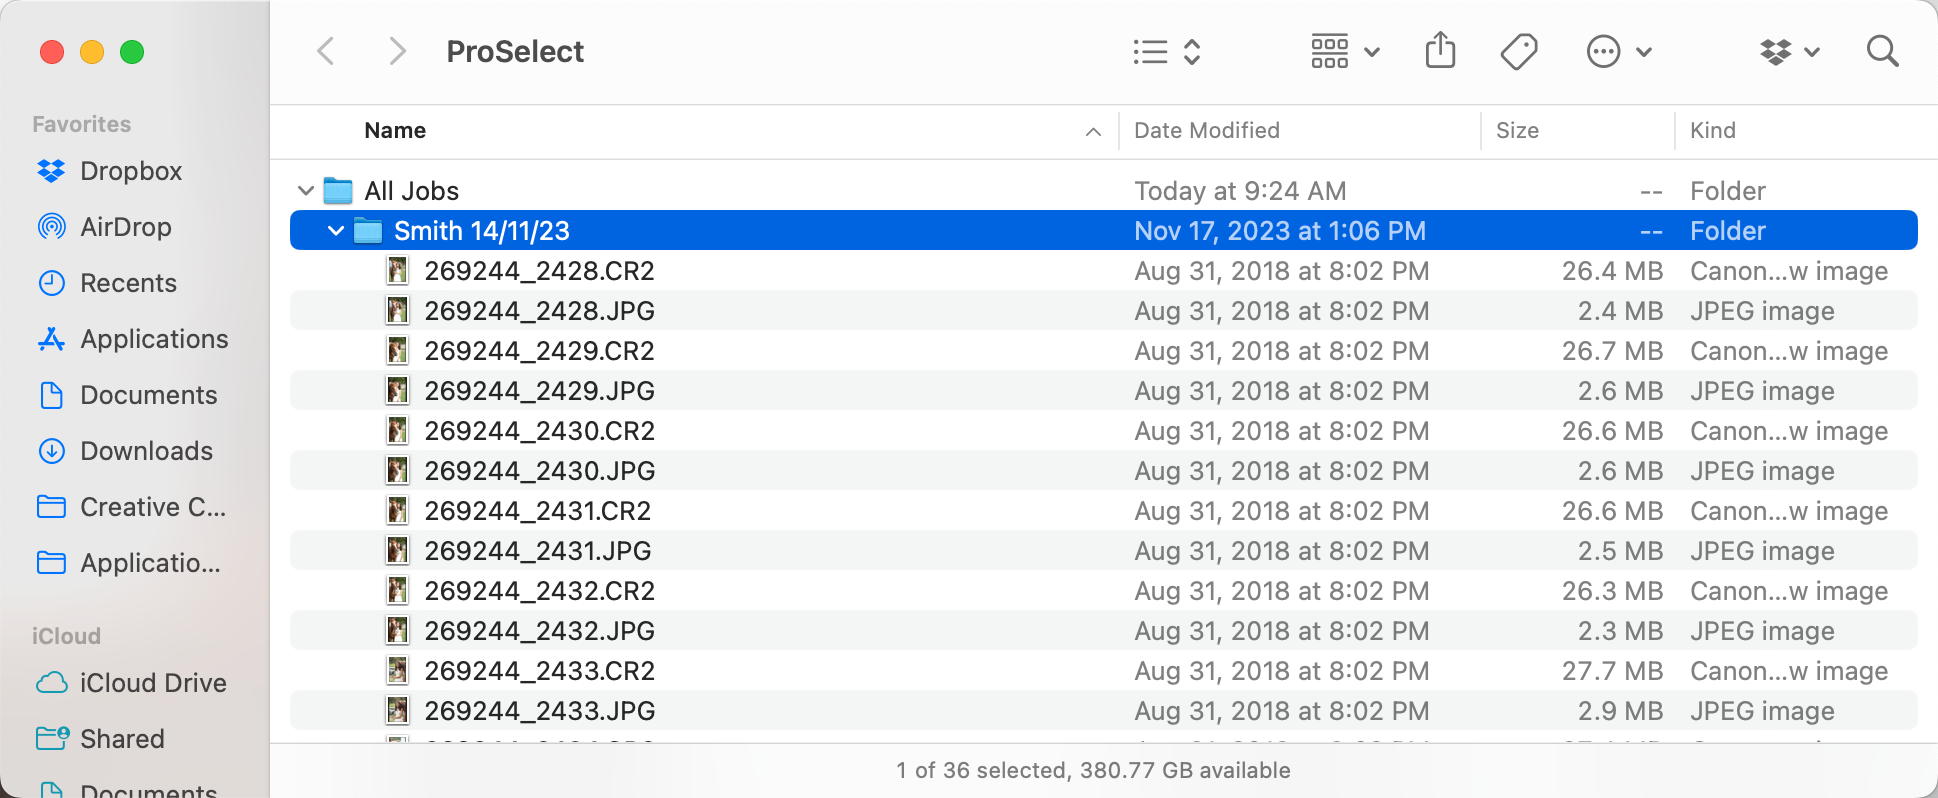
- Create an "All Jobs" folder on your computer.
- Within that folder, create a folder for the client. Use the client's name as the folder name, and add the date. E.g. Smith 14/11/23
- Offload all images into the folder.
- Create a backup of all your images. Save them to a different location such as an external drive.
You can add any sized JPEG, TIFF, or PSD file to ProSelect. If you are shooting RAW and don't have a compatible file for ProSelect to import, use Lightroom to create a JPEG and import directly from there.
- Open ProSelect.
- There are a number of ways to add images to ProSelect. Choose from one of the following options:
- On the top menu, go to Images > Add Folder of Images or Add One Image.
- Drag and drop a folder of images (or a single image) into the Image List on the left of the main screen.
- Drag and drop a folder of images (or single image) into the ProSelect application icon.
- Use the Add Folder of Images to Album toolbar button
 (on the right of the main screen).
 Quick Tip - RAW Files
If your folder of images contains both RAW and JPEG/TIFF/PSD files, ProSelect will ignore the RAW files and only import the JPEG/TIFF/PSD files. A link will be created to the RAW file for use in Production. Click on Importing Raw Files for more information.
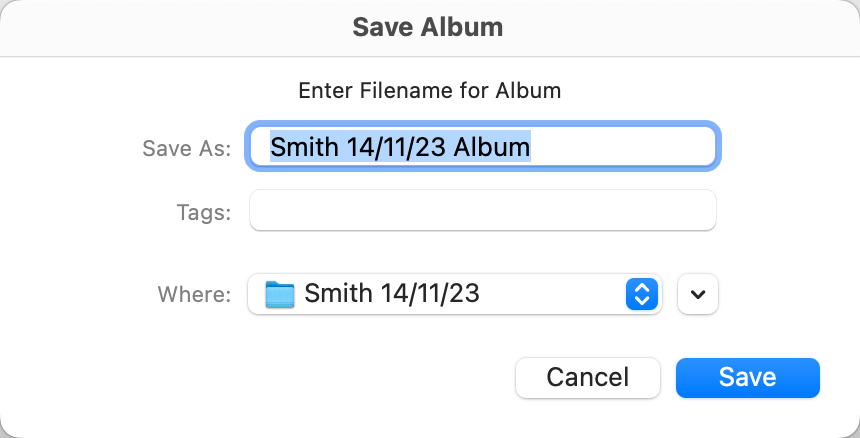
- On the top menu, go to File > Save Album.
- Name the album using the same method as the original job folder e.g. Name and date.
- Save the album into the client folder.
- By default, images are added to the Maybe tab
 . However, you have the option to change this setting so that they always load into the Yes, No, or currently selected tab. On the top menu, go to ProselectEdit > Settings > Importing Images > Adding Images.
If you are using Adobe Lightroom Classic, you can export images and videos directly from Lightroom into ProSelect. This is the recommended workflow if you are shooting RAW files. A JPEG file will be created and can be imported into ProSelect. Before using this feature, install and test the Lightroom Plugin.
- Open ProSelect.
- In Lightroom, select the images you wish to export.
- Go to File > Export.
- Export To: Select ProSelect from the drop-down menu.
- Select either Create a New Album with the selected images OR Add the images to the currently open album. (Update in Open Album).
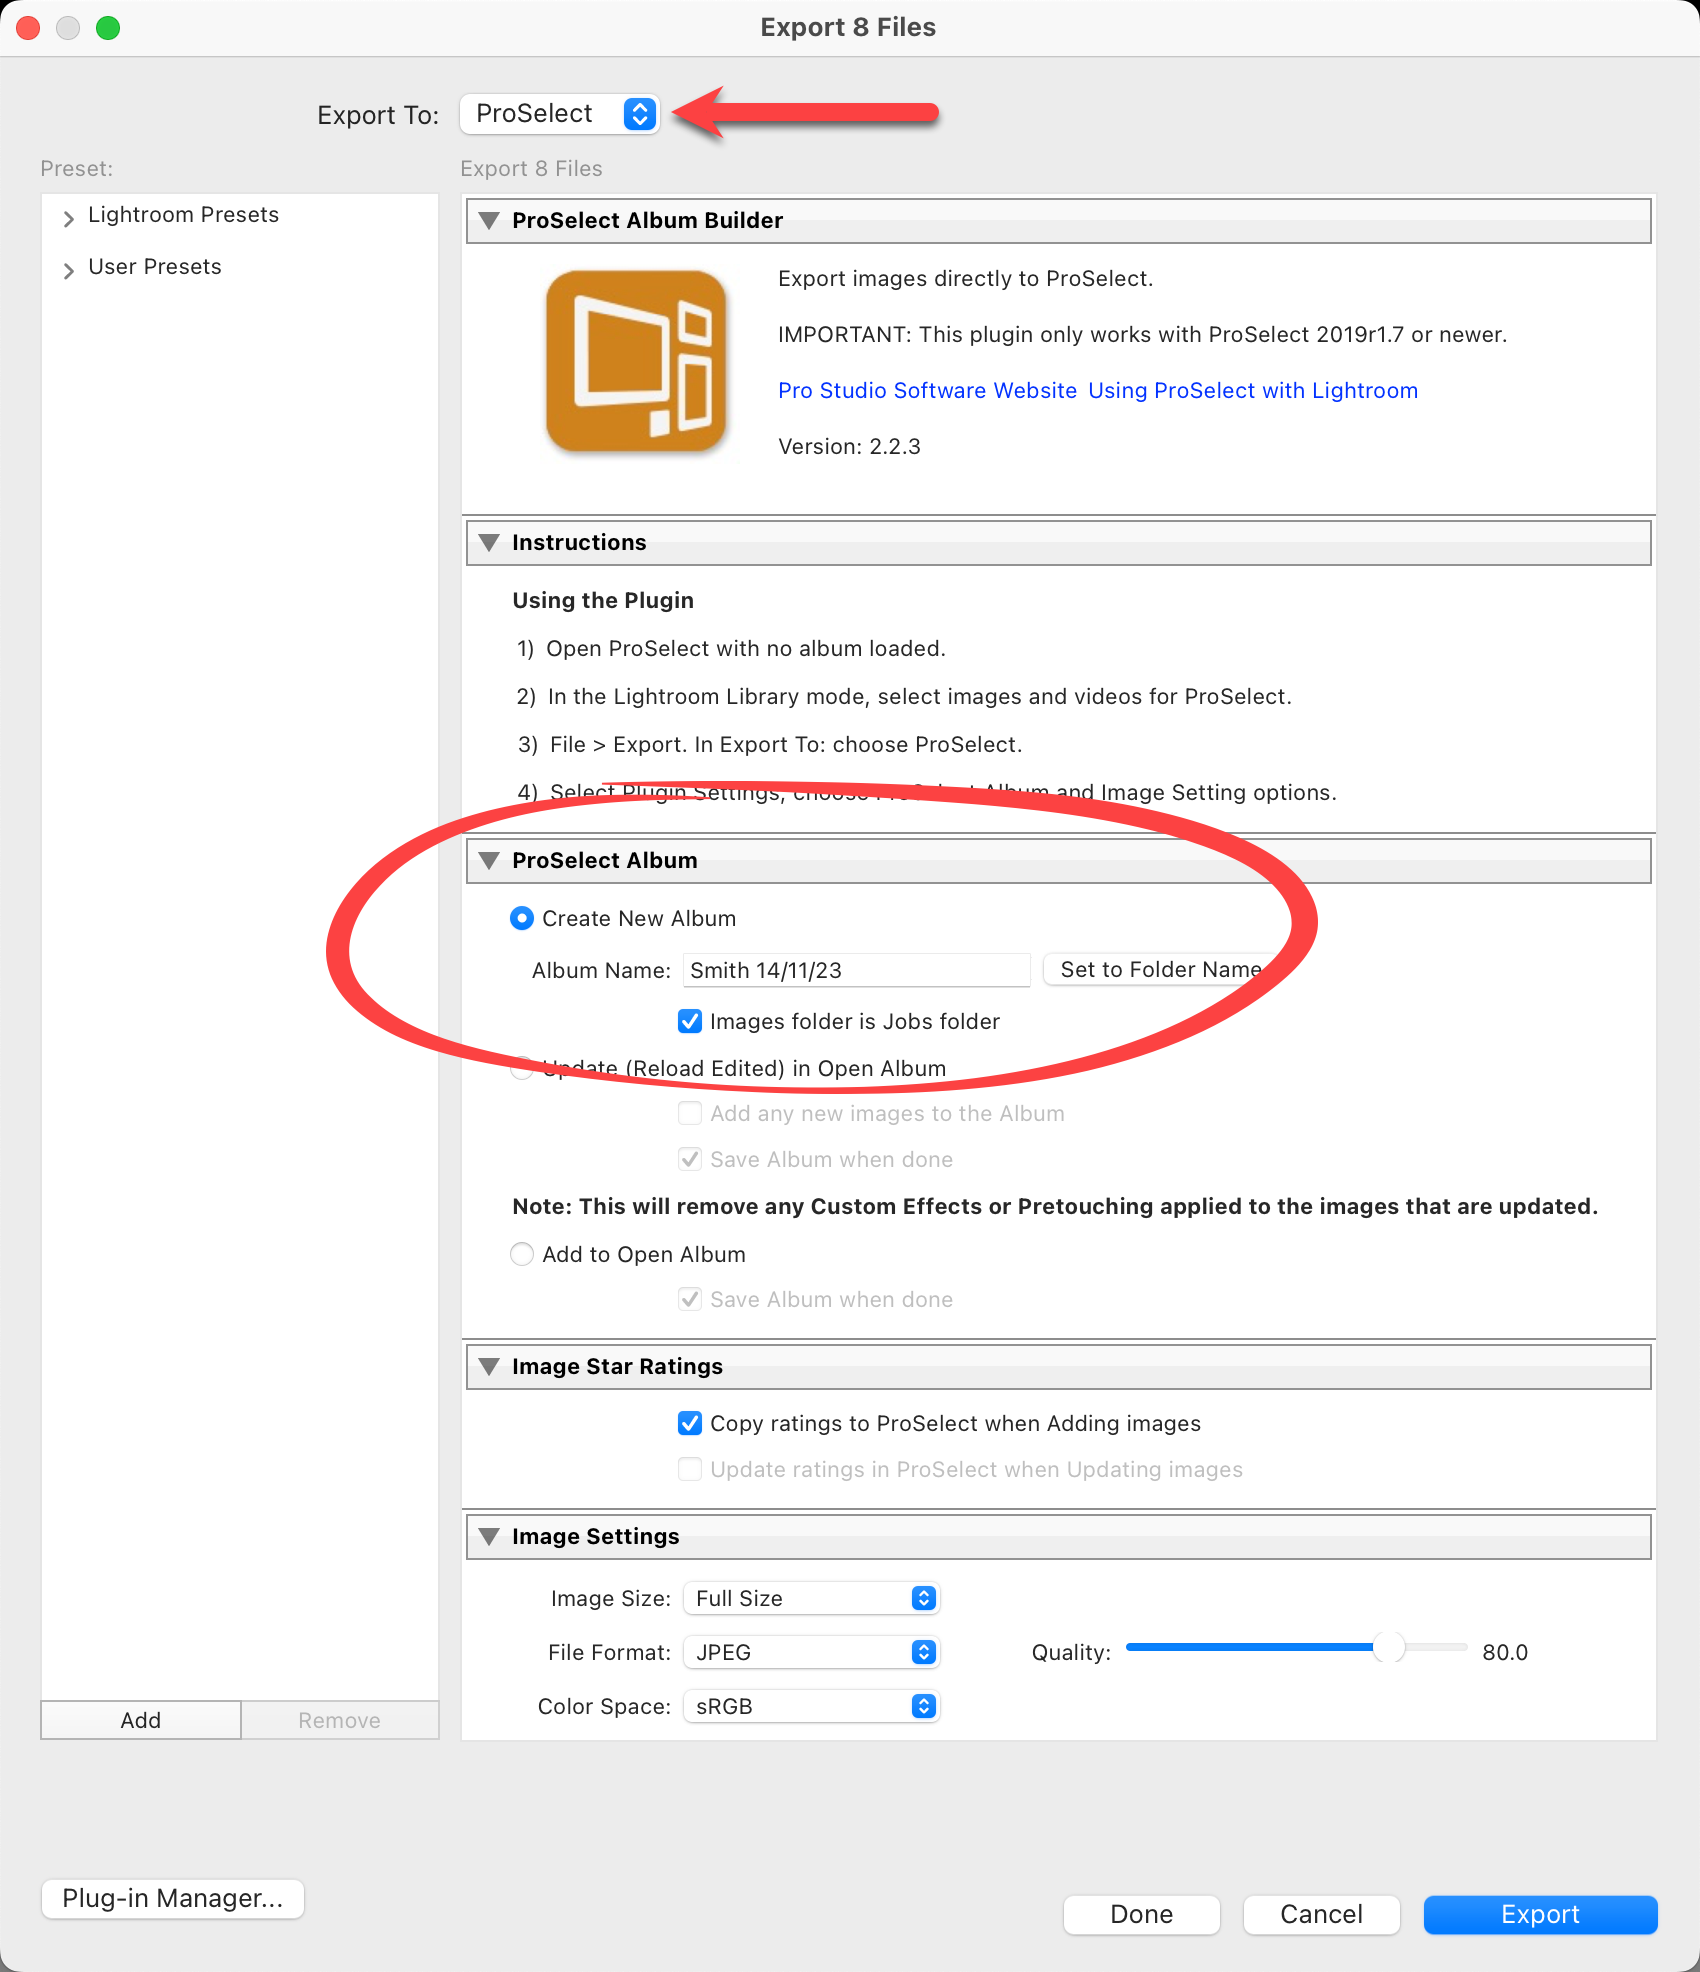
- You can use the folder name as the Album Name or type in a name (if creating a new album).
- Check the "Images folder is Jobs folder" box to ensure the ProSelect album is saved alongside the original images.
- Check the box to include any Image Star Ratings.
- If needed, adjust the image size, file format, and/or color space. The default settings should be fine unless you have a reason to change them.
- Click the Export button.
- The exported images will be imported into the desired album in ProSelect. ProSelect will save the album using the Album Name created above.
The copies created from the RAW files will appear in the folder alongside the original RAW files. Any existing image files of the same name and type will be deleted. If you have only imported JPEG images into Lightroom, you must export them as a different type (eg TIFF or PSD) or the export will be stopped to prevent the original images from being overwritten. See Troubleshooting - Lightroom Plugin Stops Export for more information.
If you plan to use the exported images for final production, you should export them at Full Size at a quality of 90 or higher. The color space should match that of your Photoshop Color Settings.
If the images are only for viewing and you intend to reprocess the Raw images into full-sized images during production, choose Large Size (up to 2400 pixels) to save drive space. Otherwise, choose Full Size.
- Open your ProSelect Album. Create a Client profile, or link to a Studio Management software such as Studio Cloud.
- Send the Client an invitation through SendMyRooms™.
- Go through all of the images in the Album. Sort and remove any unwanted images.
- Apply any desired cropping to images.
- Change the display order of the images by dragging them in Thumbnail view.
- Apply Image Effects: You can apply Pretouching Presets, transform to B&W, use a special tint, or apply Photoshop actions to one or more images at a time.
- Select any photographer favorites. You can apply the favorites stamp or use the star system.
- Create Products: Create products or books using the client's images. These can include composite collages, ornaments, cards, books, etc.
- Create a custom slideshow (or use Quick Slideshow) for use during the sales session.
- Import Client Rooms: Import and calibrate the client's room images from SendMyRooms™.
- Play Slideshow: Open up your Client Album, and play the prepared slideshow in Working with Images. You can optionally choose "start paused" (On the top menu, go to Slideshow > Start Paused) so that it is open and ready to go when your clients arrive.
- Go Through Images: Sort through the images with your client. As the client makes selections, you can move images into the Yes, No, or Maybe tabs. You can flag favorites, or use the star system.
- Compare Images: You can compare similar images side by side. To show different image effects, duplicate the selected image first, then apply the image effect.
- When an image has been selected, use the Create Print Product tool.
- Show at Actual Size: Switch to Working with Products, Actual Size view to visually help clients choose a size for their favorite wall portraits.
- Show in a Room: Switch to Working with Rooms to create or show a wall grouping.
- Add a Frame: Use the frame tool to show clients how their favorite images look with a frame.
- Order Large Wall Portraits: After you have decided on the best size, order your print or wall grouping.
- Showcase Products or Books: Show the client any products you have created with their images. These can include composite collages, ornaments, cards, books, etc.
- Extra Print Orders: Order any extra prints using the shopping cart tool.
- Circle back to any favorite images that have not yet been ordered (use the filtering options in Working with Images). Add any additional prints to the order.
- Review Order: Print out the Order Report and review it with the client. Have the client sign off on the order.
- Collect Deposit: Record and collect any payments (this can be done in the Review Order dialog).
- Save Album.
- Export Order: If you use Studio Management Software such as Studio Cloud, export the order so it can link to it.
Workflow Option 1: JPG + RAW Using Photoshop
- On the top menu, go to Production > Production Manager.
- Select the first image.
- Click on "Open Raws in Photoshop"
- Process and Retouch the image in Photoshop.
- Save as a .tiff
- Repeat for all other prints, products, and digital files.
- Reload images back into ProSelect.
- Click on Produce Images.
Click on Retouch RAW Files Using Adobe Camera Raw or Retouch JPEG Files Using Photoshop for more information.
Workflow Option 2: Raw Using Lightroom
- On the top menu, go to Production > Production Manager.
- Select the first image.
- Click on "Open Raws in Lightroom.
- Process and Retouch the image in Lightroom.
- Export .tiff from Lightroom using the Lightroom Plugin.
- Repeat for all other prints, products, and digital files.
- Reload images back into ProSelect.
- Click on Produce Images.
Click on Retouch RAW or JPEG Files Using Lightroom for more information.
Each print lab uses specific software for image uploads. For more information, please refer to your print lab's website.