 Thumbnail View
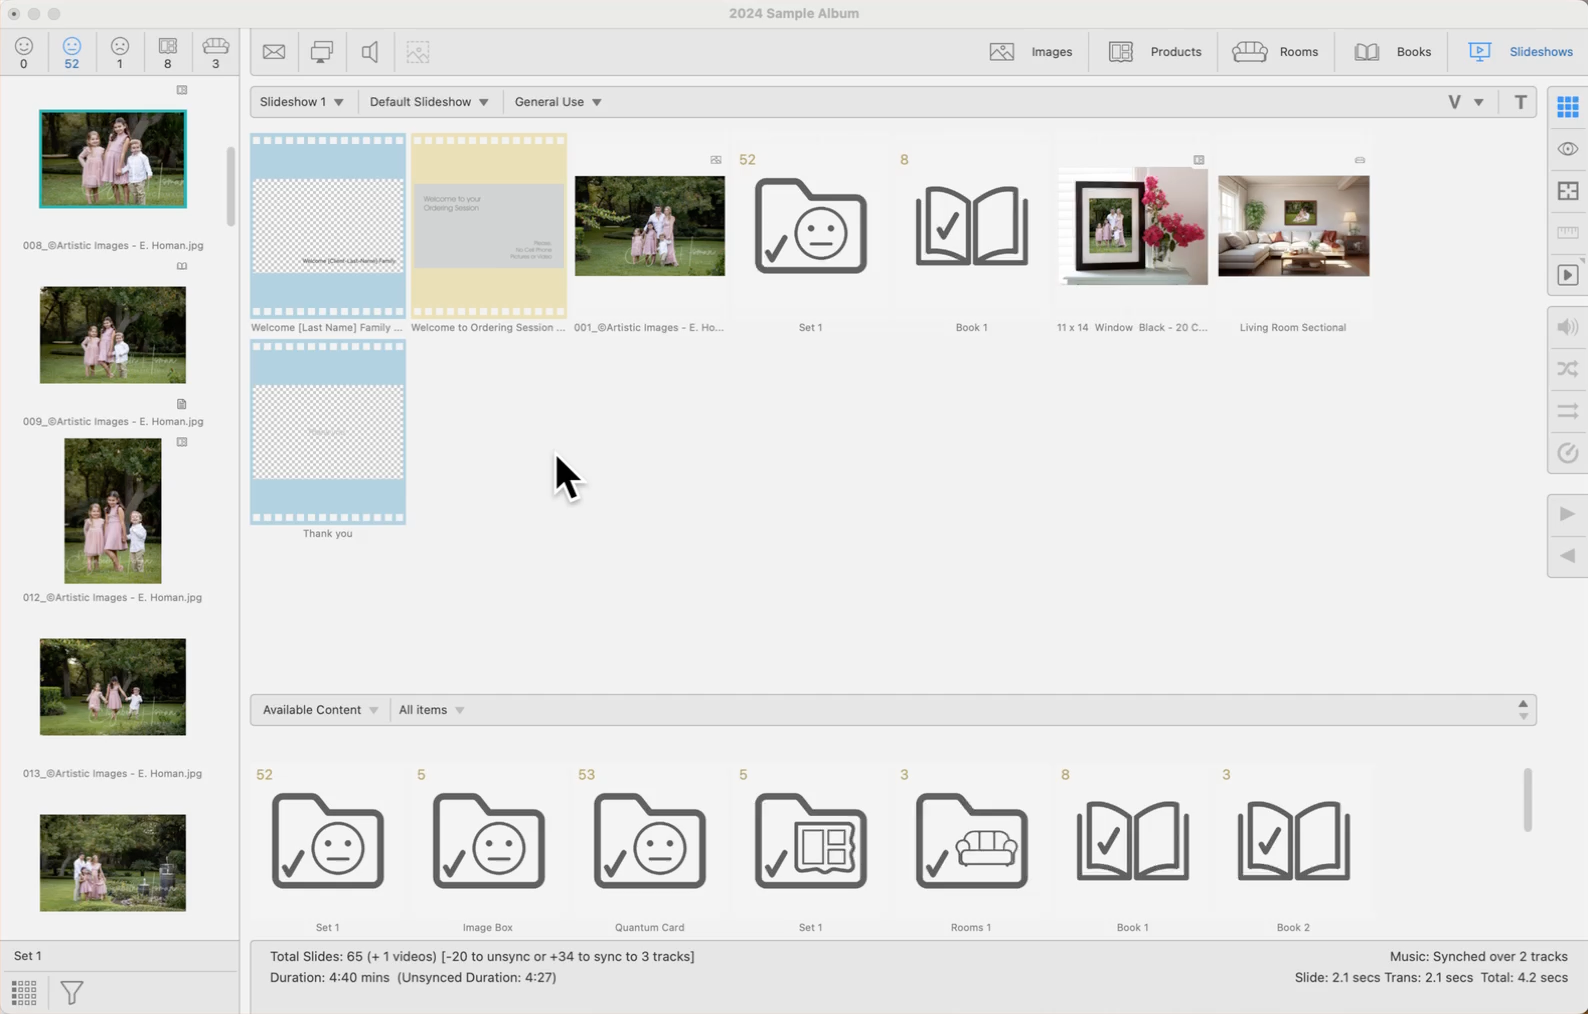
In Thumbnail view, you can manage and customize your slideshow by creating a timeline of elements. This allows you to organize, style, and adjust all the components that make up your slideshow directly from this view.
How to Access Thumbnail View
- Click on the Thumbnail view button
 . It is the topmost View mode located on the right-hand side.
 - When in a different view mode, press the "T" key to toggle between Thumbnail view and Preview Slideshow Slides.
- On the top menu, go to View > Thumbnails.
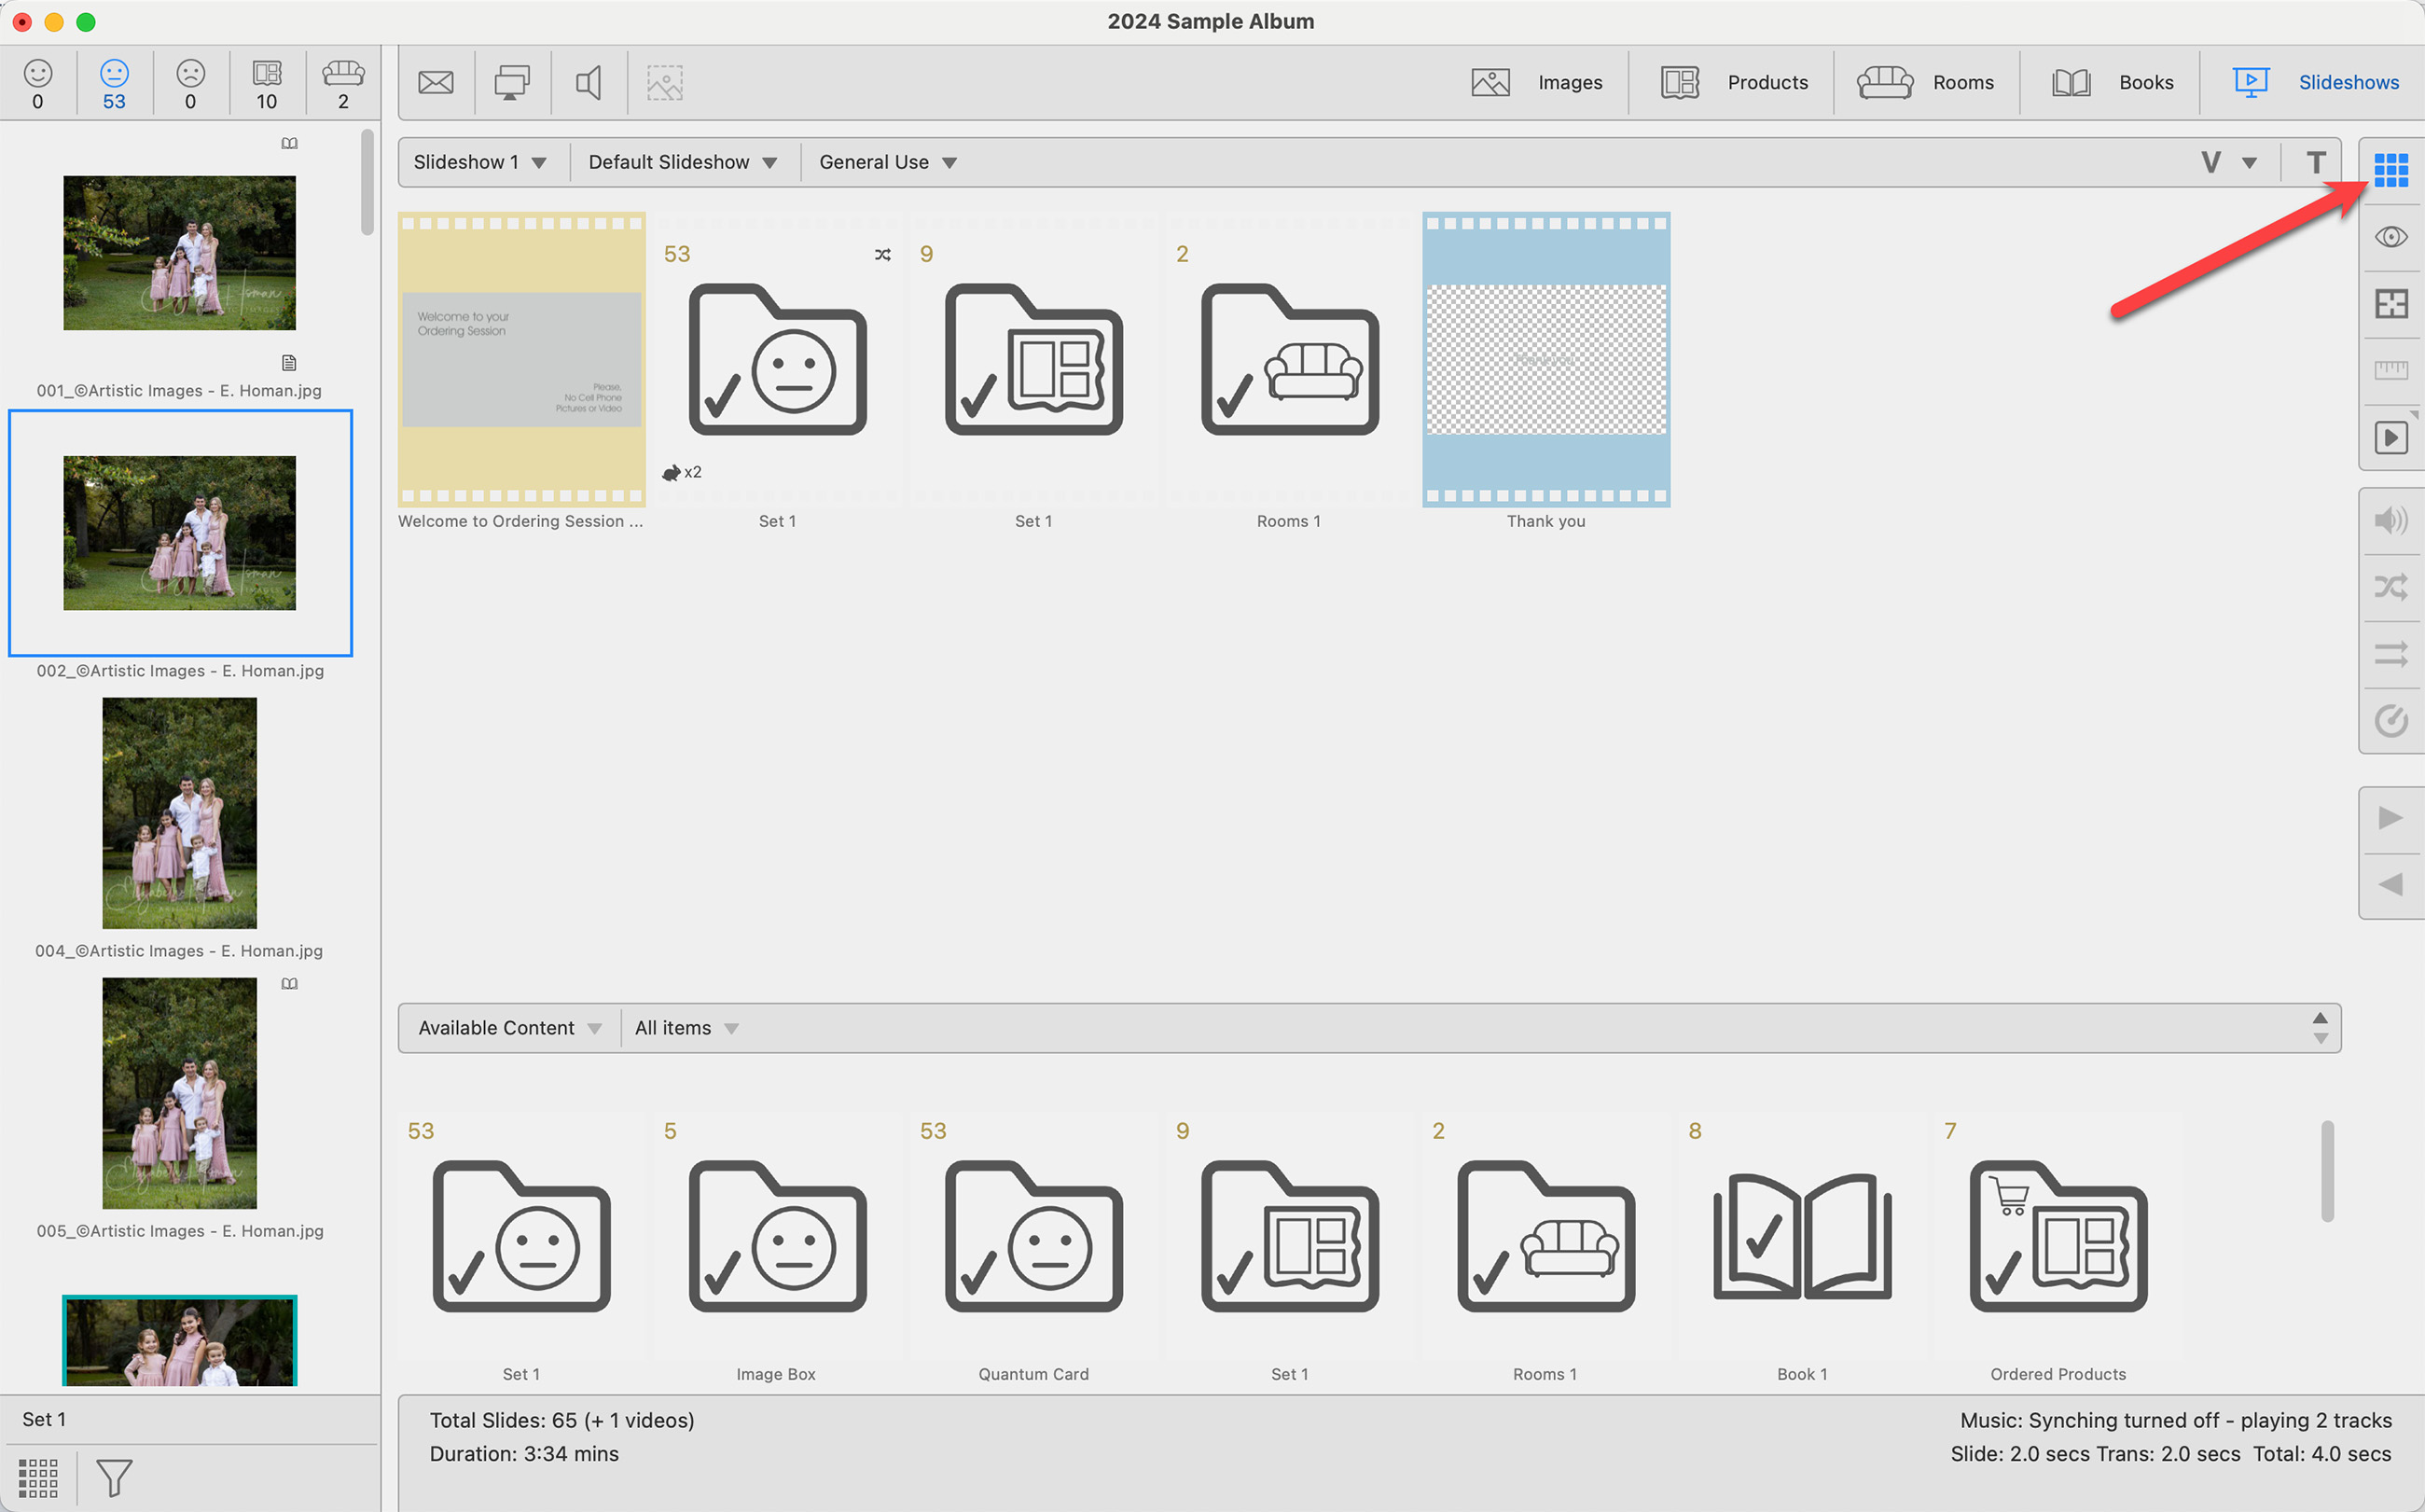
Using Thumbnail View
- Create Multiple Slideshows: ProSelect Pro allows you to create up to five different slideshows (or one in the basic ProSelect version). You can choose which slideshow to set up and play by clicking on the "Slideshow 1" in the top bar.
- Add Content: You can add various content to each slideshow from your current album. This can include individual items, Album Sets, Title Slides, and Video.
- Random Order: Select an Album Set and use the Use Random Order tool to play its contents in a random sequence. If you prefer the original order, toggle it back with the Use Original Order tool.
- Title Slides and Videos: Incorporate Title Slides from your resources and add Library Videos. If you have ProSelect Pro, you can also include Album Videos related to the current project.
- Organize Play Order: Drag items within the slideshow to adjust their order of appearance or remove them by selecting them and using the deletebackspace key.
- Slideshow Style and Music: Choose a Slideshow Style for playback and select a starting music track from the Slideshow Style’s associated Music Group.
- Sync Music and Timing: Check the timing and music synchronization status in the Info Bar at the bottom. ProSelect can also automatically select the best starting music track to sync with your chosen music group, ensuring a seamless audio-visual experience.
When creating your slideshow in ProSelect, you can incorporate various elements from your album.
- Images, Products, and Rooms: From the Image List, drag and drop your selected images, products, or room views directly into the slideshow timeline.
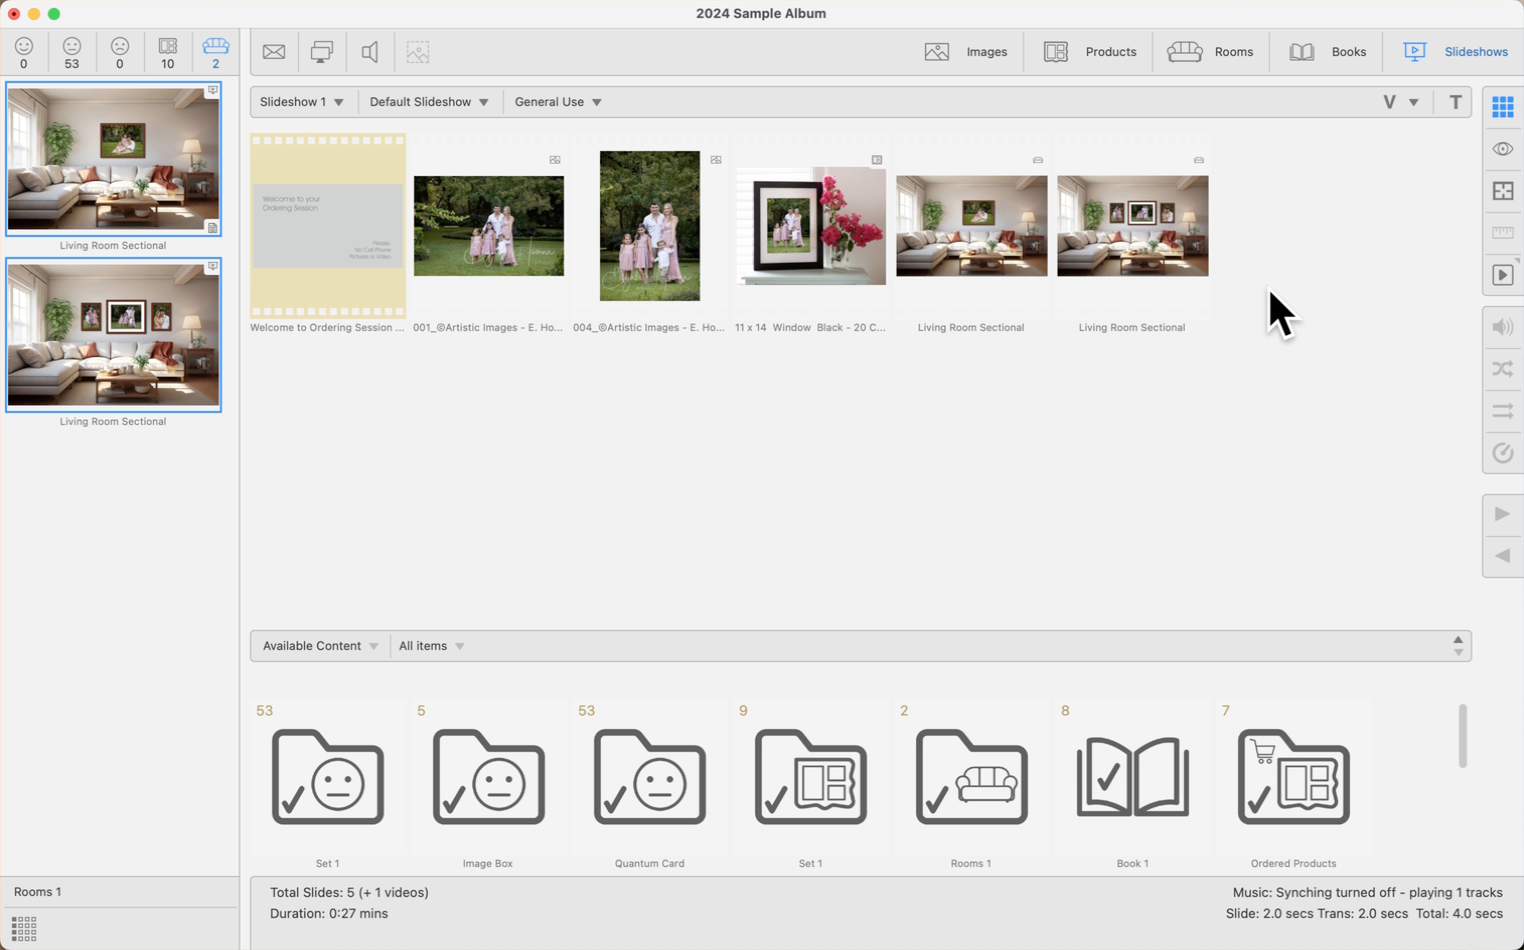
- Album Sets: To include a complete set of album content like images or book pages, go to the Resources Area. Open "Album Sets" in the popup menu, select the specific subgroup you need, and then drag it into your slideshow timeline. Adding book pages to your slideshow can only be done through this method.
- Title Slides: You can also drag title slides or groups of title slides from the Resource Area into your slideshow. When you add title slides from a group into your slideshow, each slide is added individually. This allows you to rearrange and position each title slide as needed within the slideshow timeline.
- Video: Select either a Library Video or Album Video from the Resource Area and drag it into your slideshow (Pro users only).
- Filtering Content: If you want to streamline what’s displayed in the Resource Area, select the "Available Content" option. This will only show non-empty album sets, along with any available videos and title slides. You can further refine what’s shown by choosing to display only album-specific or resource-specific (Library) items through the subgroup selection.
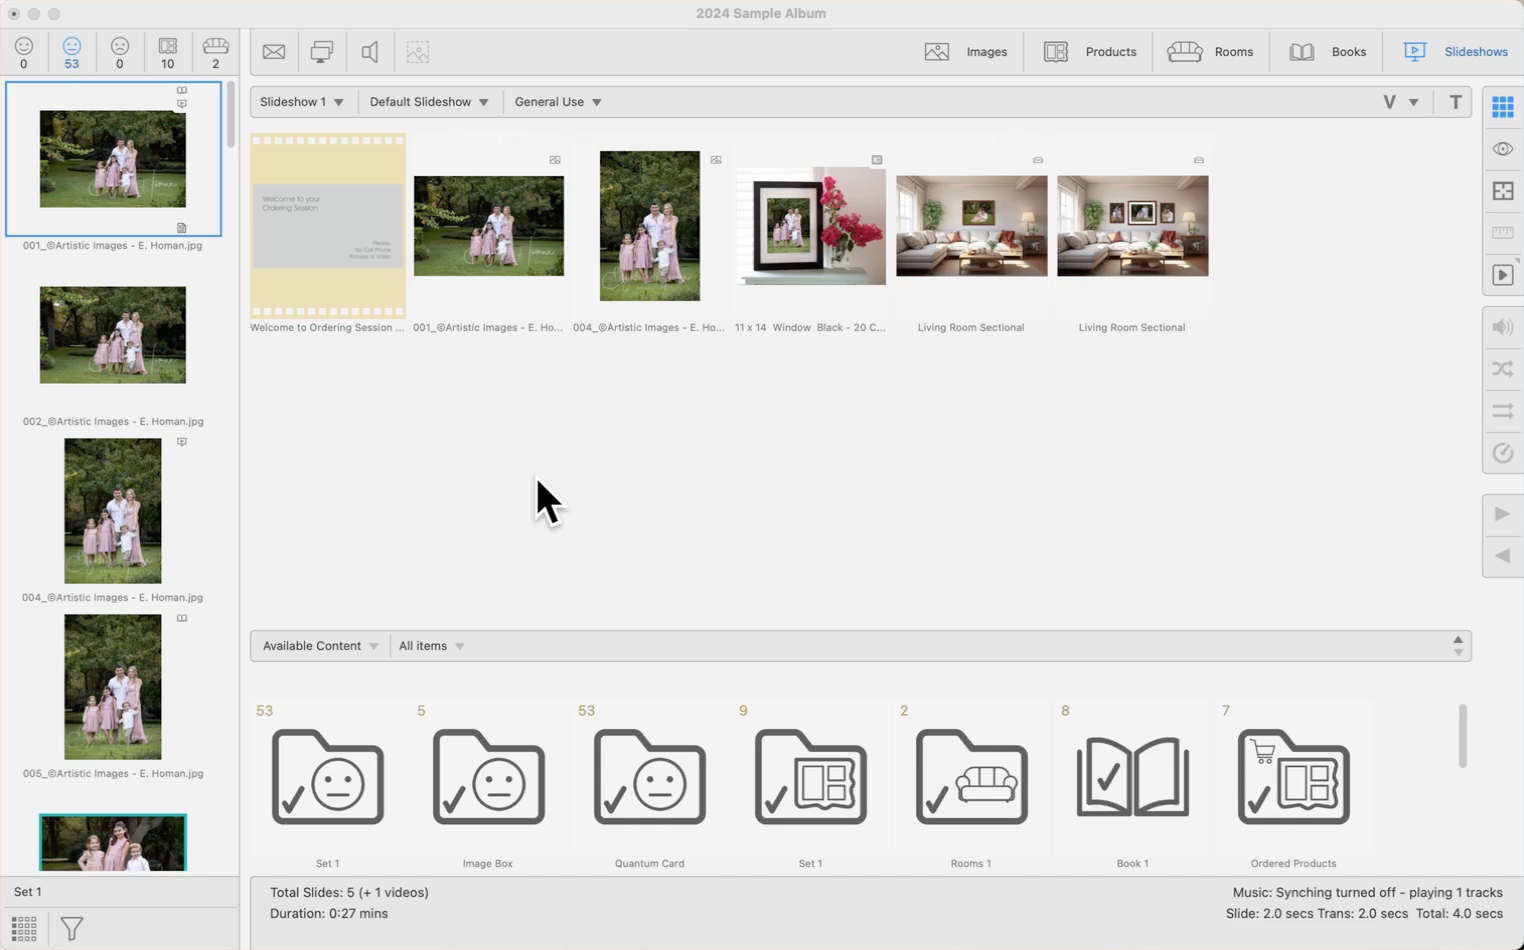
If a set contains multiple slides, you can spread these out as individual slides in the timeline. You can see how many slides are in a set by looking at the count displayed in the top left corner of the set's thumbnail. This feature allows you to individually manage or rearrange each slide within a set directly in the timeline.

- Once the set is in your slideshow timeline, right-click on it.
- You can convert the selected set into slides in one of three ways:
- Current Display Order
- Name
- Randomly
- Select one of the options from the list. It is important to note that you cannot undo this action once you expand the slides.
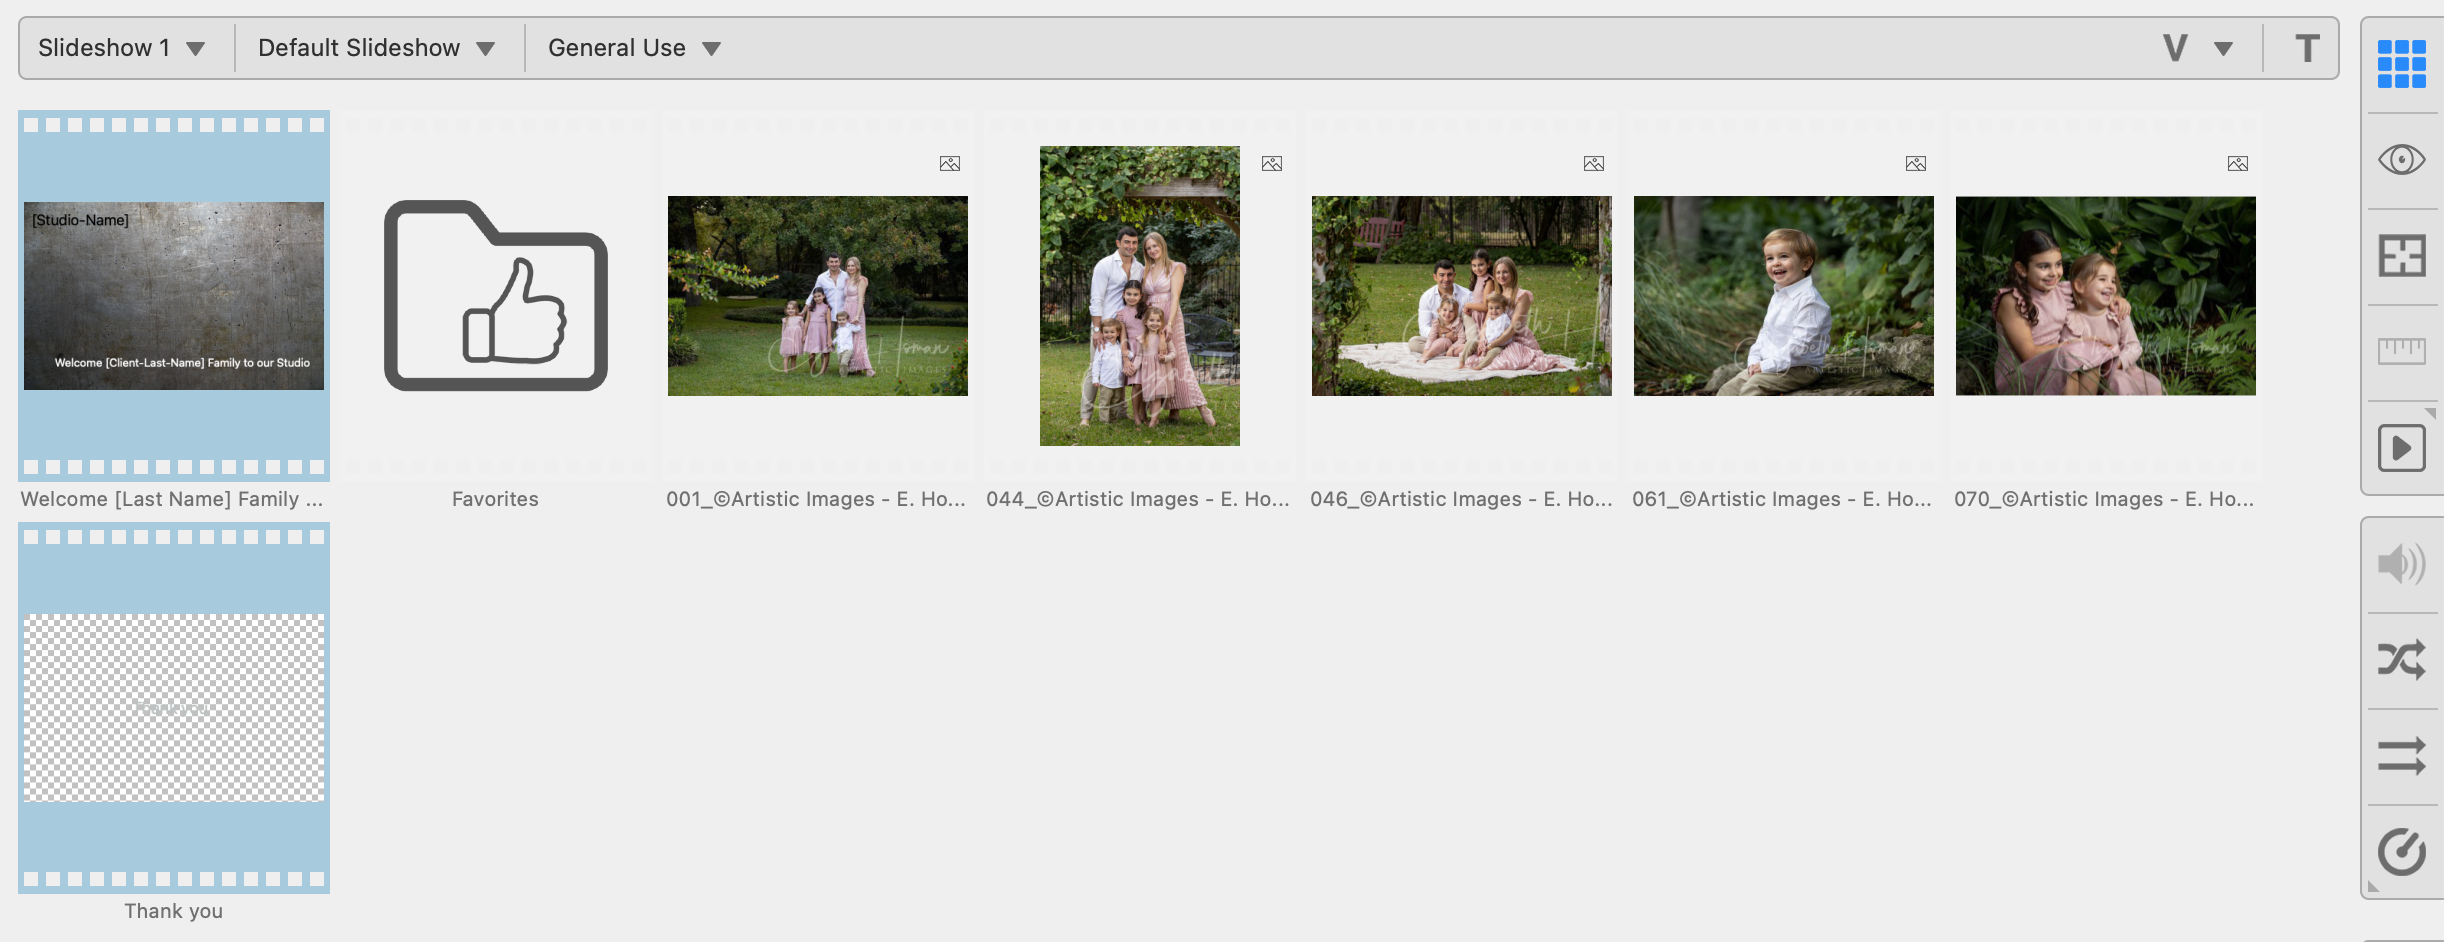
- Once the set has been converted to slides, you can rearrange the order by clicking and dragging the individual slides.
In order to undo this action, you can select all the slides within the set you just expanded, delete them, and then re-add the set from the resource area.
In your slideshow, you can select any Album Set and activate the Use Random Order ![]() tool to randomize the playback order of that set. Once activated, a random order tag
tool to randomize the playback order of that set. Once activated, a random order tag ![]() will be displayed on the thumbnail of the set.
will be displayed on the thumbnail of the set.

- Use the Original Order
 tool to deactivate the random order option.
 - Activating this option will establish a new random sequence each time.
- The last random order you set is saved within the album file, so it will retain the same order each time you reopen the album.
Preview the Random Order
When previewing your slideshow in Thumbnail view, double-clicking on an album set will switch to the Preview Slideshow Slides view, showing the first image in that set.
- To shuffle the order, click the Use Random Order tool in this view.
- If you want to see where all the images will appear during the slideshow, switch to the Show/Edit Ken Burns Focal Point view, where images are displayed in the random order they will play.
- You can shuffle and preview another random sequence using the same Use Random Order tool in this view.
Select the music you want to play for your slideshow by going to the top bar and clicking on the drop-down arrow next to the music group. Select a starting track from the list.
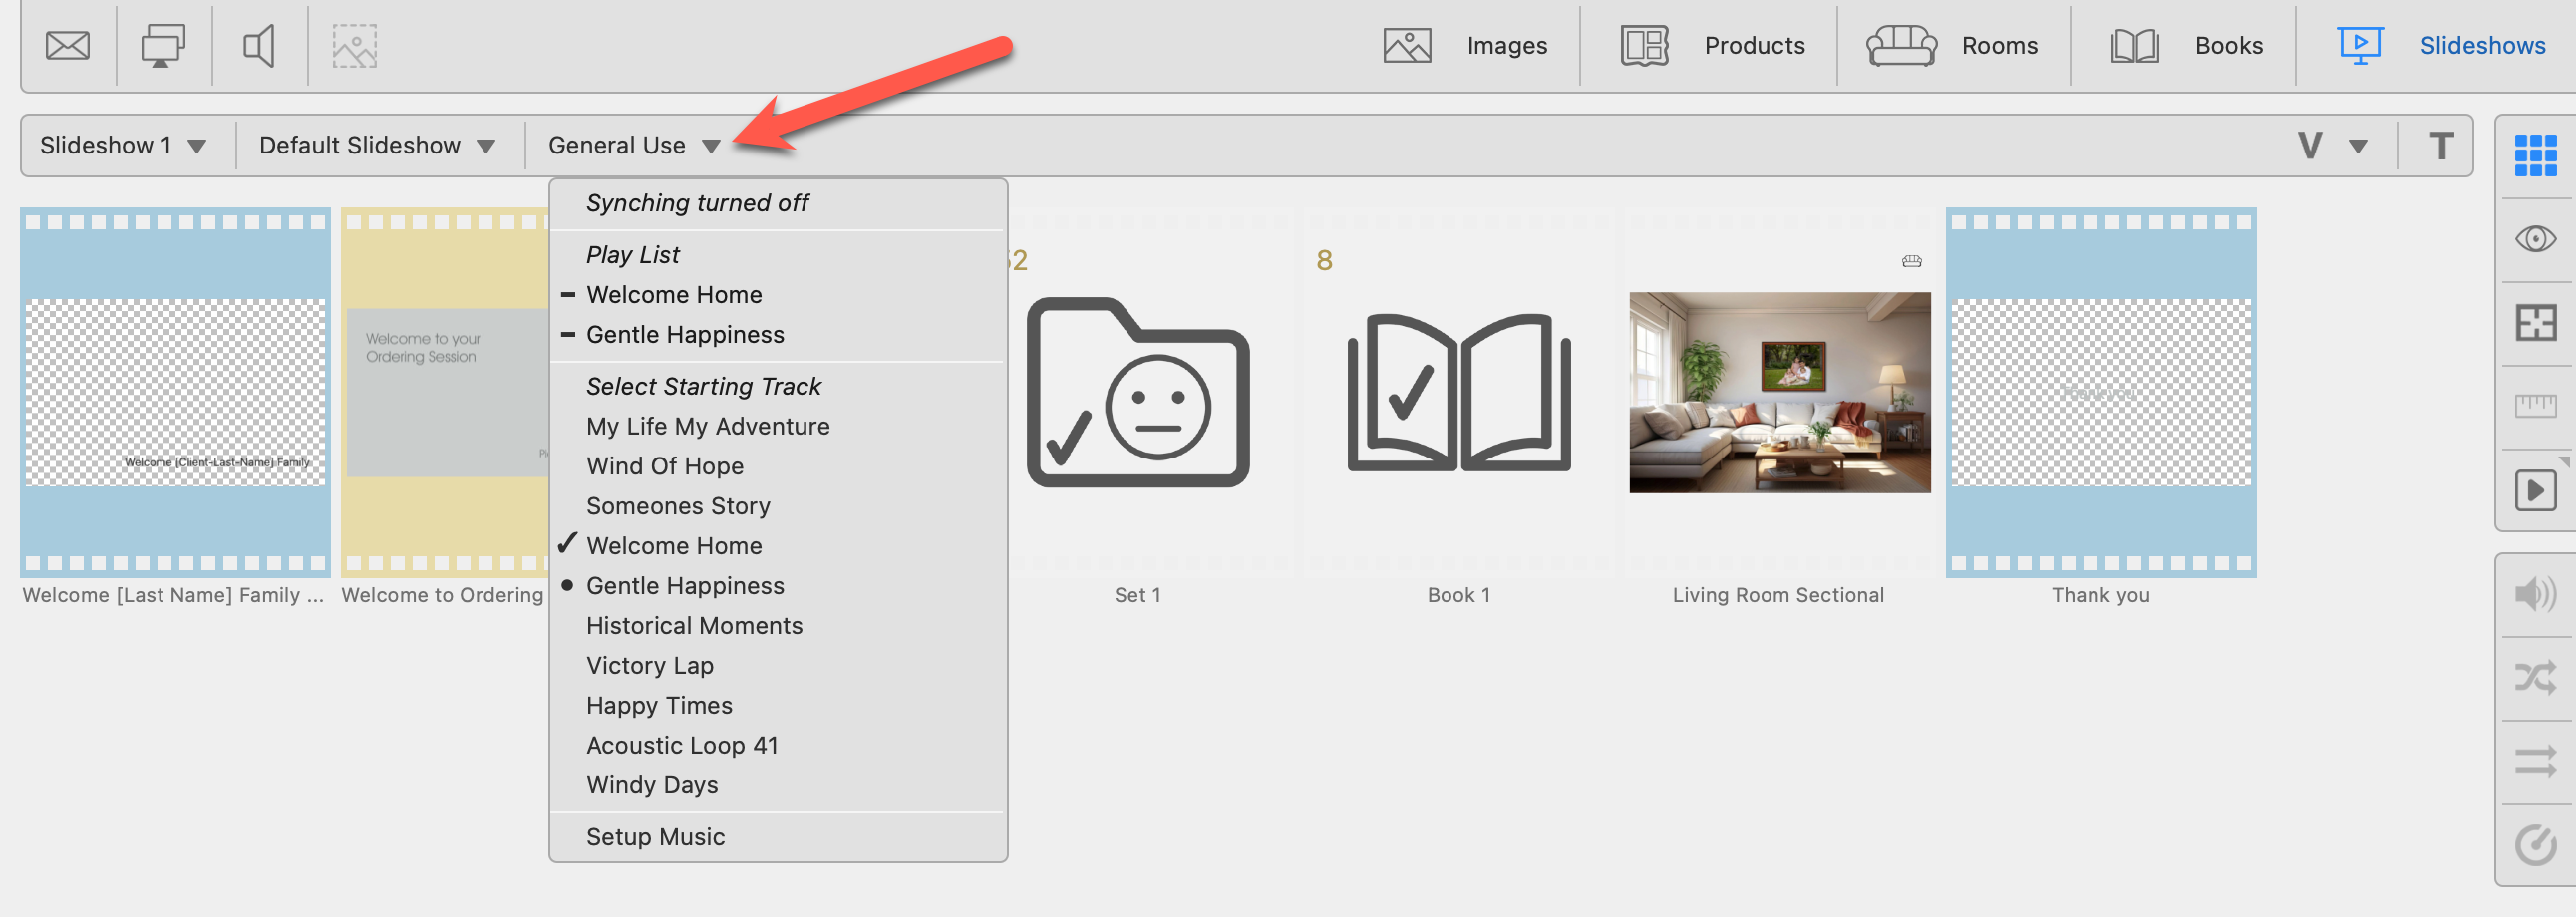
- Synching to music can be turned on by editing the Slideshow Style.
- The "Play List" will list the tracks selected to play in the current slideshow. The number of tracks listed depends on the overall length.
- All tracks in the music group will be listed below "Select Starting Track." A checkmark indicates which track has been selected as the starting track. By default, the tracks will play in order. You can rearrange the order in Setup Music.
If your slideshow lasts longer than the total duration of your selected music tracks, ProSelect will automatically loop back to the first track in the music group and continue playing.
When setting up a Slideshow Style in ProSelect you have the option to sync slideshow with music.
About Music Syncing
- Default: ProSelect automatically uses the first track in your Music Group. You can adjust the order of the music tracks in the Setup Music dialog.
- Track Suitability Rating: The star rating indicates how well a track matches your preferred slide and transition times set in the Slideshow Style. Four green stars represent the best match.
- Unsuitable Tracks: A red "X" indicates that starting from that track will not sync the music well, and the slideshow will play at your preferred time, fading down at the end.
- Music Looping: If more tracks are needed than are available in your Music Group, ProSelect will loop back to the first track.
- Flexibility in Timing: Setting a wider range for acceptable slide and transition times increases the likelihood of finding tracks that will sync.
- Pausing: If you pause the slideshow using the Space Bar, the music will pause as well, maintaining synchronization upon resumption.
- Auto-Select Best Music Track: This option allows ProSelect to automatically choose the music track that best matches your preferred slide timing set in the Slideshow Style. This can be set as the default for all new albums in the Slideshow Preferences.
Steps to ensure smooth playback:
- Check Sync Compatibility: Verify in the bottom right corner of the Info Bar if the number of slides in your slideshow can synchronize effectively from the start of the first music track. Make sure the slide times align well with the music.

- The slide time and transition time are listed below the music sync. To adjust it, see Slideshow Styles.
- If the music does not sync, it will be indicated here and the music will instead fade out at the end.
- Not enough slides may have been the reason for the music not syncing, or the slide transition times were too tight.

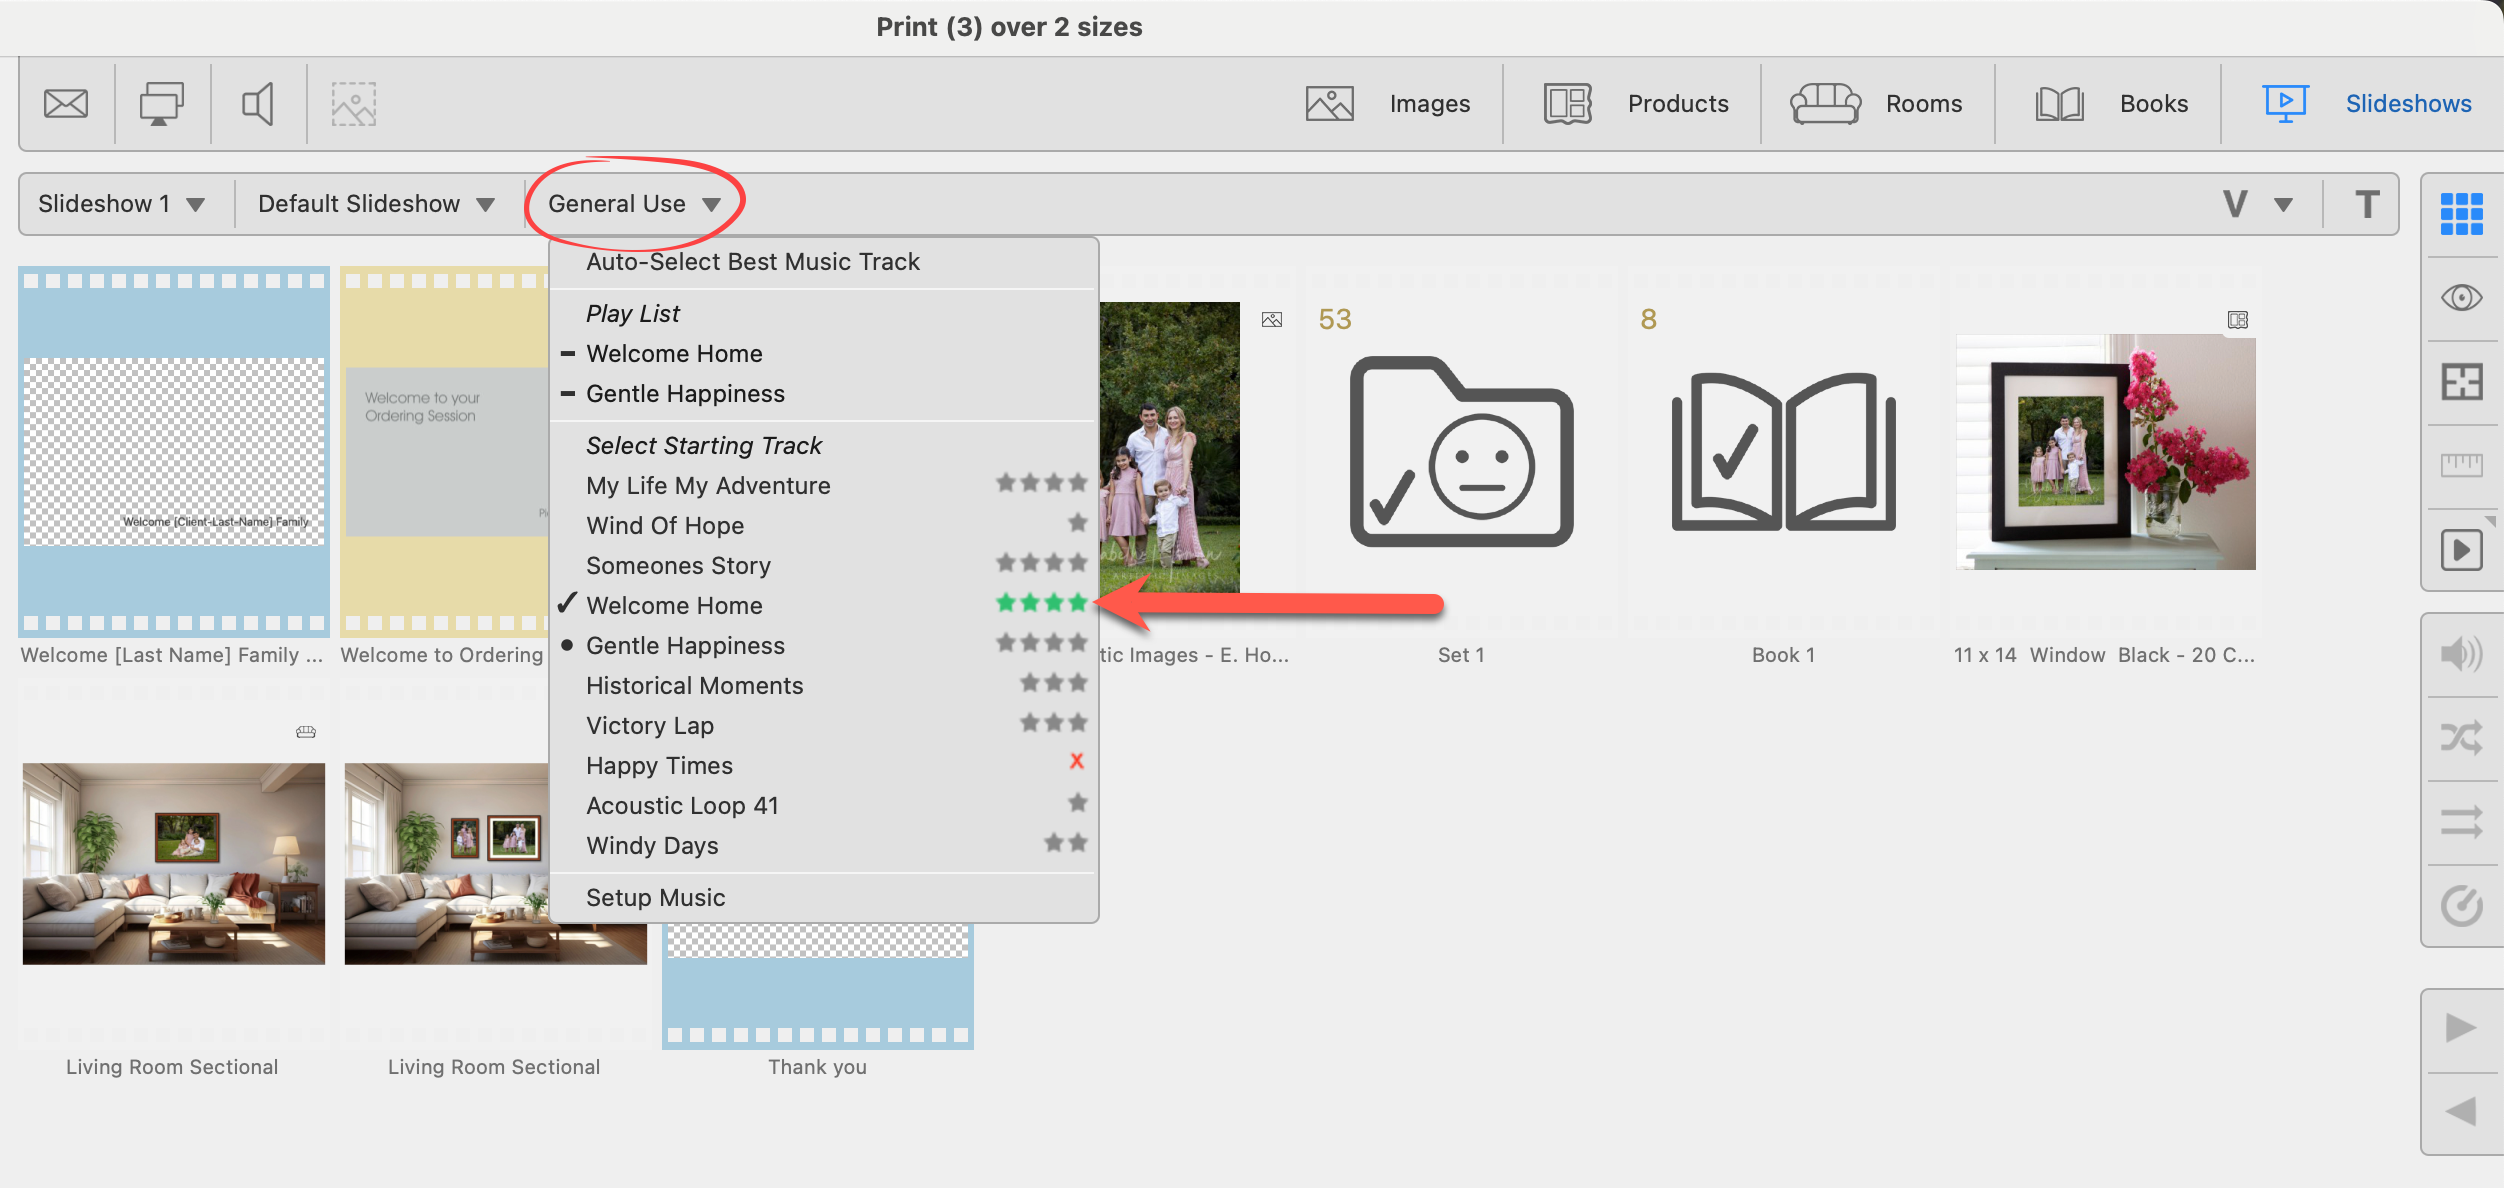
- Select Starting Music Track: You can change the starting music track by clicking on its group name in the title bar to open a popup menu. Here, you can choose a different track from your selected Music Group to start the slideshow.
-
- In this case, the music track "Welcome Home" is selected. The green stars indicate it is the best starting choice for syncing the slideshow to music.
- Because 2 music tracks are required for the length of the slideshow, "Gentle Happiness" will play next.
- The "Play List" at the top of the menu will show which music tracks will be played.
- Note that music tracks with a red "X" should not be used as the starting track for music syncing.
In ProSelect Pro, you have the ability to create up to five different slideshows within each album. If you want to create a variant of an existing slideshow, you can easily copy it to another group.
Copying slideshows is a Pro feature. Upgrade your subscription to Pro on the Pro Studio Software website.
- Reveal all Slideshow sets by clicking on the drop-down arrow next to "Slideshow 1." Select "Show All Sets" from the list.
- Select all the slides in the slideshow you want to duplicate by pressing CmdCtrl + A.
- While holding down the OptionAlt key, drag and drop these slides into another slideshow group, which is typically empty.
This action will copy all selected slides into the new group, allowing you to modify or adjust this version without affecting the original.
Tools Available in Thumbnail View
When playing video clips within a slideshow, you have several audio options. Clicking on the Background Music Level tool ![]() will allow you to adjust the background music level.
will allow you to adjust the background music level.
Background Music Level
- High (No Video Sound): This option will mute the video sound completely. The slideshow backgroud music will be played.
- Medium (Video Sound On): The slideshow background music will combine with the video sound at a medium level.
- Medium-Low (Video Sound On): The slideshow background music will combine with the video sound at a medium-low level.
- Low (Video Sound On): The slideshow background music will combine with the video sound at a low level.
- Off (Video Sound Only): This option will play the video’s soundtrack, overriding the slideshow background music.
If you choose to play both video sound and slideshow background music, the slideshow background music will automatically fade to your selected volume level when the video starts and will fade back up once the video ends. The volume level selected is indicated on the thumbnail tags for each video.
![]() Video sound off.
Video sound off.
![]() Video sound on.
Video sound on.
![]() H Slideshow background music level high.
H Slideshow background music level high.
![]() M Slideshow background music level medium.
M Slideshow background music level medium.
![]() ML Slideshow background music level medium-low.
ML Slideshow background music level medium-low.
![]() L Slideshow background music level low.
L Slideshow background music level low.
![]() X Slideshow background music off.
X Slideshow background music off.

In your slideshow, you can select any Album Set and activate the Use Random Order tool to randomize the playback order of that set. Once activated, a random order tag ![]() will be displayed on the thumbnail of the set.
will be displayed on the thumbnail of the set.

- Use the Original Order tool to deactivate the random order option.
- Activating this option will establish a new random sequence each time.
- The last random order you set is saved within the album file, so it will retain the same order each time you reopen the album.
Preview Slides View
When in Preview Slides view, use this tool to shuffle the order.
Use the Original Order tool to deactivate the random order option. Once deactivated, the random order tag will be removed from the thumbnail.
When Working with Slideshows, the selected Slideshow Style generally dictates the slide and transition durations. You do, however, have the flexibility to adjust the display time for individual slides or Album Sets. This allows you to tailor the duration each slide appears on the screen relative to the standard timing set by the Slideshow Style. Options include:
- 4.0 x Faster
- 2.0 x Faster
- Style Time (1x)
- 1.5 x Slower
- 2.0 x Slower
- 2.5 x Slower
- 3.0 x Slower
Practical Examples
- Larger family group photos might be set to display for a longer period, indicated by a tortoise tag
 on their thumbnail.
 - A sequence of rapid, secondary images ("B roll") might be sped up, marked by a rabbit tag
 on their thumbnail.

Removing Timing Adjustments
Select the affected slides and reset them to the standard style duration by selecting "Style Time (1x)" from the popup menu.
Use the Next and Previous tools to navigate through your images, products, book pages, rooms, or slideshow slides.
- Use the Left and Right Arrow keys on your keyboard to navigate through your images, products, book pages, and slides.
- Use Shift + Left and Right Arrow keys to navigate through your rooms.
Jump in Groups
If you hold the OptionAlt key while clicking on the Next or Previous tool, the next group of items will be displayed. This group can be between 2 and 30 items. You can select the group size by right-clicking on the Next or Previous tools. This feature is only available in Show view and Cropping view.