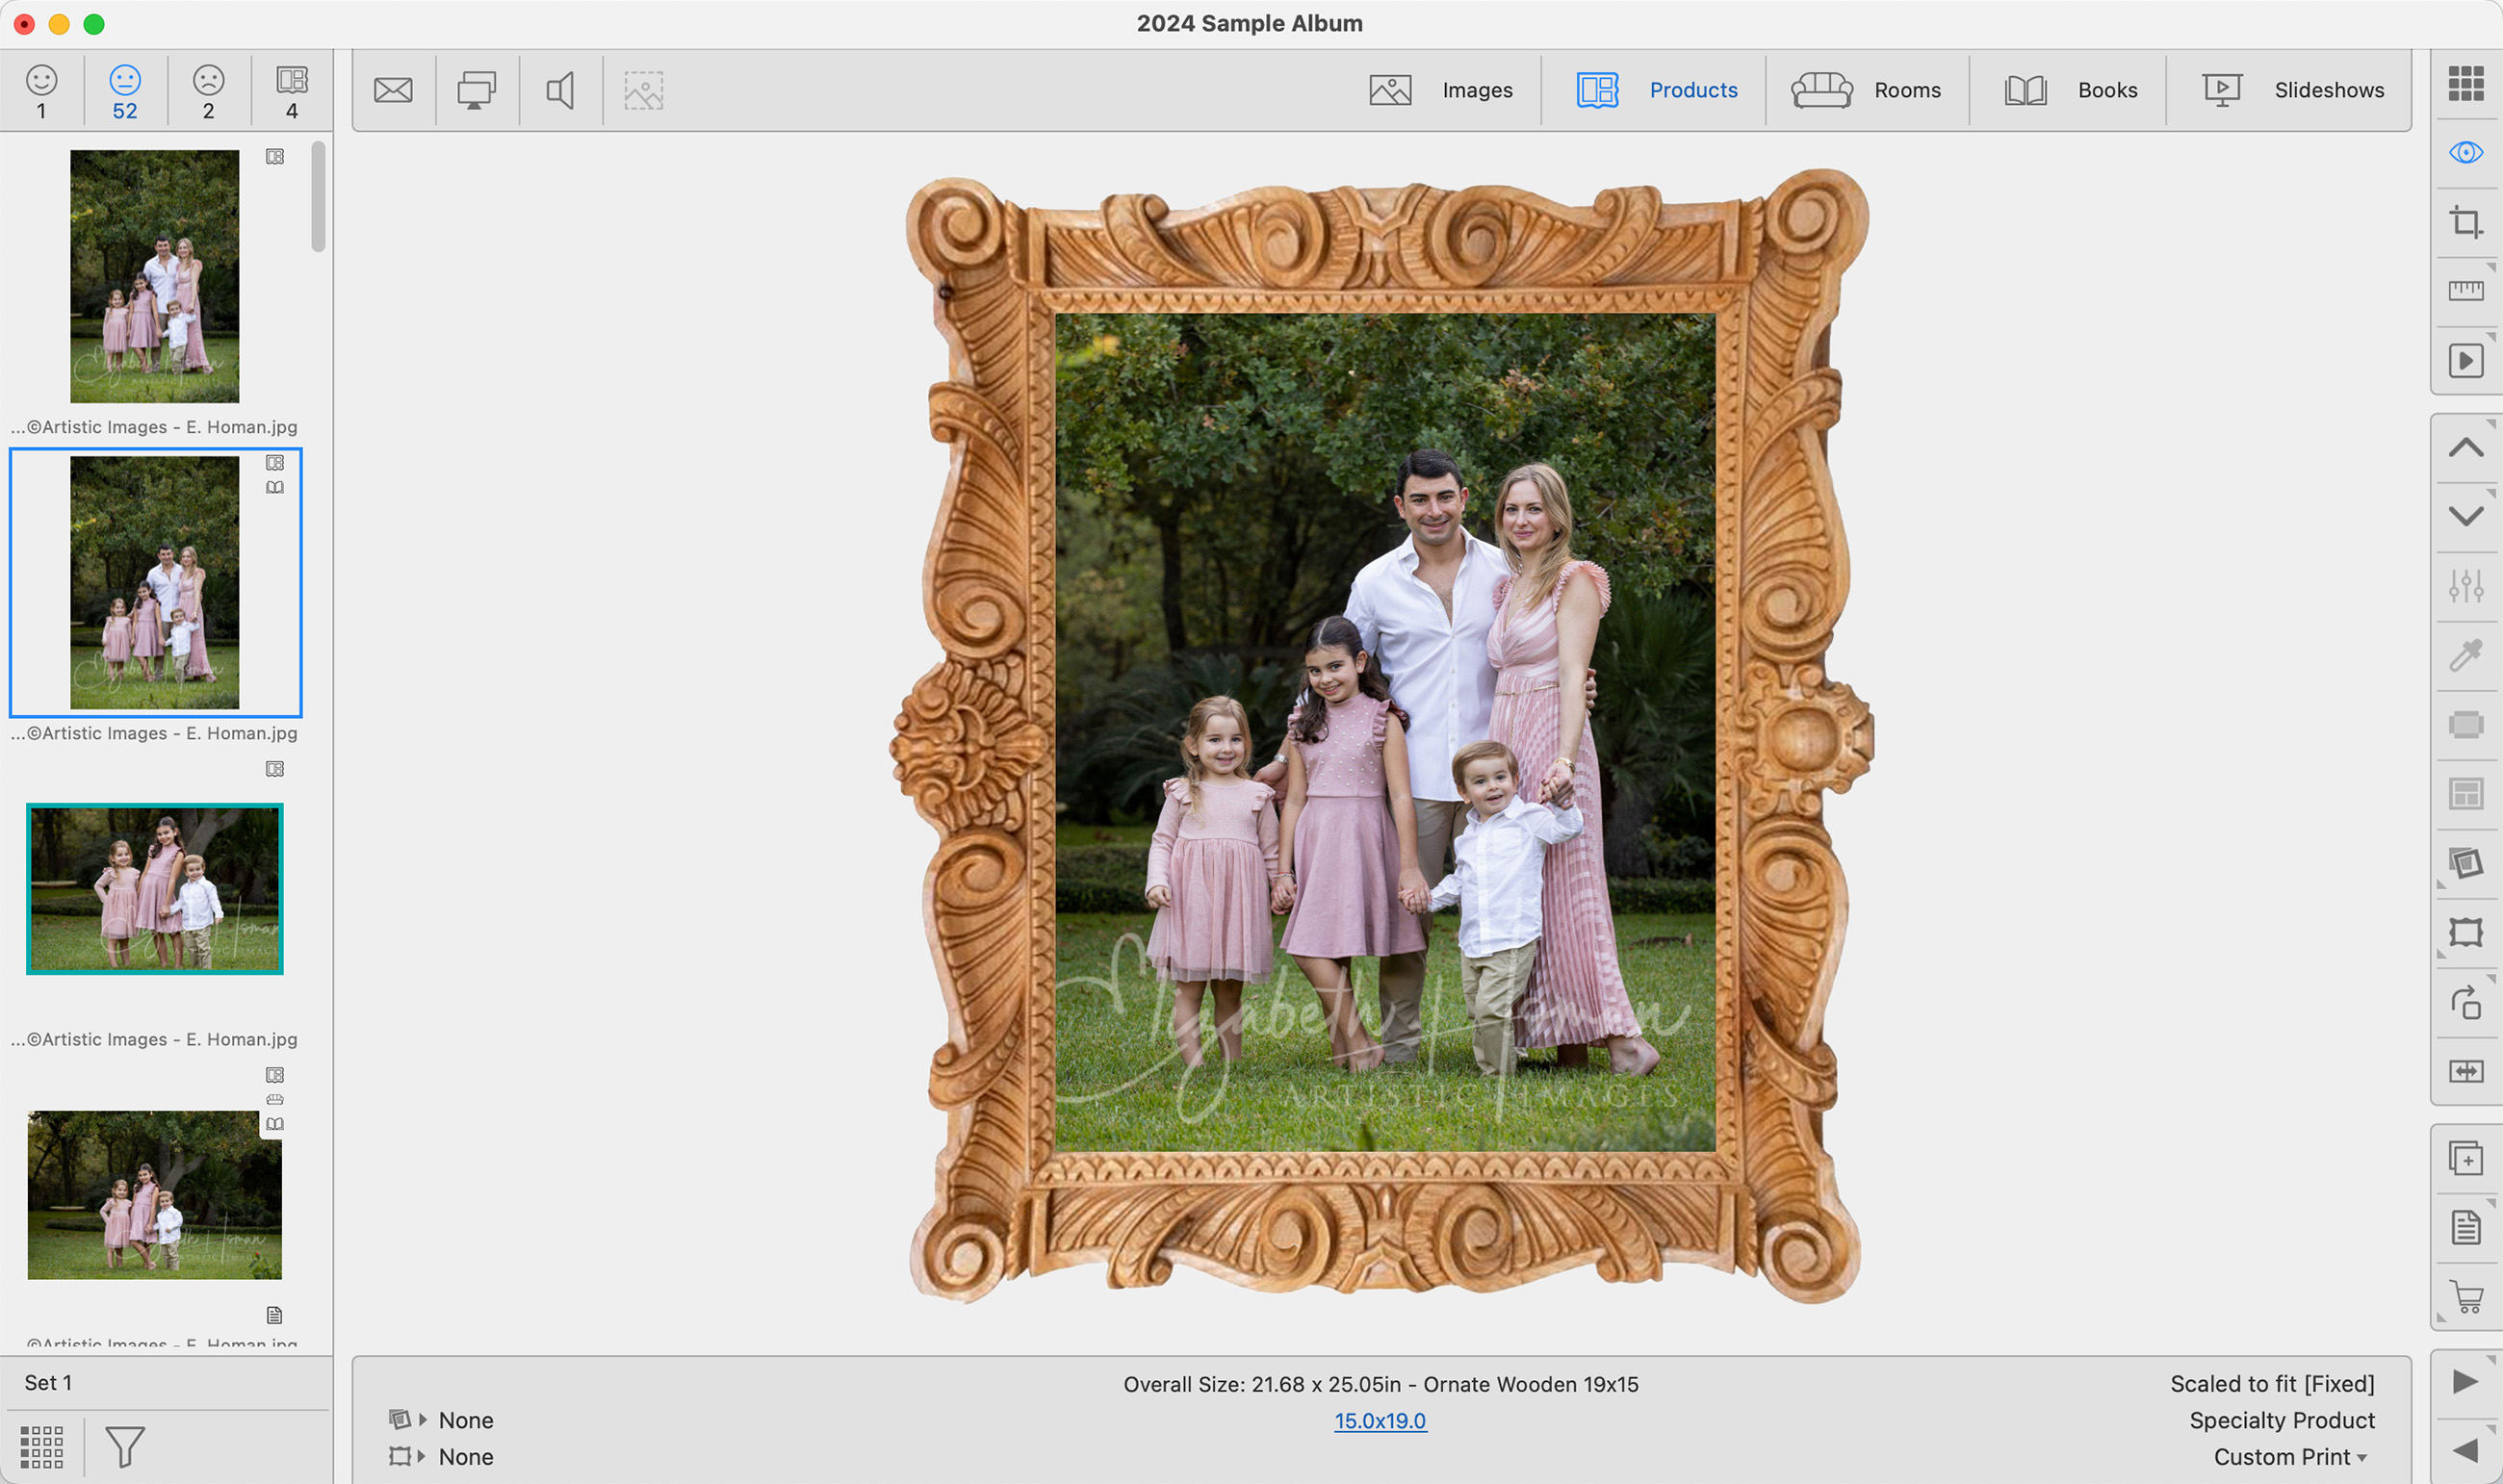
Creating Fixed Corner Frames
These frames are ideal when the frame has decorative corners or unique edge details. This method involves simulating a framed appearance using a single overlay image. To use this method, the frame is photographed, edited in Photoshop to remove the background, and saved as a transparent PNG or Photoshop file. A shape mask is required for more intricate frames. The image and mask are then used to make a specialty product template.
Images from your Supplier's website can be used, or you can photograph a physical frame. Frame templates are set to specific sizes (fixed).
If you want to offer frames in different sizes, you'll need separate overlay images for each size. This ensures that the frame details appear correctly proportioned, whether you're displaying an 8x10 or a 30x40.
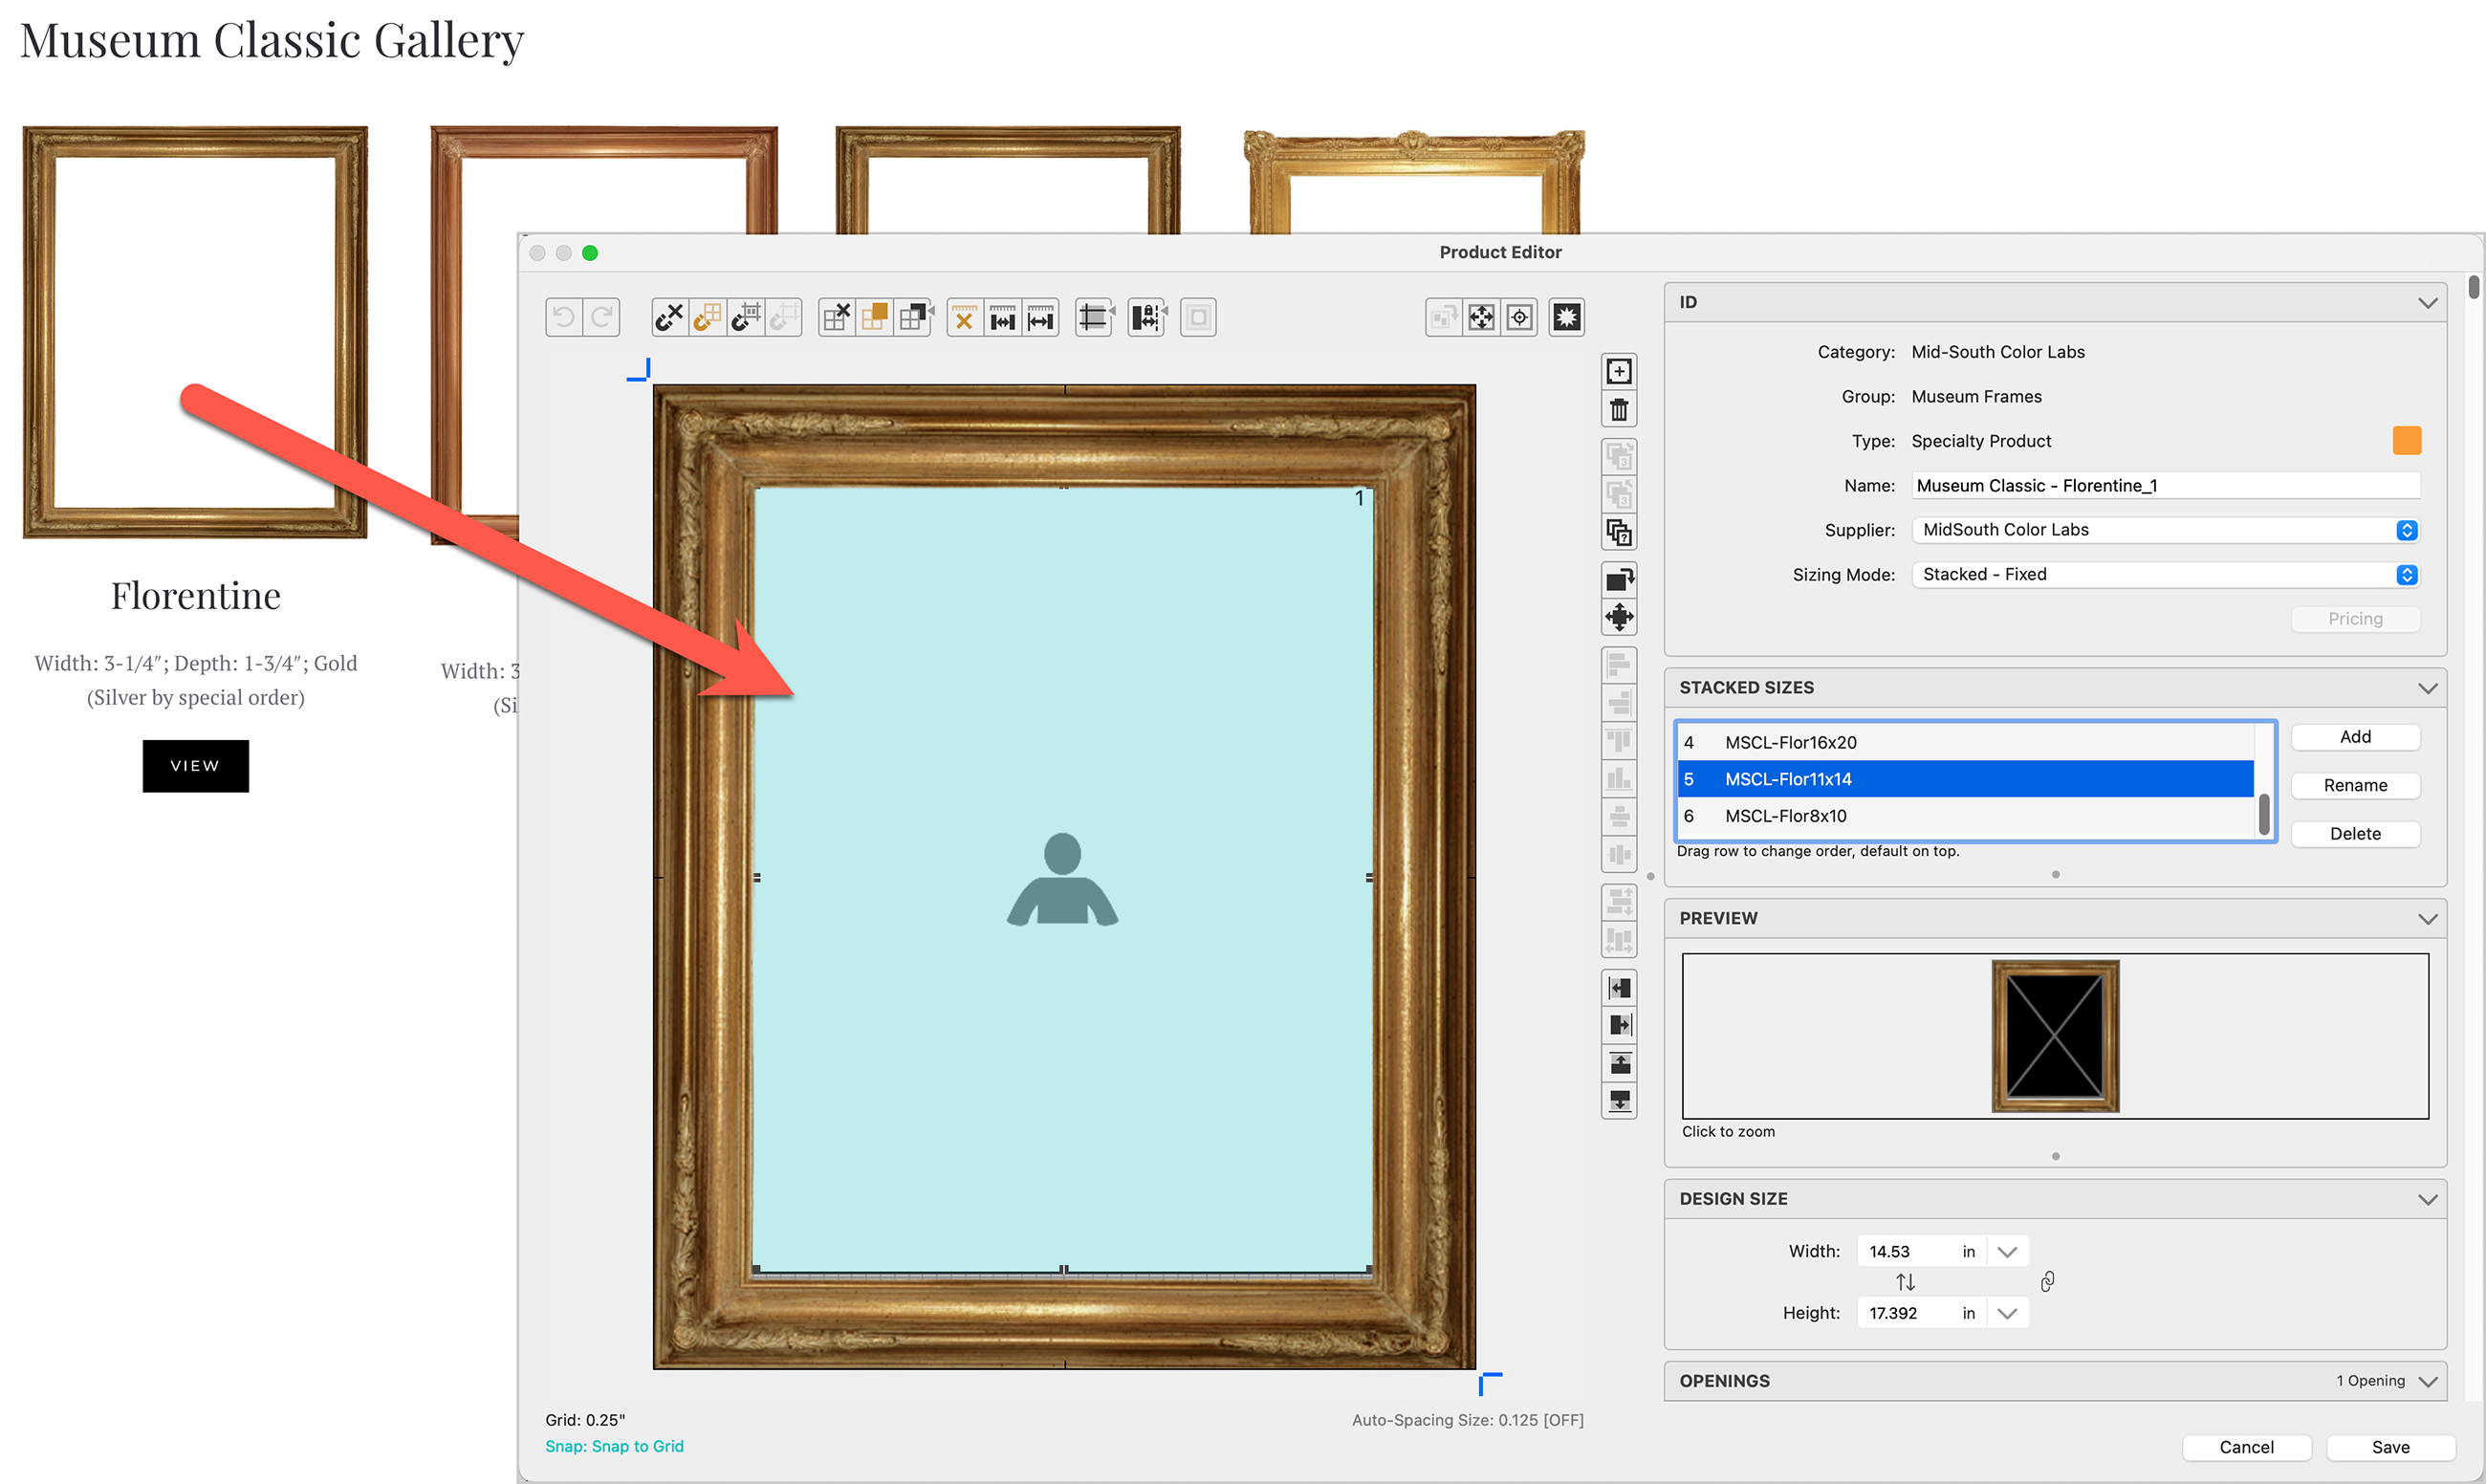
Prepare the Frame Image
- Photograph the Frame: Capture a photo of the frame you wish to use, or use a screenshot from a Supplier website. Ensure the frame is named with its dimensions, for example, Ornate Wooden 19x15.
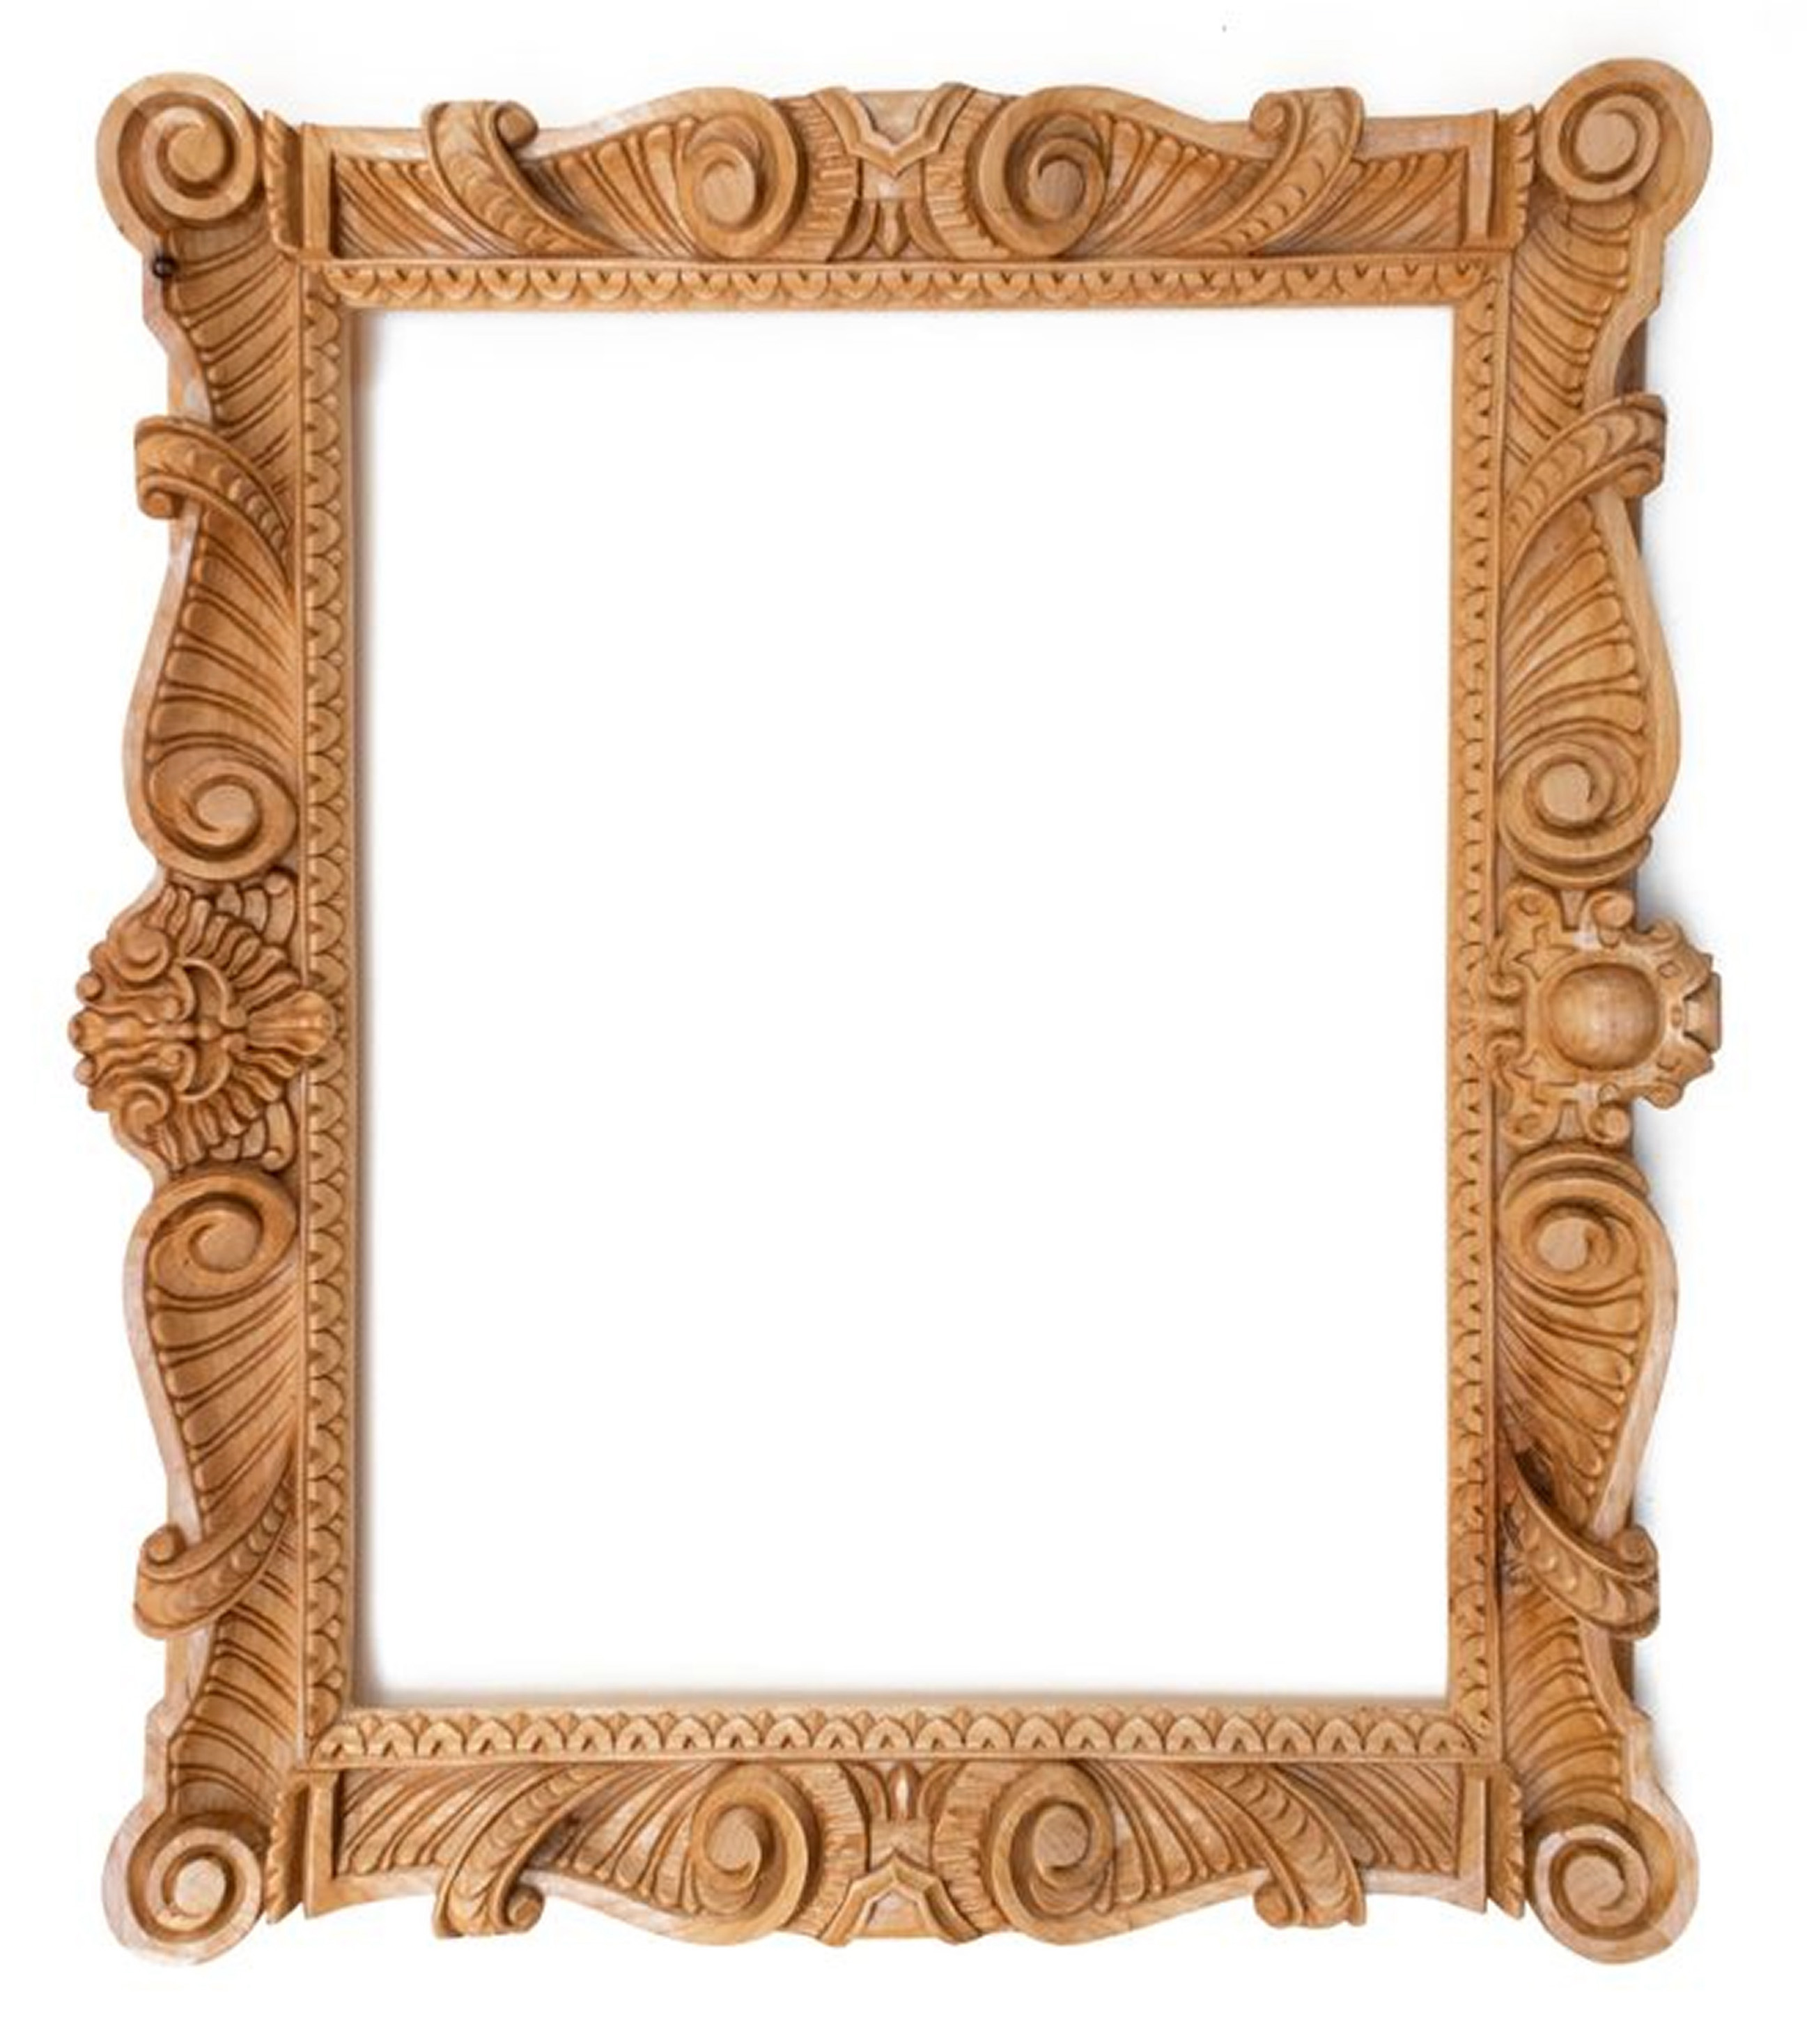
- Open in Photoshop: Open the photograph in Photoshop. Double-click on the background layer to rename it to Layer 0, allowing for transparency.
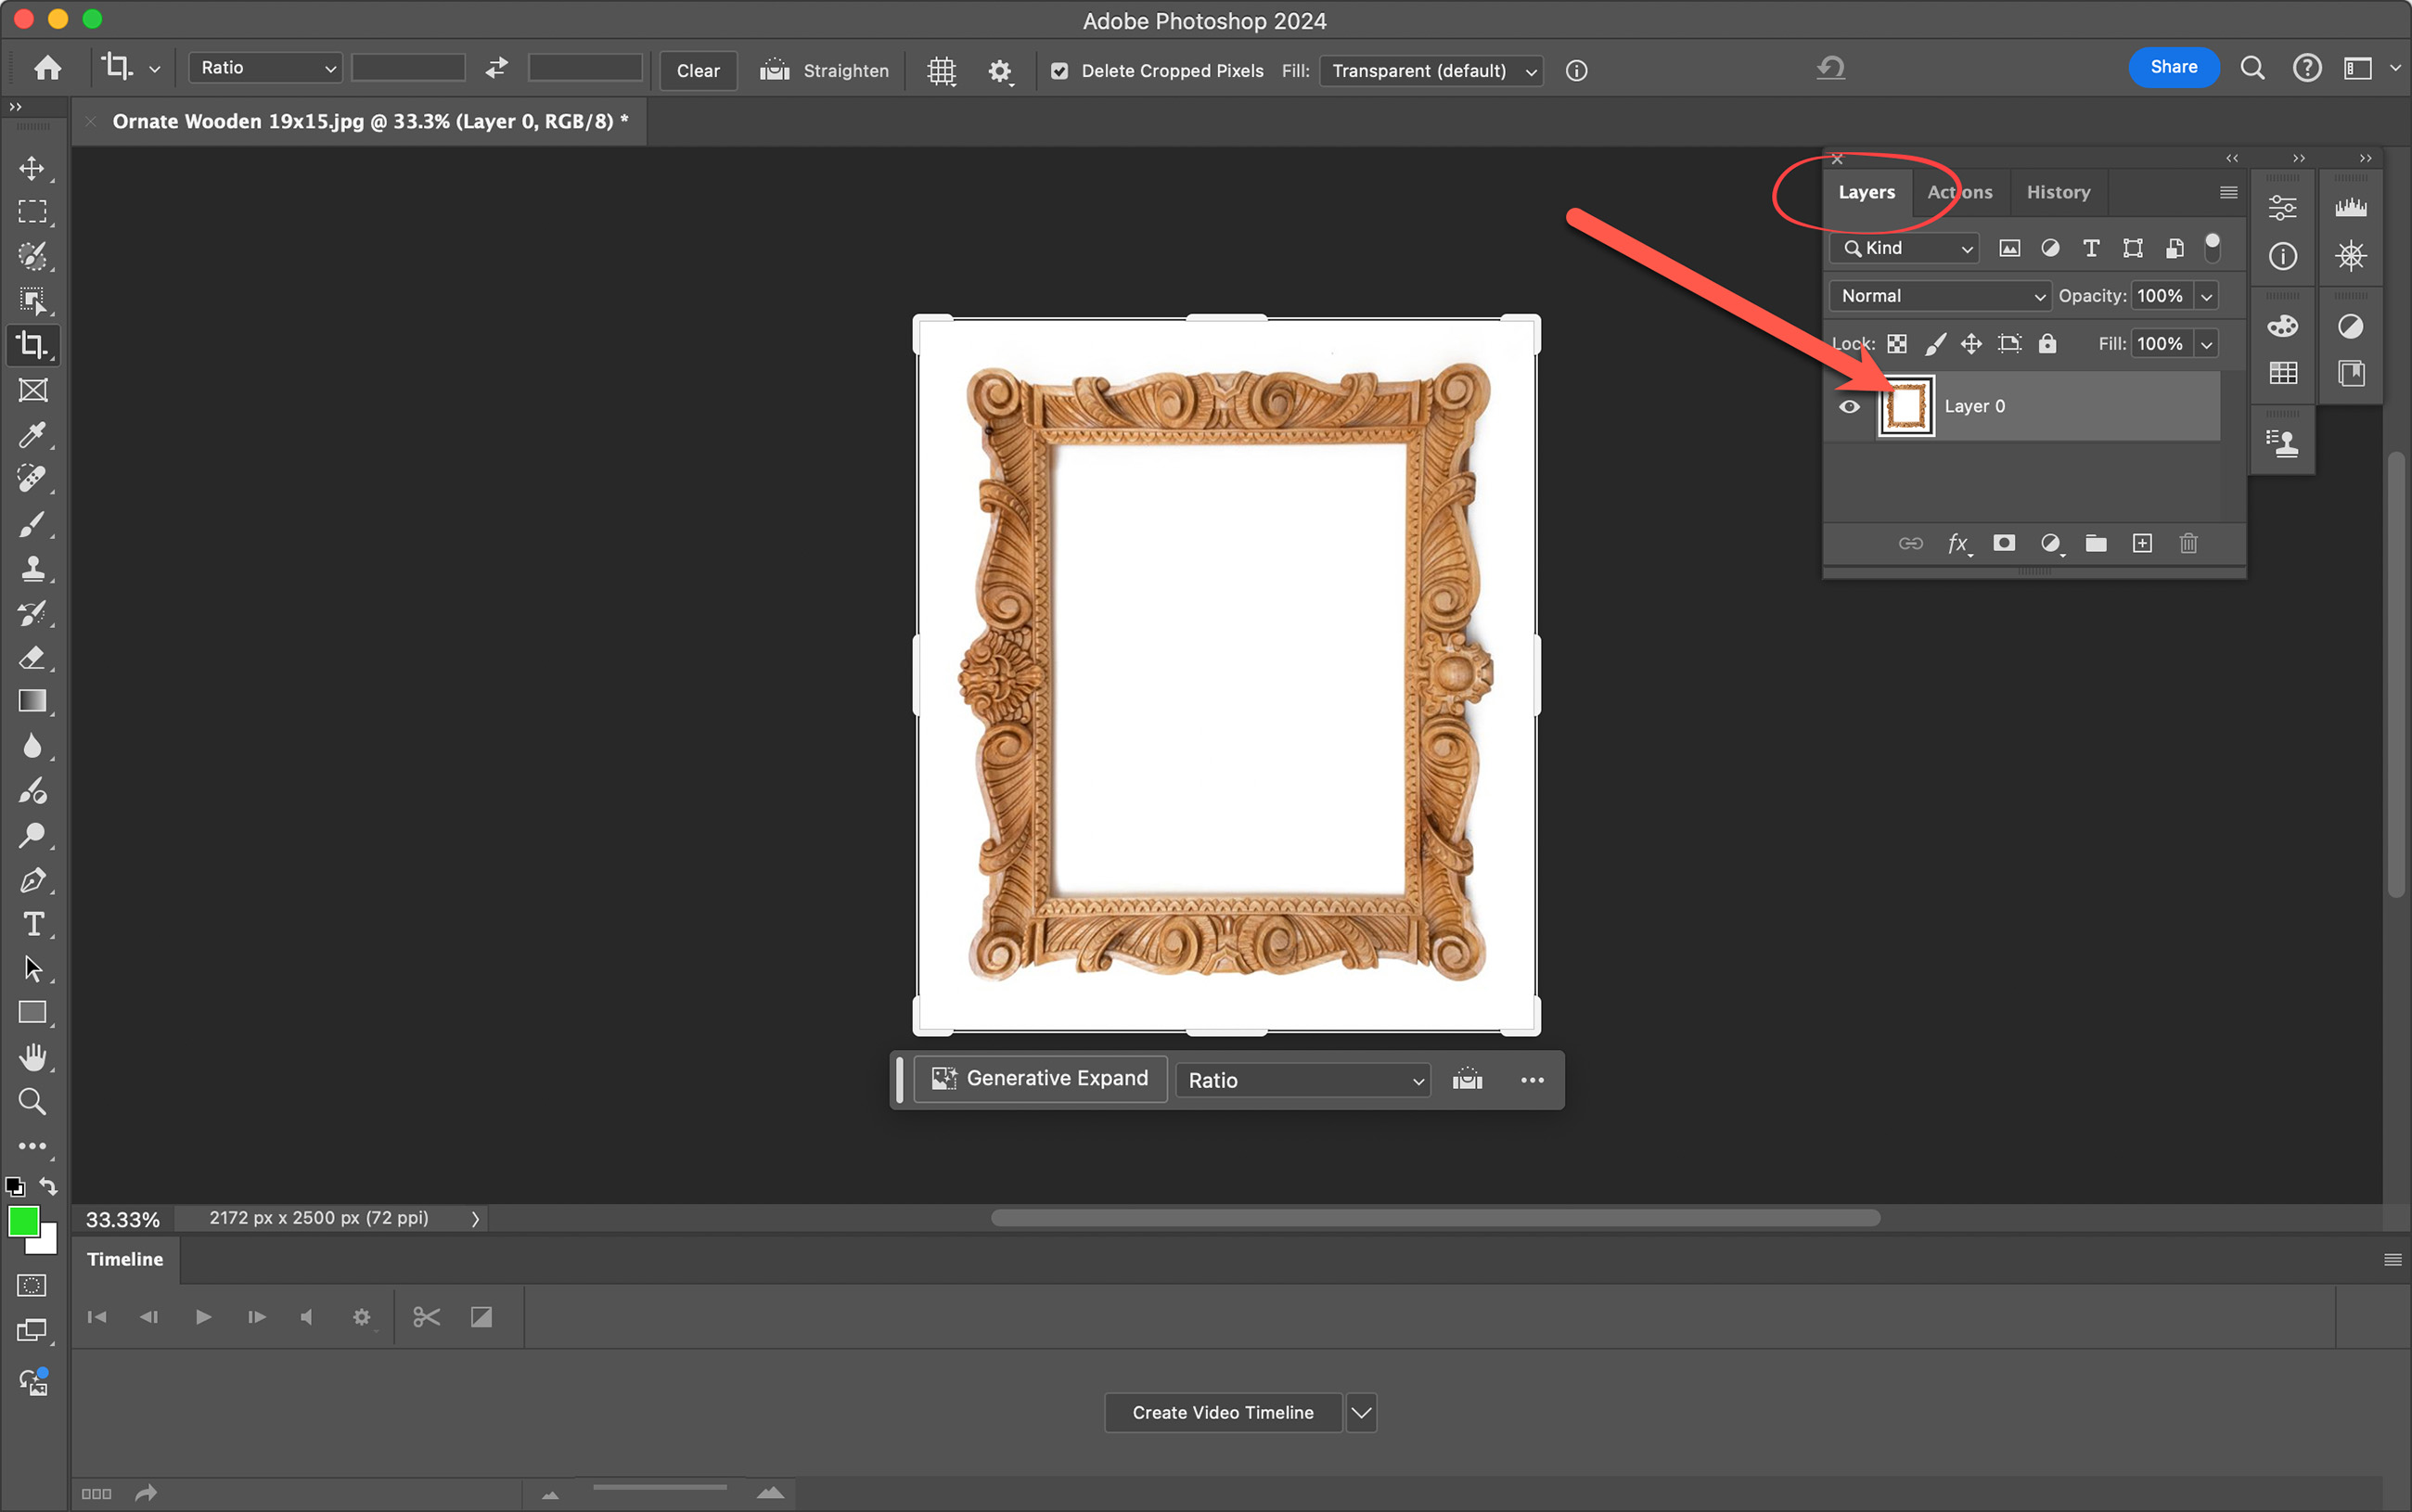
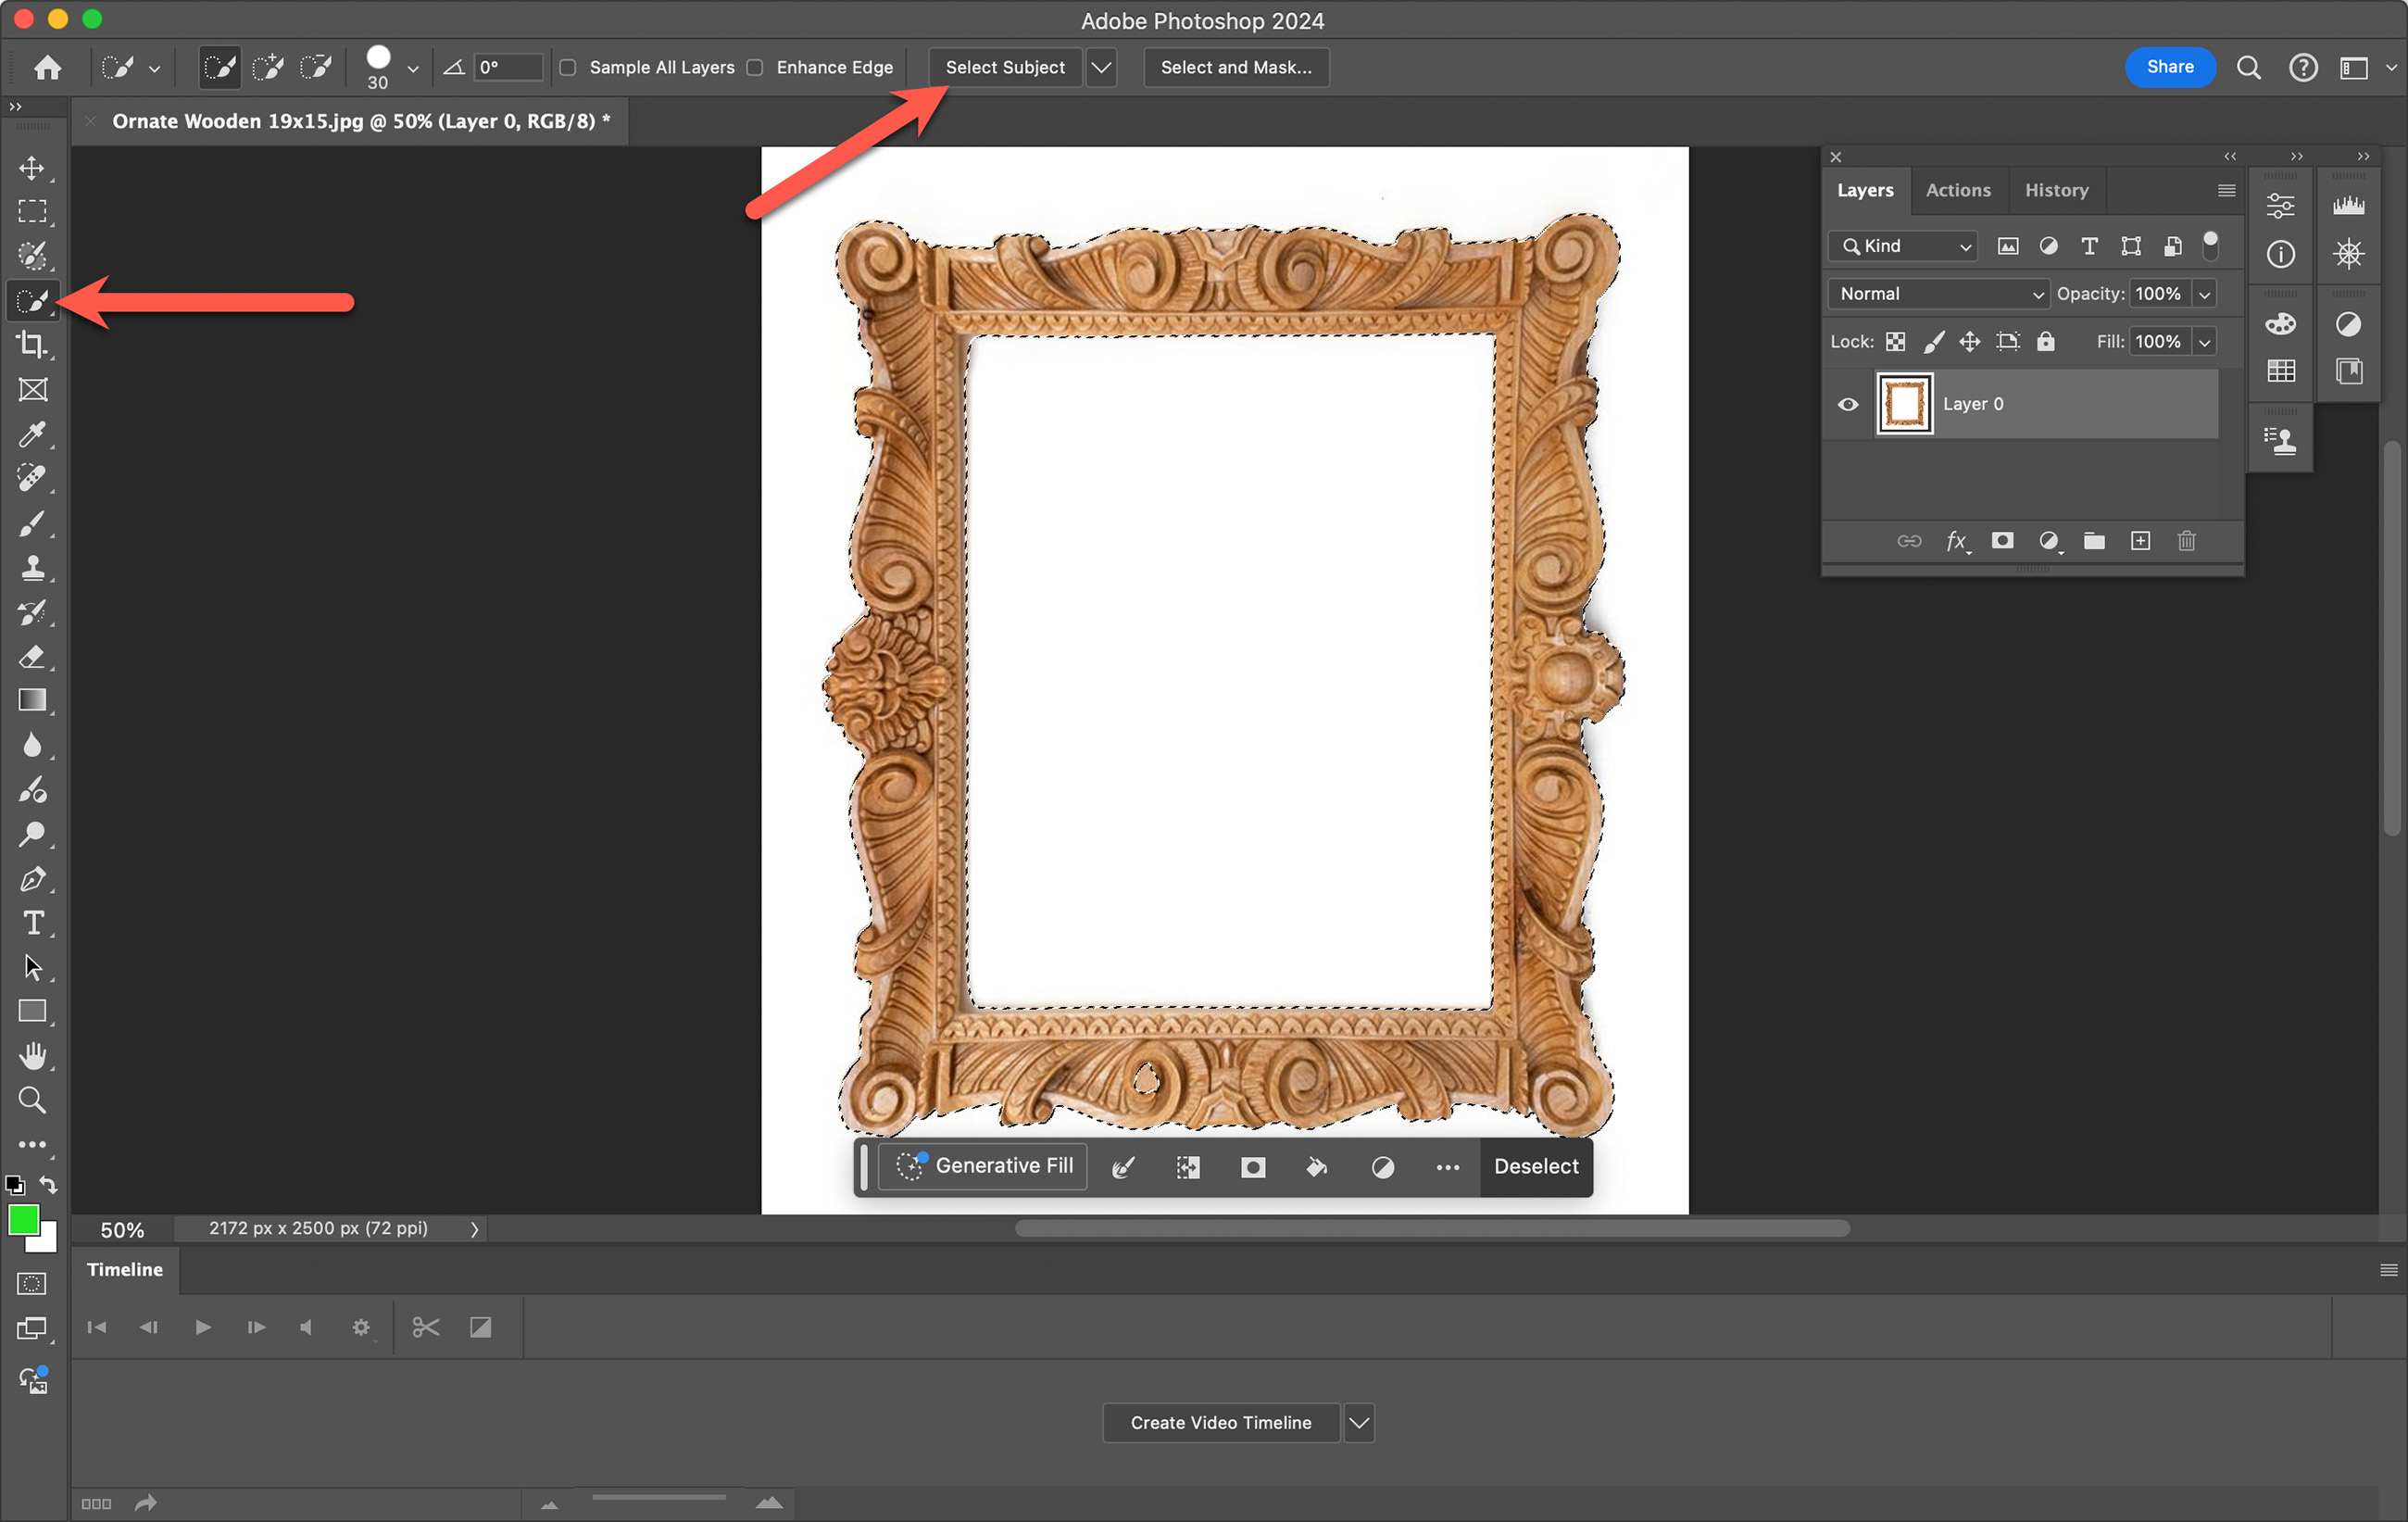
- Select the Frame: Click on the "Quick Selection tool" then click "Select Subject." These actions will select the frame. Adjust the selection as needed to include all parts of the frame, using the "Add to Selection" tool if necessary.
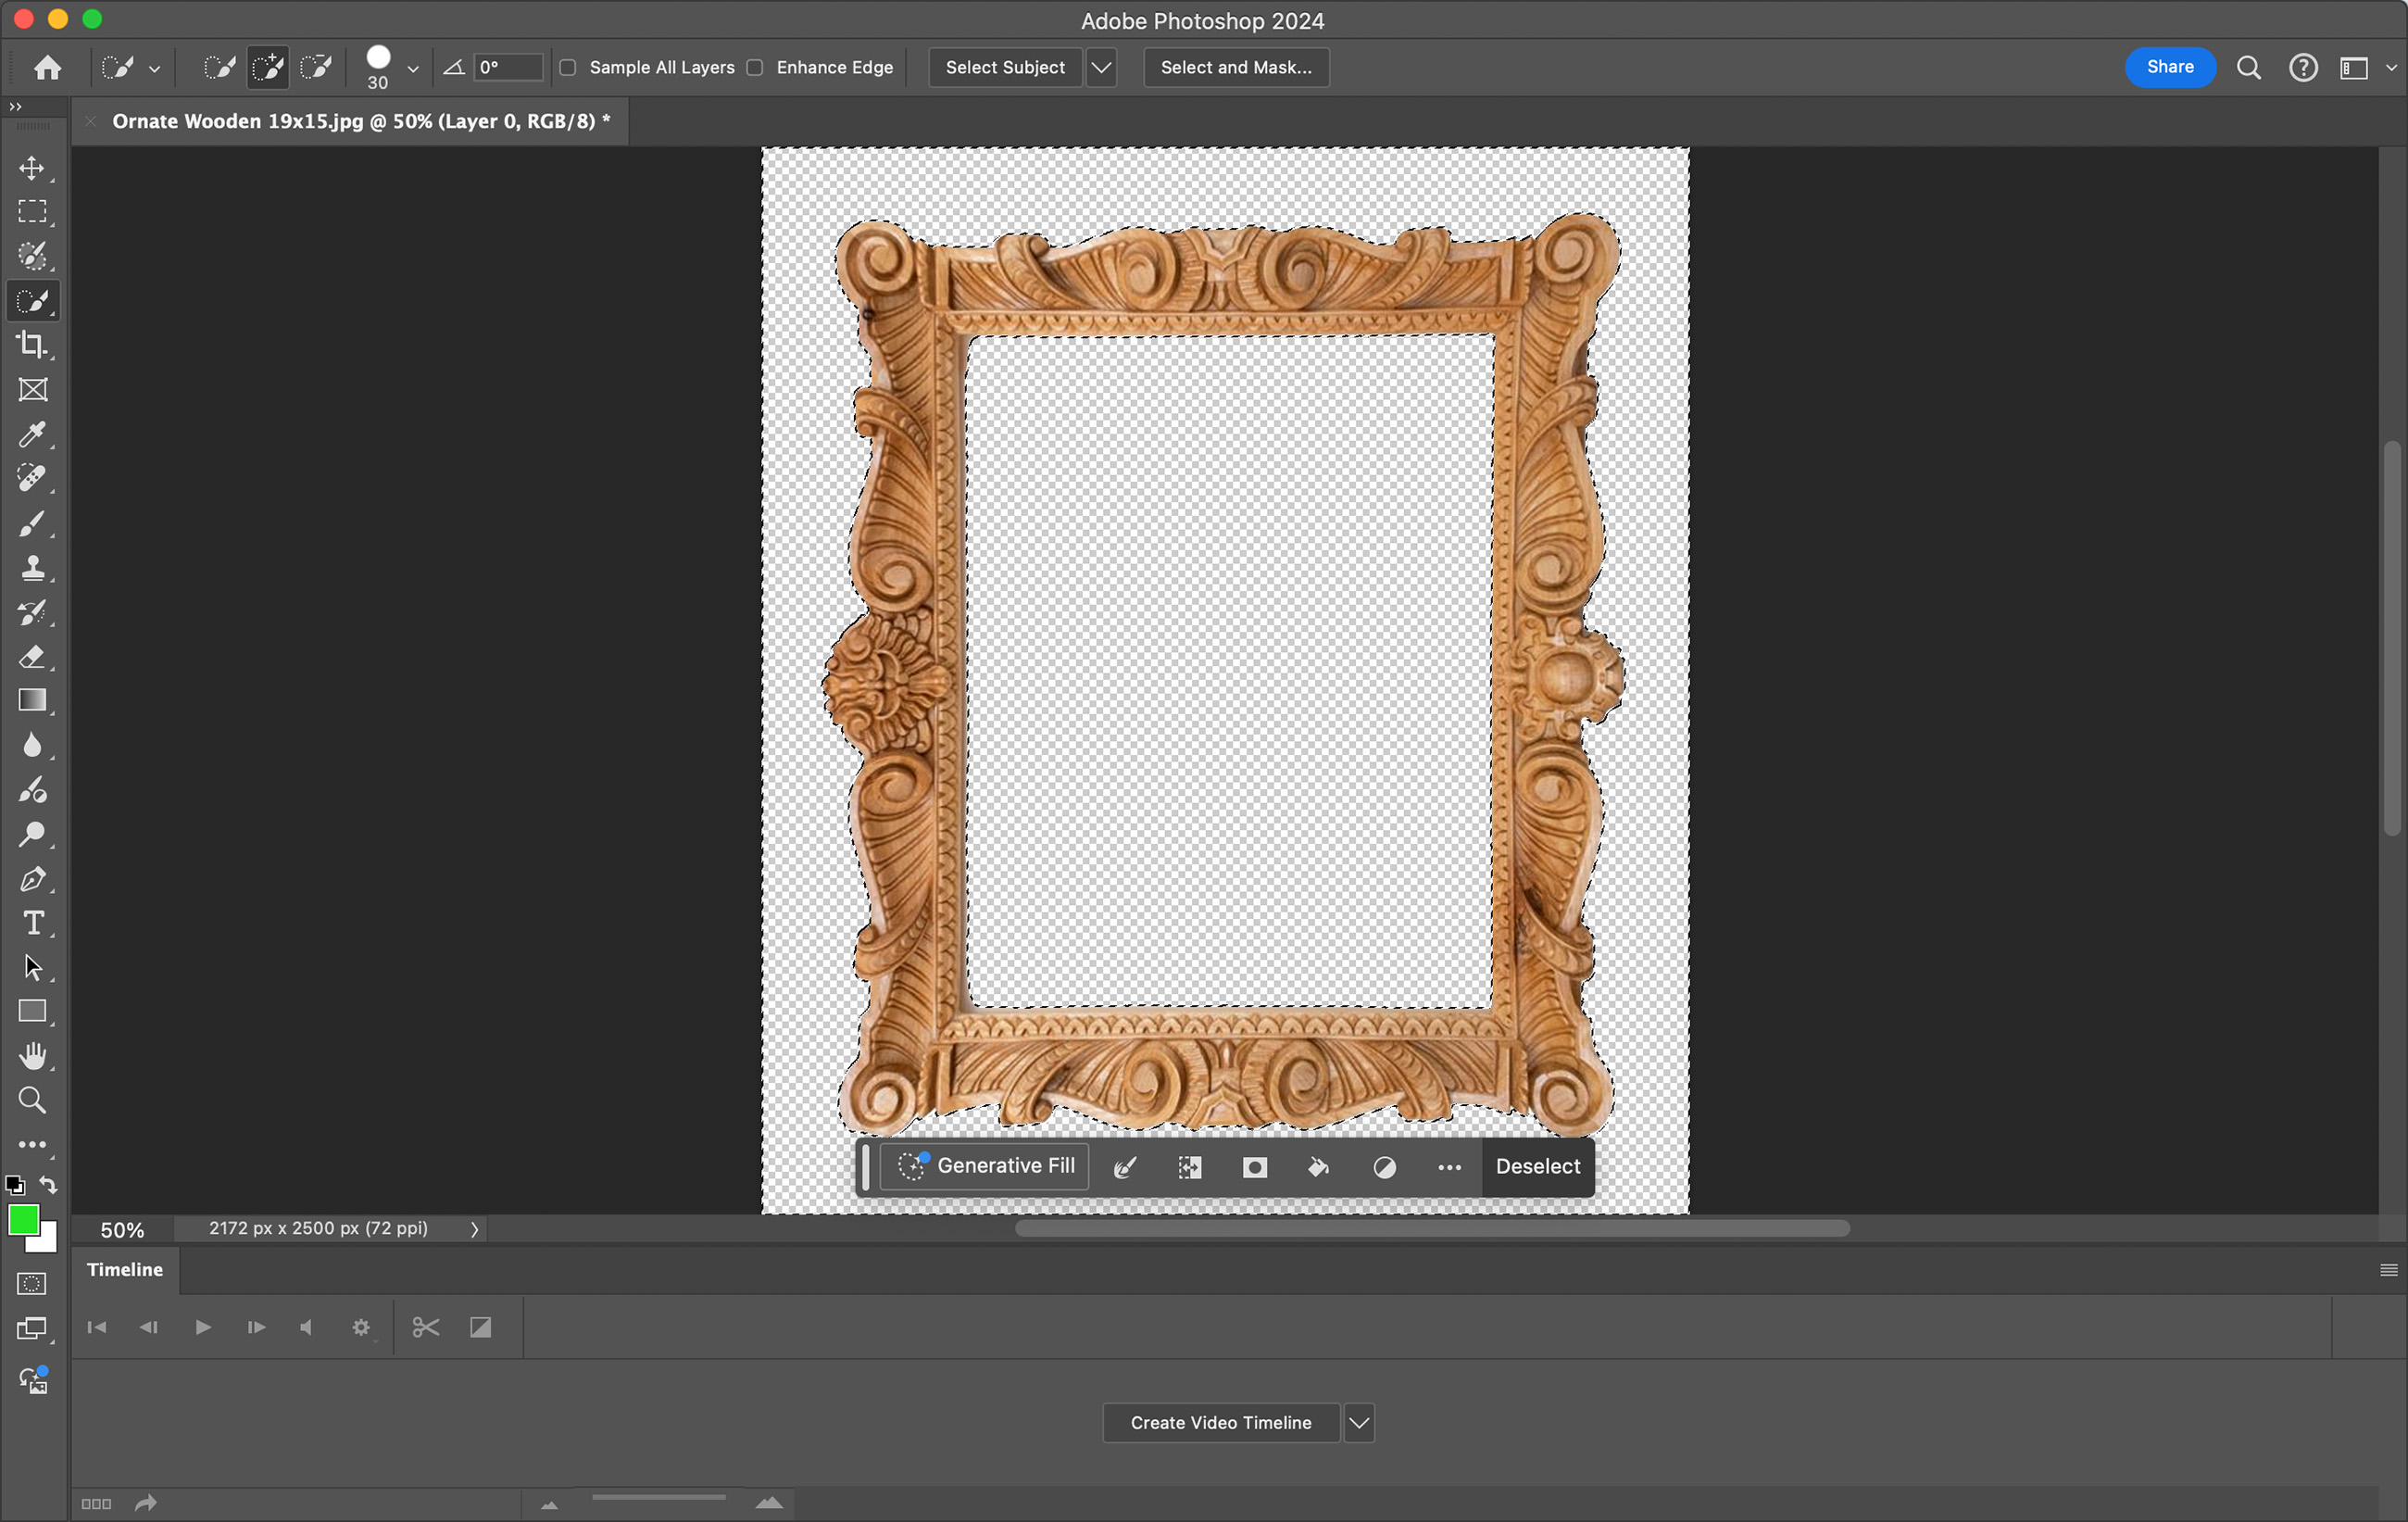
- Delete the Background: Invert the selection by going to Select > Inverse. Tap the Delete key to delete the background, leaving the frame on a transparent background. Deselect all.
Clean Up and Save the Frame
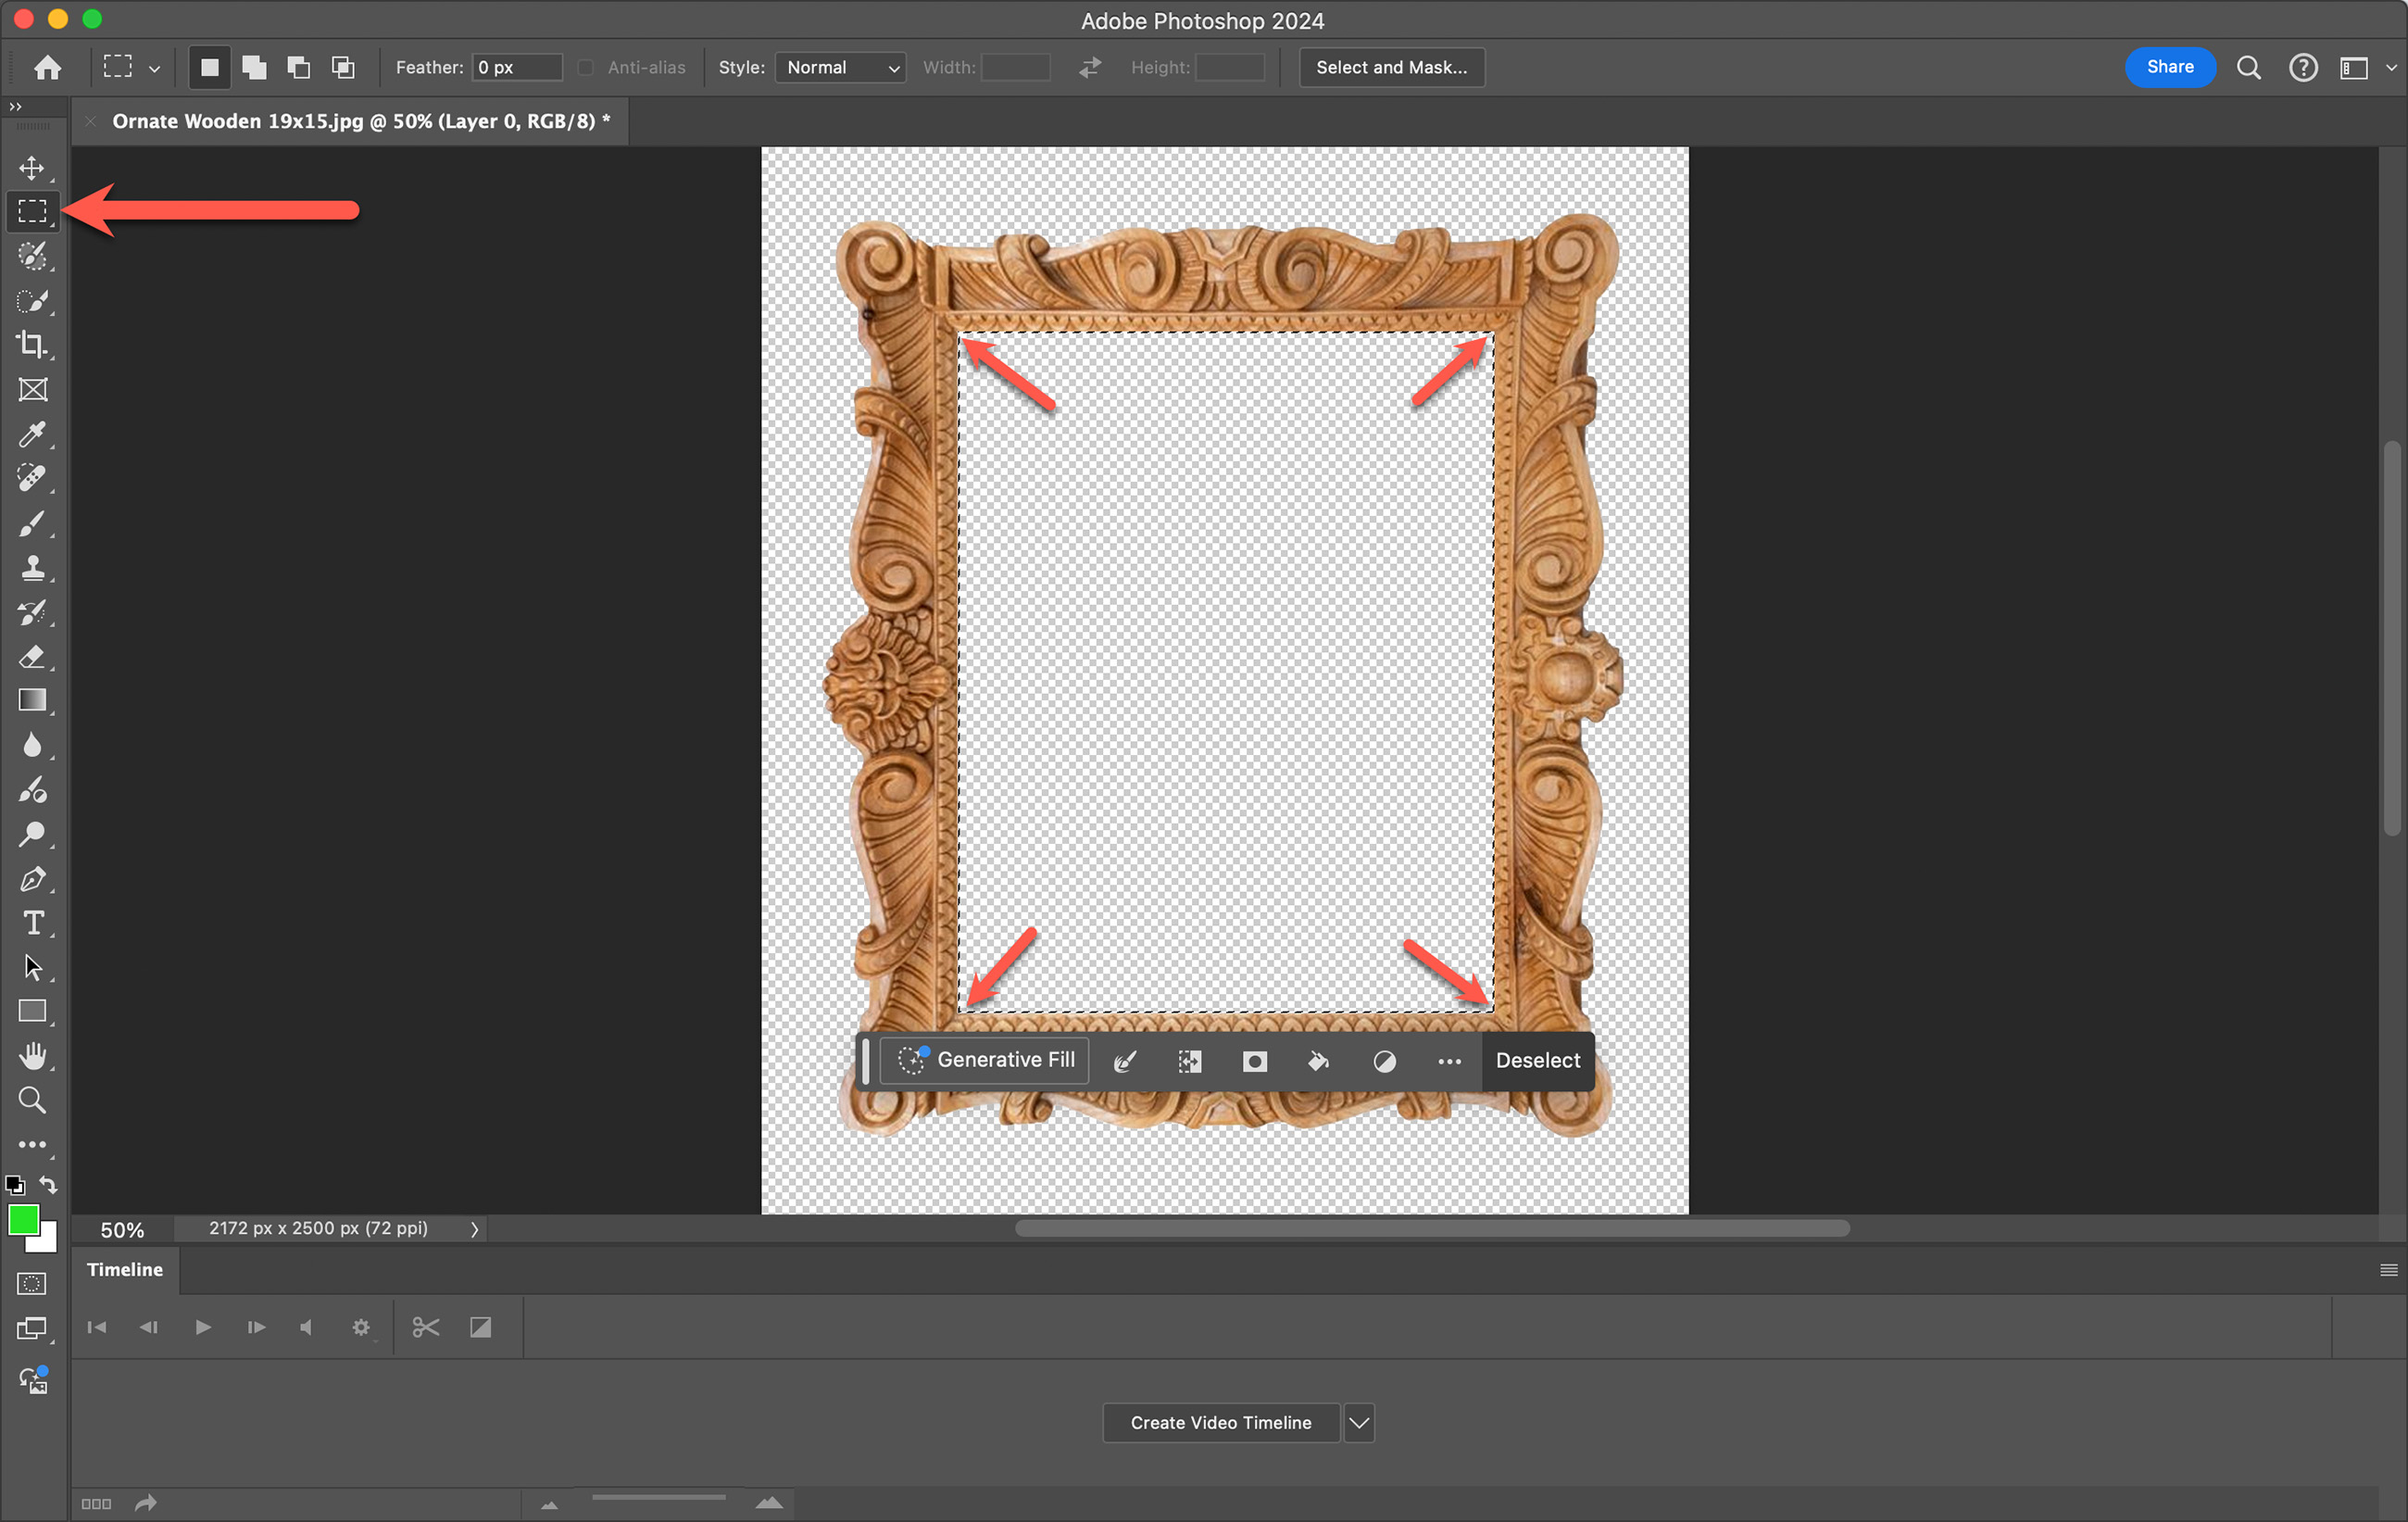
- Clean Corners: Use the "Marquee" tool to clean up any messy corners by selecting and deleting unwanted areas. It is important that the opening be square.
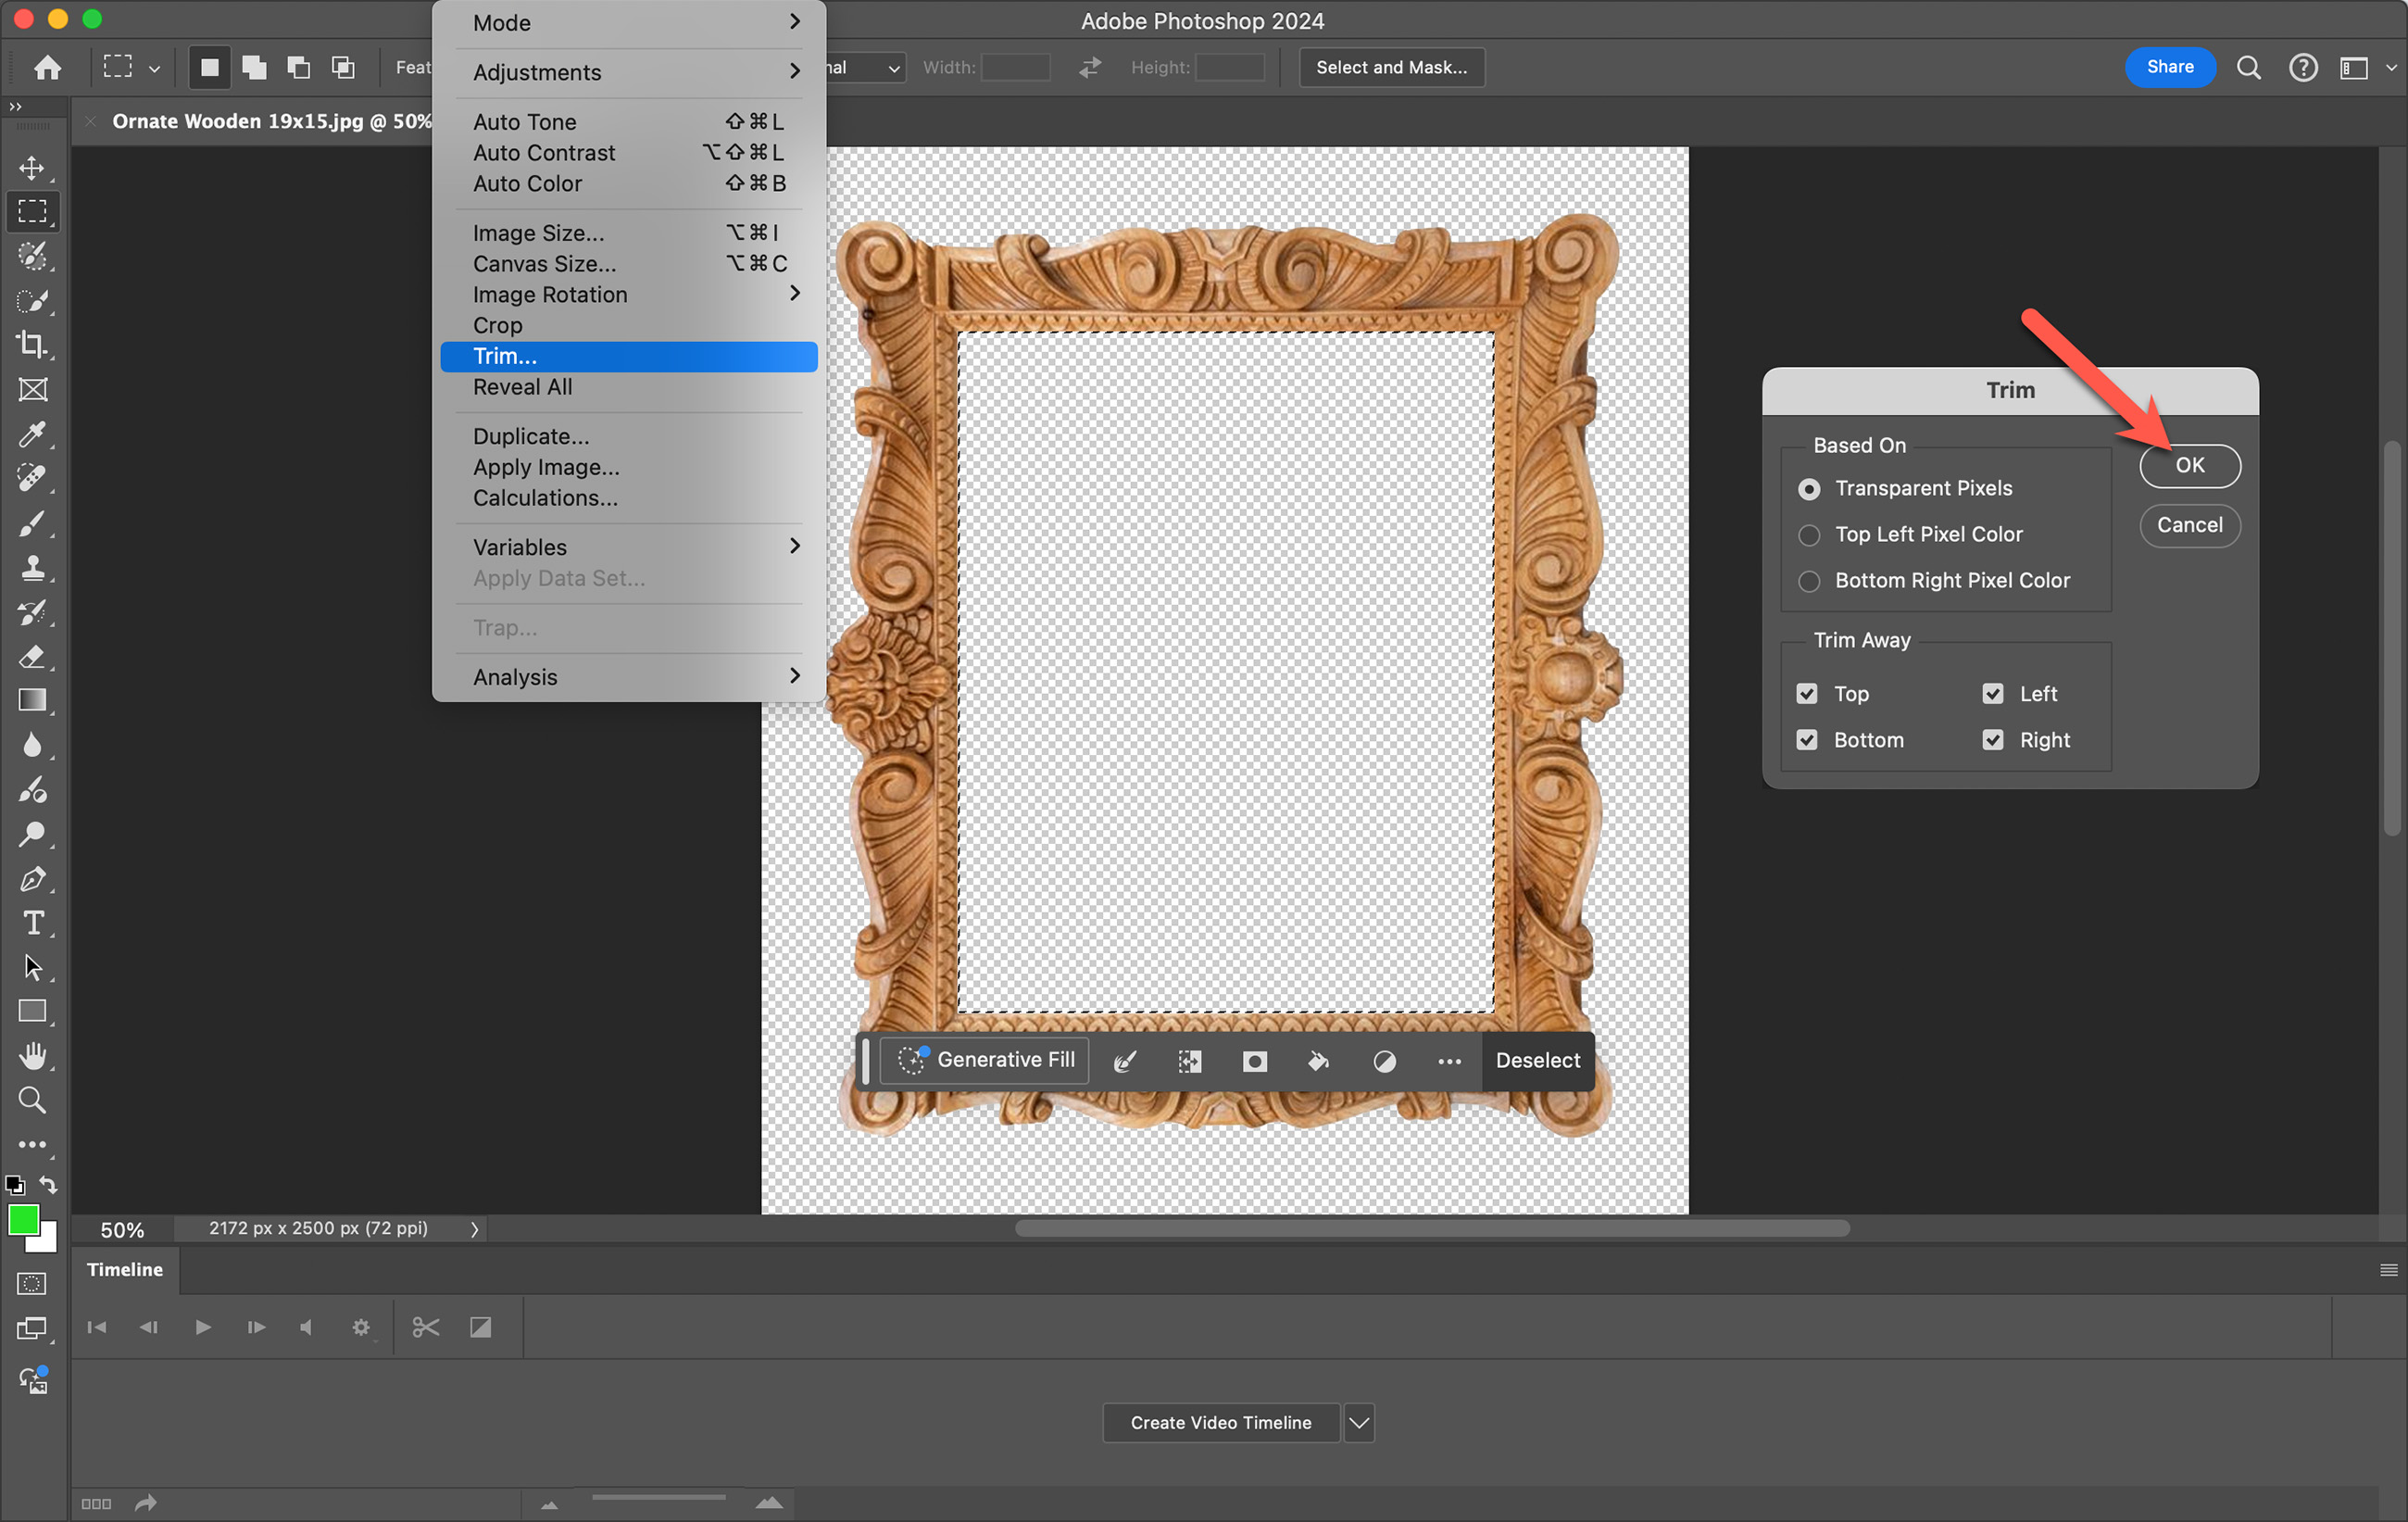
- Trim the Image: Trim the transparent pixels around the frame. Go to Image > Trim. This will tidy up the edges.
- Save the Frame Image: Save the cleaned frame as a PNG file to maintain transparency.
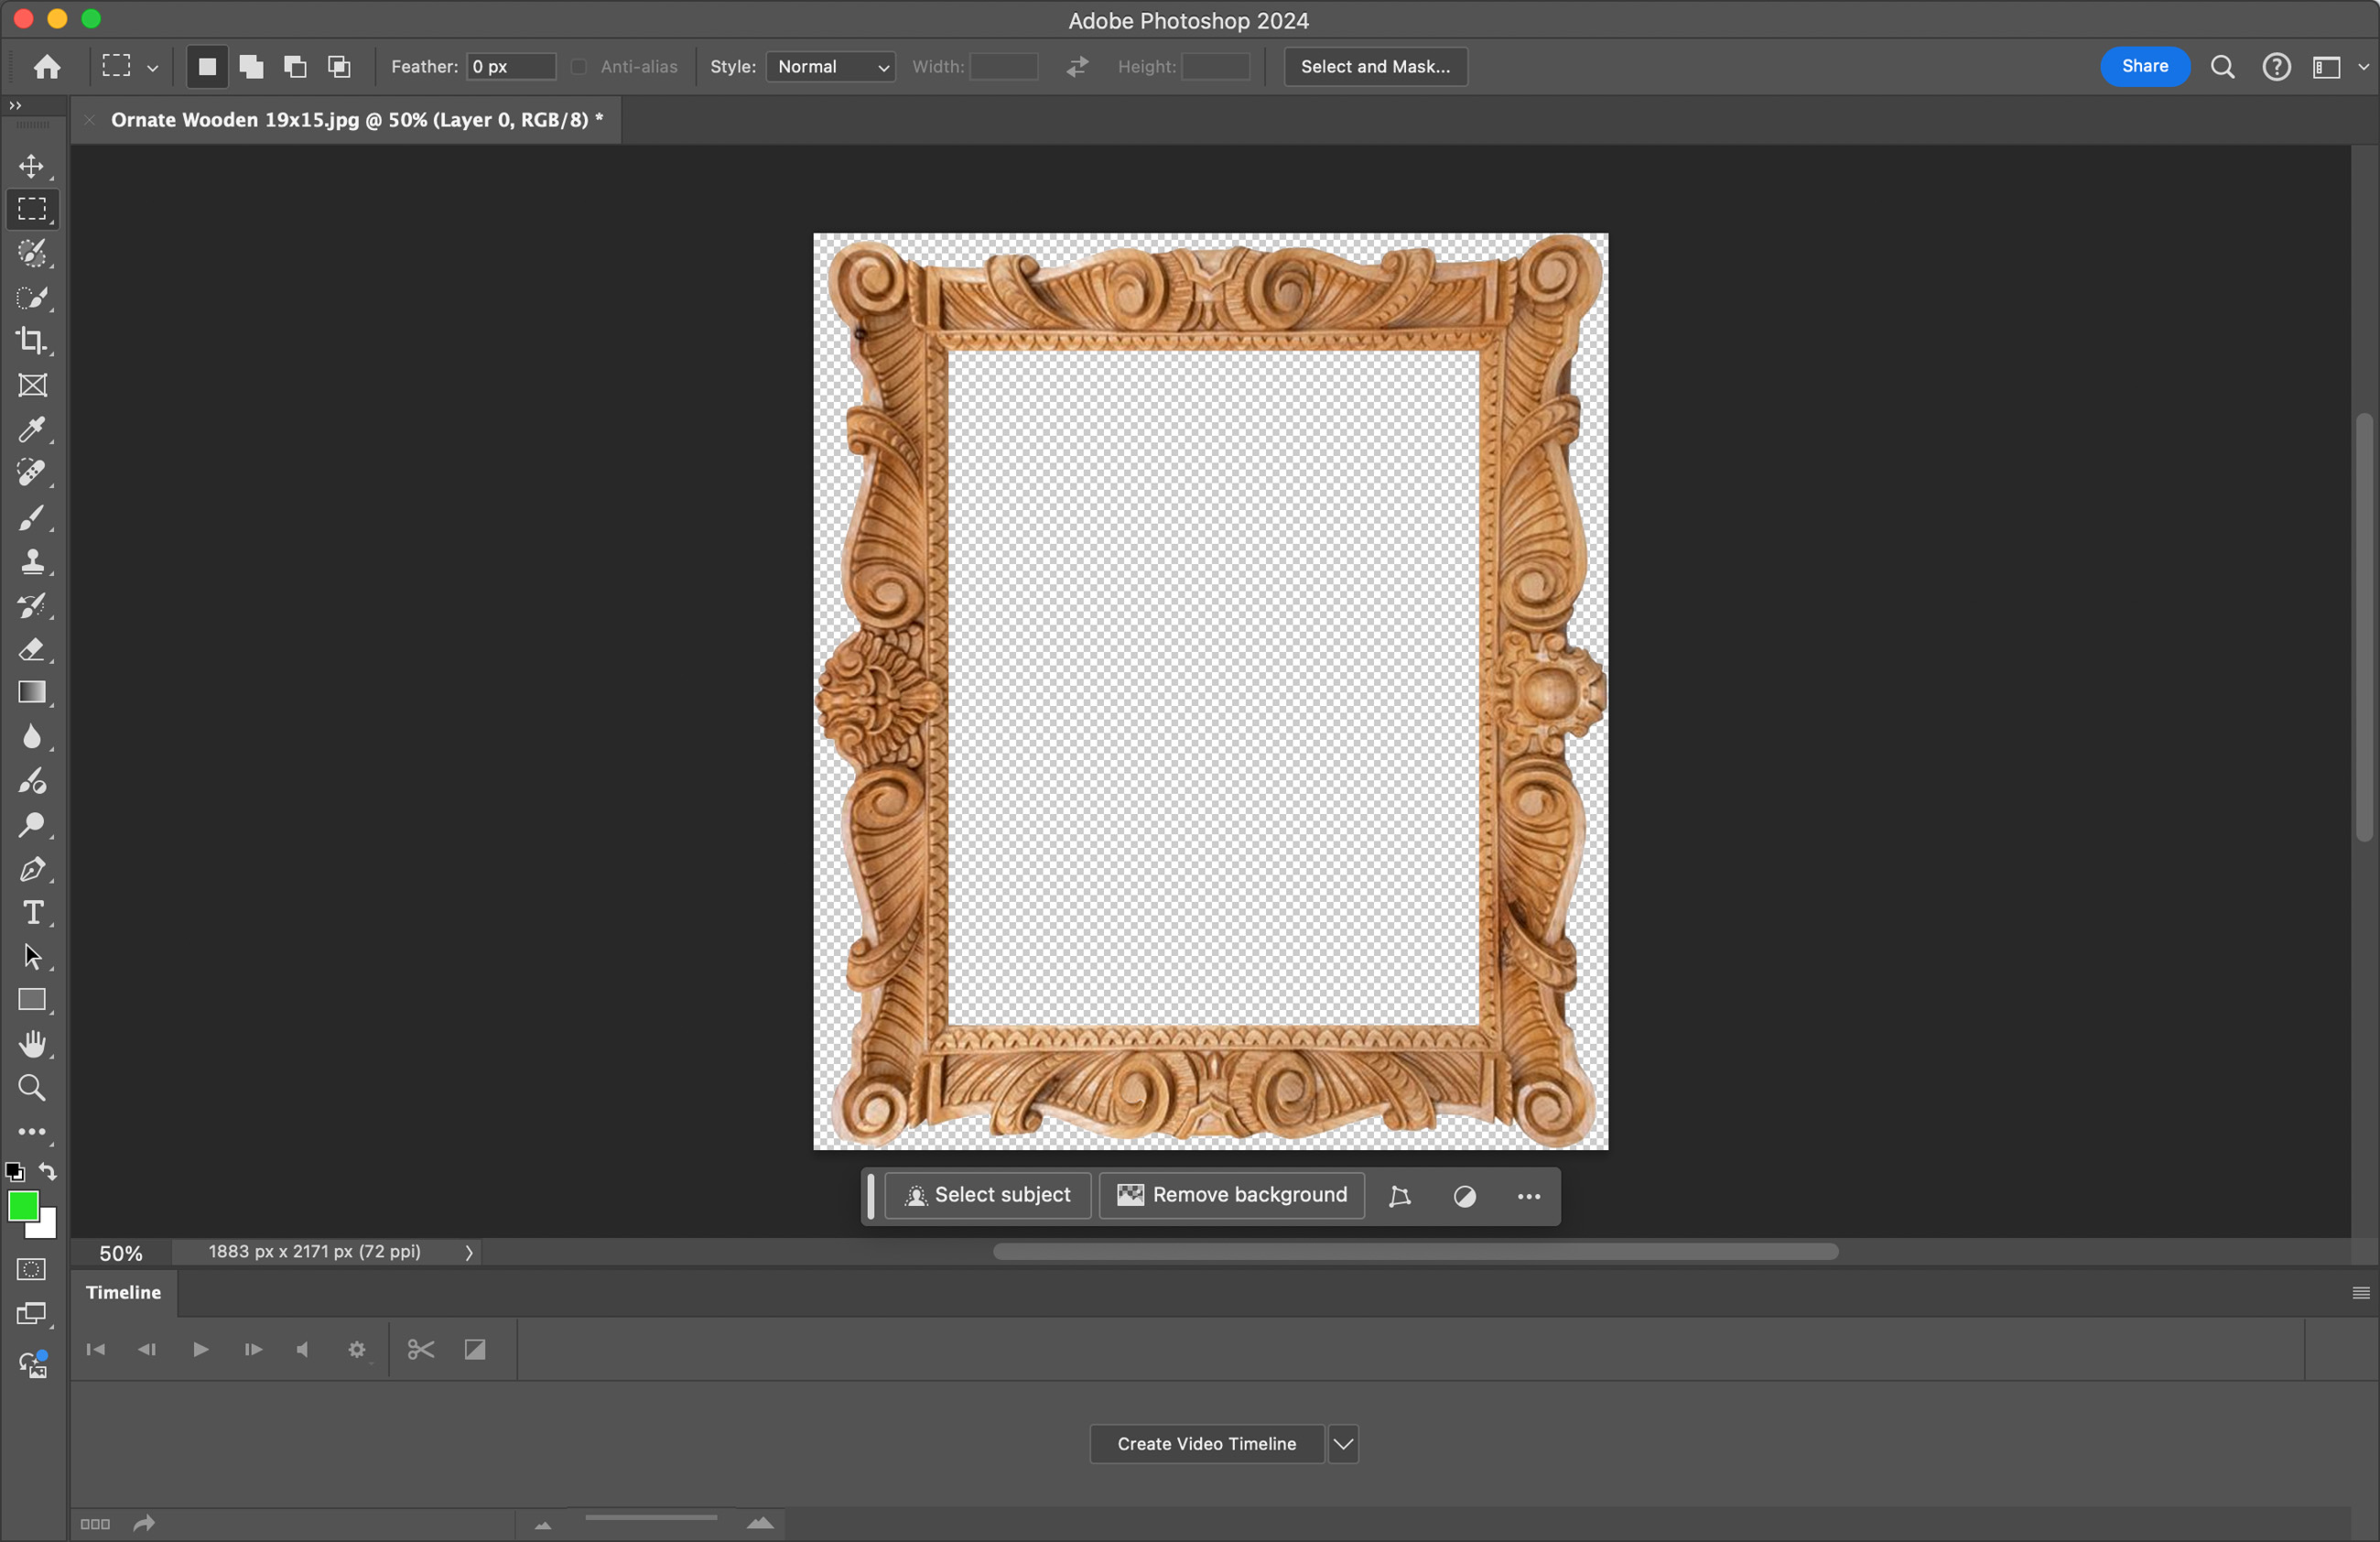
- We now have an overlay image ready for use in ProSelect. Follow the steps to create a Shape Mask if required, or see the page Set up a Fixed Corner Frame in ProSelect.
- Repeat the above process for each size you wish to offer. Separate overlay images will be required for each size.
A shape mask is required when you need to define a specific area within a frame that should remain transparent. This is essential for frames with intricate designs or non-standard shapes where the edges must be clearly defined to ensure the underlying image shows through correctly. For example, on the Ornate Wooden frame, we need the outer edges of the frame to be transparent, otherwise a white rectangular edge will appear around the frame when Working with Rooms.
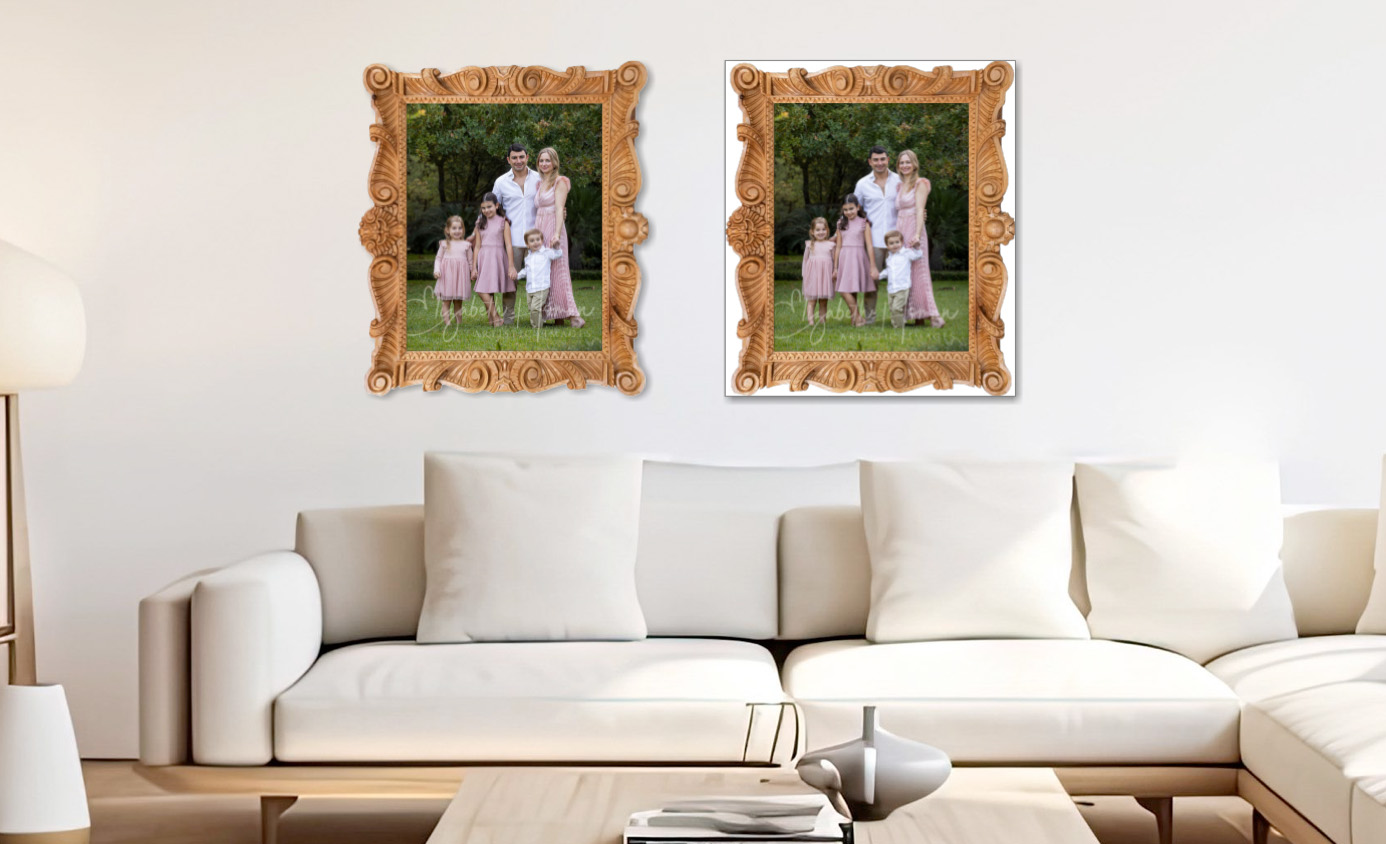
- The product template on the left was created using both an overlay image and a shape mask.
- The product template on the right was created only using the overlay image.
An overlay image alone is sufficient when the entire image can be uniformly overlaid without the need for selective transparency. Overlay images are primarily used to add a visual layer on top of an image without needing to mask any parts of it, suitable for simpler frame designs. Any frames with straight, square outer edges will not require a shape mask.
Is a Shape Mask Required

Create and Save the Shape Mask
- Open the recently created PNG file of the frame in Photoshop.
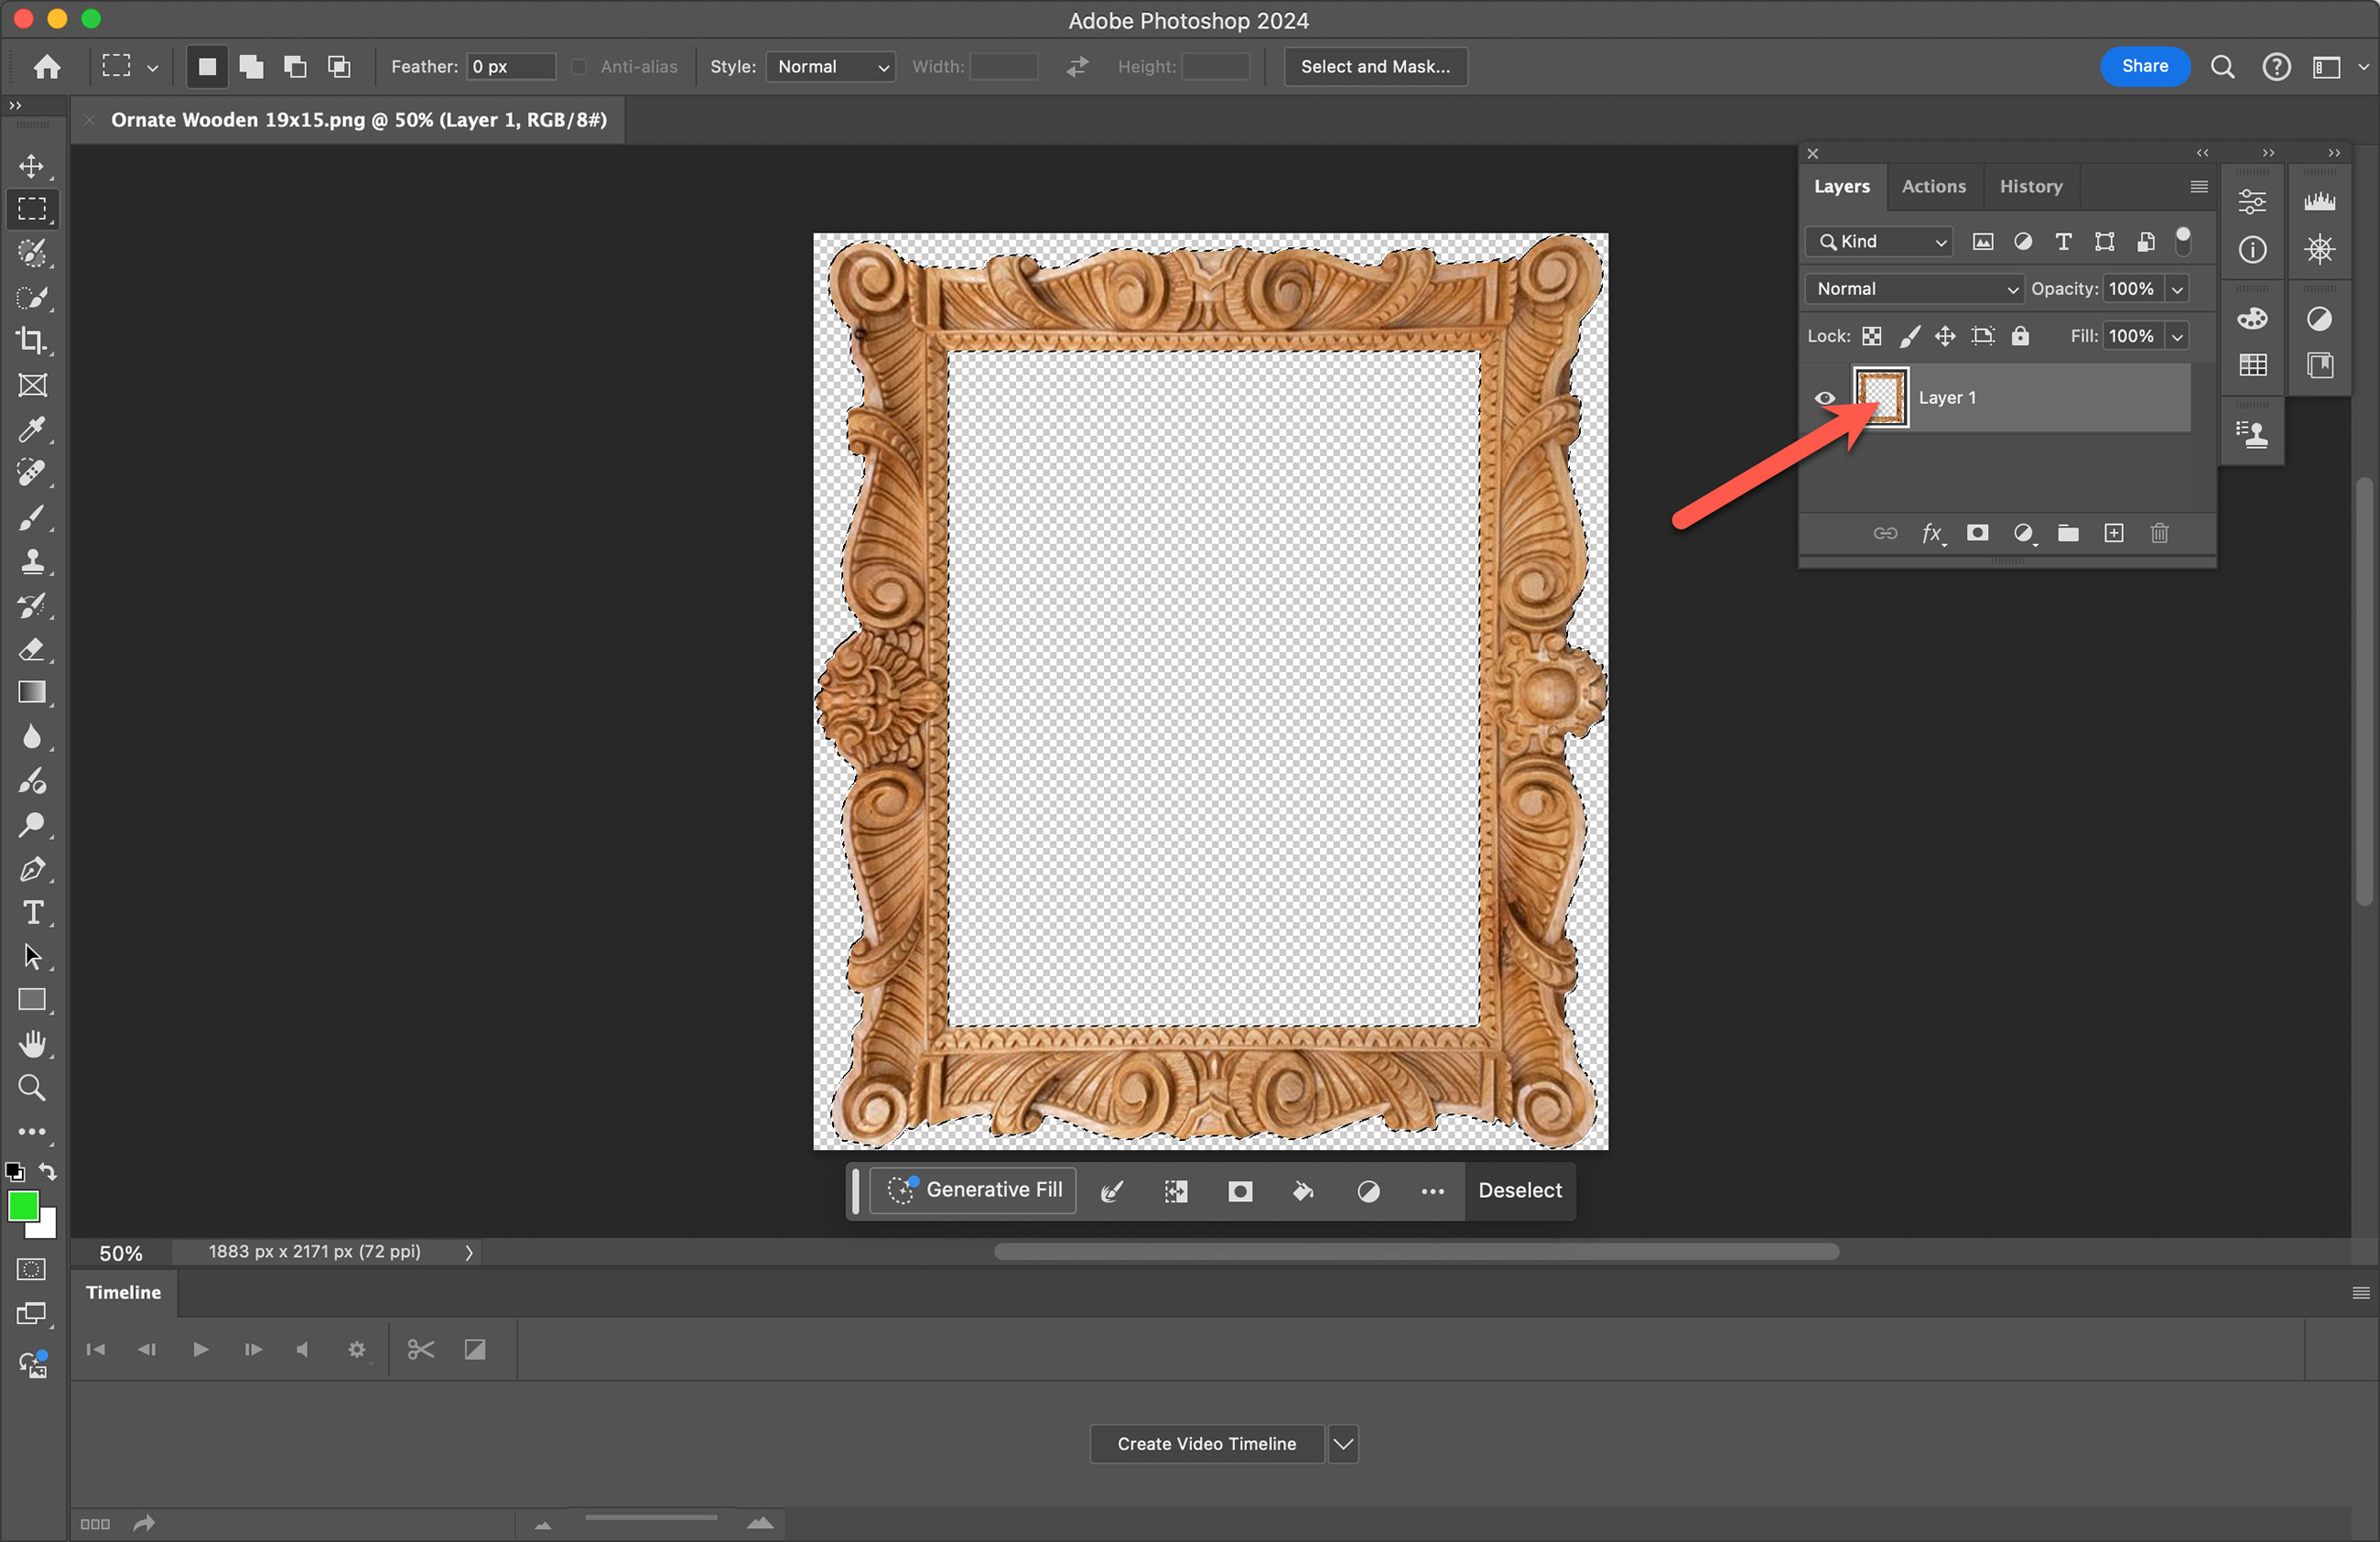
- Select Frame: Use the CmdCtrl key and click the frame layer thumbnail to select all active pixels of the frame.
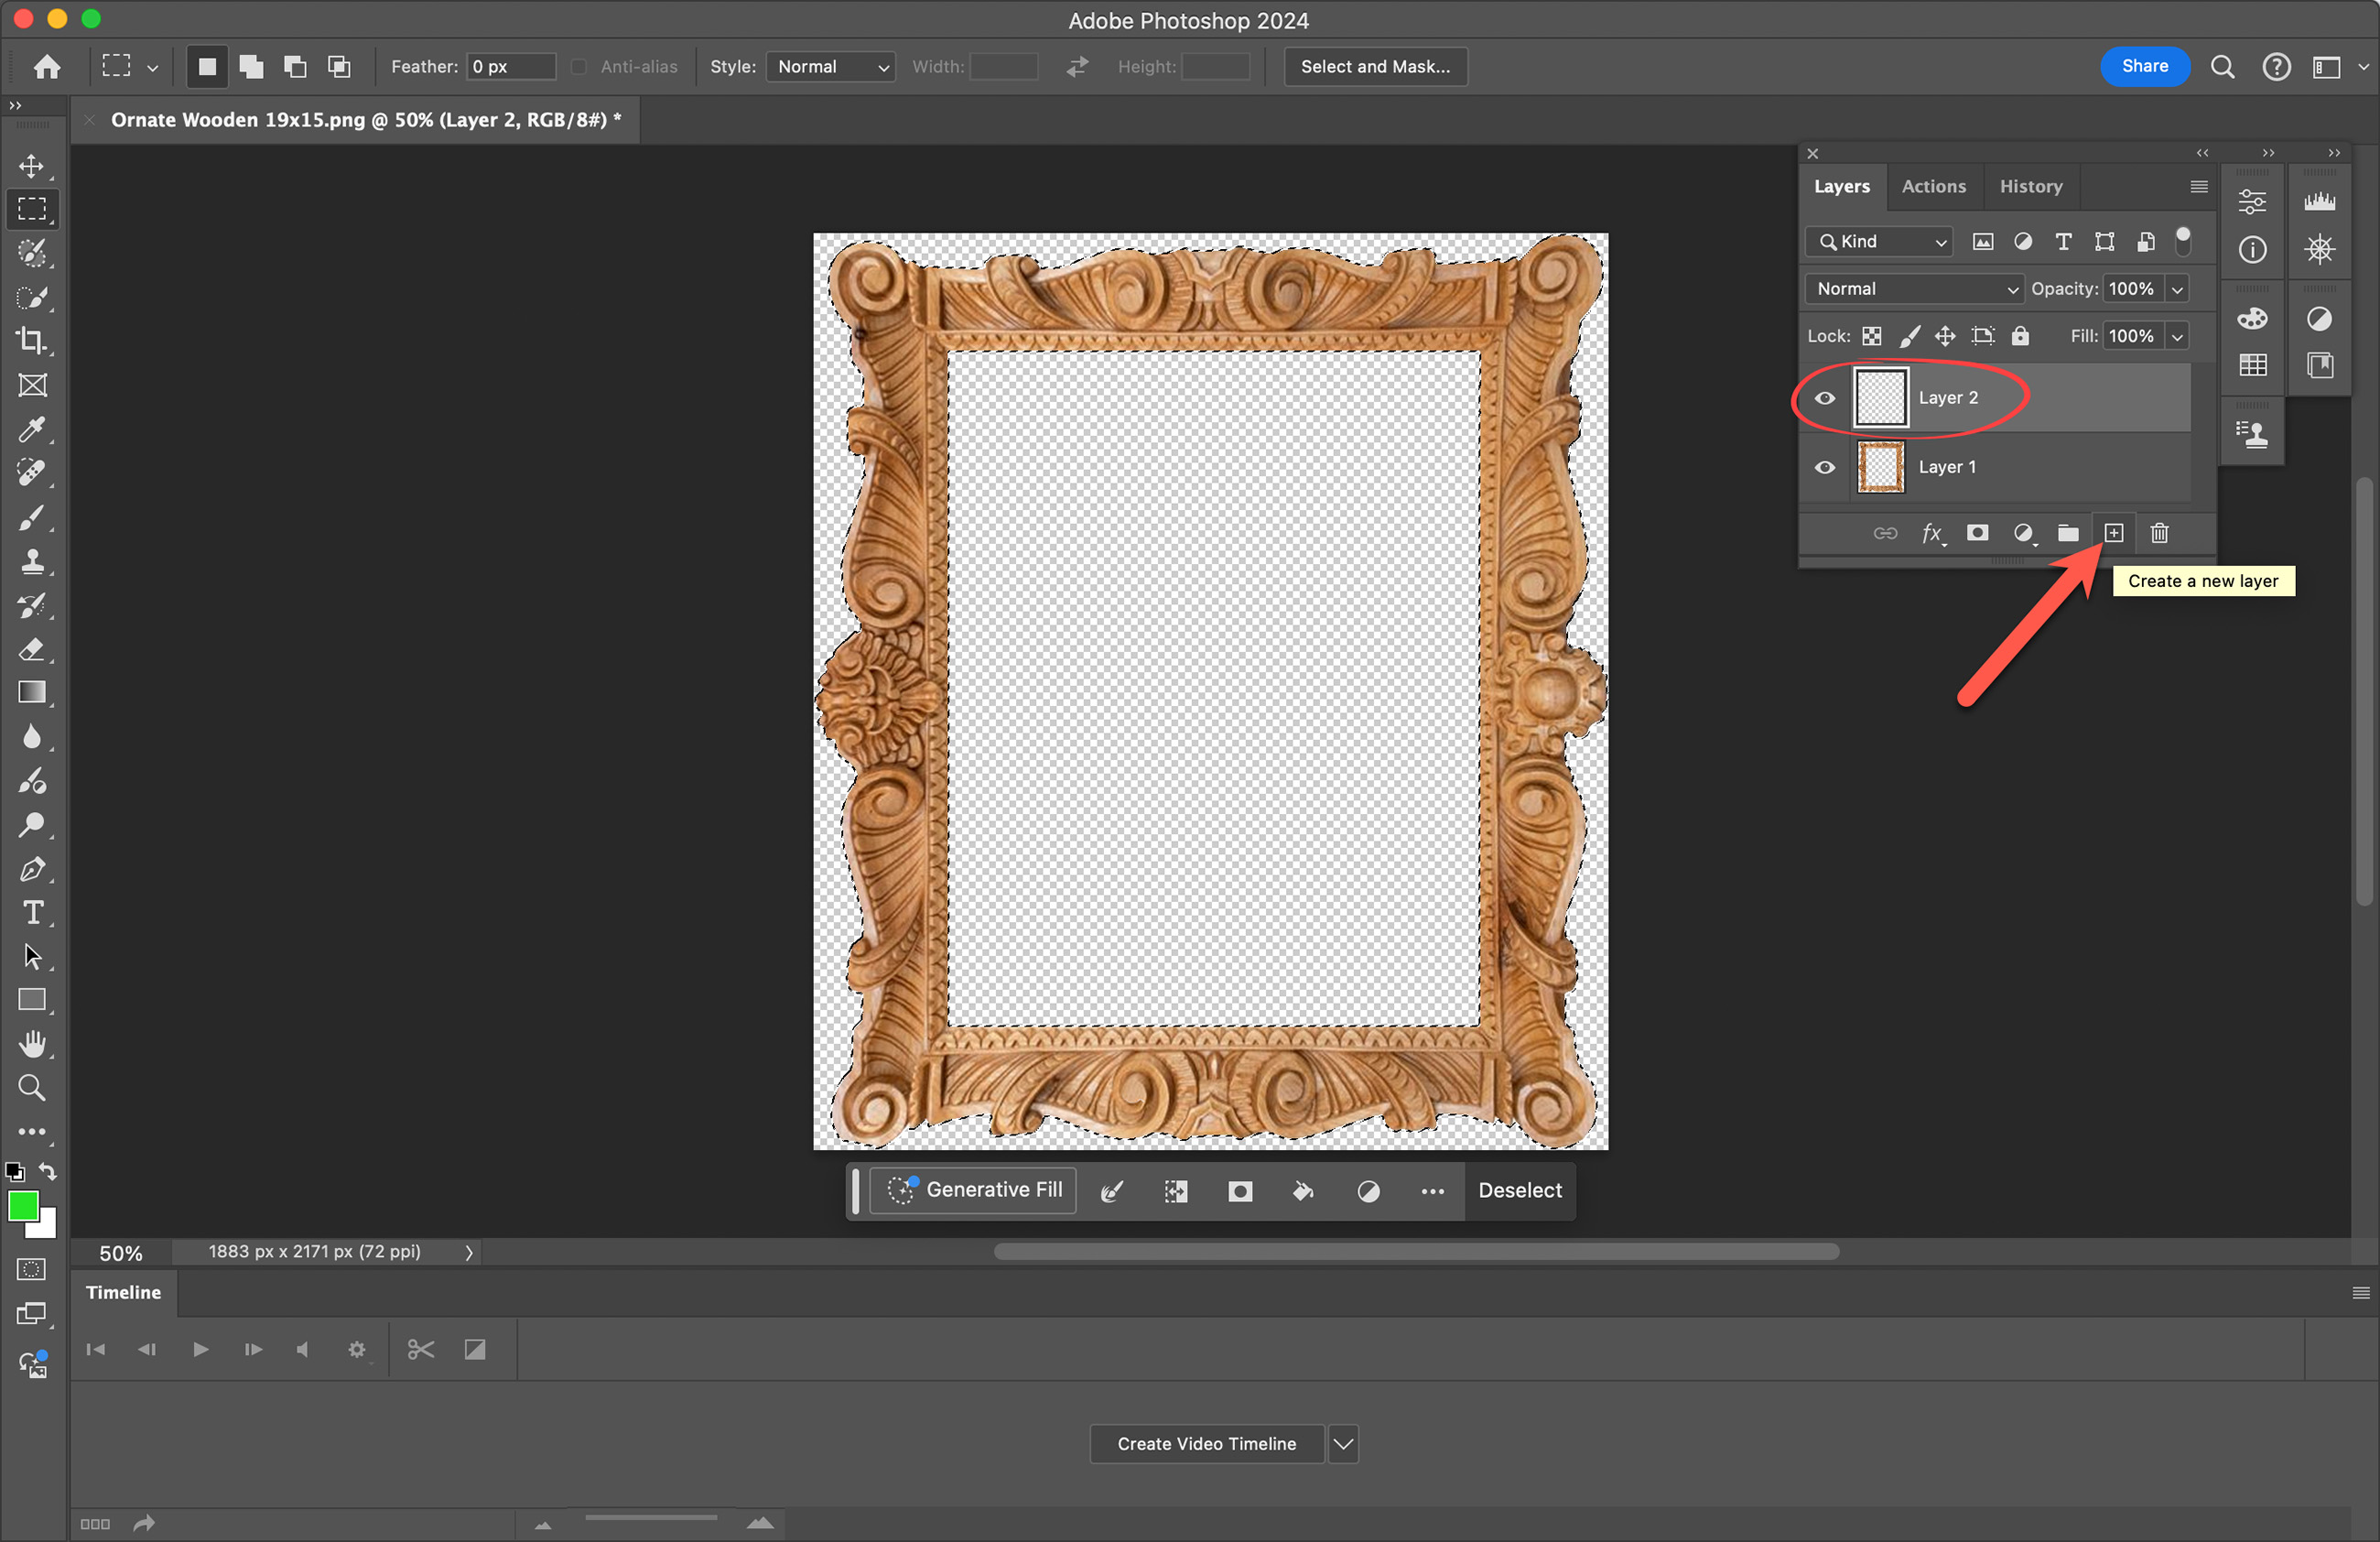
- Create a New Layer: Add a new layer using the "Create a new layer" tool.
- Fill this selection with black to create a shape mask. Tap the D key to select black as your foreground color. Go to Edit > Fill. Select "foreground color" from the contents list, and click OK. Click deselect.
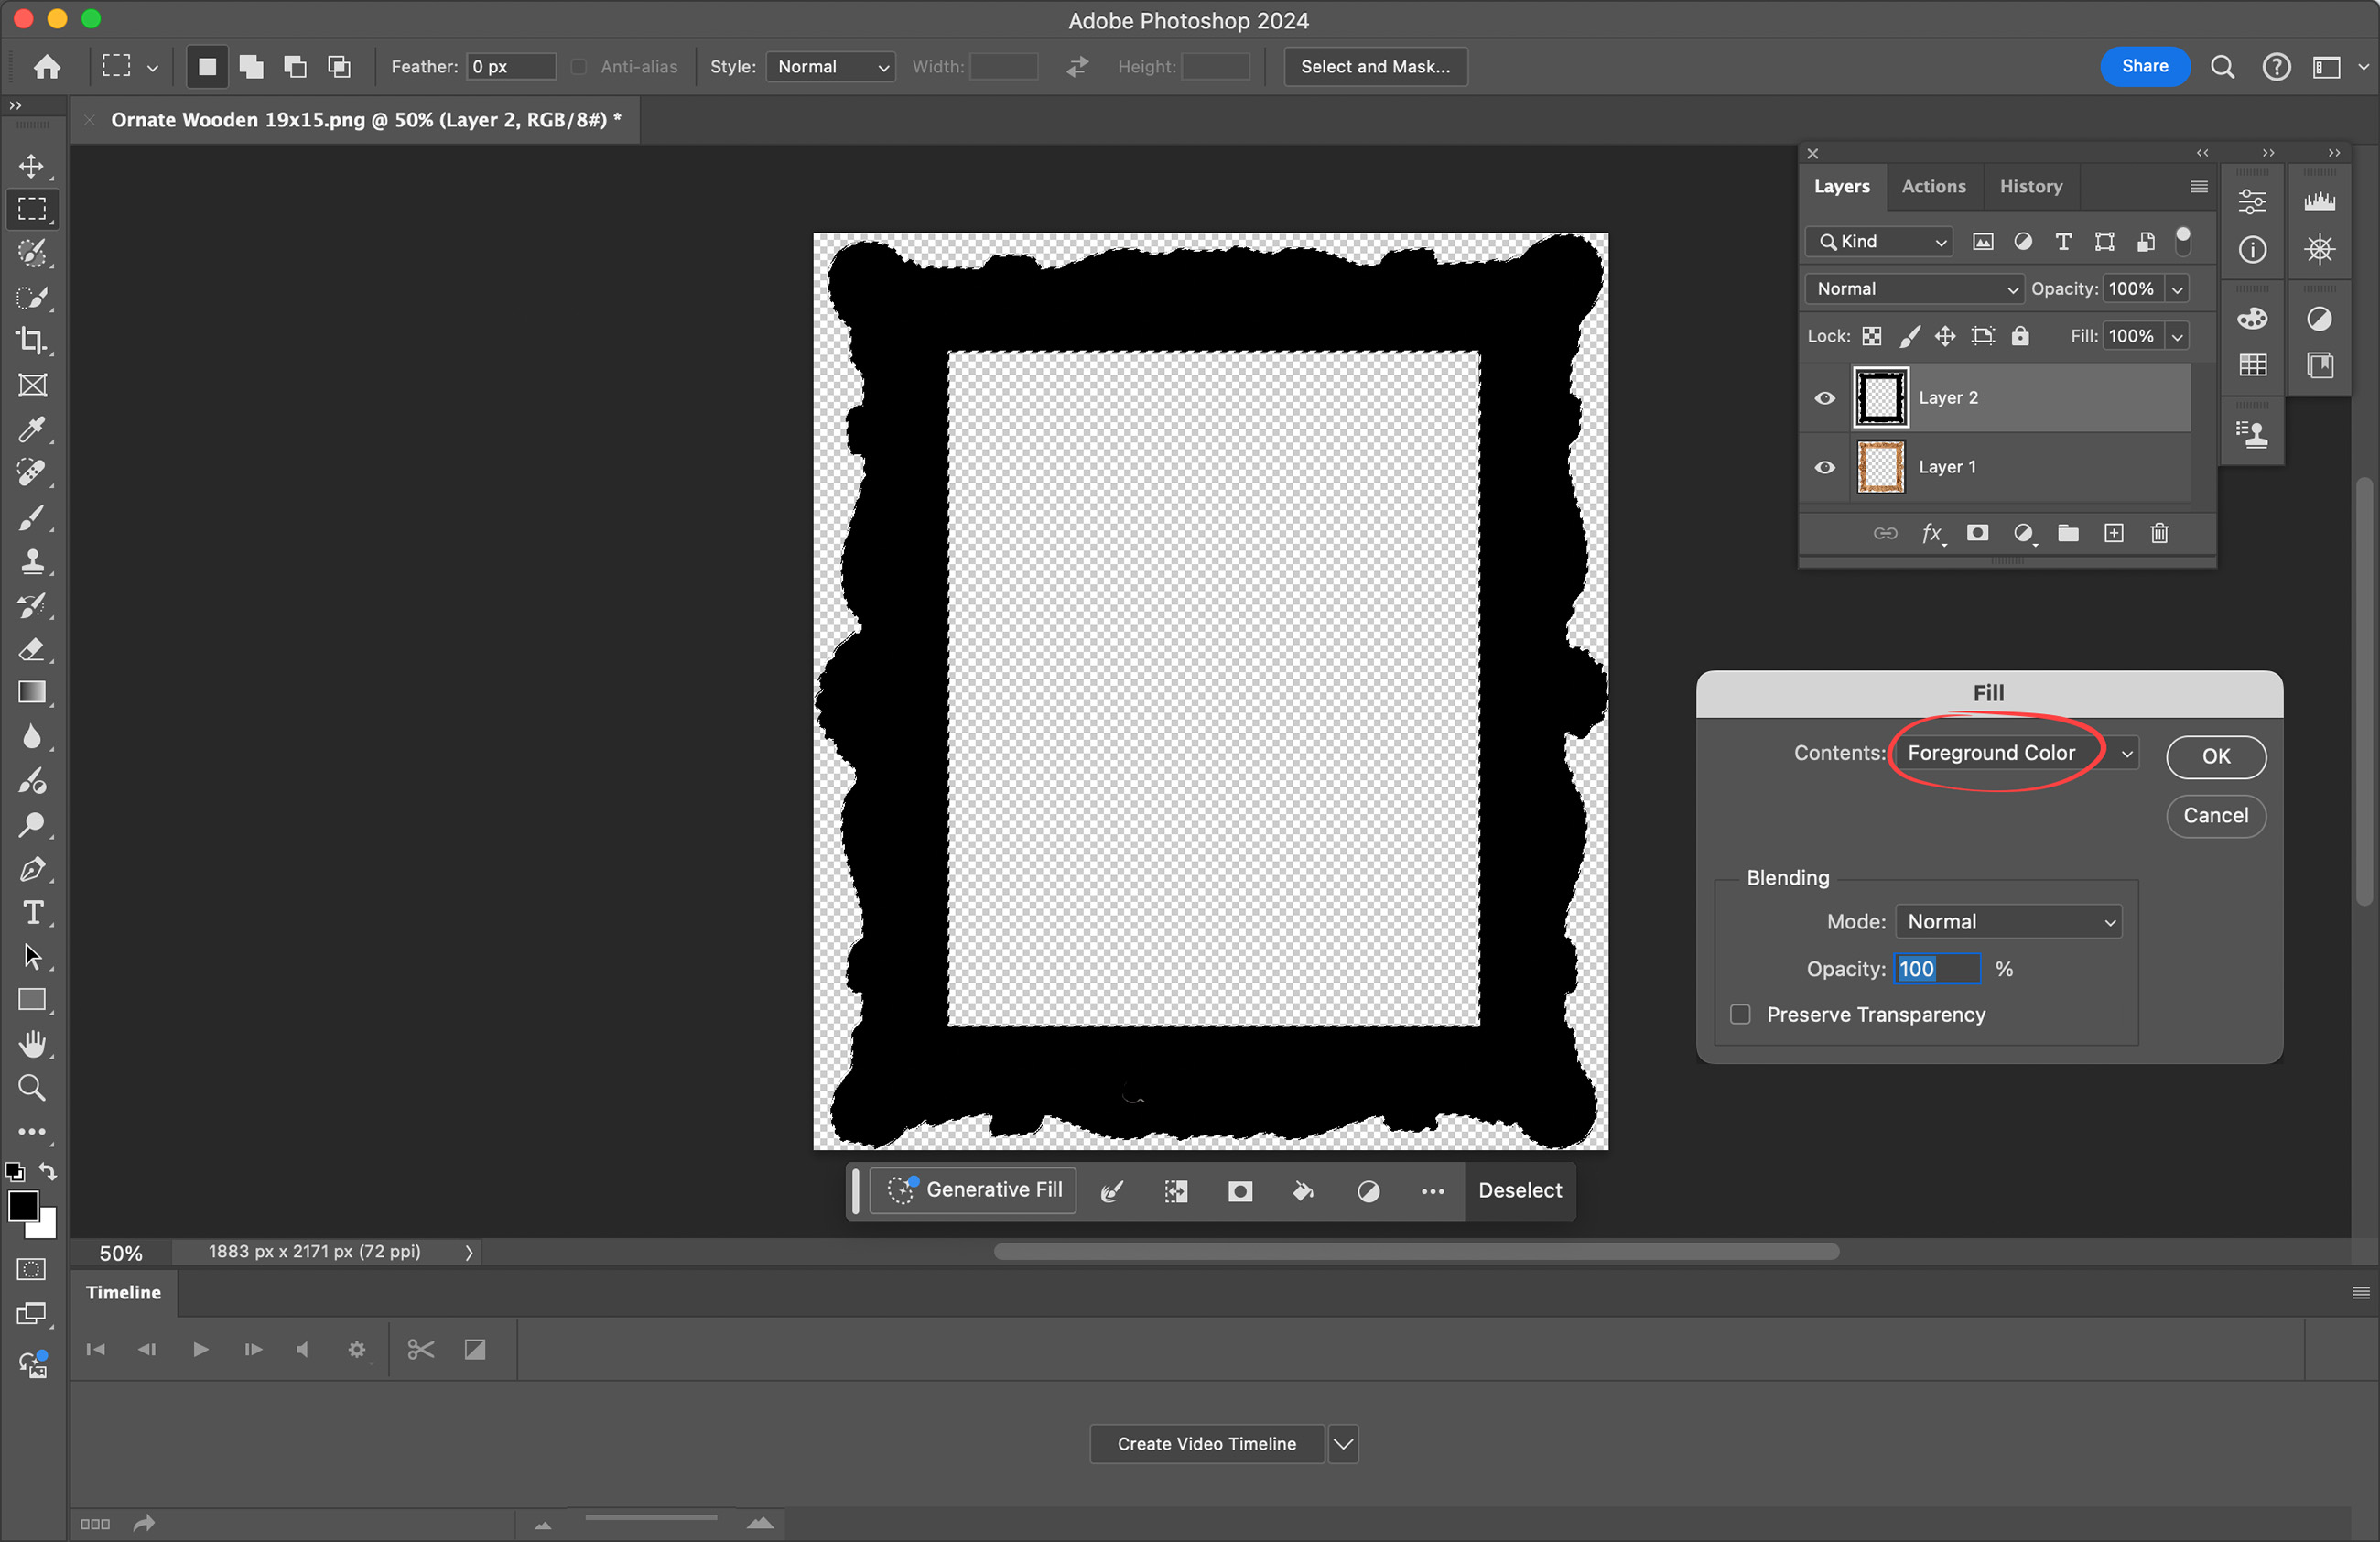
- Drag a marquee to cover the inside of the frame. Fill with black using the "Fill Selection" tool.

- Save the Shape Mask: Save this layer as a JPEG for use as the shape mask in ProSelect. You may have to flatten the image first (Layer > Flatten Image).
- We now have an overlay image and shape mask ready for use in ProSelect. Follow the steps to Set up a Fixed Corner Frame in ProSelect.
- Repeat the above process for each size you wish to offer. Separate shape masks will be required for each size.
- Go to the Product and Pricing Manager in ProSelect.
- Click on the Product Templates tab.
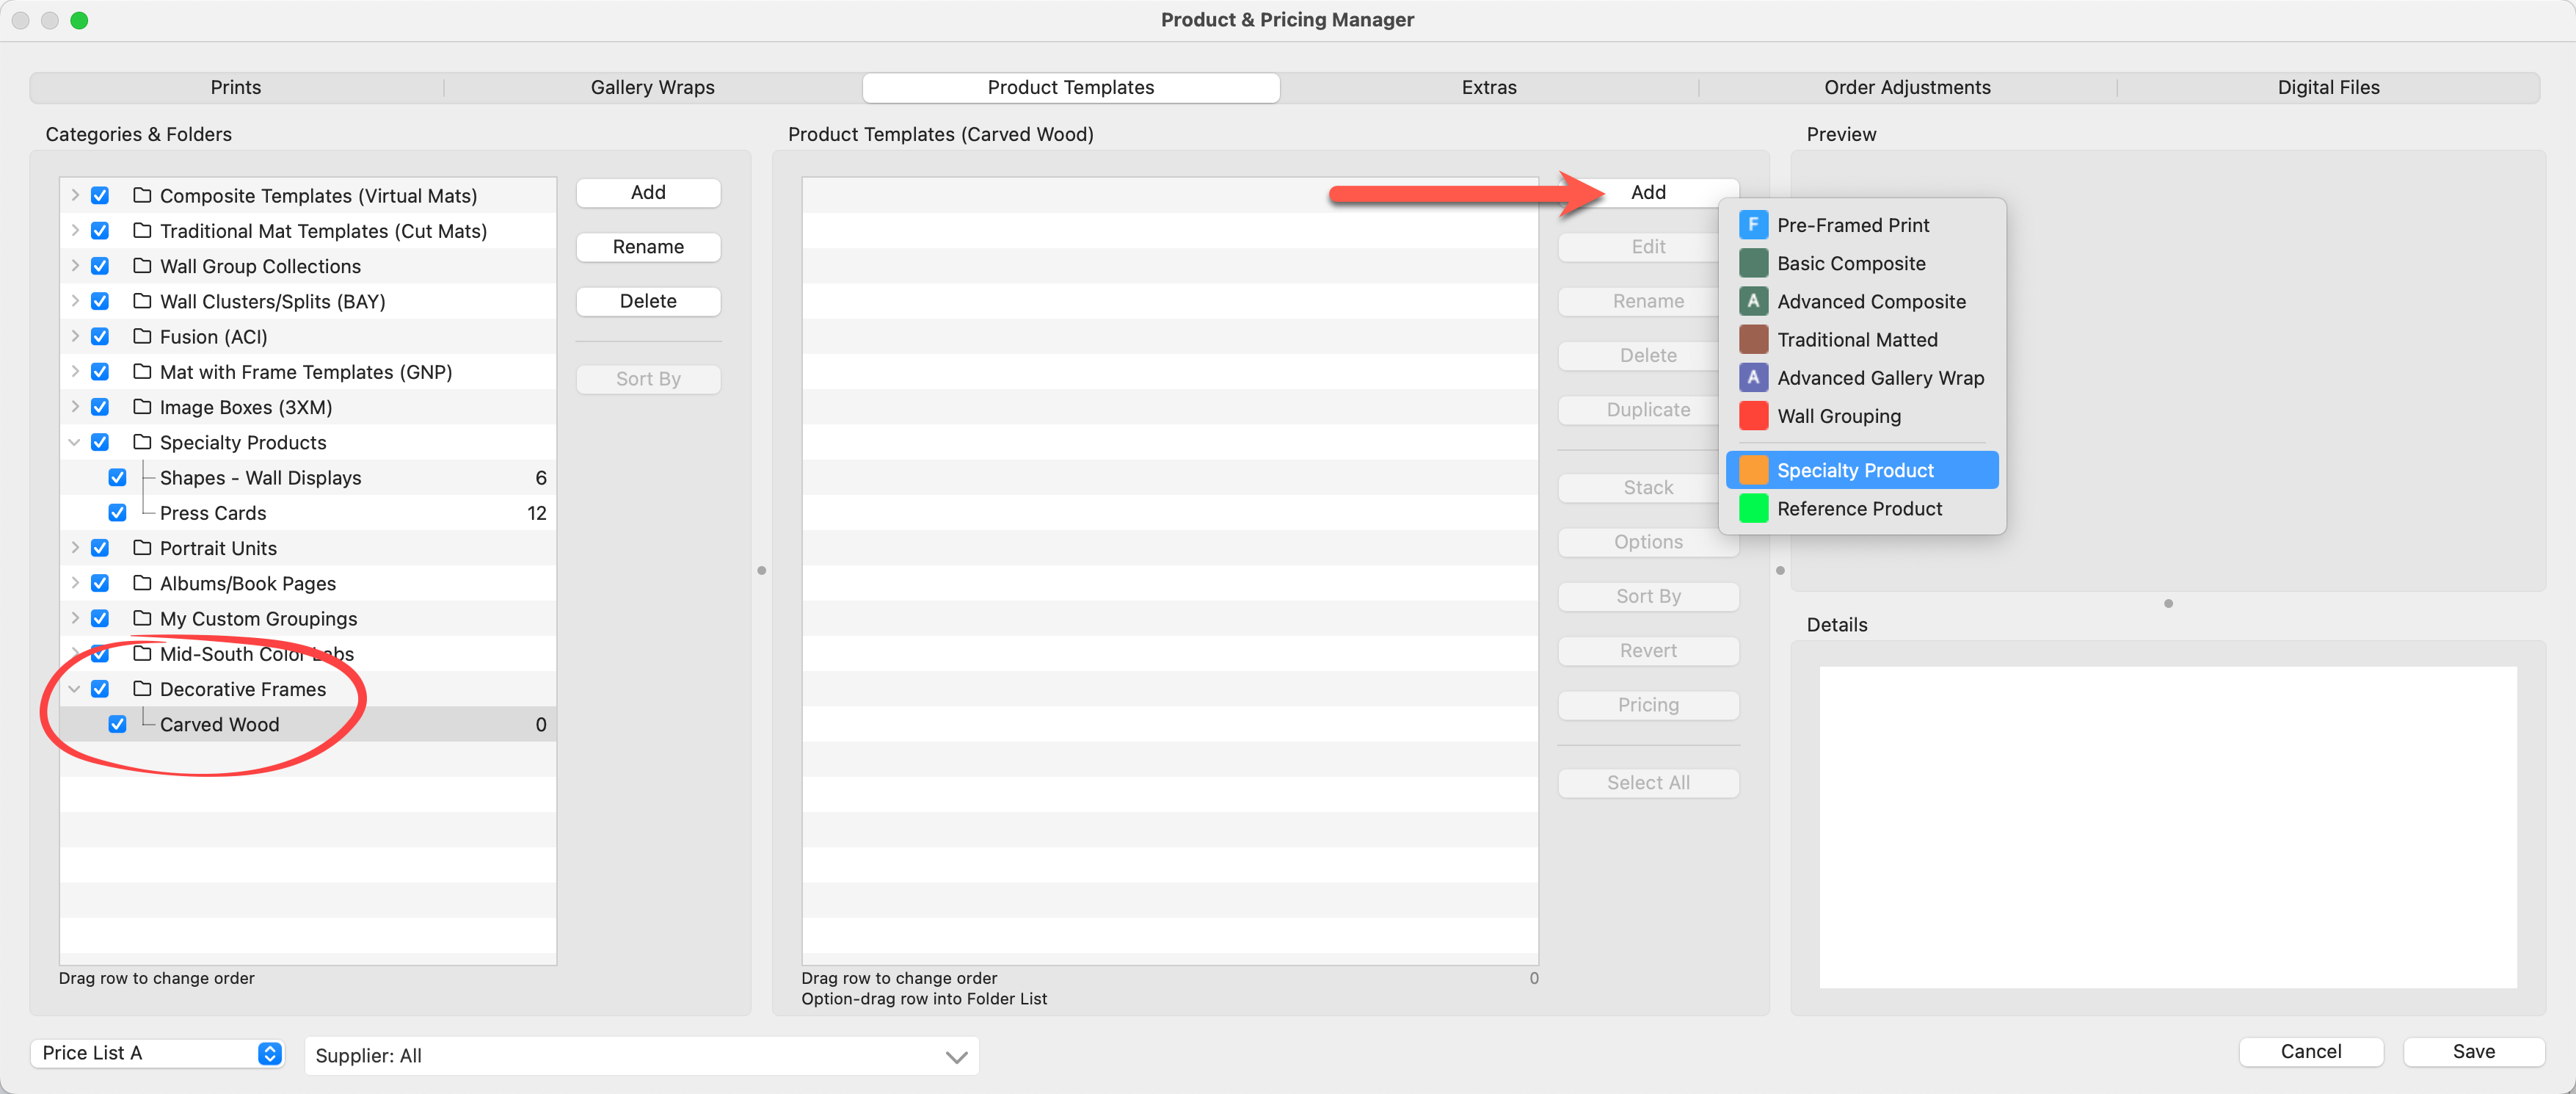
- Create a relevant category and folder for your new frame. (e.g., Decorative Frames, Carved Wood).
- With your new folder selected, click on the Add button in the product templates panel.
- Select Specialty Product. This action will open the Product Editor.
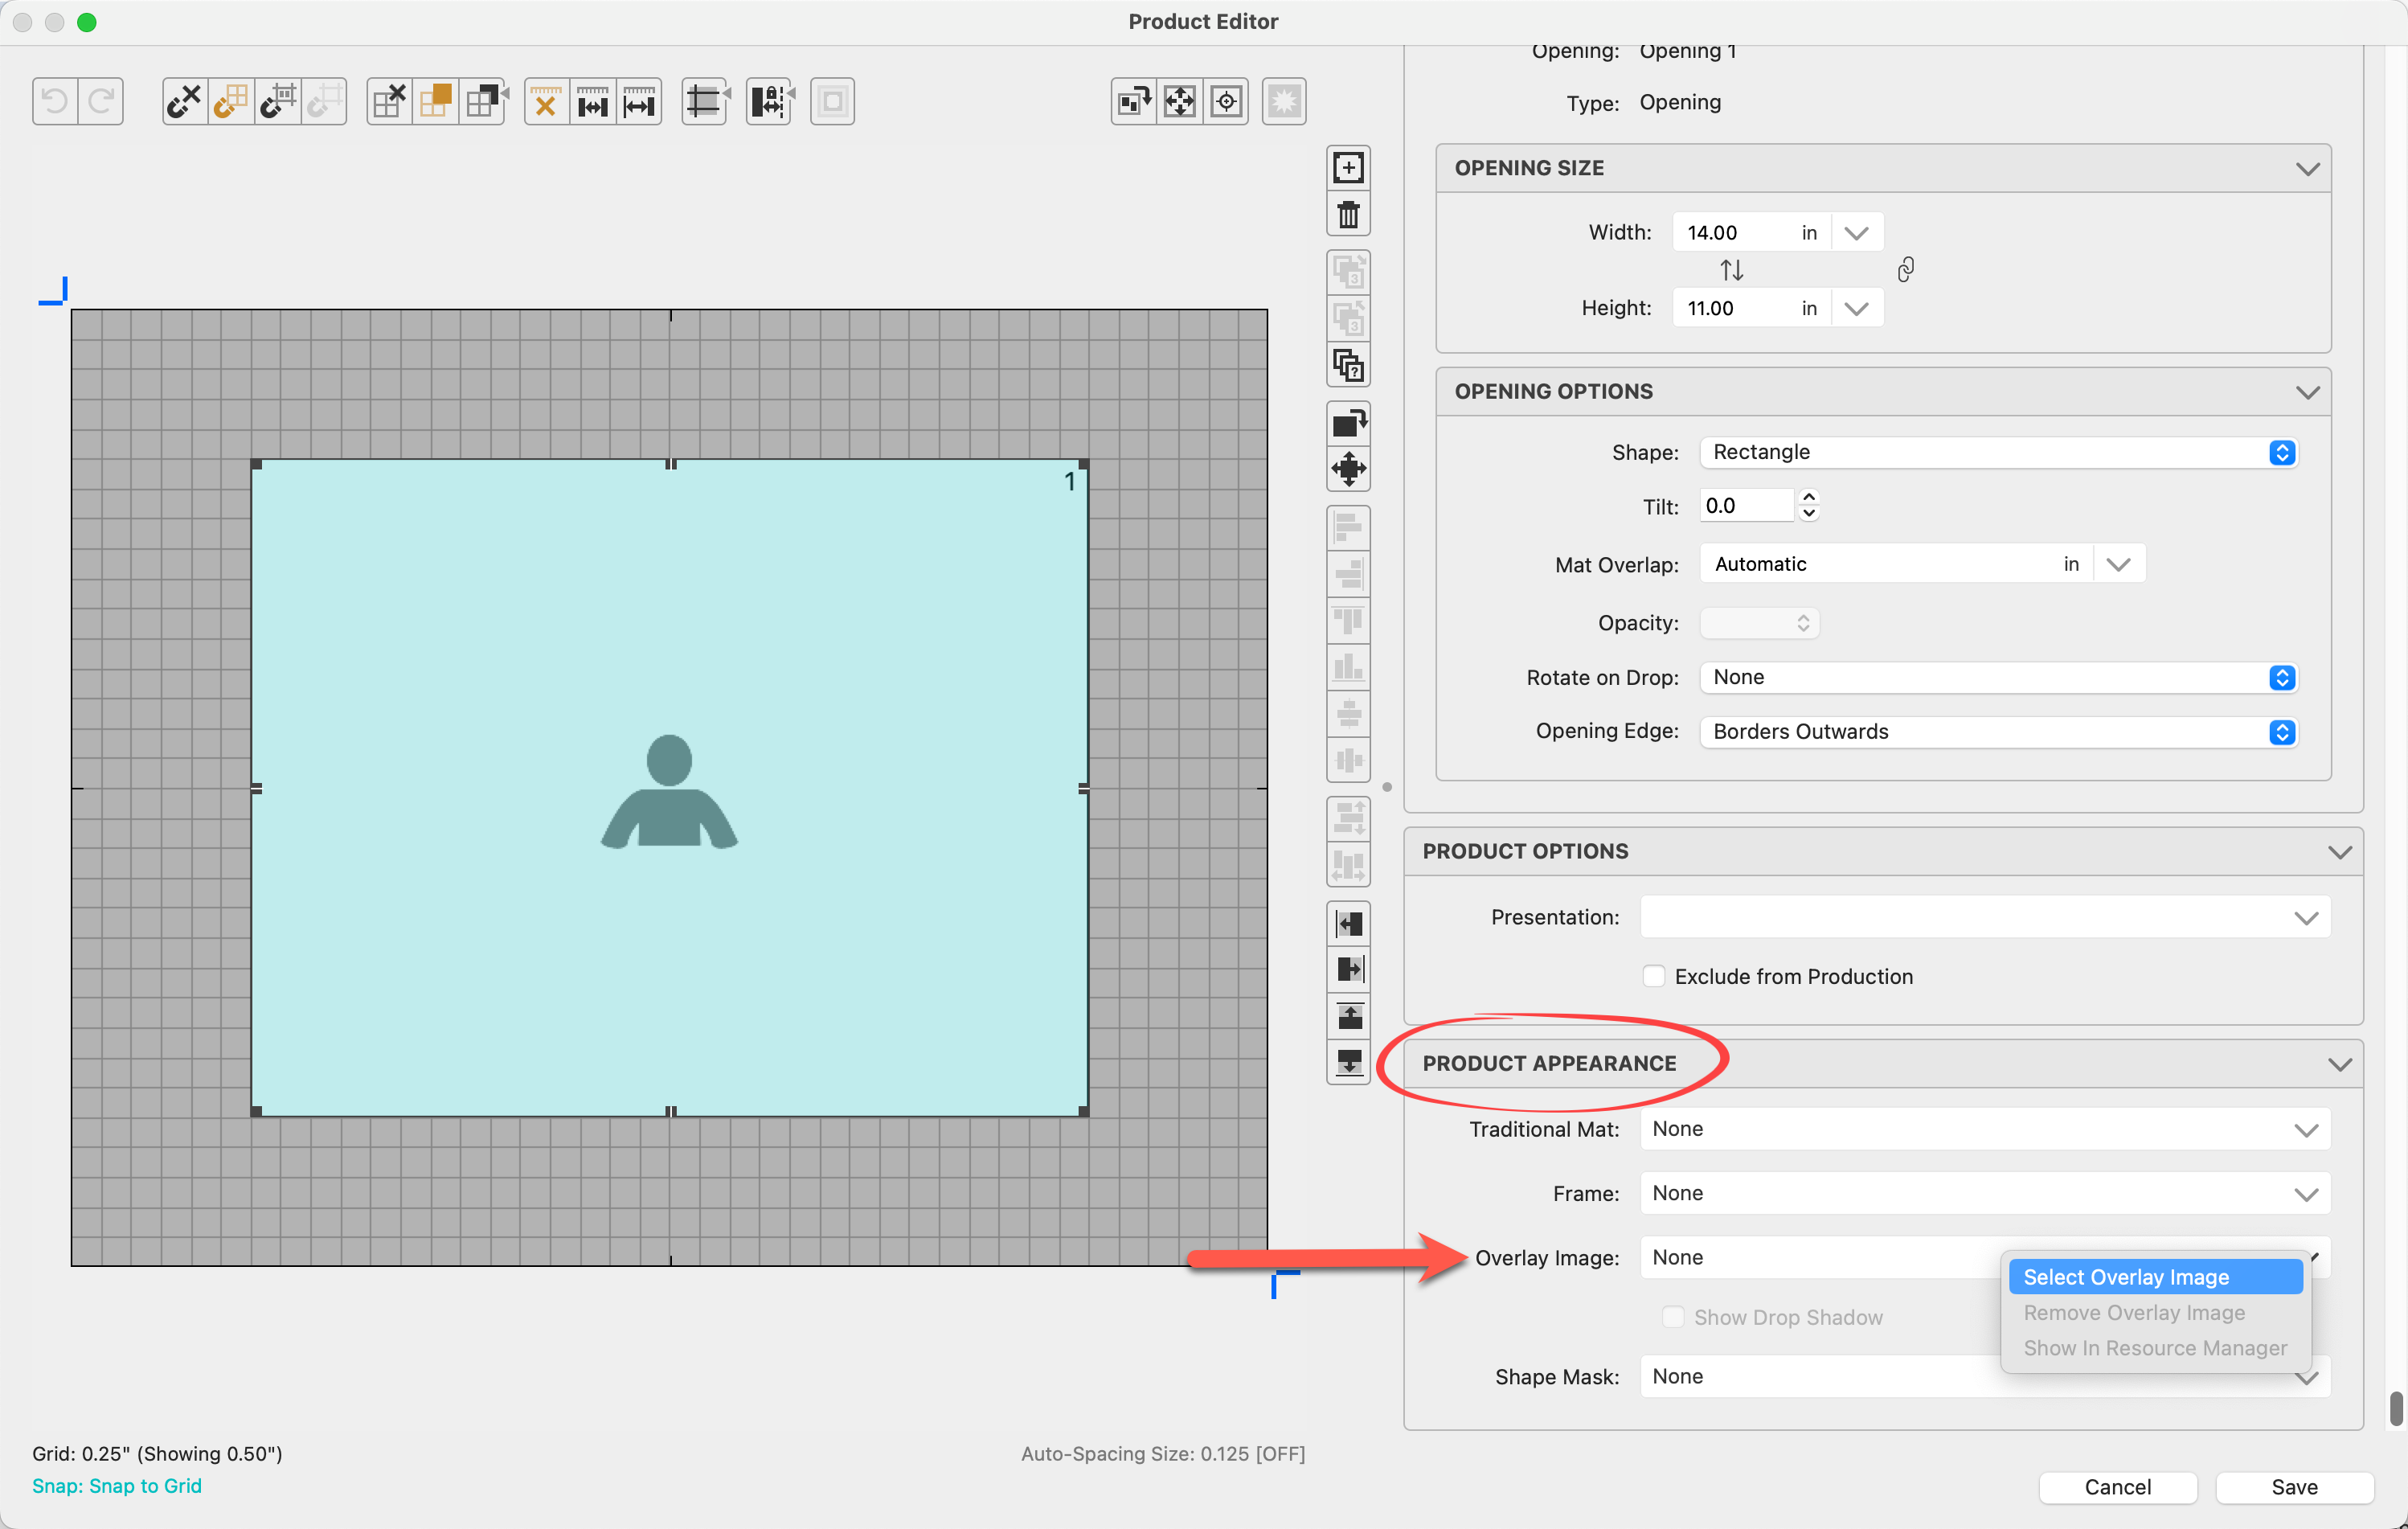
- We can now create our specialty product template. To begin, scroll down to the Product Appearance box.
- Click on the Overlay Image drop-down. Choose "Select Overlay Image."
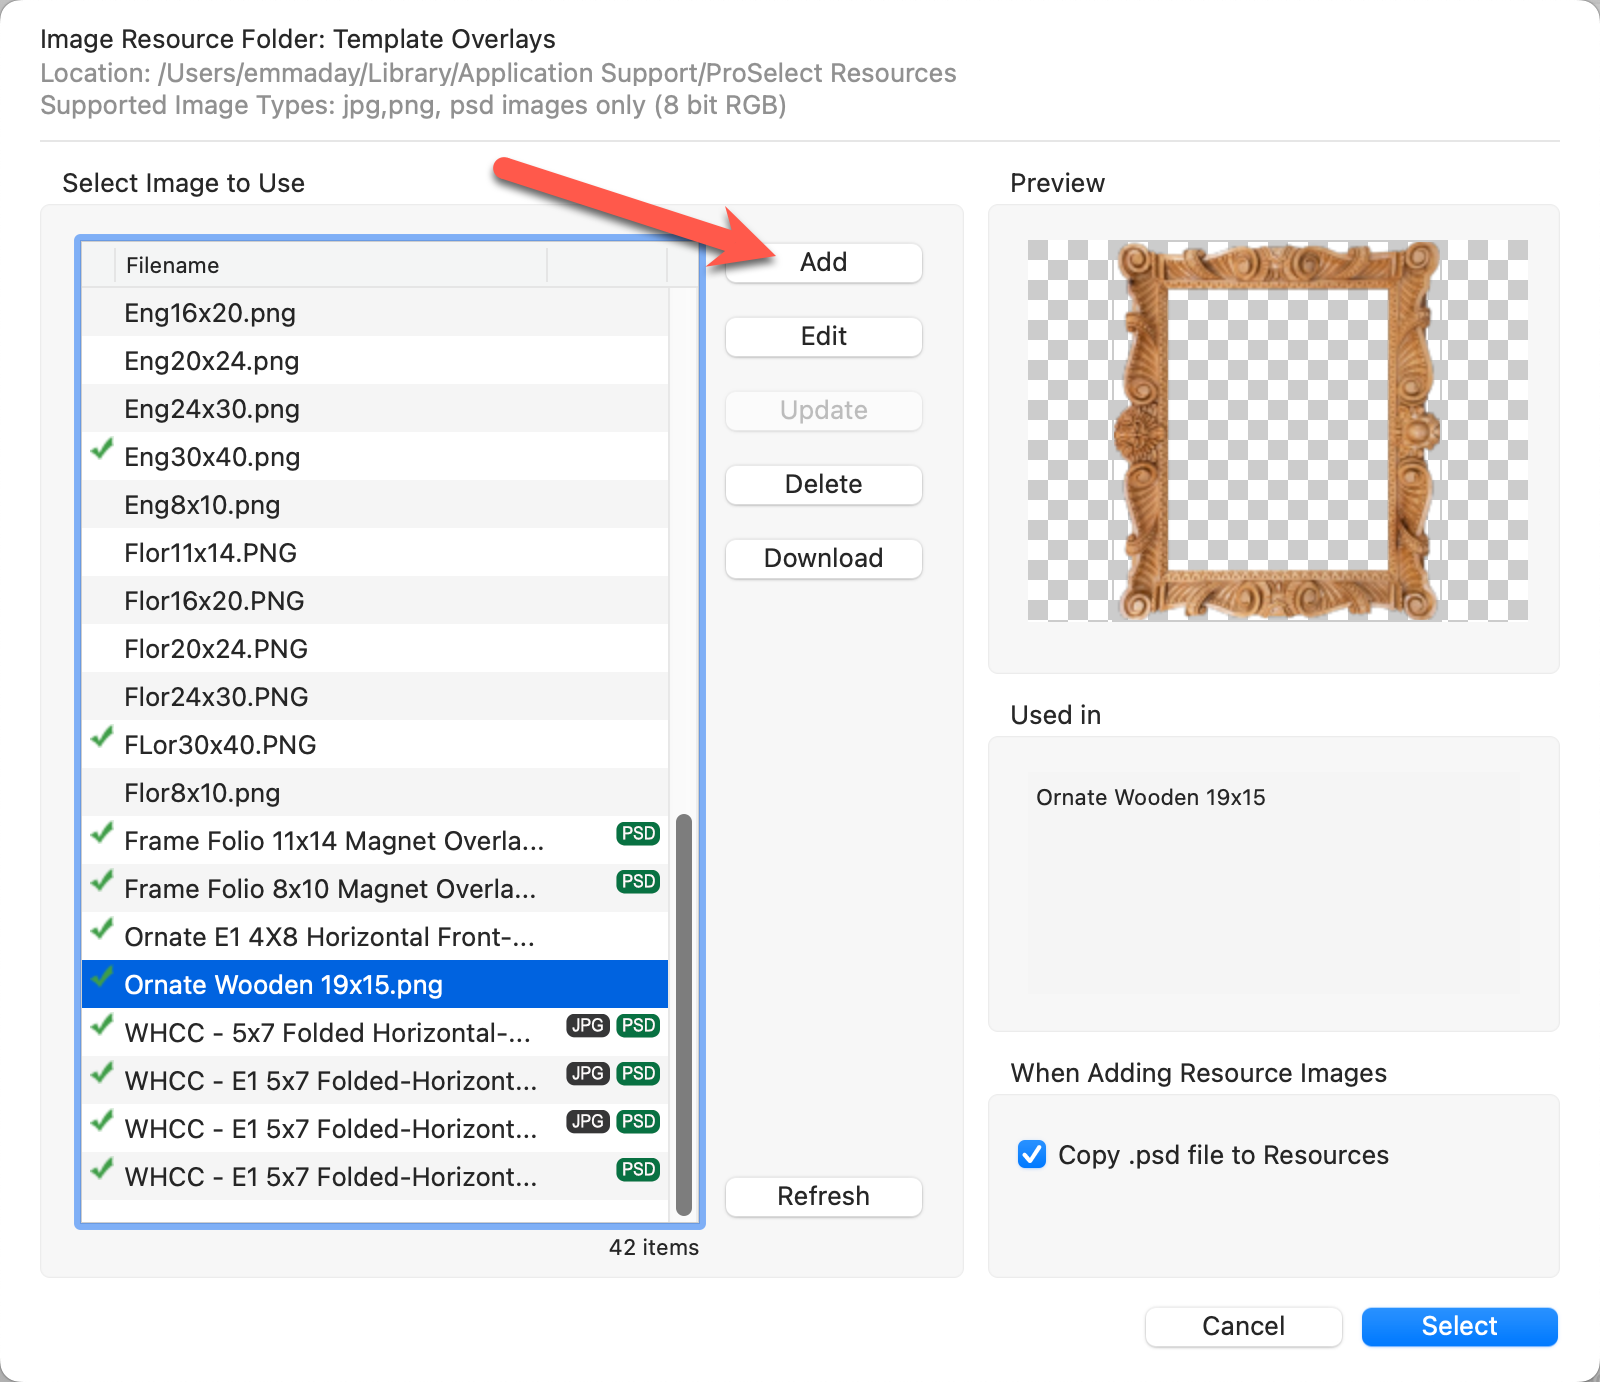
- Use the Add button in the Template Overlays dialog to import the frame overlay image PNG file. A preview of the image will appear on the right. Click the Select button. The name of the Overlay Image file will populate the template name box unless otherwise specified.
- Back in the Product Editor, follow the same steps to add in the shape mask you created if required.
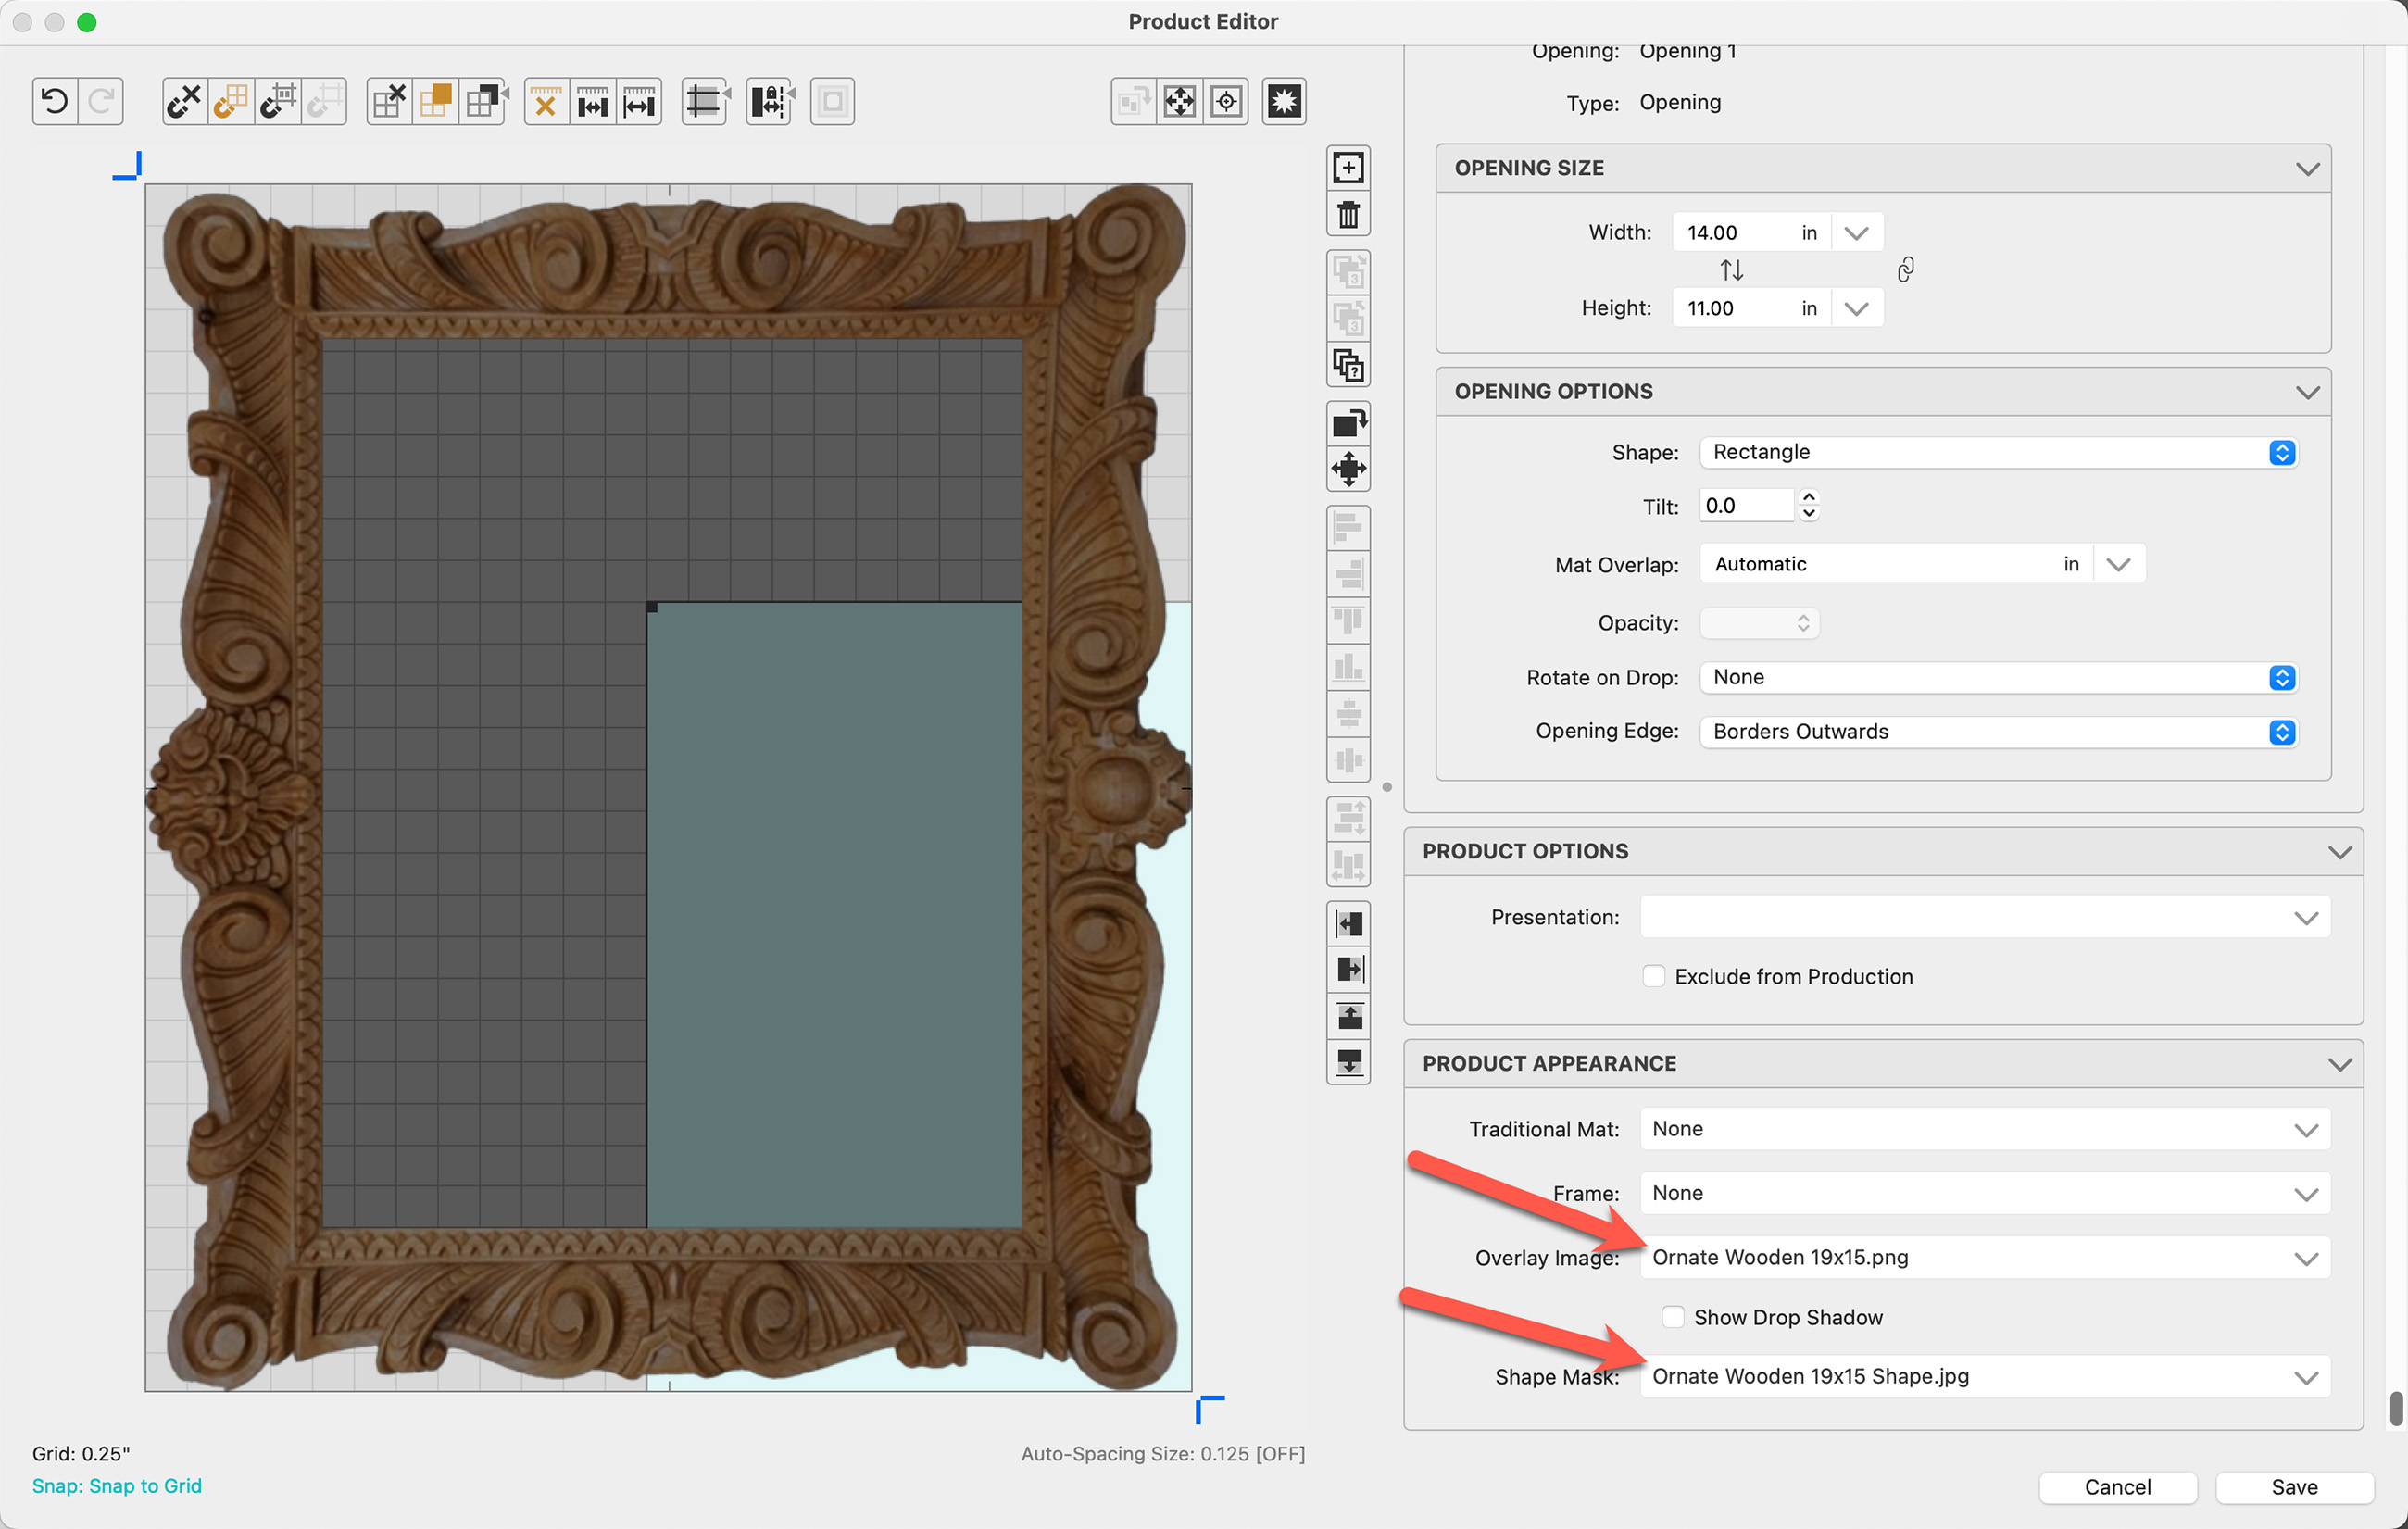
- Click on the Show Overlay Mask
 button.
 - Type in a height value into the Design box which is larger than the frame size. This allows us some room to work with the opening size.
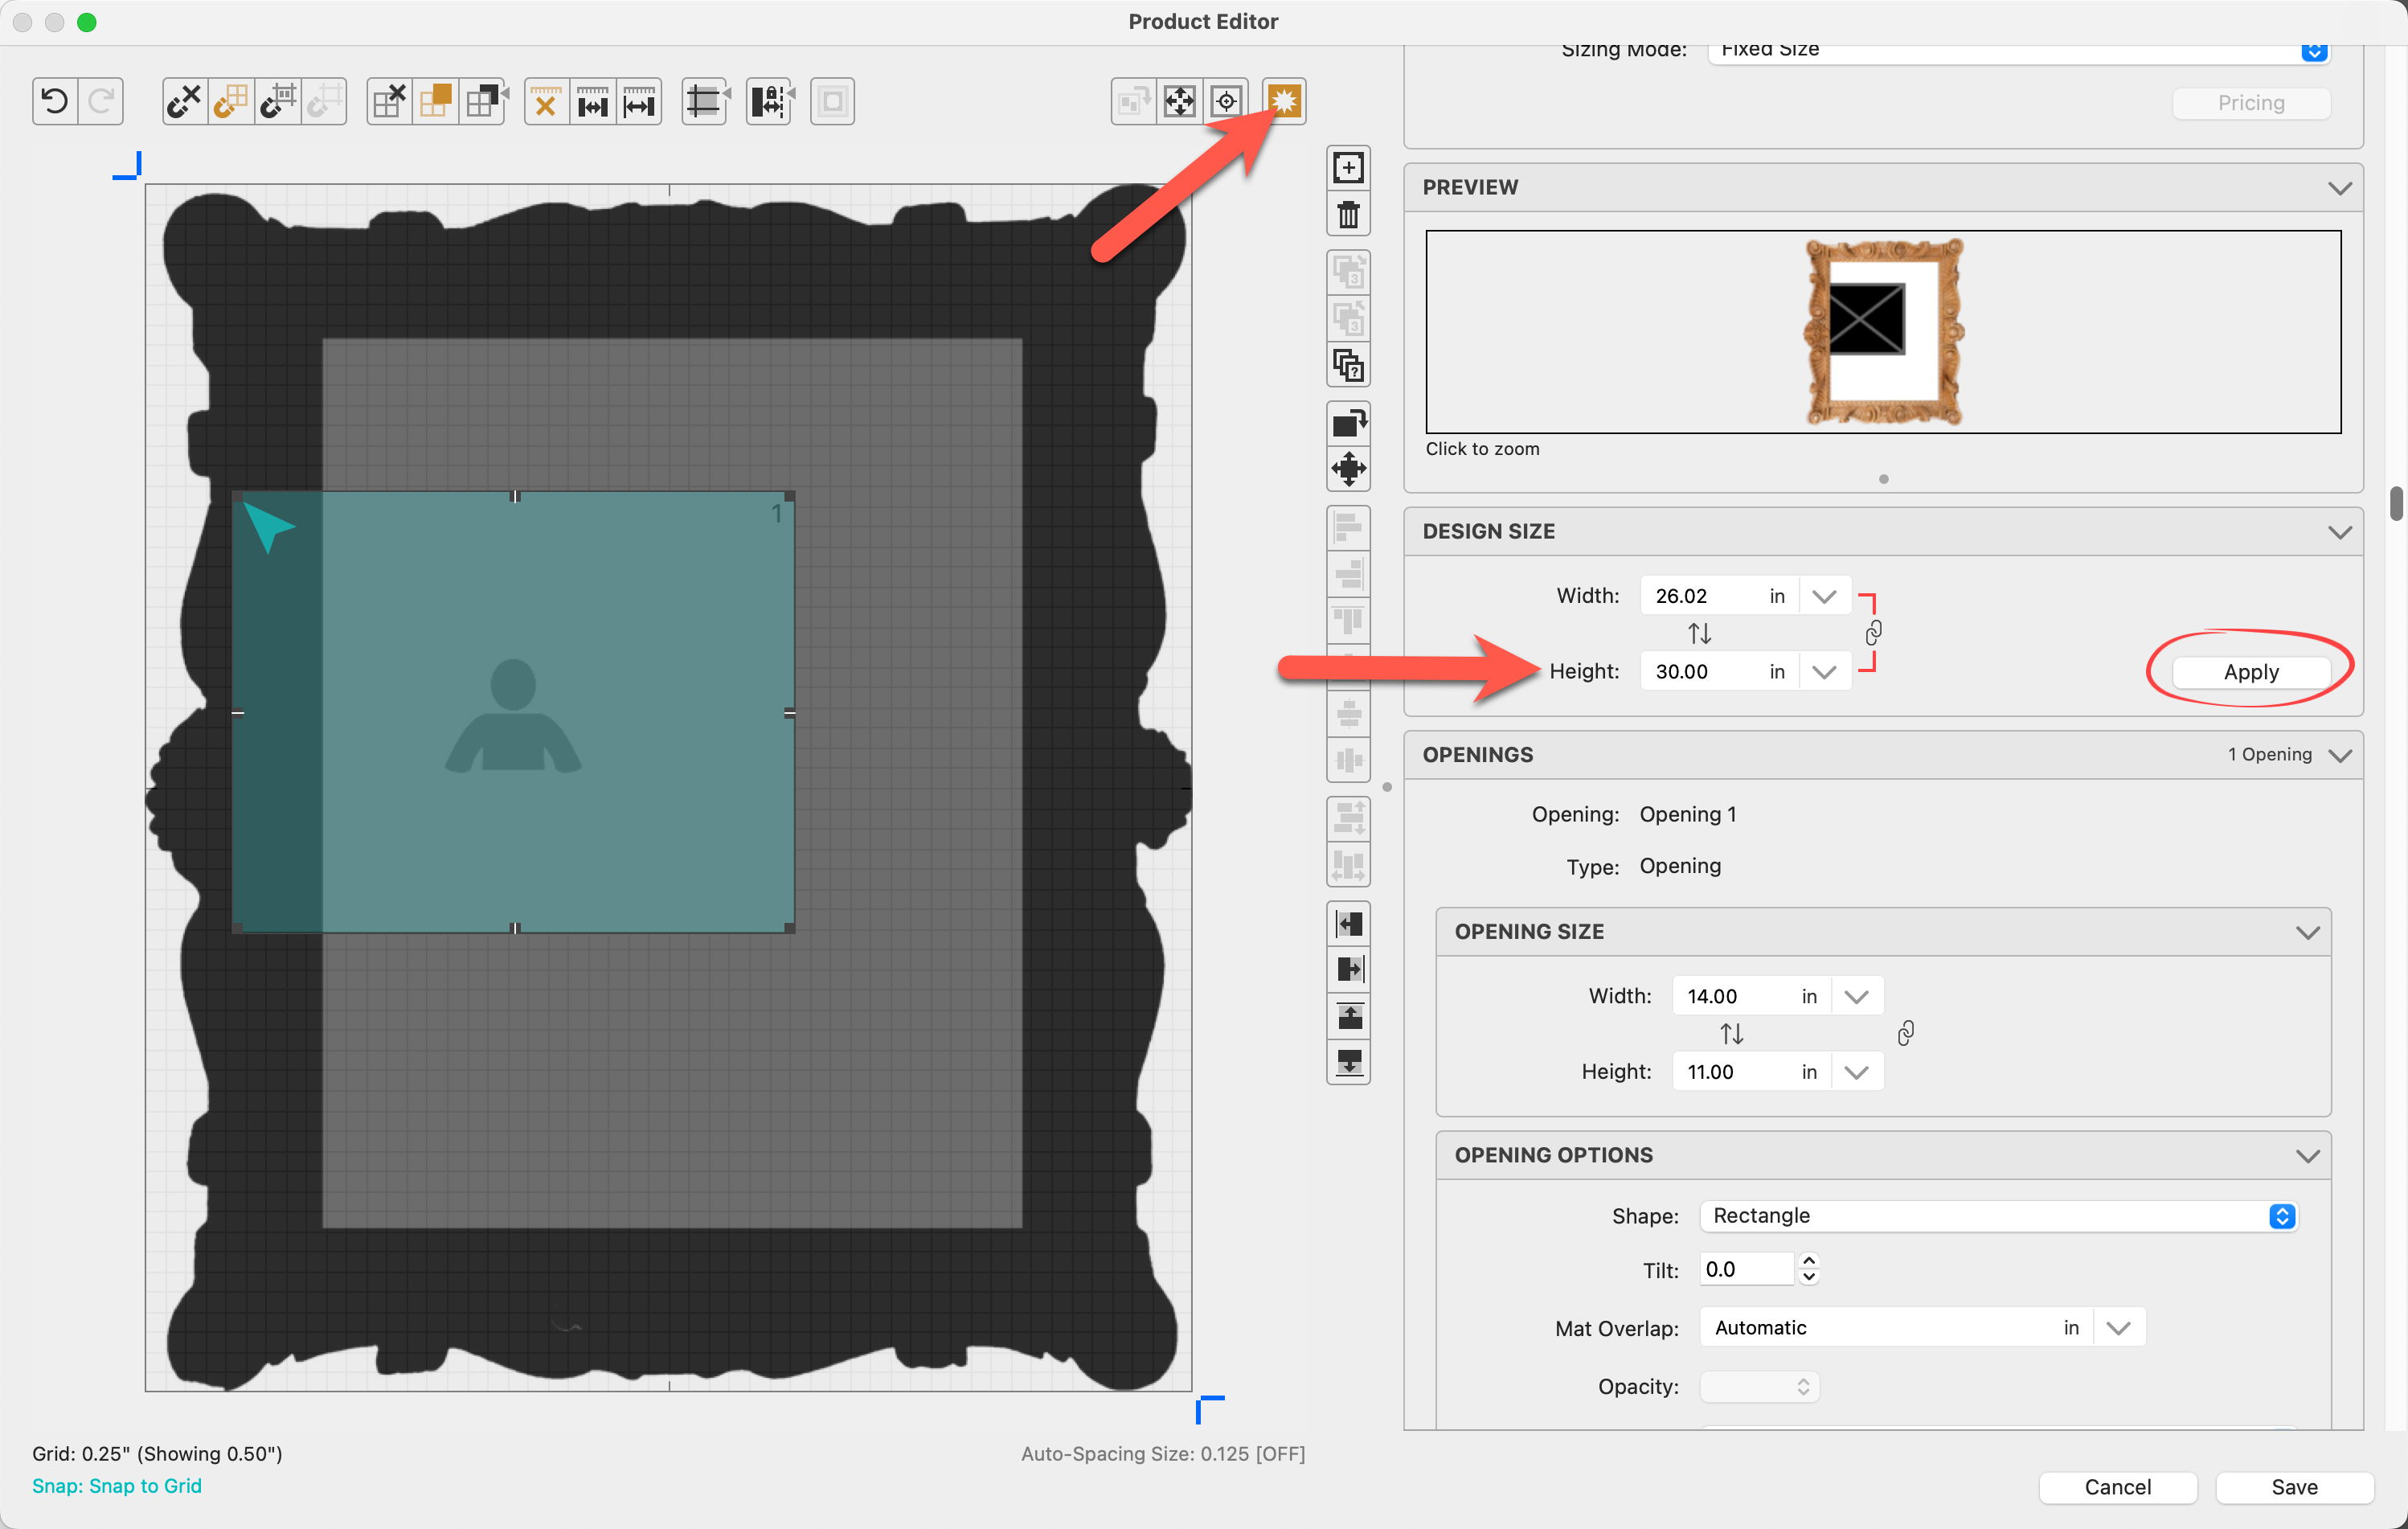
- Adjust Opening Size: Use the corner handles to set the size for the frame's opening, ensuring a slight overlap.
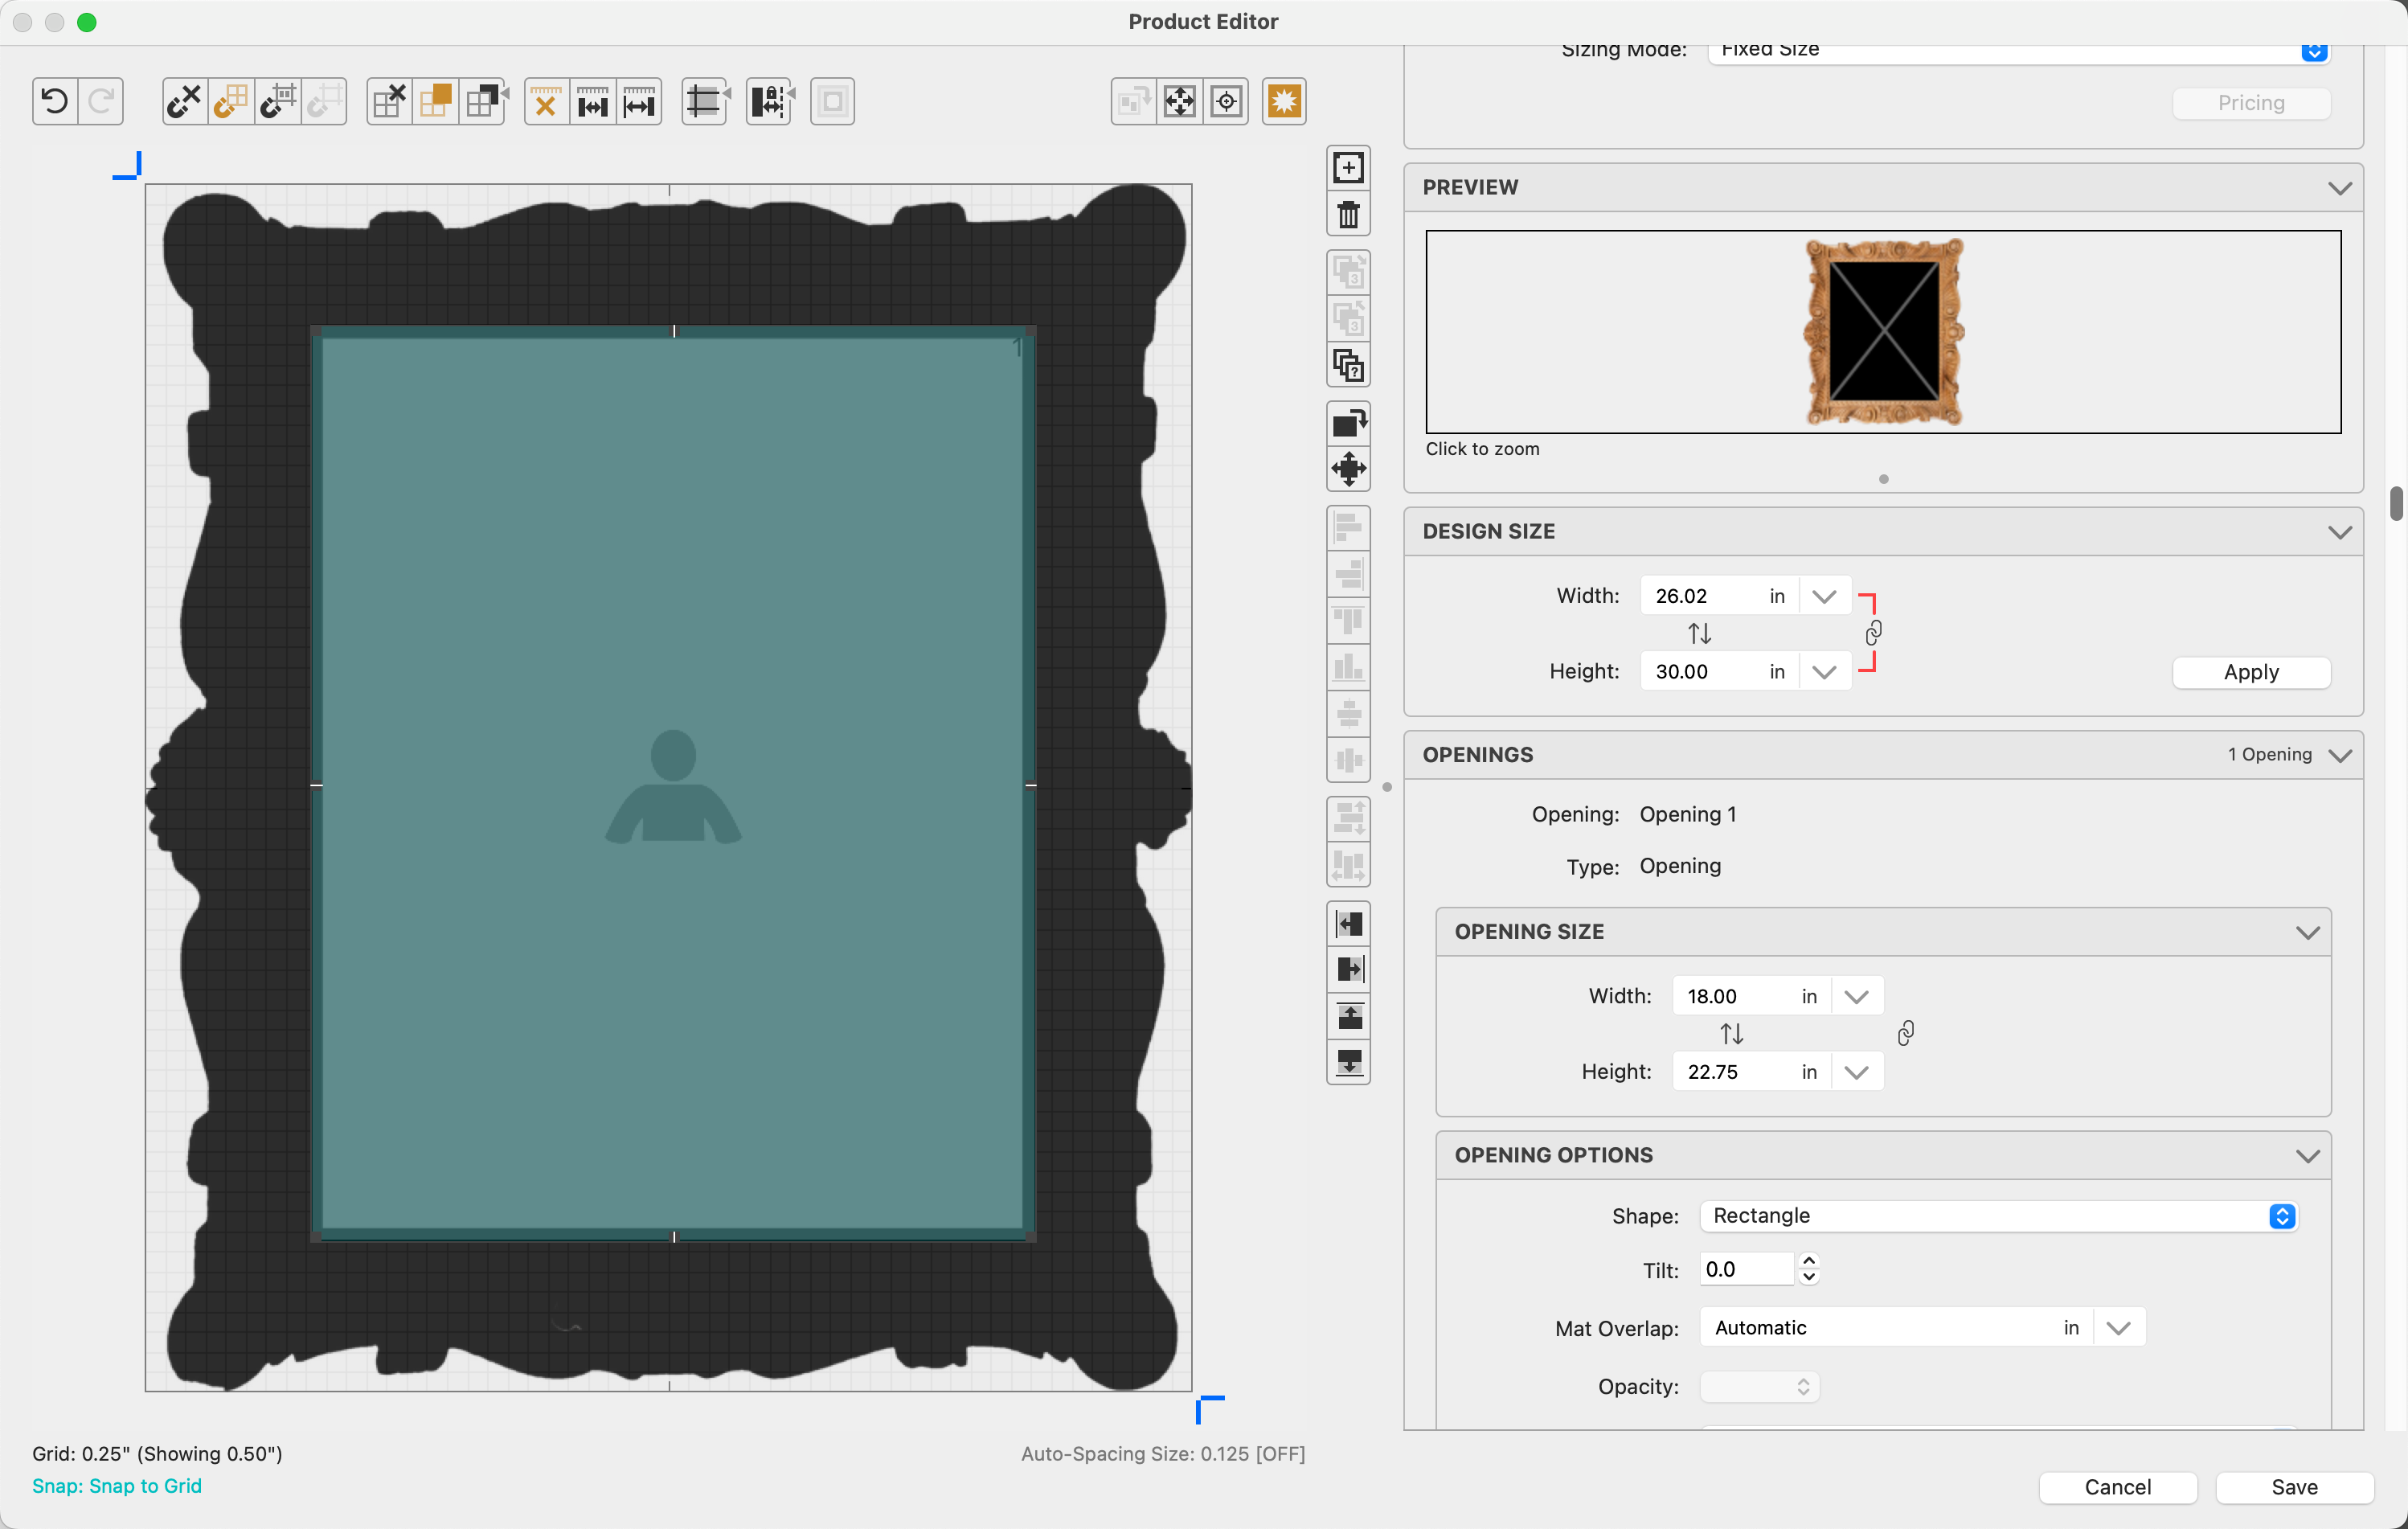
- Type in the opening size of the frame in the Opening Size box. In our case, 19x15. Hold down the OptionAlt key while clicking on the Apply button. This readjusts the design size of the template to match the opening size.
- Assign a Presentation Option.

- Save the Product Template.
- Repeat the above process for each size you wish to offer. Separate overlay images and shape masks will be required for each size.
- If you are offering multiple sizes of the same frame, you can stack the product templates together. See Stacking Templates for more information.
- Price the frames accordingly. See Specialty Product Pricing for more information.
Final Adjustments and Usage
- Test the frame by inserting an image into the newly created frame template to ensure it fits correctly.
- Navigate to Working with Products, Resource Area. Locate the frame.
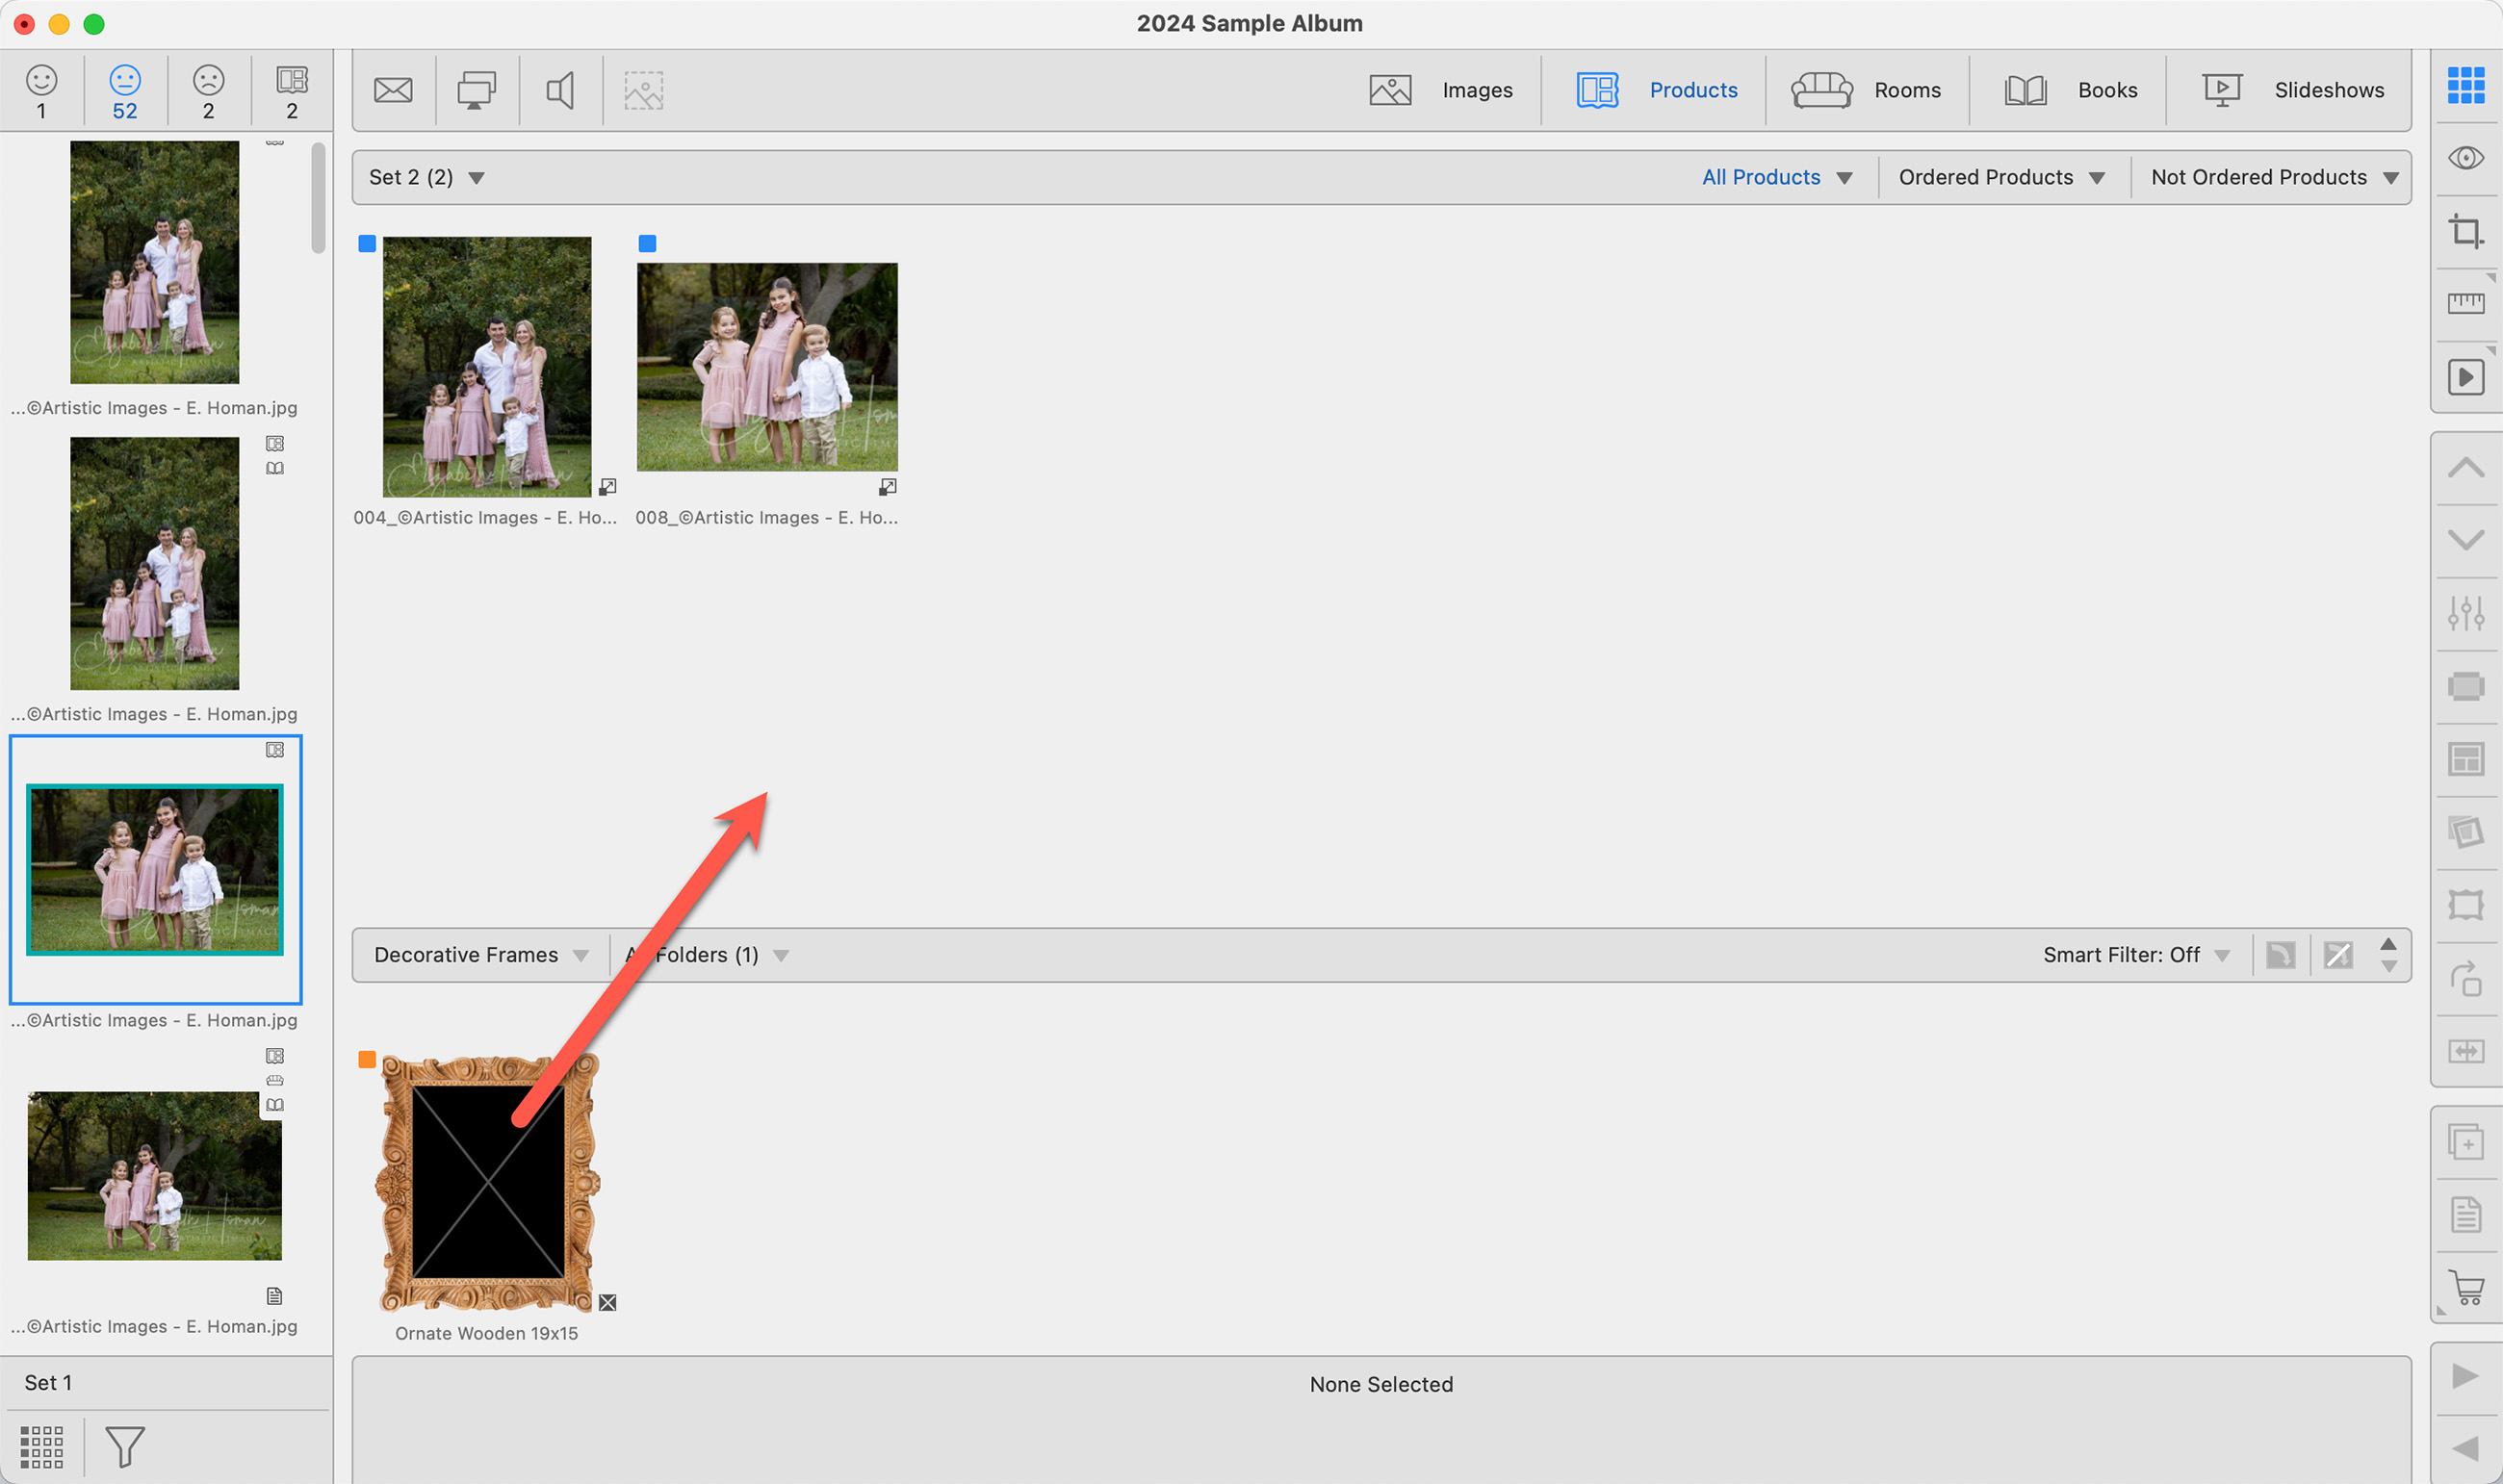
- Drag an image into the frame. Adjust as Needed: If there are issues with the shape mask or the frame alignment, right-click on the product and select "Edit" from the list. You can make adjustments in the Product Editor, or return to Photoshop to make necessary adjustments to the shape mask or the frame itself.
