 Wall Groupings
Wall groupings are a preset collection of images that can be of varying sizes, presentation types, and gallery wraps. They can support any combination of mats and frames. Wall Grouping templates use a “Work Area” rather than a “Design Area” as used in other template types. The Work Area has no relevance to the final product other than to provide a large canvas from which to build the grouping. The overall design size can be found on the Bottom Info Bar in the right corner.
Wall Groupings use “Objects” rather than “Openings” as used in other templates. Wall Groupings must consist of at least 2 objects. An Object requires you to assign a “type." Once the object type is selected, specific design options become available. Object types include:
- Basic Prints (BP)
- Shape Prints (SP)
- Gallery Wraps (GW)
When Wall Groupings are added to rooms, the images can be moved freely. Presentation Options for the individual images can be changed, or conversions can be made for Gallery Wraps. The sizes of images in a Wall Grouping cannot be changed without modifying the template.
Another method of creating wall groupings is to arrange a collection of prints or gallery wraps within a room. Add frames and mats if desired. Once you've designed the arrangement to your liking, you can save it as a "Wall Grouping Template." This allows you to set a price for the template, making it reusable for future projects. Click on Create Your Own Wall Groupings for more information.
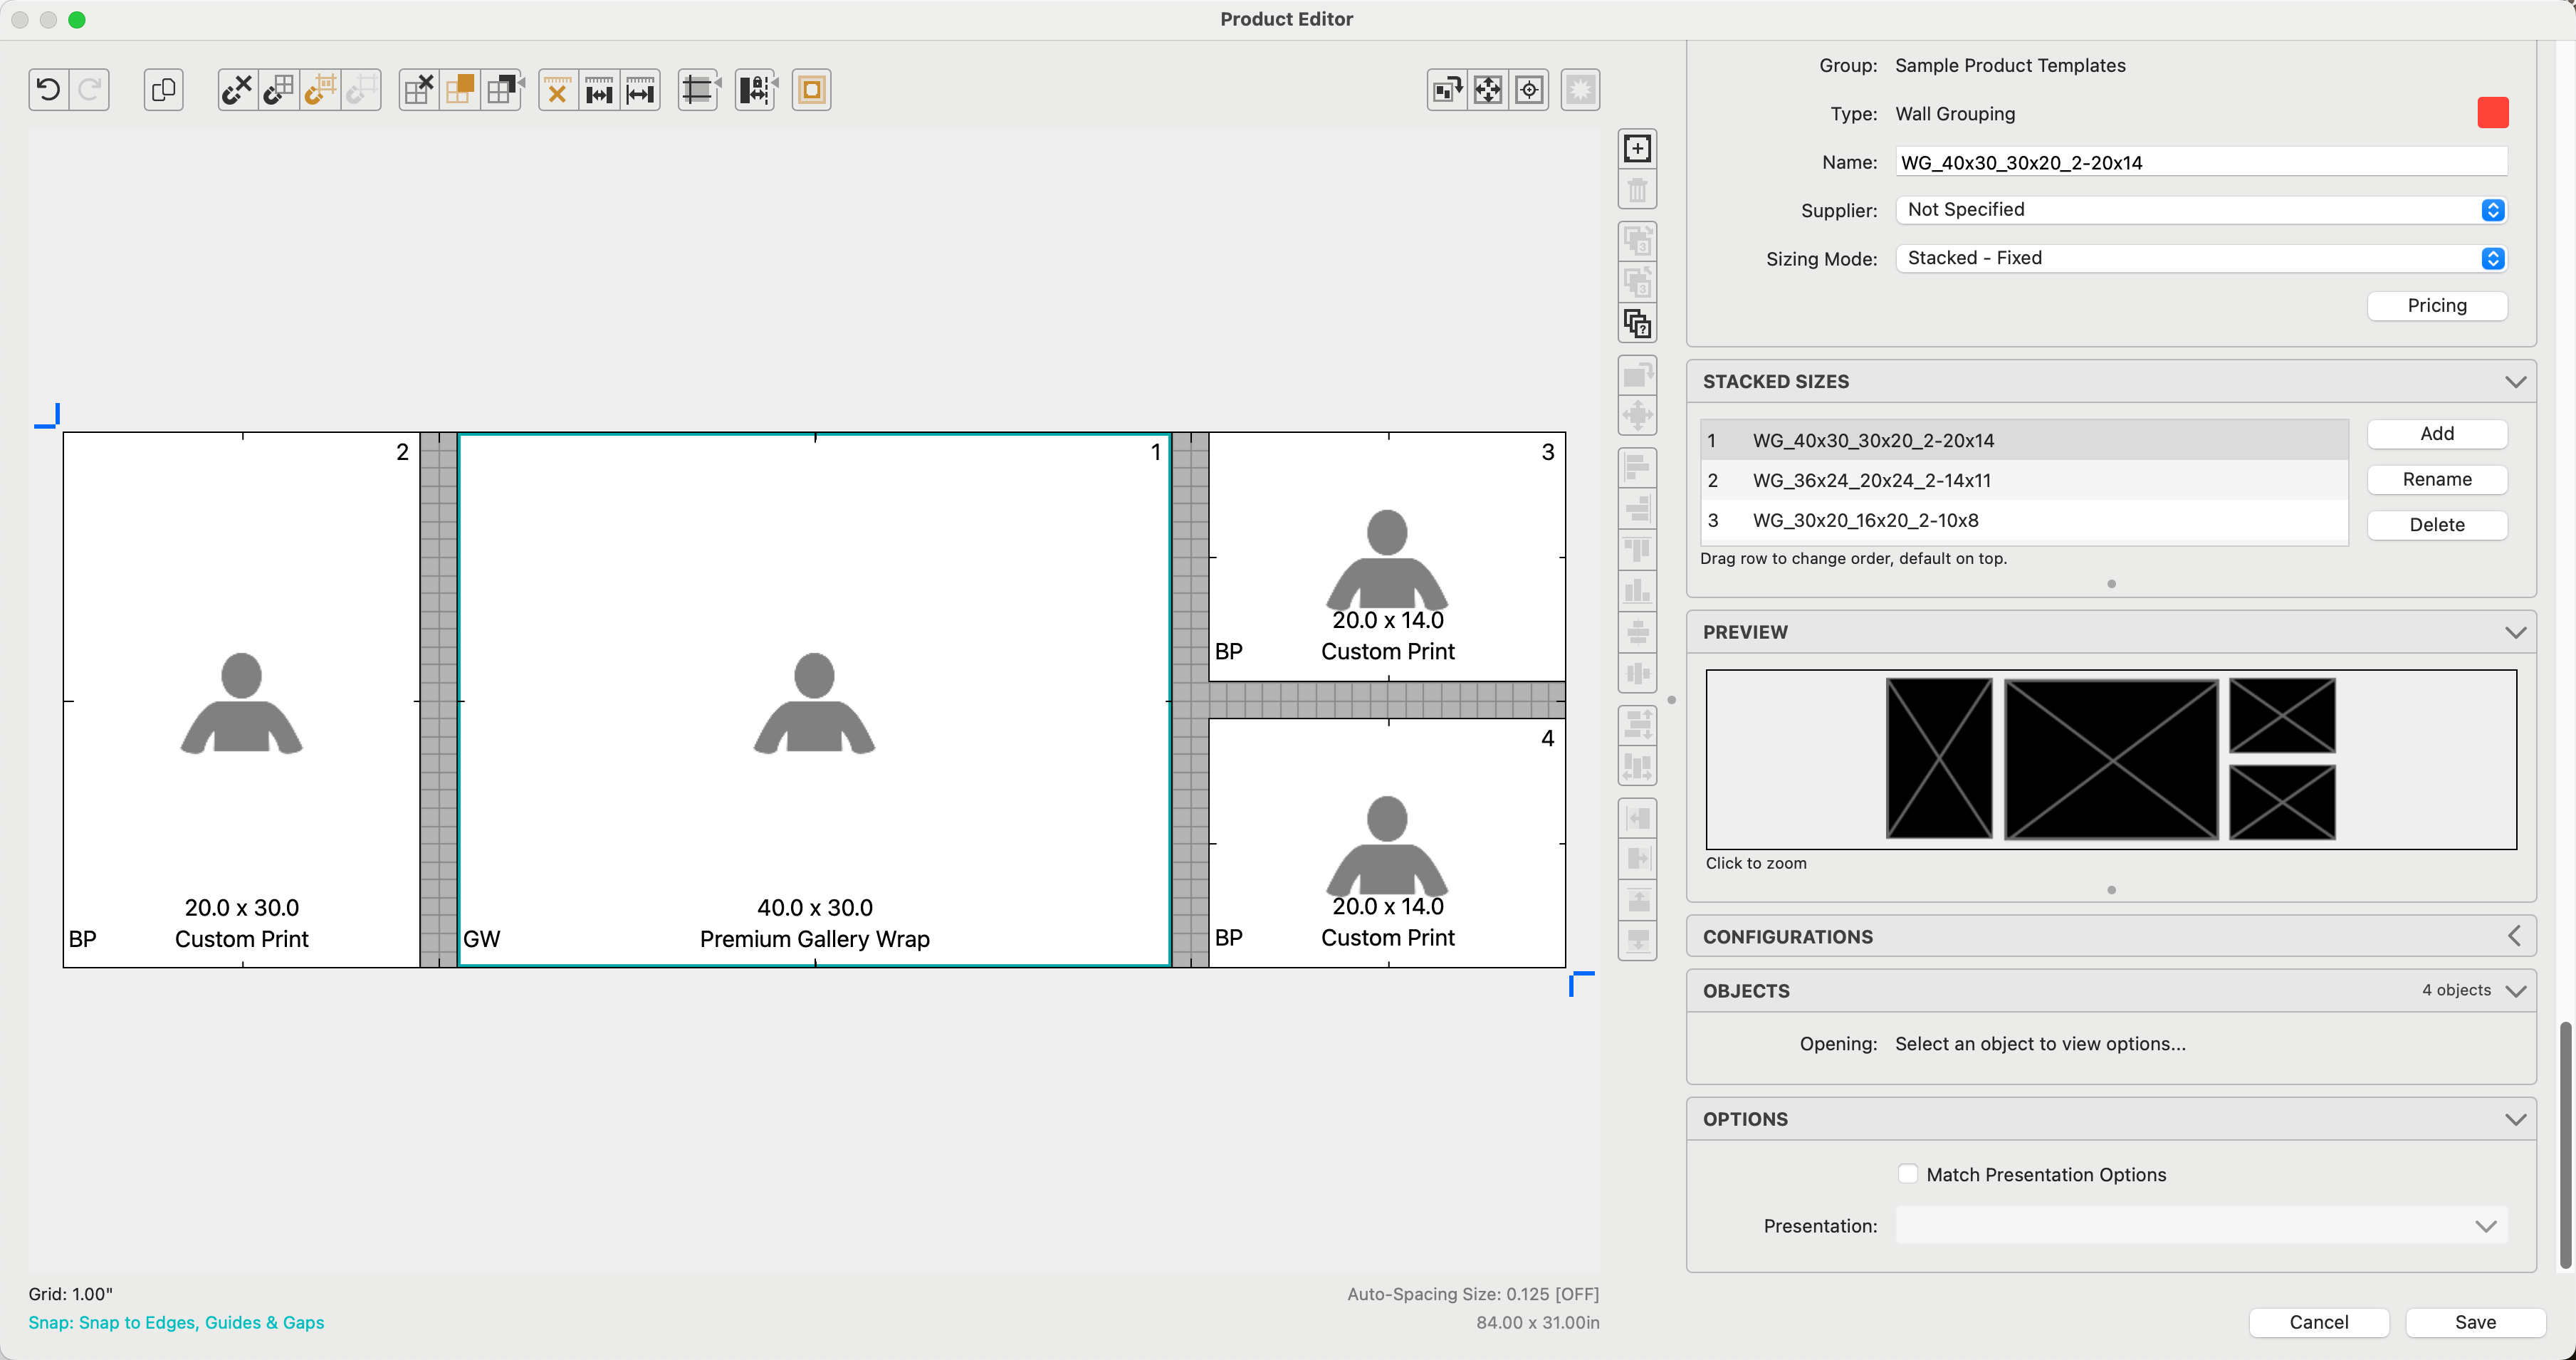
Wall Groupings look a little different in the Template Editing Area. In order to keep track of all the different Objects (Openings) in a grouping, the following information is displayed:
- GW: The Object Type
- 40.0 x 30.0: The Size of the Object
- Premium Gallery Wrap: The assigned Presentation Option
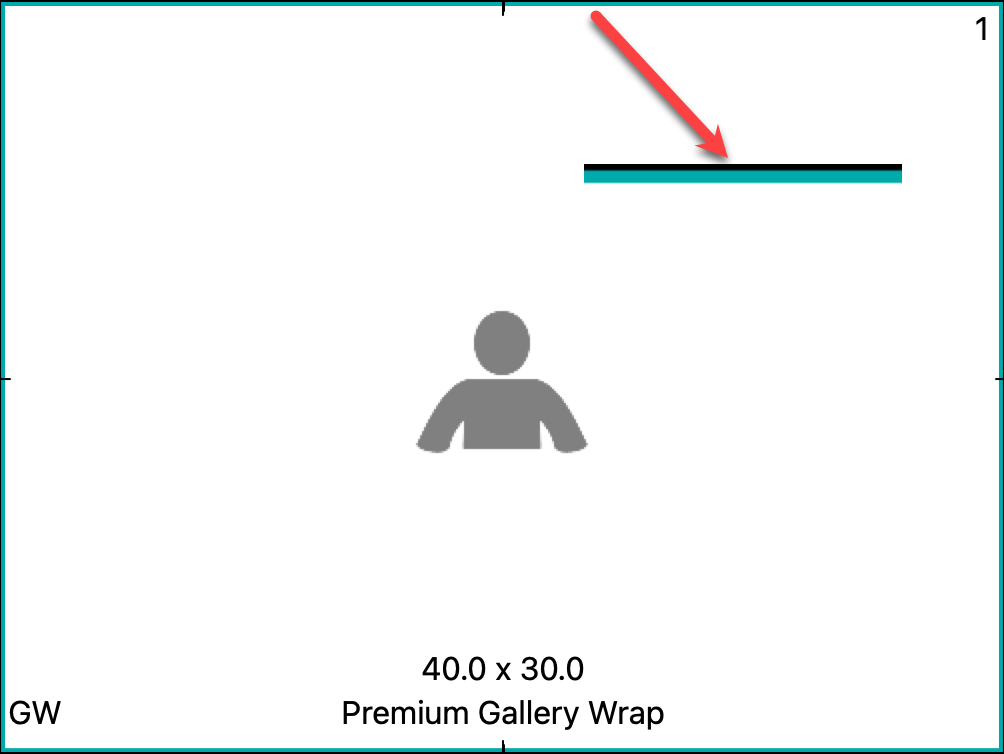
- Gallery Wraps are identified by having a teal border around the object
- You will find the overall size of the grouping on the Bottom Bar.
The ID Box:
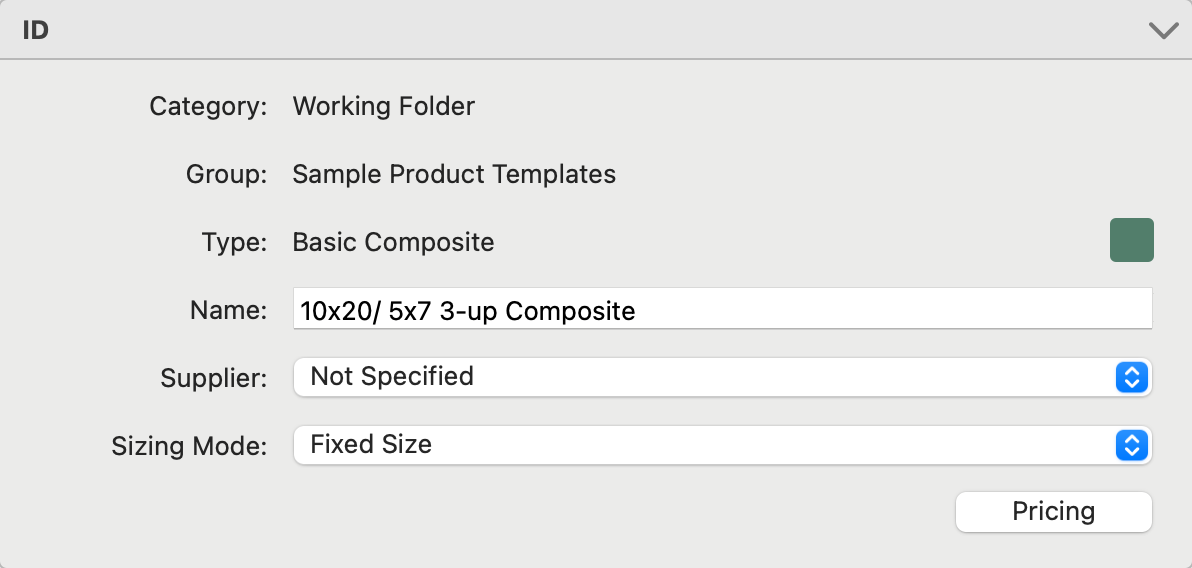
- Category, Group, and Type are listed at the top.
- Name: For fixed-size templates, it is helpful to name your templates using the overall size (10x20), then the size of your openings (5x7), followed by how many are in the template (3-up). For a dynamically sized template, don't use the size (as it may change). Instead, use "3-up" or something else to describe the product.
- Supplier: Optionally attach a Supplier to the product template.
- Sizing Mode:
- Fixed Size: A single template of one size.
- Stacked - Fixed: Two or more templates with the same number of openings and the same opening type. These are typically similar with varied sizes.
- Dynamic: This is the same template scaled to fit paper sizes that match the ratio of the template. If there are five paper sizes of matching ratios, five sizes will be available.
- Pricing: Click on the Pricing button to open the Price List Items dialog. *Pricing is not enabled for Book Pages. They are priced as a Reference Product or an Order Adjustment.
- Dynamic Sizing is not available for Traditional Matted, Wall Grouping, or Specialty Products. Use Stacked Sizing as an alternative.
- Framed & Matted Prints always use dynamic sizing.
- Sizing is not available for Reference Products.
If you select the "Stacked-Fixed" option from the Sizing Mode (in the ID Box), the Stacked Sizes box will appear.
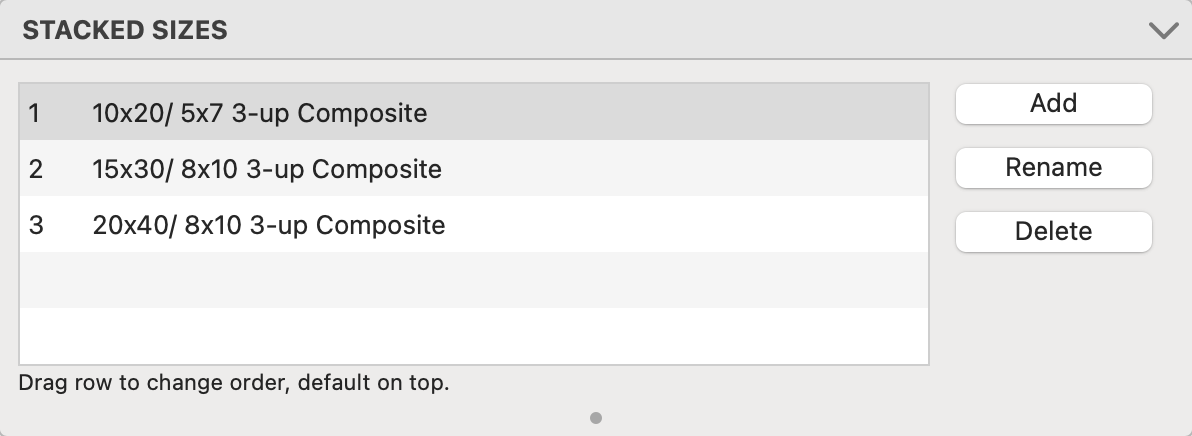
- Add: Clicking the Add button will duplicate the existing template and add it to the stack.
- Rename: This allows you to rename the new template.
- Delete: Use this button to remove a template from the stack.
When the Add button is used, you can change the design size, modify the openings, add bleeds, and assign presentation types, traditional mats, and frames. If you right-click on the Add button, you can choose from a list of paper sizes matching the original template's aspect ratio. When you choose a size, a new template will be created that is proportionally sized to the new paper size. That paper size becomes the new design size of that template. You can then rename the template and make design modifications as required.
Changing Attributes to Stacked Product Templates
In the Product Editor, you can change Presentation Options or add or modify mats and frames for individual or all openings in the template or stack. When a change is made to a selected opening(s), an Apply Changes dialog will appear, allowing you to make the desired changes.
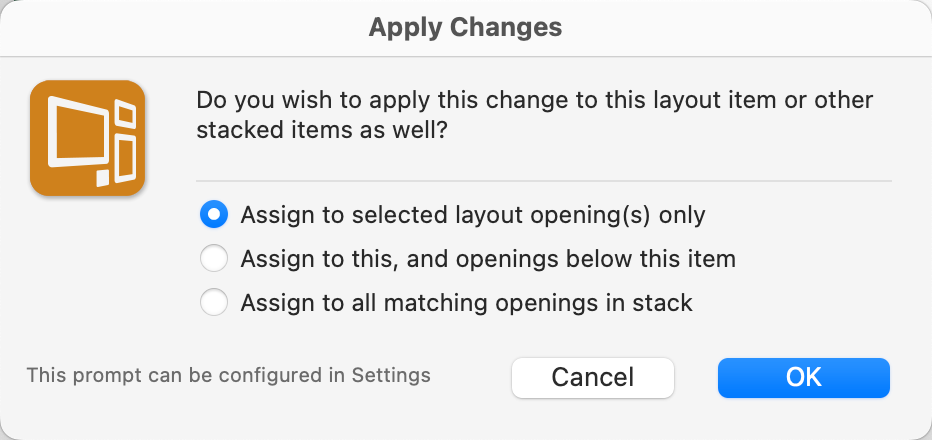
- Assign to selected layout opening(s) only:
- This option applies the attributes (Presentation Option, mat, or frame) to the selected opening on that current layout only.
- If there are different configurations of that layout, the modified attribute will be applied to the corresponding opening in any alternate configurations.
- Assign to this, and openings below this item:
- This option applies the attribute to the selected opening on the current layout and all lower-level layouts.
- If you are at the top of the stack, the attribute will be applied all the way down.
- If you are halfway through the stack, it will start from that point and apply the changes downward.
- If there are different configurations for those layouts, the mat or frame will be applied to the matching opening in any alternate configurations.
- Assign to all matching openings in stack:
- This option applies the attribute to the selected opening in each layout within the stack.
Please note that the same rules mentioned above apply if multiple openings are selected simultaneously.
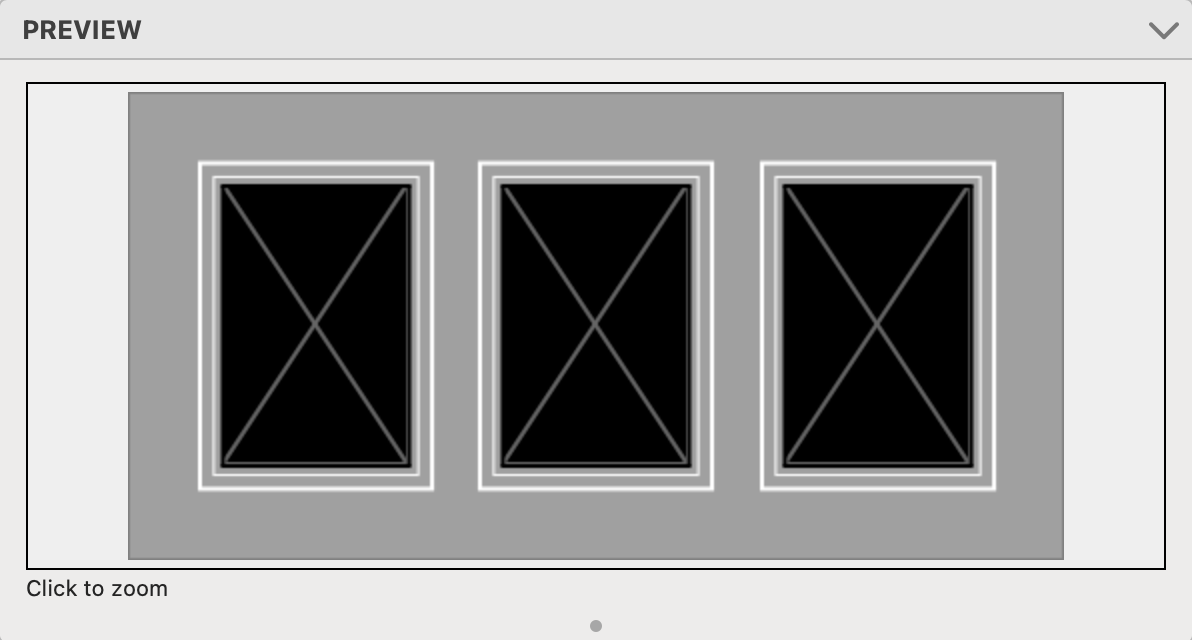
The Preview Box reflects how the template will look with added mats, frames, etc. Click on the preview image to zoom.
You have the option of adding multiple different configurations to wall groupings. If you are using a Stacked Wall Grouping, you must adjust the configurations for each size individually.

To add a new configuration, click the Add button.
- Rearrange your objects within the Template Editing Area.
- The Preview window will reflect each configuration.
- You can remove a configuration by selecting it and clicking the Remove button.

Practical Example:
A Wall Grouping has been populated with images and placed in a room. Use the left and right arrows on your keyboard to cycle through the different configurations available.

Wall Groupings use “Objects” rather than “Openings” as used in other templates. An Object requires you to assign a “type” to each object. This can be a Print (BP), a Shape Print (SP), or a Gallery Wrap (GW). Once the Object type is selected, specific design options are available for the object.
Prints and Shape Prints

- The upper-right corner of the Objects box will tell you how many objects are in the template.
- Opening: The Object number will be listed here. If multiple objects have been selected, that will be reflected.
- Type: Choose either Print or Shape Print.
- Name: Wall Groupings allow for each object to be given a name. This is optional.
Object Size
- Type in the desired width and height and click the Apply button.
- Alternatively, use the drop-down arrow
 to access paper sizes. Select one from the list.
 - Objects can also be re-sized in the template editing area. Adjust the object(s) by dragging them using the re-size handles in each corner or mid-way along each side.
 Swap Sizes Around: You have the ability to swap the width and height around by clicking the swap sizes button. Click the Apply button to apply the change.
 Constrain Aspect Ratio: When constraining the aspect ratio, any adjustment to the width of the opening will automatically change the height in order to keep the same aspect ratio, or vice versa. When you click the button, red lines will appear to link the width and height boxes together. As with Swap Sizes, click the Apply button to apply any changes to the design size. Click on Locked Aspect Ratio to learn more.
- Bleed: Type a bleed amount into the box, or select from a list of commonly used bleed amounts using the drop-down arrow.
Object Options
- Presentation: Use the drop-down menu to choose a Presentation Option for the object. If the Presentation Option you want is not listed, select Manage Presentation Options. From there you can add the option you want.
Object Appearance (Prints)
The Appearance box allows you to add a virtual style, traditional mat, or a frame to your object.
- Use the drop-down menus to select a virtual style, traditional mat, or frame to add to your product template.
- Select "manage" from the list if the required option isn't listed. This will take you to the designer where you can create the option you want.
- To remove a style, mat, or frame, select "Remove" from the list of options.
Object Appearance (Shape Prints)
In addition to the options available for Prints, Shape Prints allow for the following:
- Shape: Choose the shape of the print from the drop-down menu.
- Overlay Image: Click on the drop-down menu to select an Overlay Image. You will be directed to the Template Overlays dialog. From here you can select an image to use in your product template. Template Overlays are found in the ProSelect Resources folder. For more information click on Overlay Images. You can choose whether or not to include the overlay image in production or not, by checking the Include in Production box.
- Shape Masks: Shape masks work in much the same way as Overlay Images. Click on the drop-down menu to select a Shape Mask. You will be directed to the Template Overlays (Shapes) dialog. From here you can select an image to use in your product template. Shape Masks are found in the ProSelect Resources folder. For more information click on Shape Masks. You can choose whether or not to include the shape mask in production or not, by checking the Include in Production box.
Wall Groupings use “Objects” rather than “Openings” as used in other templates. An Object requires you to assign a “type” to each object. This can be a Basic Print (BP), a Shape Print (SP), Gallery Wrap (GW), or a Graphics Block. Once the Object type is selected, specific design options are available for the object.
Gallery Wraps

- The upper-right corner of the Objects box will tell you how many objects are in the template.
- Opening: The Object number will be listed here. If multiple objects have been selected, that will be reflected.
- Type: Choose Gallery Wrap (GW)
- Name: Wall Groupings allow for each object to be given a name. This is optional.
Object Size
The Gallery Wrap Size box allows you to adjust the face size of the Gallery Wrap.
- Type in the desired width and height and click the Apply button.
- Alternatively, use the drop-down arrow to access paper sizes. Select one from the list.
- Gallery Wraps can also be re-sized in the template editing area. Adjust the Gallery Wrap by dragging it using the re-size handles in each corner or mid-way along each side.
- Swap Sizes Around: You have the ability to swap the width and height around by clicking the swap sizes button. Click the Apply button to apply the change.
- Constrain Aspect Ratio: When constraining the aspect ratio, any adjustment to the width of the opening will automatically change the height in order to keep the same aspect ratio, or vice versa. When you click the button, red lines will appear to link the width and height boxes together. As with Swap Sizes, click the Apply button to apply any changes to the design size. Click on Locked Aspect Ratio to learn more.
- Edge Depth: Select an edge depth from the drop-down list. If the wrap size you want is not listed, select Manage Gallery Wrap Sizes. This will take you to the Gallery Wraps dialog where you can create one.
Object Options
- Presentation: Use the drop-down menu to choose a Presentation Option for the gallery wrap. If the Presentation Option you want is not listed, select Manage Presentation Options. From there you can add the option you want.
Object Appearance
- Edge Treatment: Use the drop-down menu to select a Gallery Wrap Edge Treatment. If the Edge you want is not listed, you can access the Gallery Wrap Edges dialog to create one.
- Frame: Use the drop-down menu to add/remove a frame. You can also access the Manage Frames dialog from the drop-down menu. To remove a frame, select Remove from the list of options.
The Product Options box allows you to select a Presentation Option to apply to the entire Wall Grouping. If the Presentation Options match, then the pricing method "Fixed Price by Presentation Option" can be used. It should be noted that this option is not viable if you are mixing Wall Groupings and Prints in the grouping.
