Design Custom Virtual Styles
Virtual Styles are created, labeled, previewed, and organized within the Mat & Style Designer. Go to the top menu, Products > Traditional Mats & Virtual Styles > Designer. This window allows you to add new virtual styles, duplicate existing ones, and remove ones you no longer need. Additionally, you can categorize your styles into different groups for better organization, facilitating easy access and management.
- There are two tabs in the Mat & Style Designer. Be sure to select the "Virtual Styles" tab to work with Virtual Styles.
- A list of all available styles appears in the top-left. Once a virtual style is selected, a preview of that style will appear on the right.
- The design settings and details of a selected virtual style appear in the bottom half of the window.
When creating either a Traditional Mat or a Virtual Style, you can include up to three levels of mats. Bevel Mounts are also an option that can be used with both Traditional Mats and Virtual Styles.
Single Mat
A single mat provides a uniform border around the image. They can support a bevel cut or reverse bevel cut along the inner edge.

Double Mat
A double mat provides a second layer to add depth and contrast. Each layer can support a bevel cut or reverse bevel cut along the edge.
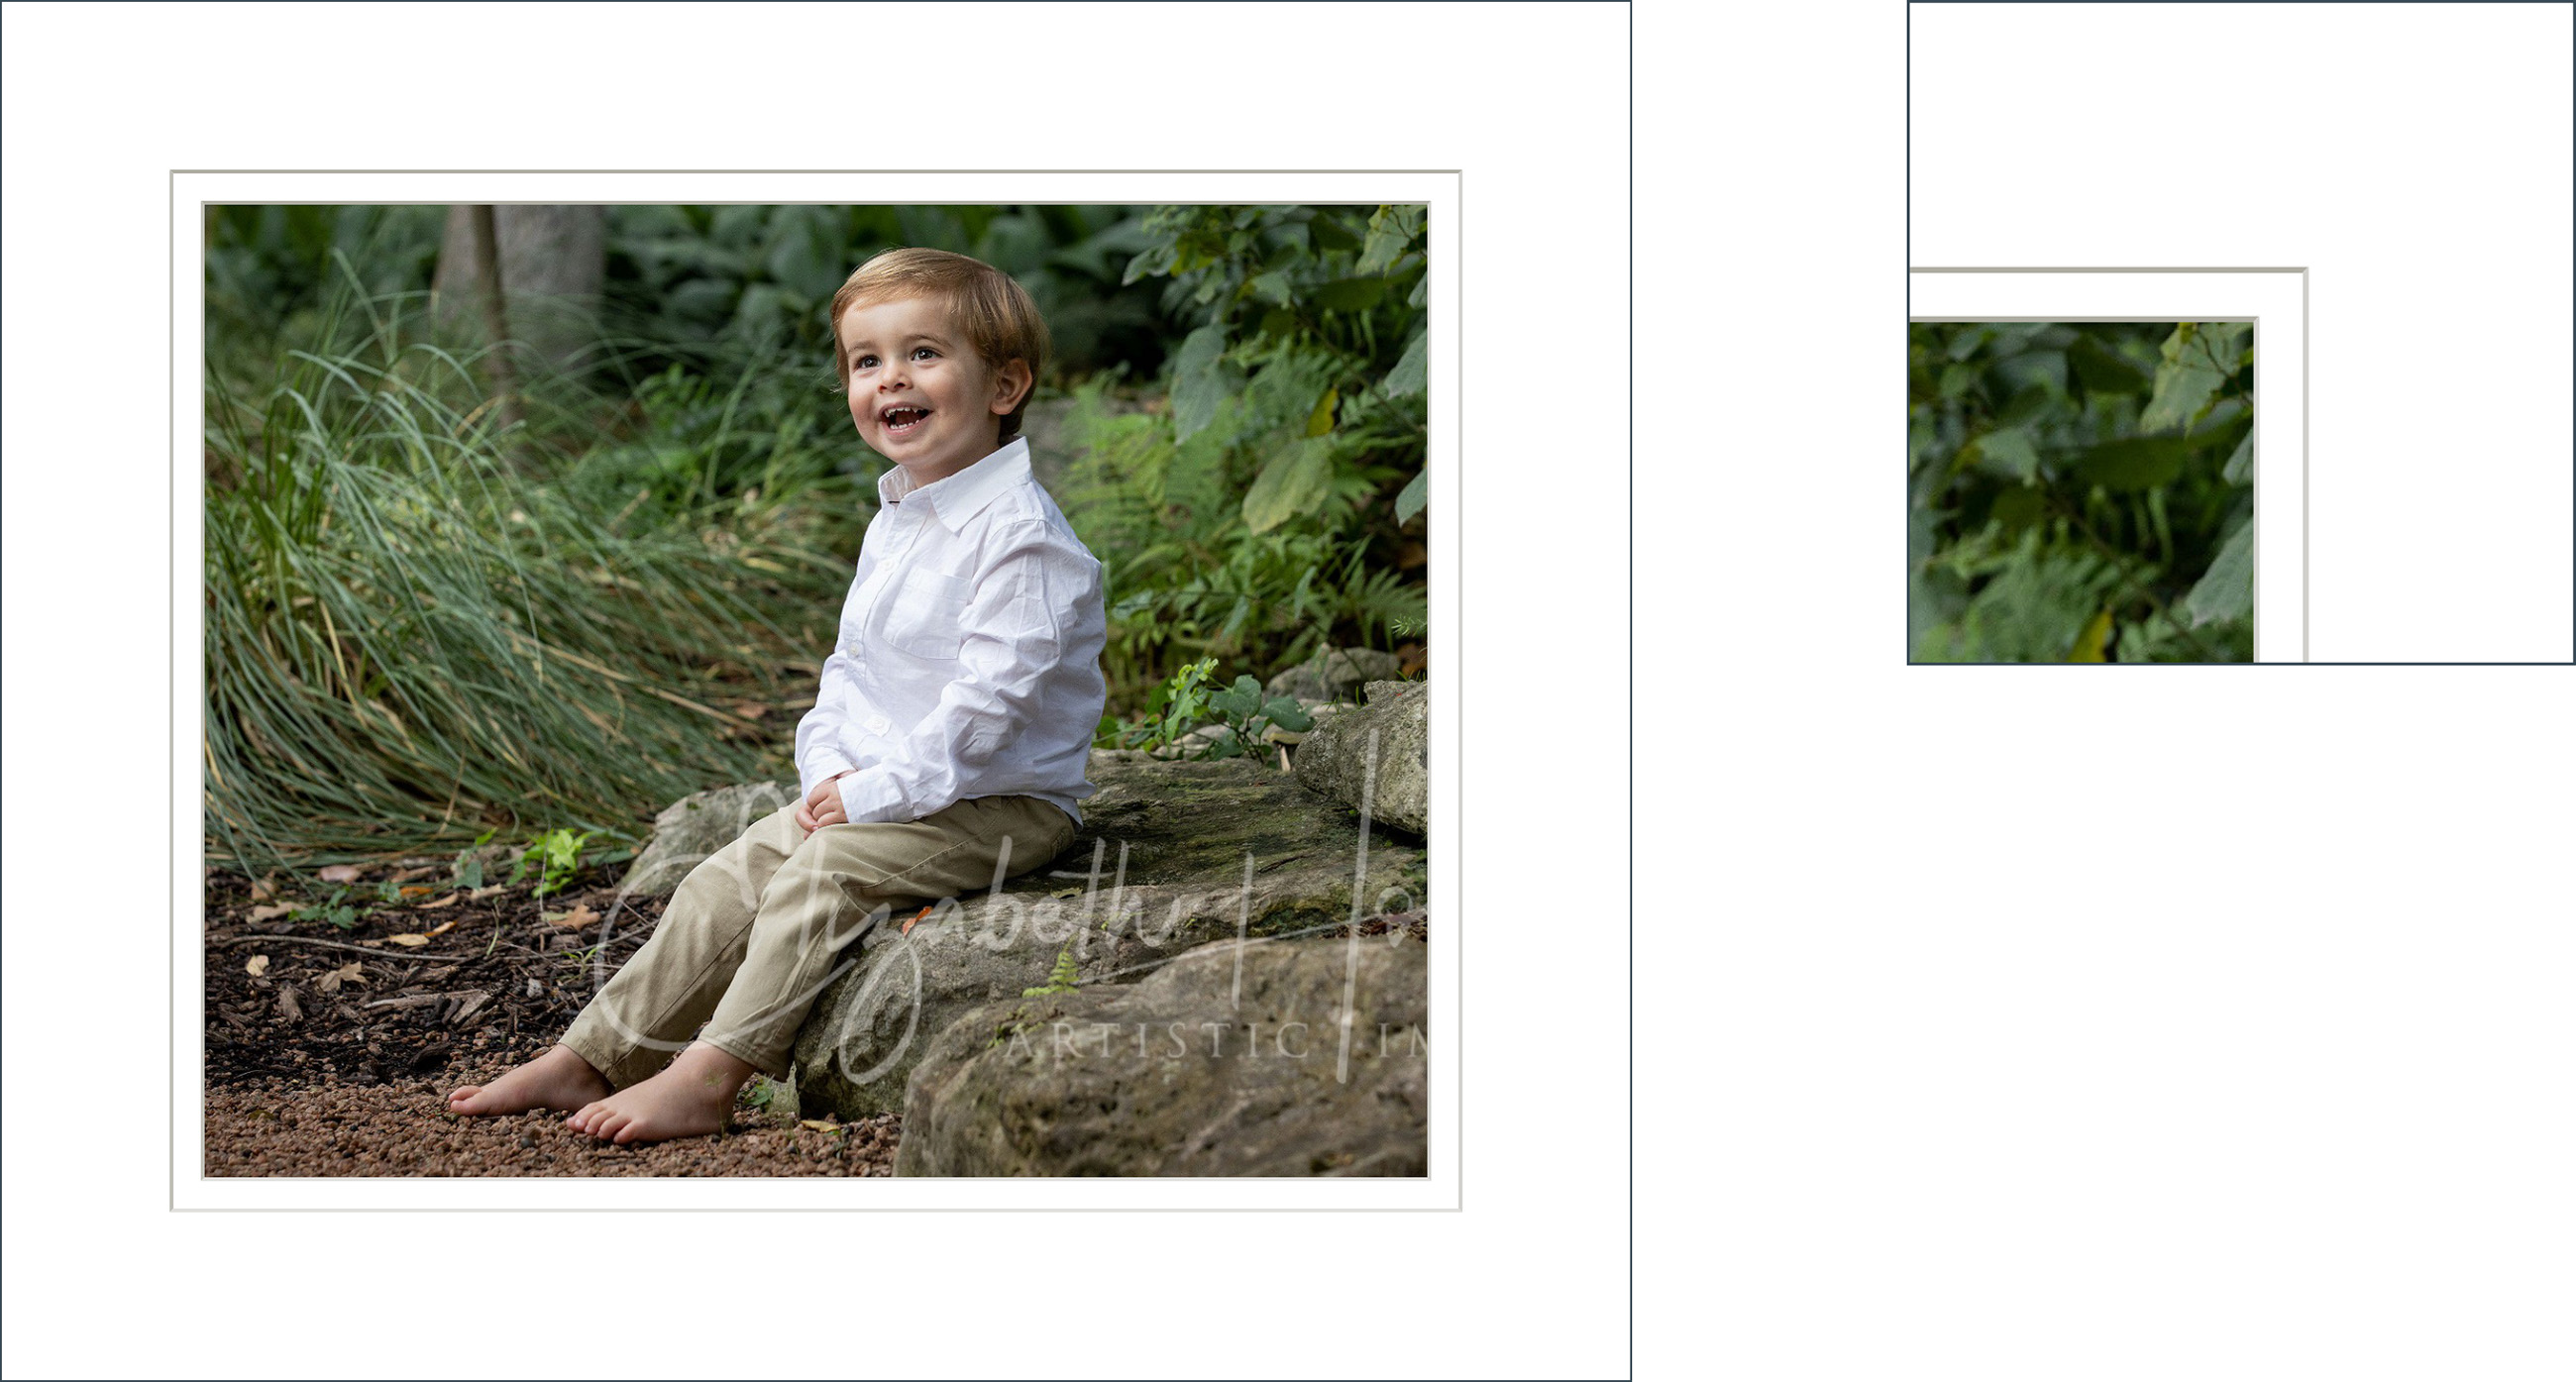
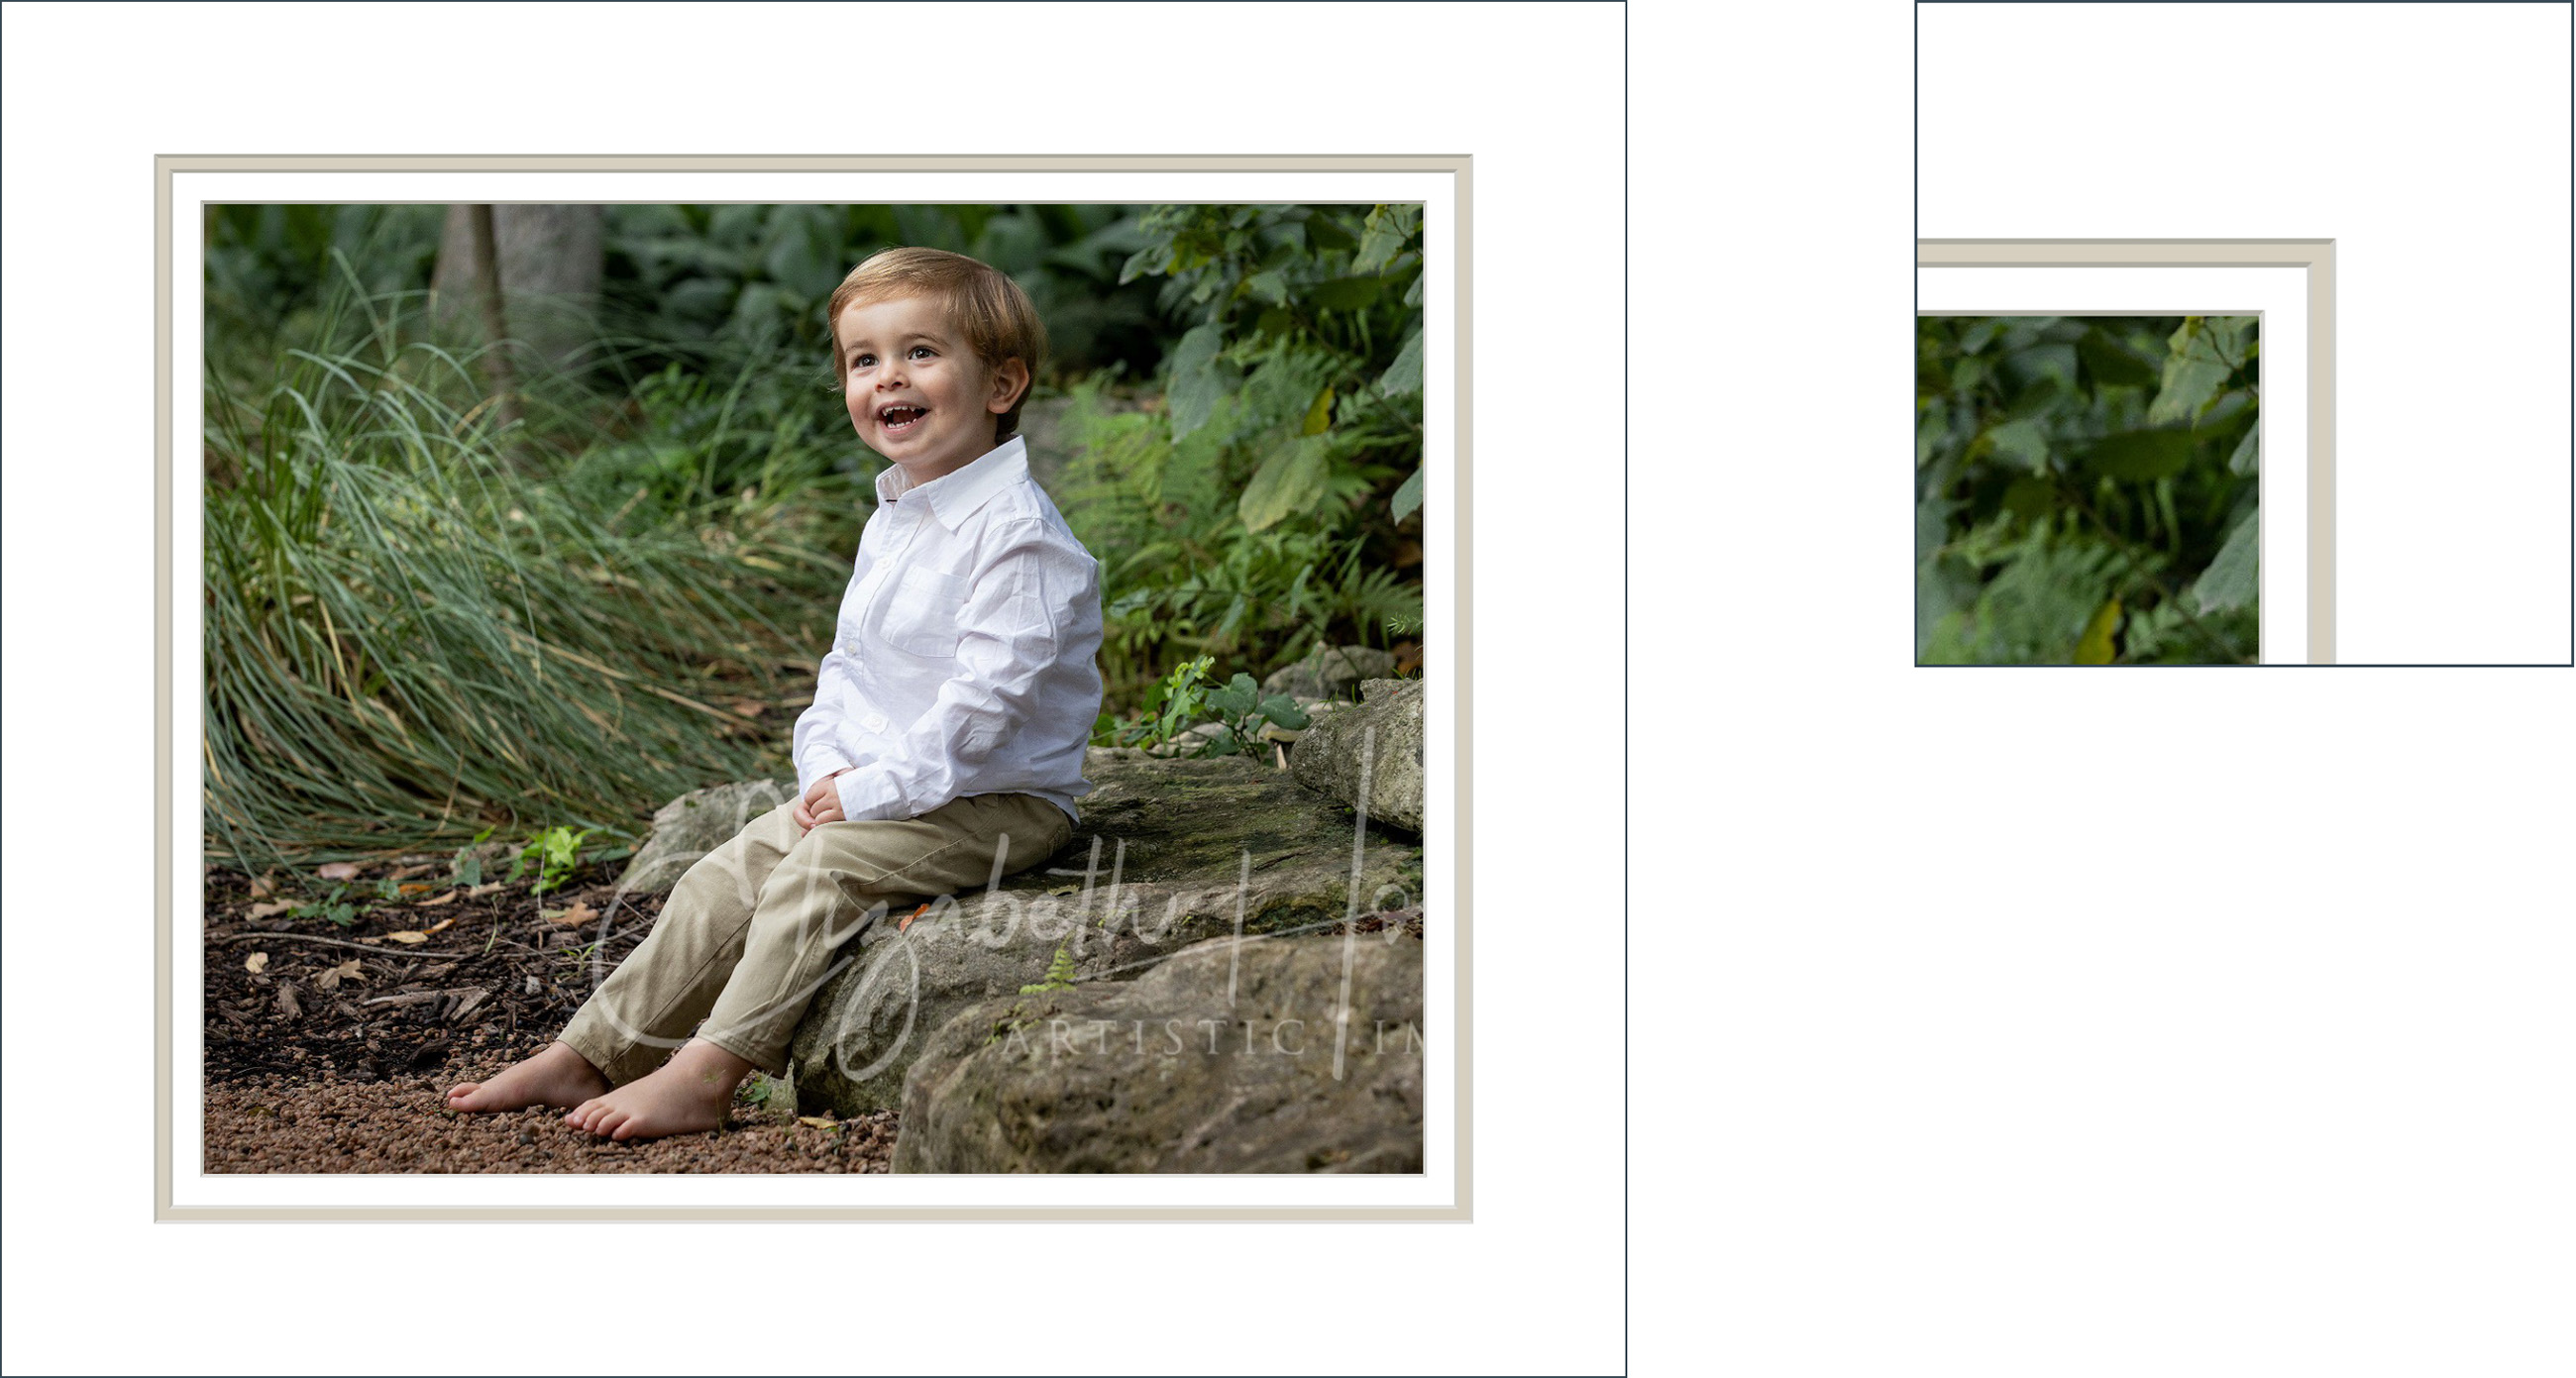
Triple Mat
A triple mat provides 3 mat layers to add depth and contrast. Each layer can support a bevel cut or reverse bevel cut along the edge.
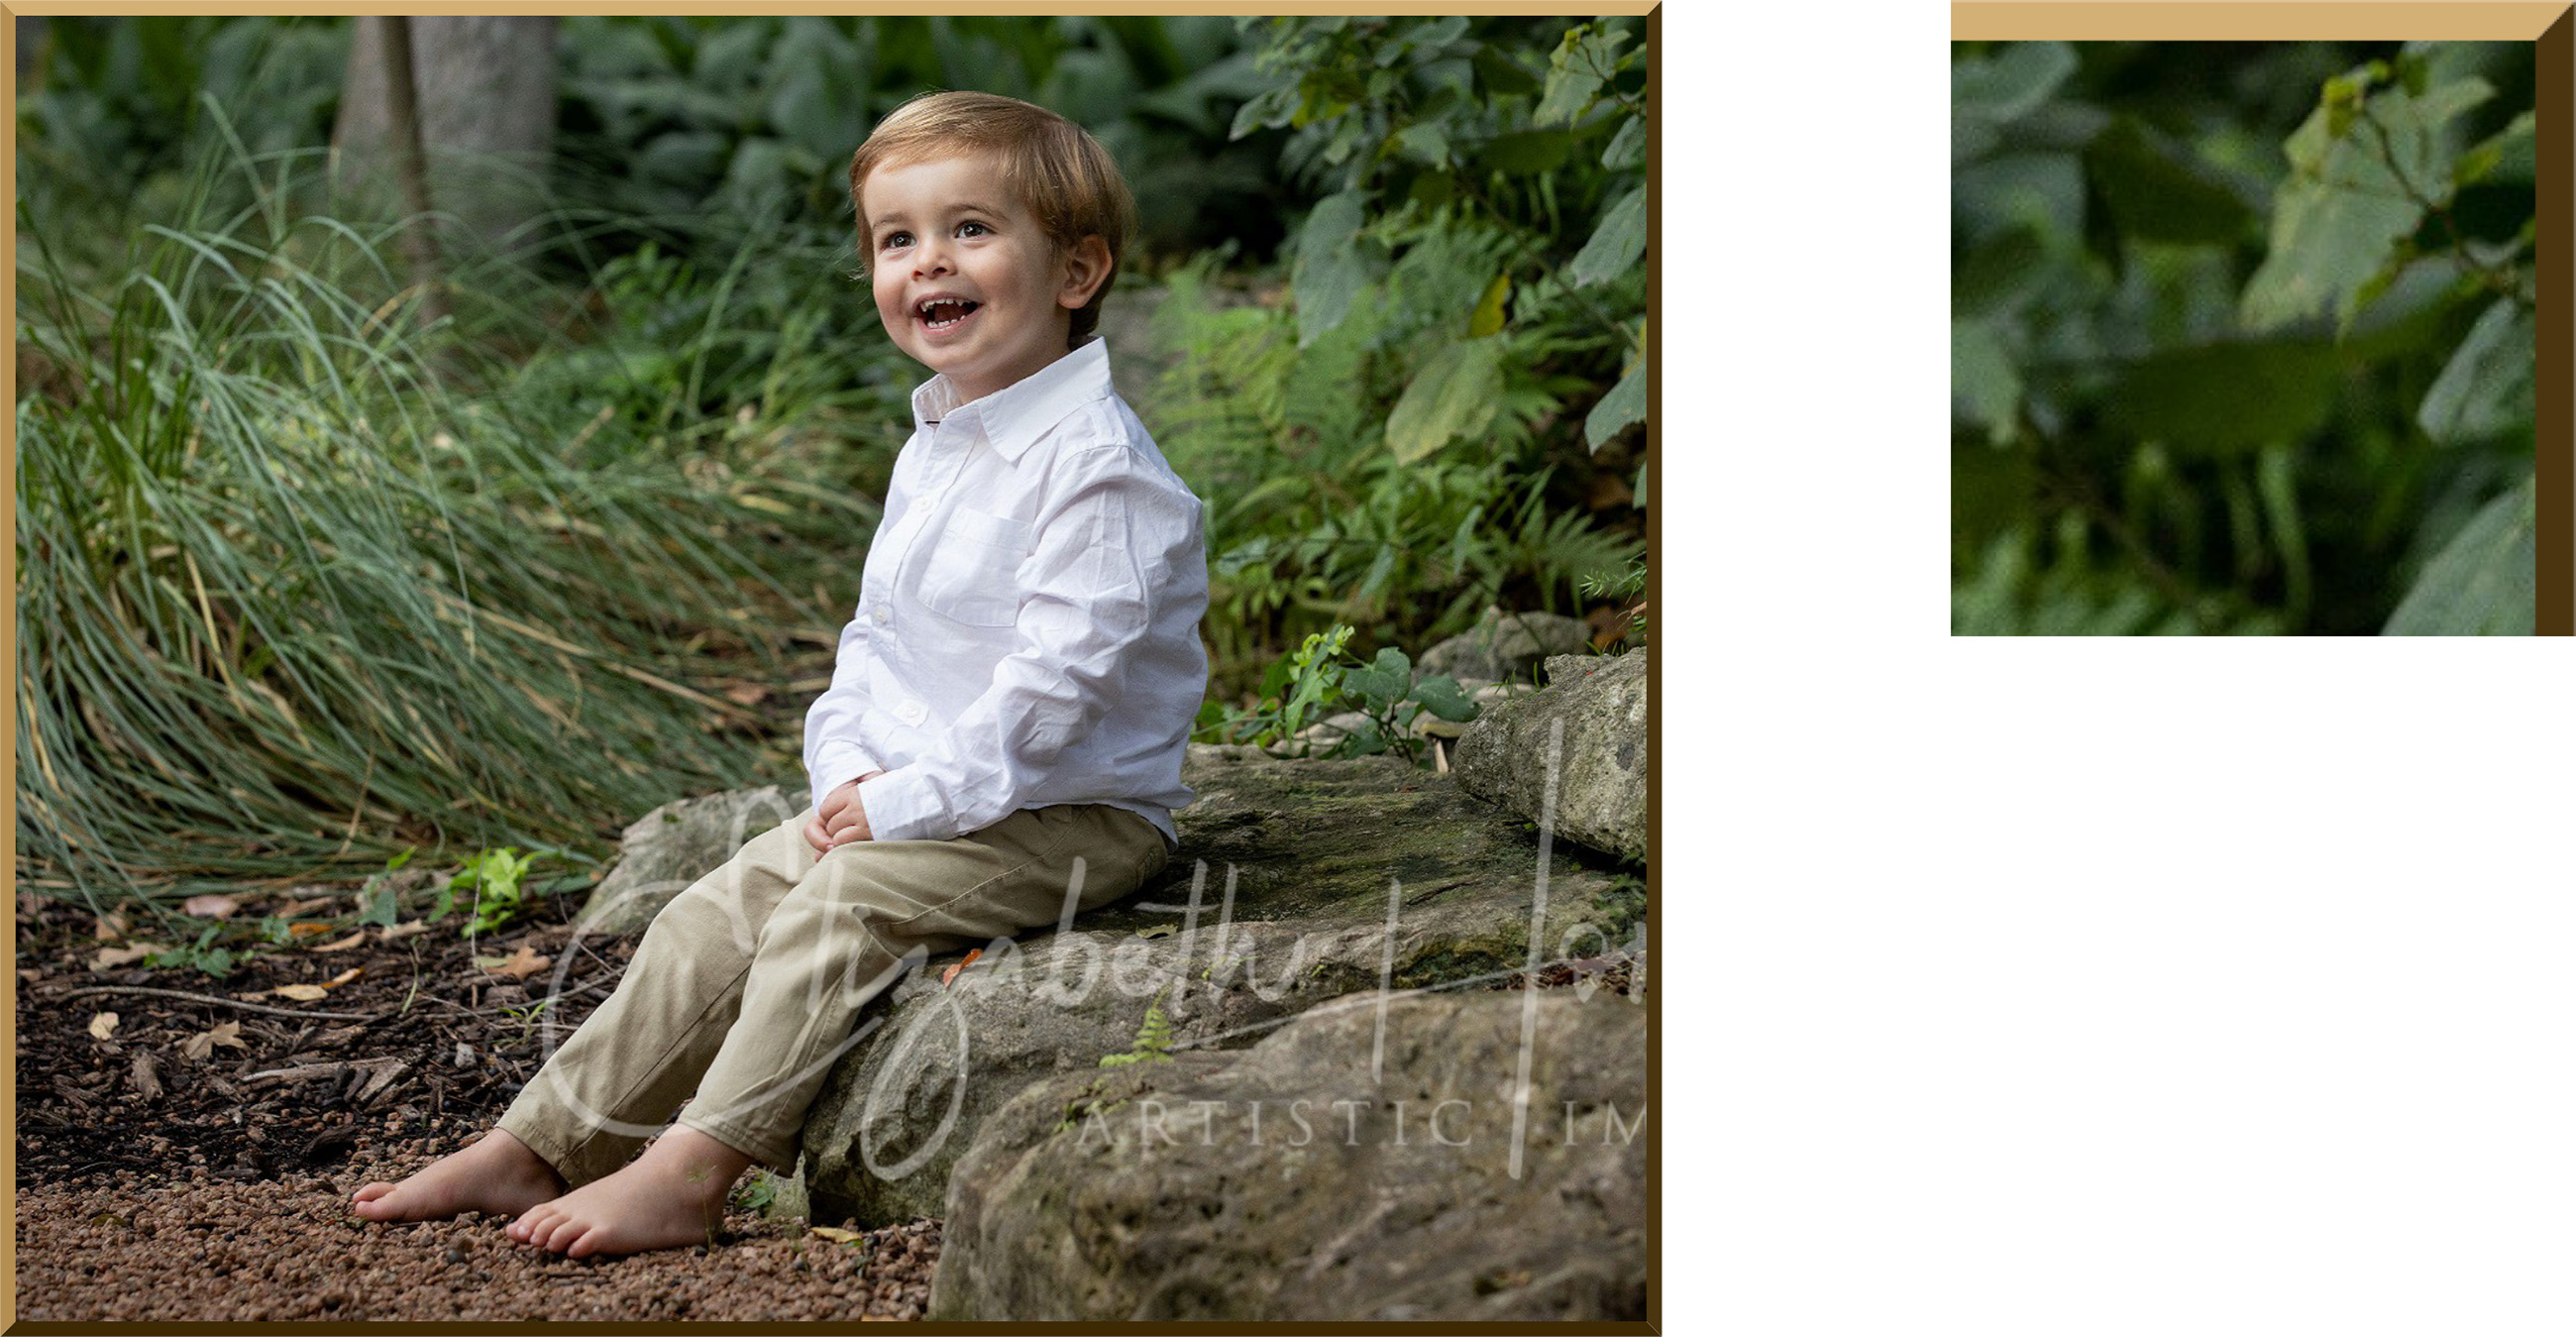
Bevel Mount
Beveled Mounts slope away from the print creating a slightly wider back than front for a formal mounted look.
When designing a new mat or virtual style, you can either "Add" a new one, or "Duplicate" an existing design and modify it.
- Type in a name for your mat or style.
- Optionally attach a supplier.
- Select a "Design Type." Choose between a single, double, triple, or bevel mount mat. Click on Types of Mats to learn more.
- Assign a price group to your mat. Click on Assigning a Mat Price Group to learn more.
- Important Note: Virtual Styles do not utilize pricing.
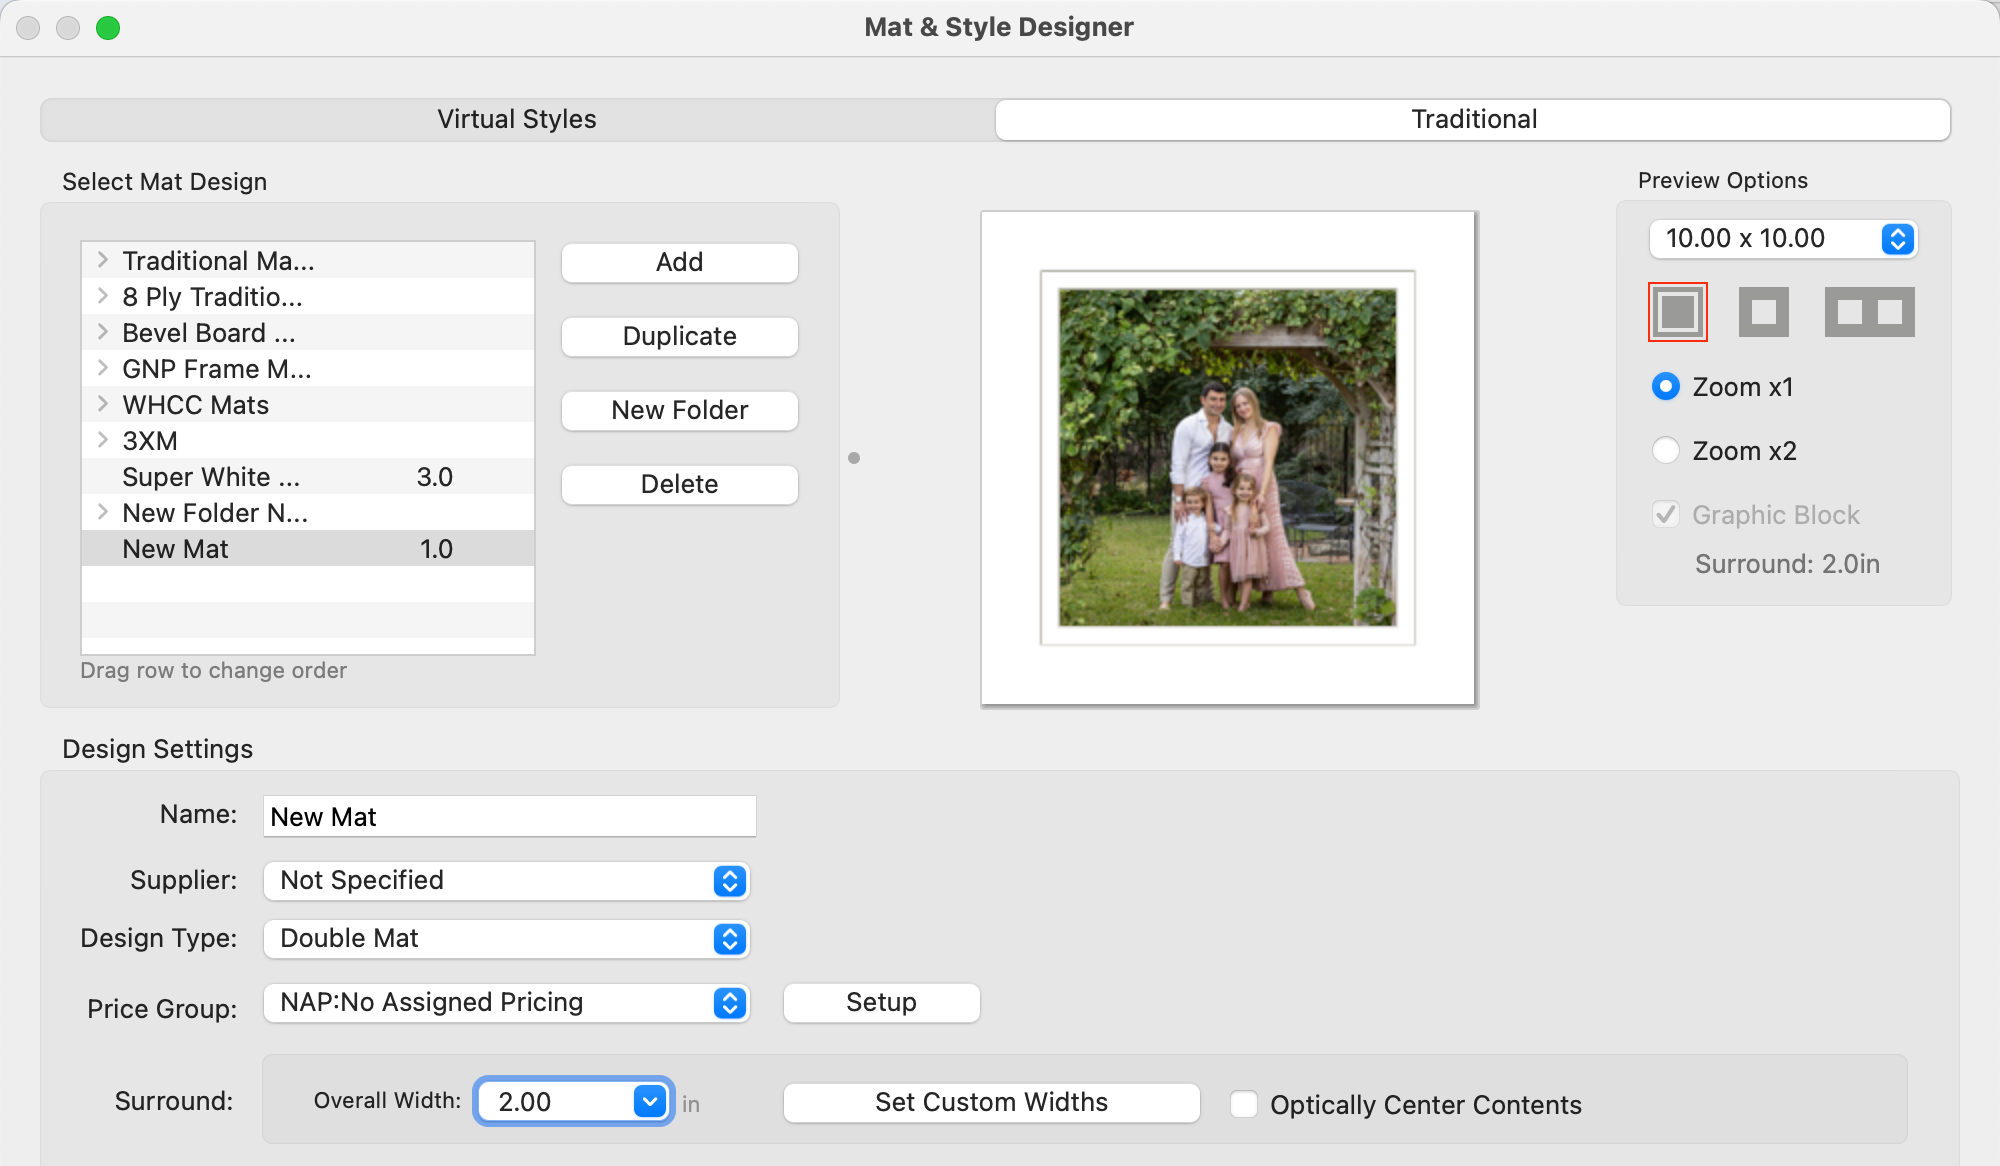
Surround
The "Surround" setting specifies a mat's overall width when used as an outer mat on a print or composite product.
- Use the drop-down list to select an overall width for your mat.
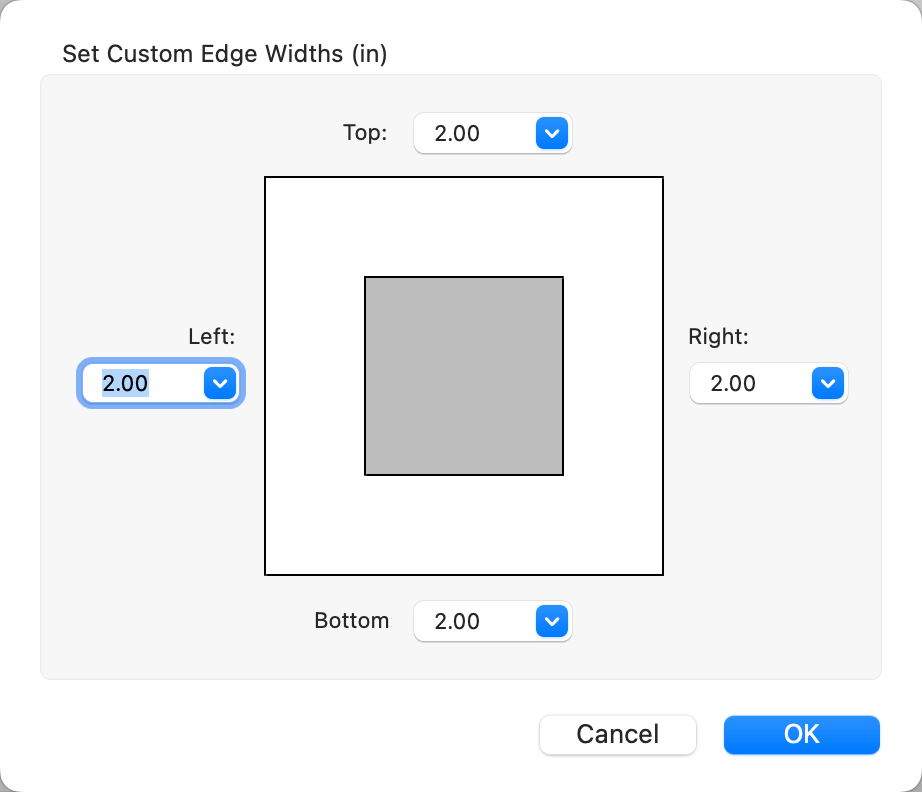
- Typically, all sides of the surrounding mat are of equal width. However, you can customize each side's width by clicking the Set Custom Widths button and entering different dimensions as needed.
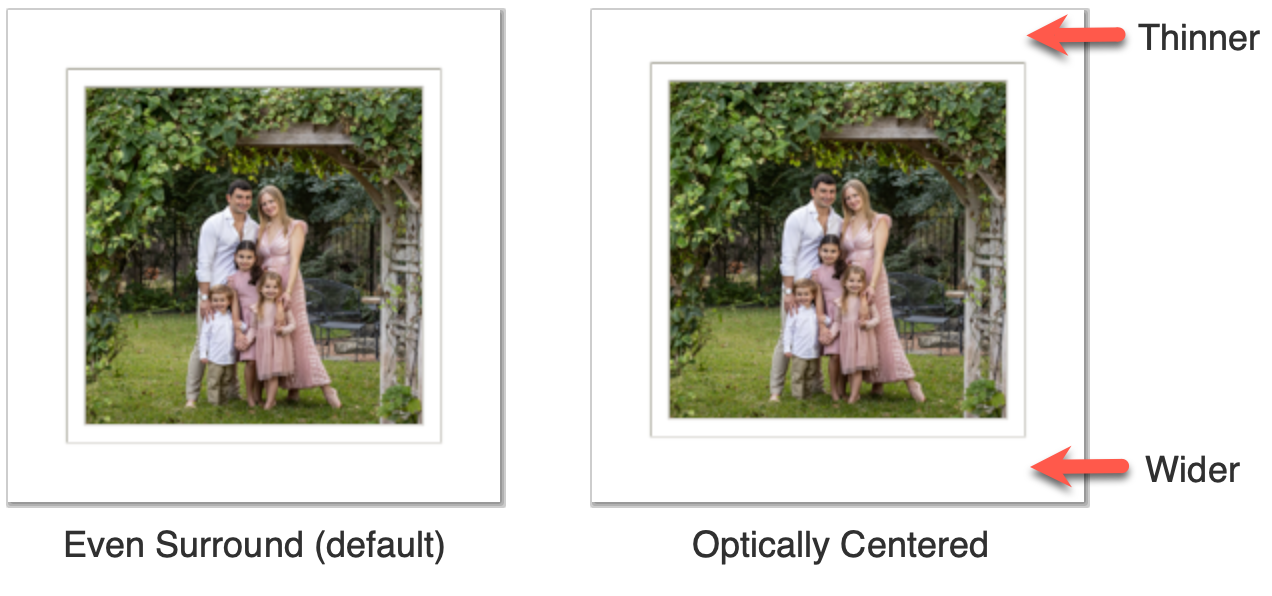
- Select the "Optically Center Contents" option if you want the contents to appear optically centered. This will adjust the top and bottom edges to achieve a visual balance.
It's important to note that these surround settings do not apply when the mat is used on a product template or book page. (In those cases, the surround size is set at the template level).
The design details for each mat layer can be tailored individually. This is similar to how Traditional Mats work. If you're working with a single-layer virtual style, you'll only need to adjust settings for that one layer. However, each layer can be customized separately for styles with double or triple layers. To modify the design settings for each layer, simply select the appropriate tab—Top Mat, Middle Mat, or Inside Mat—located at the top. This allows you to fine-tune the appearance of each mat layer within the design.

Graphic Blocks
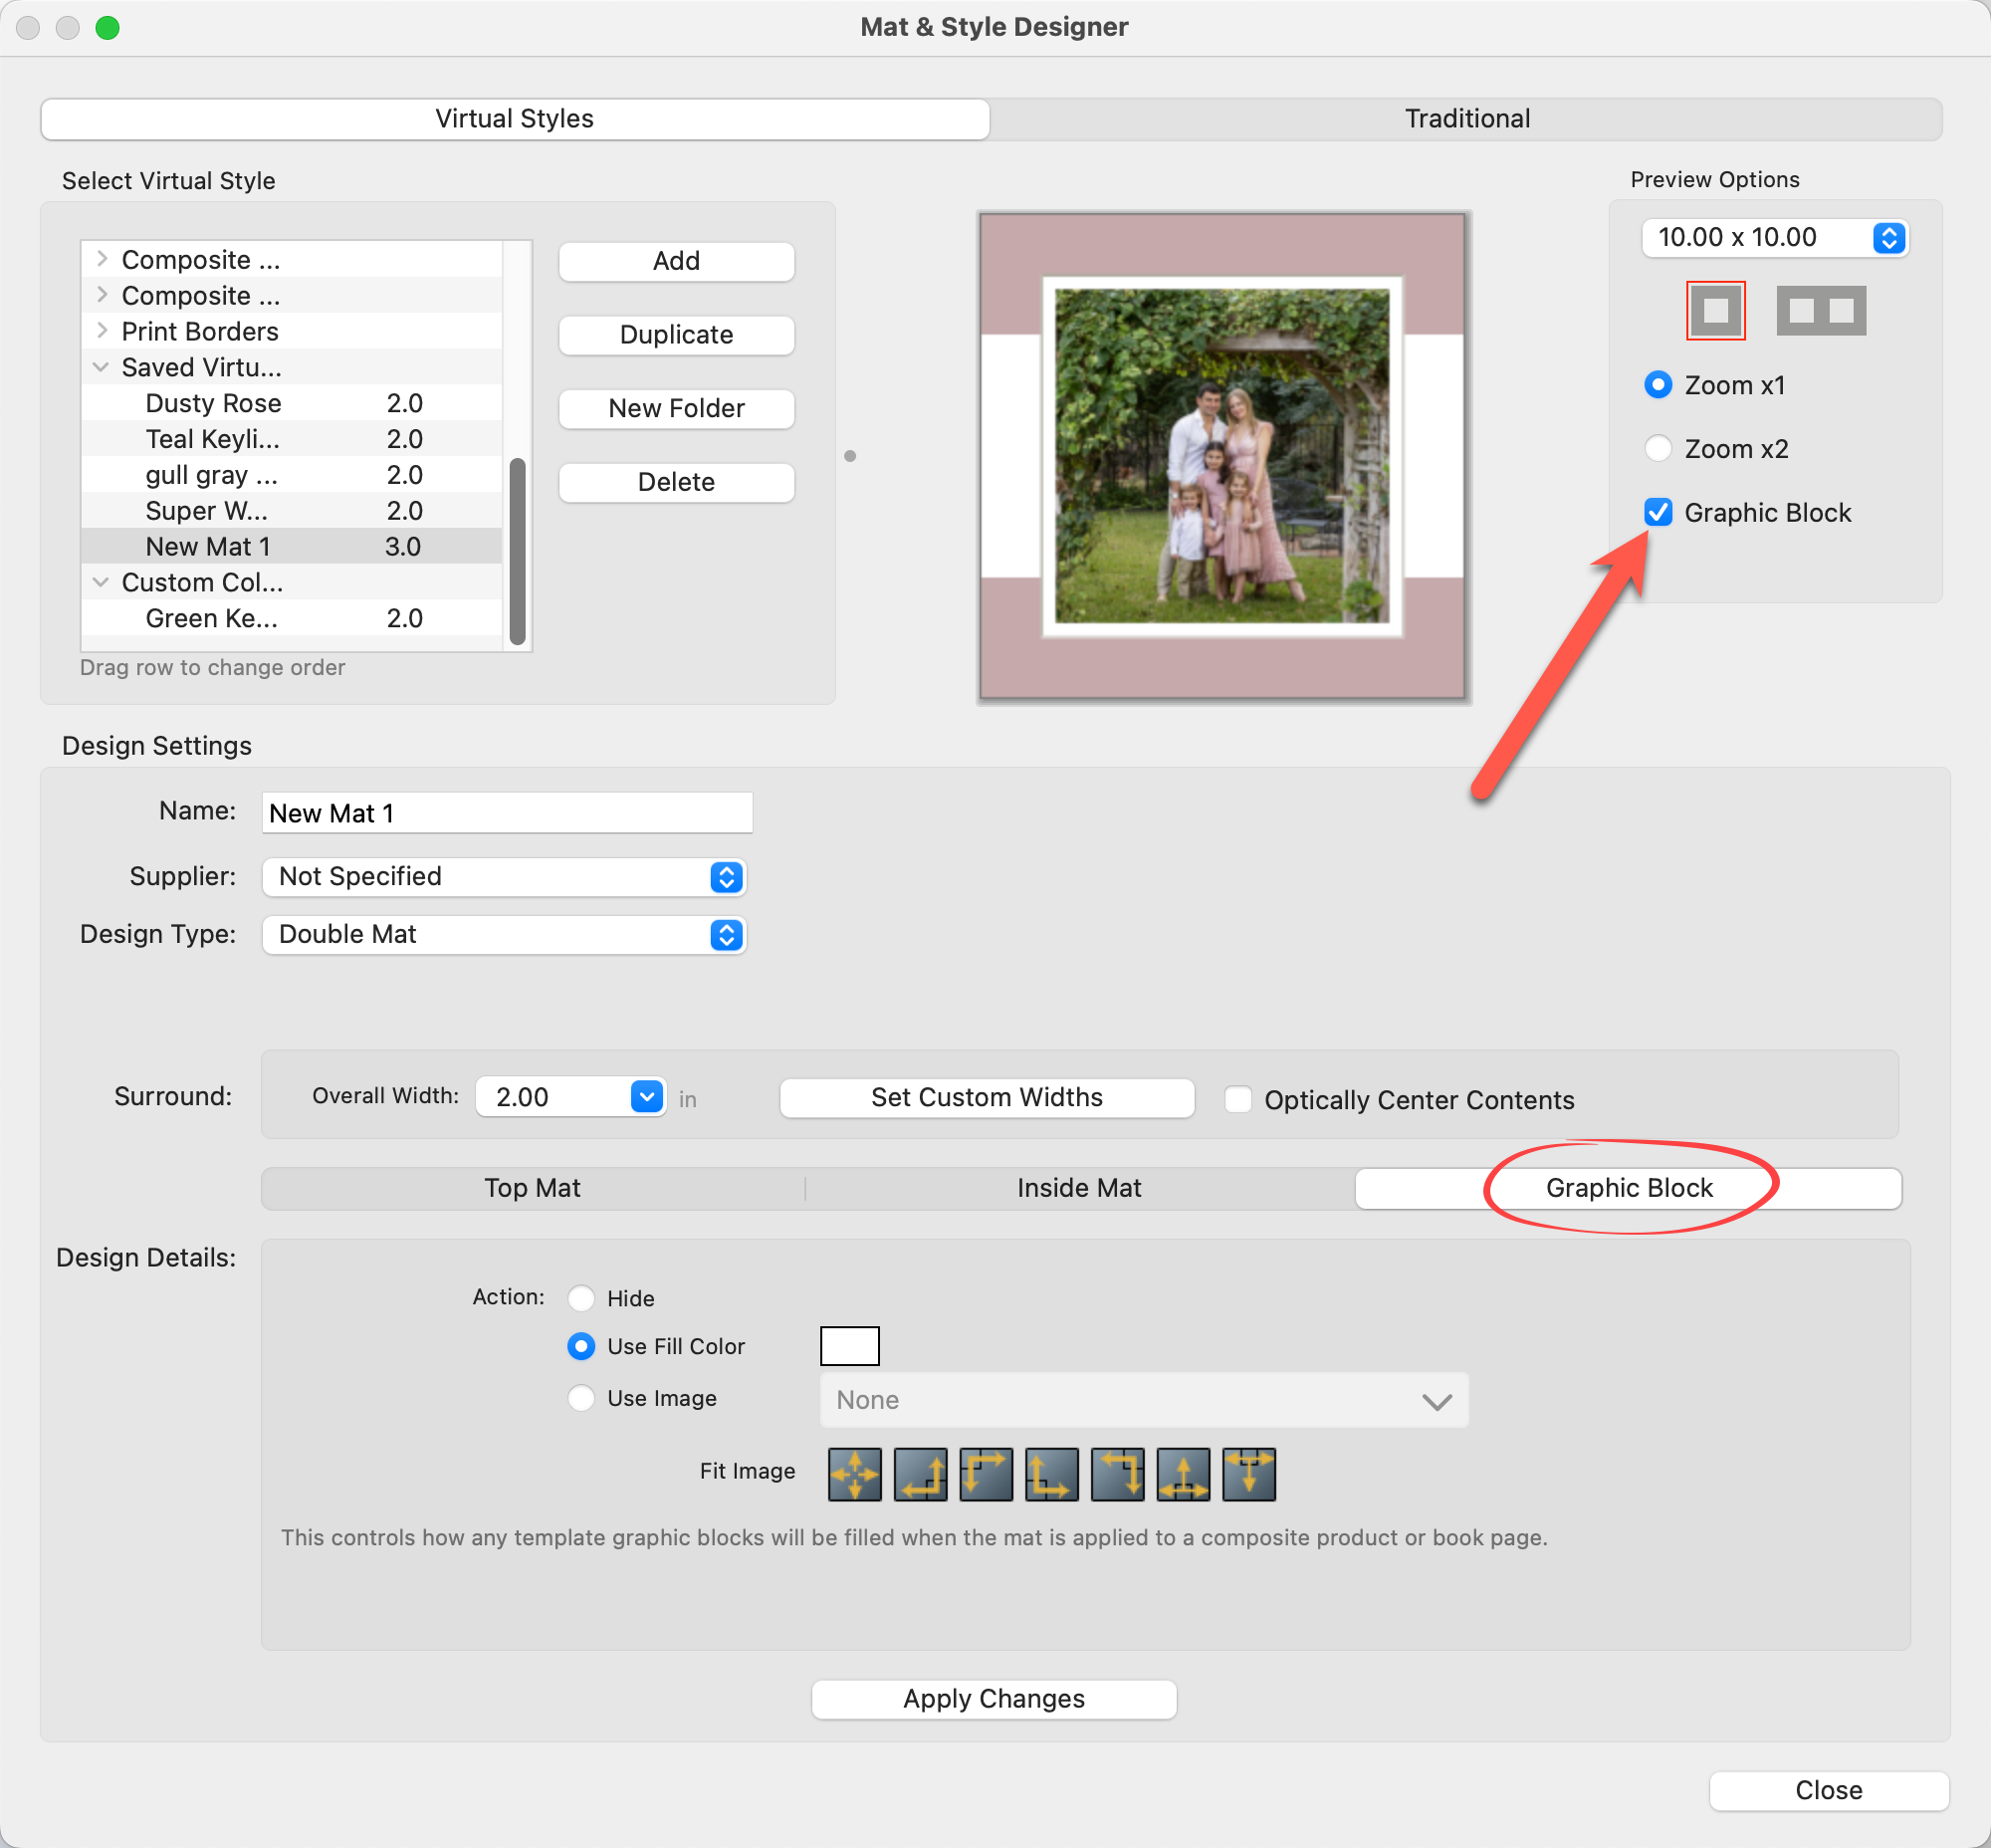
In addition to mat layers, virtual styles allow for Graphic Blocks. This is an additional tab next to the mat layers. Select this tab to work with the graphic block design details. Make sure the "Graphic Block" checkbox is enabled in order to preview it.
The term "mat reveal" refers to the visible portion of each mat layer. This concept works for both Traditional Matted and Virtual Styles. When designing mats, the reveal process starts with the innermost mat and works outward. The size of the reveal for the innermost layer is deducted from the total mat width. Whatever width remains after this subtraction is then used for the top mat, ensuring that each layer is proportionally displayed. Use the drop-down arrow to select a mat reveal size for the inside mat.
In the following example, we have a double mat with a 2.0" overall width.
- The inside mat has a reveal of 0.5". Therefore, the top mat must have a 1.5" reveal to make up the 2.0" overall width.
- We can change the inside mat to have a reveal of 0.25". In this case, the top mat reveal changes to 1.75" to make up the 2.0" overall width.
- The Preview area at the top of the window will reflect how the mat will look.
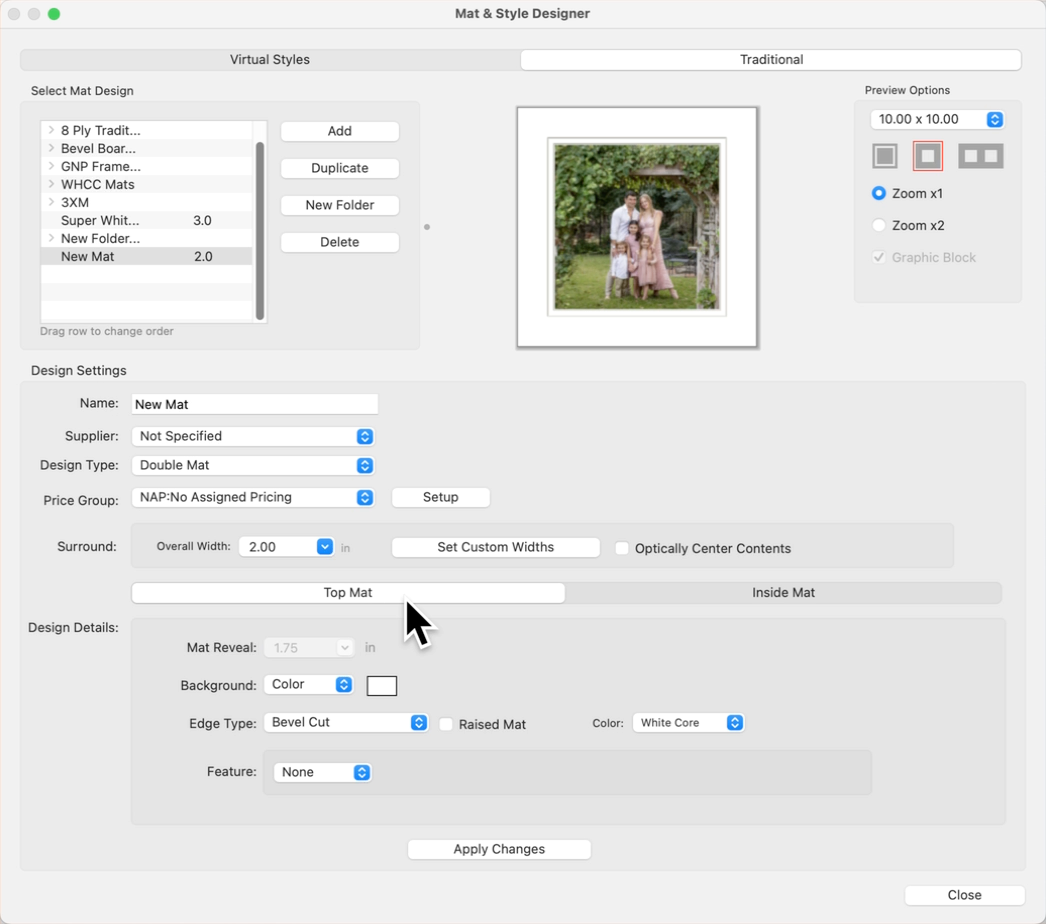
When selecting a Traditional Mat or Virtual Style background, you can choose a solid color or use a resource image file. Resource images can often be found on a supplier's website. They can match the color of the mat and also offer a bit of texture.
Option 1: Use the Color Chooser
- Select "Color" from the drop-down list.
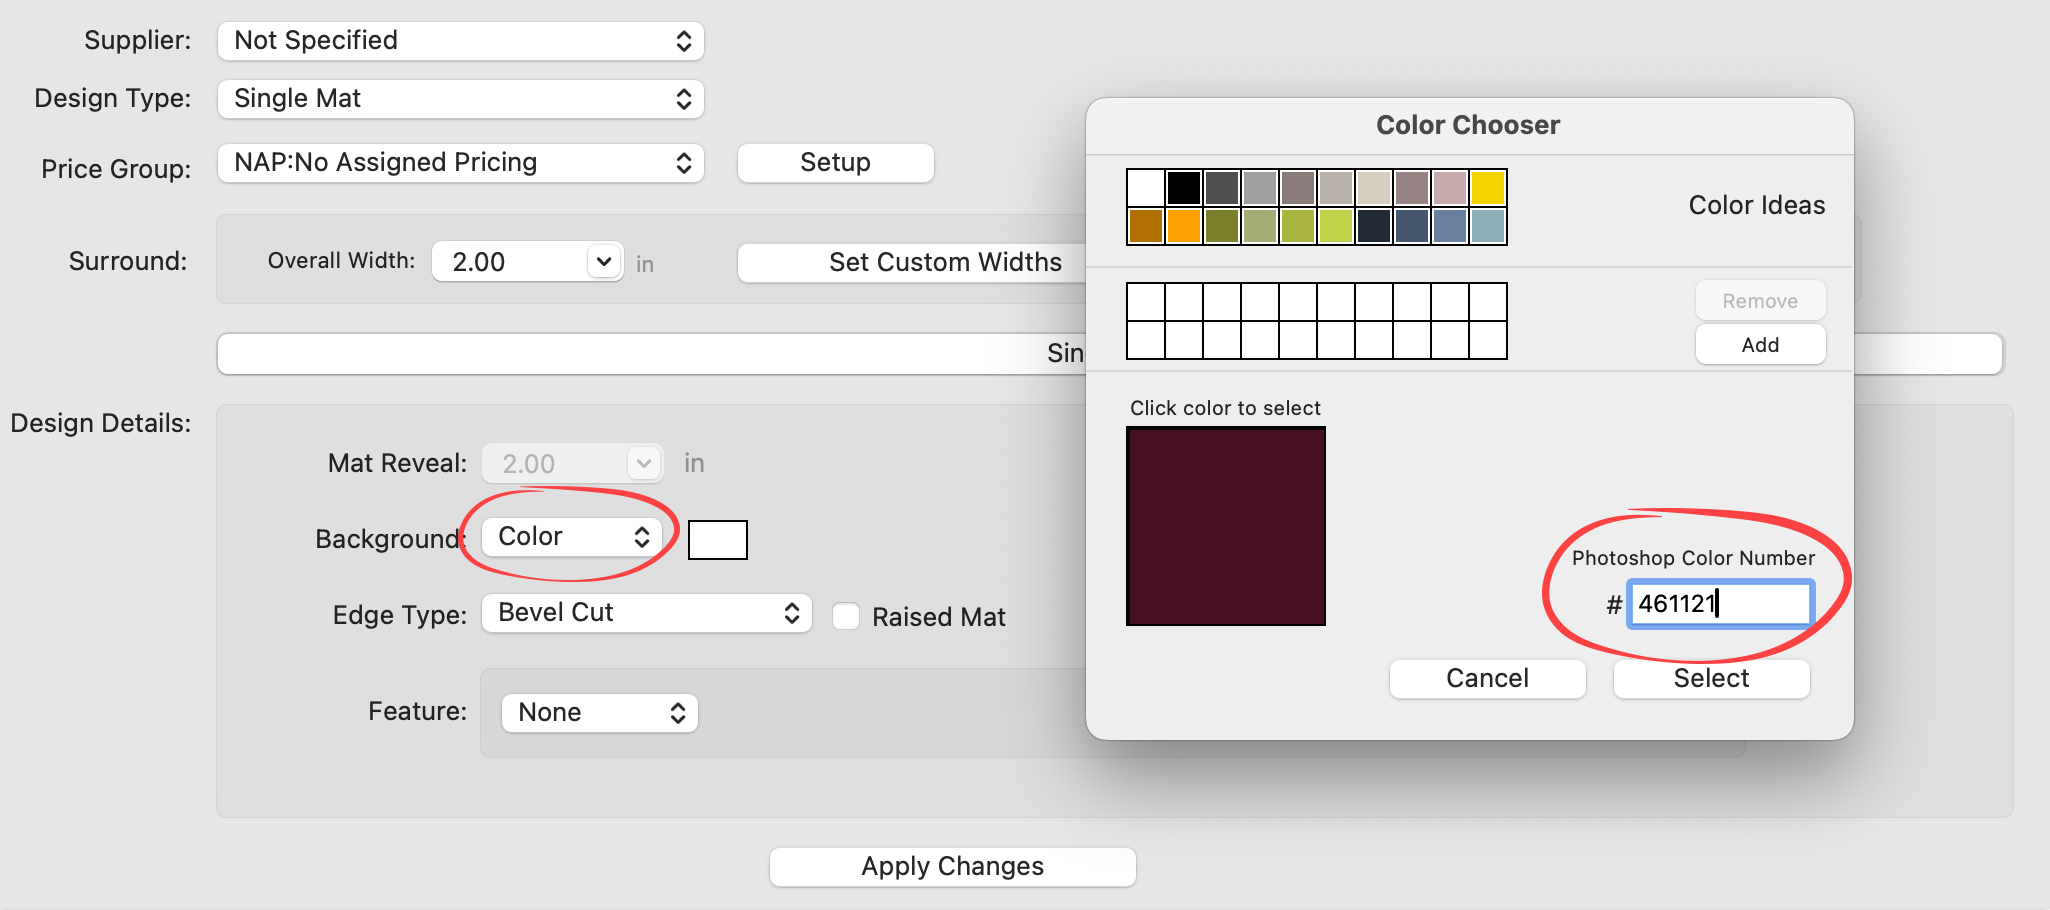
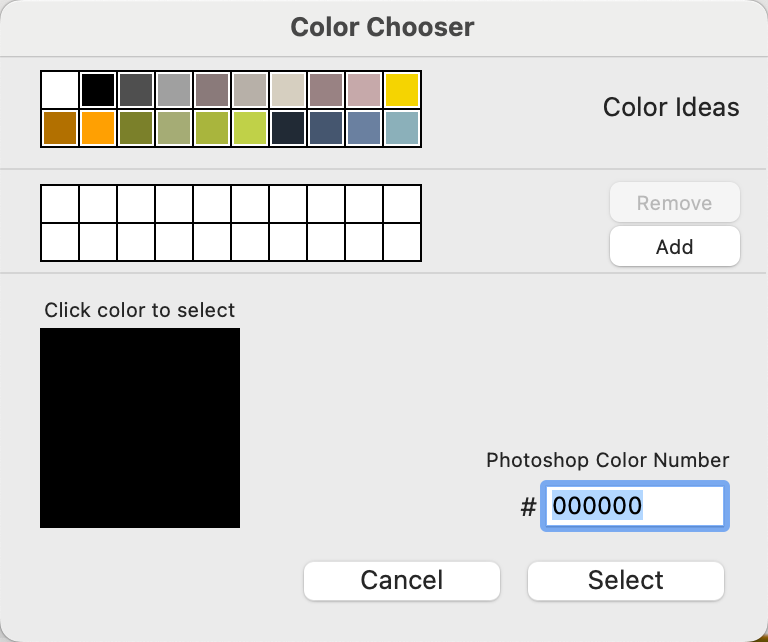
- Click on the color box next to "Background." This will bring up the Color Chooser dialog.
- From here you can manually type in a Photoshop color number, use one of the pre-selected color ideas, or click on the large color swatch to select a color. Use the Add button to add the selected color to your favorites palette.
Option 2: Use an Image File
- Select "Image" from the drop-down list.
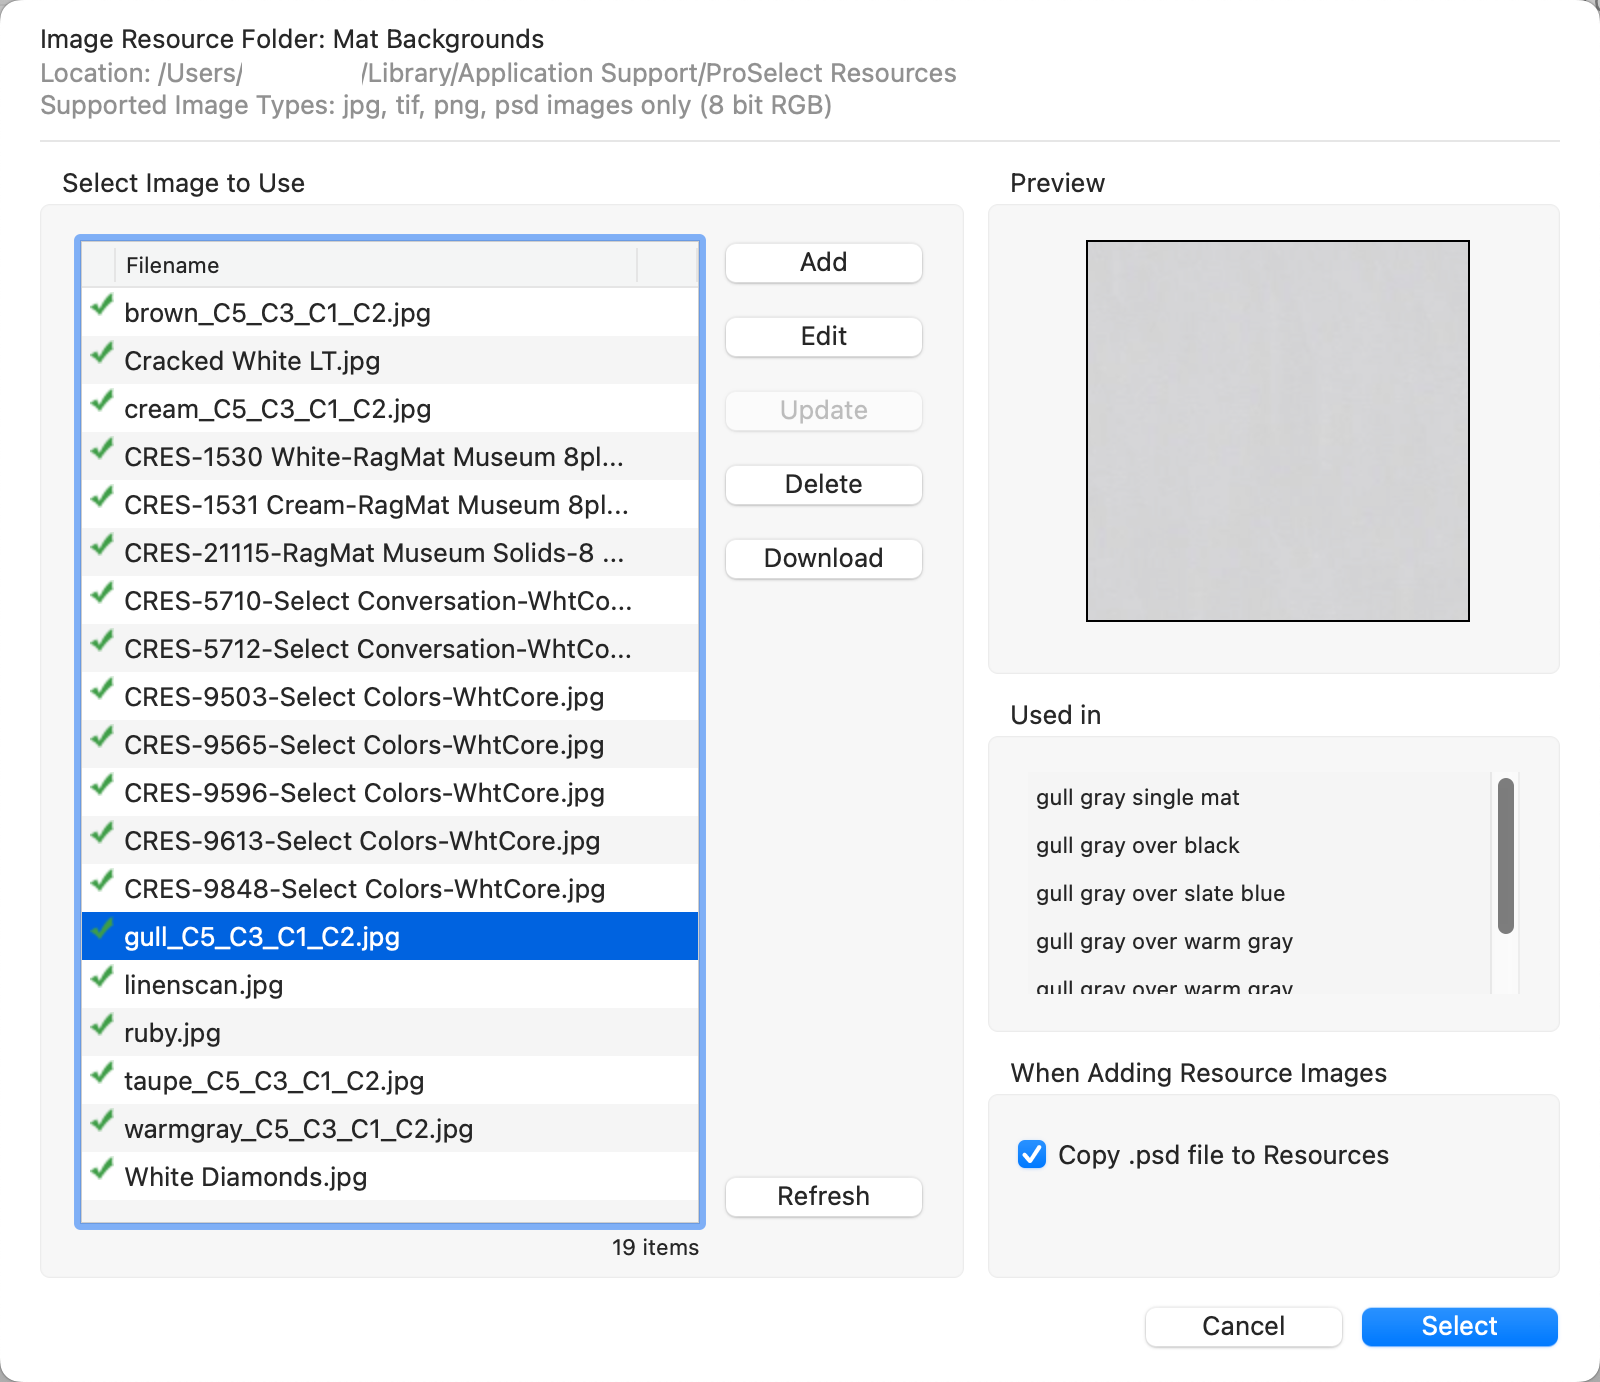
- The Mat Background Resource folder will open. Select a mat background from the list or use the Add button to import one in. Learn more about getting color swatches from supplier websites here.
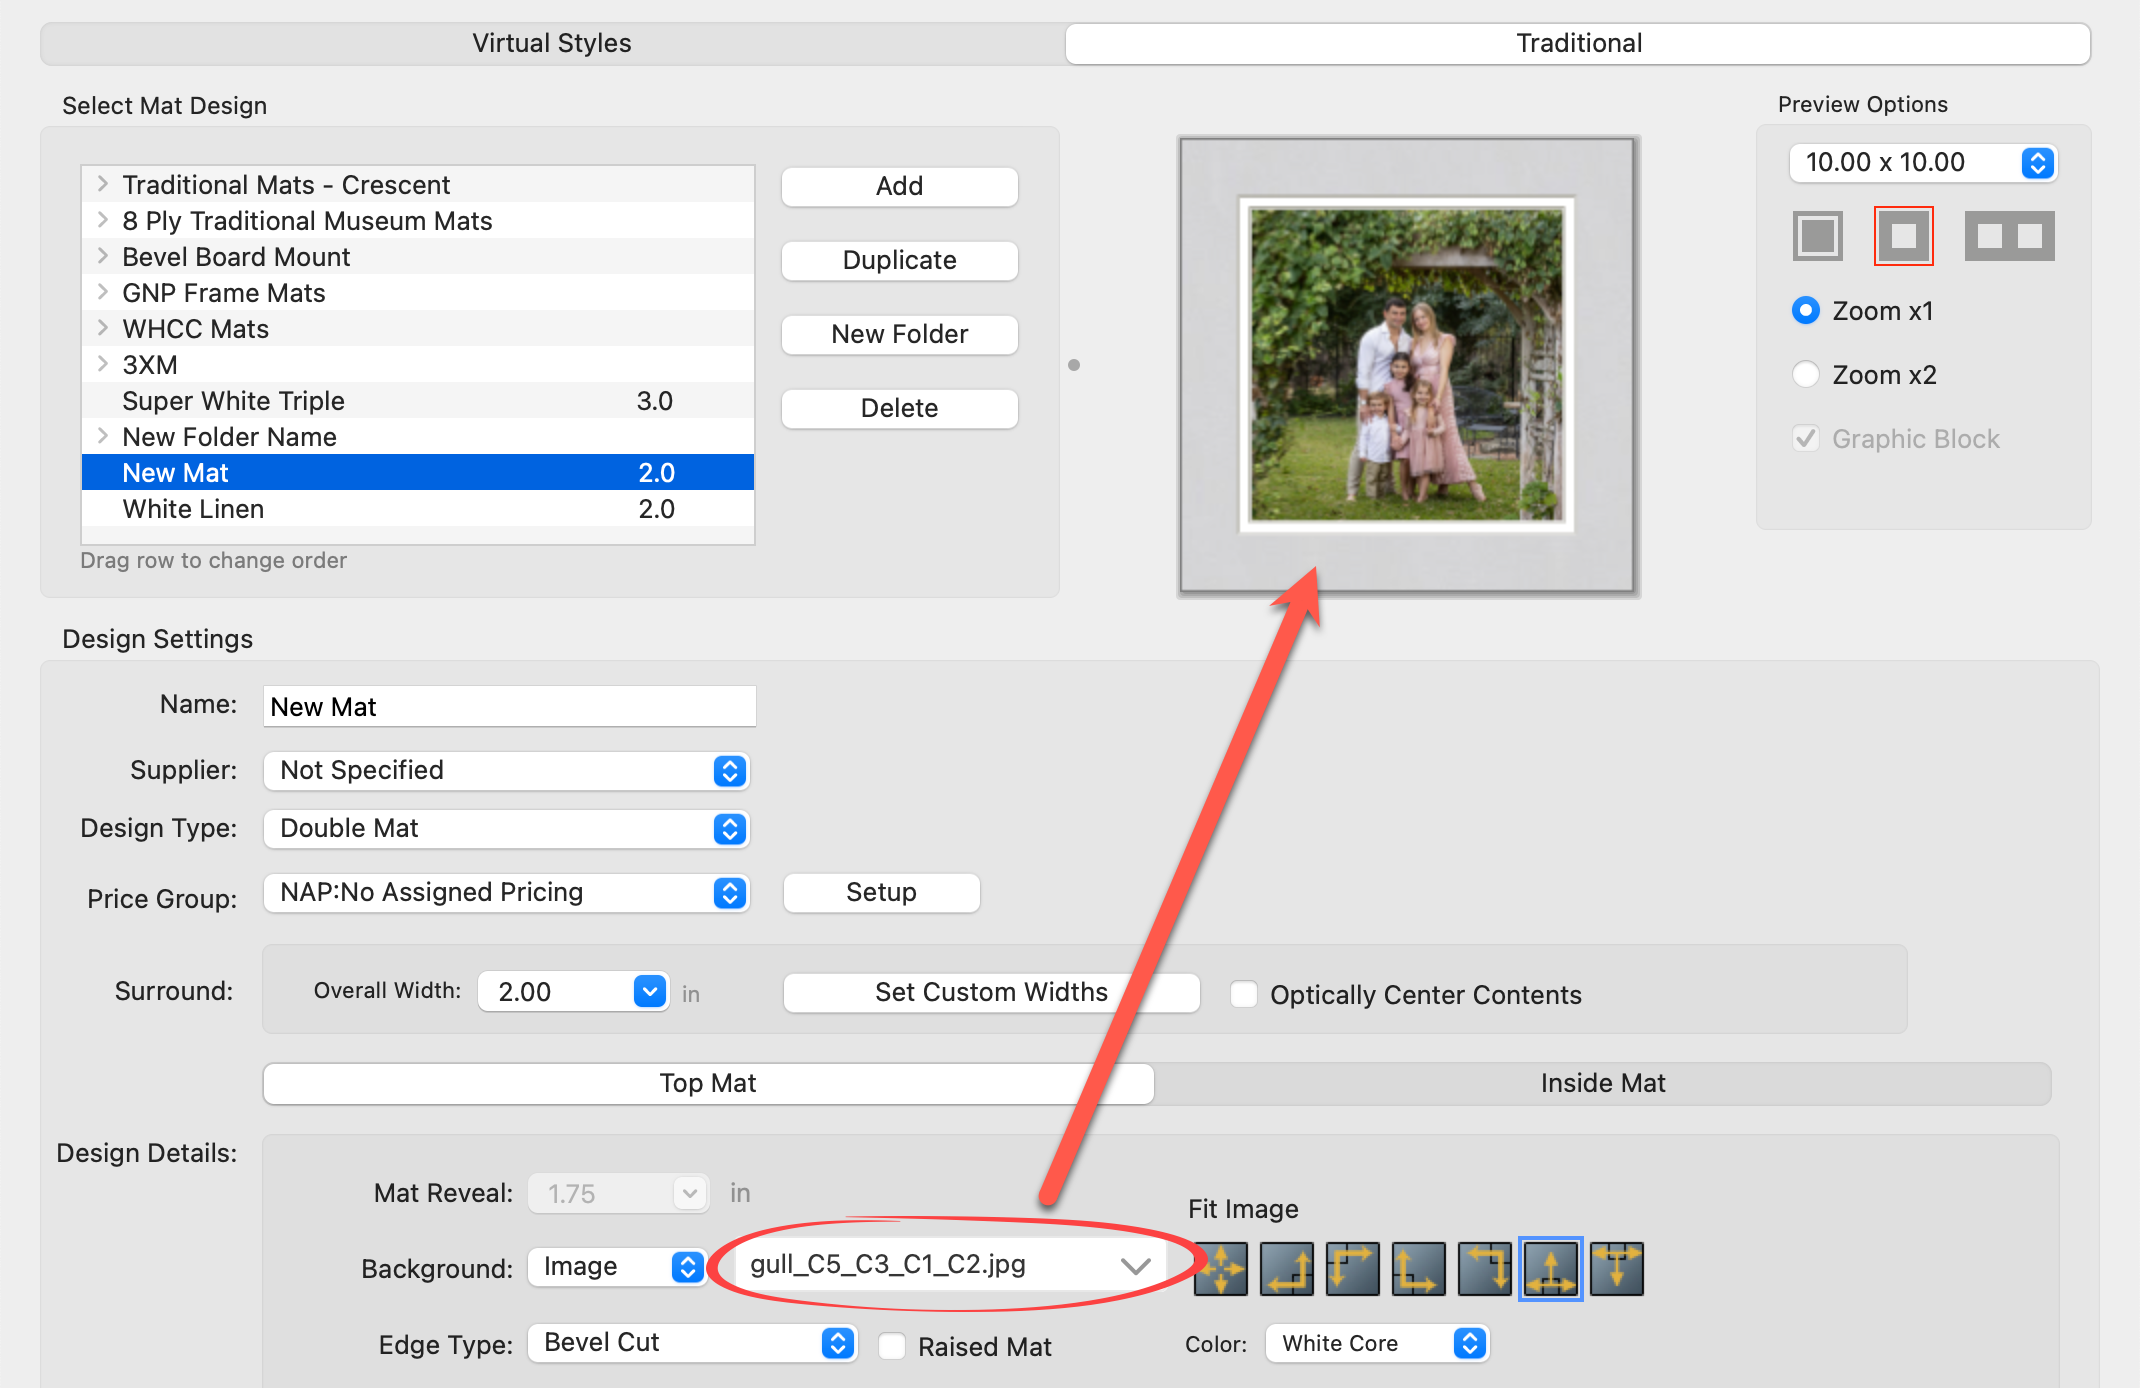
- Once selected, you can "fit the image" by anchoring it to the corner, top, or bottom, or have it stretch. Click on Image Fit Options to learn more.
Edge Types
Each layer of a mat can have different edge finishes:
- Bevel Cut: A traditional cut that reveals the core of the mat board, usually white or black, creating a distinct angled edge that leads the eye into the image.
- Reversed Bevel Cut: Similar to the bevel cut but reversed, often used for a subtle framing effect.
- 8 Ply Bevel Cut: Thicker than standard bevel cuts, this option offers a more pronounced, dramatic depth.
- Bevel Mount: This type offers a metallic core in colors like black, silver, or gold, providing a sleek, modern look.
- Fillet: Acts like a miniature frame within the mat. When selecting a fillet, you will use one of your frame images. Click on Using a Fillet Frame Edge to learn more.

Virtual Styles Only
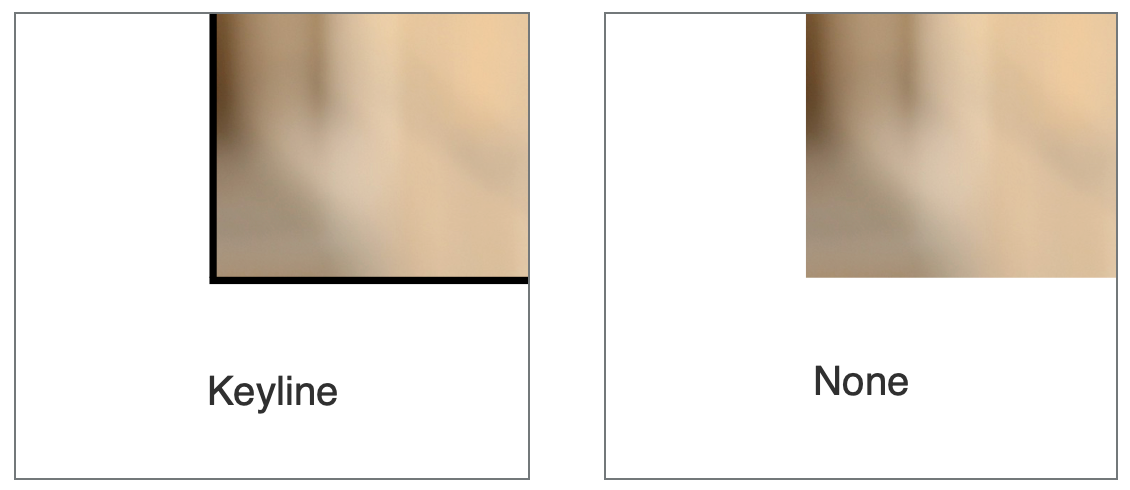
In addition to the edge types listed above, virtual styles can be created with a Keyline Edge or No Edge.
Raised Mat
- Mats with Bevel Cut, 8 Ply Bevel Cuts, Bevel Mounts, and Fillets can optionally be designed with a raised feature, adding a three-dimensional aspect to the mat.
Core Color
- Mats are often available with either a white or black core. You can choose which option by selecting "White Core" or "Black Core" from the color list.
Additional Features
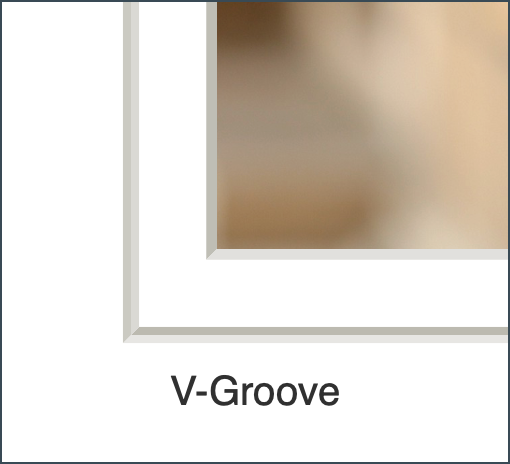
- V-Grooves: A V-Groove is a small indented line that adds depth and shadow, enhancing the layered look of the mat.
- If you select to have a V-Groove feature, adjust the positioning of the groove using the "Offset" drop-down list.
Keylines are thin lines added to the edges of mats enhancing the visual separation between the image and the mat or between multiple mat layers. Keylines can be customized in color and width. They can be set to surround the inner edge of a mat layer or be drawn as a feature directly on top of a mat layer.
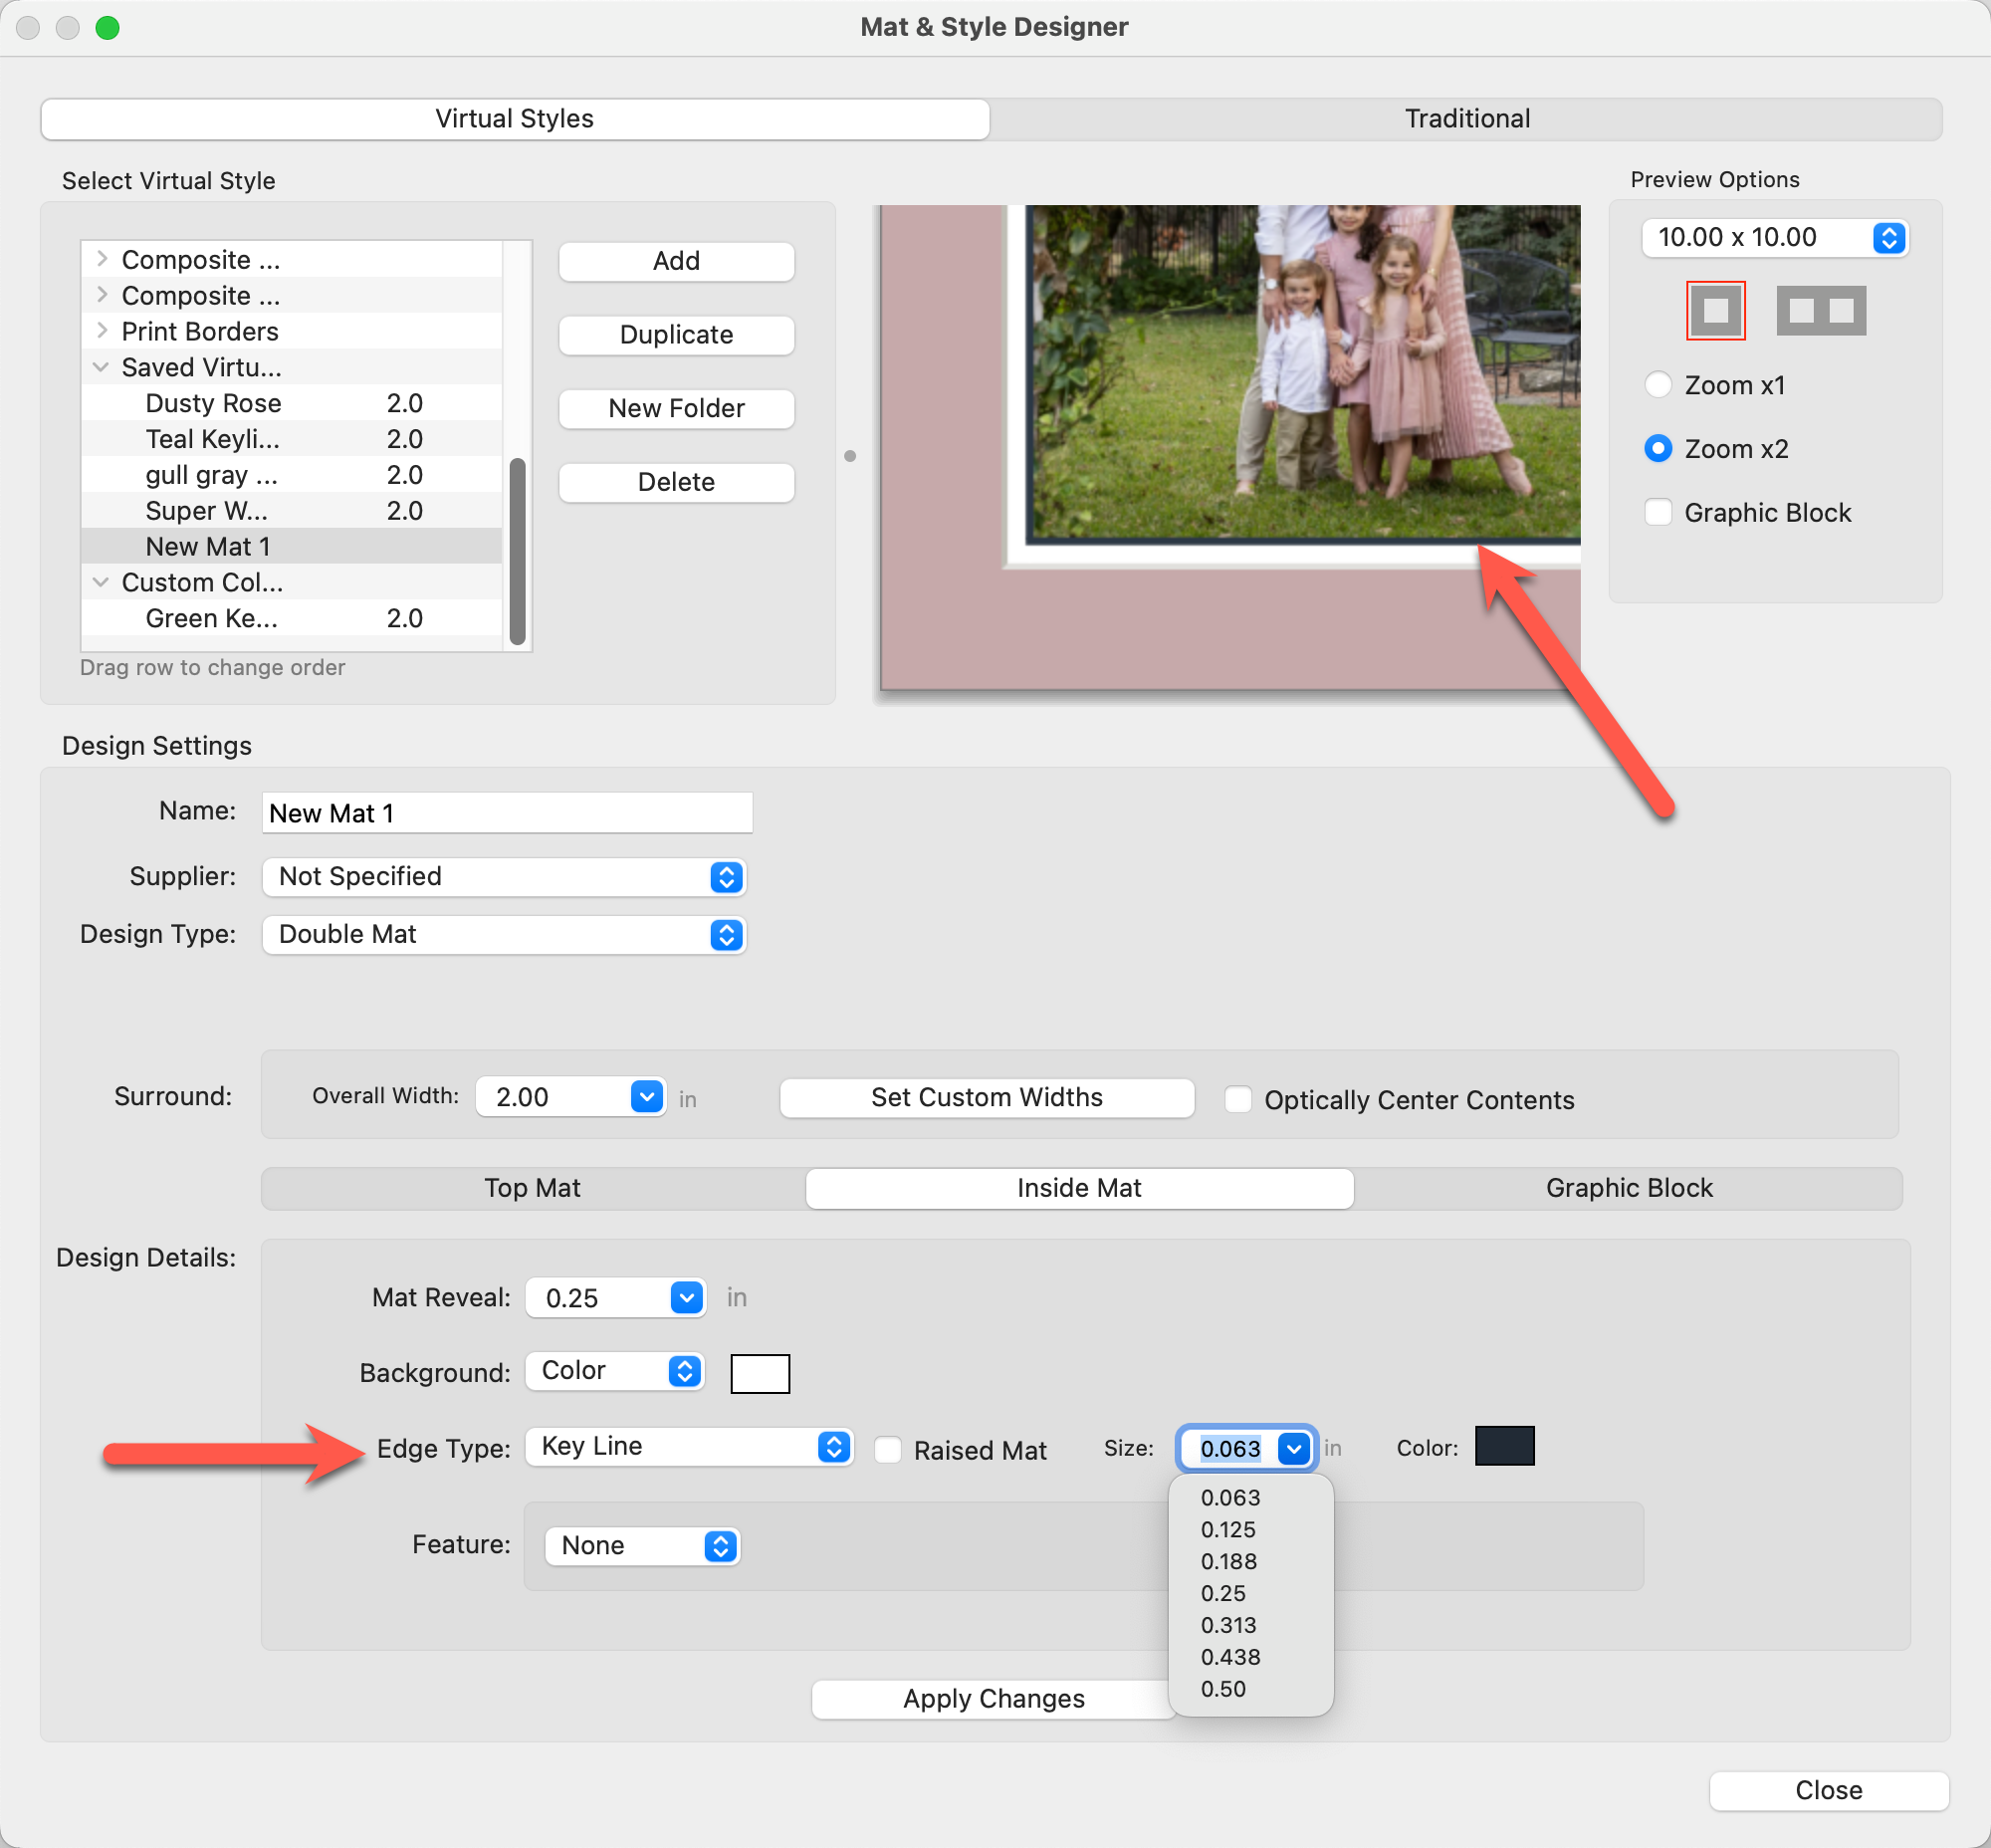
Keyline Edge
- Select a Mat Layer to work with.
- Choose "Key Line" from the Edge Type list.
- Select or type in a size (width) for the keyline.
- Choose a color.
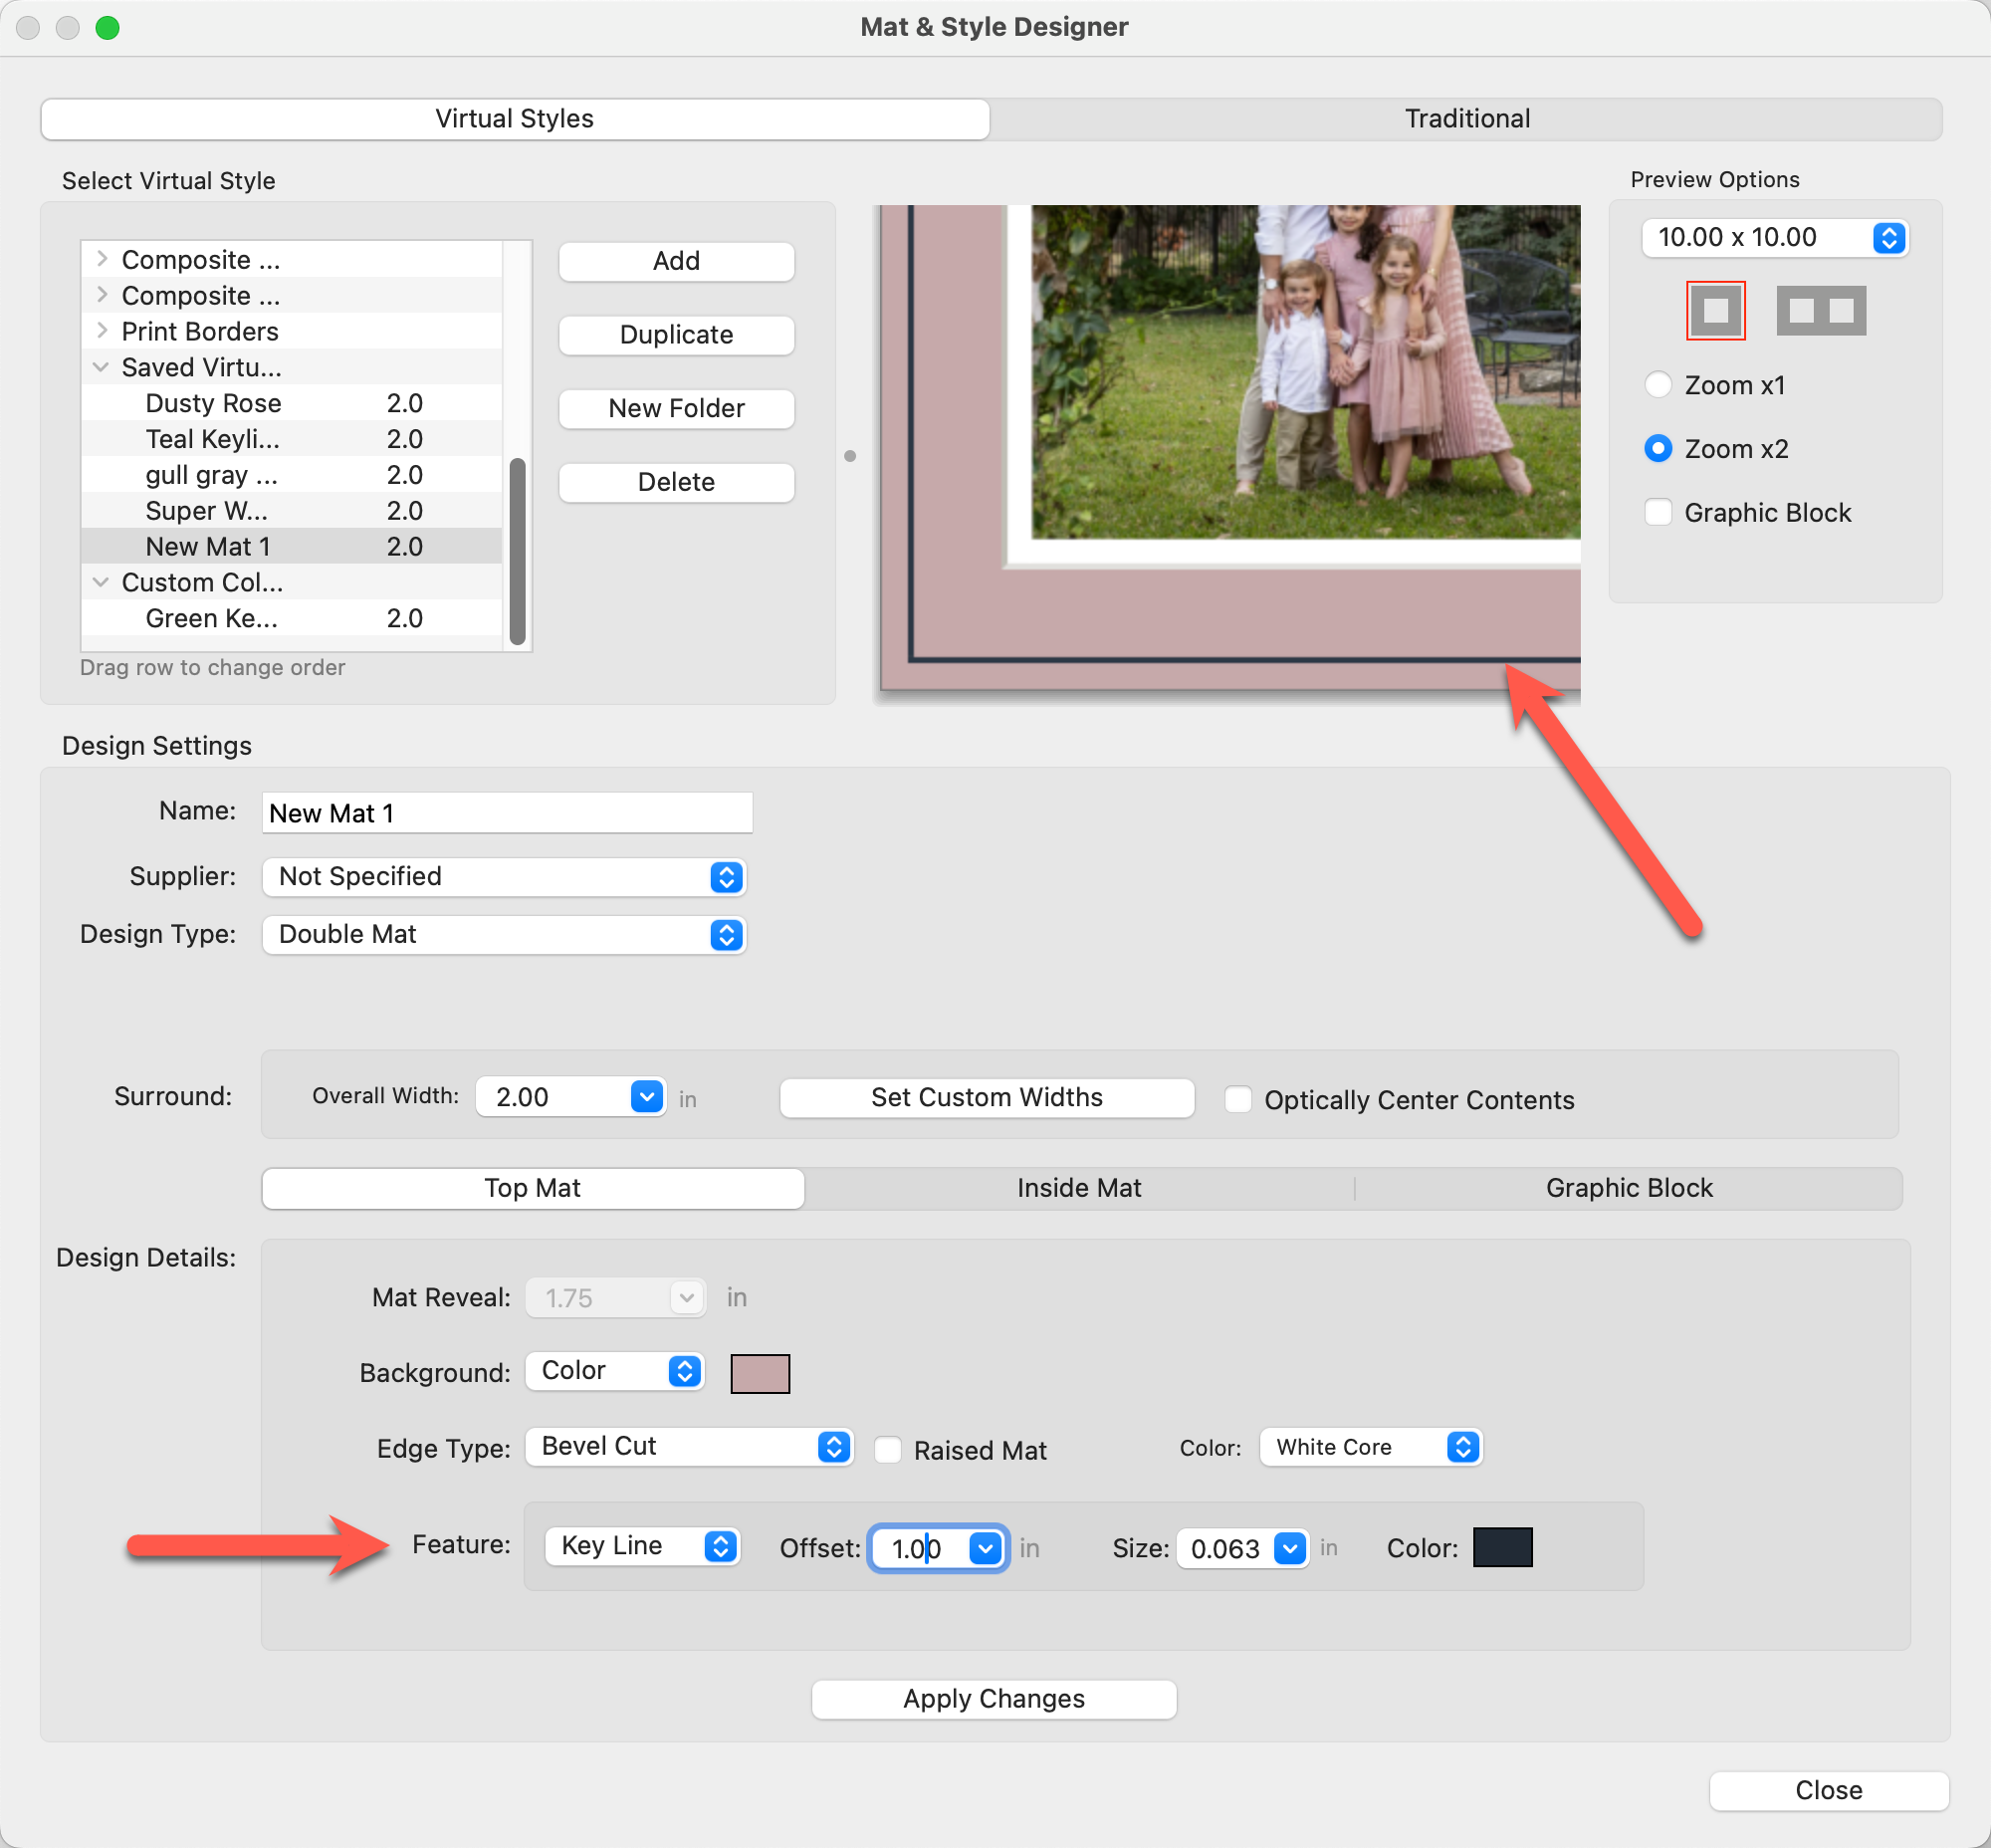
Keyline Feature
- Select a mat layer to work with.
- Choose "Keyline" from the Features list.
- The "Offset" specifies the distance from the inner edge of the mat to where the keyline begins. This measurement moves outward from the inner boundary towards the outer edge of the mat. If the keyline is not visible, it may be because the offset is too large, causing the keyline to extend beyond the visible area of the mat.
- Select or type in a size (width) for the keyline.
- Choose a color.
A Graphic Block refers to a designated area within a product template that can be filled with a specific color or image. This feature is primarily used in book pages and select composite products. Graphic Blocks can be an image from the Mat Background folder or a solid color. By default, every virtual style created has the option of a graphic block. The "Hide" option is on. To use the graphic block feature, select either "Use Fill Color" or "Use Image."
- Select the Graphic Block tab.
- Select "Use Fill Color" if you want a solid color for the graphic block.
- Alternatively, select "Use Image" to access the Mat Backgrounds folder. From here you can select an image to use as the graphics block - in the same way you would with a virtual style background.

Previewing the Graphic Block
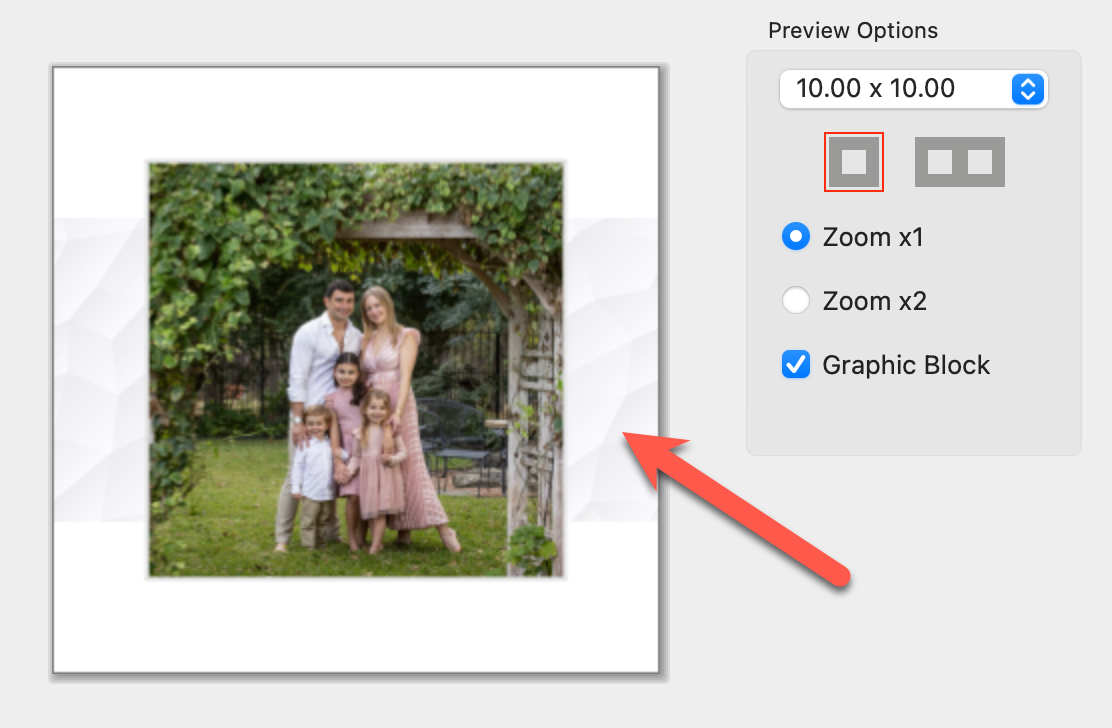
When you customize a graphic block, the preview will look slightly different than a Traditional Mat or Virtual Style. Because the placement of the graphic block is dependent on a product template, ProSelect will show the graphic block as a rectangular band across the sample image. When applied to a product template or book page, the graphic block will appear as indicated by the template.
Graphic Block Only
You have the option to set the Design Type to "Graphic Block Only." In this case, the template will focus solely on the graphic block settings, and no other mat layers will be applied to the openings.
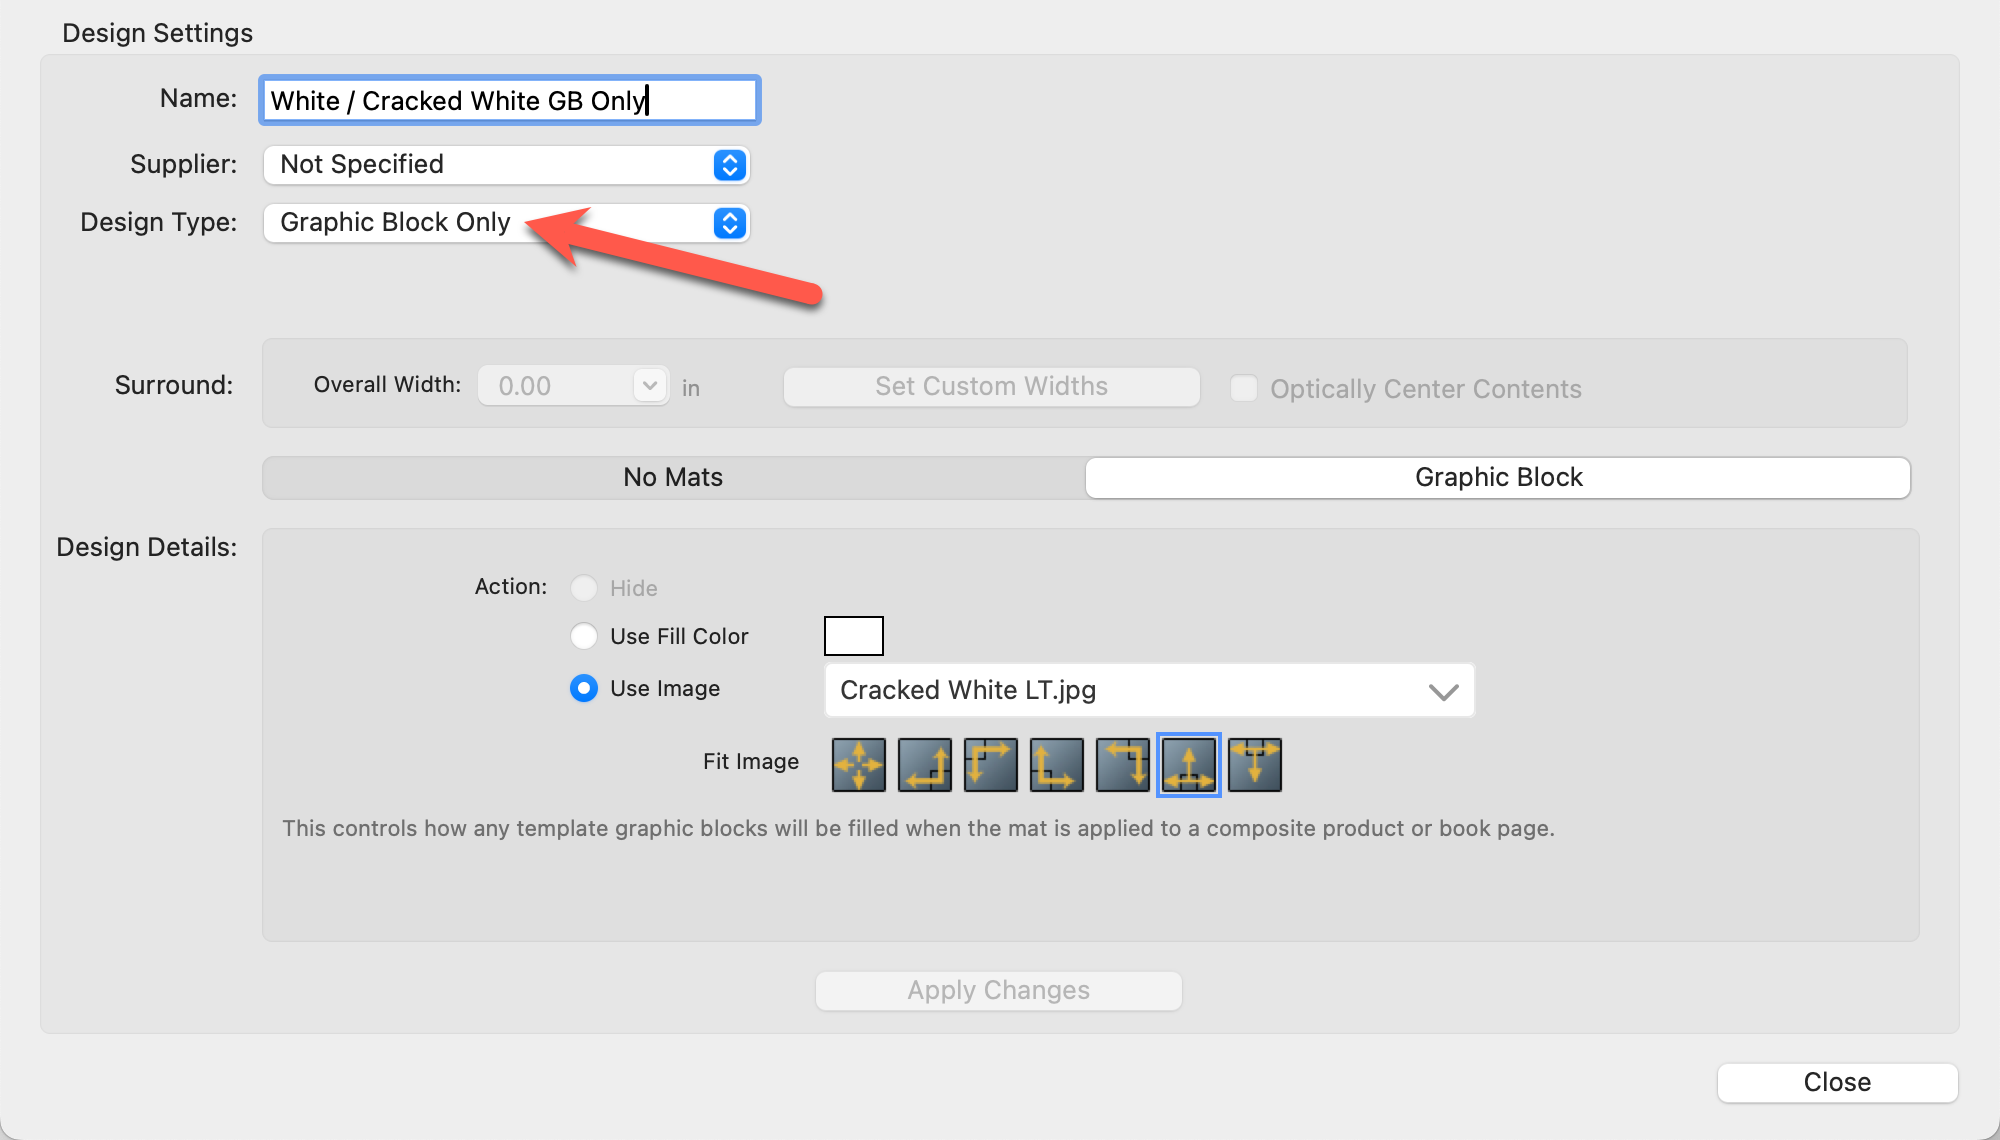
- Graphic Blocks are for use in Product Templates. They cannot be applied to prints or basic gallery wraps.
- Product Templates must have a Graphic Block element in the design for them to be customized.
- Although Graphic Blocks are considered a Virtual Style, you can elect to only use the graphic block without any mat layers being applied.
Filling a template's graphic block is done using the Select Virtual Style tool ![]() .
.
Product Templates
- Select a product template that utilizes a graphic block. Often these are indicated with a "GB" in the template name.
- Unfilled graphic block elements will appear as diagonal lines until a style is applied.
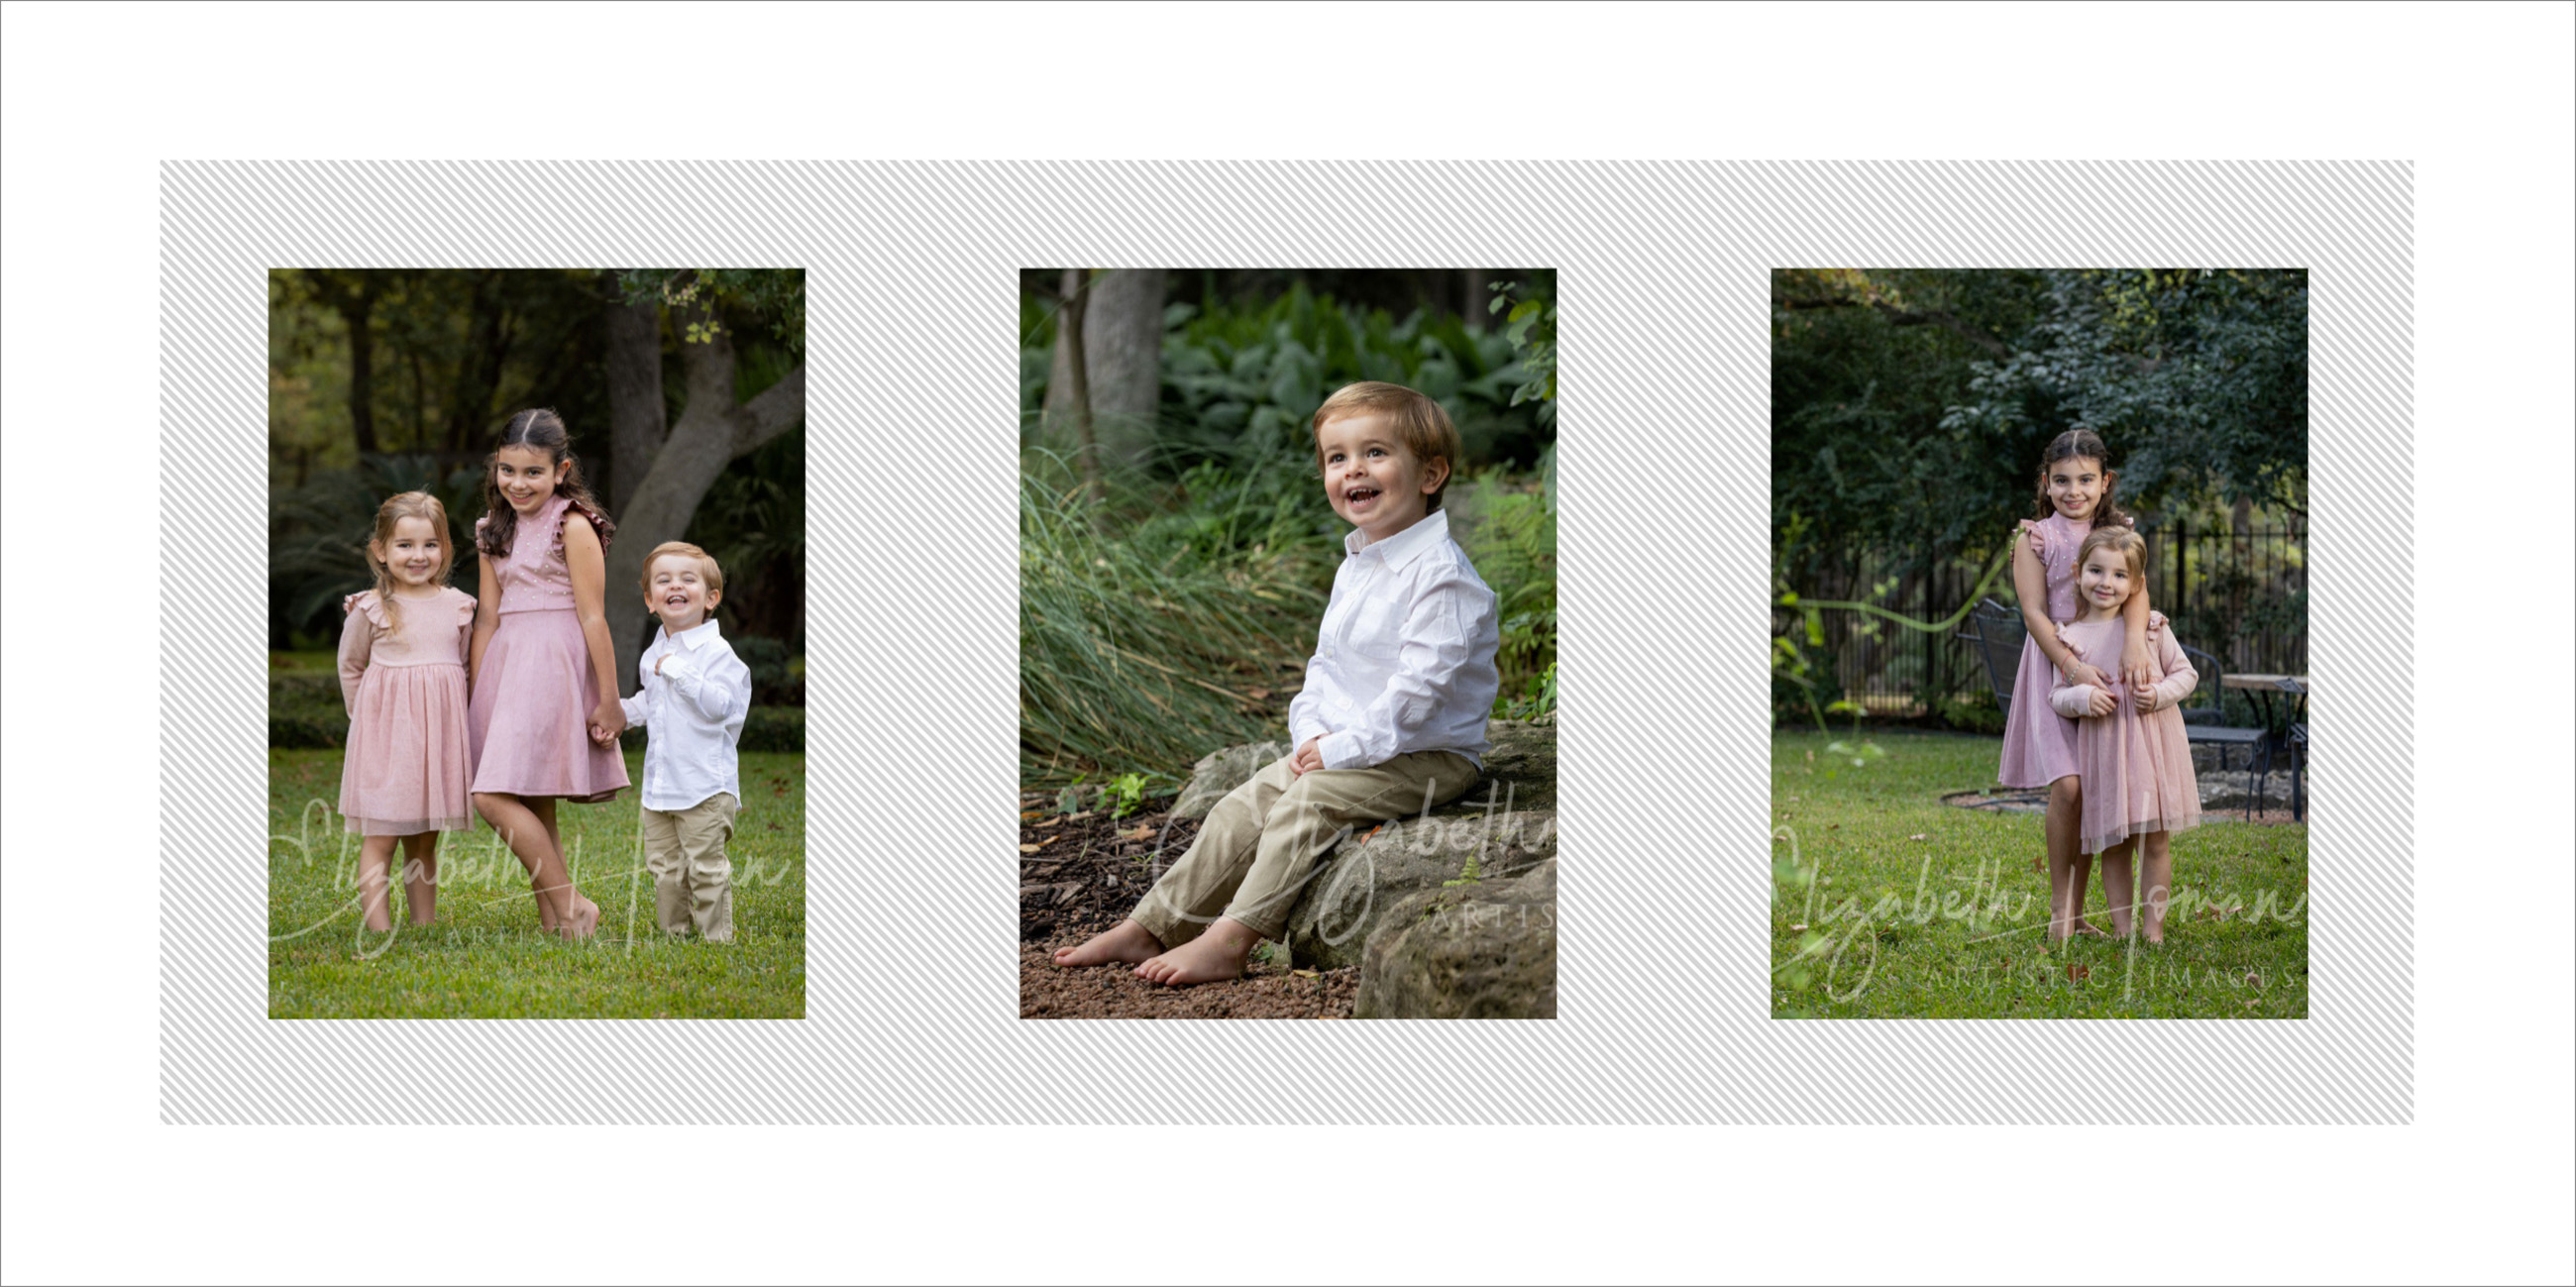
- Populate the template with images.
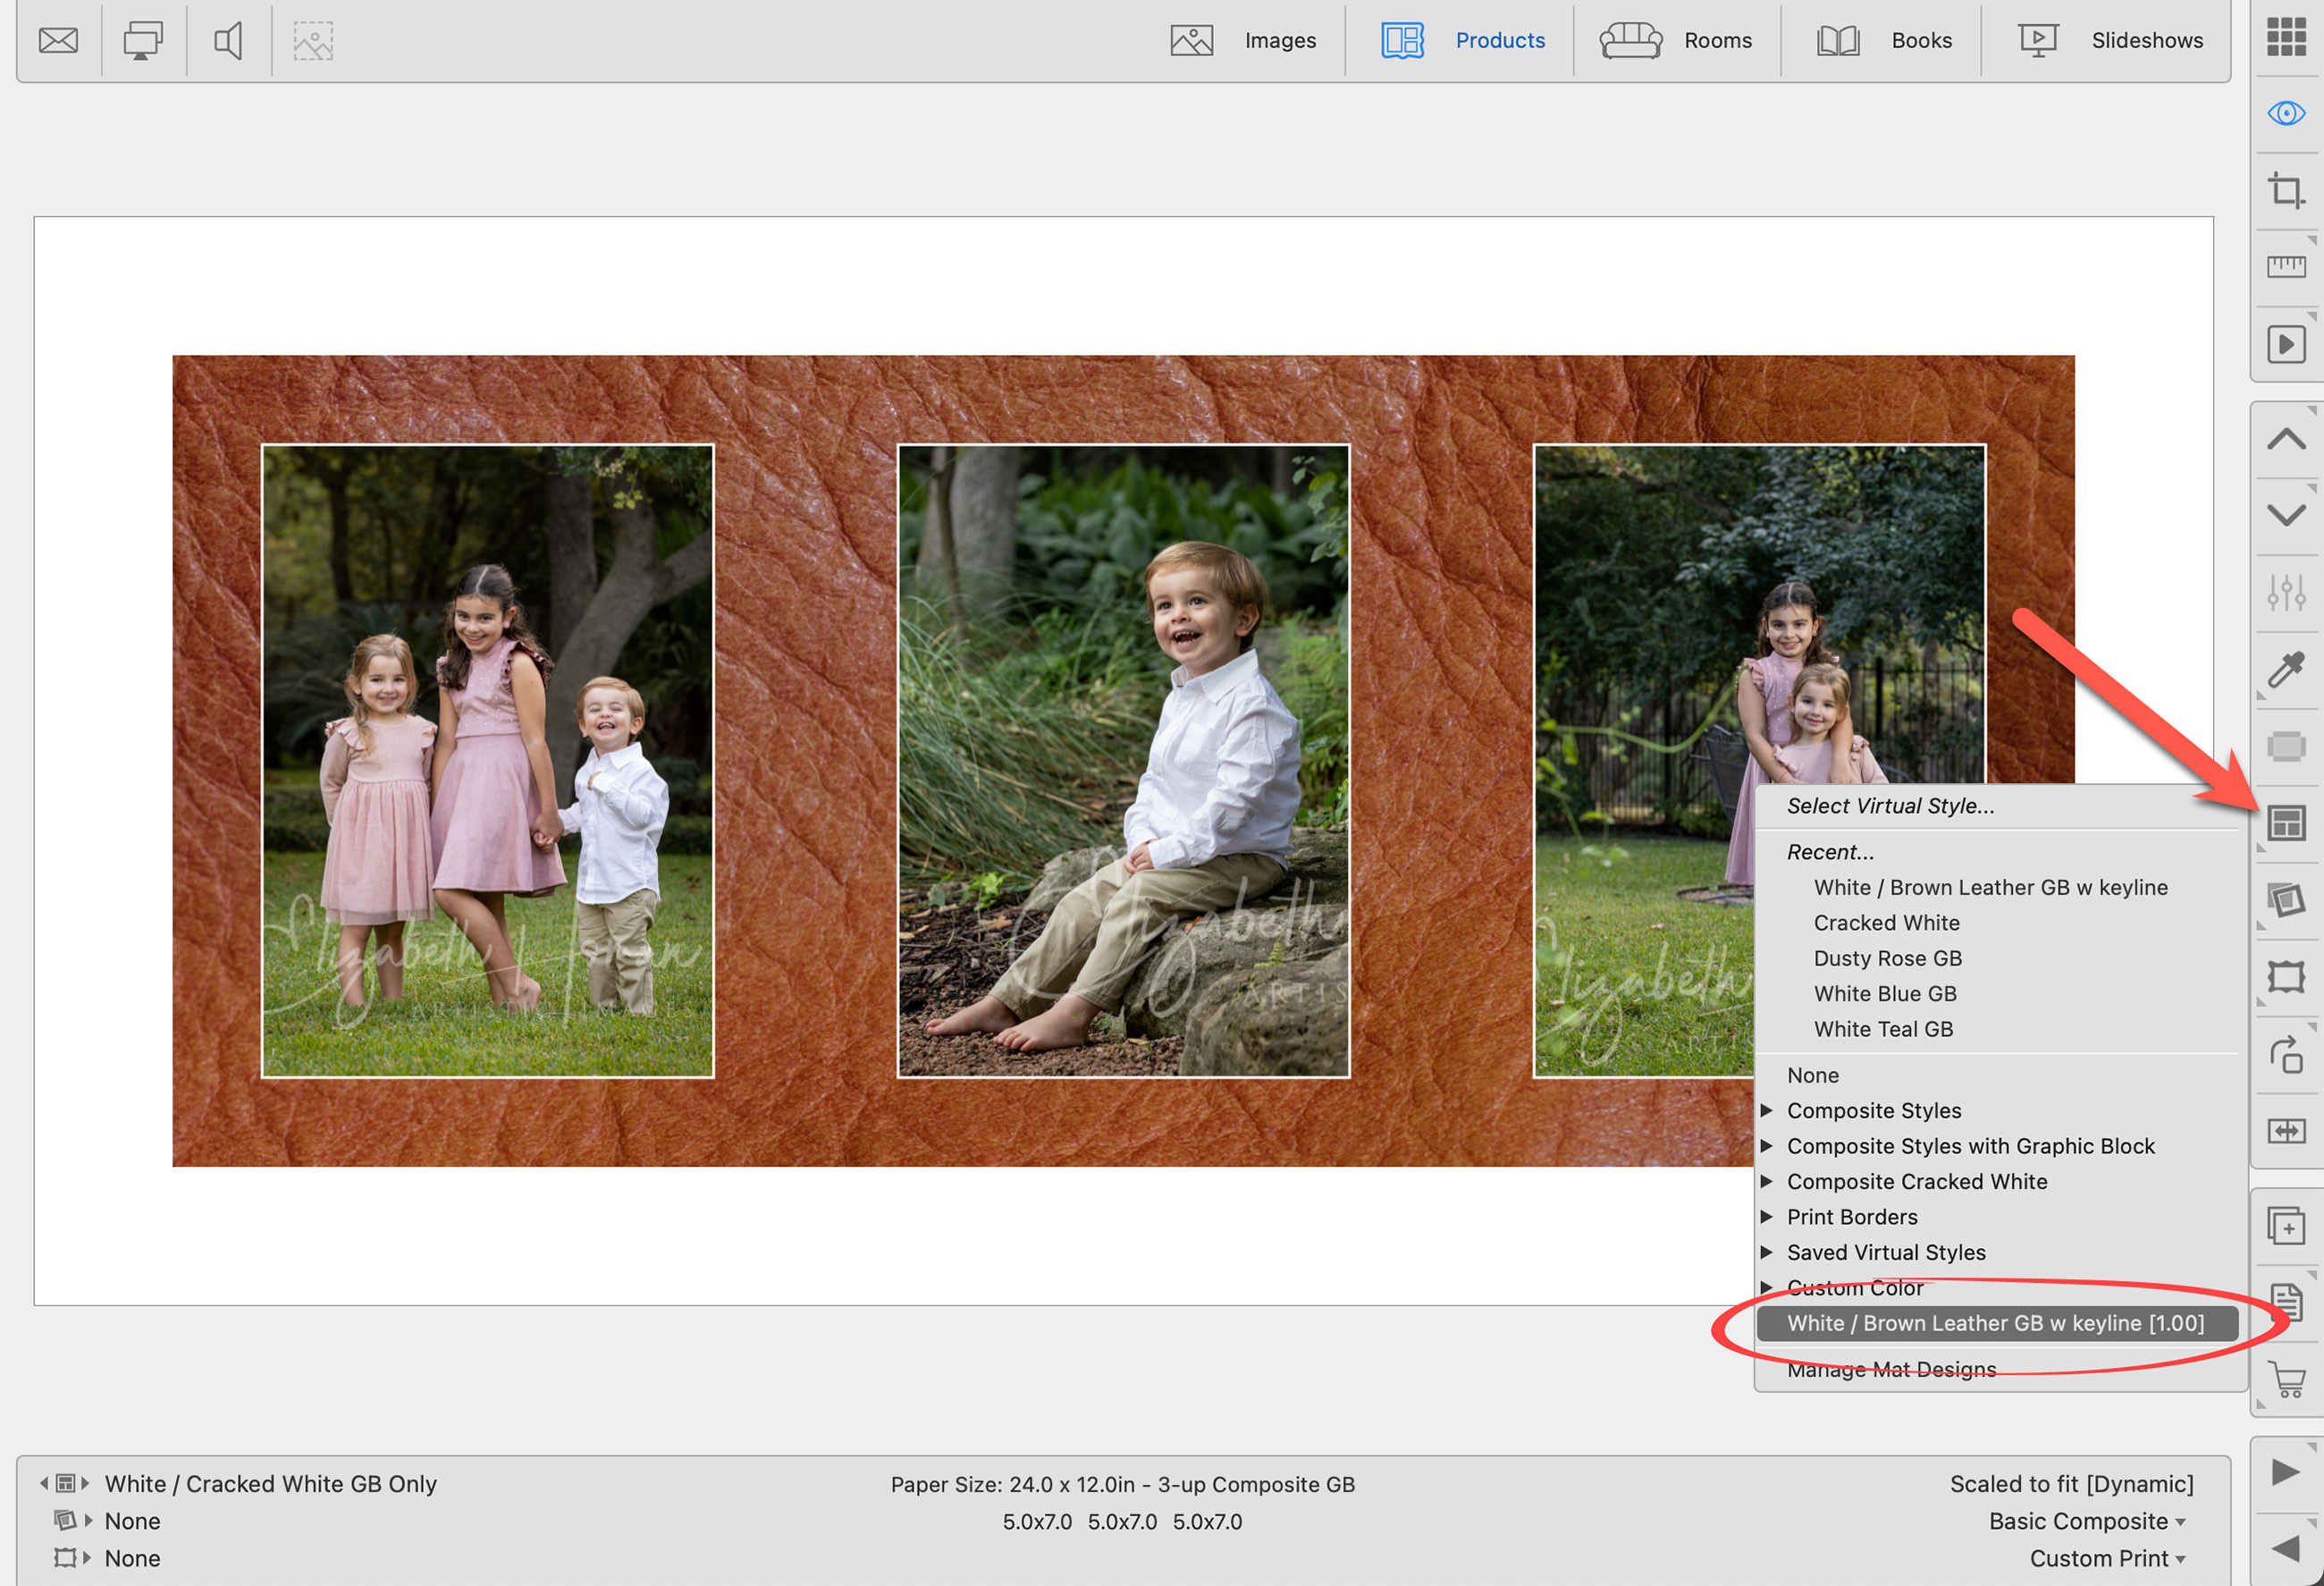
- Click on the Select Virtual Style tool
 .
. - Choose the desired Virtual Style/Graphic Block element from the list. This list will match what has been created in the Virtual Styles tab, within the Mat & Style Designer.
Create a Custom Colored Graphic Block
Using the Select Edge/Style Color tool, you can choose a custom color for your graphic block.
- Select a product template that utilizes a graphic block. Often these are indicated with a "GB" in the template name.
- Populate the template with images.
- Click on the Select Virtual Style tool
 .
. - Choose a Graphic Block element from the list that utilizes a fill color (not an image).
- Click on the Select Edge/Style Color tool
 .
. - Hover your mouse over an image within the template. Once you land on a desired color, click the mouse.
- You can save the custom color by going to the top menu, Products > Traditional Mats & Virtual Styles > Save Virtual Styles to Designer. Alternatively, right-click on the product and select "Save Virtual Styles to Designer."
Working with Books
Graphic Blocks are filled the same way when working with books.
- Select a product template that utilizes a graphic block. Unfilled graphic block elements will appear as diagonal lines until a style is applied.
- Populate the template with images.
- Click on the Select Virtual Style tool
 .
. - Choose the desired Virtual Style/Graphic Block element from the list.
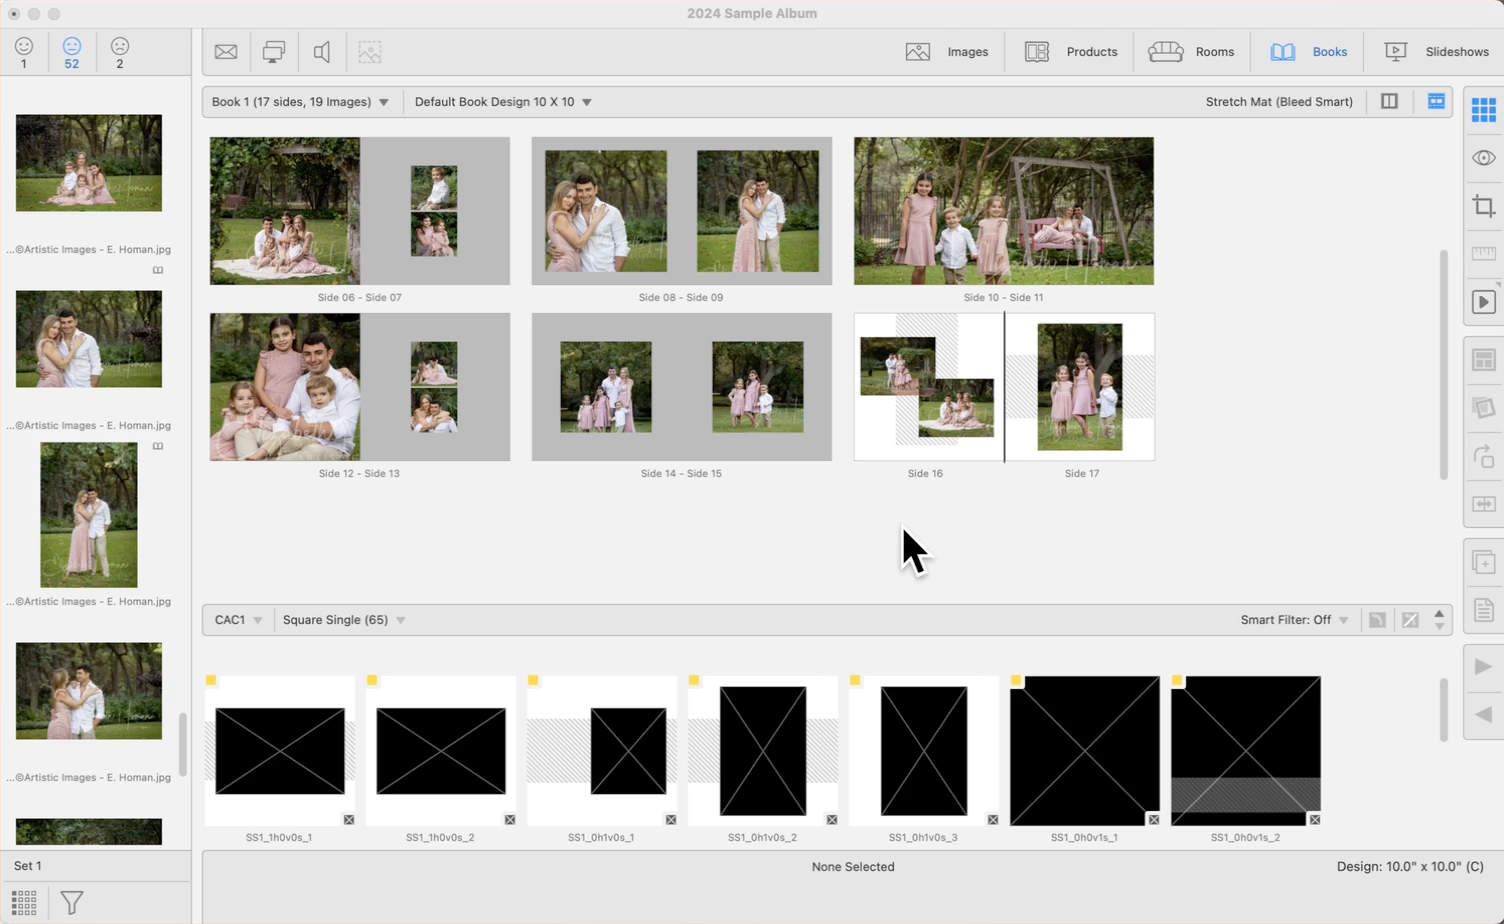
A fillet is essentially a small frame used within a mat or virtual style. Before using a fillet frame in ProSelect, it must be added to the Frames folder, click on Managing Frames to learn more.
- Select which mat layer you want to set to a fillet (using the tabs at the top).
- Choose "Fillet" as the edge type.

- The Select Frame dialog will open. Here, frames wider than 0.875 inches (23mm) are hidden by default but can be shown by unchecking the "Hide large frames" box.
- Browse through the list and click on a frame to preview it. The frame's width, which affects the overall mat sizing, is specified in the frame image’s filename.
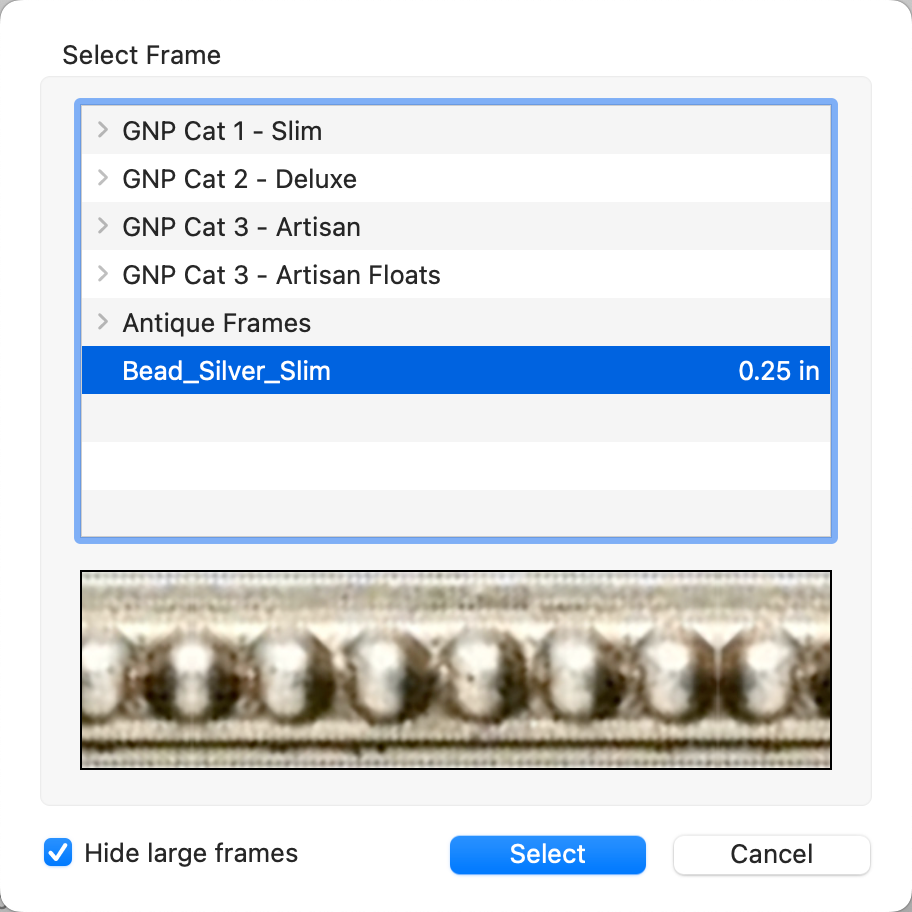
- Click the Select button.
- The fillet is applied to the "inside" of the selected mat layer, with all remaining mat layers adjusting for the size of the fillet. The overall width of the mat is not affected.
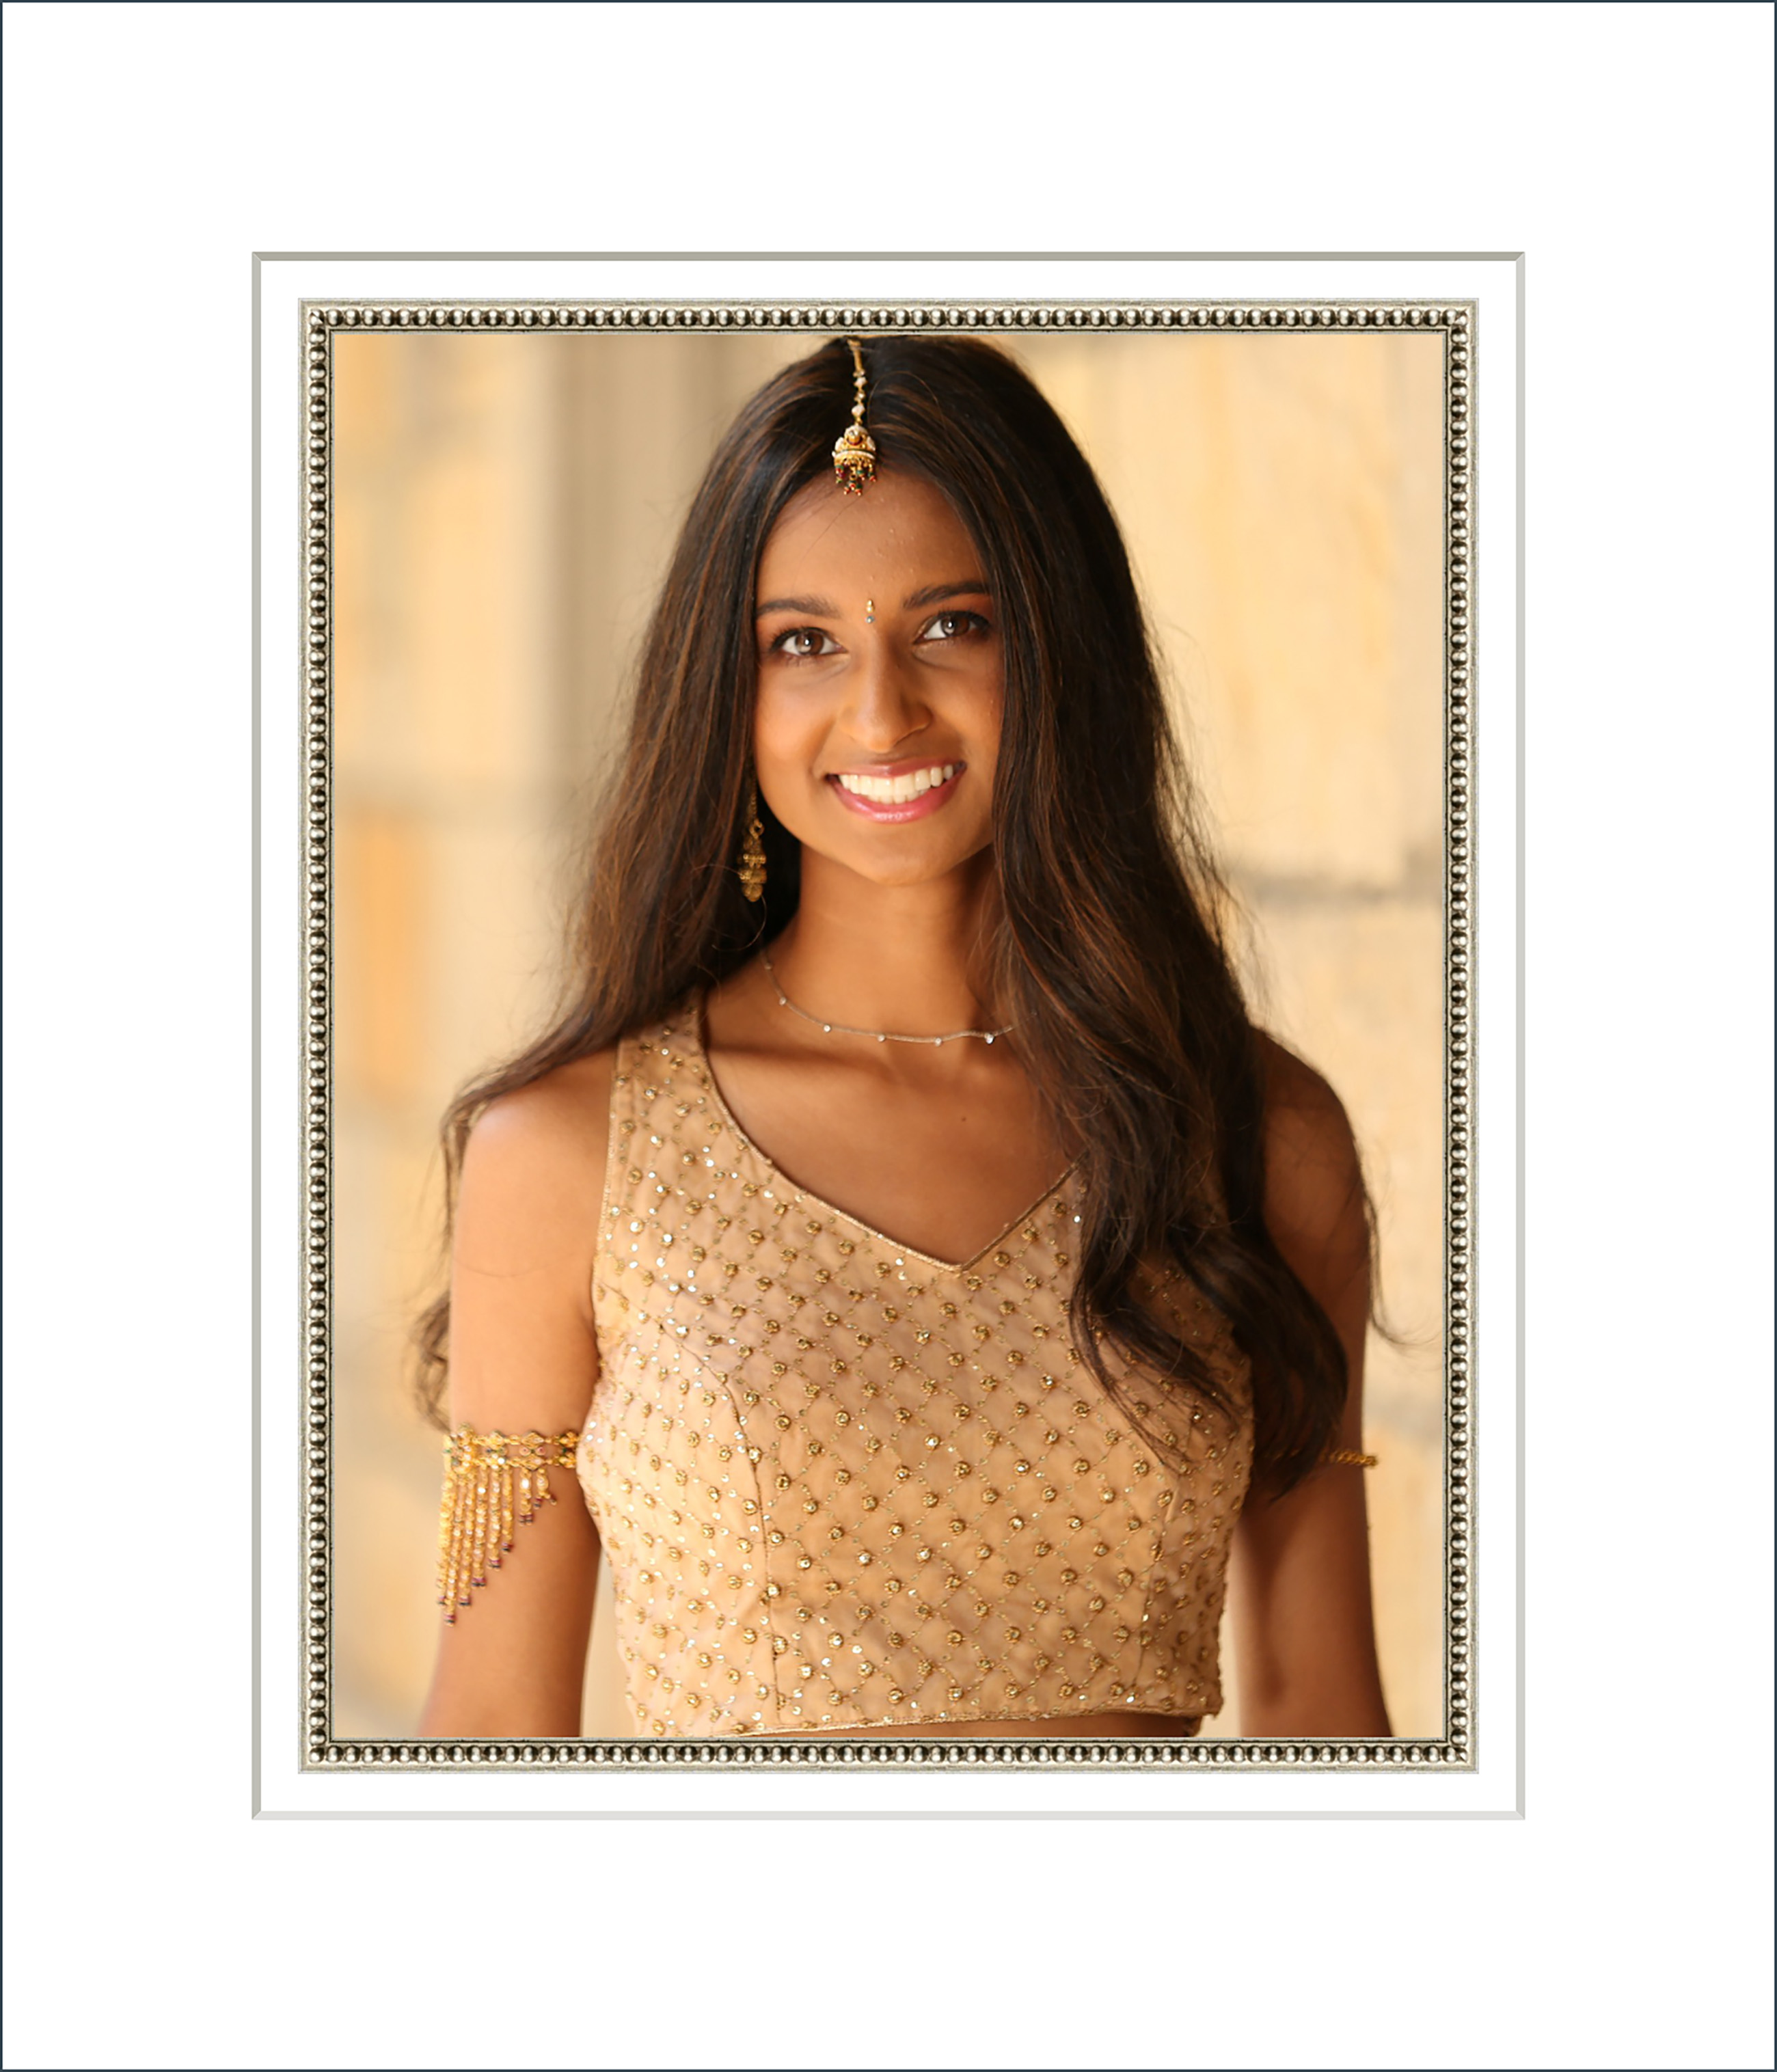
- If the designated overall mat width or reveal size is too small to accommodate the fillet frame, a warning will be displayed in the Preview area, indicating the need for adjustments.
When designing mats and virtual styles, obtaining a precise color or texture match can often be done using samples available on a supplier's website. You then have the advantage of closely matching the exact color or texture of the mat you intend to offer.
- Not all mat colors are available in all sizes. Be sure to check available sizes.
- Always check which mats your Supplier is carrying. Not all options may be available.
- Note that devices display colors differently. The match may be close, but not exact.
- Be cautious with textures. Using a small original image, like a 3"x3" sample, can lead to magnification issues when expanded to larger sizes, such as 24"x30". The texture may appear overly enlarged and not display as intended.
- Identify a Supplier: Start by selecting a mat supplier. Notable manufacturers like Crescent and Bainbridge offer a wide variety of mats and provide resources online.
- Visit the supplier's website to explore different mat options. Look for sections where you can browse mat boards to find various textures and patterns.
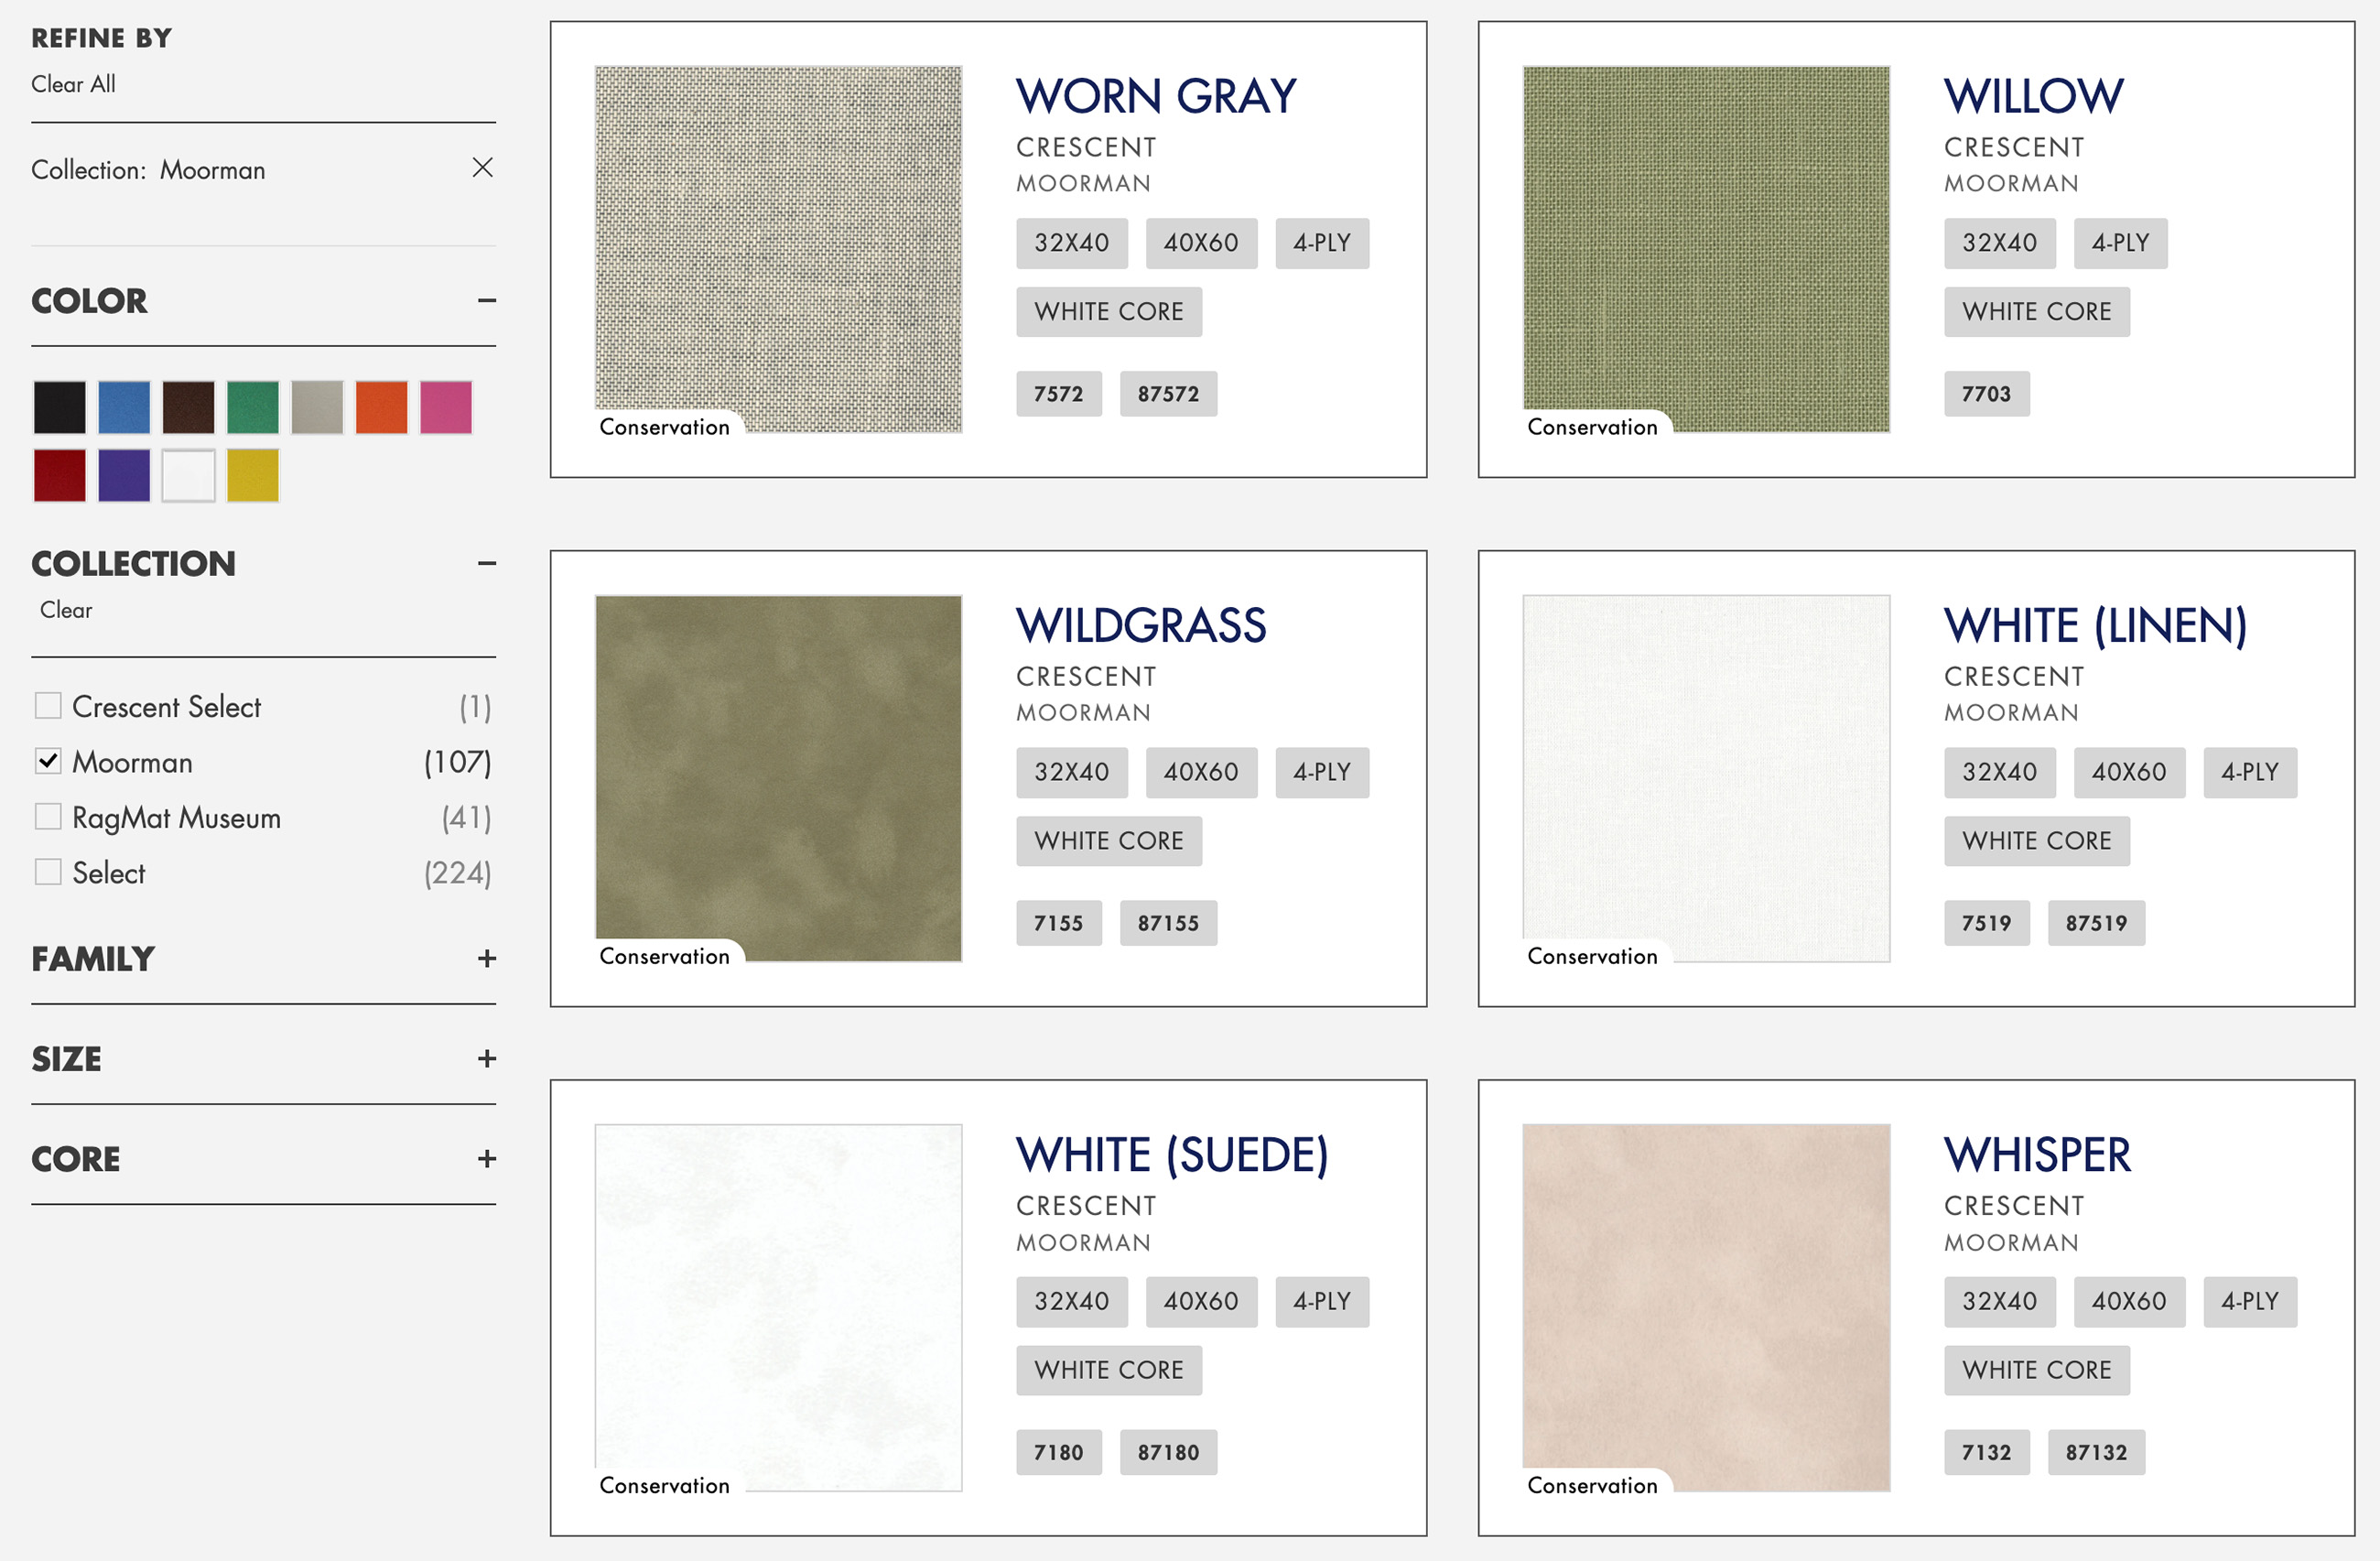
- Consider the Texture and Size: Be cautious with textures, as they can appear overly magnified in larger mats if the original image is small (like a 3-inch section expanded to a 24x30 mat). Suppliers sometimes provide images at a 1200x1200 resolution, which generally works well for mat backgrounds.
- Download Images: If available, download mat images directly from the supplier’s website.
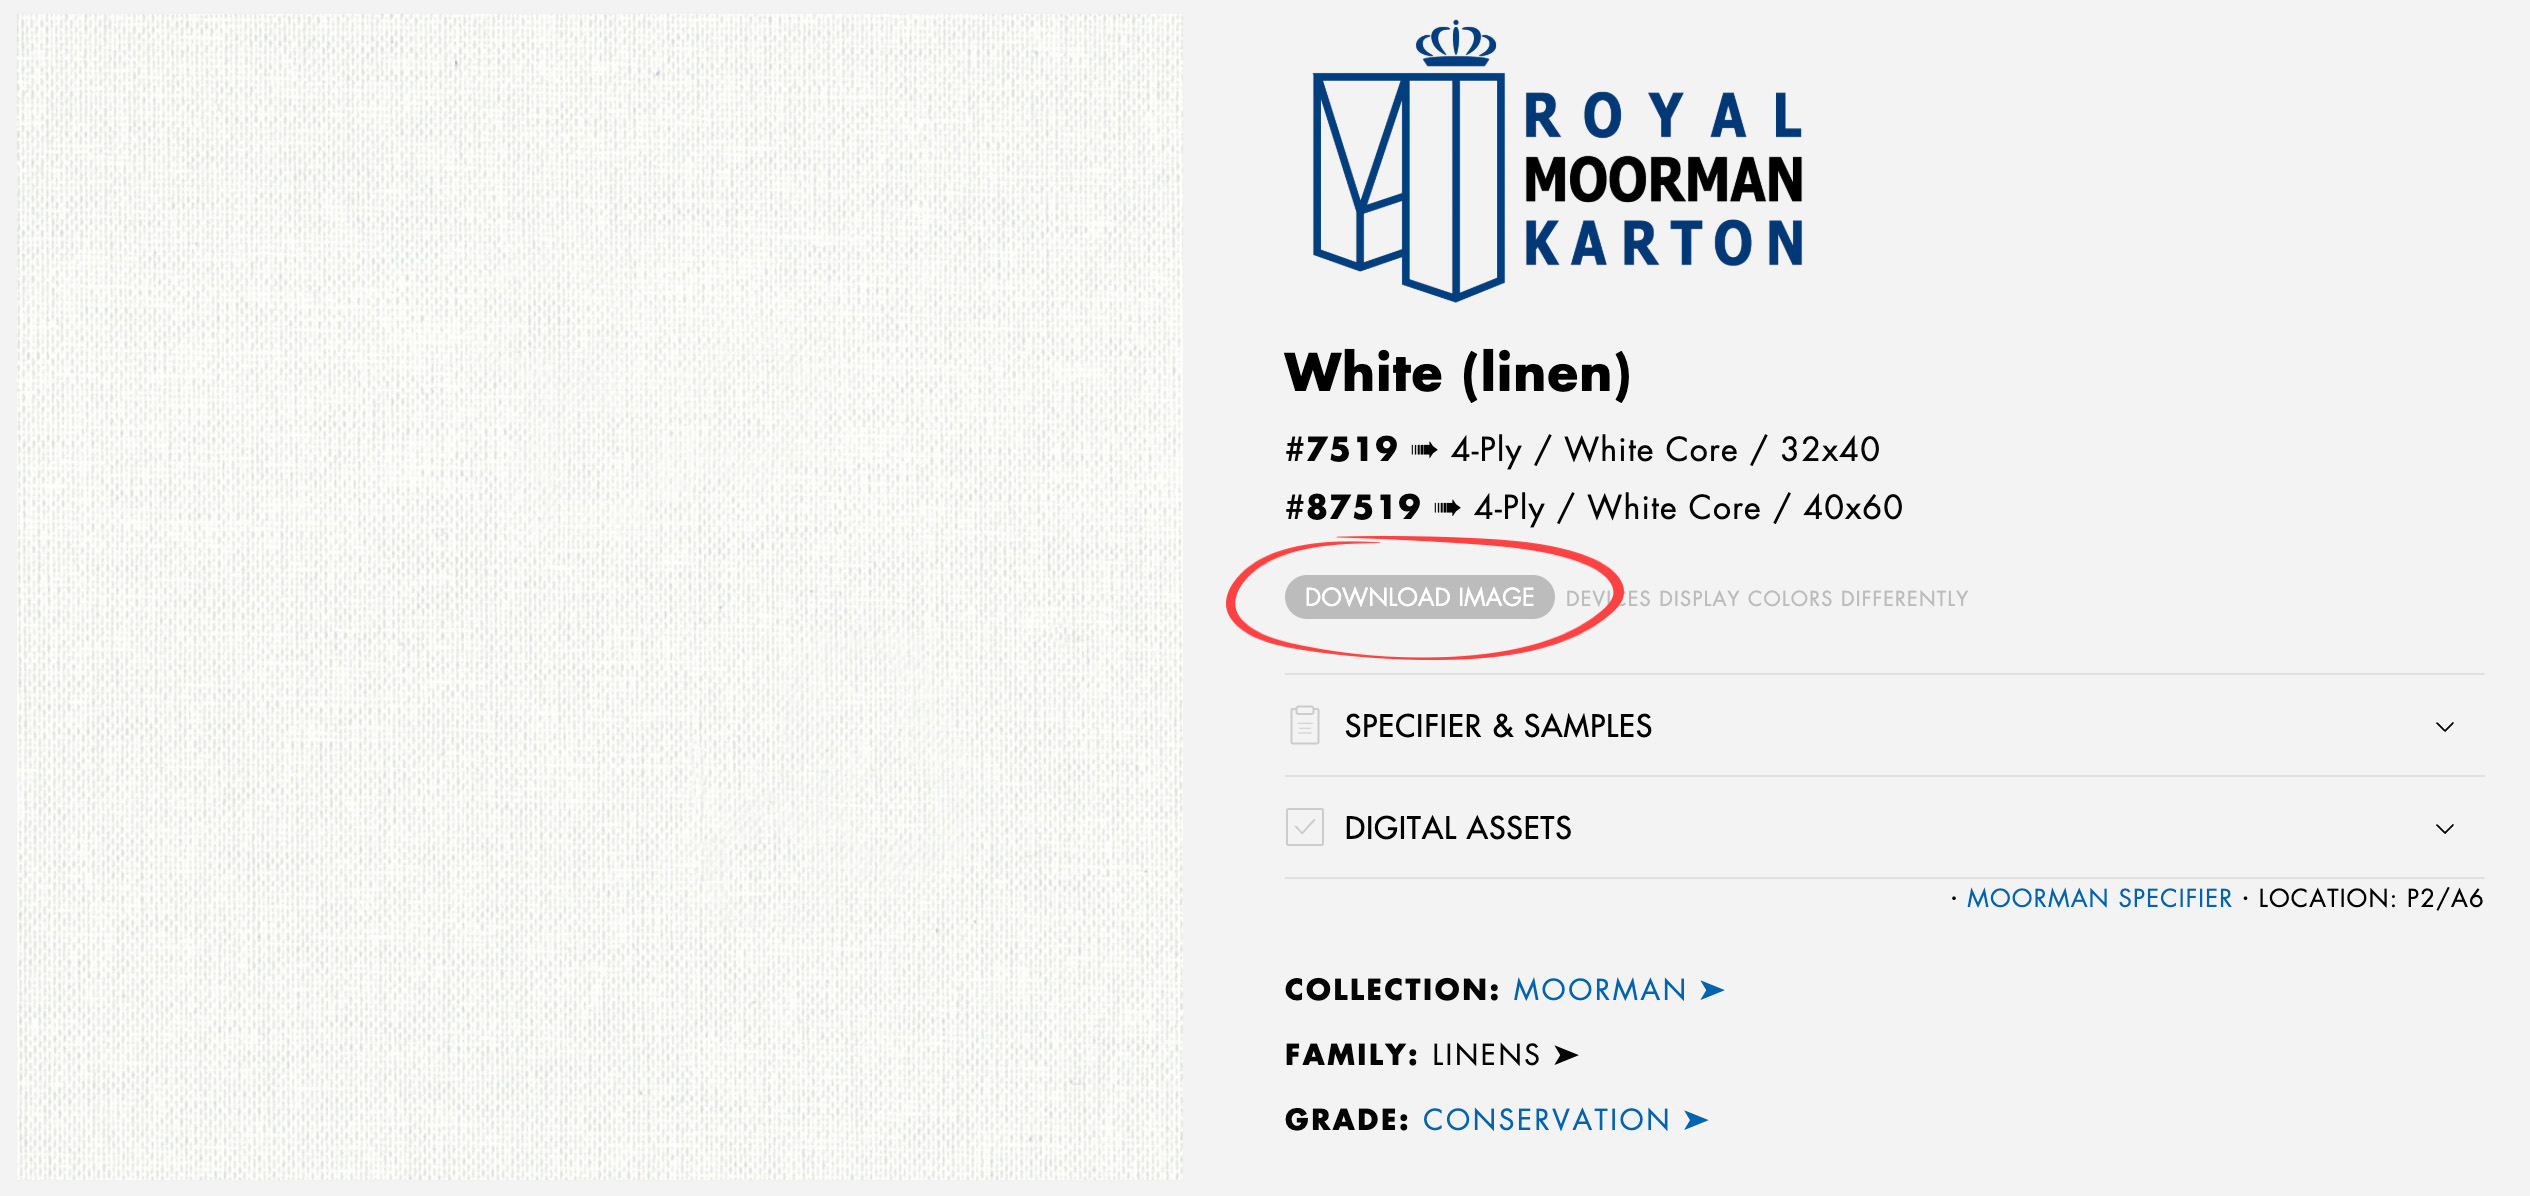
- Once you have a JPEG image file, you can follow the steps to create a mat or virtual style using an image file.
- In the Design Details area of the Mat & Style Designer, select "image" for the background.
- Add the JPEG file you just downloaded and select it.
- You can now complete the new design you have created.
- Alternatively, you can copy the mat image from the supplier's website and work with it in Photoshop.
- Open the downloaded mat image in Photoshop.
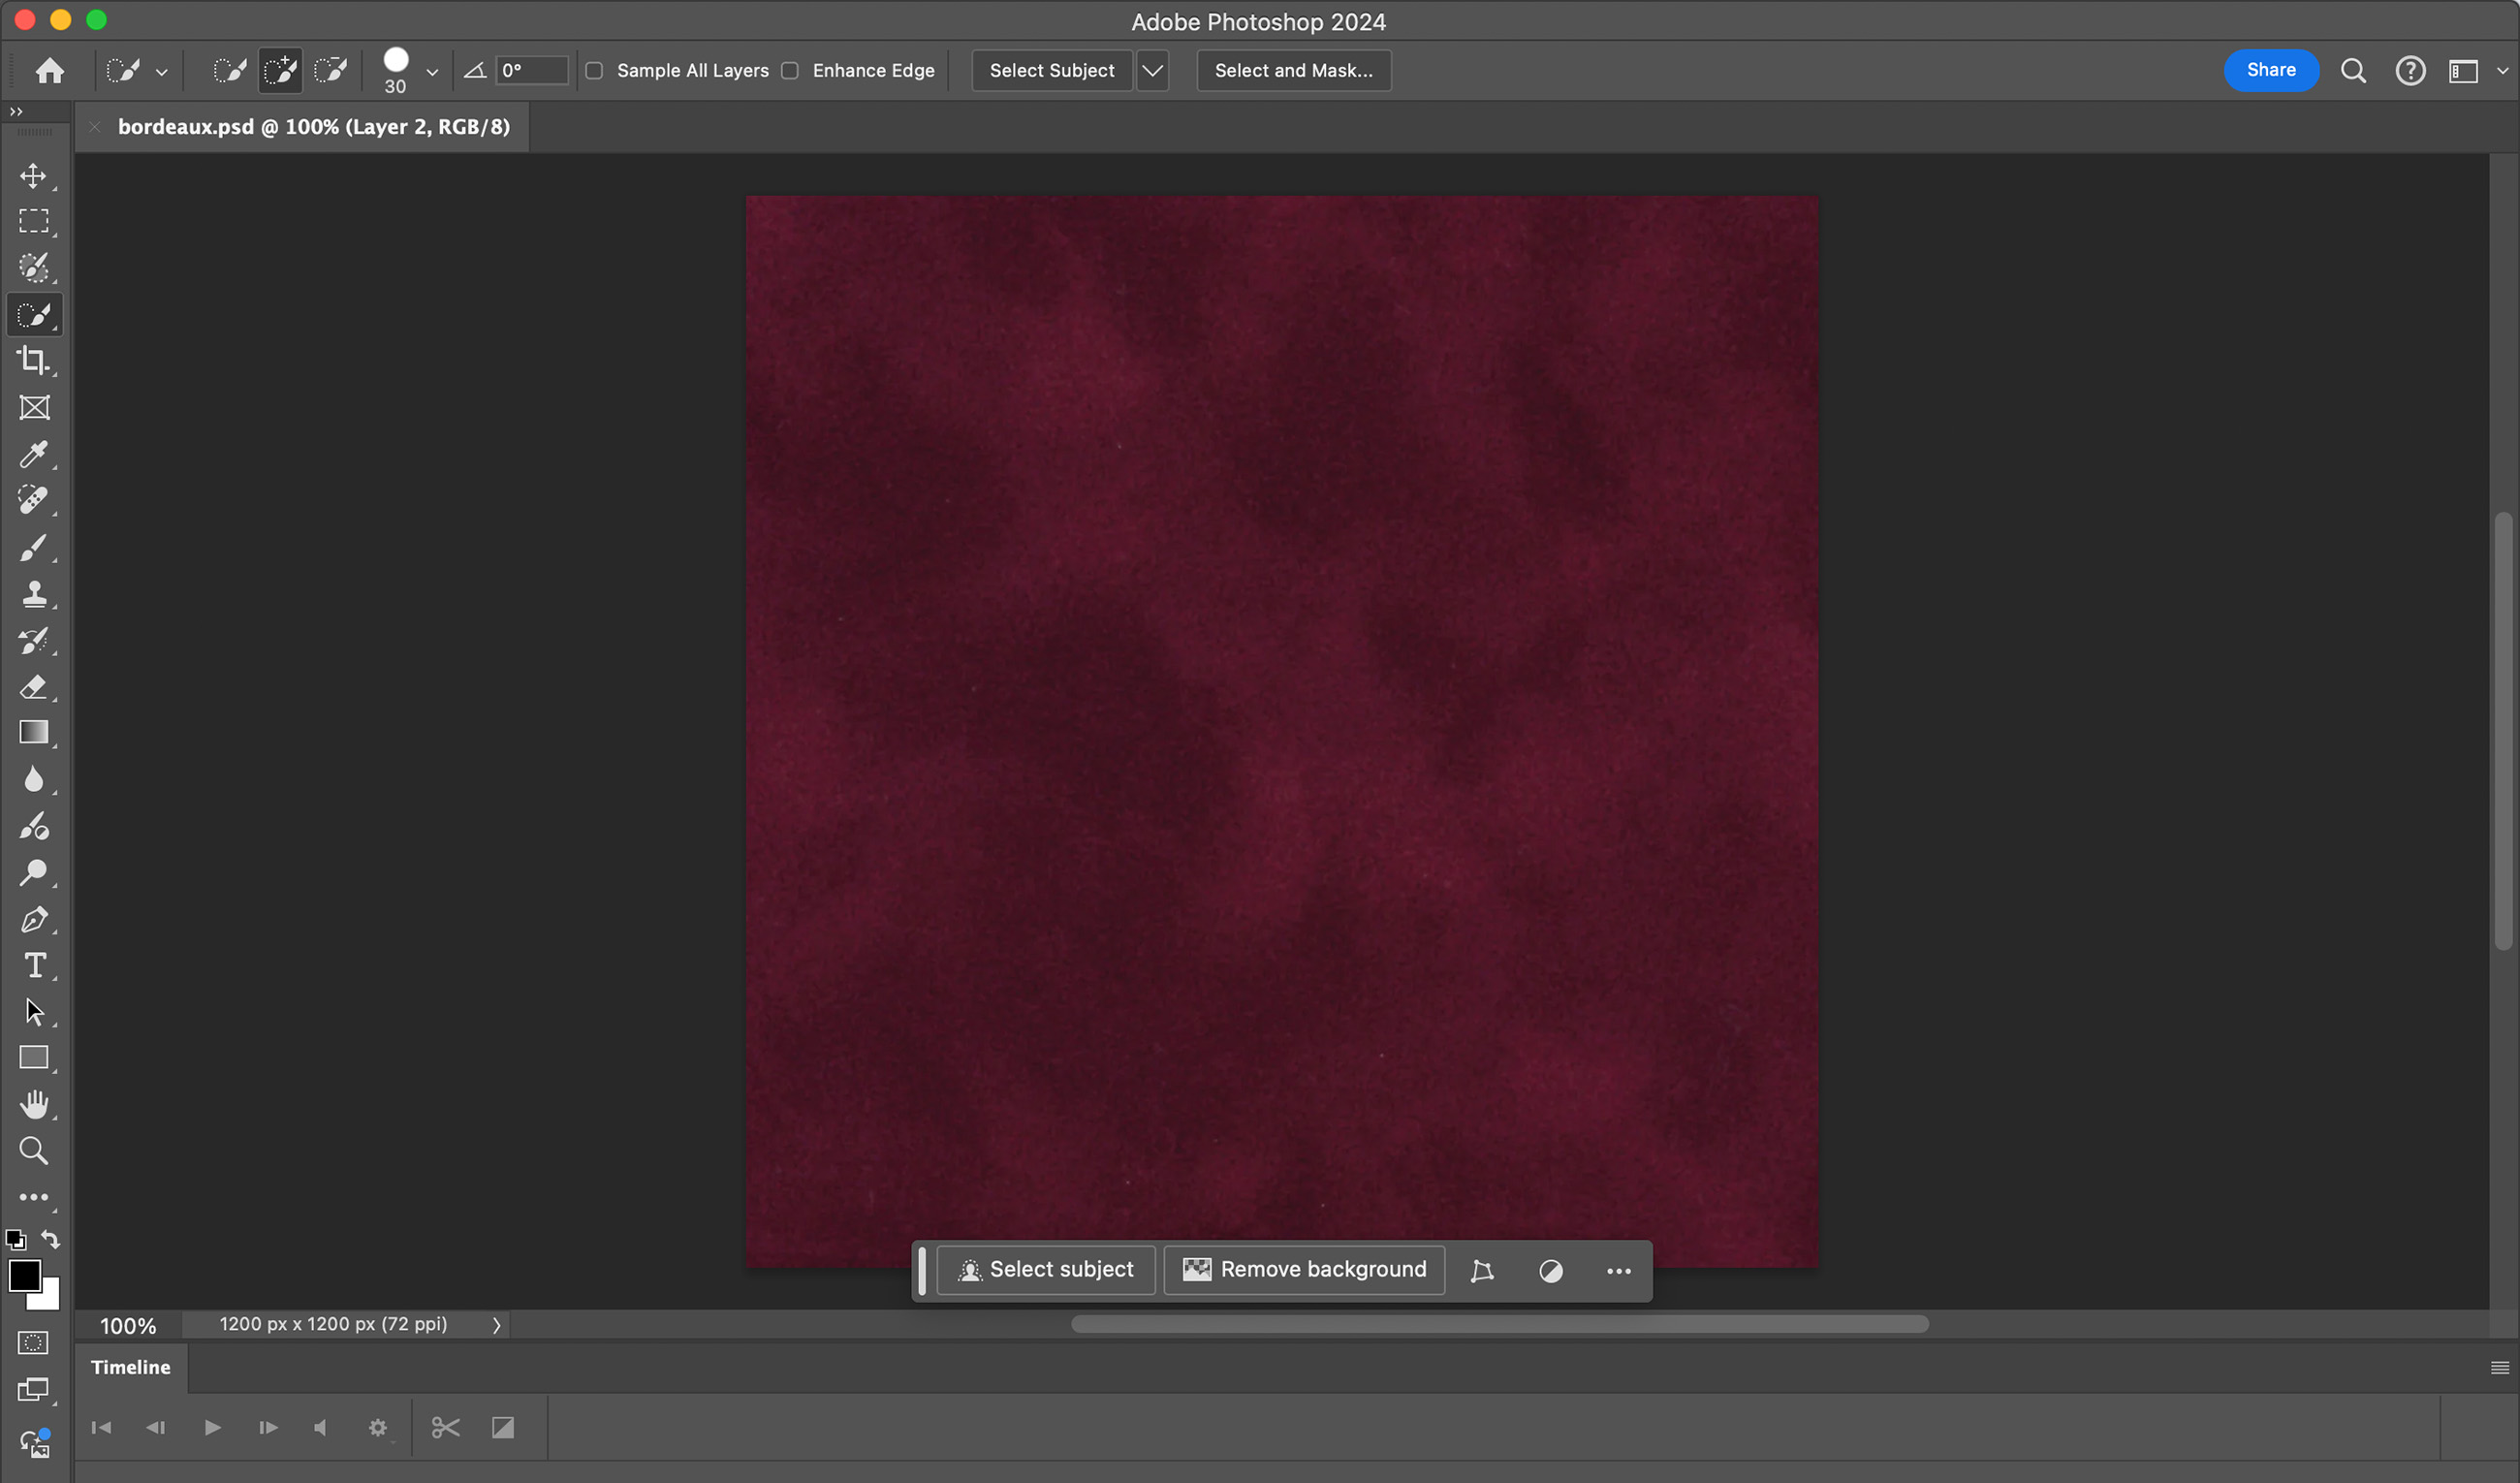
- Save the mat image as a .PNG or .JPG file. Once saved, you can use the image file just like you would in step 4.
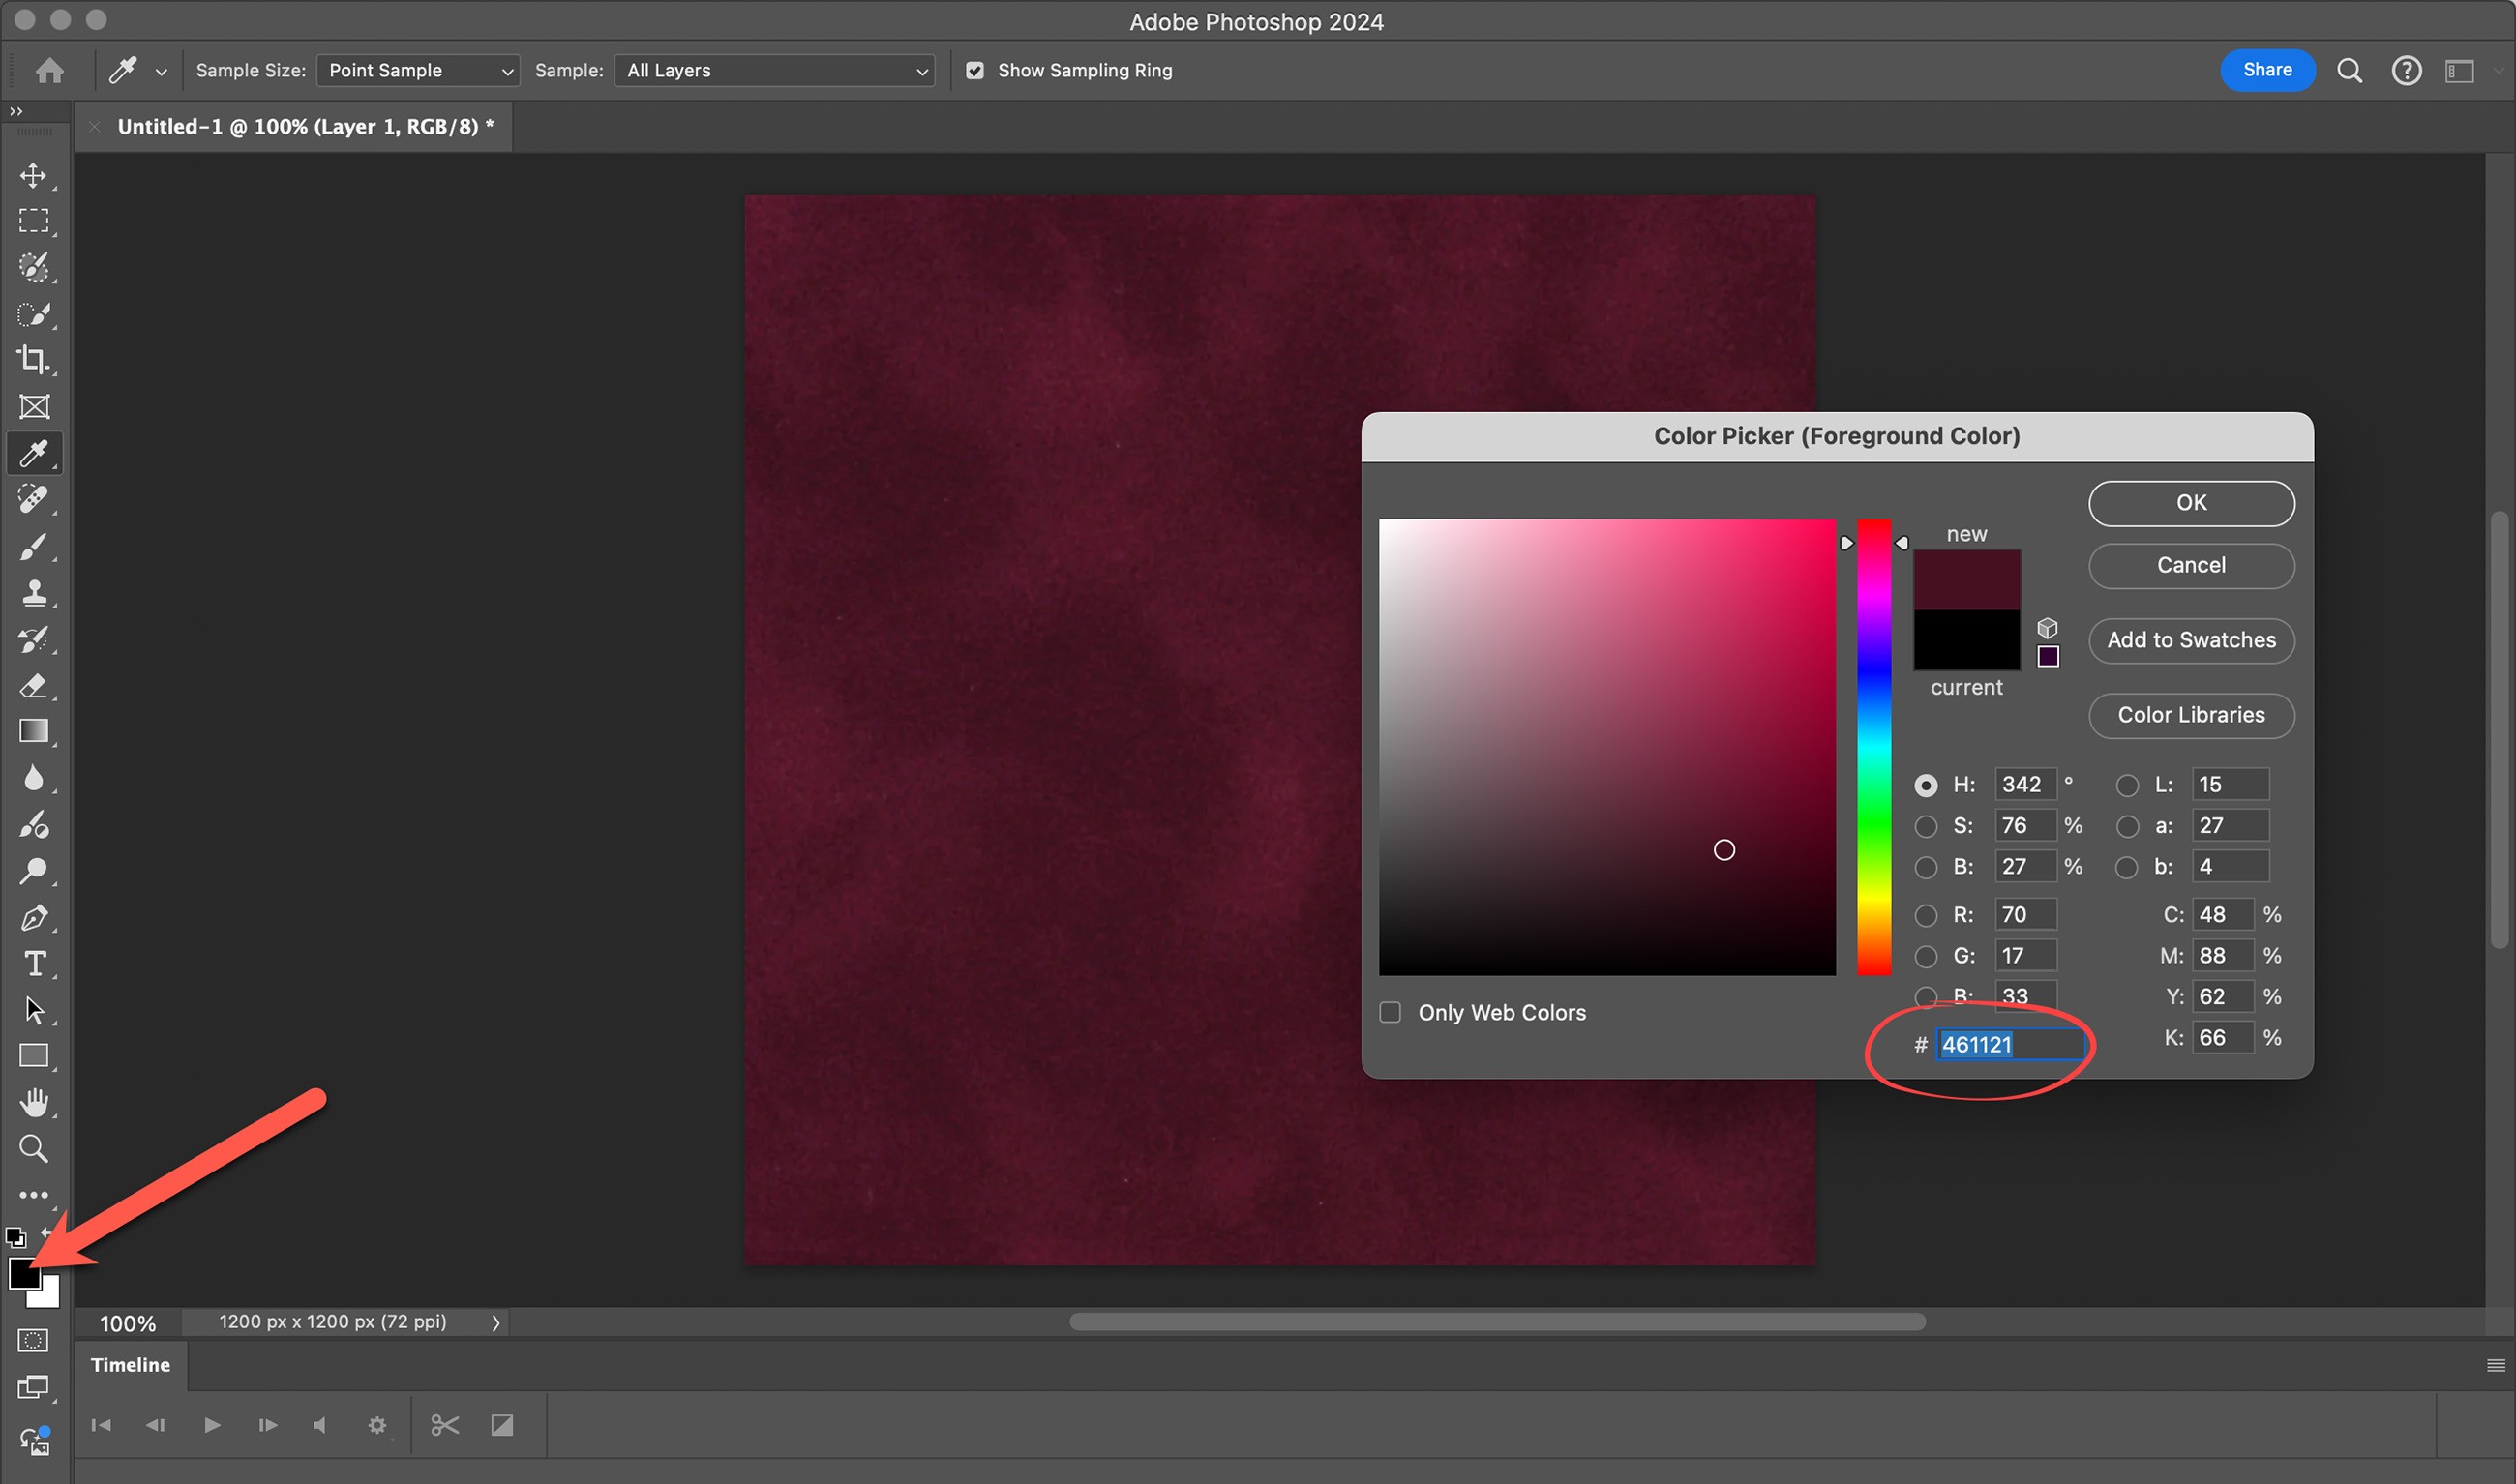
- Alternatively, you can use Photoshop to create a solid color mat by sampling the color from the image and creating a new layer filled with this color. This works well when you need a solid colored mat, or a mat with negligible texture variation.
- Click on the "foreground color" tool.
- Select the color picker.
- Click on the mat image.
- Copy the Photoshop color number.
- Navigate to the Mat & Style Designer in ProSelect.
- Select "Color" as the background, and paste the Photoshop color number into the box.
