 Working with Images - Introduction
This working with mode is your main workspace for handling individual images. Here, you can perform various tasks such as adding, removing, selecting, rearranging, rotating, cropping, comparing images, and applying effects.
- When images are first loaded into a ProSelect album, they appear in Working with Images.
- Images can be moved or rearranged using the "Yes", "Maybe", and "No" tabs.
- Star ratings can be applied.
- Favorite images can be flagged using the "F" key on your keyboard.
- Discourage screen capturing by overlaying a protective stamp using the Protect Images Stamp.
- Images can be adjusted using the tools along the right-hand side of the display area.
- Compare images side-by-side to evaluate differences or make selections based on direct comparison.
- Use Image Sets to organize images into groups.
- Apply adjustments to enhance images, such as converting to black and white, adjusting brightness/contrast, or applying custom effects.
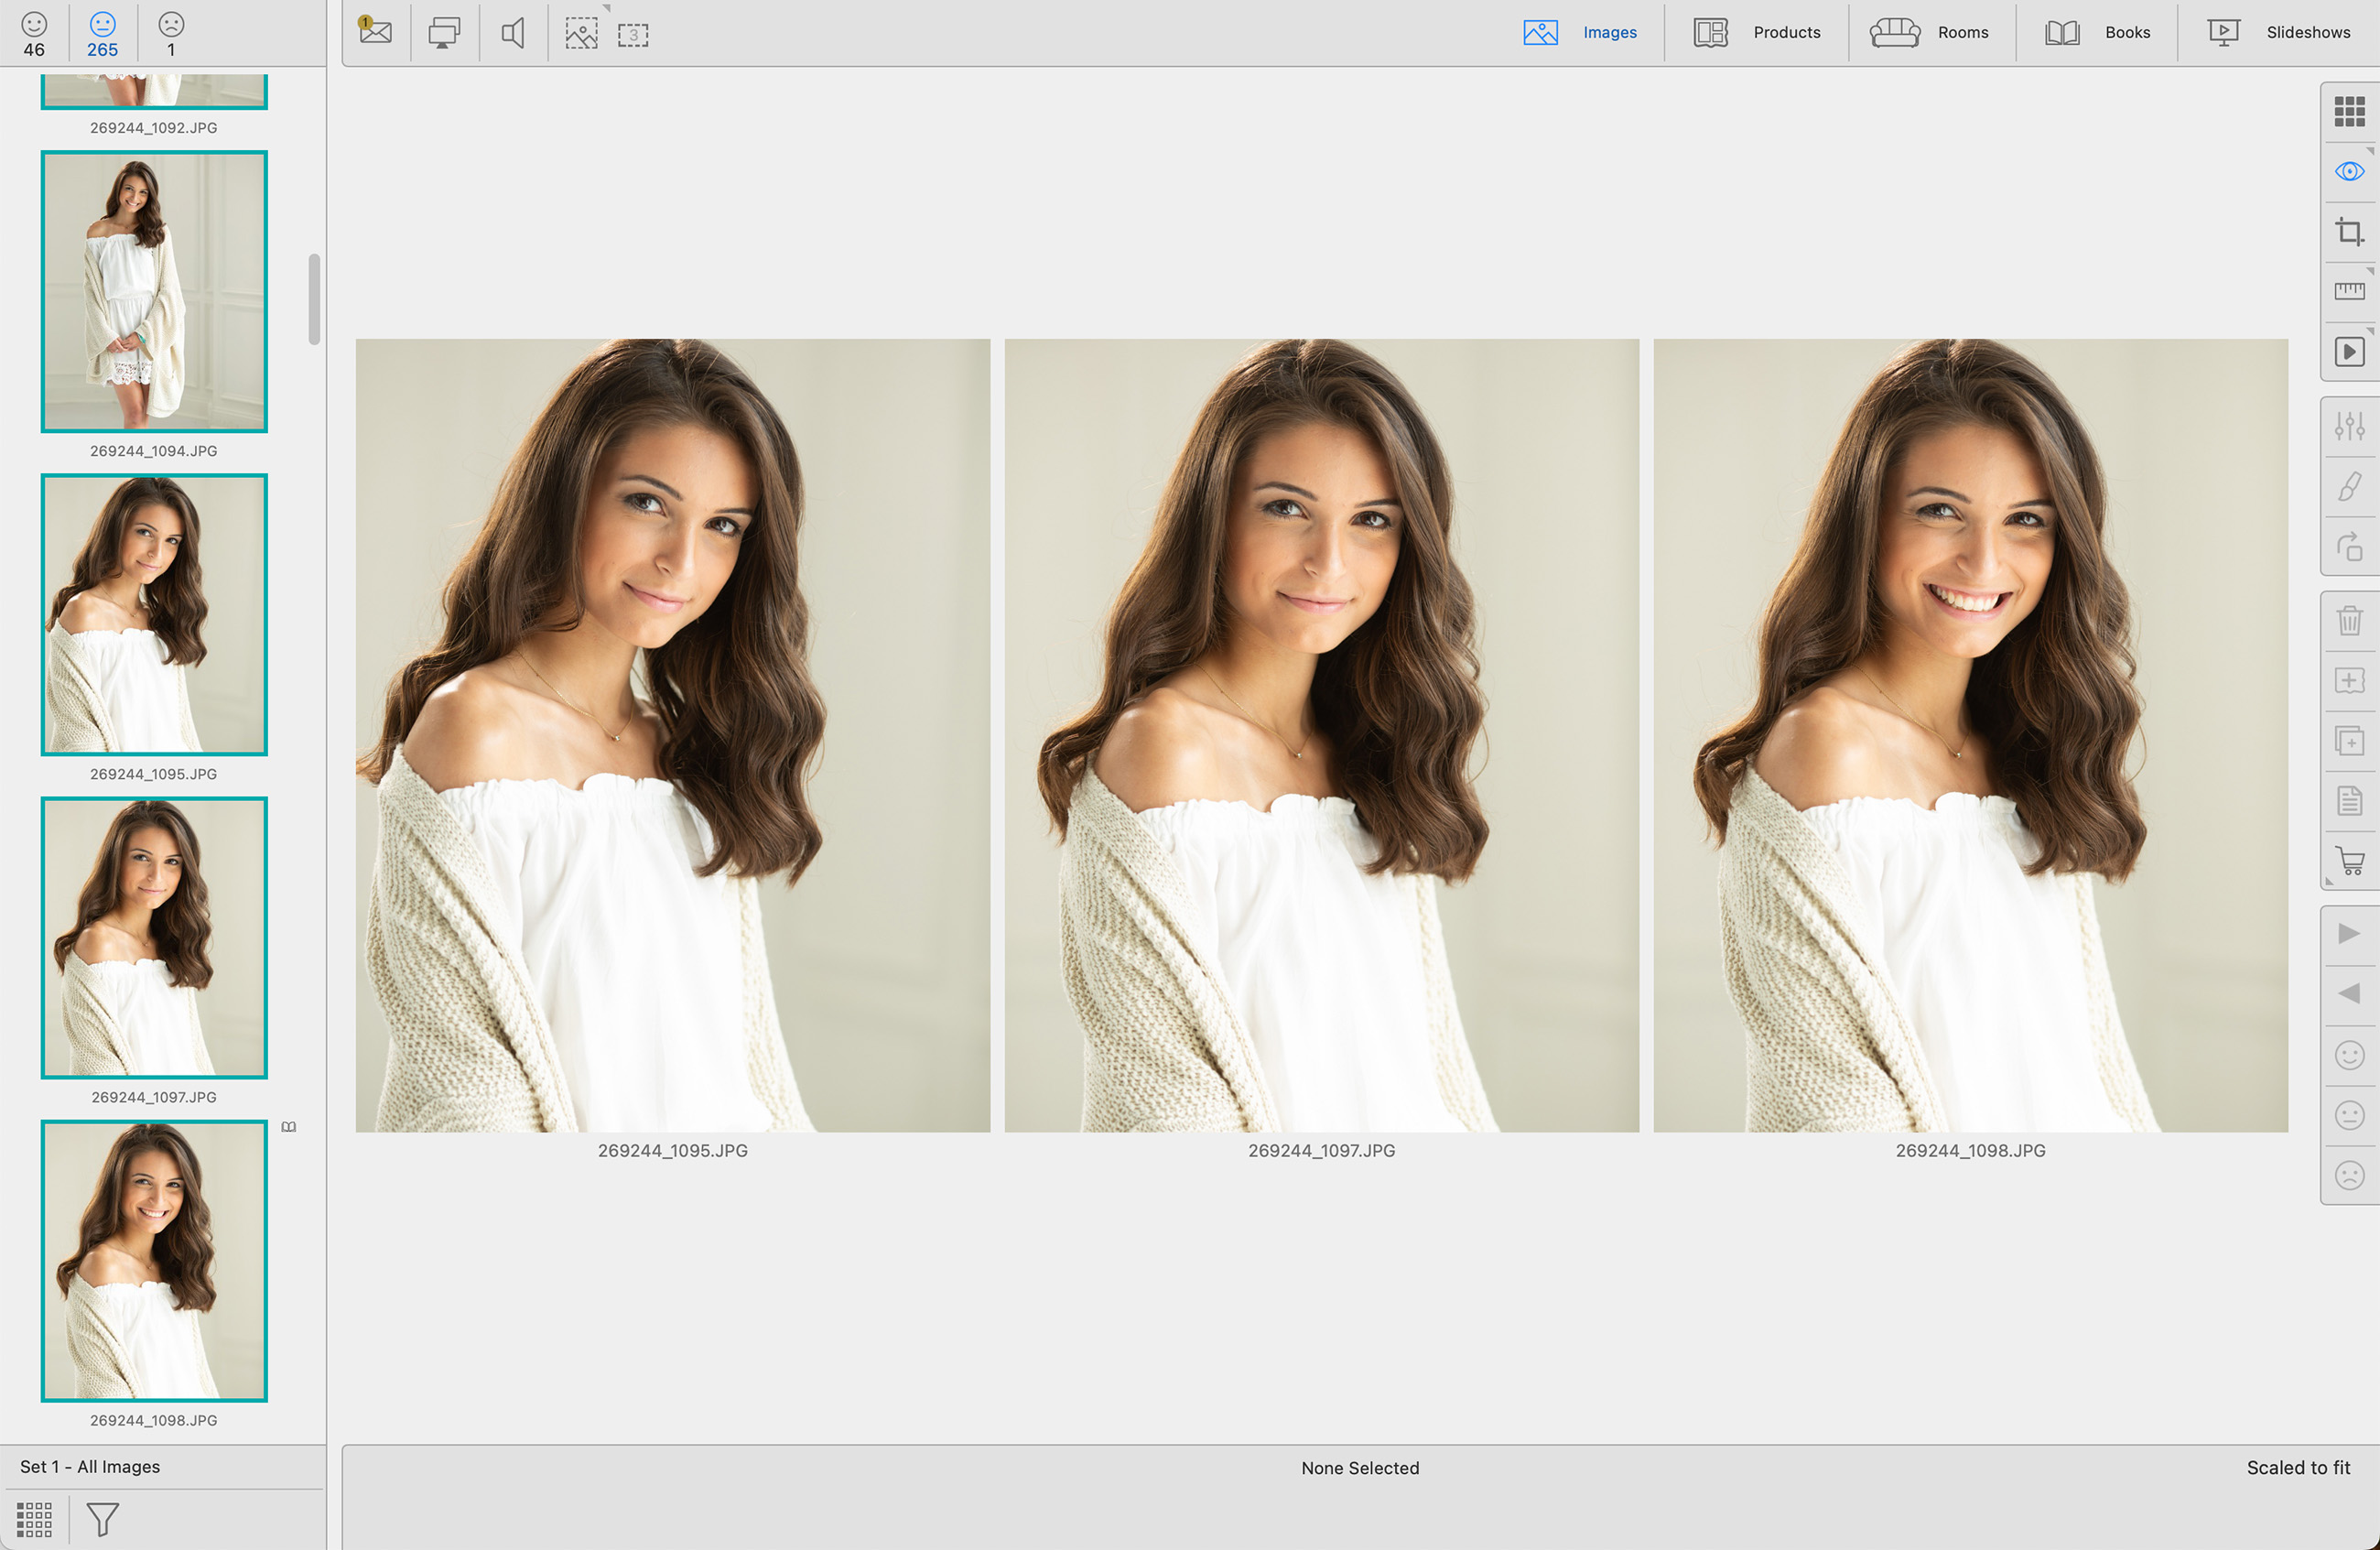
ProSelect has a straightforward Yes, Maybe, or No selection system for organizing images. These are indicated by the three face tabs located at the top of the Image List. By default, imported images are added to the Maybe tab. However, you have the option to change this setting so that they always load into the Yes, No, or currently selected tab. On the top menu, go to ProSelectEdit > Settings > Importing Images > Adding Images.
![]() Yes
Yes
![]() Maybe
Maybe
![]() No
No
- Click on one of these faces to select which group of images you wish to work with.
- The number of images in each tab is listed below the face.
- Images can easily be moved between the tabs by first selecting an image (or multiple images) in the Display Area and clicking on the face tabs in the toolbar (right-hand side of the Display Area).
- You can also use the keyboard shortcuts "1" for the Yes Tab, "2" for the Maybe Tab, and "3" for the No Tab.
- Remove the "No" tab images from the album by going to the top menu, Images > Remove "No" Tab Images.
Additional Tabs
When Working with Products and Rooms, the Products tab will be available on the image list. When Working with Slideshows, your room designs are also listed in a separate Rooms tab.
![]() Products - This tab lists all of the album products. You can drag a product from this list into a room.
Products - This tab lists all of the album products. You can drag a product from this list into a room.
![]() Rooms - This tab lists all of the album rooms. You can drag a room from the list into a slideshow.
Rooms - This tab lists all of the album rooms. You can drag a room from the list into a slideshow.
Hide Tab Counts
The number of images/products in each tab is listed underneath. You can hide the tab count by going to the top menu, ProSelectEdit > Settings > Display > Calibration & Options > Image List.
By default, the image list has one column of thumbnails. You can expand this by using the Image Width tool ![]() . The maximum number of columns permitted is determined by the main window size and your selected thumbnail image size.
. The maximum number of columns permitted is determined by the main window size and your selected thumbnail image size.
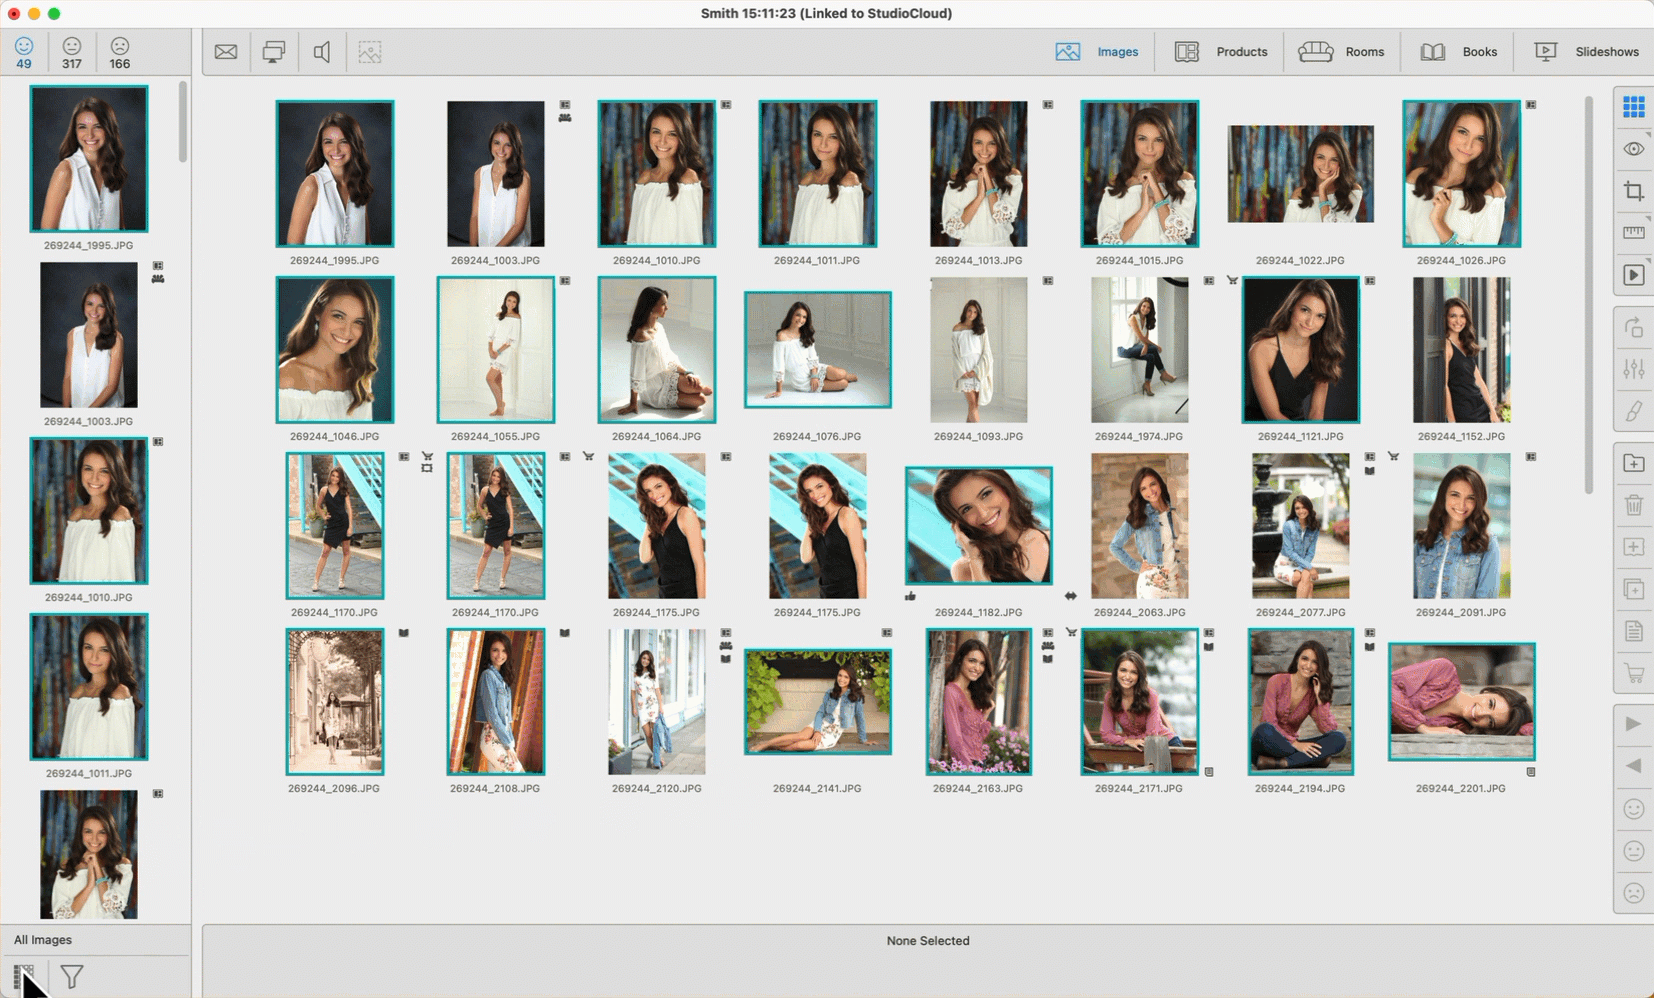
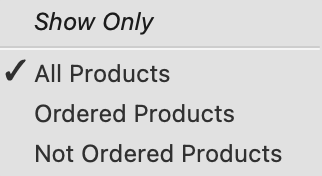
The Image Filter is turned off by default, so the Image List displays all content from the currently selected tab. Clicking the Filter tool will open a menu, allowing you to display only a chosen group of items in the Image List. Filtering can be especially useful if you have an album with a large number of images. It can also make book building more efficient: simply filter out the images you have already used in the book.
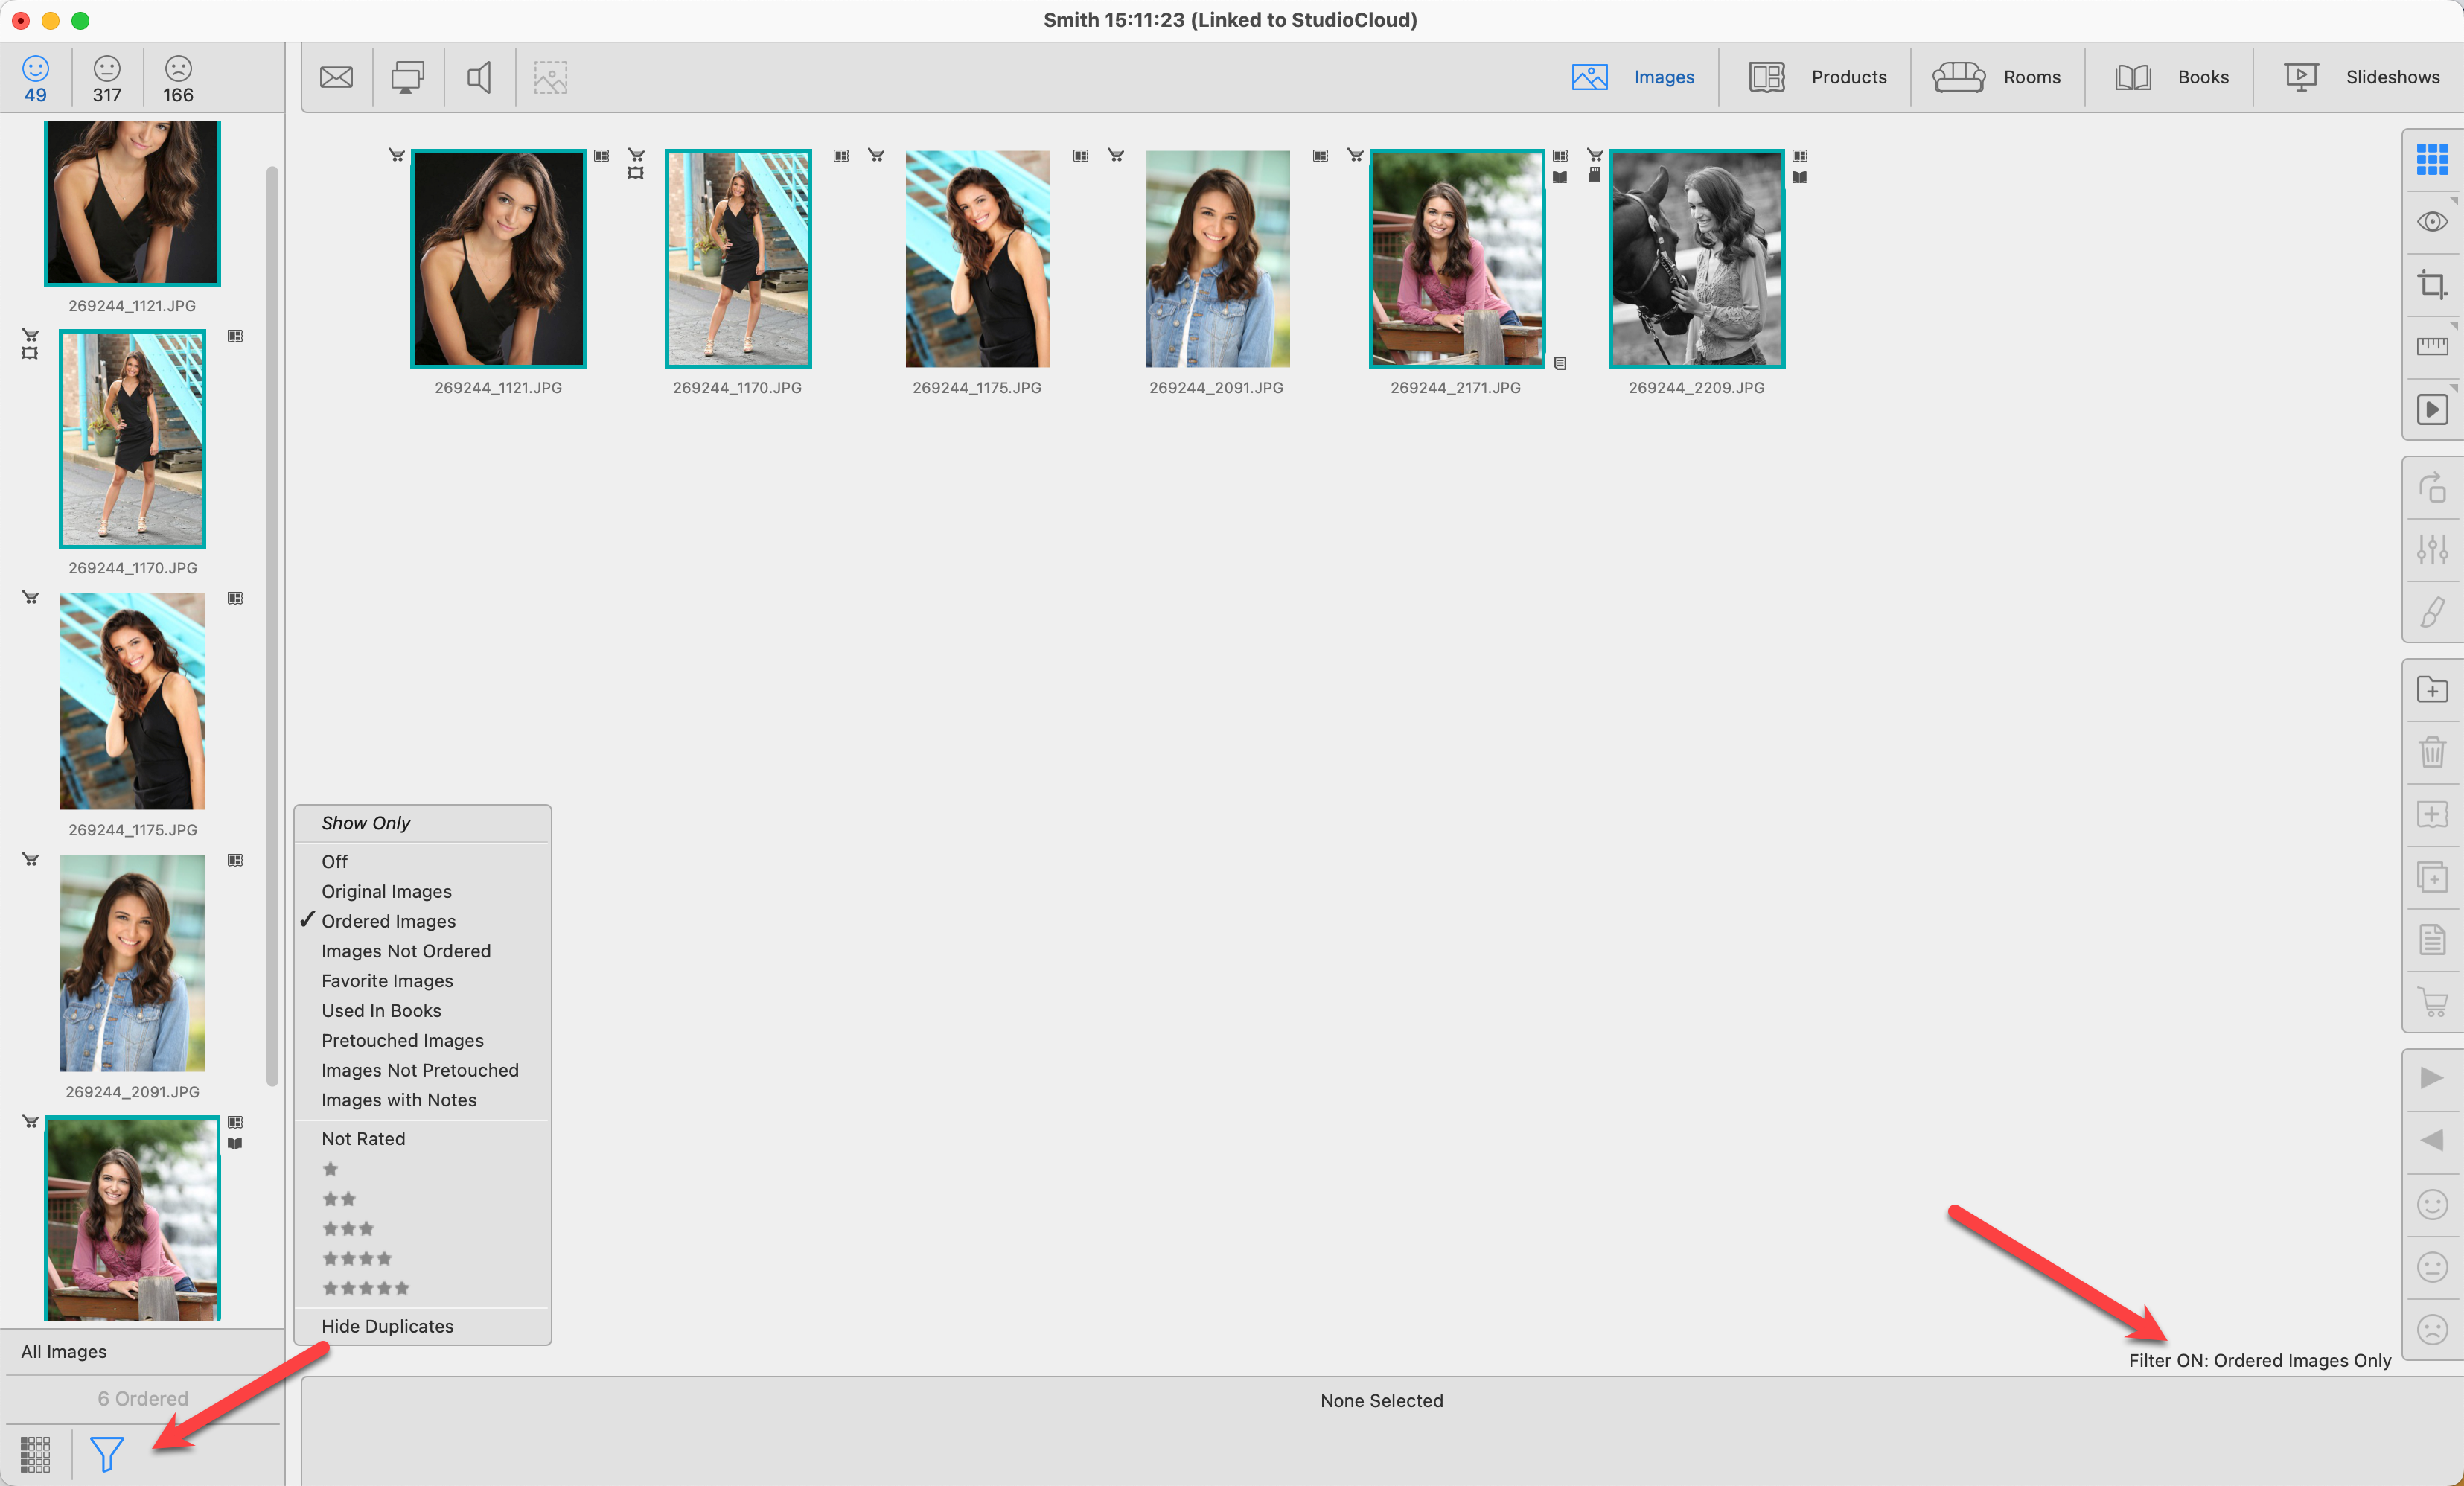
- When the filter is turned on, the tool is highlighted.
- The filter type and the number of filtered items are shown on the line above the filter tool.
- In Thumbnail view, the applied filter type is shown in the bottom right corner of the Display Area.
- Your current Filter selection for each area is saved when moving between working with modes and when choosing different tabs.
- If you have also checked "Hide Duplicates," then only the Original images will be shown.
- To turn filtering off, select "Off" or go to the top menu, View > Turn Off All Image List Filters.
The filters vary based on whether you are on the Yes/No/Maybe tabs or the Products tab and your current working with mode. The following filter options are available when using the Yes/No/Maybe tabs:
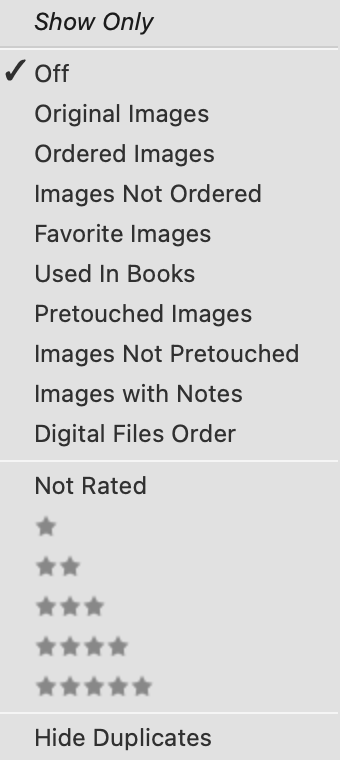
When you have the Products tab selected, the following filter options are available:
In ProSelect, you can mark selected images and products as favorites either through the Edit menu or by using the "F" keyboard shortcut. Once images have been selected as a favorite, you can optionally include the favorites stamp when exporting sample images, products, and slideshows. You can customize the appearance of favorite stamps, and designate which stamp to use for your favorites in the Setup Stamps, Watermarks & Logos dialog.
You can choose between one of the ProSelect default stamps, or create your own.
ProSelect default favorite stamps
Setup Your Favorites Stamp
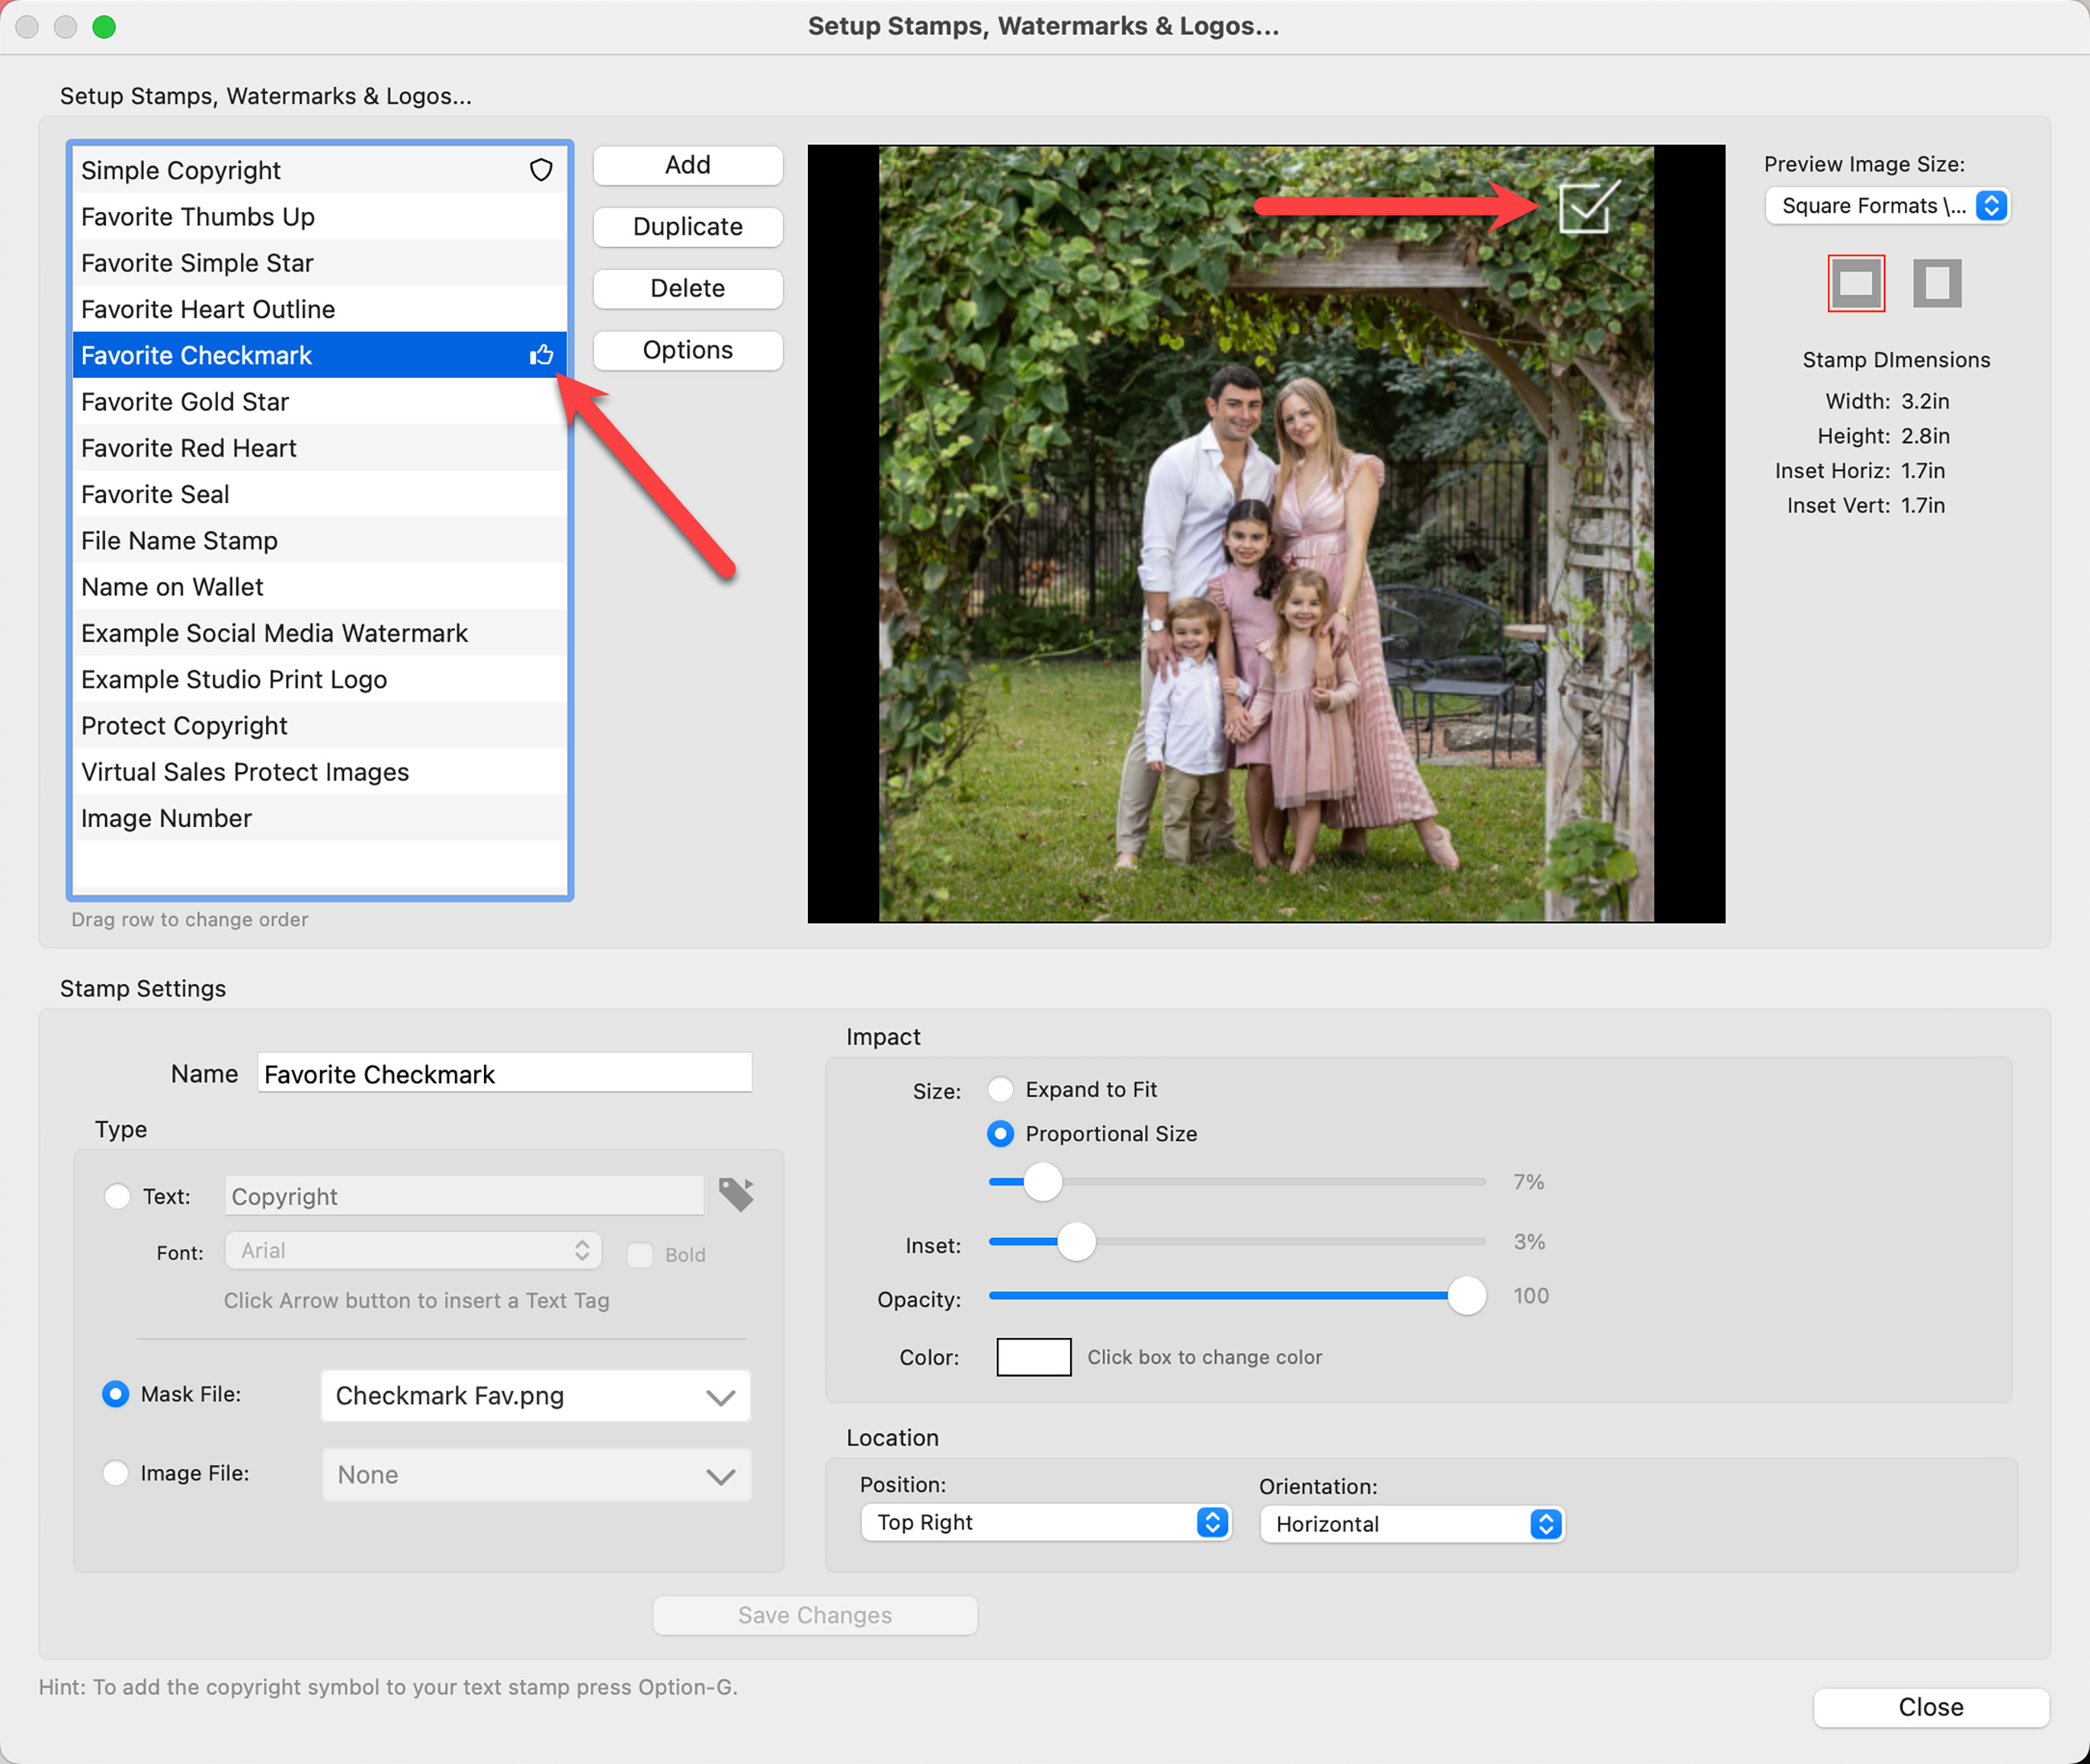
- Go to the top menu, Resources > Setup Stamps, Watermarks & Logos.
- Select the stamp you wish to use as your "favorites" stamp from the list.
- Customize the impact (size and opacity) as well as the location.
- Click on the Options button.
- Select "Set as Favorites Stamp" from the options list.
- A thumbs up tag
 will appear next to the stamp you have selected as your favorites stamp.
ProSelect Main Display
For full-sized images, the favorites stamp will display exactly as configured in your setup. When viewing thumbnails, a thumbs up tag ![]() serves as the tag to indicate favorites. This tag appears on the bottom left corner of all thumbnails that are marked as favorites.
serves as the tag to indicate favorites. This tag appears on the bottom left corner of all thumbnails that are marked as favorites.
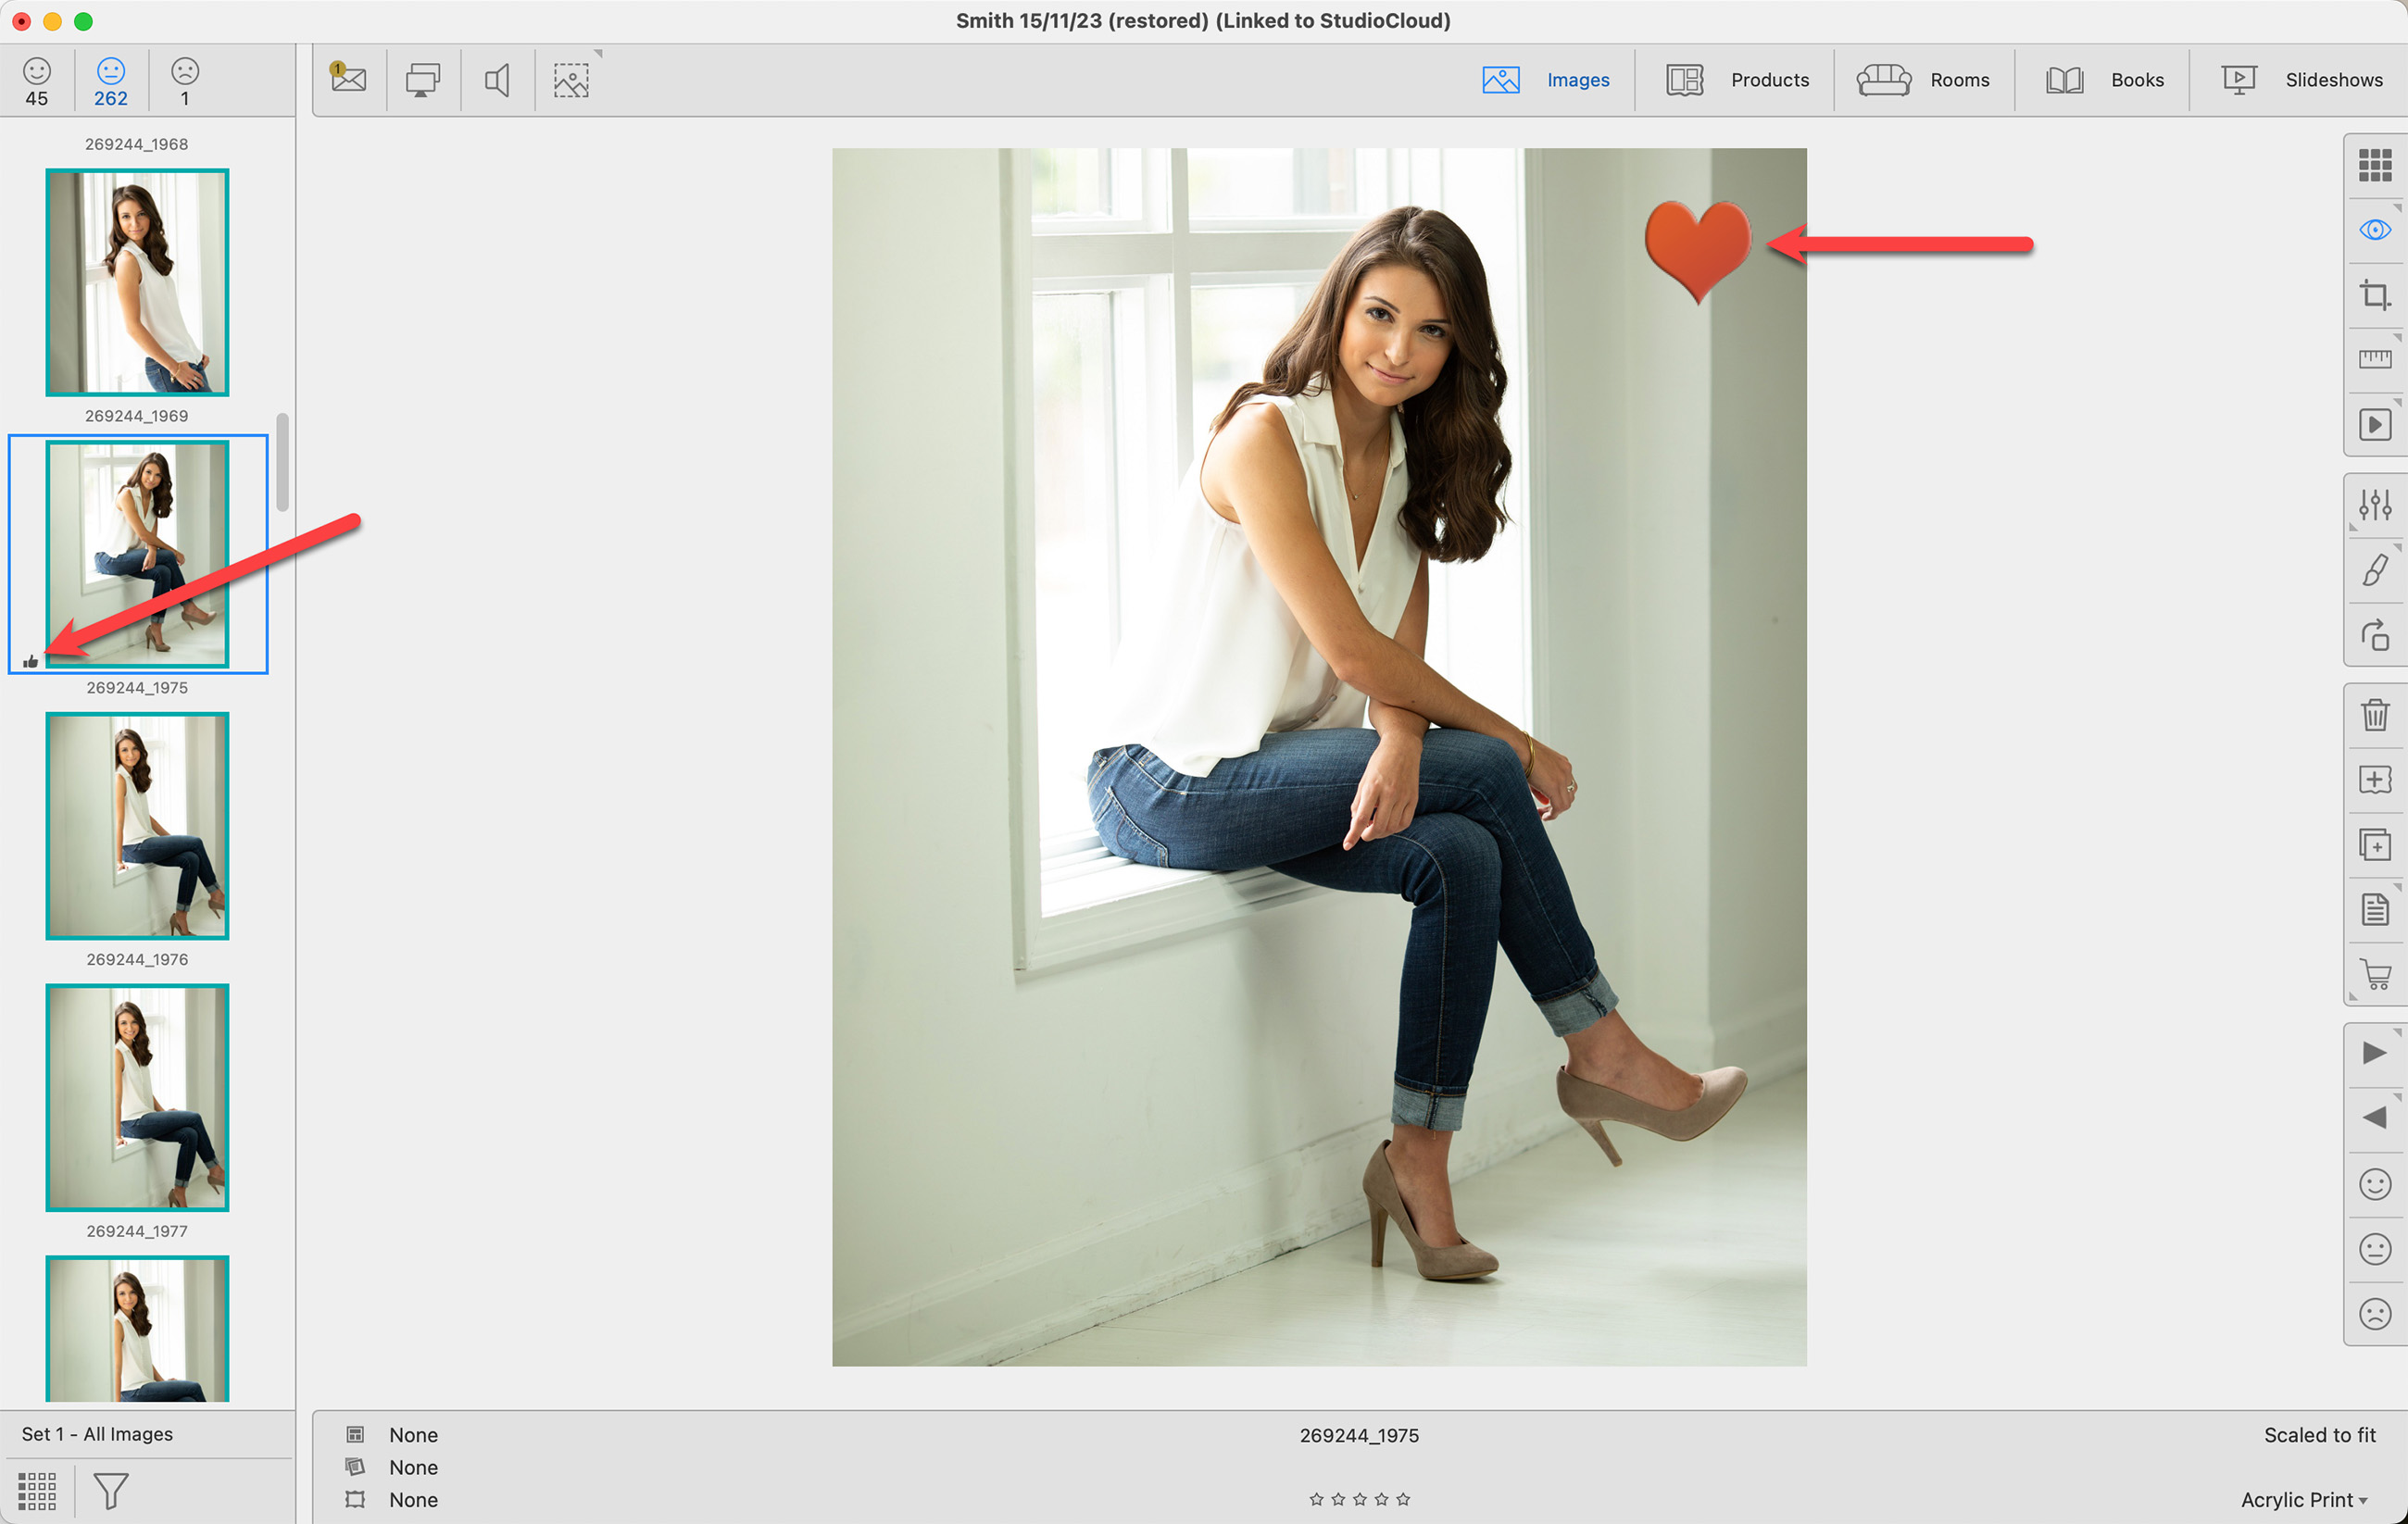
- When viewing thumbnails of your favorites, ensure the "Show Thumbnail Tags" option is enabled (found under the View menu).
- For full-sized images, activate the "Show Favorites Stamp" option (found under the View menu).
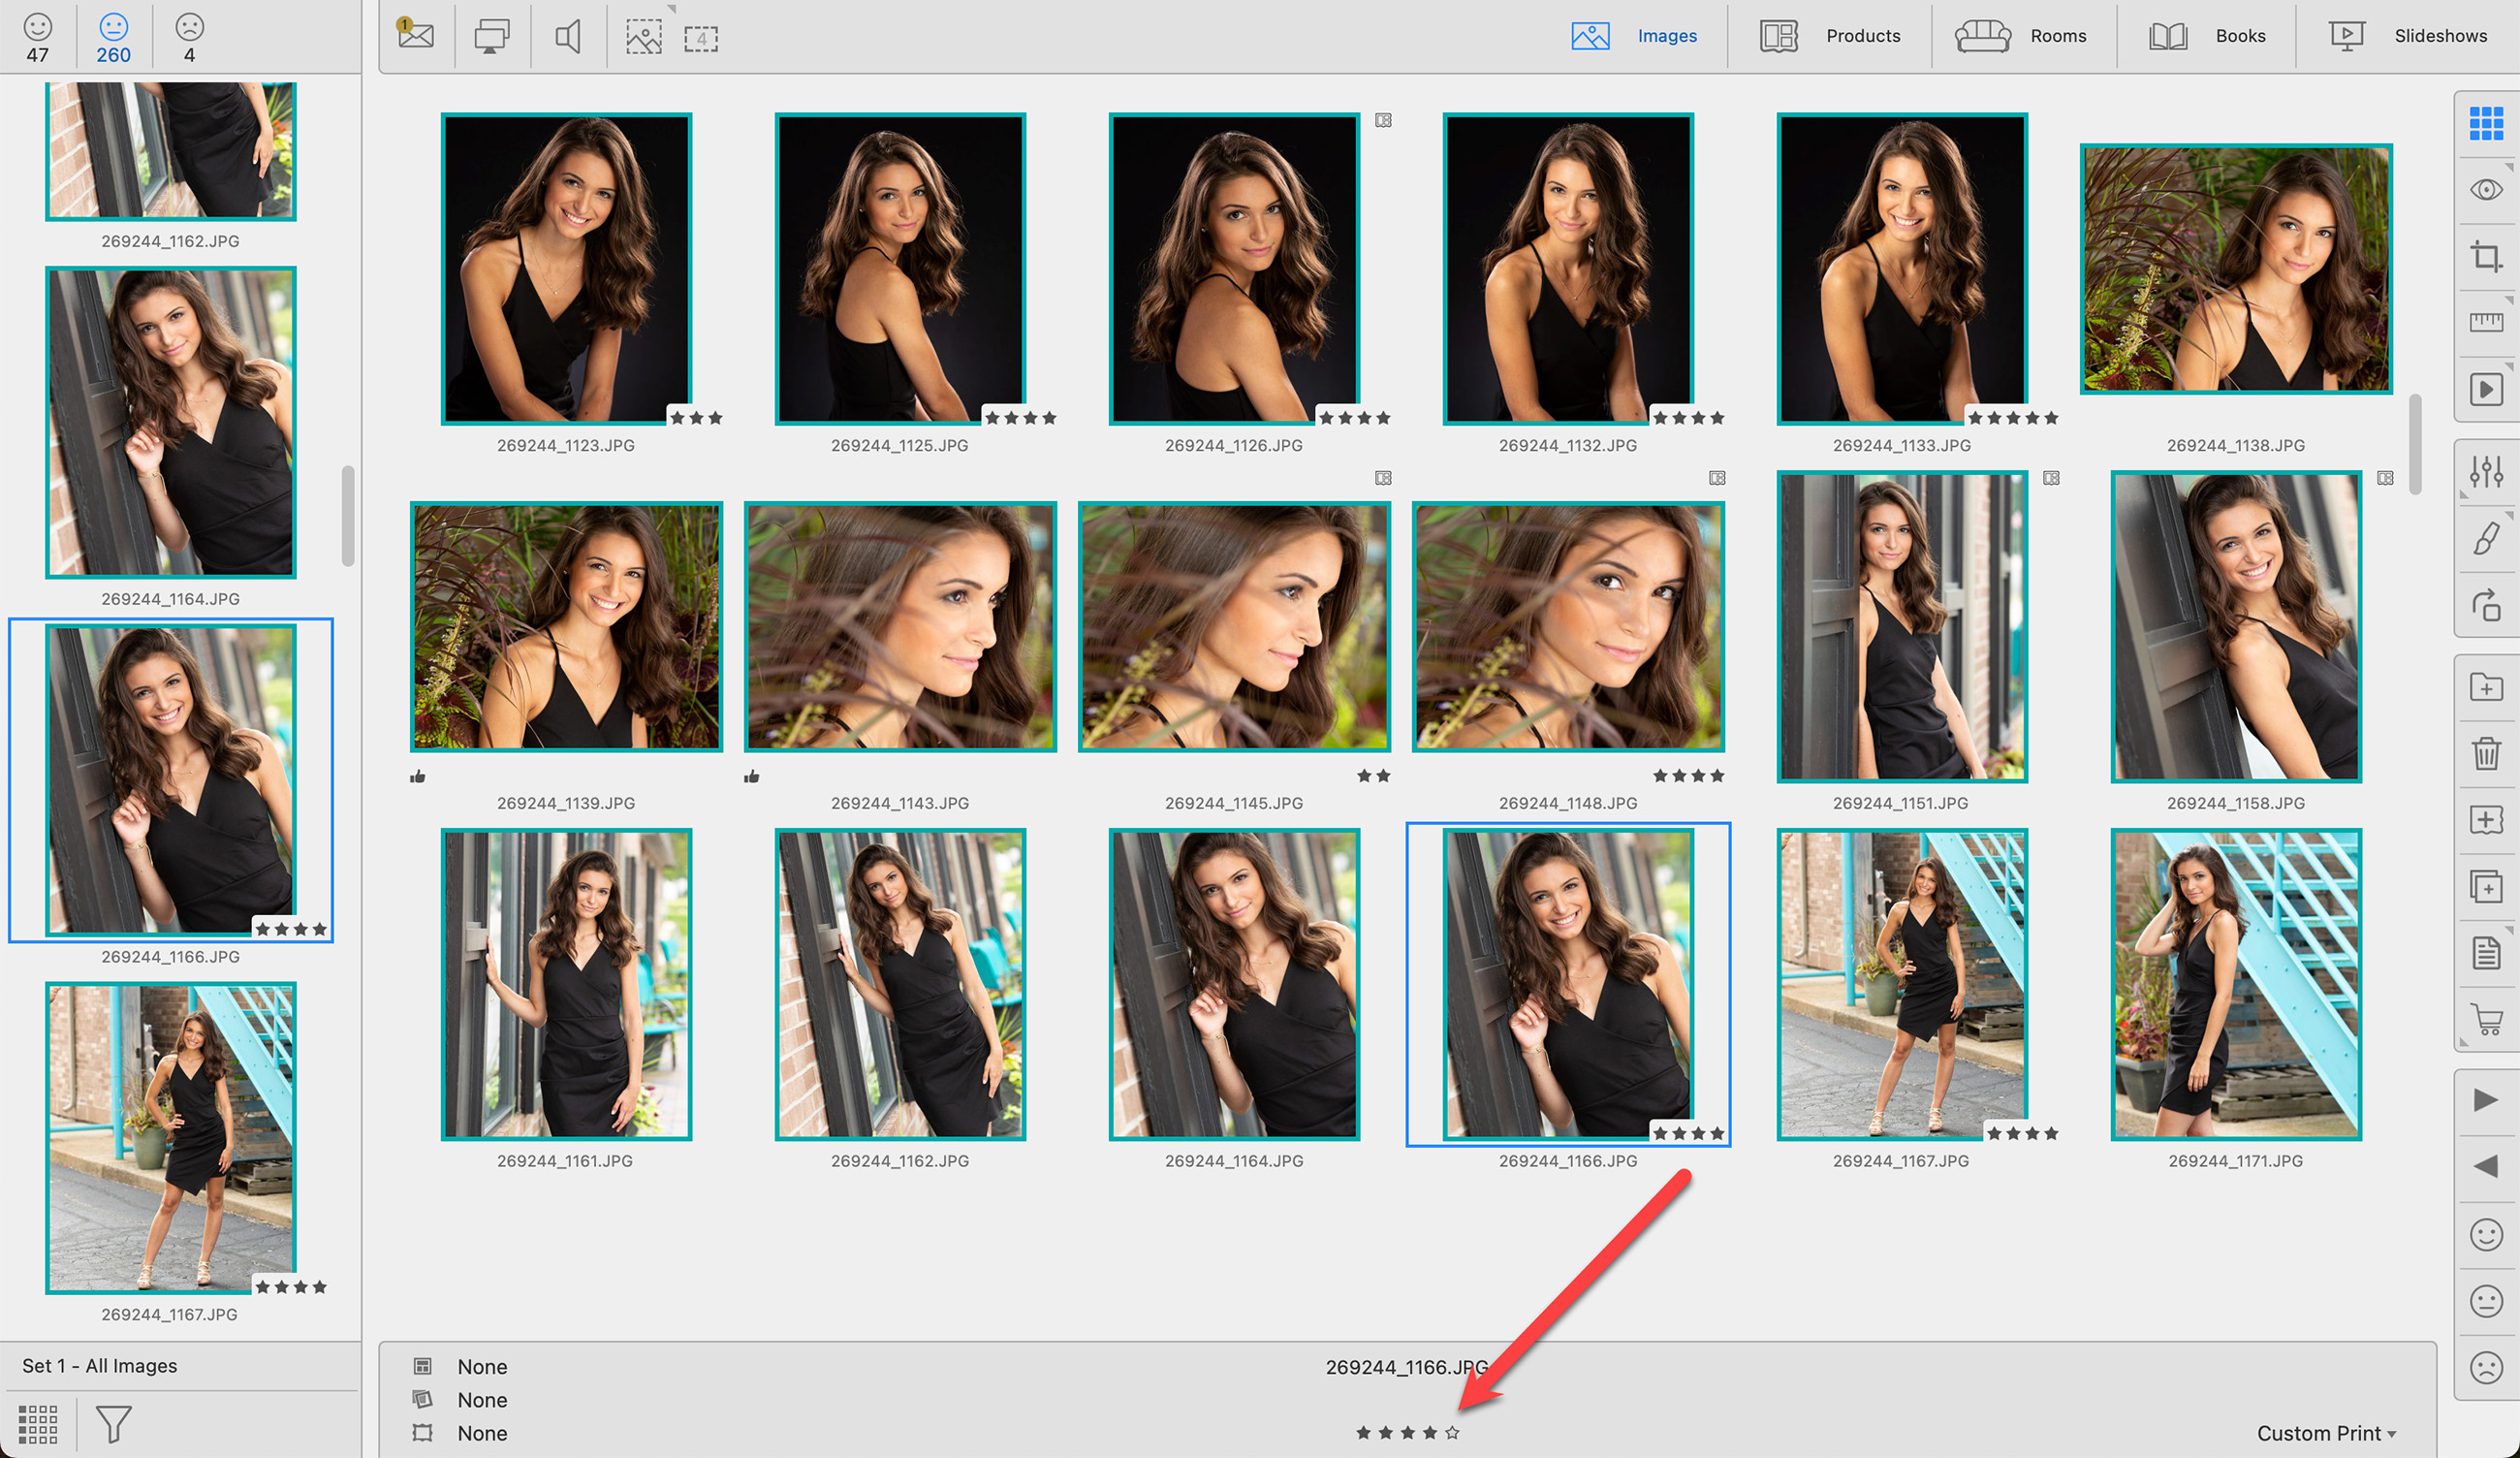
In ProSelect, you can rate each image from 1 to 5 stars to help organize and categorize them. These ratings are displayed on the bottom right corner of the thumbnail images in Thumbnail view, provided you have the "Show Thumbnail Tags" option enabled under the View menu. Additionally, the current rating of an image is also shown in the bottom center of the Info Bar, allowing for quick and easy reference while sorting through images.
Setting a Rating
There are three methods to set a star rating on a selected image:
- On the top menu, go to Images > Set Star Rating. Select the rating from the list. Select multiple images to set the same rating.
- Click the rating star
 on the Info Bar.
 - Use the keyboard shortcut CmdCtrl + 1-5. Select multiple images to set the same rating.
Removing a Rating
- On the top menu, go to Images > Set Star Rating. Select "None"
- Use the keyboard shortcut CmdCtrl + 0
- Click on the empty circle
 which appears as you mouse over the star rating in the Info Bar.
Filter by Rating
You can filter your images by star rating using the Filter tool ![]() . For more information, see Image Filtering.
. For more information, see Image Filtering.
Sort Images by Rating
You can sort your album images by star rating. On the top menu, go to Images > Sort Album Images By. Select "Rating." This will place the highest rated images (5 stars) at the top.
When using the ProSelect Lightroom Plugin, you can optionally copy over any star ratings on your images in Lightroom.
ProSelect has many right-click options available. Depending on what you click on, right-clicking provides quick access to various functions and actions related to the selected item. It is a convenient and efficient way to customize images and products. For a full list of right-click options click here.
The toolbar options change based on the Mode and View you're working in. As you switch between different Modes and Views, the toolbar displays tools relevant to those specific tasks.
- Click on a tool to use its main function. The tools are explained in each View mode where they appear. For a complete list of ALL toolbar tools, click here.
- If there is a gray triangle on the left-hand side of a tool, a popup list will appear when you click on it. You can then choose an action or item from the list to apply.
- Some of the tools have right-click options. A gray triangle appears on the top-right side of the tool. Right-clicking on the tool will access additional options.
- When a tool is grayed out, that means you can't use it on the selected product.
- If a tool is missing or doesn't appear, this is because it is not available in that working with mode or View.
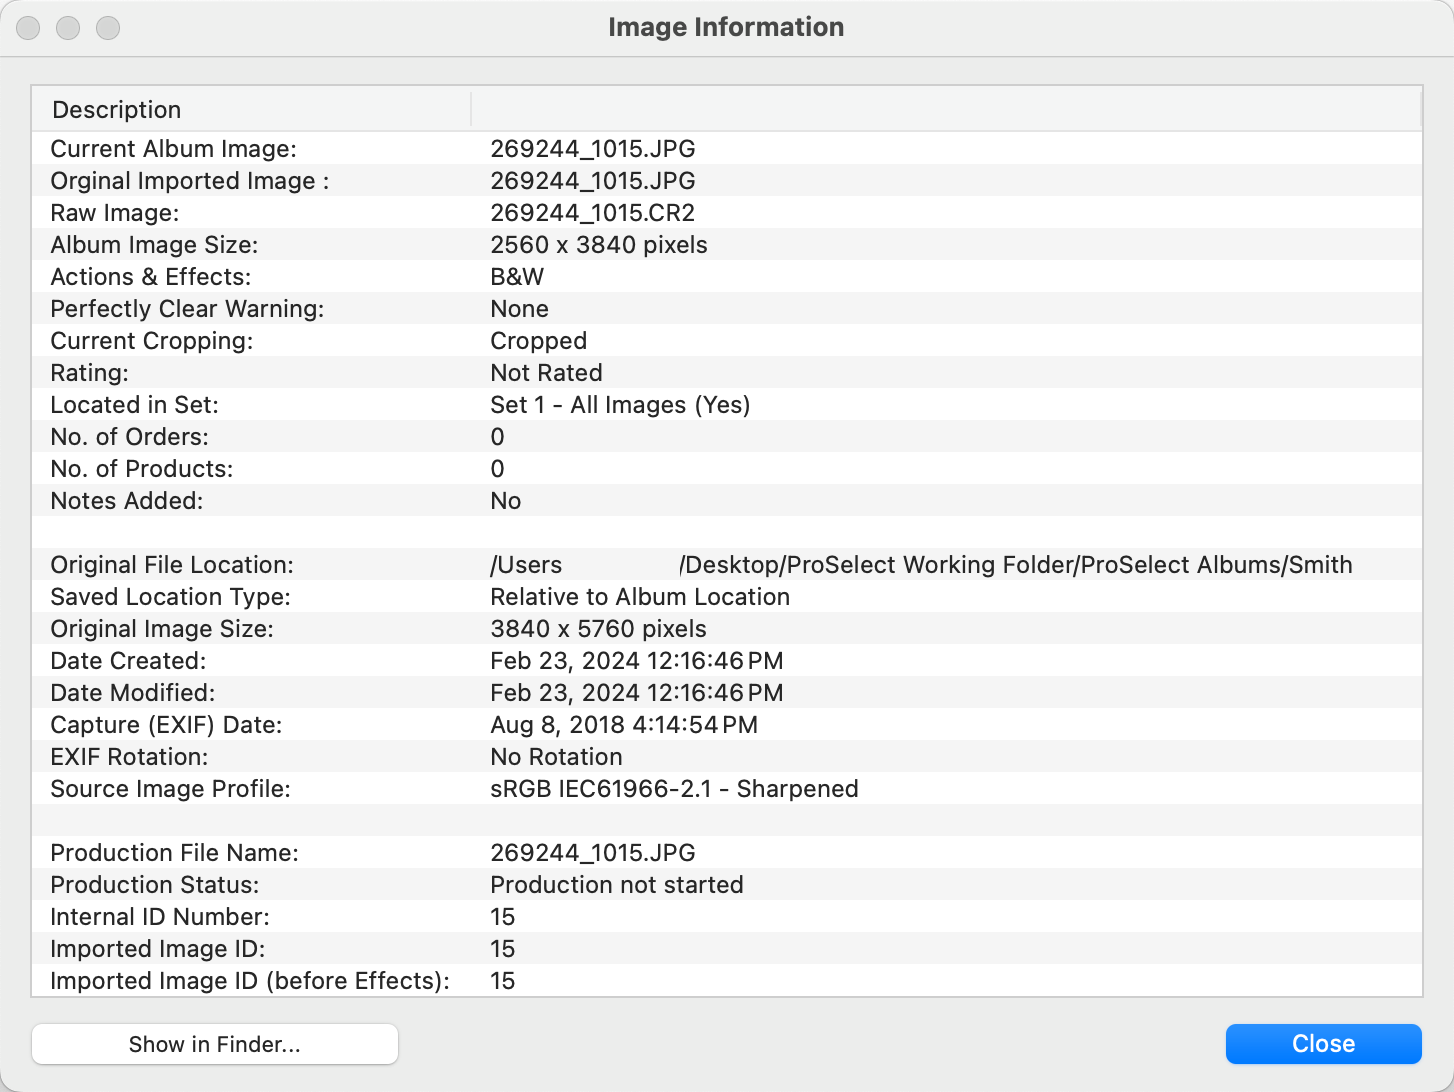
- Select an image.
- On the top menu, go to Images > Show Selected Image Info to view the Image Information dialog. Alternatively, right-click on the image and select "Show Image Information."
To find specific images in your ProSelect Album by their filenames, you can use the Search for Album Images feature.
- Go to the top menu, Images > Search for Album Images.
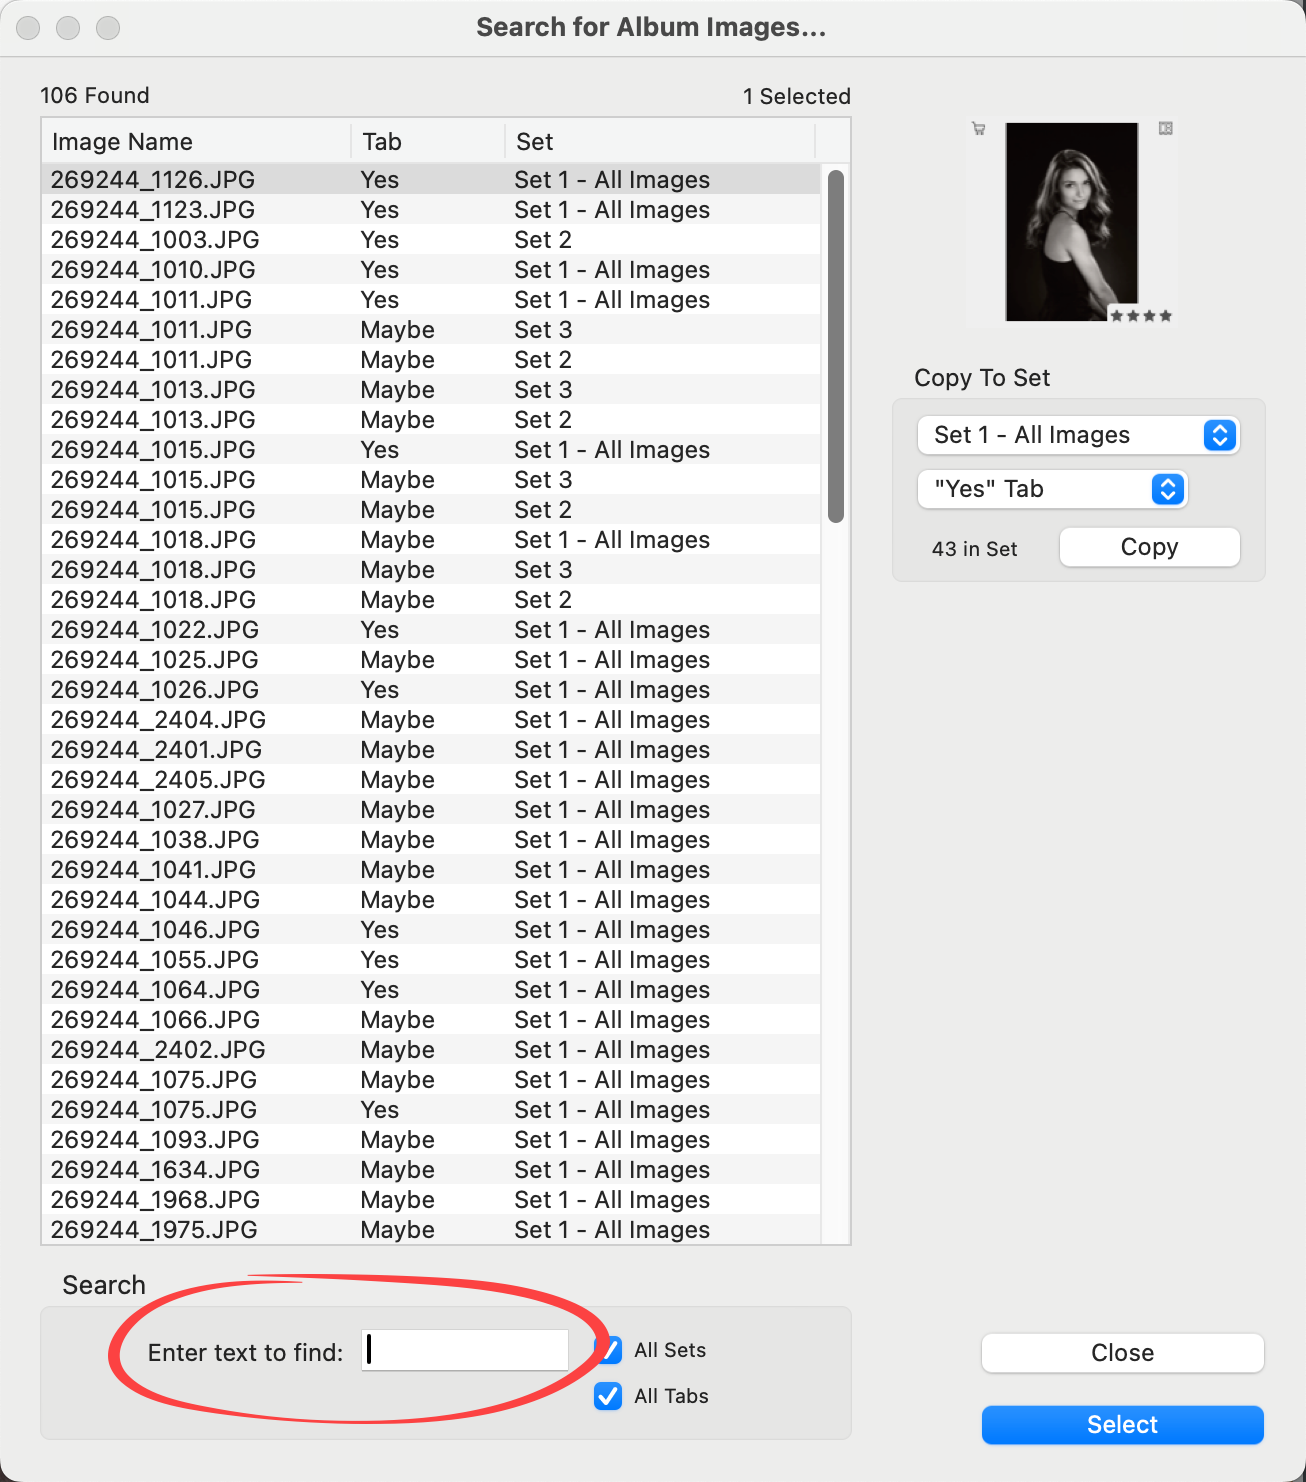
- Type in part or the entire filename in the search box. For example, entering “8” will display all images that have “8” in their filenames.
- You can refine your search further:
- Use the "All Sets" checkbox to include all sets in the search, or uncheck it to limit the search to the current set.
- Use the "All Tabs" checkbox to search across all tabs (Yes, Maybe, No), or uncheck it to search only within the current tab.
- The search results will list all matching images. Selecting an image in this list will show its thumbnail.
- To go directly to an image:
- Double-click on the image name or click the Select button. ProSelect will automatically switch to the tab and set where the image is located, highlighting the selected image.
Copying Images to Another Set or Group
- You can also select multiple images from the search results using the Shift key or the CmdCtrl key.
- After selecting, you can copy these images to a different Tab and Set as needed. This allows you to organize and group images quickly based on search results.
For a complete list of Working with Images Shortcuts, click here.
