About the Product Editor
Product Templates are an important part of ProSelect as they can be used to design a wide range of products to which you can add your images and sell. ProSelect includes a powerful Product Editor which you can use to create your own templates or copy and modify any others that you have. You can even do this quickly during the sales session if you need to.
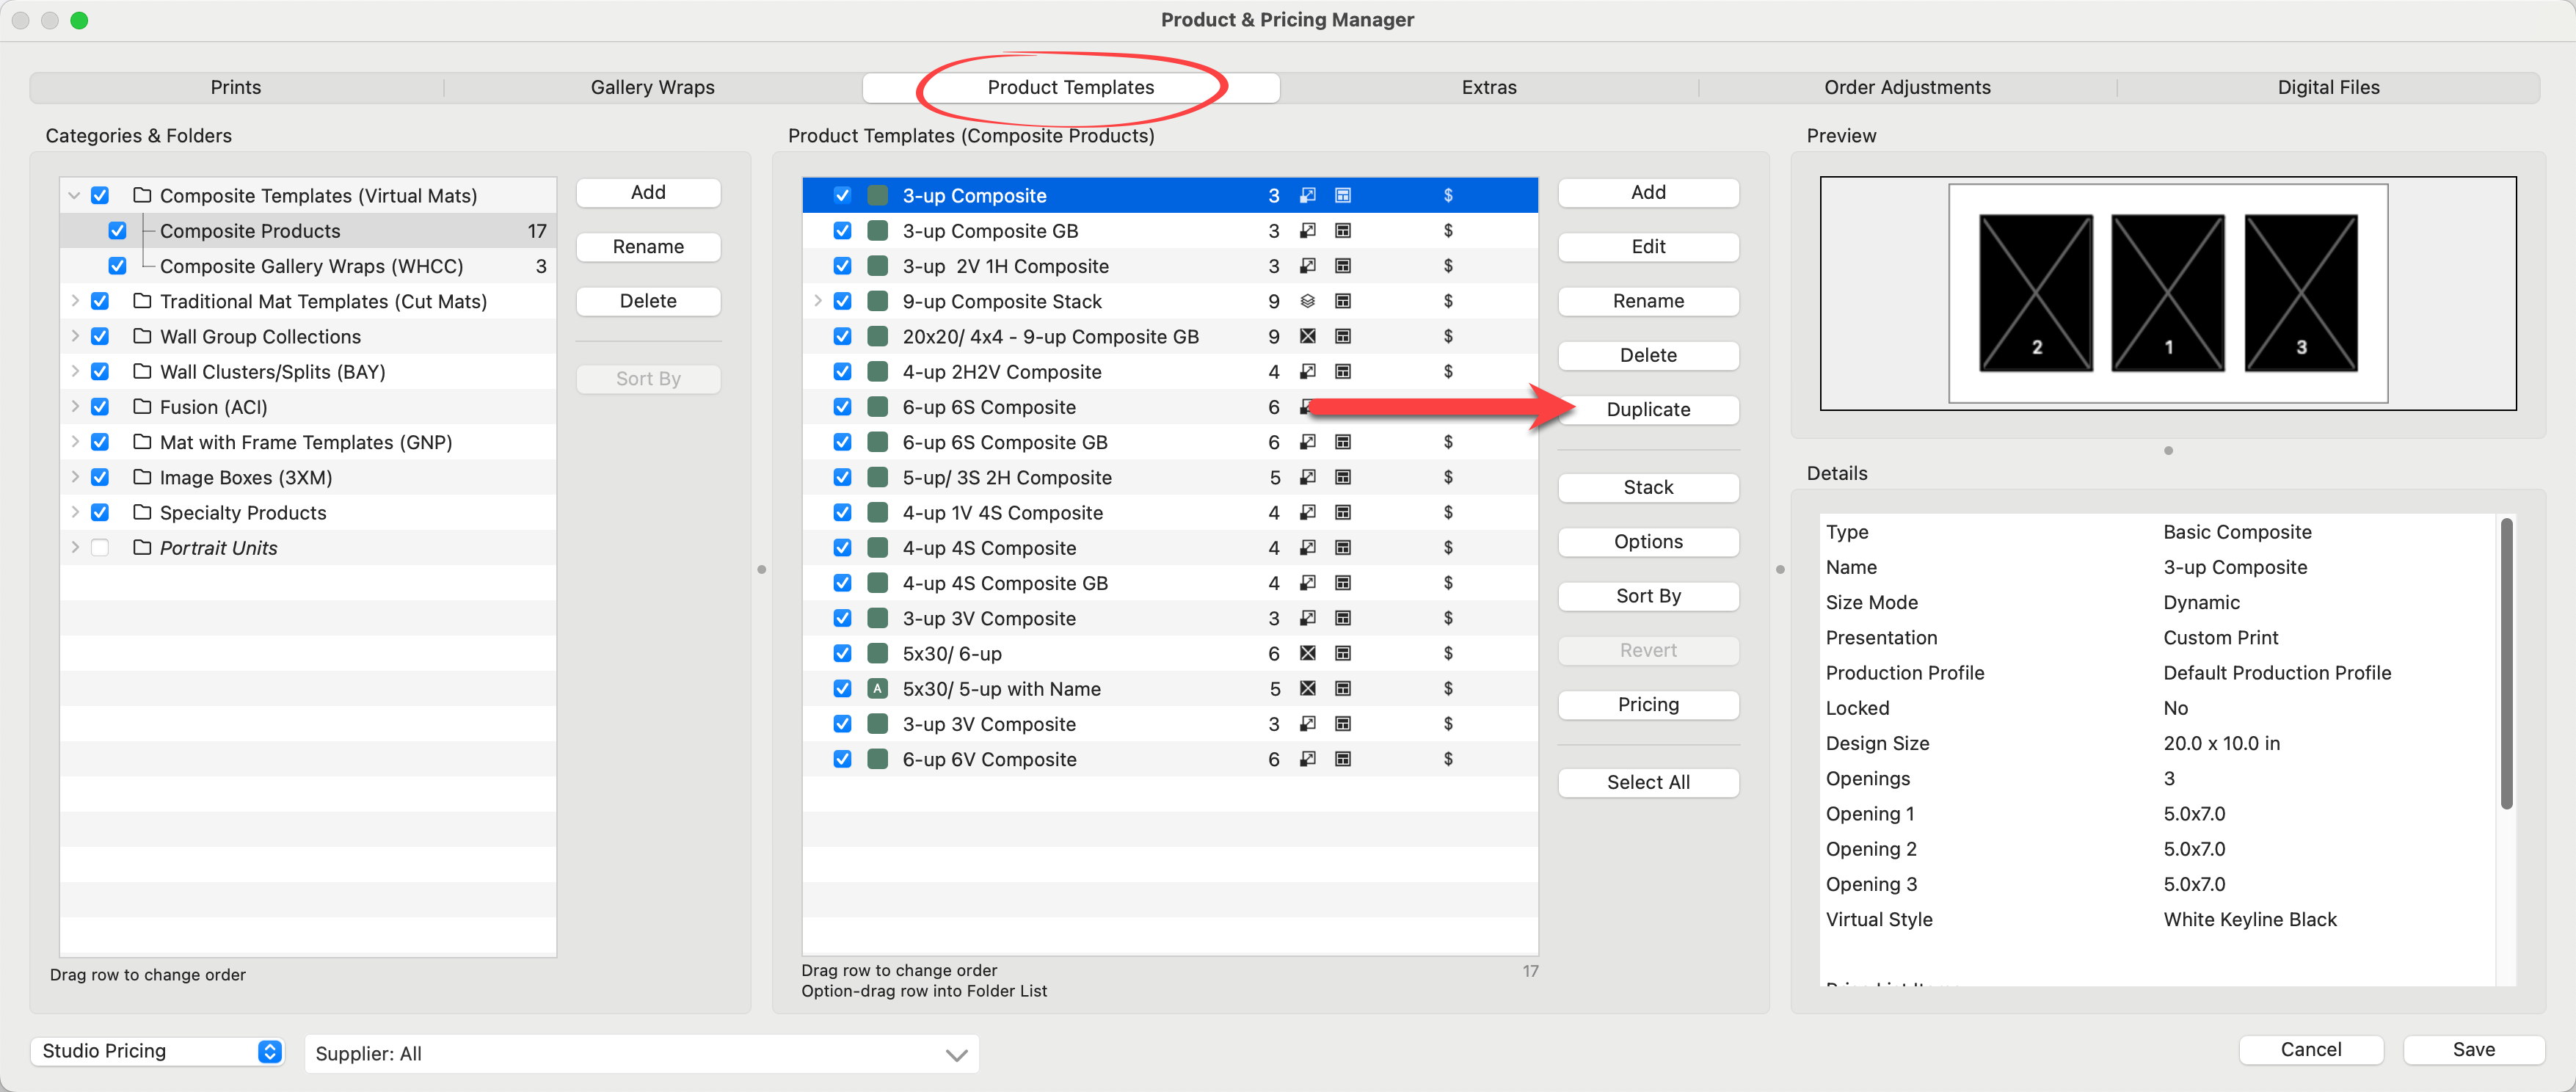
While you can use the Add button to create a new Product Template, often it is easier to make a duplicate of a similar Product Template and modify it to your needs. Select the Product Template you wish to use (in the Product & Pricing Manager) and click the Duplicate button. You will be prompted to name the new template as well as choose a Product Template Type. Once you have made your duplicate, you can click the Edit button, which will take you to the Product Editor.
For a collection of pre-designed product templates, consider downloading a Supplier Collection file.
There are a number of ways to access the Product Editor.
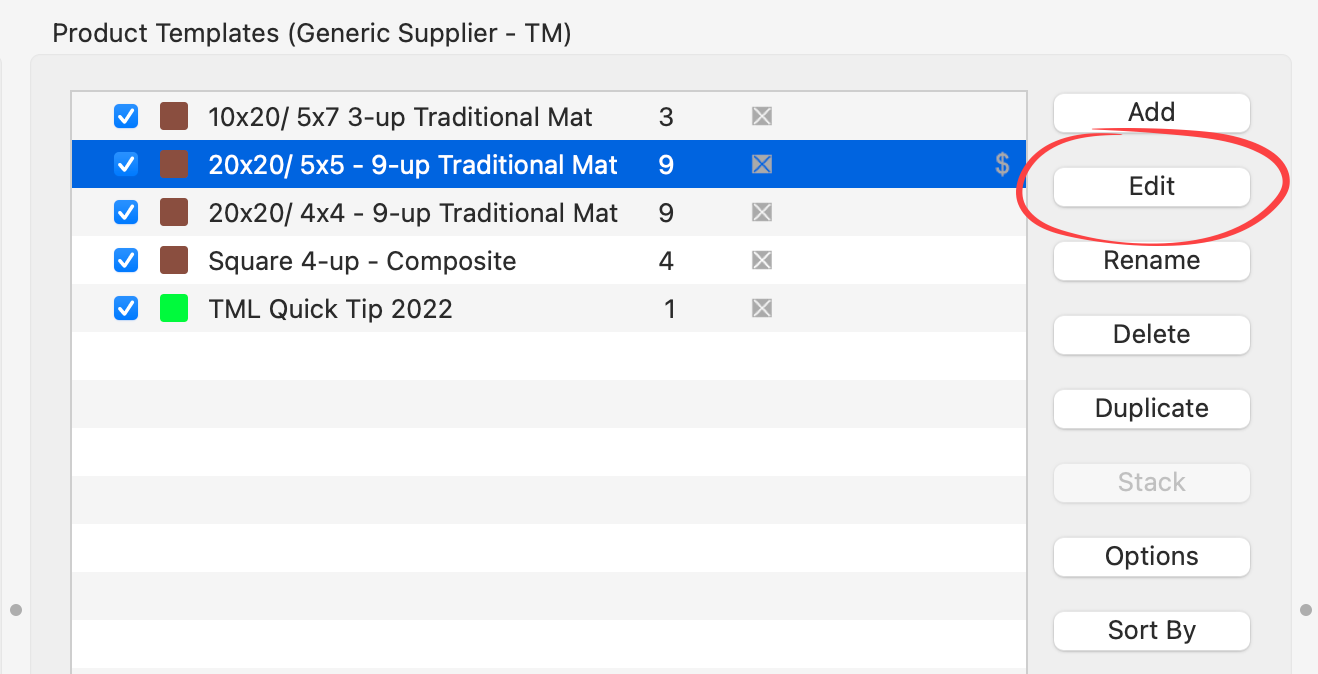
- The Product Editor can be accessed from the Product & Pricing Manager. Go to the top menu, Products > Product & Pricing Manager. Select a product template you wish to edit, and click the Edit button. Double-clicking on the product template will also open the Product Editor. If you are creating a new product template, click the Add button. Once you have named the new product template, you can click Edit.
- Similar to the Product & Pricing Manager, you can access the Product Editor from the Book Page Manager. Go to the top menu, Products > Book Page Manager. Select a book page you wish to edit, and click the Edit button. Double-clicking on the template will also open the Product Editor. If you are creating a new page template, click the Add button. Once you have named the new page template, you can click Edit.
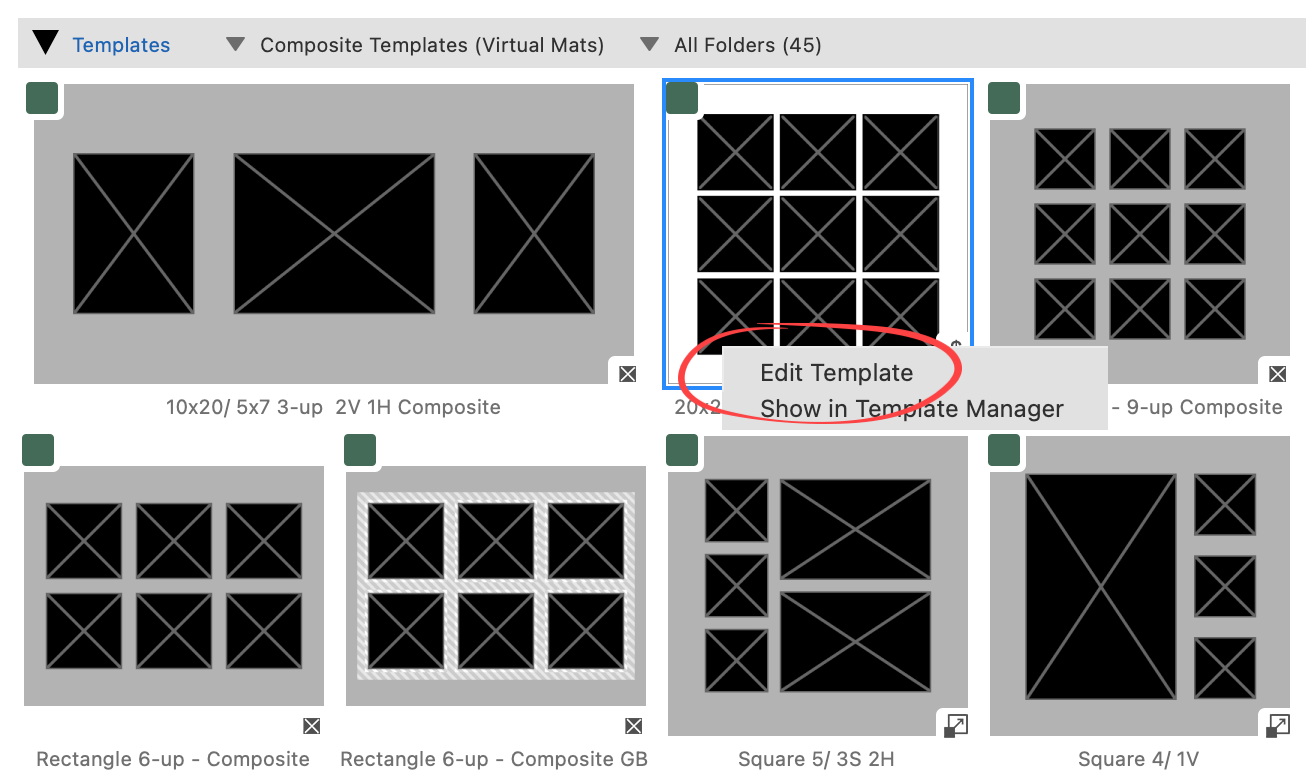
- Another way to access the Product Editor is through Working with Products or Books. Right-click on a template in the resources area at the bottom and select "Edit Template" from the popup menu.
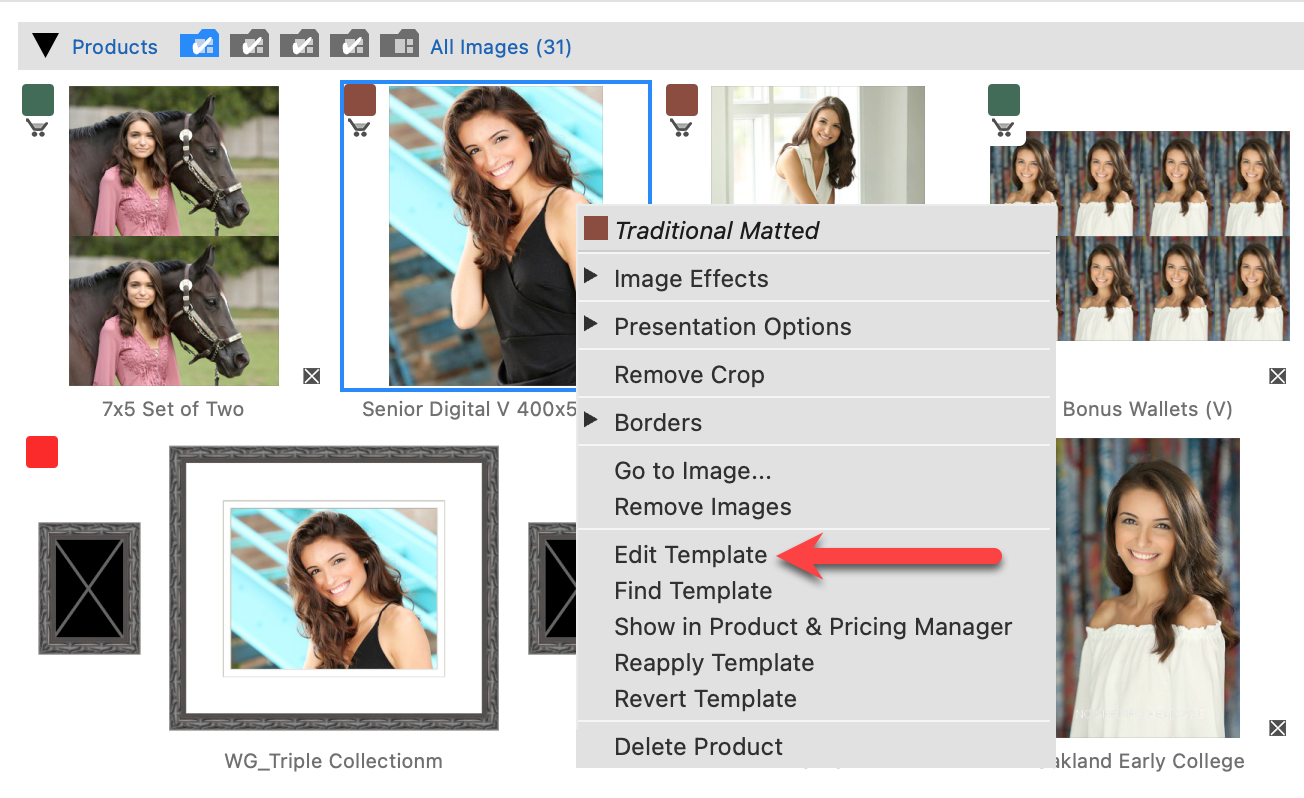
- When Working with Products or Books (Thumbnail View), you can right-click on a product (or book page) already populated with images and select "Edit Template" from the popup menu.
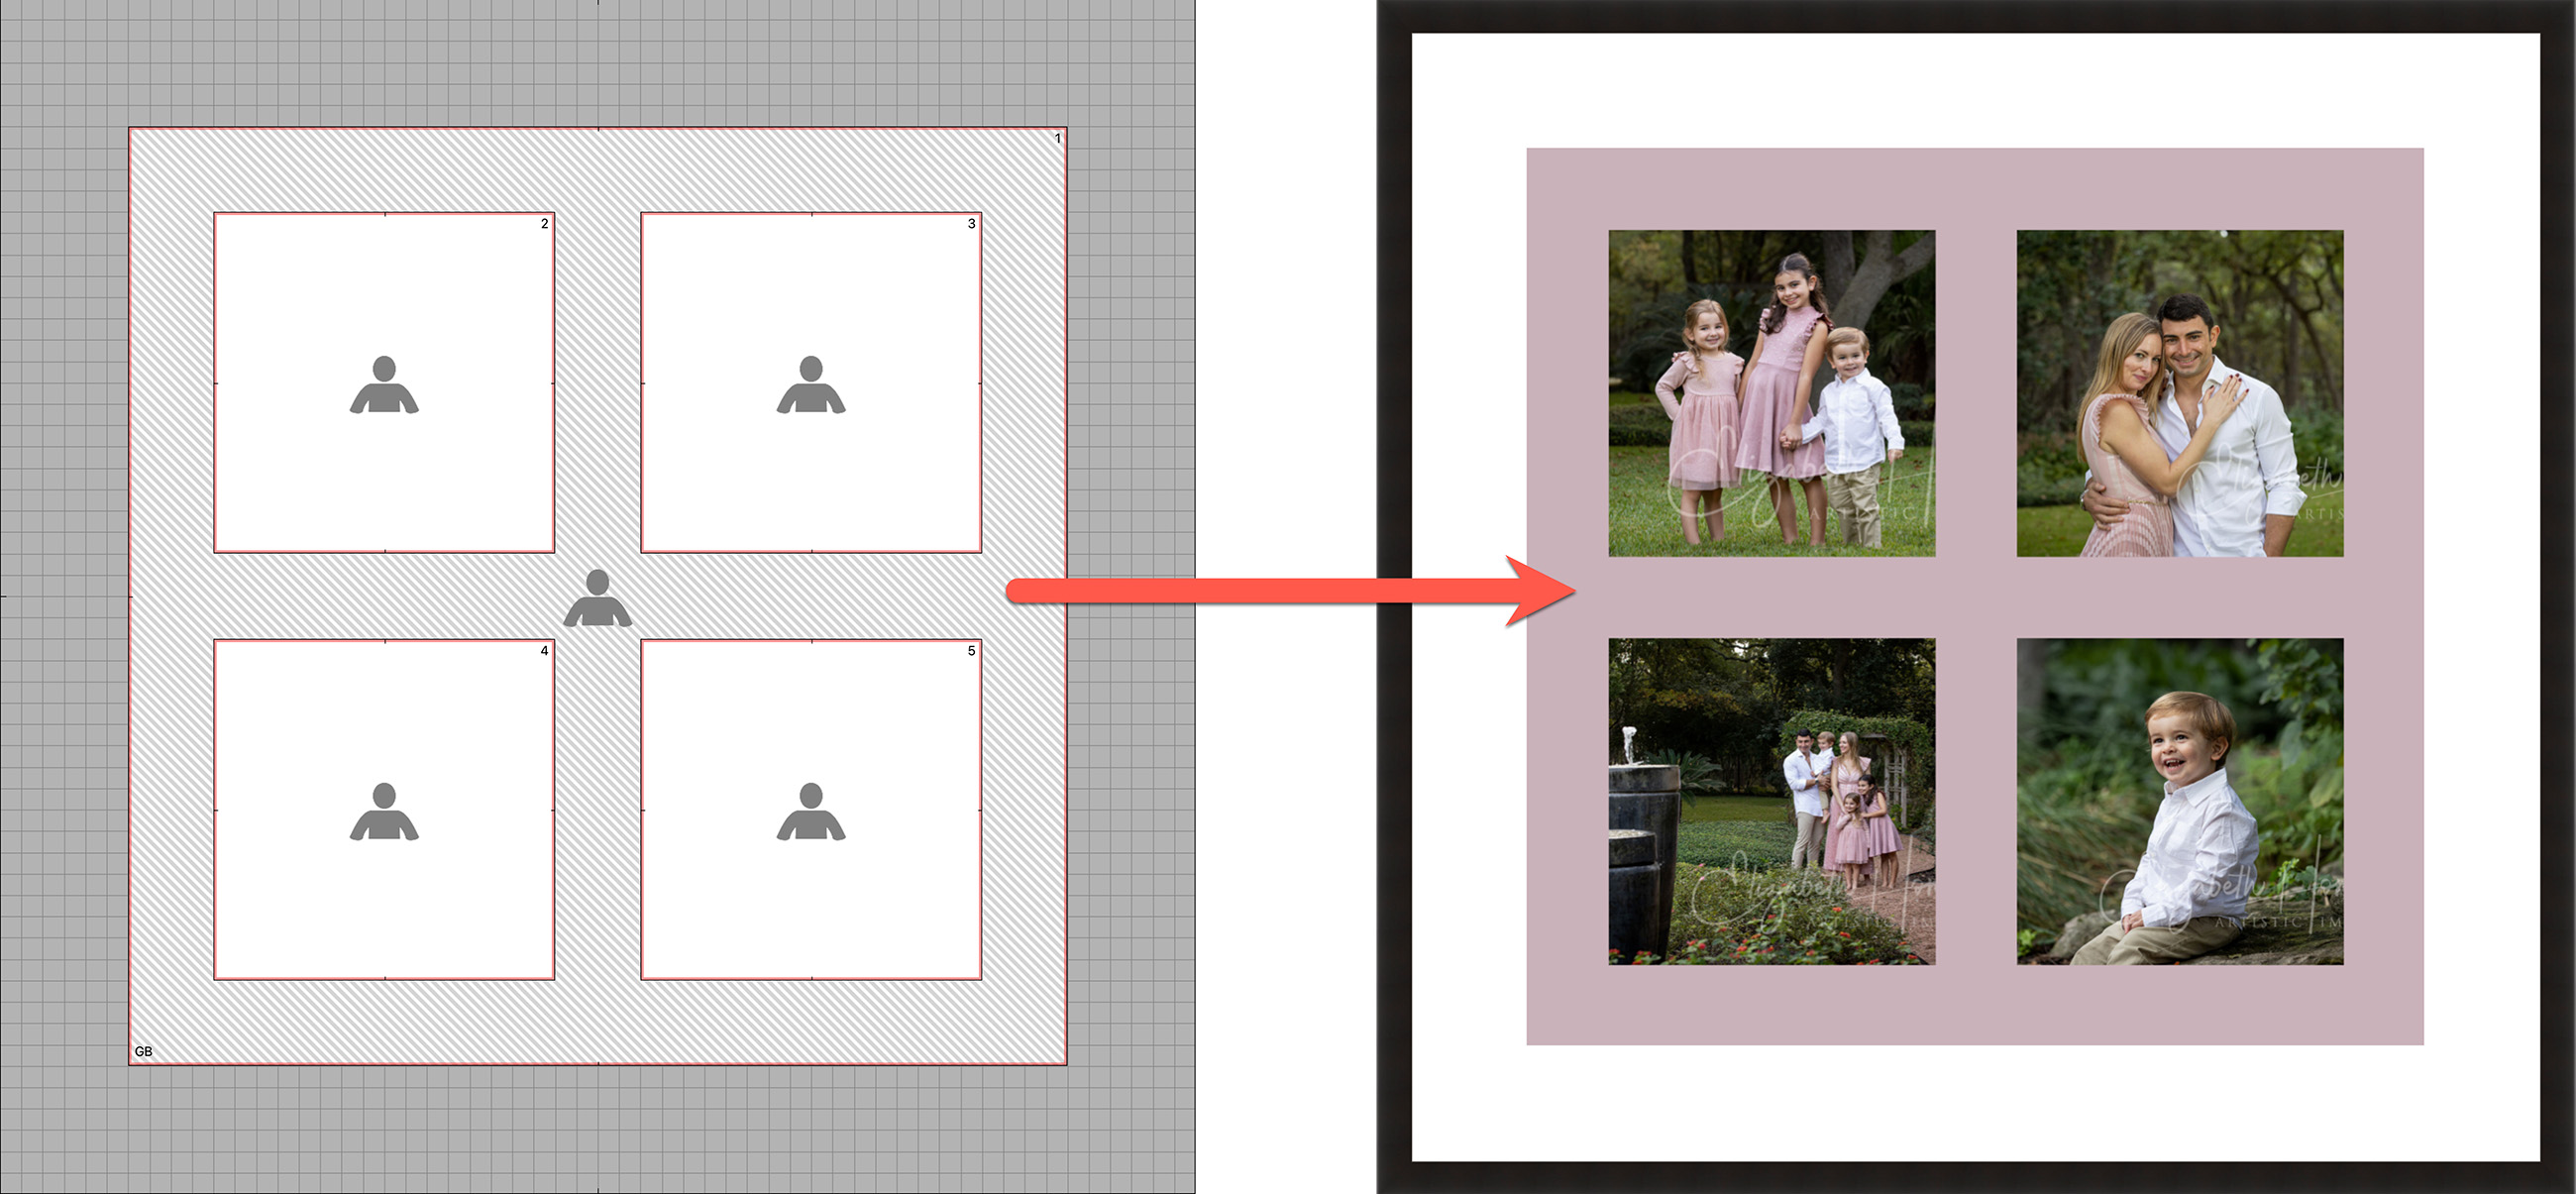
- Each product template consists of one or more “openings” which can be used to place your images into or as graphic elements (Graphic Blocks) and some surrounding space to balance the design.
- Use templates to create wall groupings, complex products with overlay images from Photoshop files, and different overall shapes using shape masks.
- Add a wrap or bleed to your openings.
- Set up your openings with different shapes, angles, and transparencies.
- Set up specific grid sizes, guide positions, and auto-spacing settings which are saved with each template.
- Templates are kept within ProSelect. They can be shared between different albums and clients.
- Once you create products for a client using their images within the templates, the products are saved directly to that client's album.
At times, it might be more convenient to create a new product template by duplicating an existing one that is similar to what you need. After duplicating, you can then make your modifications and save it as a new Product Template.
Duplication can also be used to change the Template Product Type. For example, if you have chosen to create a Basic Composite and realize you need to modify certain attributes only supported in Advanced Composites, you can duplicate the template and select the desired product type.
- Navigate to the Product & Pricing Manager by going to the top menu, Products > Product & Pricing Manager.
- In the Product Templates tab, select the product template you wish to duplicate.
- Click the Duplicate tool.
- Optionally attach a Supplier.
- Type in a new name for the template.
- Select a Product Type from the drop-down menu.
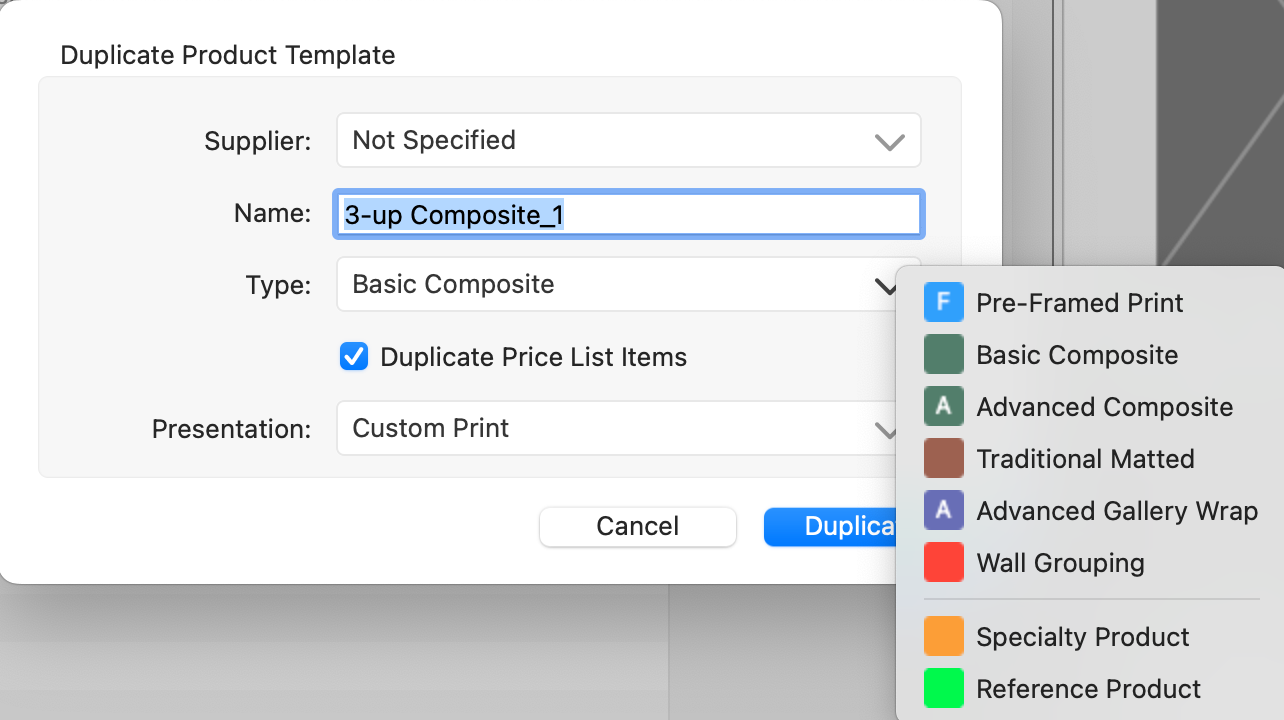
- Check the Duplicate Price List Items box if you wish the new template to be priced the same.
- Select a Presentation Option.
- Click Duplicate.
Graphic Blocks are design elements that you can incorporate into your templates to enhance their appearance. These blocks can be filled with a specific color or a background image, as determined by the virtual style you apply. This feature allows you to swiftly alter the look of your product. When you convert an image opening into a Graphic Block, it is represented visually by diagonal stripes. Learn more about graphic blocks on the Design Custom Virtual Styles page.
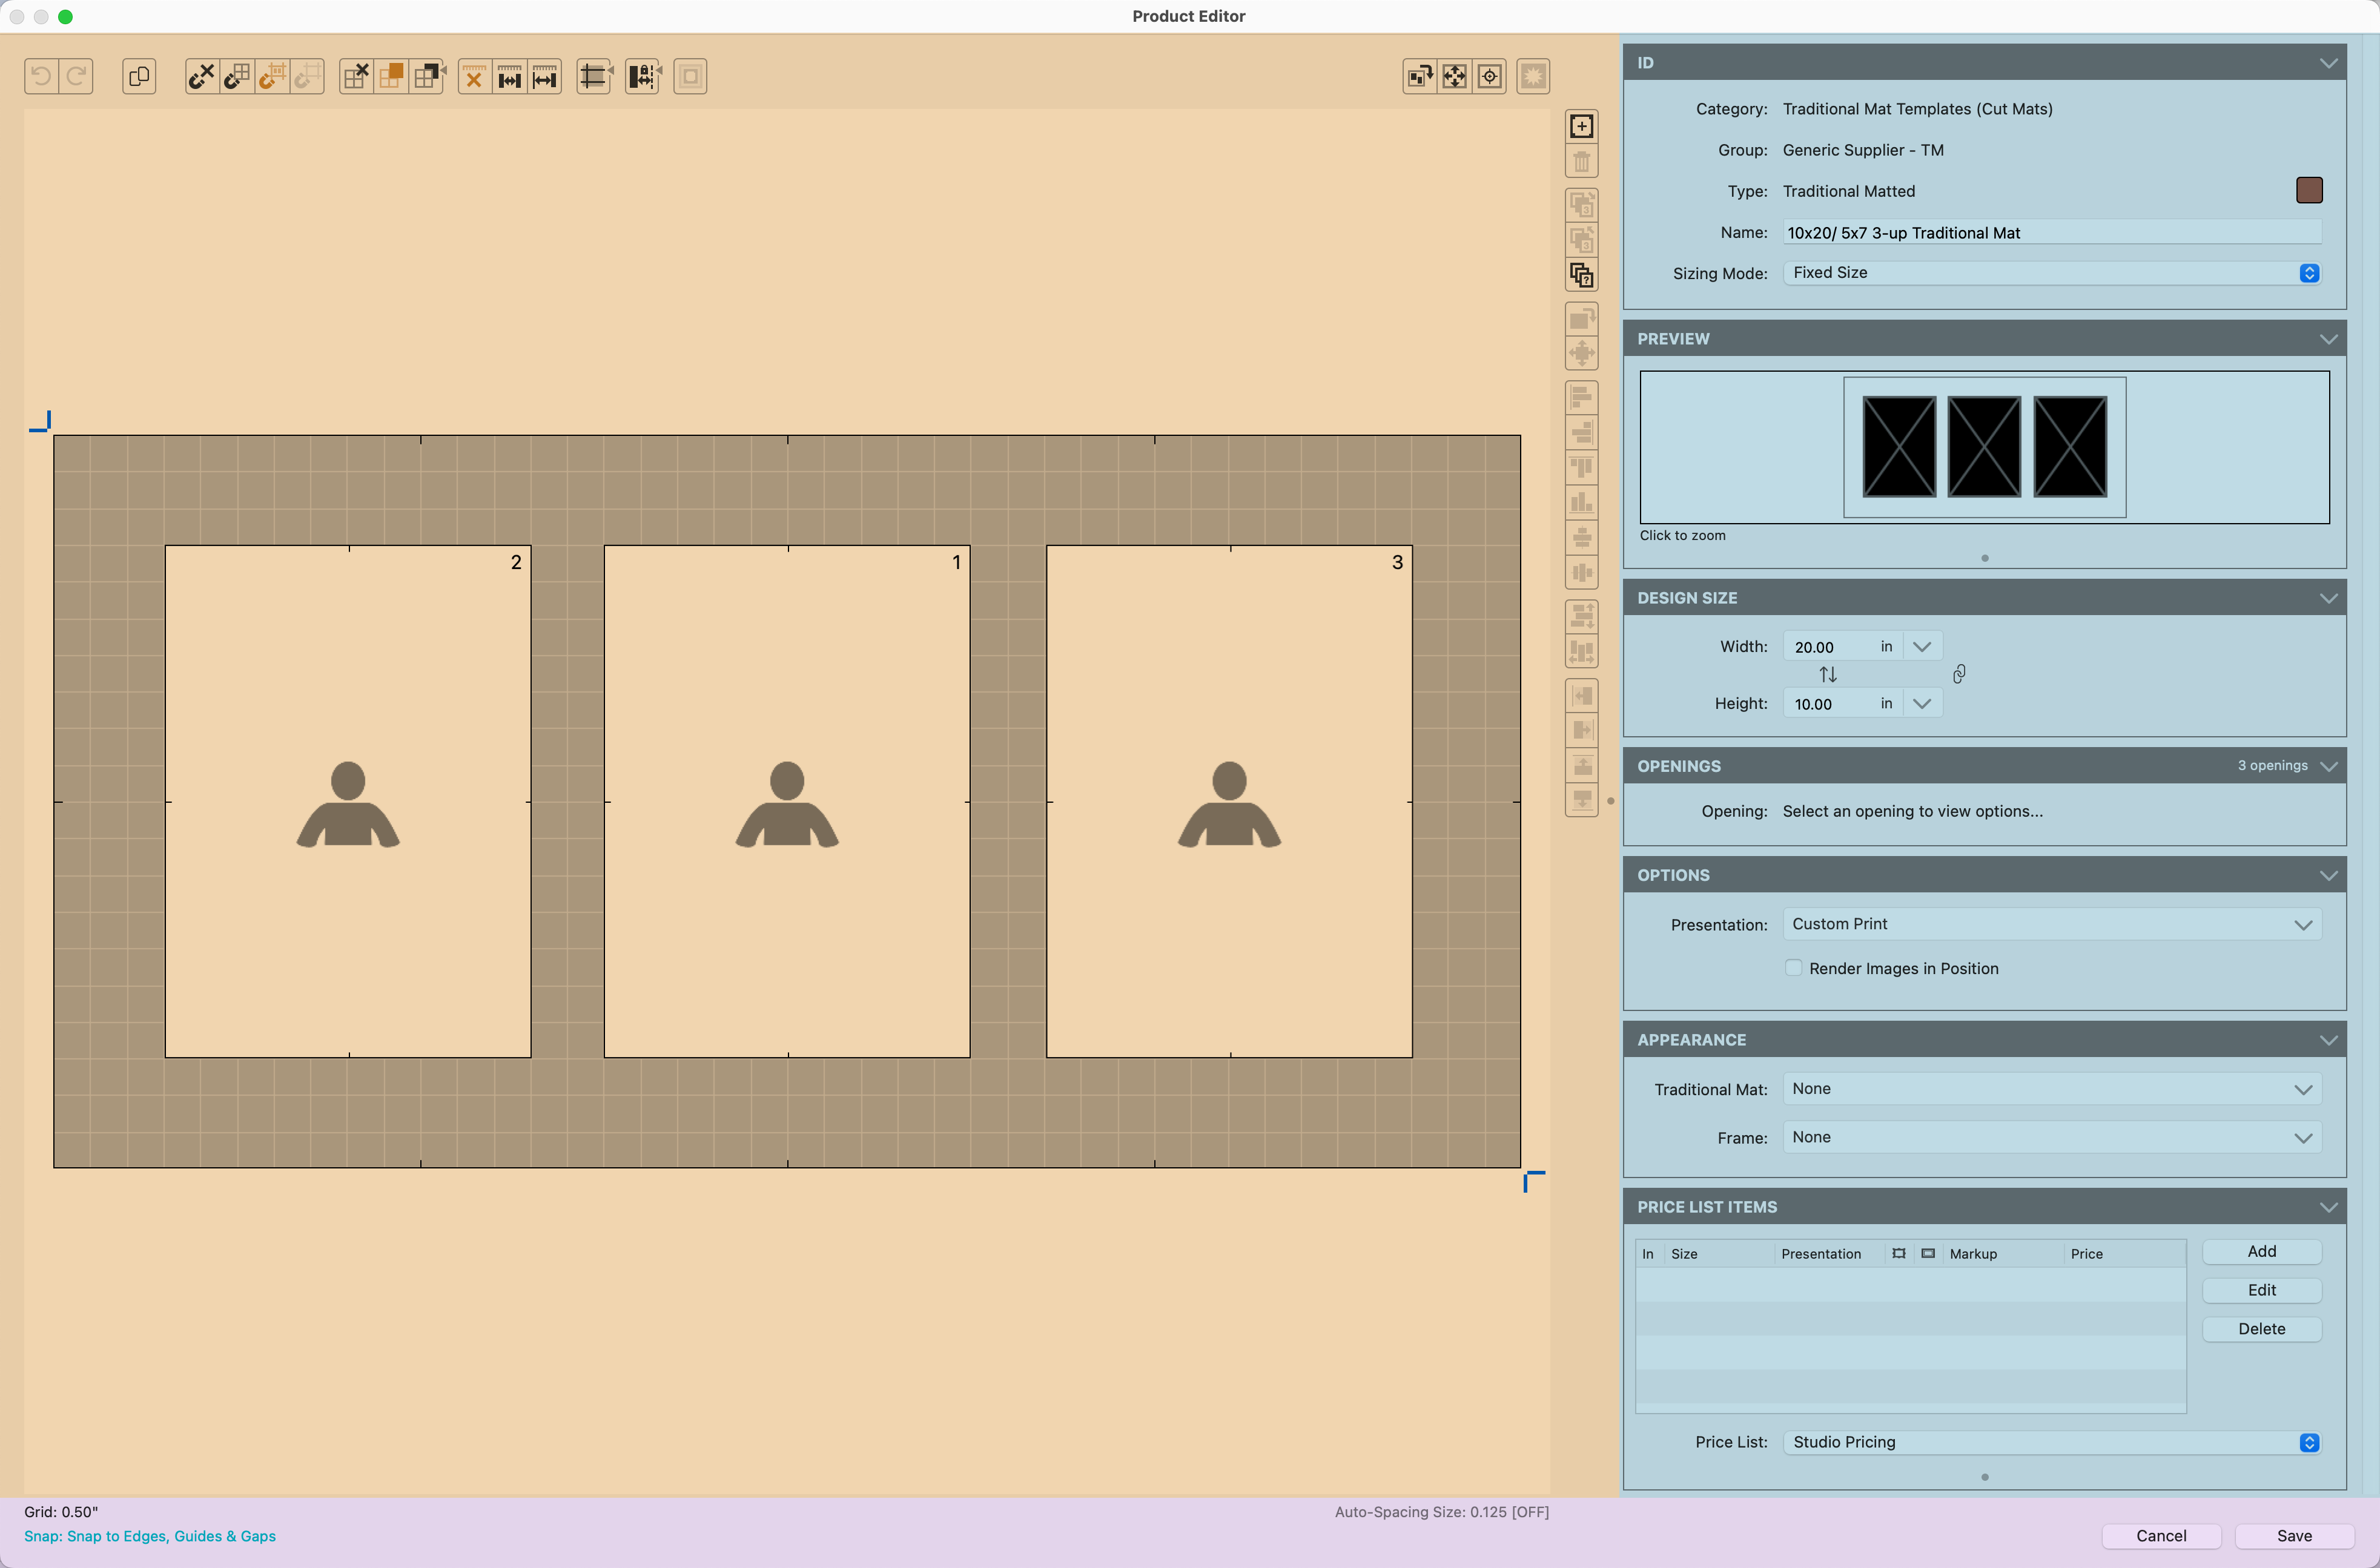
This is the working area in the Product Editor. Template openings can be added, moved, and re-sized by either clicking and dragging the corners or by using the tool buttons along the top and right sides.
The Data Area allows for comprehensive customization of your template's overall size, the adjustment of openings, and the addition of various template attributes. Here, you can modify the size, position, shape, opacity, and tilt of selected openings. Additionally, you have the option to enhance your template by adding mats and/or frames, creating a ready-to-sell product.
- Keep in mind that not all customization options are available for every type of template. When you select a specific template type, the Data Area will adjust to show only the applicable options.
- The Data Area also features a Preview Box to view changes in real-time and a section to add your template to the price list.
- If needed, you can discard all modifications by clicking the "Cancel" button at the bottom of the Editor.
Resizing the Data Area
All of the Data Area boxes can be hidden, using the drop-down arrow on the right-hand side. Certain Data Area boxes can be resized using the dot at the bottom. There is also a resizing dot midway through the Data Area on the left-hand side. This allows you to resize the entire Data Area.
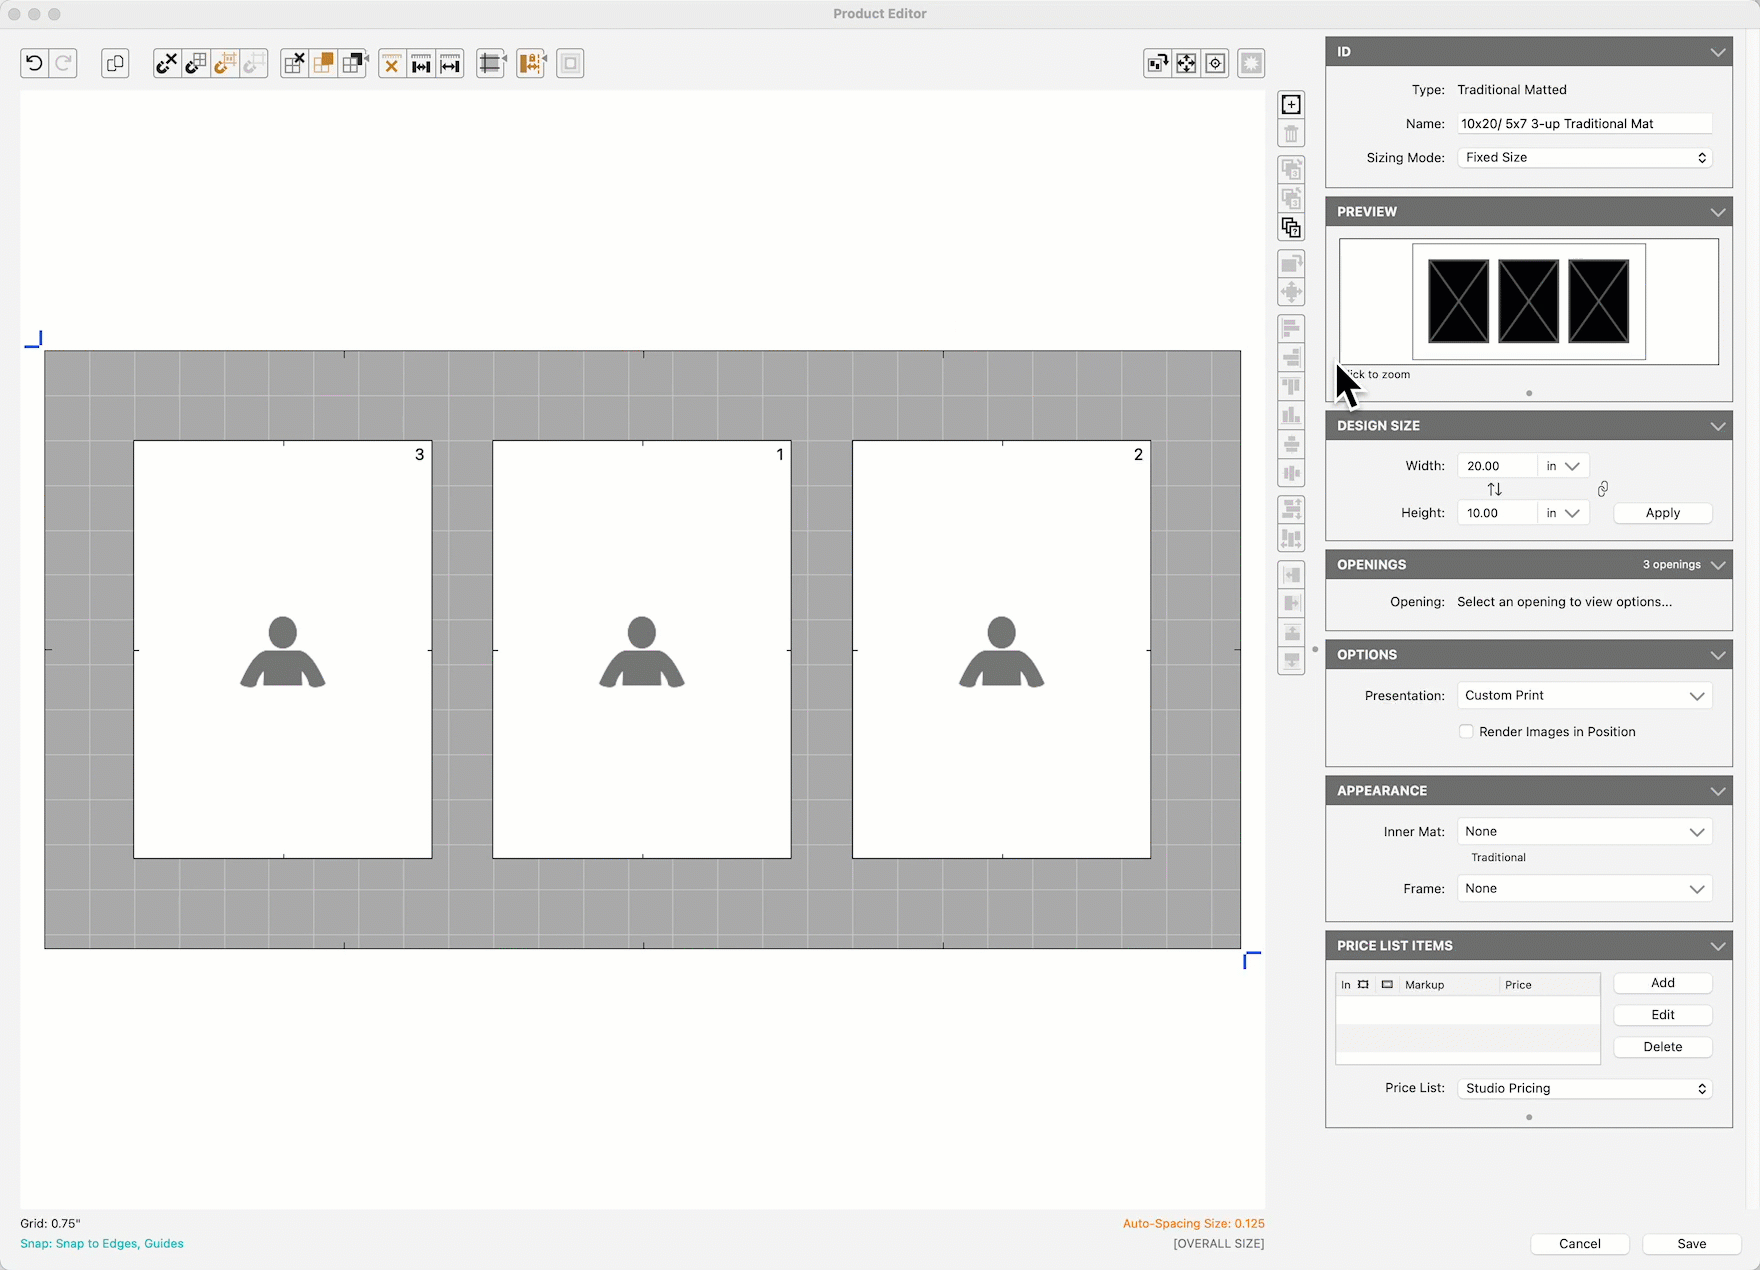
The Bottom Bar gives a snapshot of the current settings being used in the Template Editing/Data areas. The Cancel and Save buttons are located here.
After making any changes, click the Save button to confirm those changes. Normally, any changes made in the Editor are saved to your ProSelect Data file when you close the Editor window. However, if you hold the Shift key down while clicking the Save button, your changes will be immediately written to the ProSelect Data file.
For a complete list of Product Editor Shortcuts, click here.