Fixed Price by Size (FPS)
Fixed Price by Size (FPS) is a pricing method that allows you to set prices for specific-size products within ProSelect. This method is particularly useful for pricing frames, traditional mats, and additional items like glass and special mounting options.
Many suppliers have a predetermined range of frame or mat sizes available, rather than offering custom sizes. By utilizing FPS pricing, ProSelect can indicate which size combinations are available from your supplier, ensuring that you avoid selling items they cannot produce. If your supplier utilizes FPS pricing and offers custom sizing for frames and mats, ProSelect will automatically use the price for the next standard size.
When using the FPS pricing method, you have the option to enter your wholesale cost and apply a markup factor. ProSelect will then calculate the retail selling price based on these inputs, simplifying the pricing process for your products.
It is important to note that if using the fixed price by size pricing method, each size being offered will need to be individually priced.
- Select either the "Frames" tab or the "Tradition Mats" tab if in the Frame & Mat Pricing Manager.
- Click the Add button on the right-hand side of the Frame & Mat Pricing Manager window (or the Extras Pricing panel).
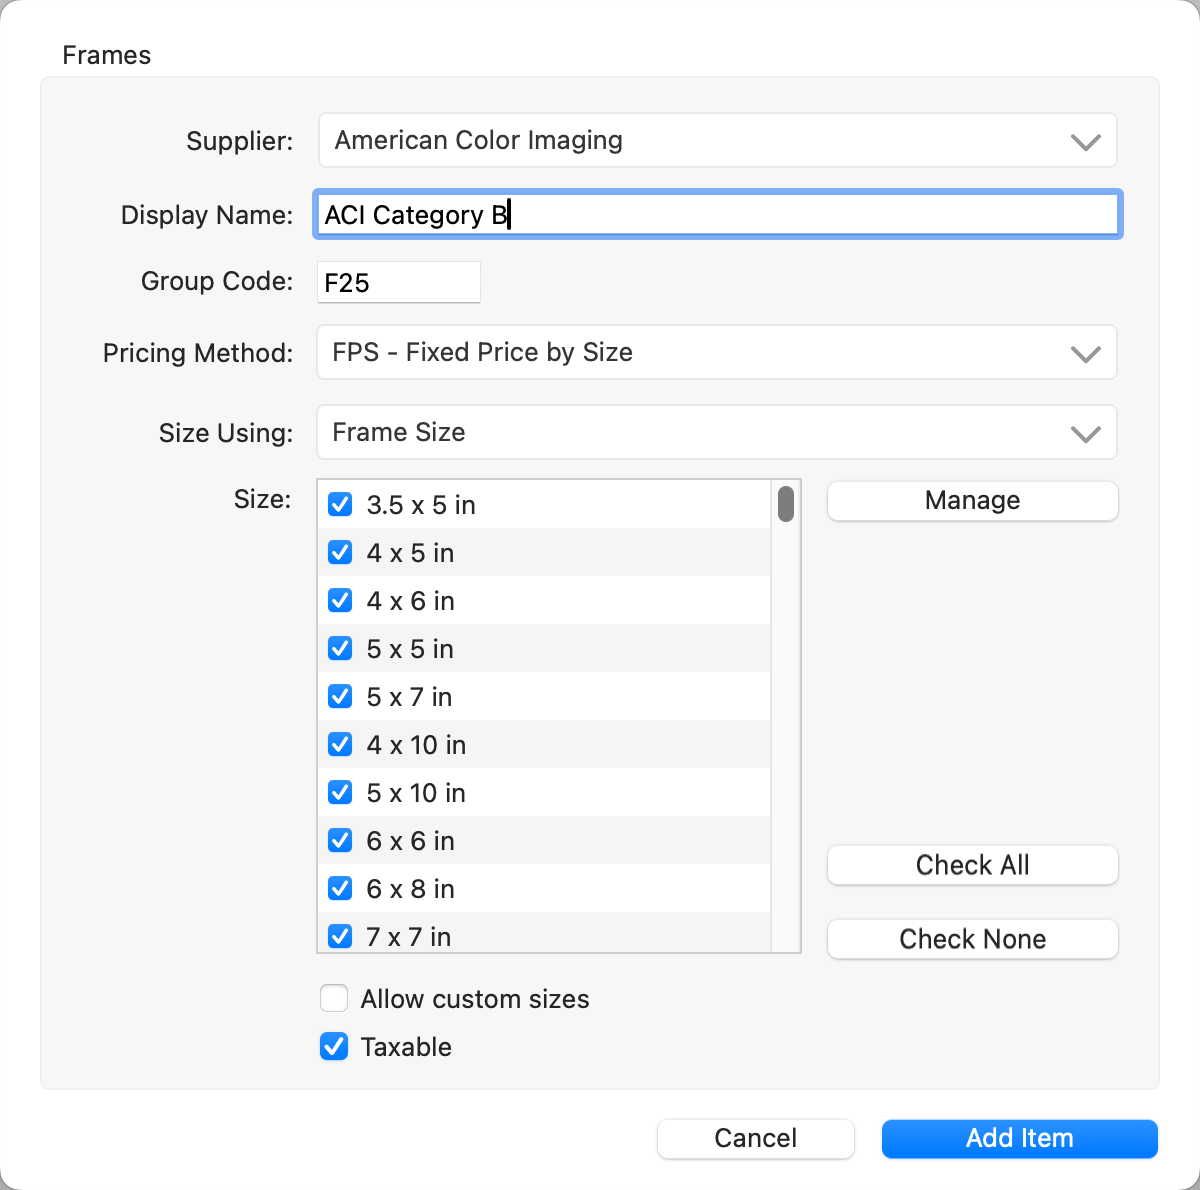
- Supplier: Optionally assign a Supplier to the item.
- Display Name: Type in a description of the item.
- Group Code (Frames and Mats only): A group code will automatically be generated. Use this or create your own unique code.
- Available to (Extras only): To make the new Extras item available for specific products, check the boxes next to the products you want to include.
- Pricing Method: Select FPS - Fixed Price by Size.
- Size Using: There are two options to choose from, based on how your print lab charges for frames and mats.
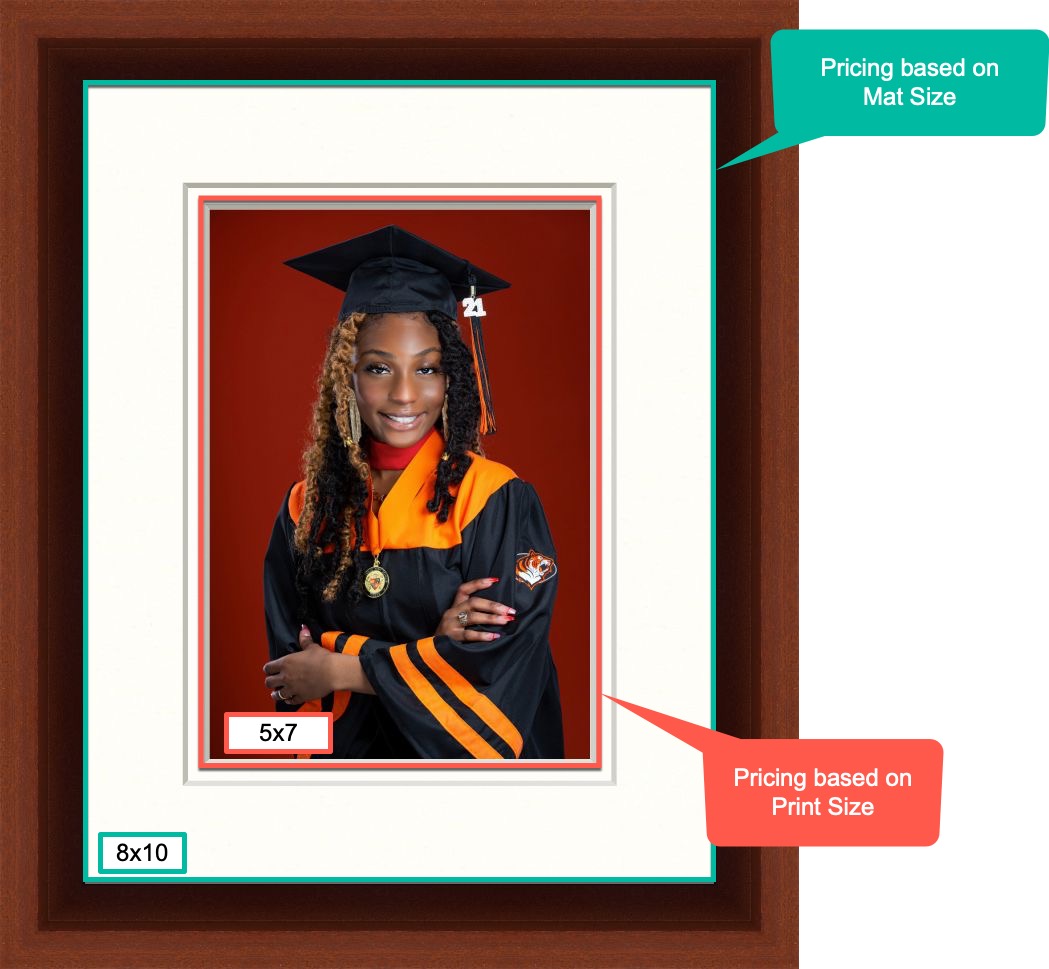
- Traditional Mat/Frame Size: Selecting Traditional Mat/Frame Size will trigger a price based on the size of the traditional mat that would always equal the size of the frame. Most labs and framers use this size/pricing method. If you are unsure, choose Traditional Mat/Frame Size.
- Print Size: Selecting Print Size will trigger a price based on the size of the print regardless of the size of the mat or frame. In the example shown, with the Print Size selection, the frame and/or traditional mat would be priced at the 5x7 cost, although the frame and mat size are 8x10. The Print Size setting is rarely used.
- Size: Check the boxes to include as many sizes as you would like. You have the option to Select All or Select None. To add more sizes, click the Manage button.
- You can add sizes from your Paper Sizes, or allow custom sizes.
- Allow Custom Sizes: If your supplier can only supply selected specific sizes, you should NOT check the Allow Custom Sizes checkbox. If your supplier can supply any sizes and you wish to price items by size range, then check the Allow Custom Sizes checkbox. In this case, the price for the next larger listed size (based on the perimeter or United Inches values) will be used. You will not be allowed to select any size greater than the largest size you have added to the Price Group.
- Product Code: If enabled, one will be auto-generated.
- Check the Taxable box if you wish the item to be taxed.
- Click the Add Item button.
- Once the price group has been created, you will need to individually price each size being offered.
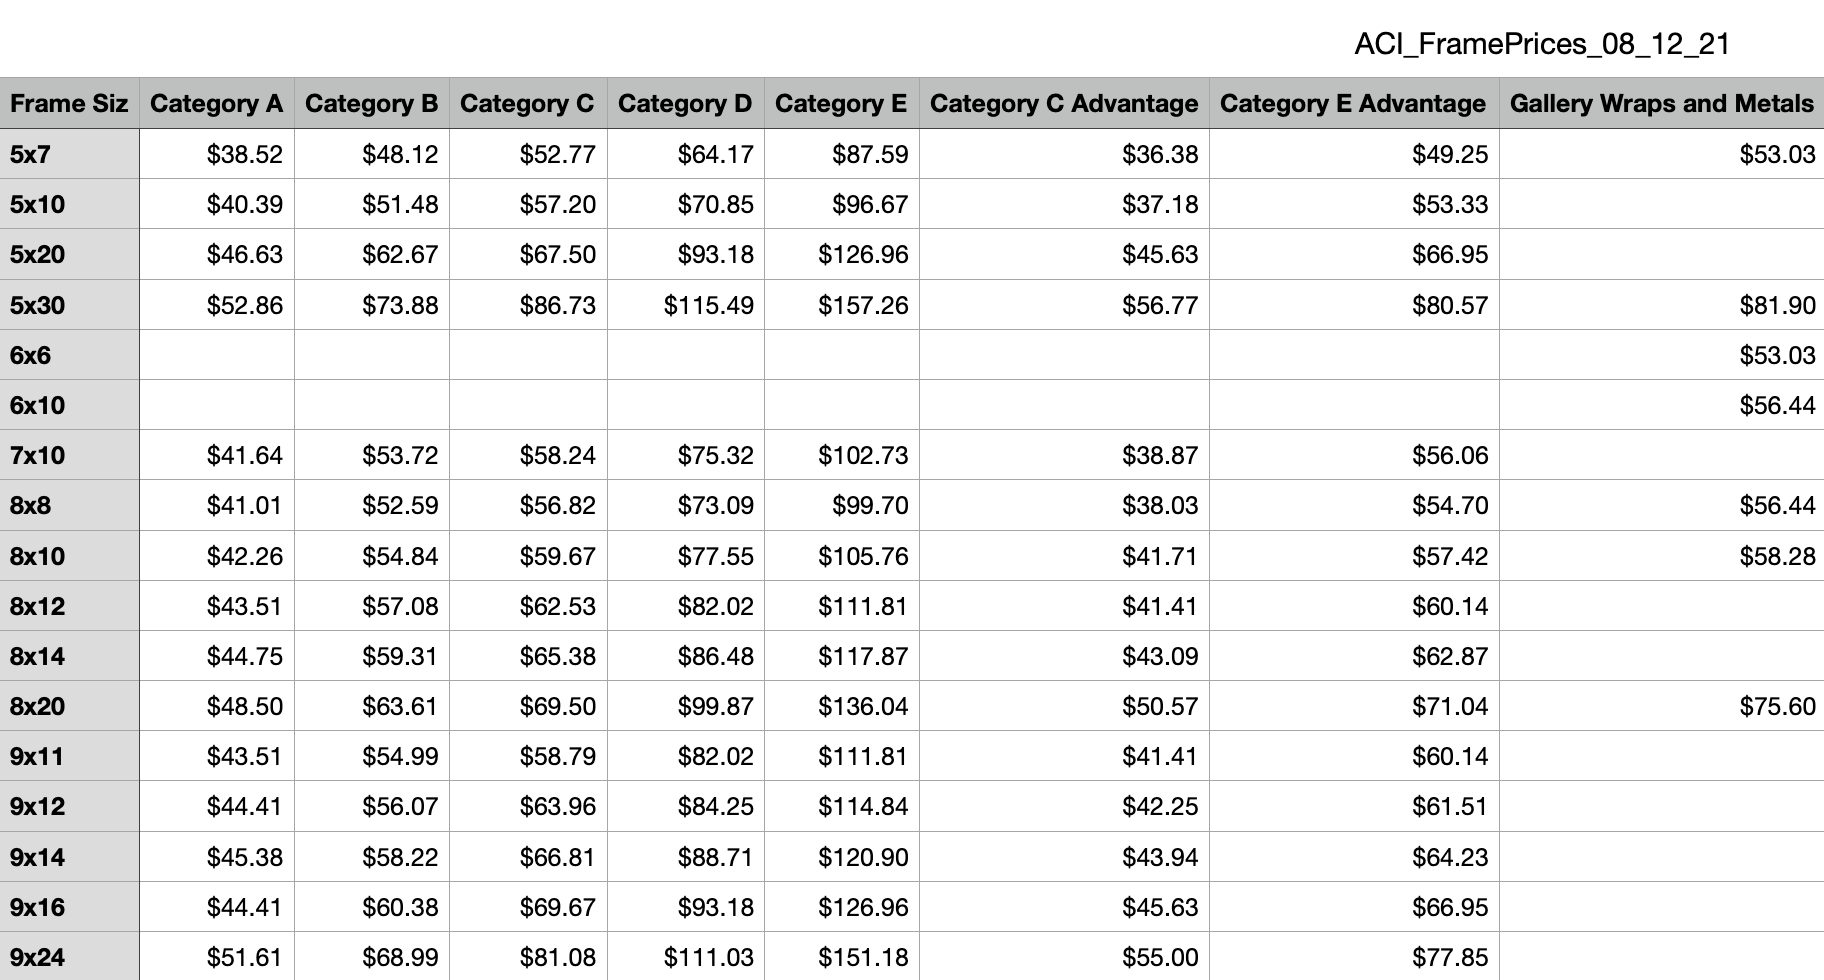
Another option when creating a Fixed Price by Size Pricing Group, is to import the data from a CSV file. These can sometimes be supplied by print labs. The following is an example of a CSV file provided by ACI:
- When working with Excel or Numbers, remember to export your file as a .csv before importing it into ProSelect.
When in the Frame & Mat Pricing Manager dialog (Go to the top menu, Products > Frame & Mat Pricing Manager) if you hold OptionAlt while clicking the Add button, you can select and import a CSV file containing a list of sizes and one or more price columns.
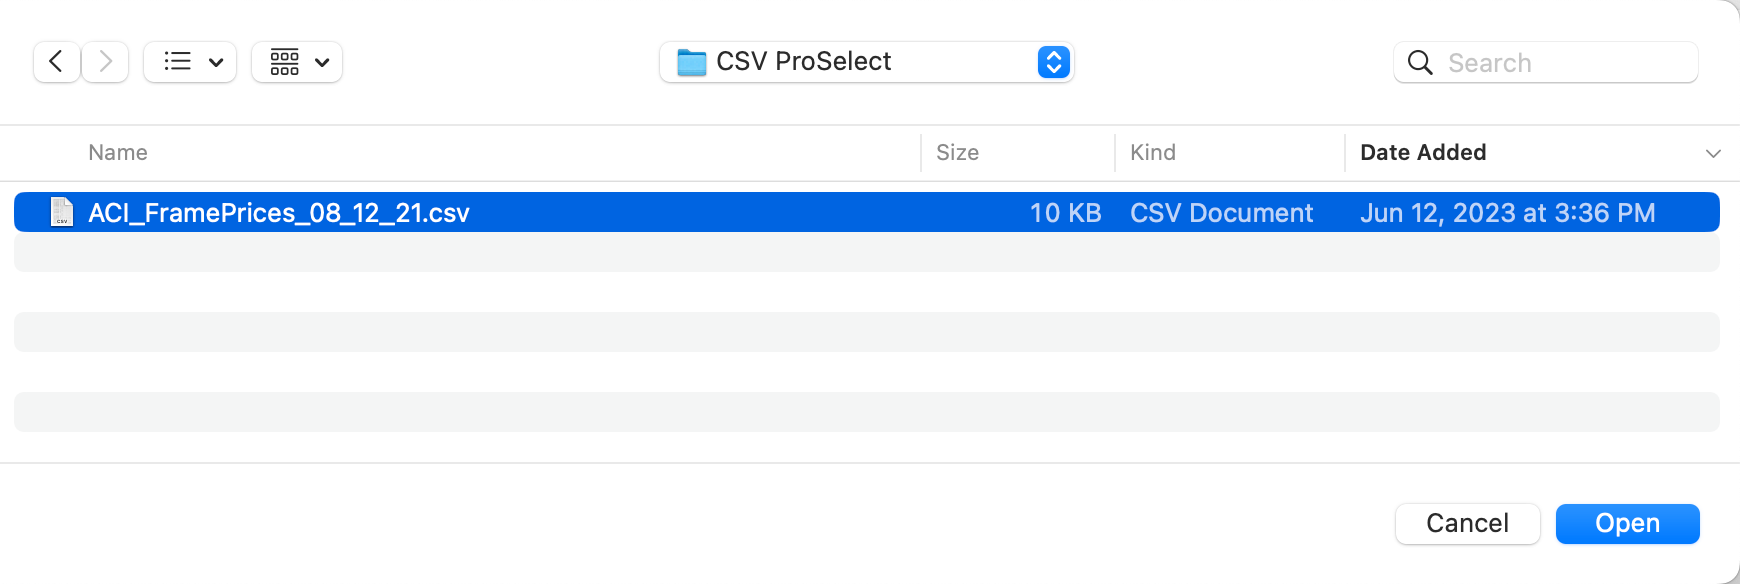
Select the file you wish to import, then click the Open button.
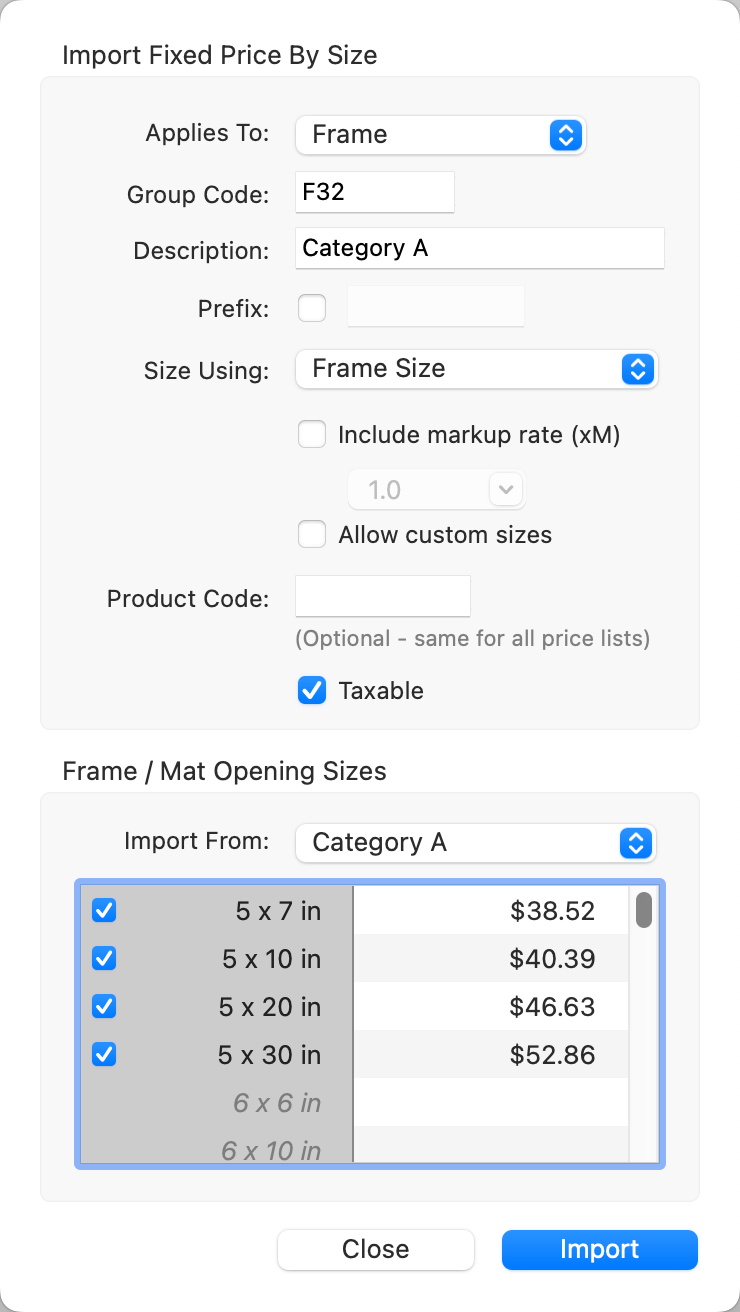
- Applies To: Select whether you are importing a Frame or Traditional Mat.
- Group Code: A group code will automatically be generated. Use this or create your own unique code.
- Description: A description will also be automatically generated. Use this or type in a description of your own choosing.
- Prefix: Checking this box allows you to add an acronym to each price group upon import.
- Size Using: There are two options to choose from, based on how your print lab charges for frames and mats.
- Frame (or Mat) Size: The listed sizes refer to the outside of the frame or mat.
- Print Size: The listed sizes refer to the inside of the frame or mat (the print size).
- Check the box if you wish to include a markup rate (xM).
- Allow Custom Sizes: If your supplier can only supply selected specific sizes, you should NOT check the Allow Custom Sizes checkbox. If your supplier can supply any sizes and you wish to price items by size range, then check the Allow Custom Sizes checkbox. In this case, the price for the next larger listed size (based on the perimeter or United Inches values) will be used. You will not be allowed to select any size greater than the largest size you have added to the Price Group.
- Product Code: If enabled in your Settings, you can add a product code here.
- Check the Taxable box if you wish the price group to be taxed.
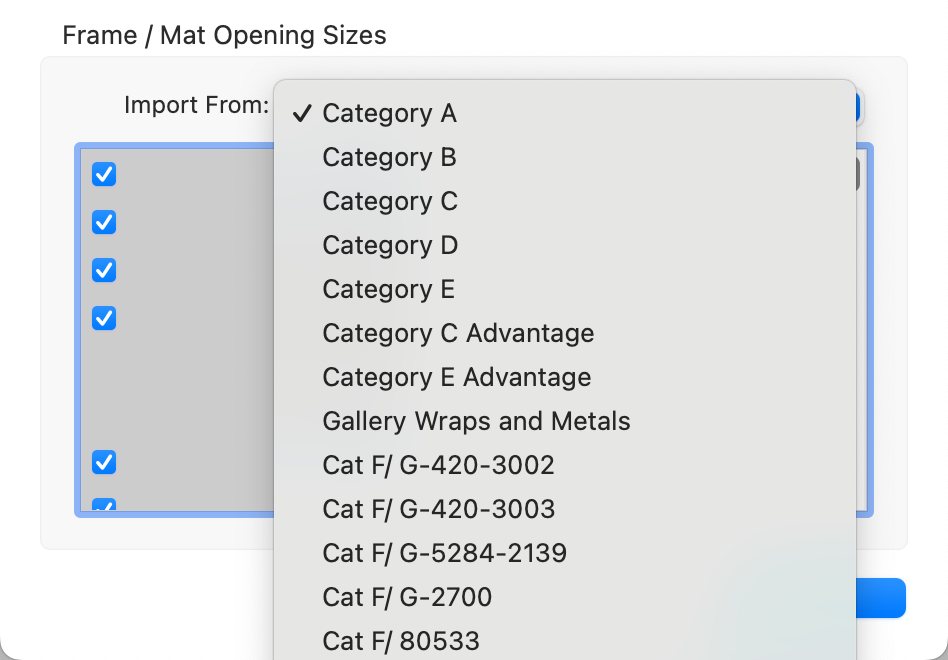
- Import From: Select a group you would like to import from the drop-down menu. If the file contains a header row, then the title of each of the price columns will be displayed. As you can see from this example, the Import From drop-down menu matches the column headers in our CSV file. You can select one of the columns and create a new FPS price group using the selected sizes and the associated price in the selected column.
- Size: By default, all of the sizes will be checked. Uncheck any you don't wish to import.
- Click the Import button.
If you have multiple columns to import, the import window will remain open after each import until you have finished importing all columns.
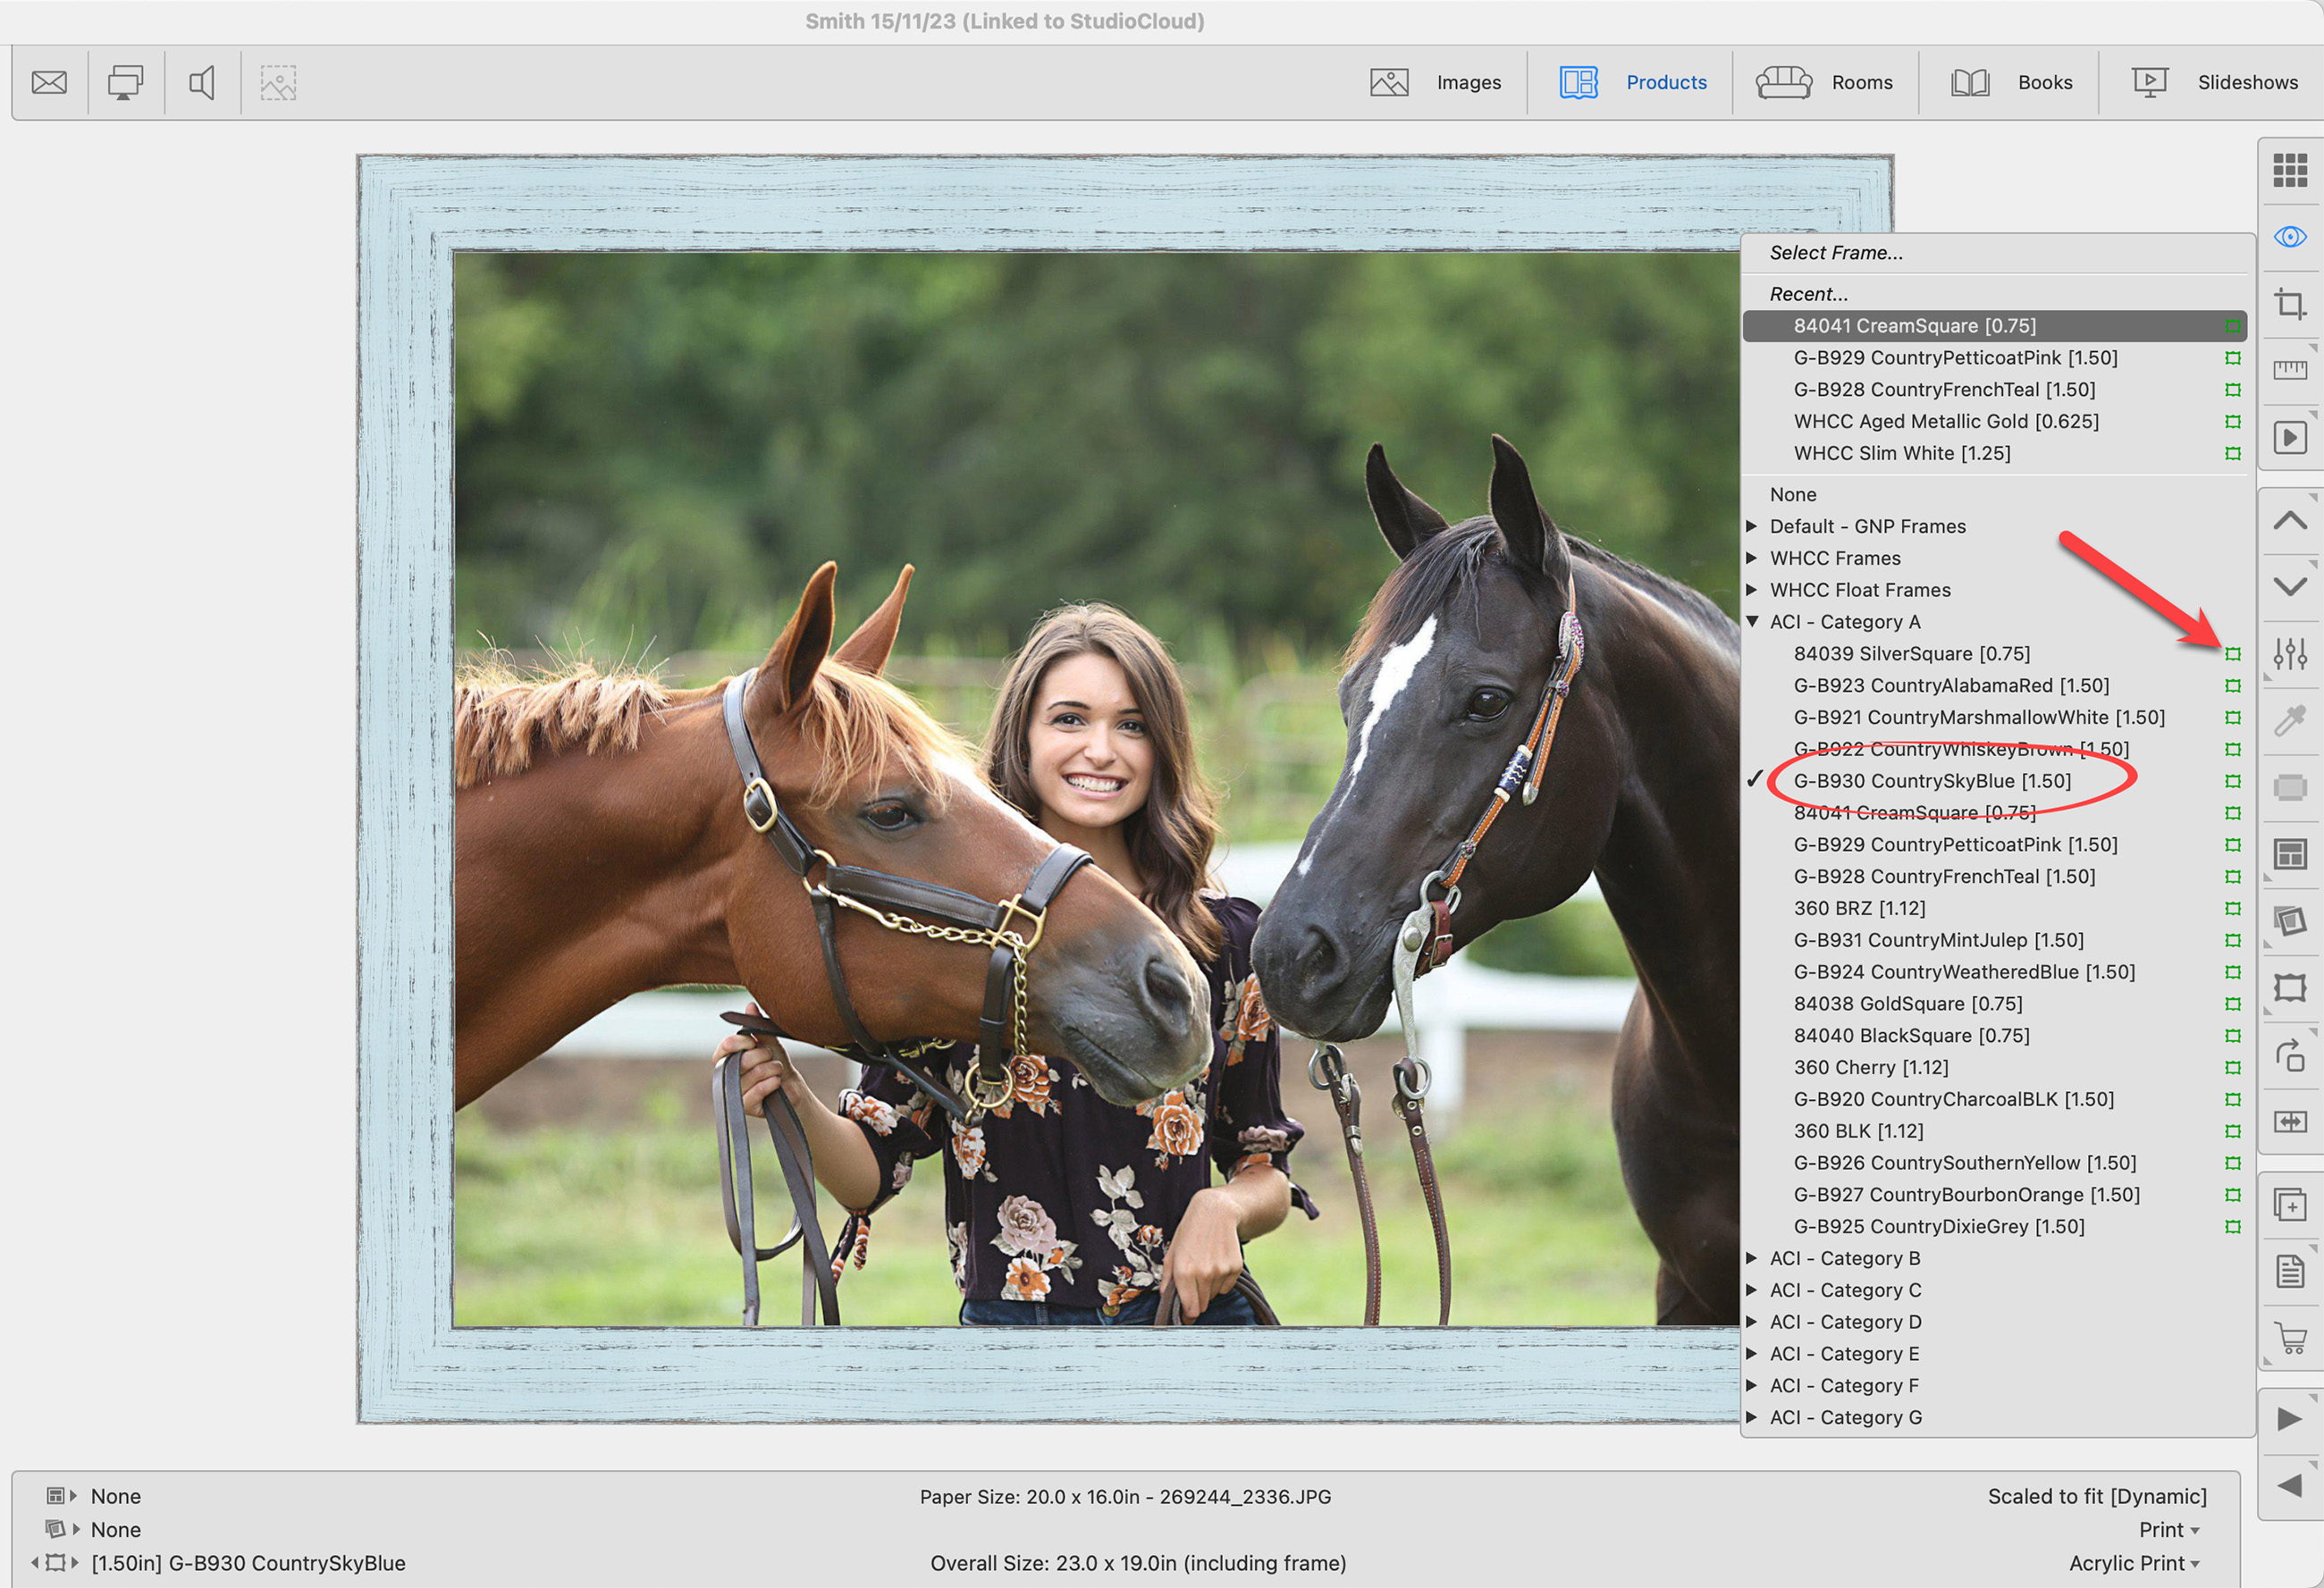
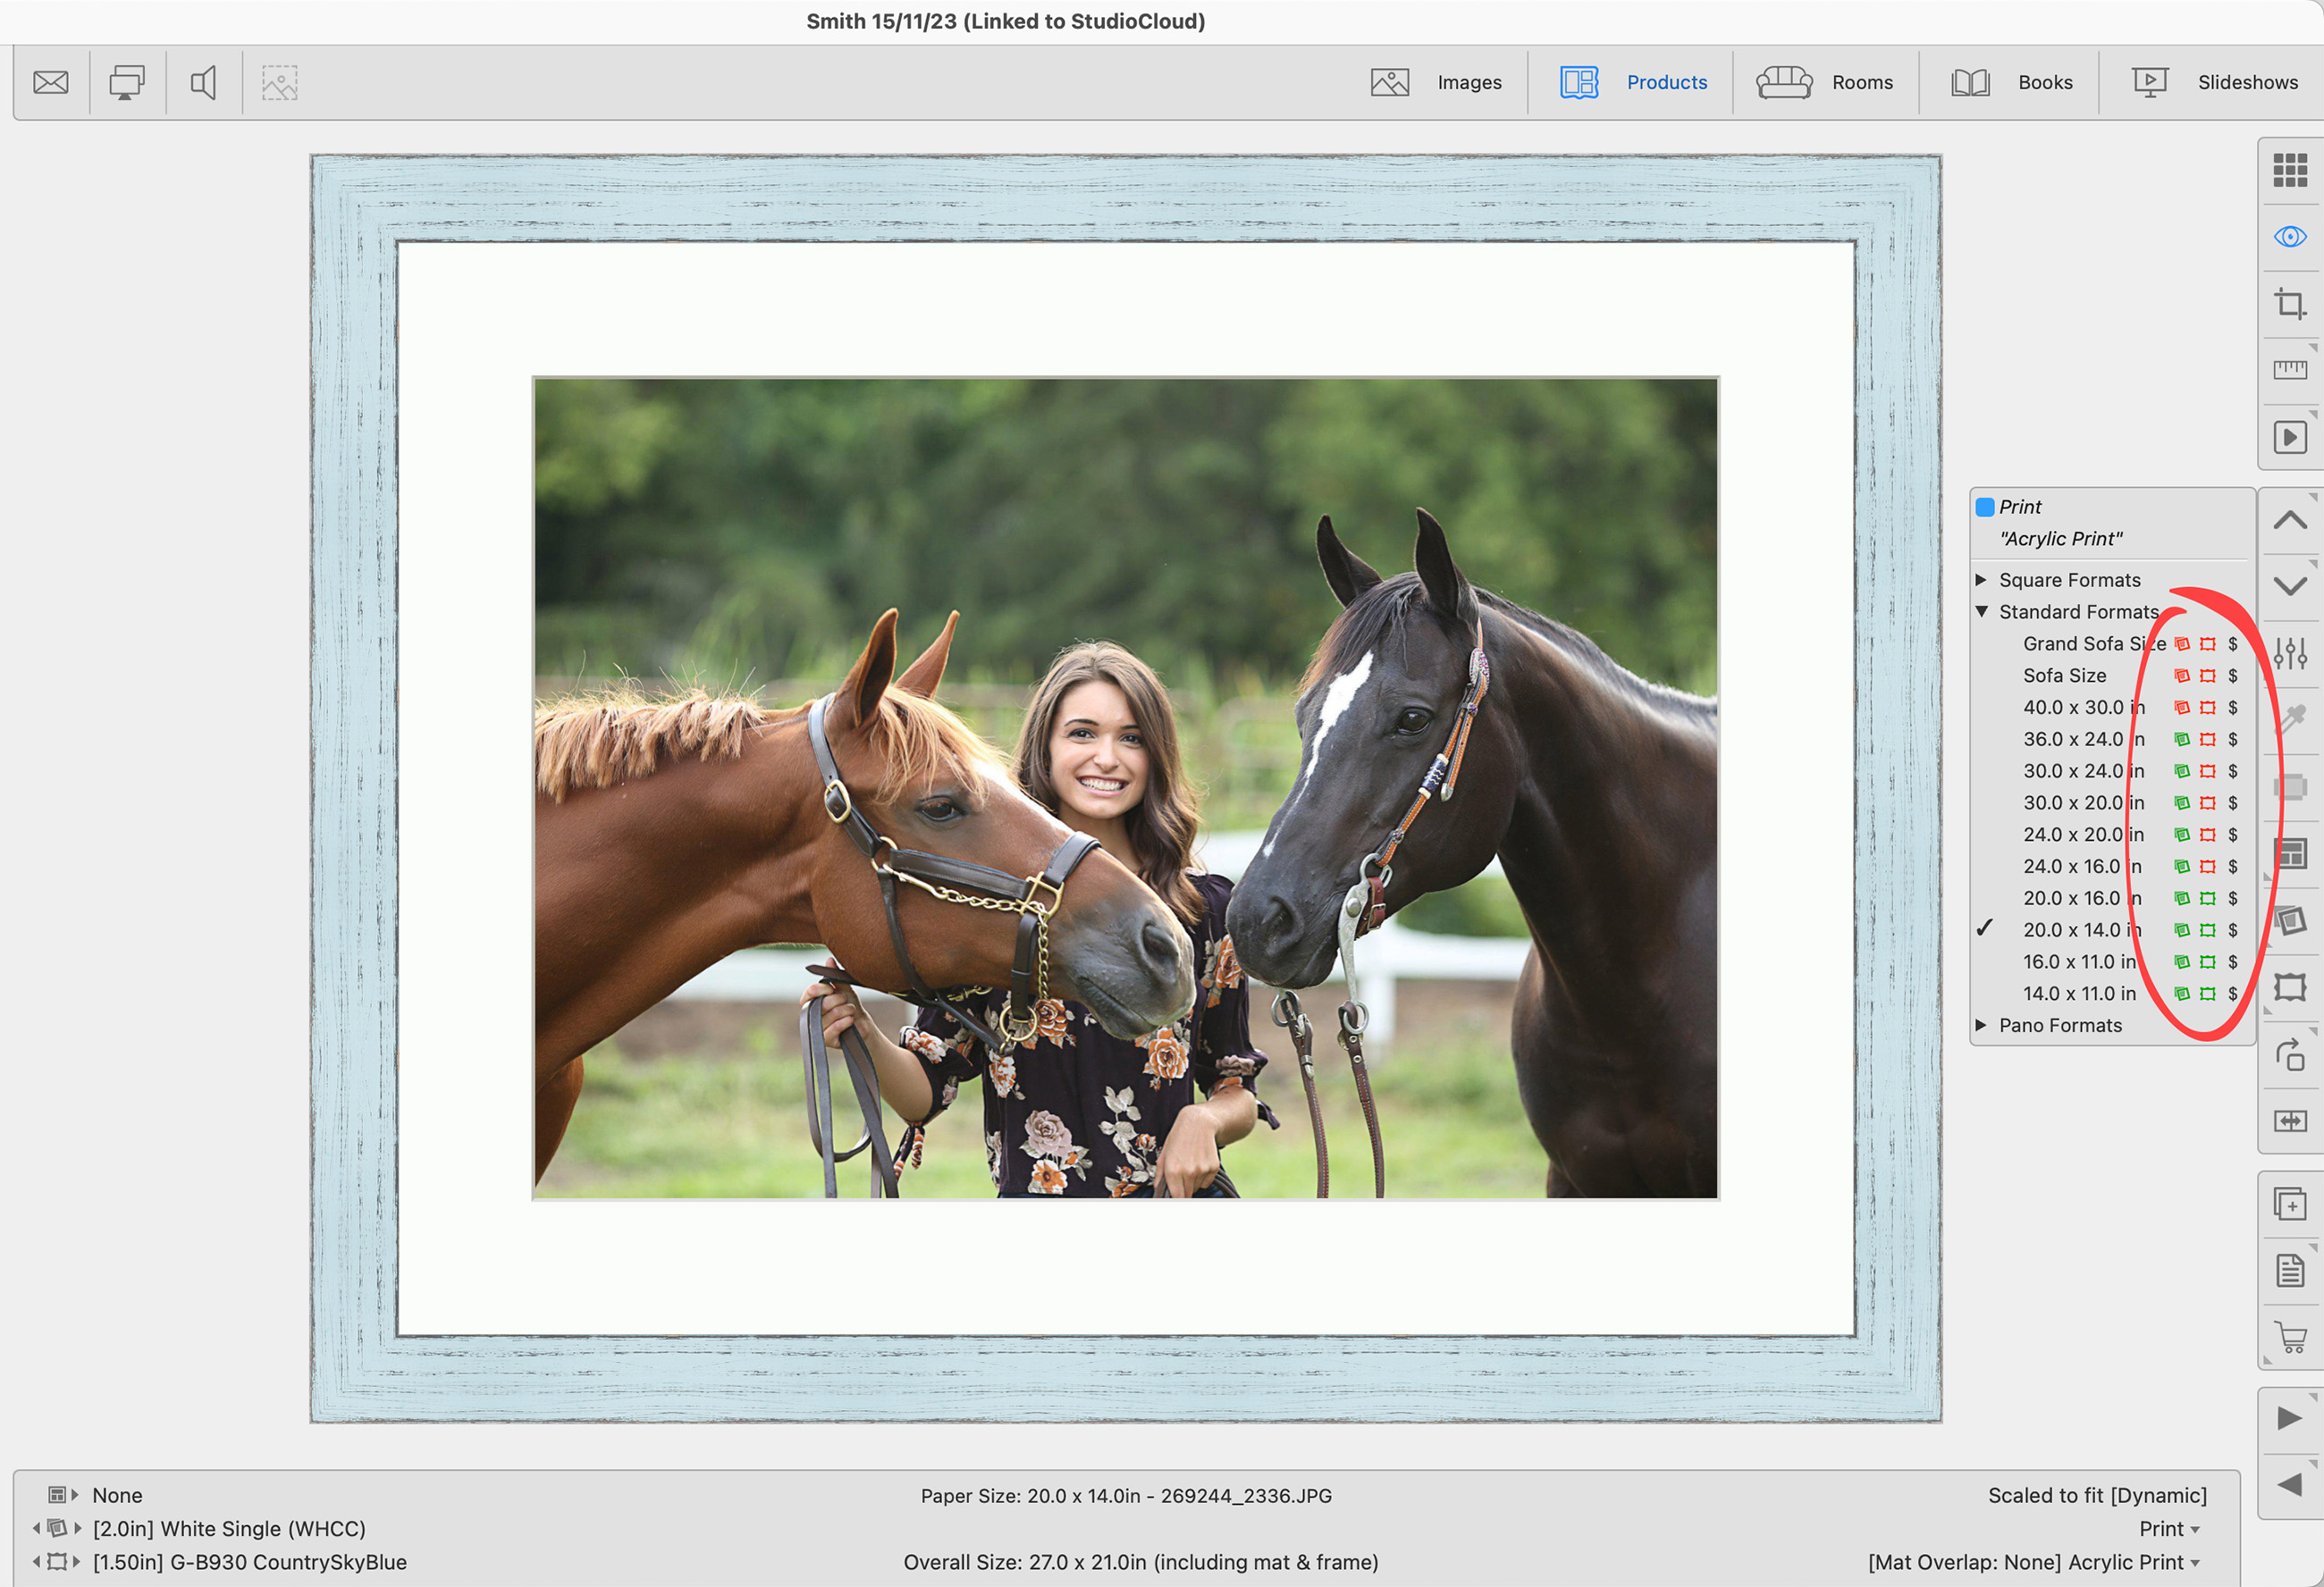
If you use the FPS pricing method for any frames or mats, you'll see a green or red frame tag on the right side of these frames/mats when you use the Frame or Mat tool. Frame Validation depends on the supplier's ability to create a frame specific to the size required for the print. If a frame tag is red, this means “based on information provided by the supplier, the frame is not available in the selected size. Custom sizes may be available by contacting the supplier's customer service dept.” If you've allowed custom sizes in your frame/mat group setup, it's assumed all sizes are available, and the tags will all be green. Any product templates you create using the Product Editor will also show a red or green frame/mat tag.
![]() - This frame is available at the selected product size.
- This frame is available at the selected product size.
![]() - This mat is available at the selected product size.
- This mat is available at the selected product size.
![]() - This frame is NOT available at the selected product size.
- This frame is NOT available at the selected product size.
![]() - This mat is NOT available at the selected product size.
- This mat is NOT available at the selected product size.
- It is important to note that a red frame tag does not prevent you from choosing or ordering a frame or mat. It simply serves as a warning to indicate that, in your current setup, the frame or mat is not available from the supplier at that size.
- Displaying unavailable frame and mat tags on the main interface can be turned off. Go to the View menu. Toggle "Show Unavailable Frame/Mat Size Tags."
- To temporarily hide the red frame tag on a product, hold the Spacebar.
Framed or Matted Prints
If you find the standard products available to be limiting, consider choosing a frame supplier with a wider array of products available. For example, GNP Framing offers custom-sized products. More print/frame/mat combinations will be available if the chosen supplier offers custom sizes. Custom sizes are typically priced at the next largest size, but in some cases, they may add an additional fee. Also, be aware that sizes 30x40 and larger may incur shipping surcharges.
In the following example, we are framing a 16 x 20 print. It is a common size, so all of the ACI frames are available as indicated by the green frame tags.
This same concept works when using the Previous Size tool ![]() or Next Size tool
or Next Size tool ![]() in the right-hand toolbar. Once a frame is assigned, right-click on the Previous/Next Size tool to see available sizes.
in the right-hand toolbar. Once a frame is assigned, right-click on the Previous/Next Size tool to see available sizes.
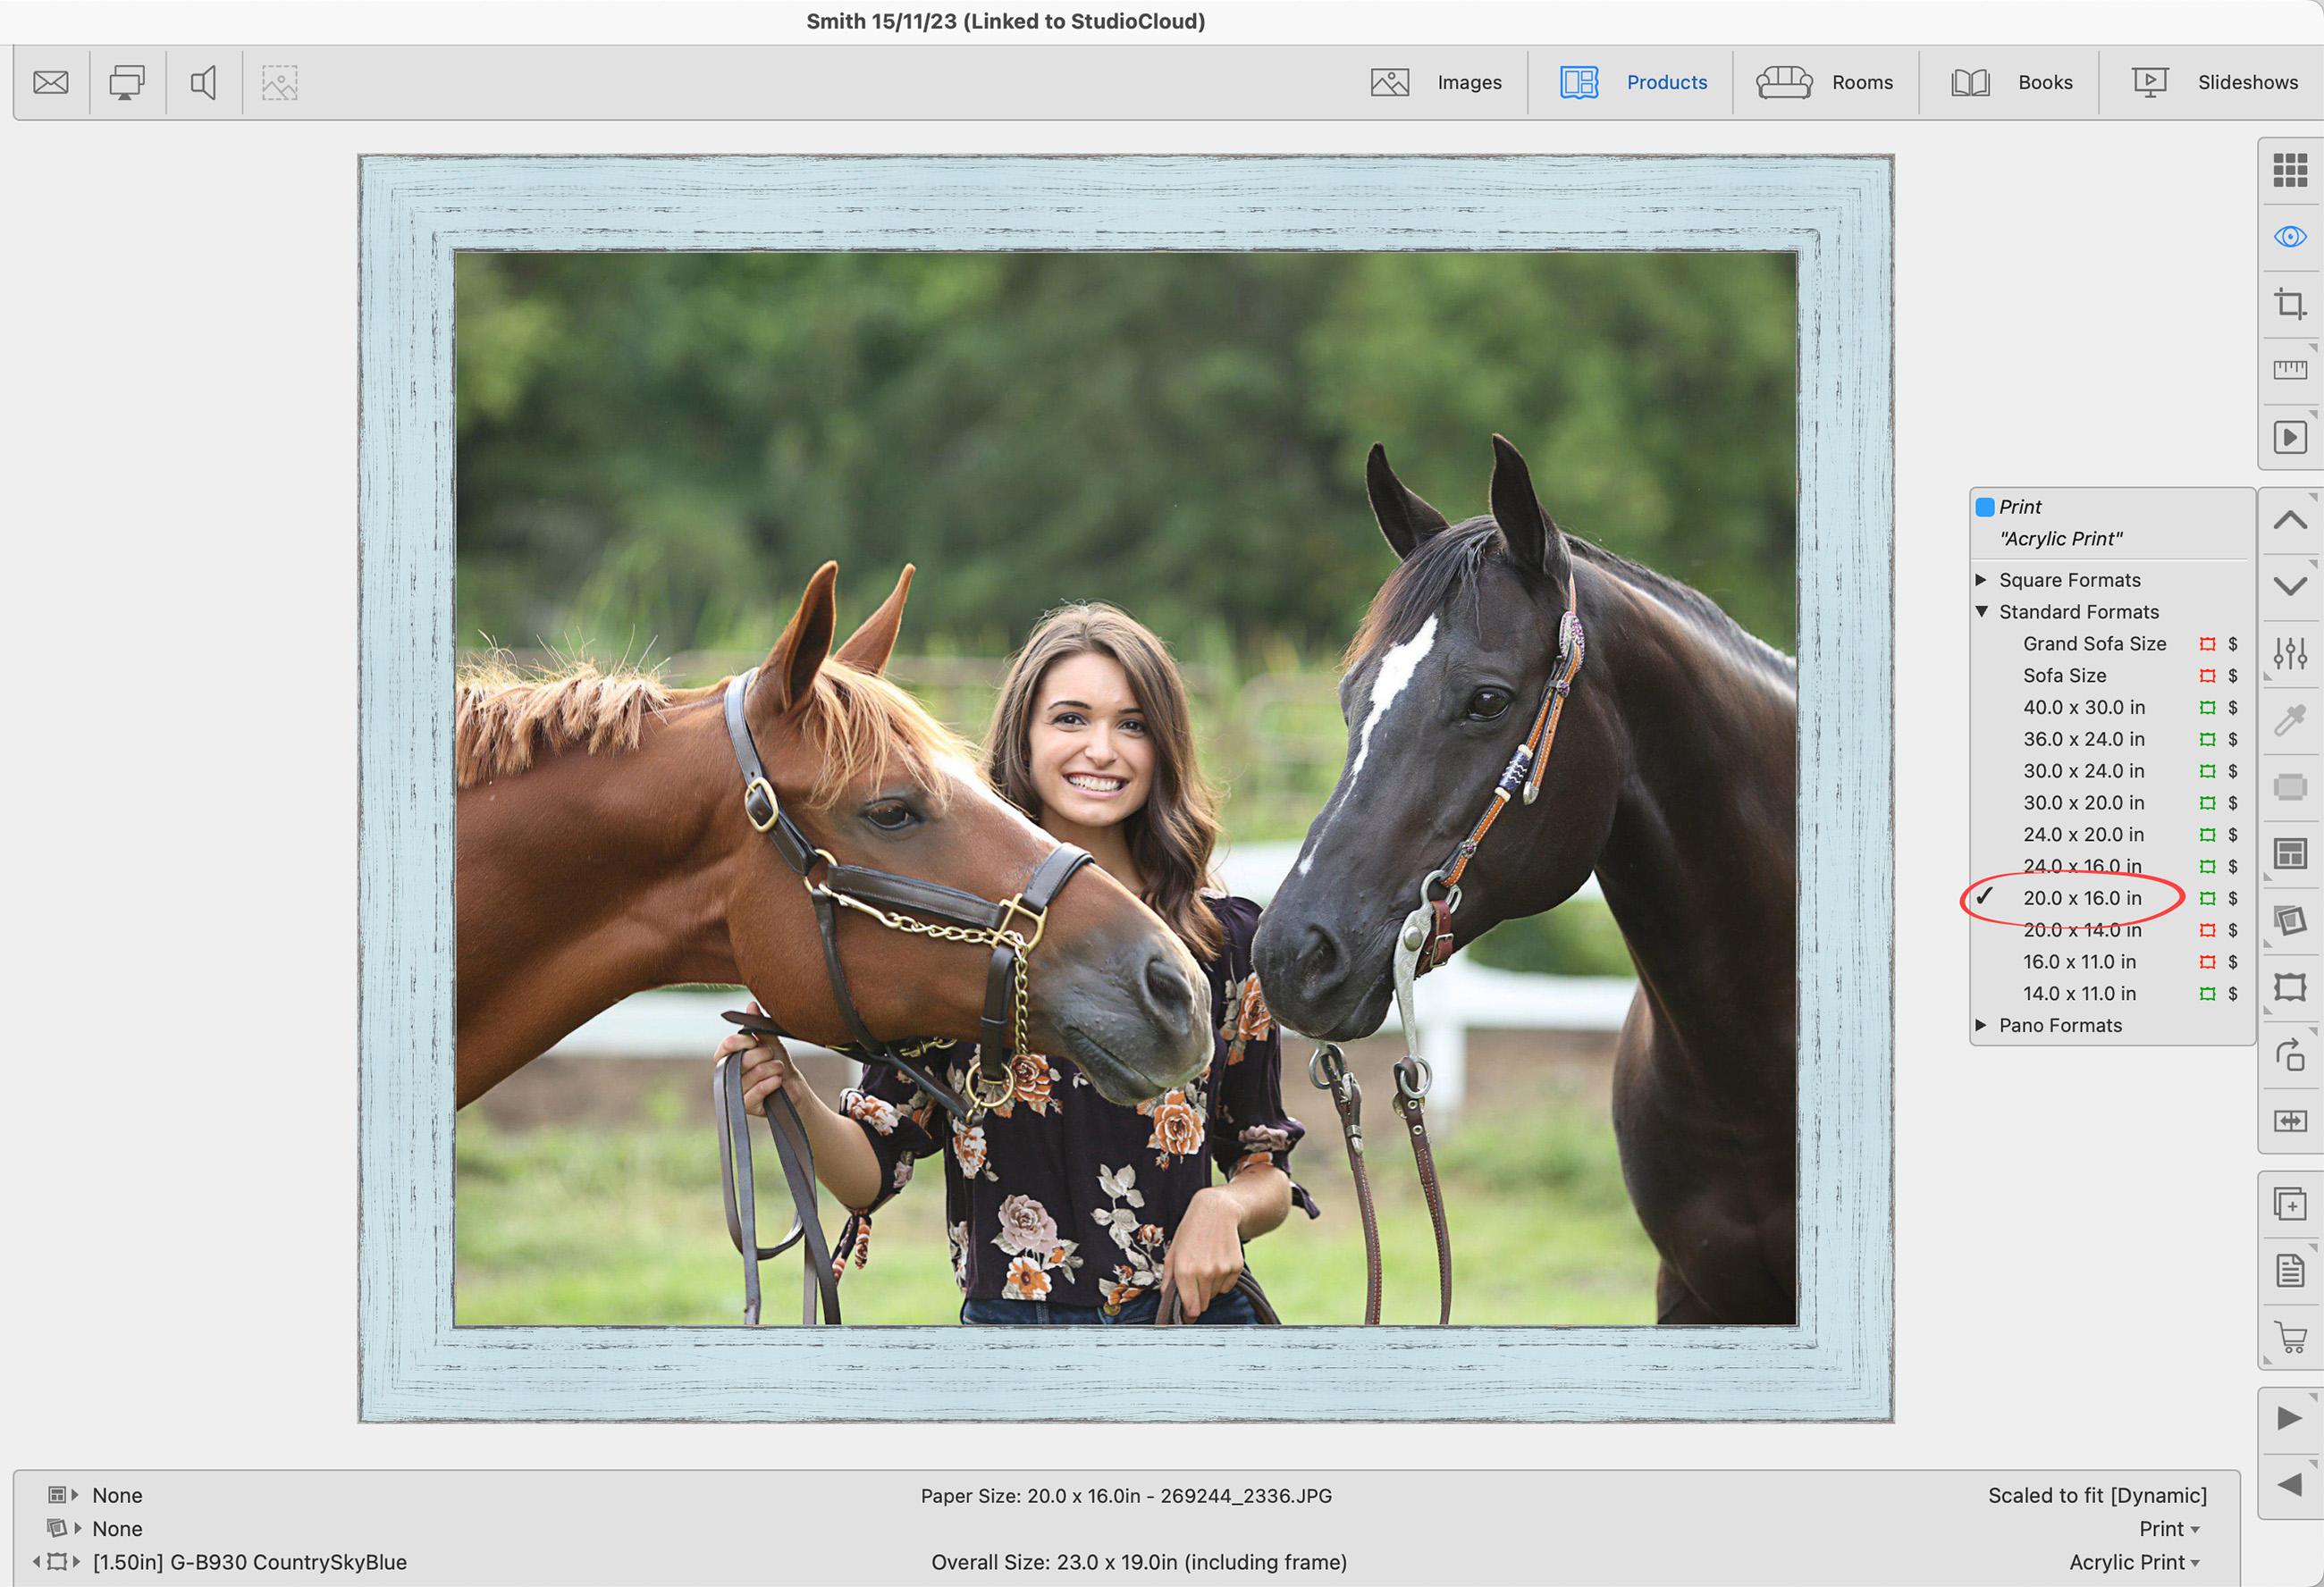
If both a mat and frame, are applied, the red and green tags serve as an important indicator of which combinations are producible.
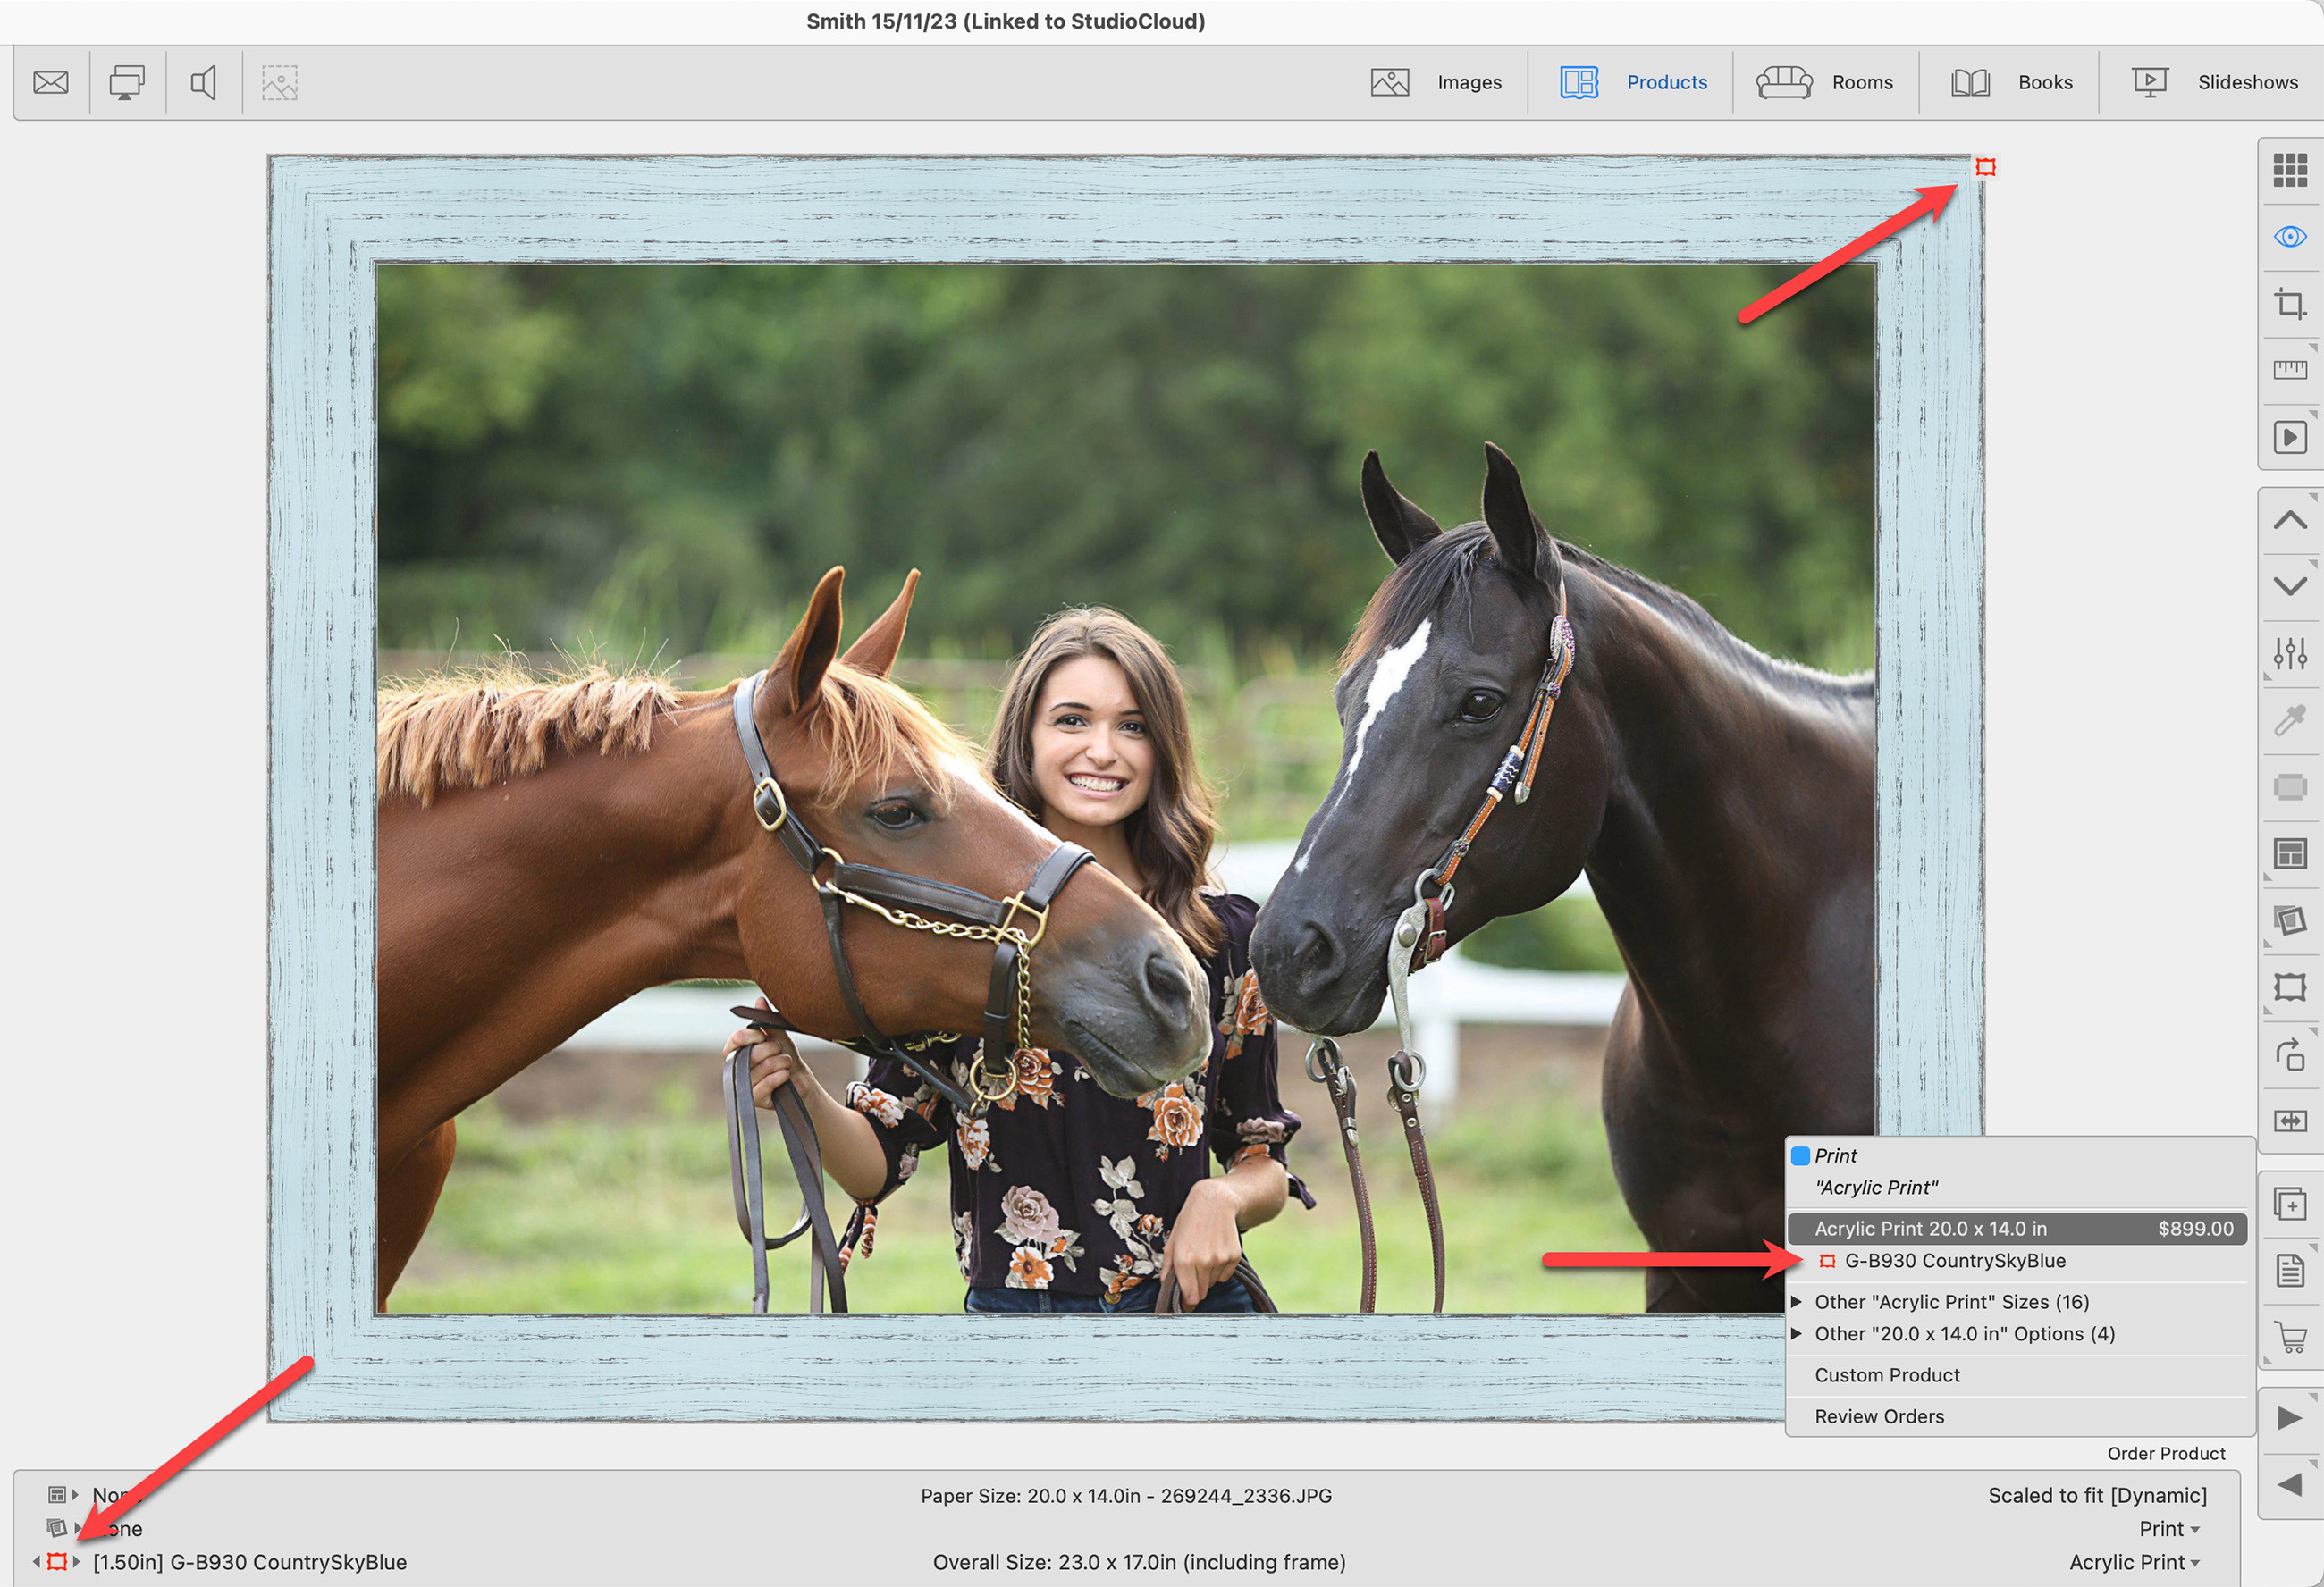
If you select a frame or mat with a red tag, the tags also appear in the upper right corner of the print, the bottom info bar, as well as in the Order Product popup menu.
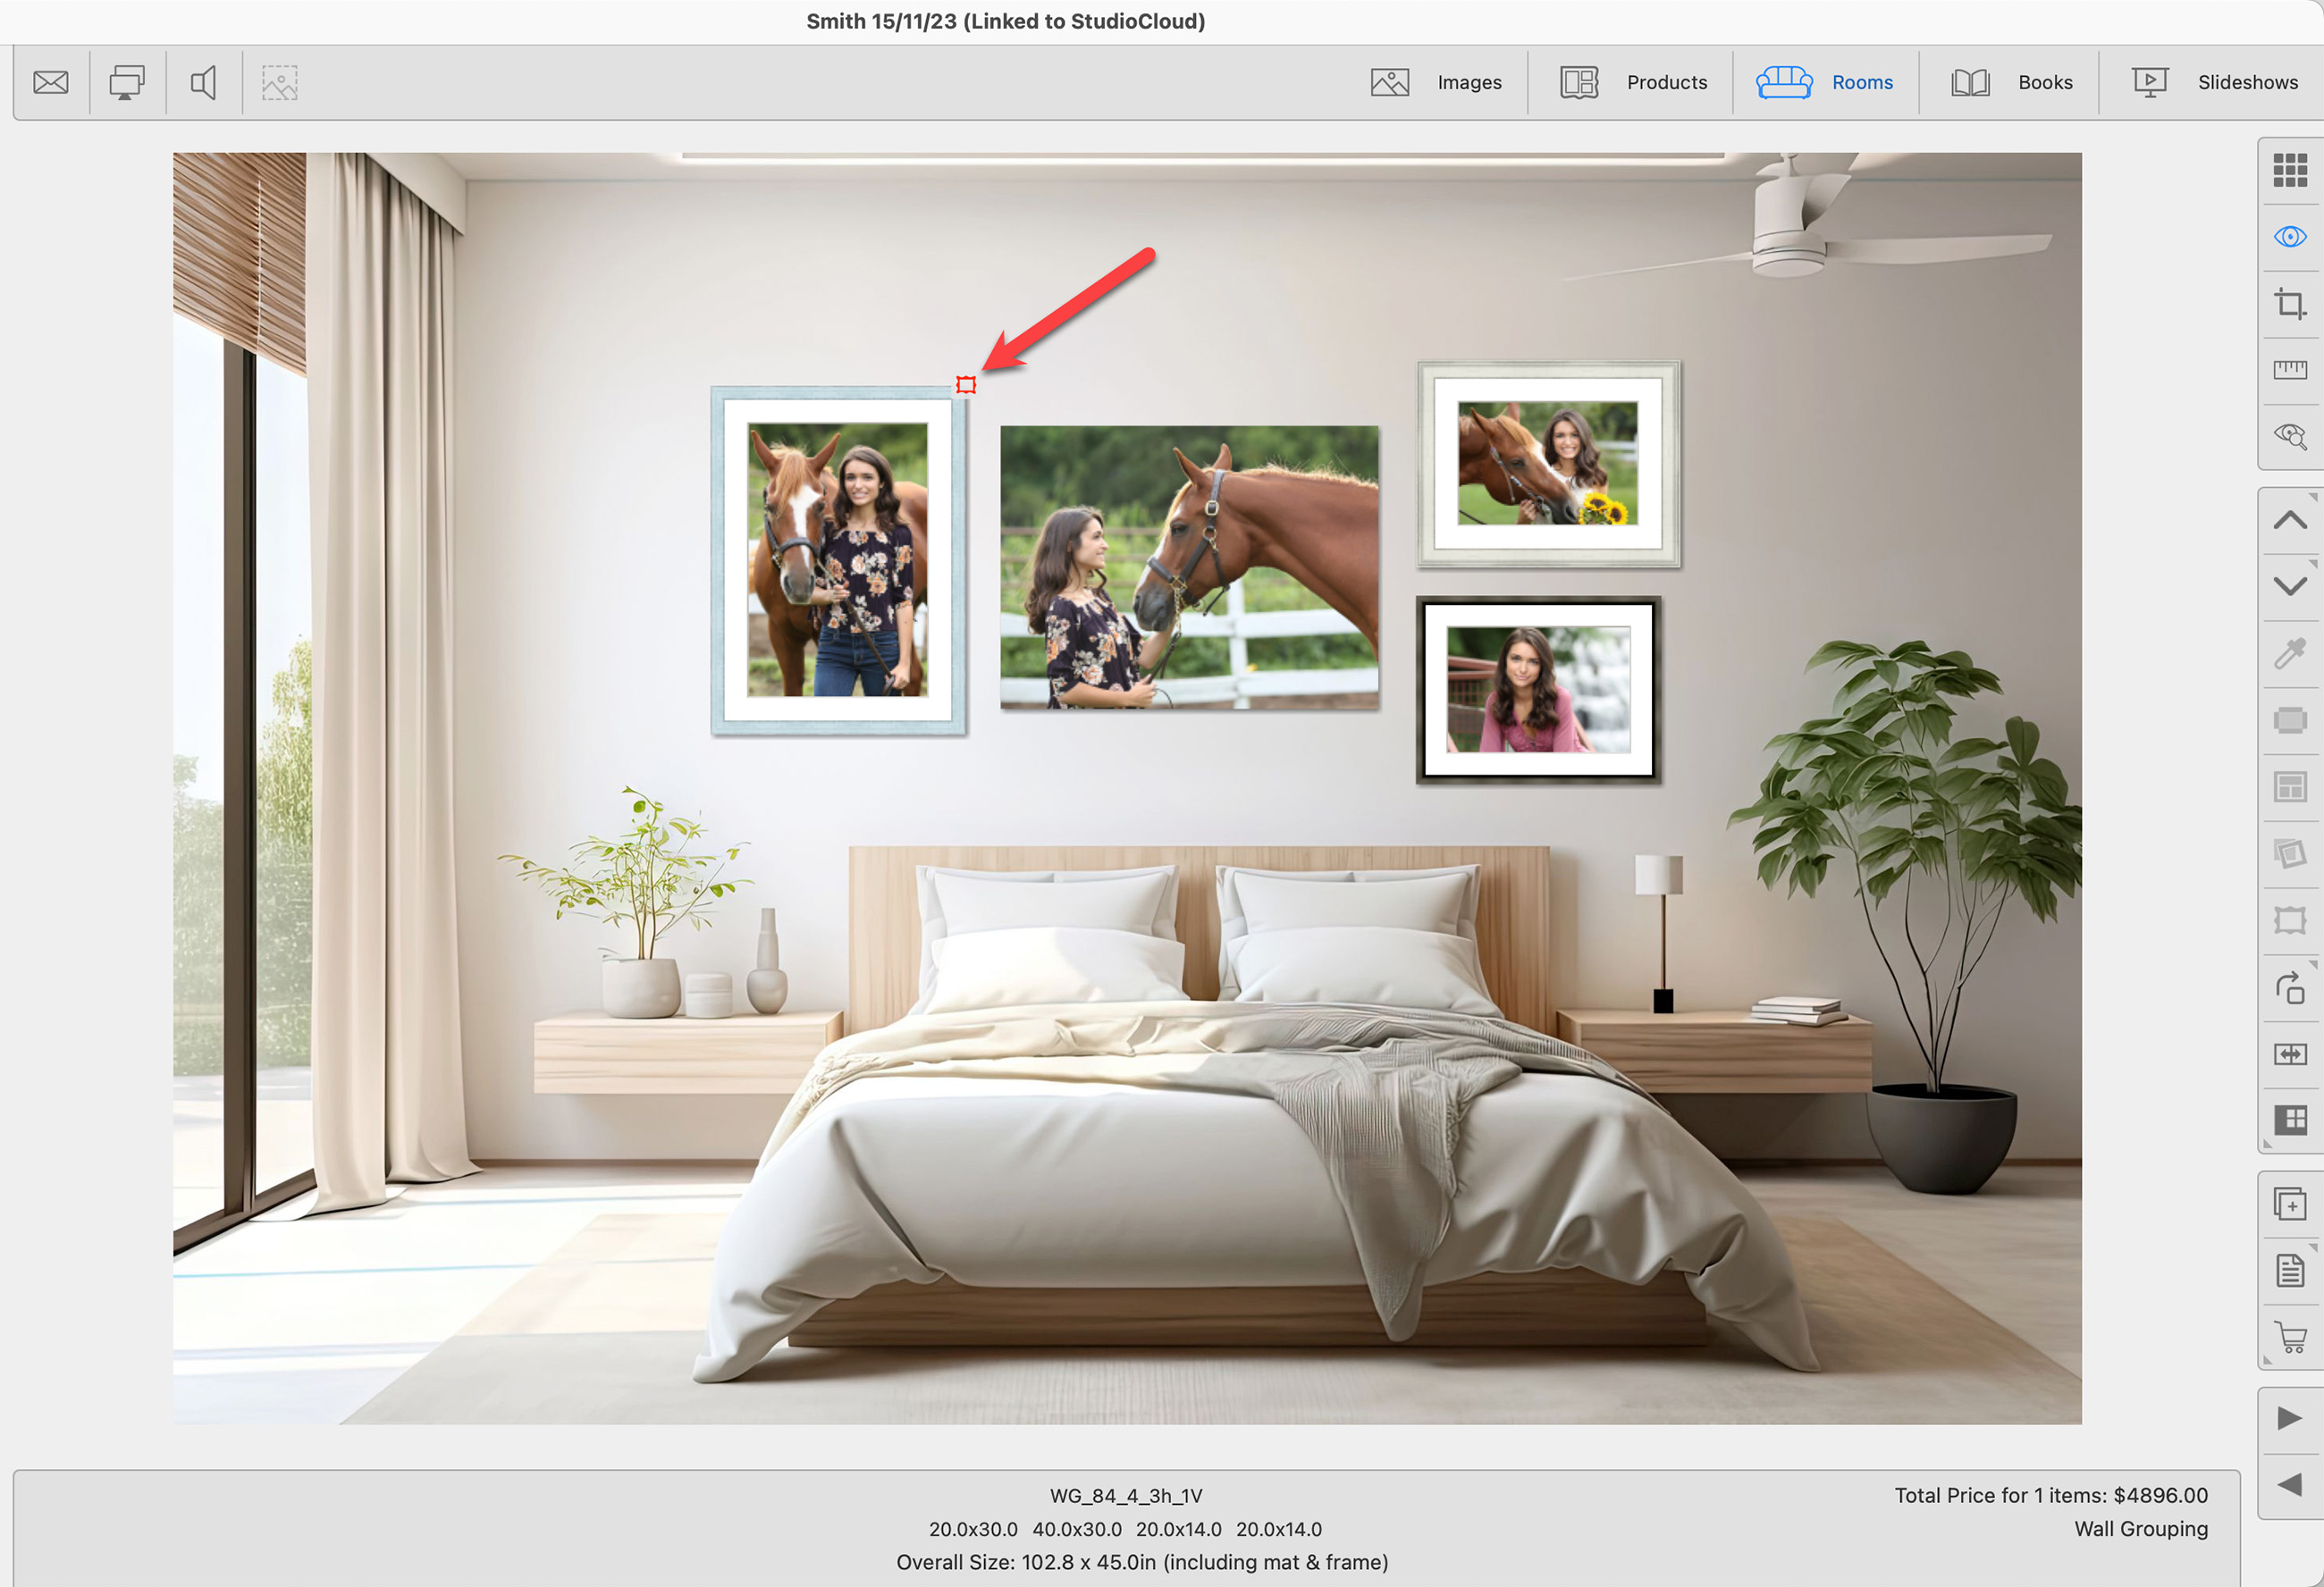
Wall groupings may contain different-sized products, each with different mats and frames.
If you have "Show Unavailable Frame/Mat Size Tags" checked, (Go to the top menu, View > Show Unavailable Frame/Mat Size Tags), red tags will be displayed over the top right corner of any image that is using a frame or mat that is not available at the current size.
Click on Frame Validation - Frame and Mat Selection Tags to learn more.