Gallery Wrap Components
The thickness of the wrapped edges on a Gallery Wrap typically ranges from 0.5" to 3". When setting up wrap edge depths, check the specifications set by your production lab to determine the correct wrap amount. The wrap area required is usually larger than the actual wrap depth of the product. For a 1.5” wrap, most labs require 2” of wrap area.
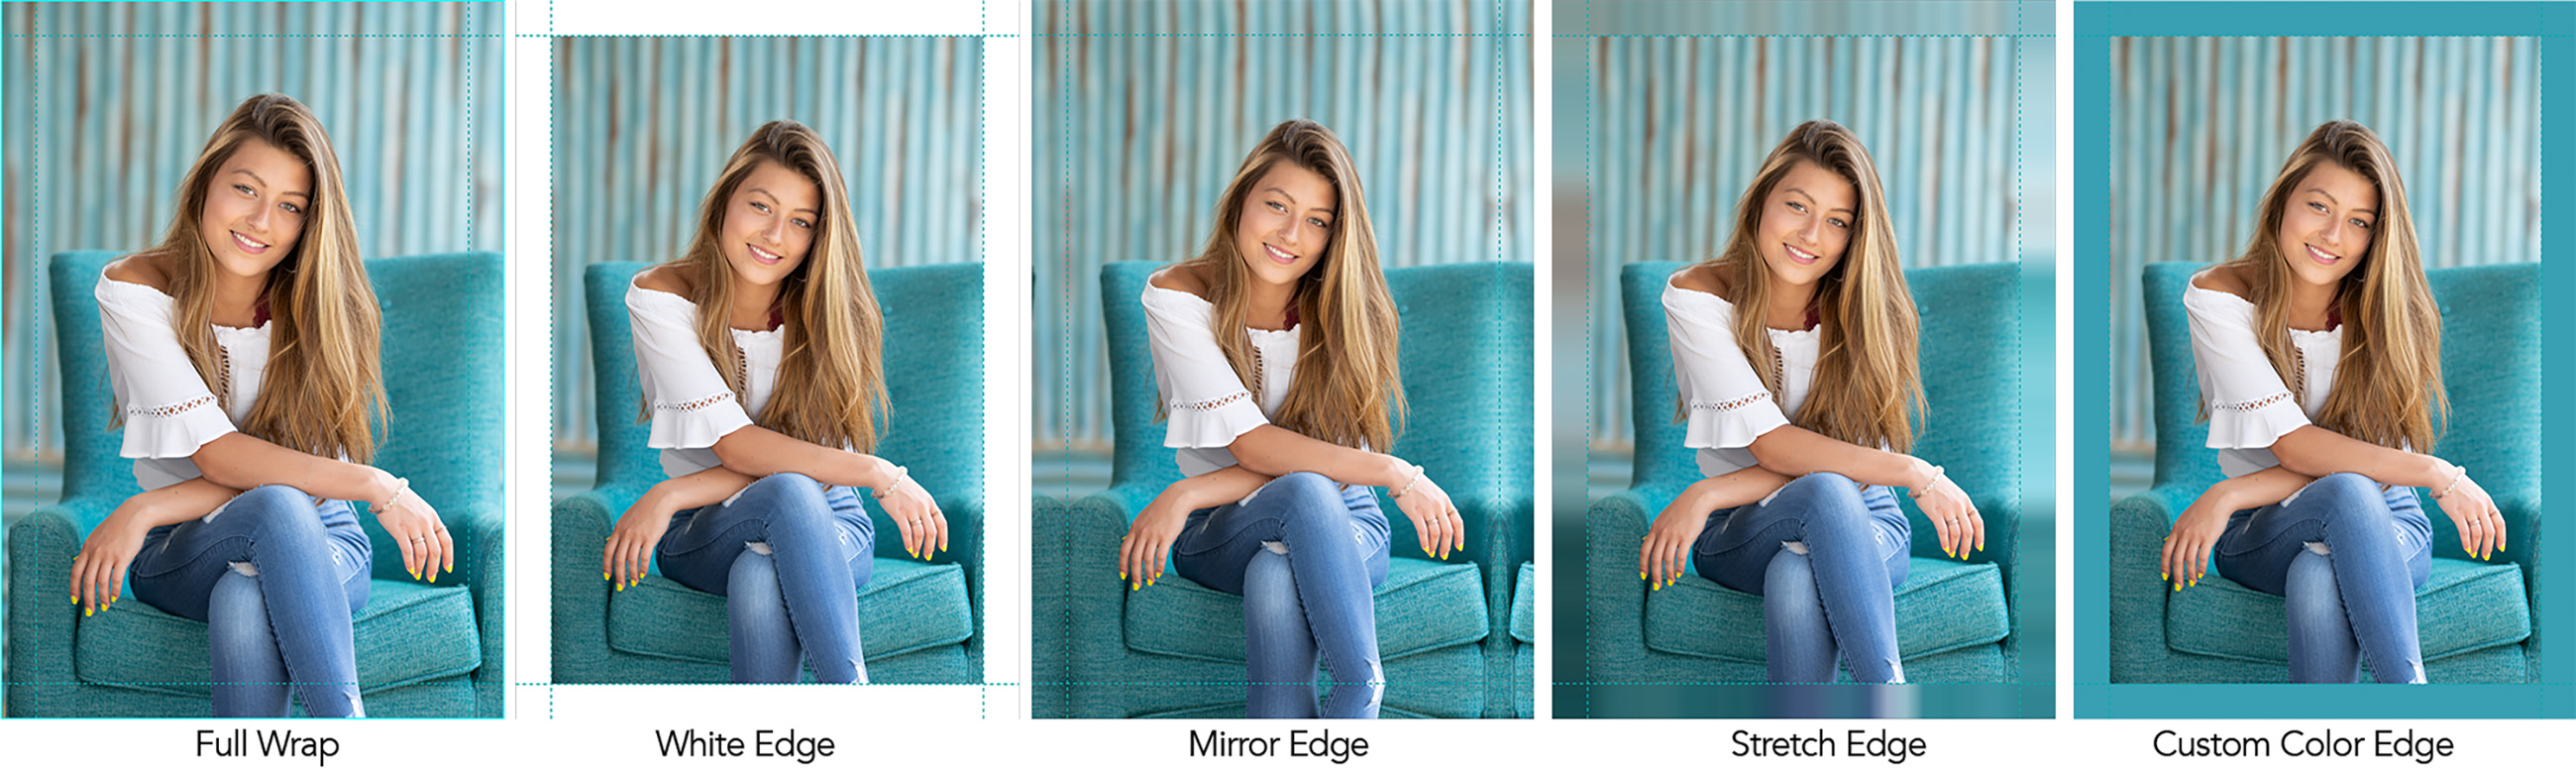
Gallery Wraps are sized based on the face size, and the images can either bleed to cover the edges or utilize specific edge treatments set in the Gallery Wrap Edge Treatment section.
ProSelect has an extensive library of Edge Depths based on numerous different Supplier's requirements. You can customize your Gallery Wrap edge depths by going to the top menu, Products > Gallery Wraps > Edge Depths. Note: Edge depths are enabled when the Supplier has been enabled (turned on). If an edge depth appears grayed out, this is because the Supplier has not been "turned on." Go to the top menu, Products > Suppliers to turn them on.
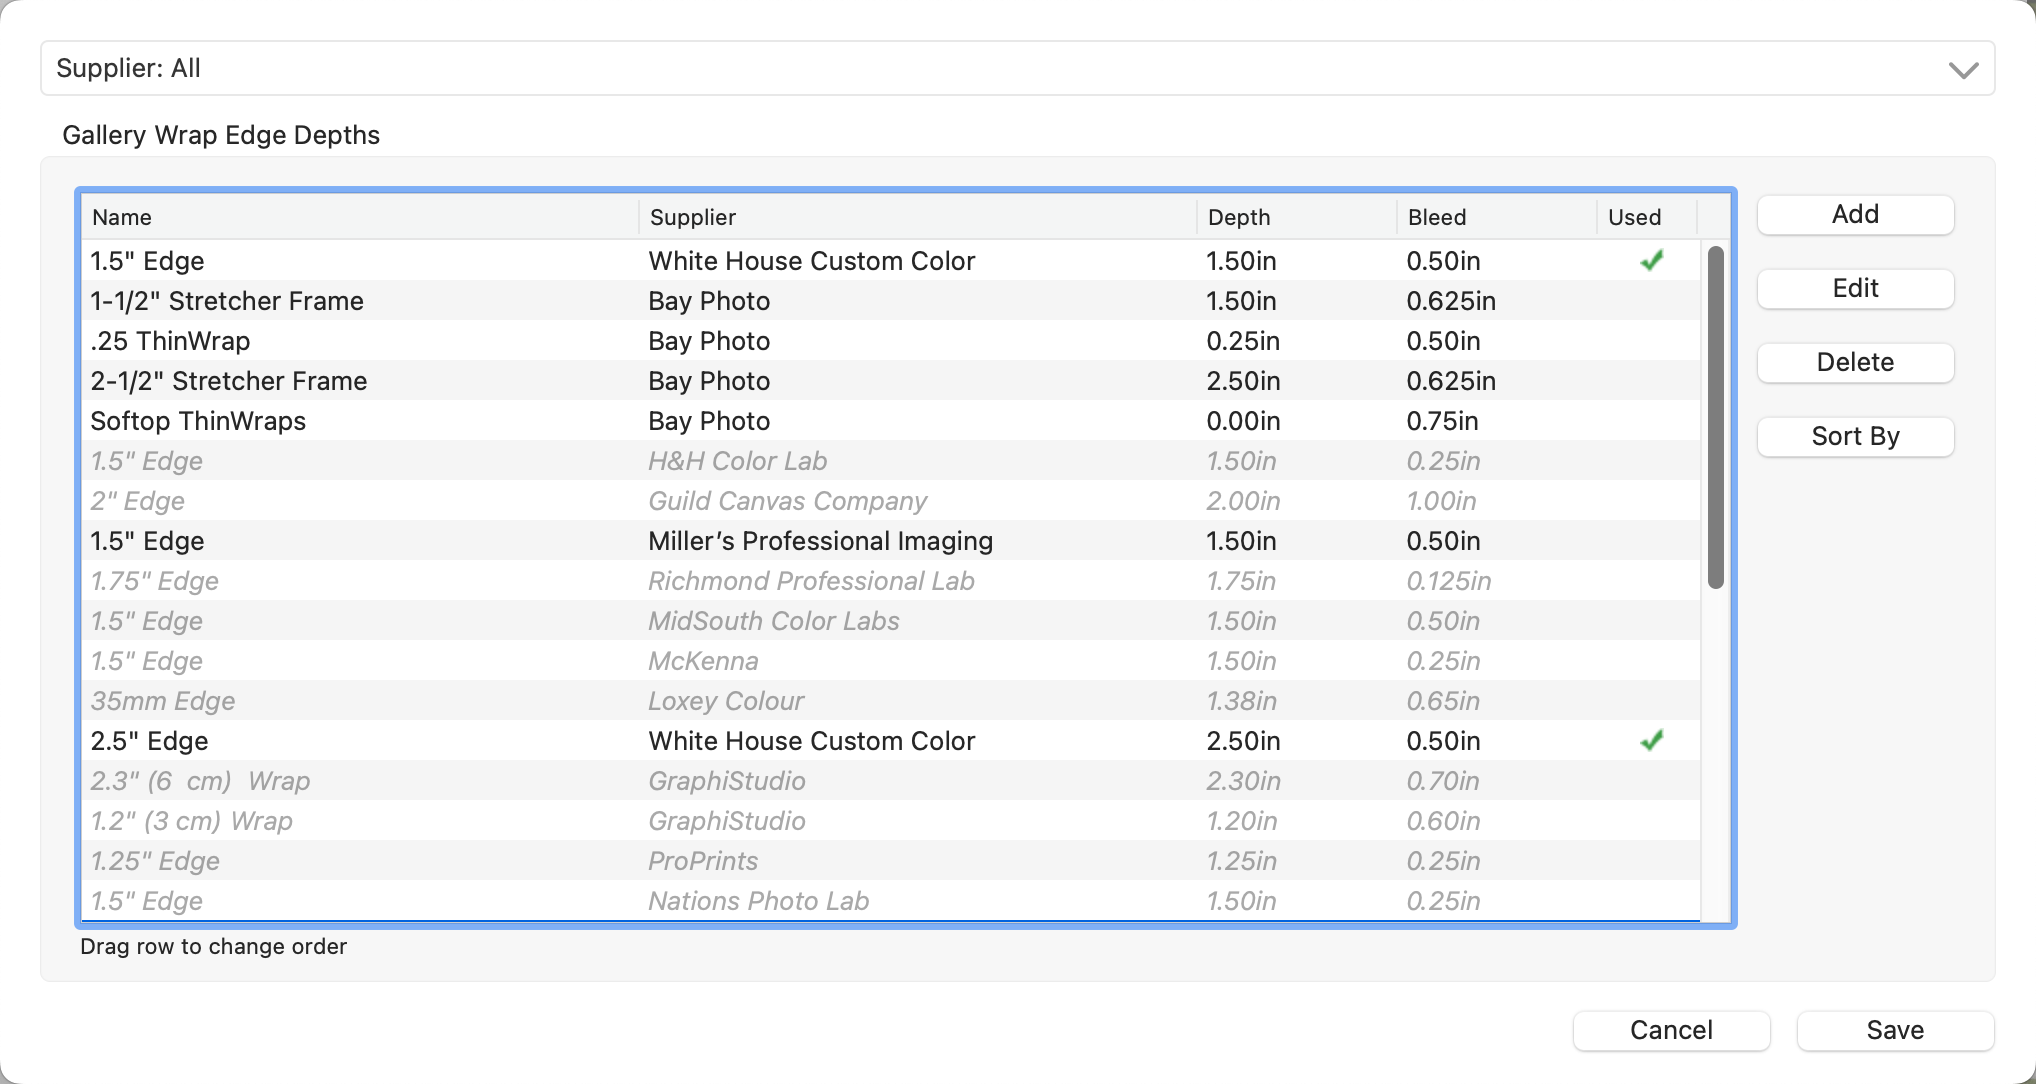
- Name: This is the name of your Gallery Wrap. It can include the depth, or it can be a descriptive word such as "Thin Wrap" or "Float Wrap."
- Supplier: Optionally assign a supplier to the Gallery Wrap Edge Depth. This is especially useful for Gallery wraps, as each Supplier has different specifications for depth and bleed required. To view a single supplier, choose the supplier name from the drop-down list at the very top of the dialog.
- Depth: This is the depth the Gallery Wrap will be produced at.
- Bleed: The required extra area needed by the lab to create the desired depth.
- Used: If a green checkmark appears, the Gallery Wrap is being used in a product.
Adding/Editing Edge Depths
- To add a new edge depth, click the Add button on the top-right.
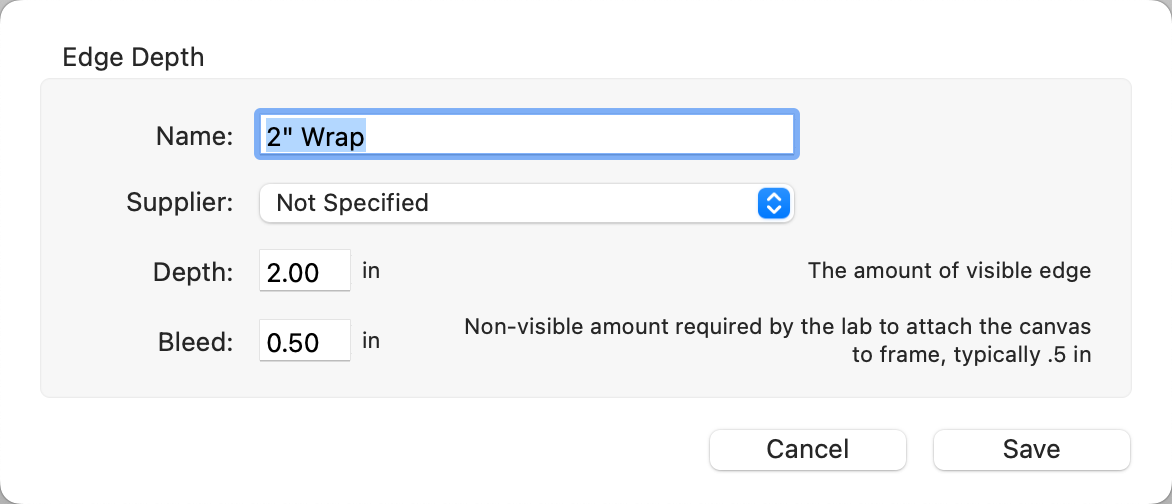
- Type in a Name, Depth, and the required Bleed.
- Optionally assign to a supplier (recommended).
- Click the Save button.
- To make changes to an edge depth, use the Edit button.
- To delete an edge depth, use the Delete button.
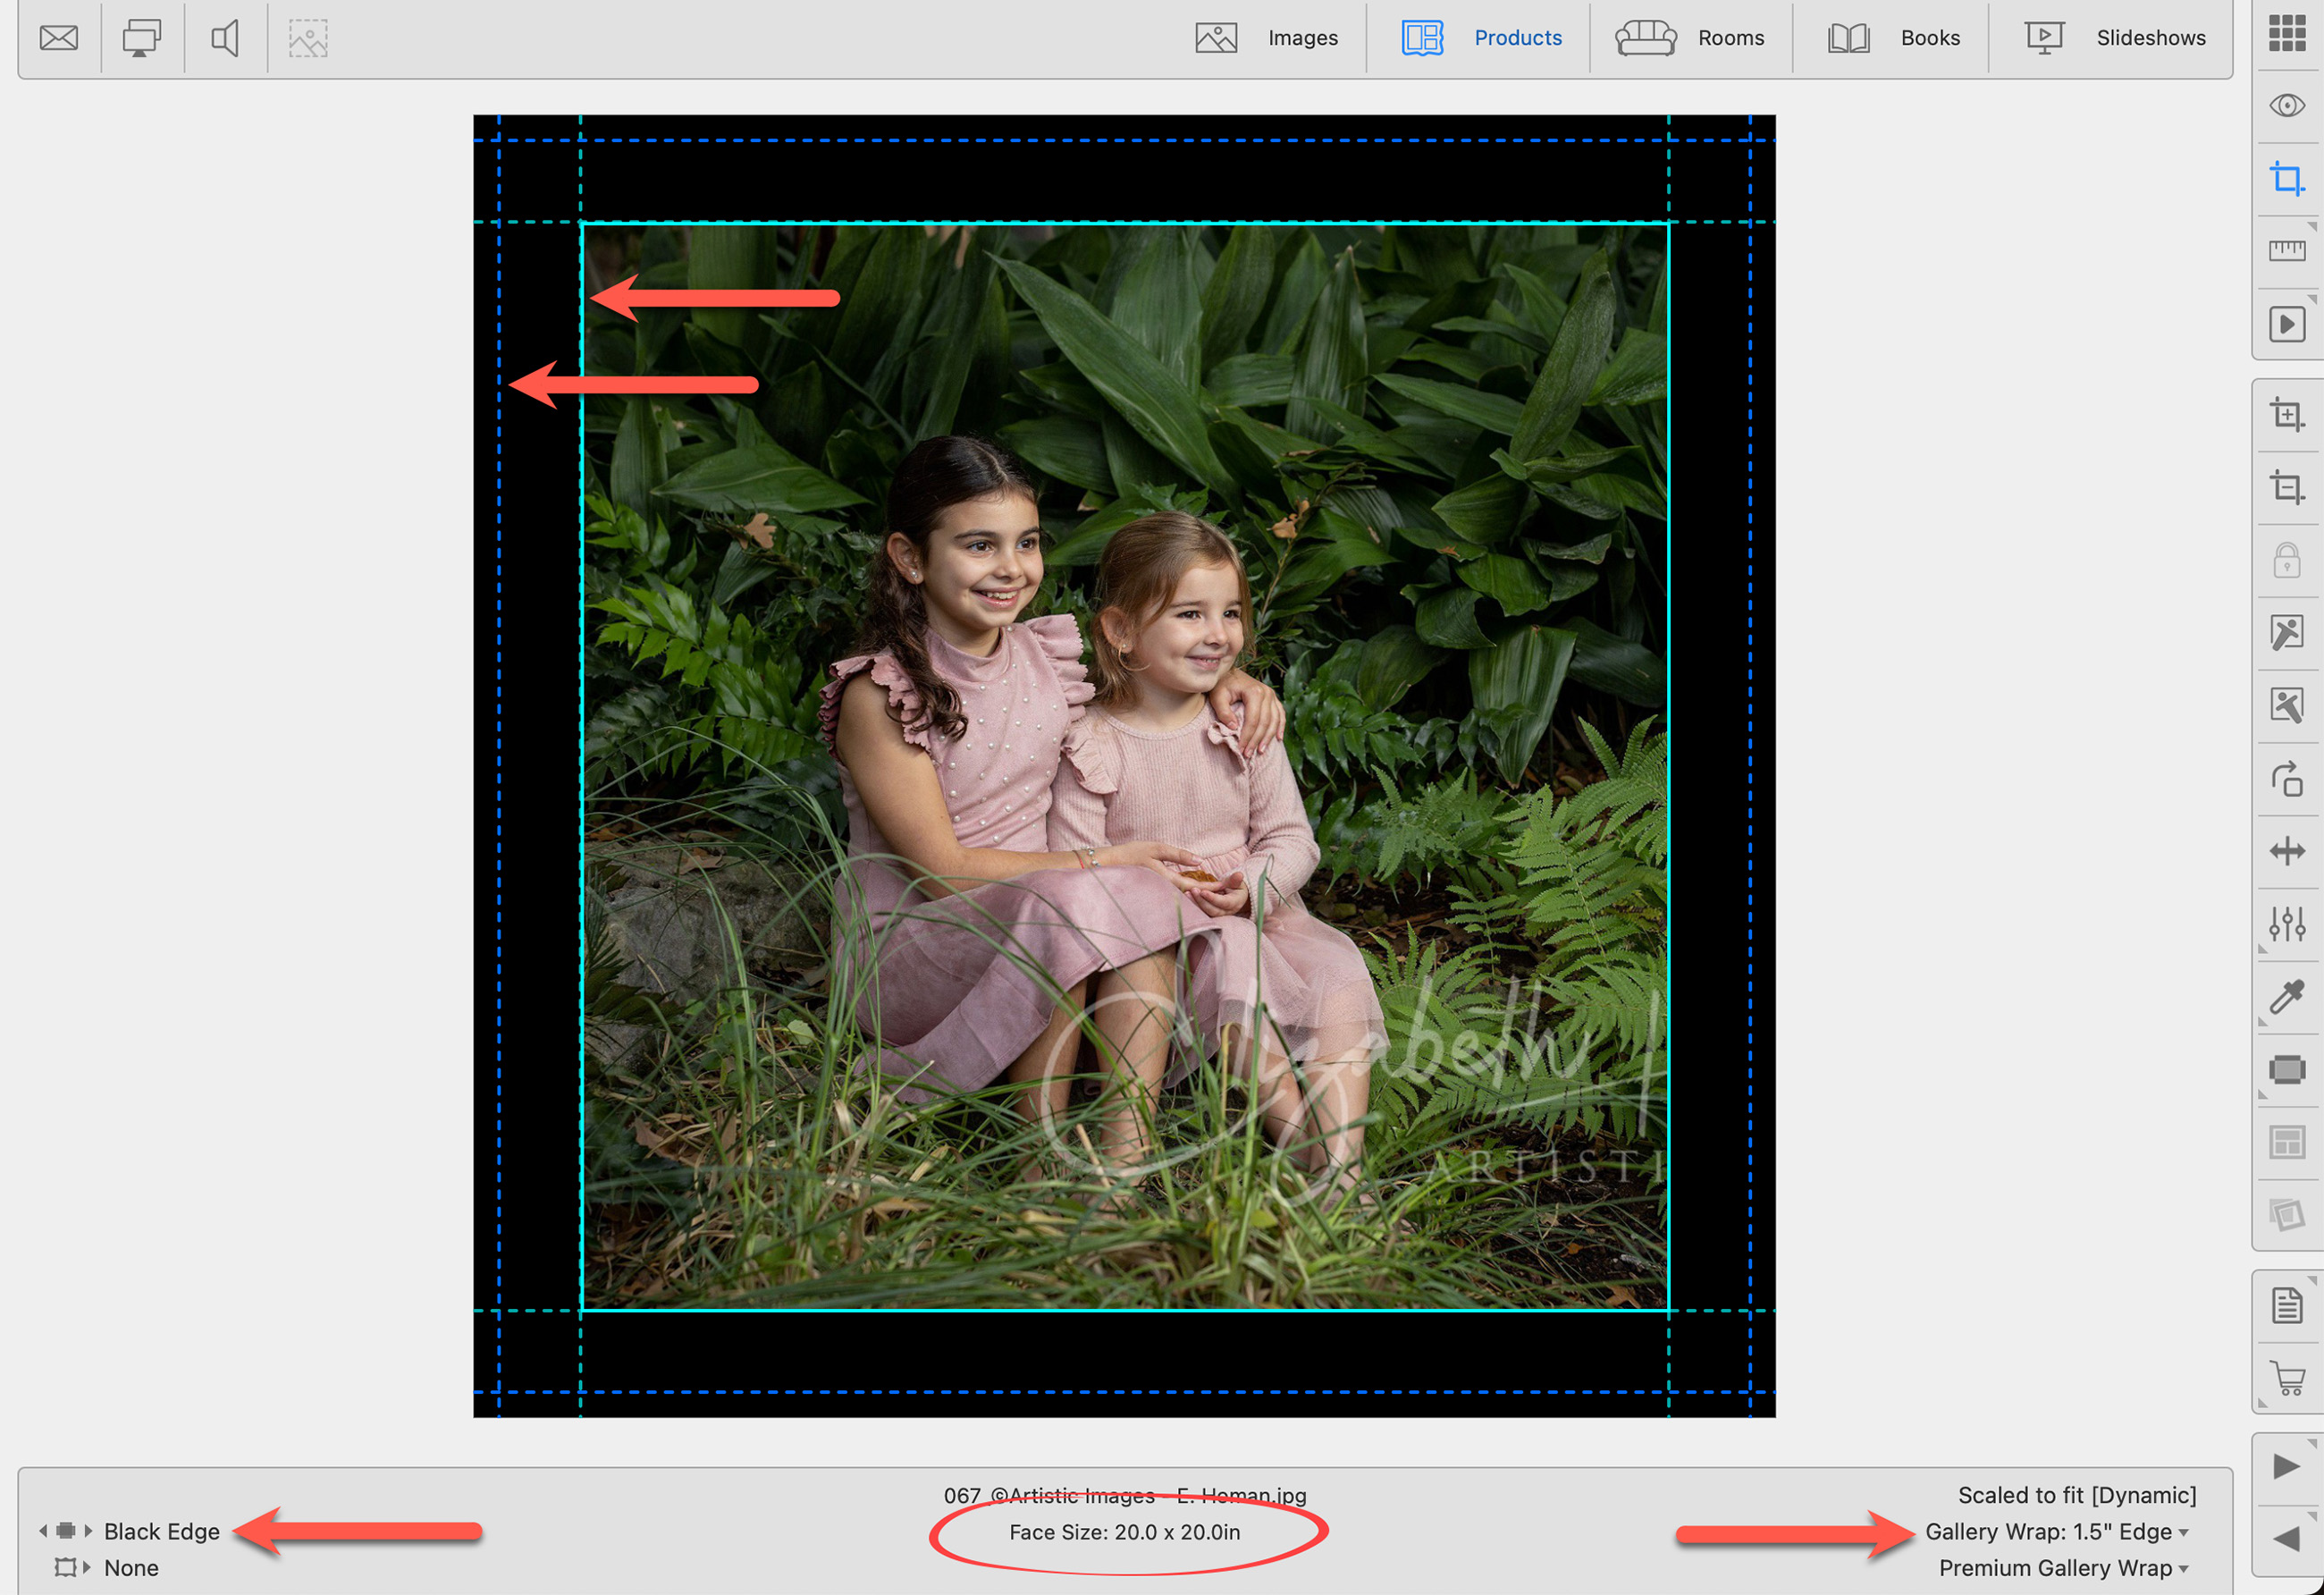
Practical Example
In the following example, you will see a gallery wrap created with a 1.5" edge depth, as shown by the teal line. The bleed is shown as a blue dotted line. This information is visible when in Cropping view.
You can manage your Gallery Wrap Edge Treatments by going to the top menu, Products > Gallery Wraps > Edge Treatments.
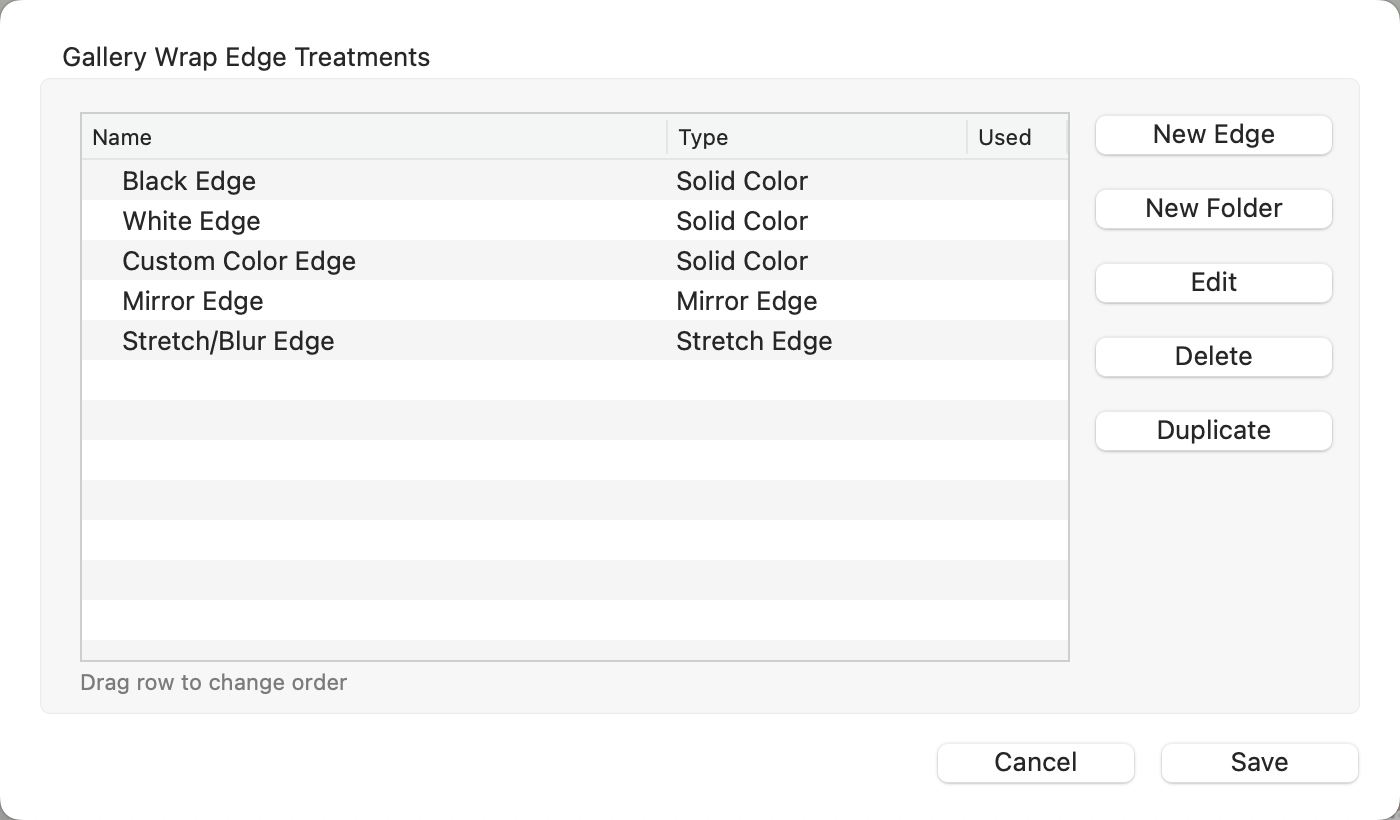
- Name: This is the name of your Gallery Wrap Edge Treatment.
- Type: Edges can be a solid color, a mirror, or a stretched edge.
- Used: If a green checkmark appears, the Gallery Wrap edge is being used in a product.
Adding/Editing Gallery Wrap Edge Treatments
- To add a new Gallery Wrap edge treatment, click the New Edge button on the top-right.
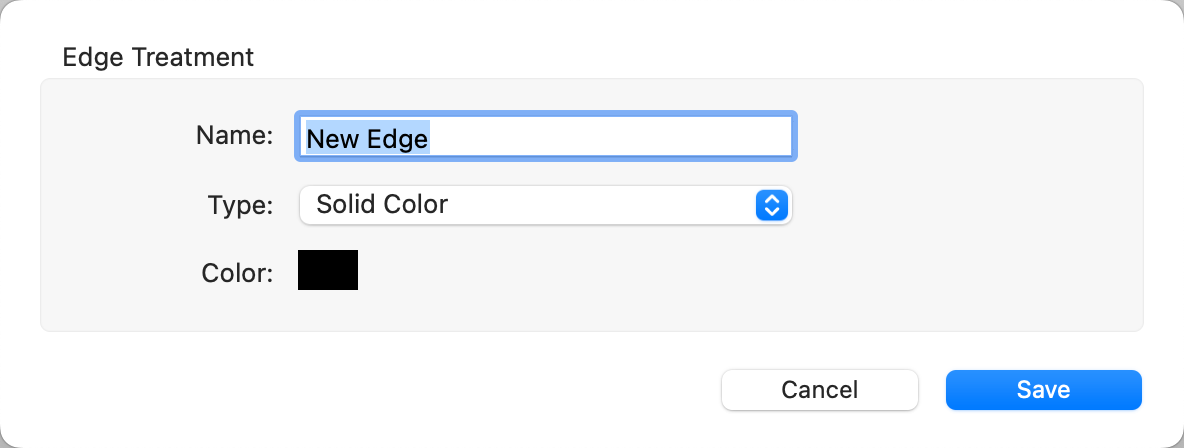
- Name: Type in a name for your Edge.
- Type: Use the drop-down to choose between a Solid Color, Mirror Edge, or Stretch Edge.
- Click the Save button.
- You also have the ability to create folders for your edges so you can group them together. Click the New Folder button.
- Edge Treatments can be deleted (using the Delete button) or duplicated (using the Duplicate button).
By default, Gallery Wraps are created with a "Full" edge treatment. The image selected will wrap around the sides of the Gallery Wrap. Any other edge treatments can be applied to the Gallery wrap when Working with Products or Working with Rooms.
ProSelect has a select edge/mat color tool. This allows for custom colors to be applied to your edges or mats. Create an edge treatment called "Custom Color Edge" for use in these cases. The words "Custom Color Edge" will then be displayed on the invoice. Custom Color Edges can also be saved to the Designer for future use. Click here for more details.
Follow these steps to set up Gallery Wraps in ProSelect:
- Confirm Lab Requirements:
- By default, ProSelect comes with pre-configured Gallery Wrap settings that should work with most labs. However, it's essential to confirm these settings with your color lab to ensure compatibility.
- When producing gallery wraps, the image or edge area must be large enough to wrap around the back of the stretcher frame or block. Typically, a 1.5" wrap requires 2" of printed material for a clean edge, while a 2.5" wrap usually requires 3" of wrap. Confirm these requirements with your lab. You can also look at the Photoshop templates provided by labs.
- Manage and create Edge Depths:
- Go to the top menu, Products > Gallery Wraps > Edge Depths.
- Please note that the names used in ProSelect for Gallery Wraps are descriptive references and may not be the actual product names. These references help identify the make-up of the product.
- In this dialog, you can define the different types of Gallery Wraps you offer, as well as their edge depth.
- For a 1.5" Wrap that typically requires 2" of wrap material, enter a Depth of 1.5" and a Bleed of 0.5". Adjust this value based on the requirements of your lab. You can link the Edge Depth to a specific supplier (recommended).
- Manage and create Edge Treatments:
- Go to the top menu, Products > Gallery Wraps > Edge Treatments.
- Solid color, Mirror, or Stretch edge treatments are available.
- Configure Presentation Options for Gallery Wraps:
- All products in ProSelect must have an assigned Presentation Option.
- Options for Gallery Wraps can include Economy, Premium, Brush Stroke, etc. Refer to your print lab for more options.
- Once you have created your edge depths, edge treatments, and presentation options you are ready to price your gallery wraps.
Gallery Wrap Configuration Examples
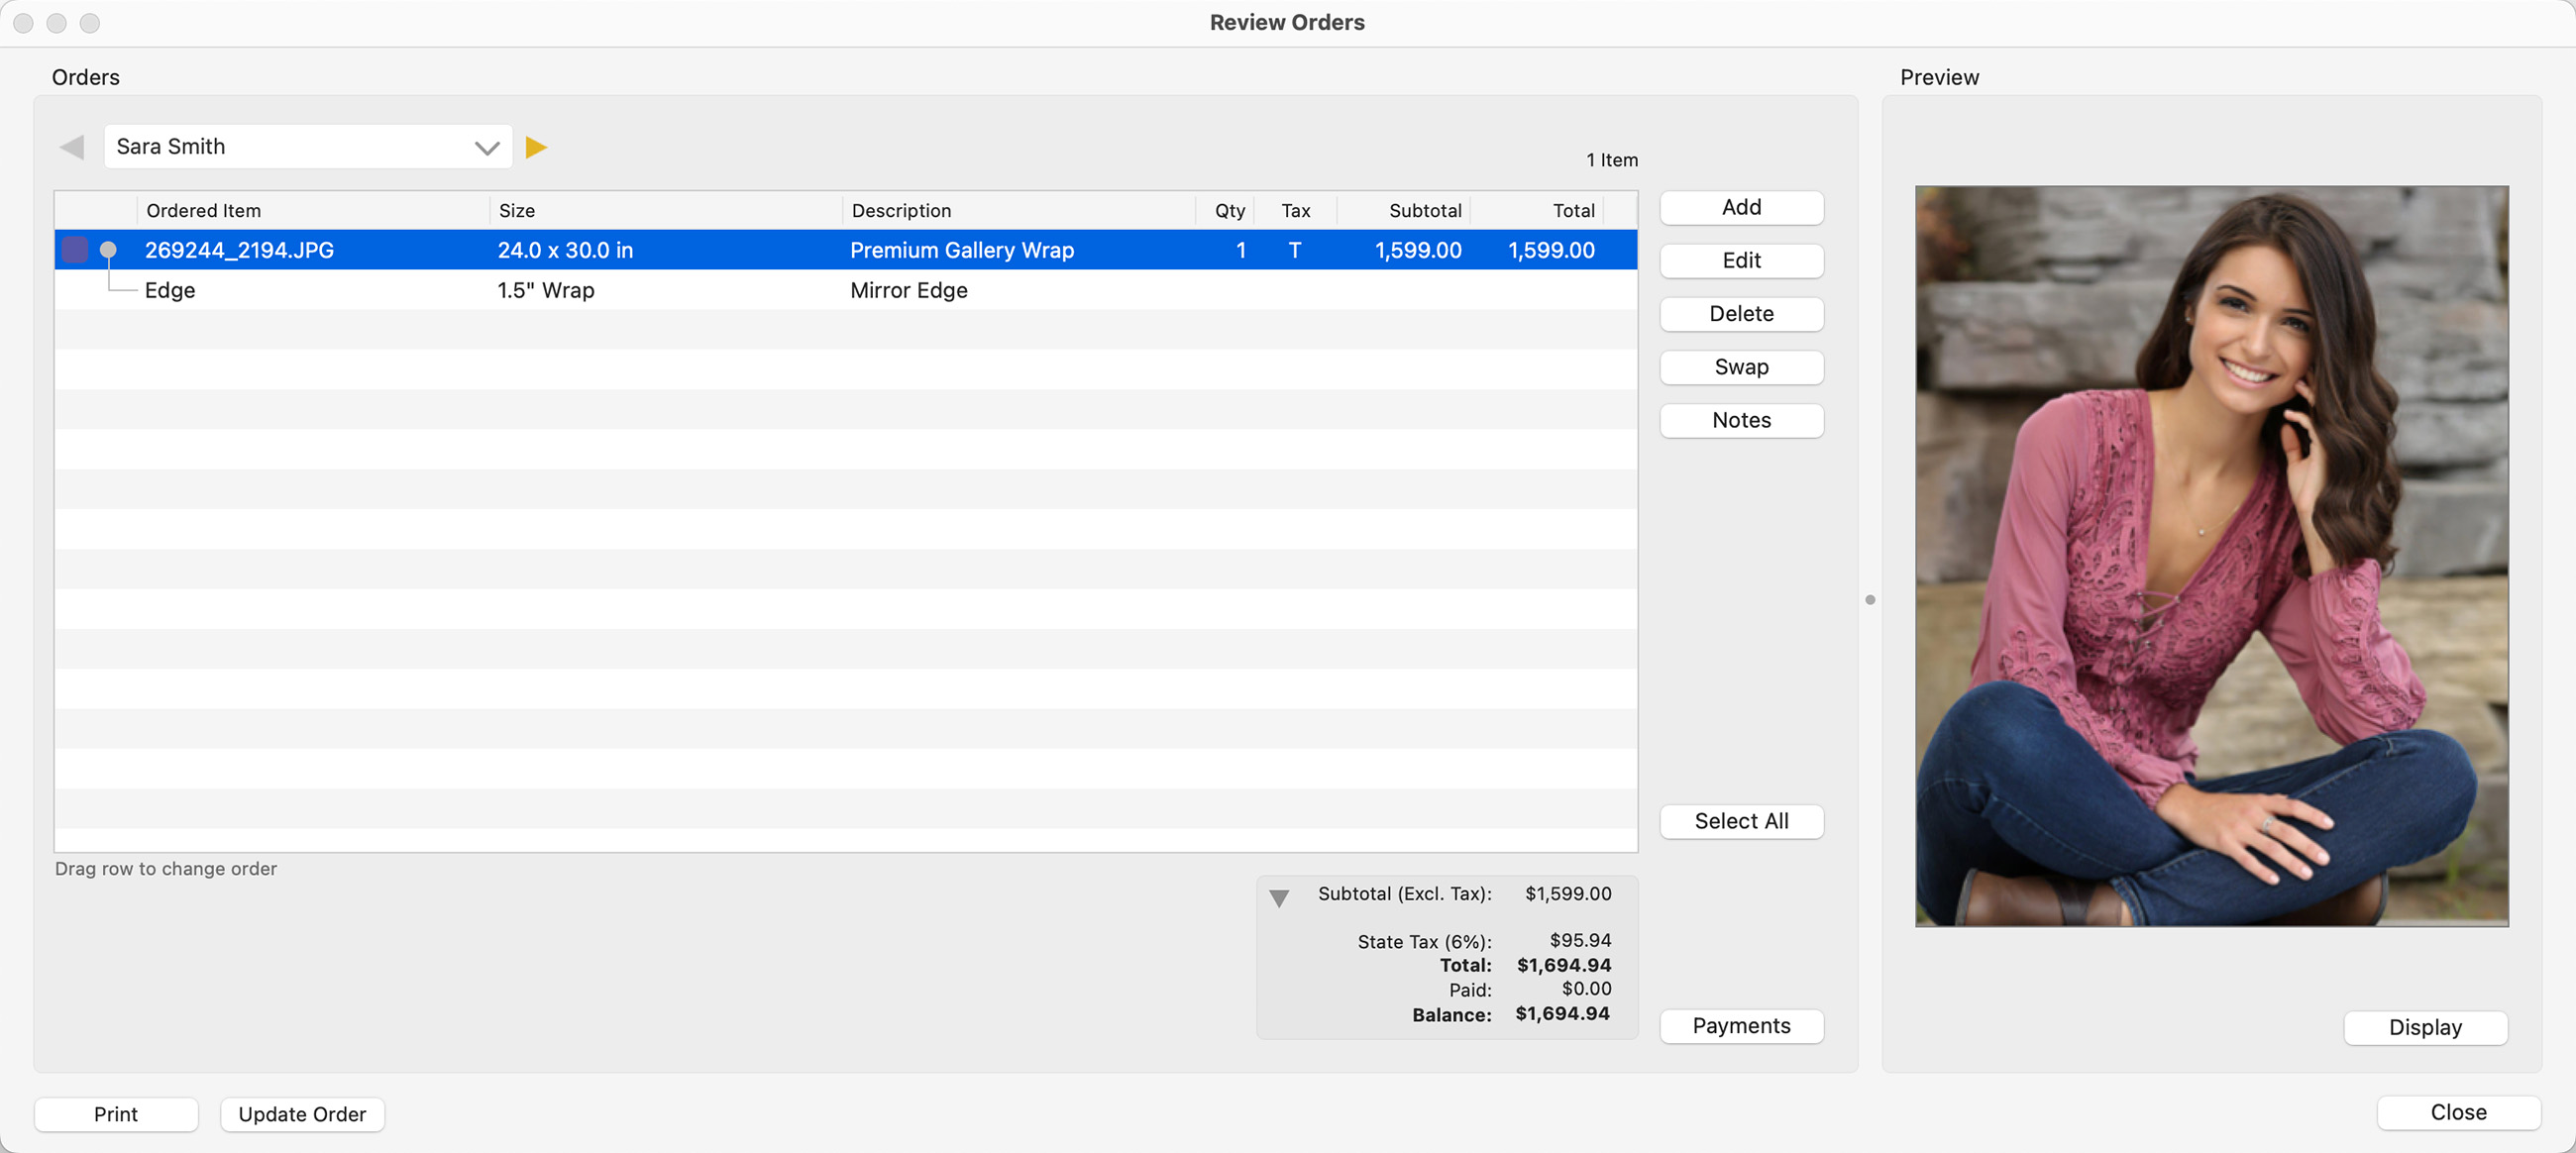
- For example, if you create a 1.5" Wrap, with a Presentation Option of Premium Gallery Wrap, and apply a "Mirror Edge," it will be displayed in the Review Orders window as follows:
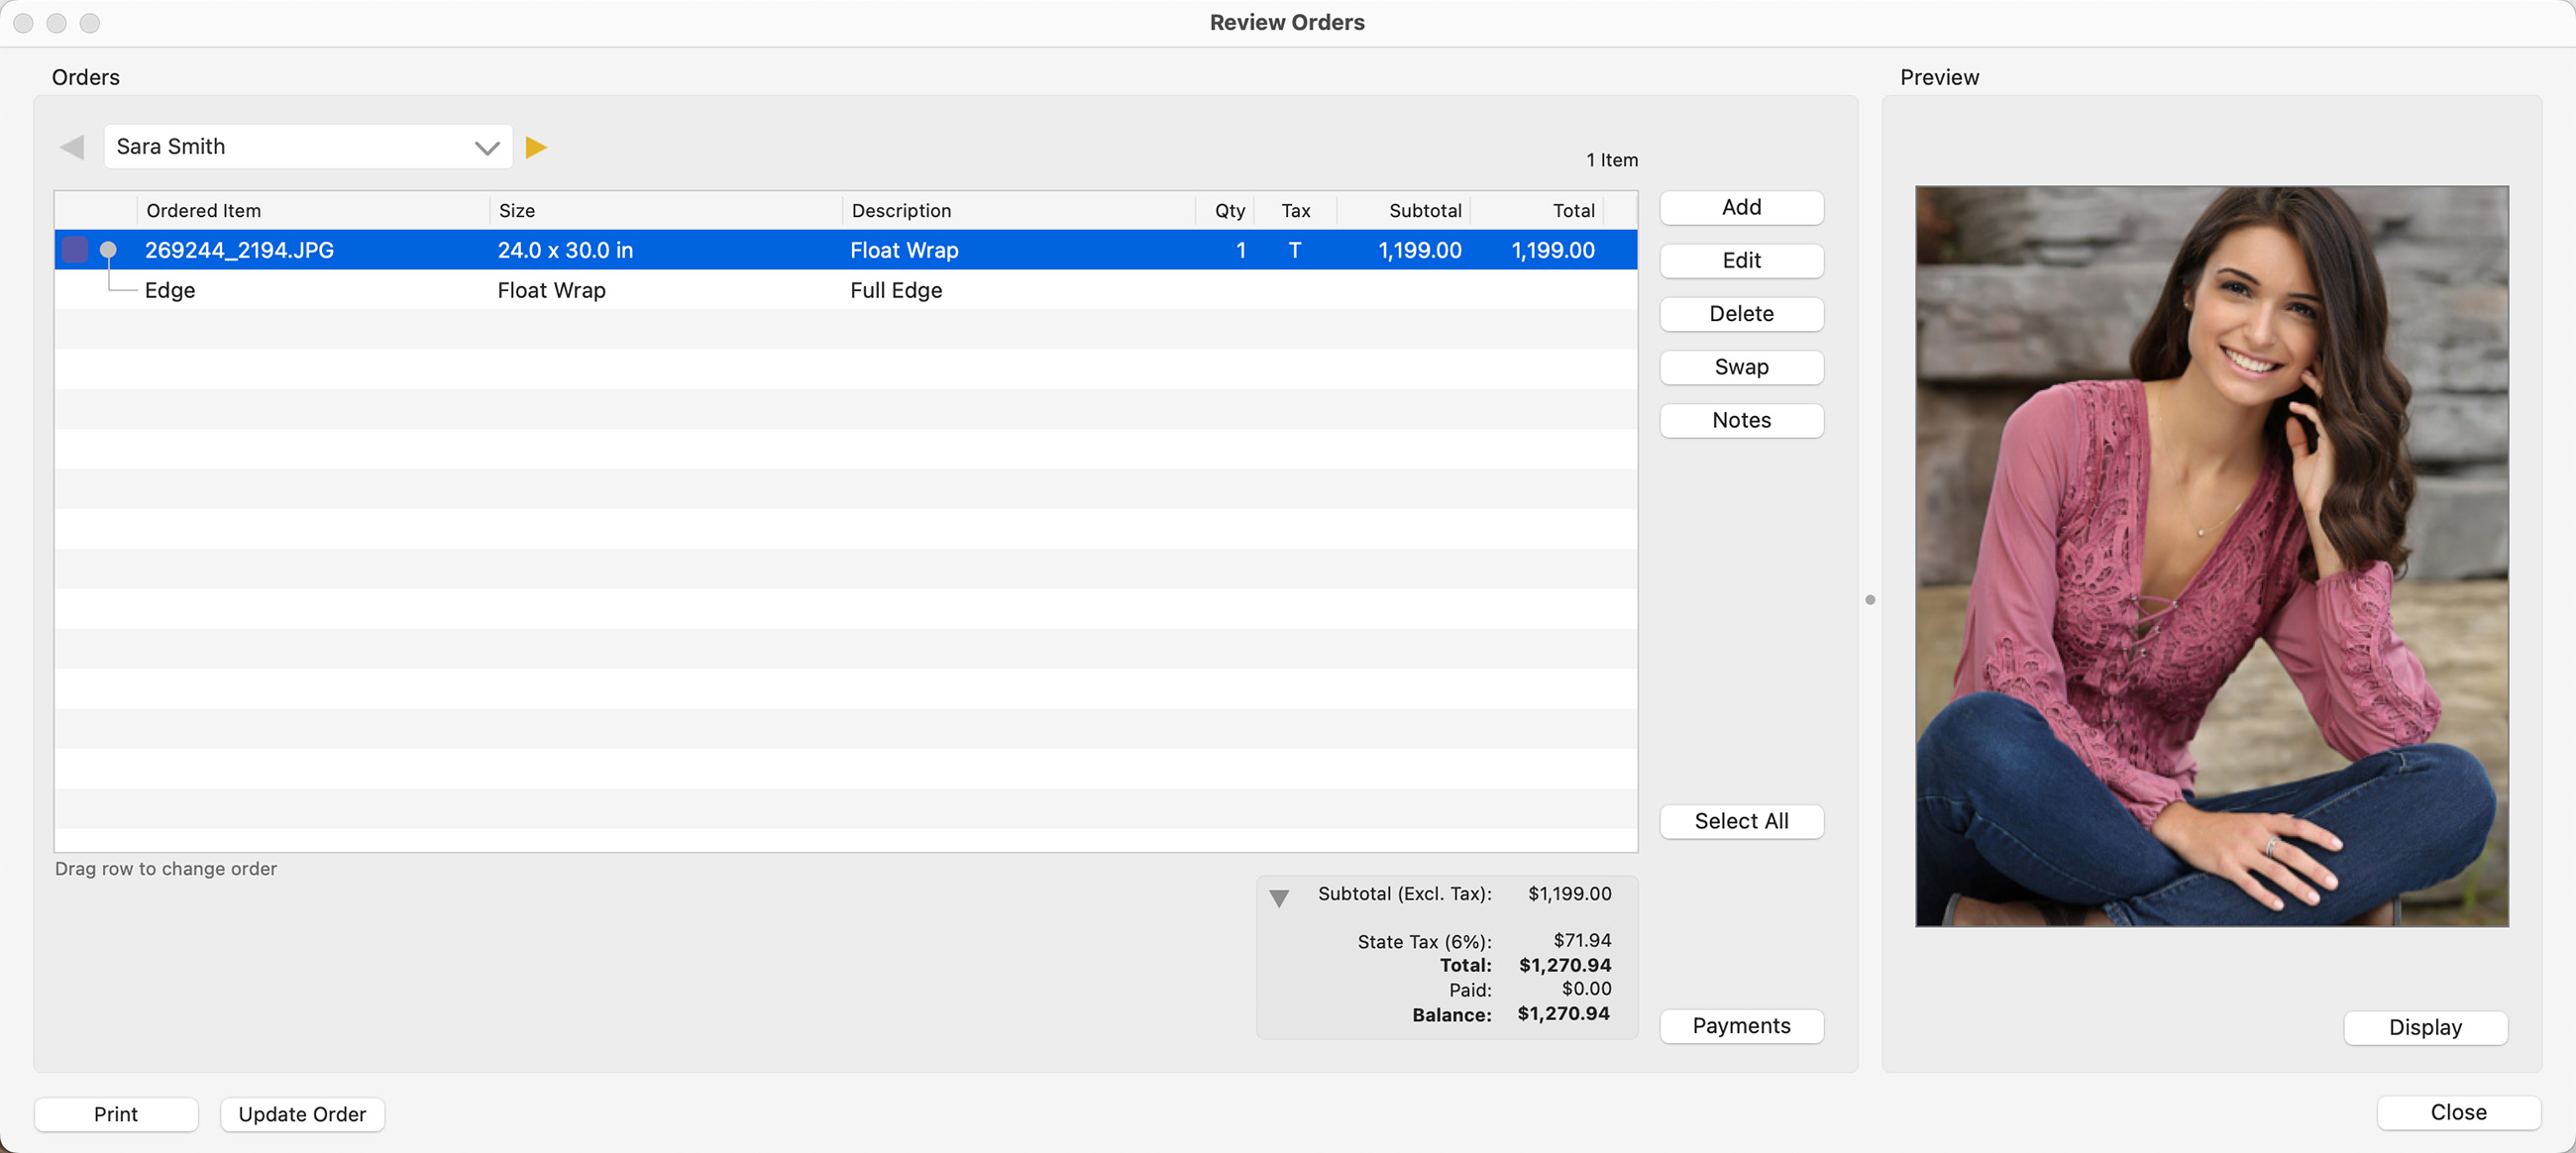
- Float Wrap Setup:
- If you are producing a "Float Wrap" product, use the term "Float Wrap" in the setup without specifying an actual thickness in the name.
- Enter the depth as 0.5" with a Bleed of 0.25".
- For the corresponding Presentation Option, use "Float Wrap."
- By default, the Edge Treatment will be "Full." The Review Orders window will display as follows:
- Labs will have different product names (Float Wrap, Soft Wrap, Softop, Thin Wrap). The size of the required wrap should be verified with the lab producing the final product. When creating one of these products, the Edge Treatment should be a Full Wrap, since there is no definitive edge.
By following these steps and configuring the Gallery Wrap settings according to your lab's requirements, you can set up Gallery Wraps in ProSelect successfully. Ensure that you double-check the settings and verify the information displayed on the invoice for accuracy.