
 Right-Click Options
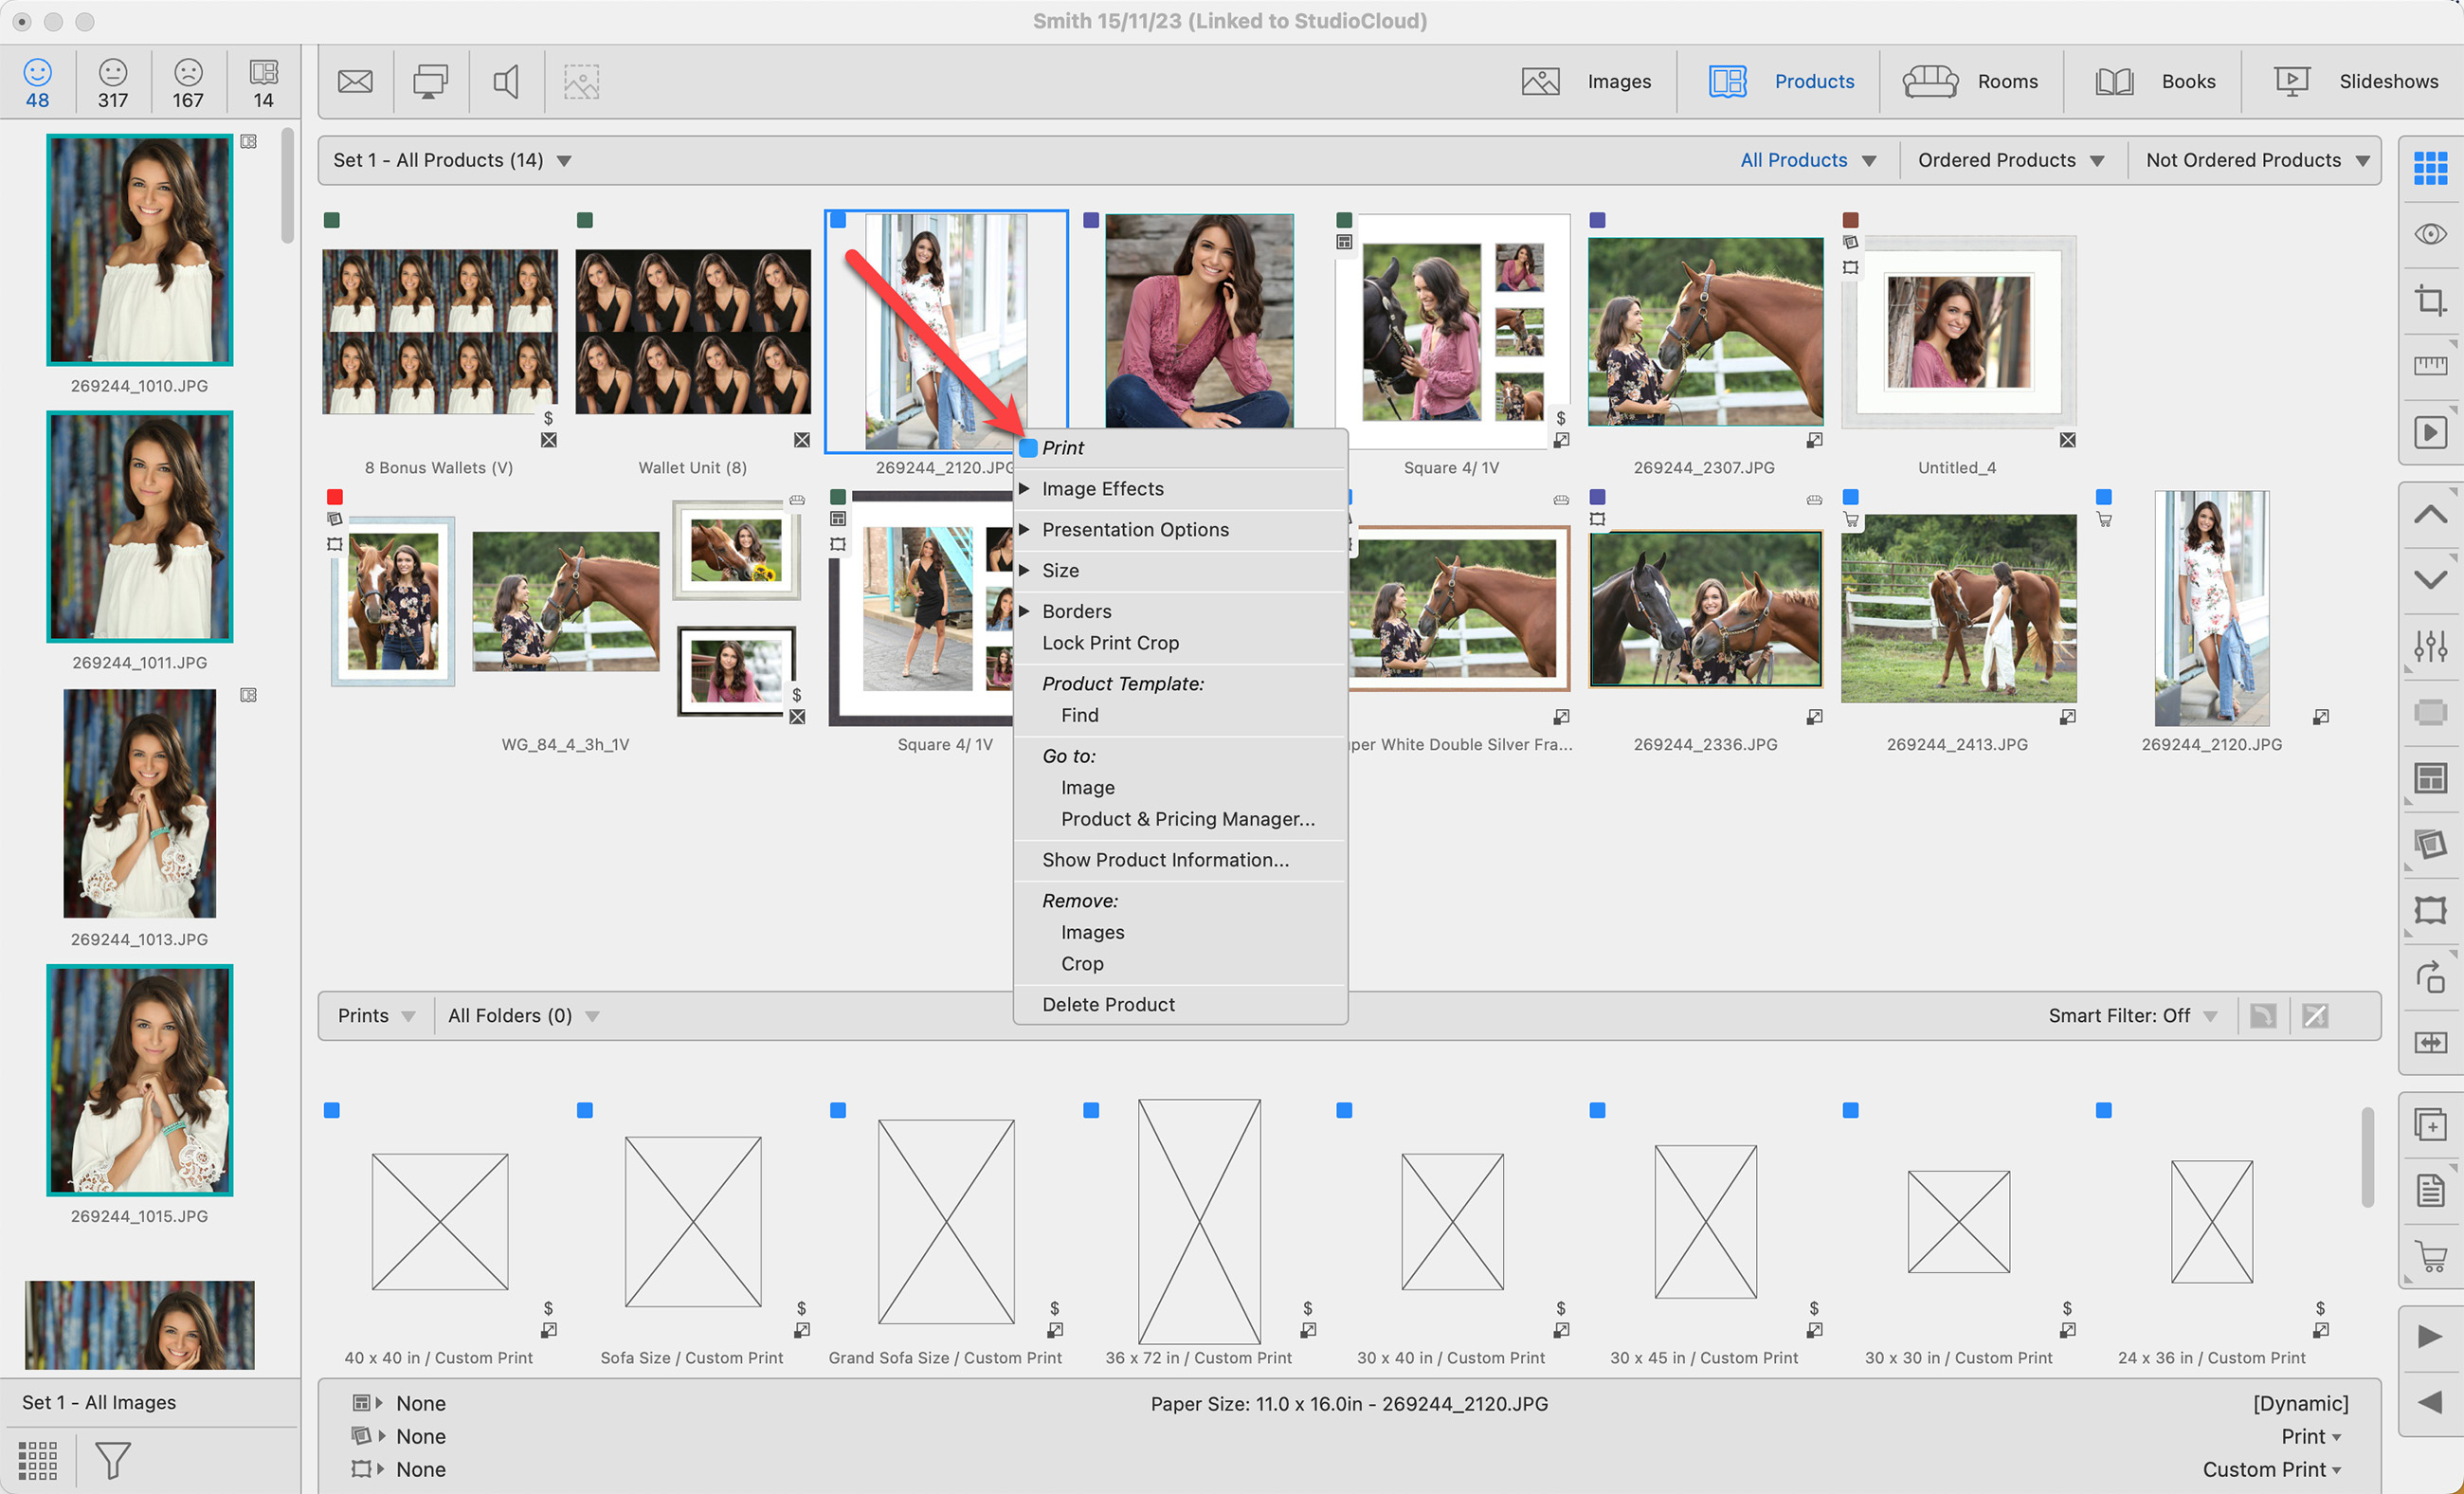
ProSelect has many right-click options available. It is a convenient and efficient way to customize images and products. Depending on what you click on, right-clicking provides quick access to various functions and actions related to the selected item. Not all functions and actions are available to all products.
- If you see a drop-down arrow beside the right-click function, this means there are additional options available. The additional options become visible when you click on the arrow or the function name.
- Right-click functions are available in all working with modes. This page focuses on Working with Products and Working with Rooms.
- The options available when right-clicking change depending on whether a product is selected or the images within that product are selected.
You can access the following image effects and apply them to your original images, images in products, or images in book pages.
- Original
- B&W
- Special Tint
- Low-Key Vignette
- High-Key Vignette
- Remove
Click on Image Effects to learn more.
If you are using an image effect on a Print, Gallery Wrap, or any other product that has a single opening, you do not need to select the opening first. For products with multiple openings, you will need to first select an opening, and then right-click on it to access image effects.
You can easily change the Presentation Option of a selected image or product using right-click. Click on the arrow or "Presentation Options" to reveal the list of all available Presentation Options. Only Presentation Options specific to that product type will appear.
Click on Presentation Options to learn more.
When you click on the "Size" option from the popup menu, all the available sizes you can choose from will appear in a list.
- If you are sizing a fixed-size product, no other sizes will be available. The current size will be displayed with a checkmark beside it as well as the sizing method (fixed size).
- If your product is dynamically sized, all the available sizes matching the aspect ratio of your design size will be available.
- If your product uses stacked sizing, you will see all the available stacked sizes. The currently selected size has a checkmark next to it.
When applicable, the "Borders" option allows you to select the edge treatment of a particular product. Click on the arrow or "Borders" to see the list of available options. These options are Borders Outwards, Borders Inwards, or No Edge Treatment.
Locked Crops are used to apply a non-standard aspect ratio crop to override the automatic fitting of an image to a paper size. For more information, click on Using Locked Crops.
This allows digital files to be produced to match the crop of a specific product. See Sync Product Crop with Original Image to learn more.
After creating a custom-colored Virtual Style or Edge, you can save it for future use. Click here to learn more.
This option will allow you to view the Product Information dialog.
When you select this option, you will be taken to Working with Images, with the image selected. If you are using this on a Print, Gallery Wrap, or any other product that has a single opening, you do not need to select the opening first. For products with multiple openings, you will need to first select an opening, then right-click on it to go to the image.
Note: Any modifications you make will not affect the selected product. Once an image is placed in a product or book page, it is independent of the original image. This means that the original image can be used multiple times, each with different cropping and custom effects.
When Working with Rooms, you can use the "Go To Product" option to make adjustments to the Product. This option will take you back into Working with Products. Any modifications you make will automatically be applied to the product within the room.
This option will open the selected product in the Product & Pricing Manager. This is useful if you need to modify the product or adjust pricing etc.
This option will open the Review Order window and highlight the selected product. Click on Review Orders Window for more information.
This option will open the Pricing dialog for the selected product in the Product & Pricing Manager.
This option will open the Production window and highlight the selected product. This option is only available on ordered products. Click on Pro Production to learn more.
When you select "Edit Template," the Product Editor will open with the currently selected template. You can make modifications and save the product template. Once the product template has been saved, you will be returned to the product you selected. From the right-click menu, select "reapply template" to apply the changes. This feature is available when Working with Products and when Working with Rooms.
Product Templates from Supplier Collections are locked. In order to make changes, you will need to duplicate the template first.
This option will locate the currently used template in the Template Resource Area and highlight it for you. This function is only available when Working with Products, Thumbnail view.
Reapply is used to update a layout from a modified product template. It can be updated from the original template or from a duplicated and modified product template. Applied frames, mats, or virtual styles remain. If changes have been made to a product template, you need to reapply the template to the current product. Otherwise, the changes you made will not appear.
When Working with Rooms, using "Reapply Template" will return the grouping to its original configuration, without removing any applied frames, mats, or virtual styles.
Revert template will apply the original product template. It will remove frames, mats, or virtual styles that were applied to the active layout. If frames and/or mats were added at the template level, they will remain. To remove them requires the Product Editor.
This option will remove the image from the selected opening. If you are using this on a Print, Gallery Wrap, or any other product that has a single opening, you do not need to select the opening first. For products with multiple openings, you will need to first select an opening, then right-click on it to remove the image. If you right-click on a product and the Remove Image option is not available, it is likely because you need to first select the opening. This is best done in Show, Cropping, or Actual Size view.
Any crop that has been applied to the selected image will be removed.
If you are using this on a Print, Gallery Wrap, or any other product that has a single opening, you do not need to select the opening first. For products with multiple openings, you will need to first select an opening, then right-click on it to remove the crop.
Selecting this option will remove the currently selected product from the order.
When Working with Rooms, use this option to remove the product from the room. This does not delete the product, the product will remain in the Products Tab. A shortcut to remove a product from the room is to use the DeleteBackspace key.
When Working with Rooms, use this option to remove the product from ALL rooms where it appears. This does not delete the product, the product will remain in the Products Tab. A shortcut to remove a product from the room is to use the DeleteBackspace key.
You have the option of removing an object from a Wall Grouping. Select the object and right-click. Select "Remove Wall Grouping Object" from the drop-down list. If you have chosen to price the grouping as "Sum of Parts," the price will automatically update. If it is priced another way, you will be prompted.
This option will delete the product. If you make a mistake in deleting, you can undo using CmdCtrl + Z.