 Traditional Mats &
  Virtual Styles
Traditional Mats are physical mats with cut openings, usually with bevel edges, that are overlayed onto an image(s) as a part of the framing process. Virtual Styles are different, in that they are a graphic enhancement to a composite product that can be as simple as a keyline around an image, a single color background, or a complex combination of edge treatments, textured elements, and graphic blocks.
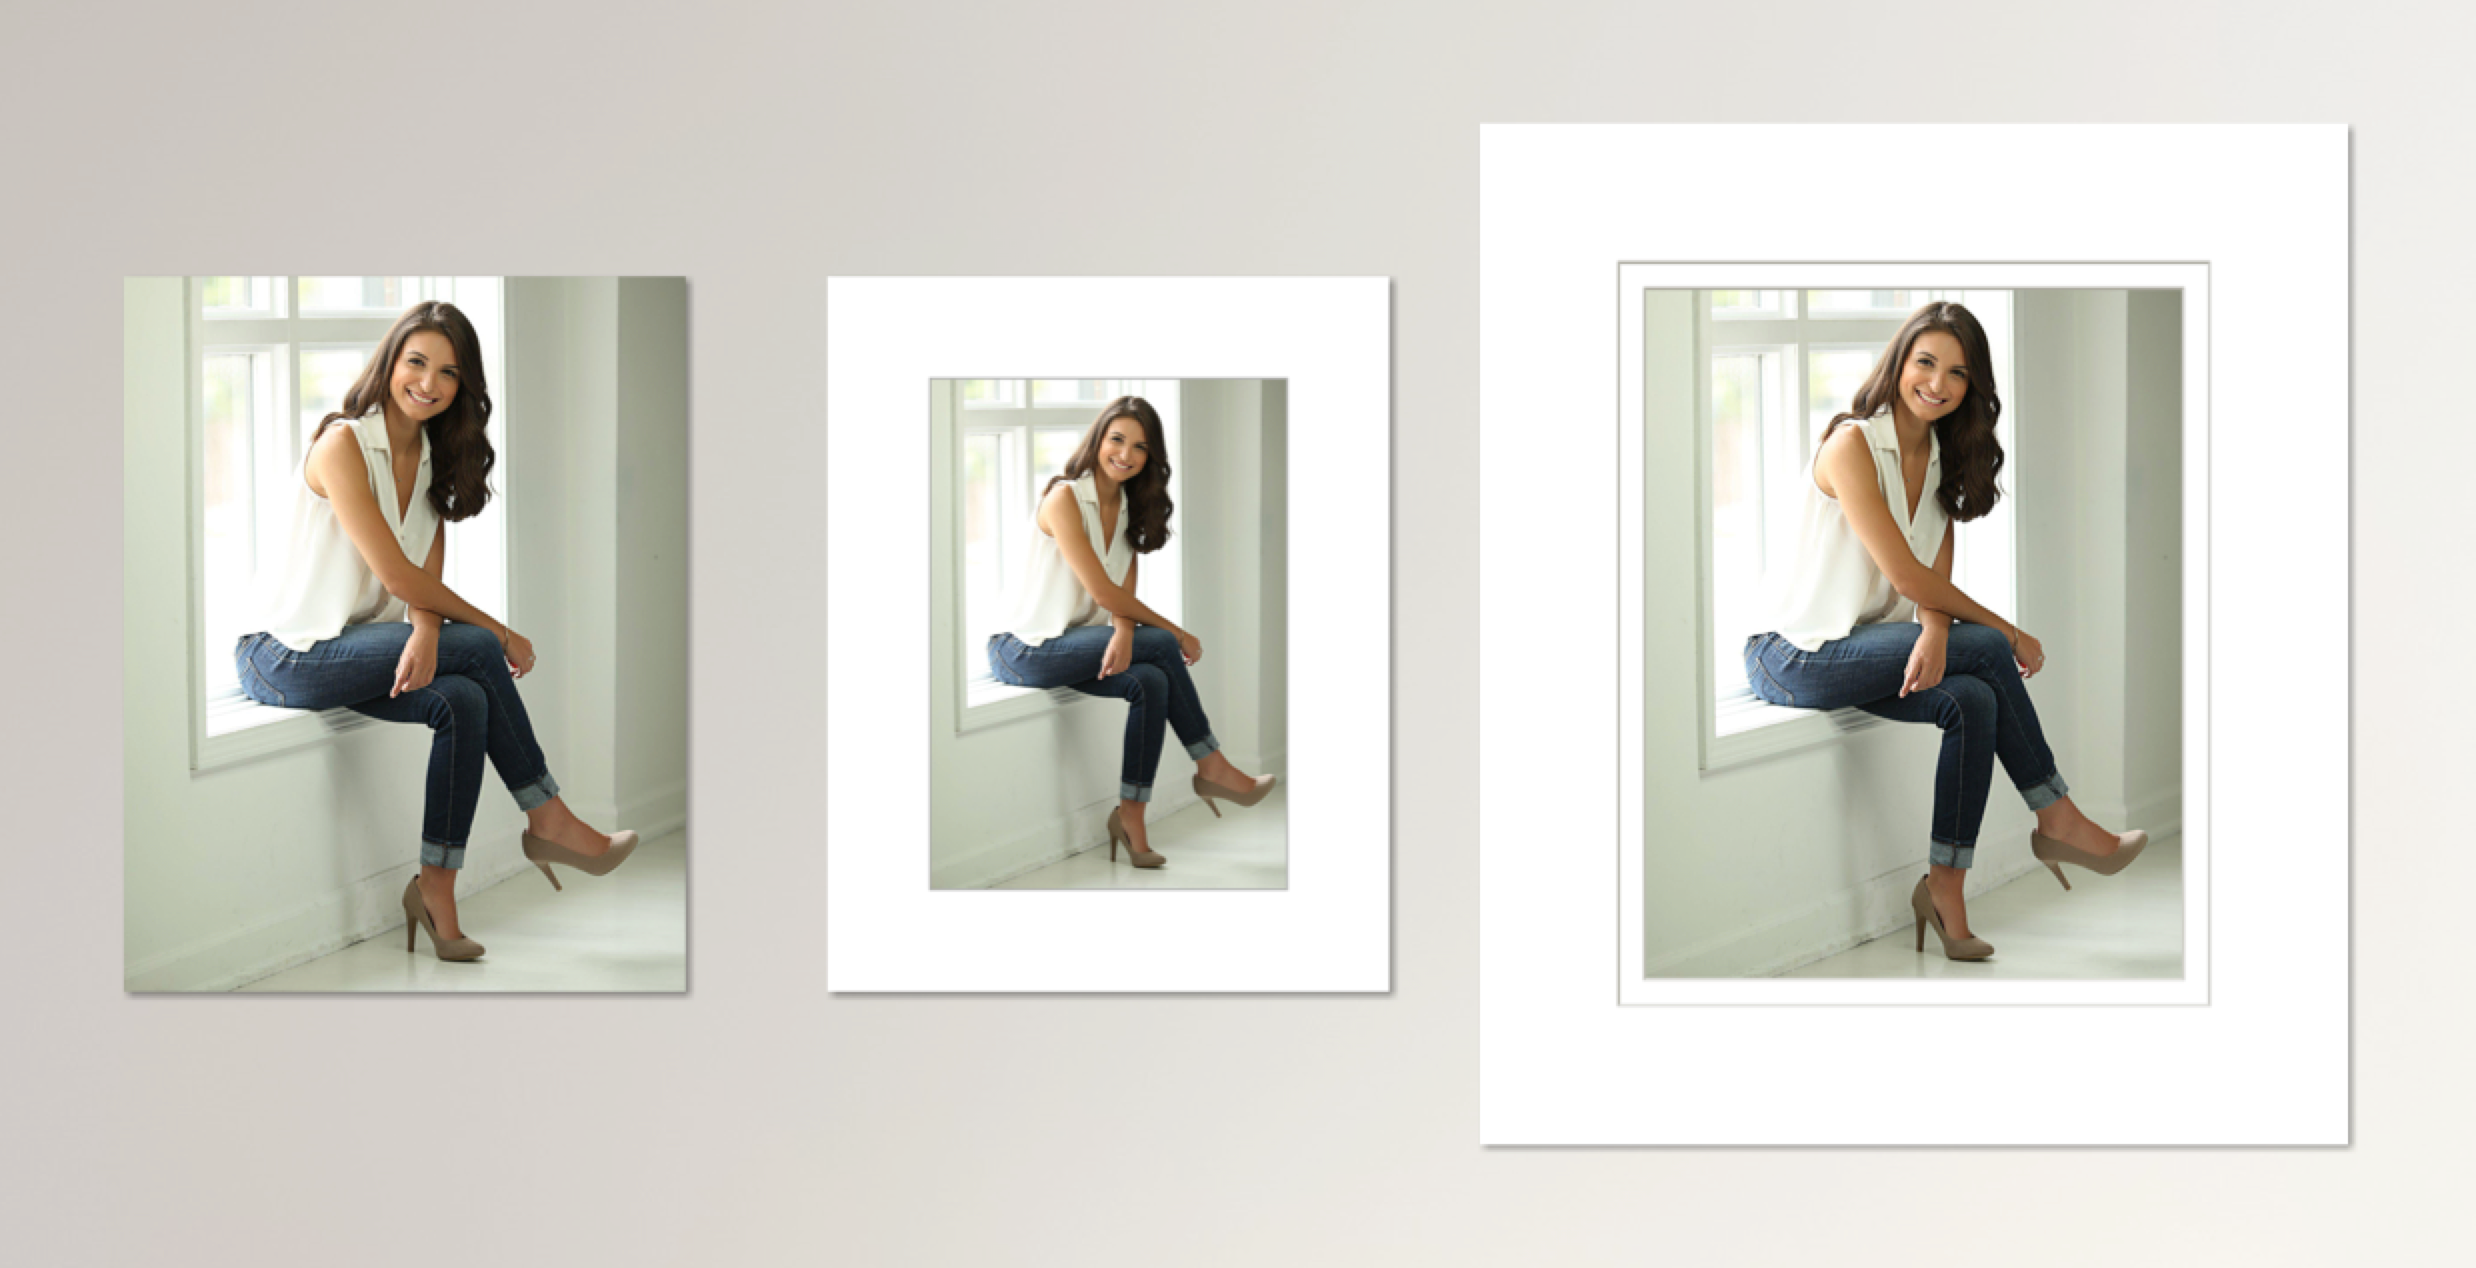
It is important to note that when you apply a Traditional Mat to a product, it gets pushed out. When you apply a Vitrual Style, the image pushes in - keeping the paper size the same.
Traditional Mats and Virtual Styles are set up in the Mat & Style Designer. Go to the top menu, Products > Traditional Mats & Virtual Styles > Designer.

In the sample above, all 3 products are using an 11"x14" paper size.
- Left: an 11"x14" Print
- Center: an 11"x14" Print, with a Virtual Style applied (2" White, Keyline Gray)
- Right: an 11"x14" Print, with a Traditional Mat applied (3" Super White Double)
The Select Edge / Style Color tool ![]() allows you to customize the color of your applied Virtual Style. After creating a custom-colored Virtual Style, you can save it for future use. Click here to learn more.
allows you to customize the color of your applied Virtual Style. After creating a custom-colored Virtual Style, you can save it for future use. Click here to learn more.
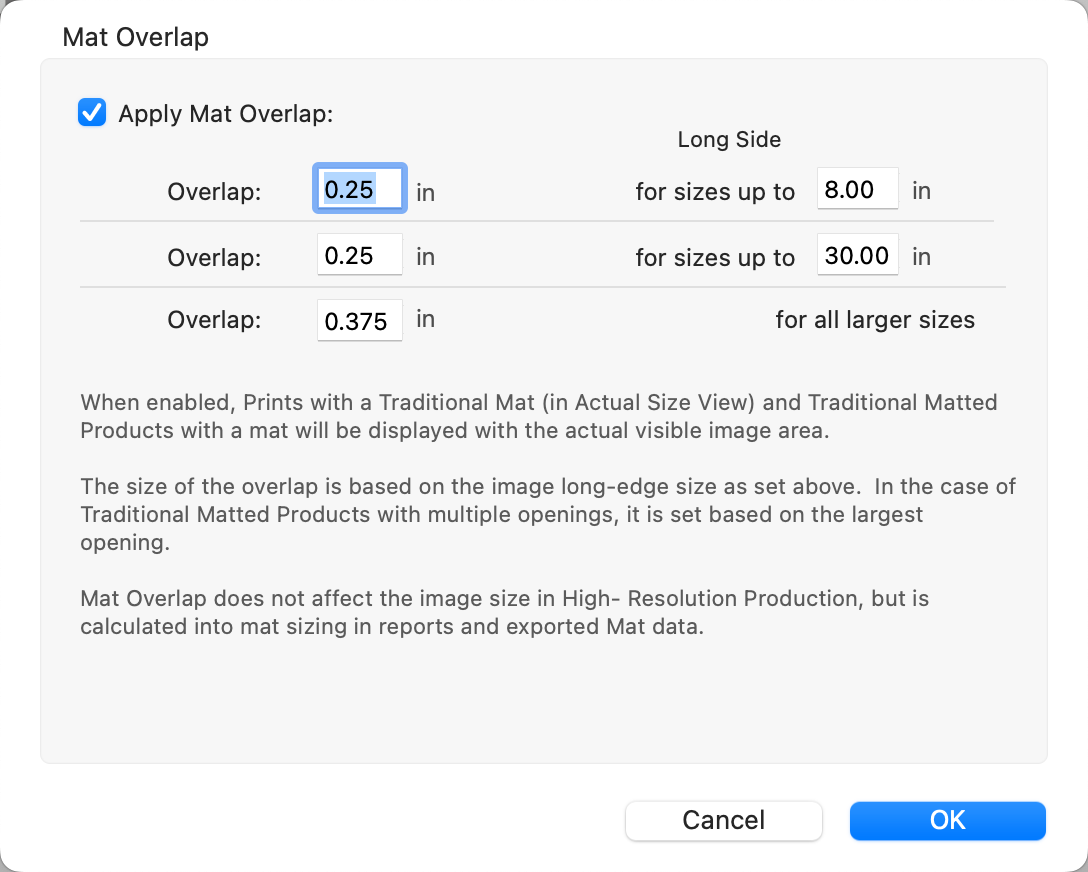
By default, ProSelect uses standard mat overlap settings of 0.25" for sizes up to 30 inches. For larger sizes, a mat overlap of 0.375 is applied. To adjust these settings, go to the top menu, Products > Traditional Mats & Virtual Styles > Traditional Mat Overlap. To learn more, click on Mat Overlap.

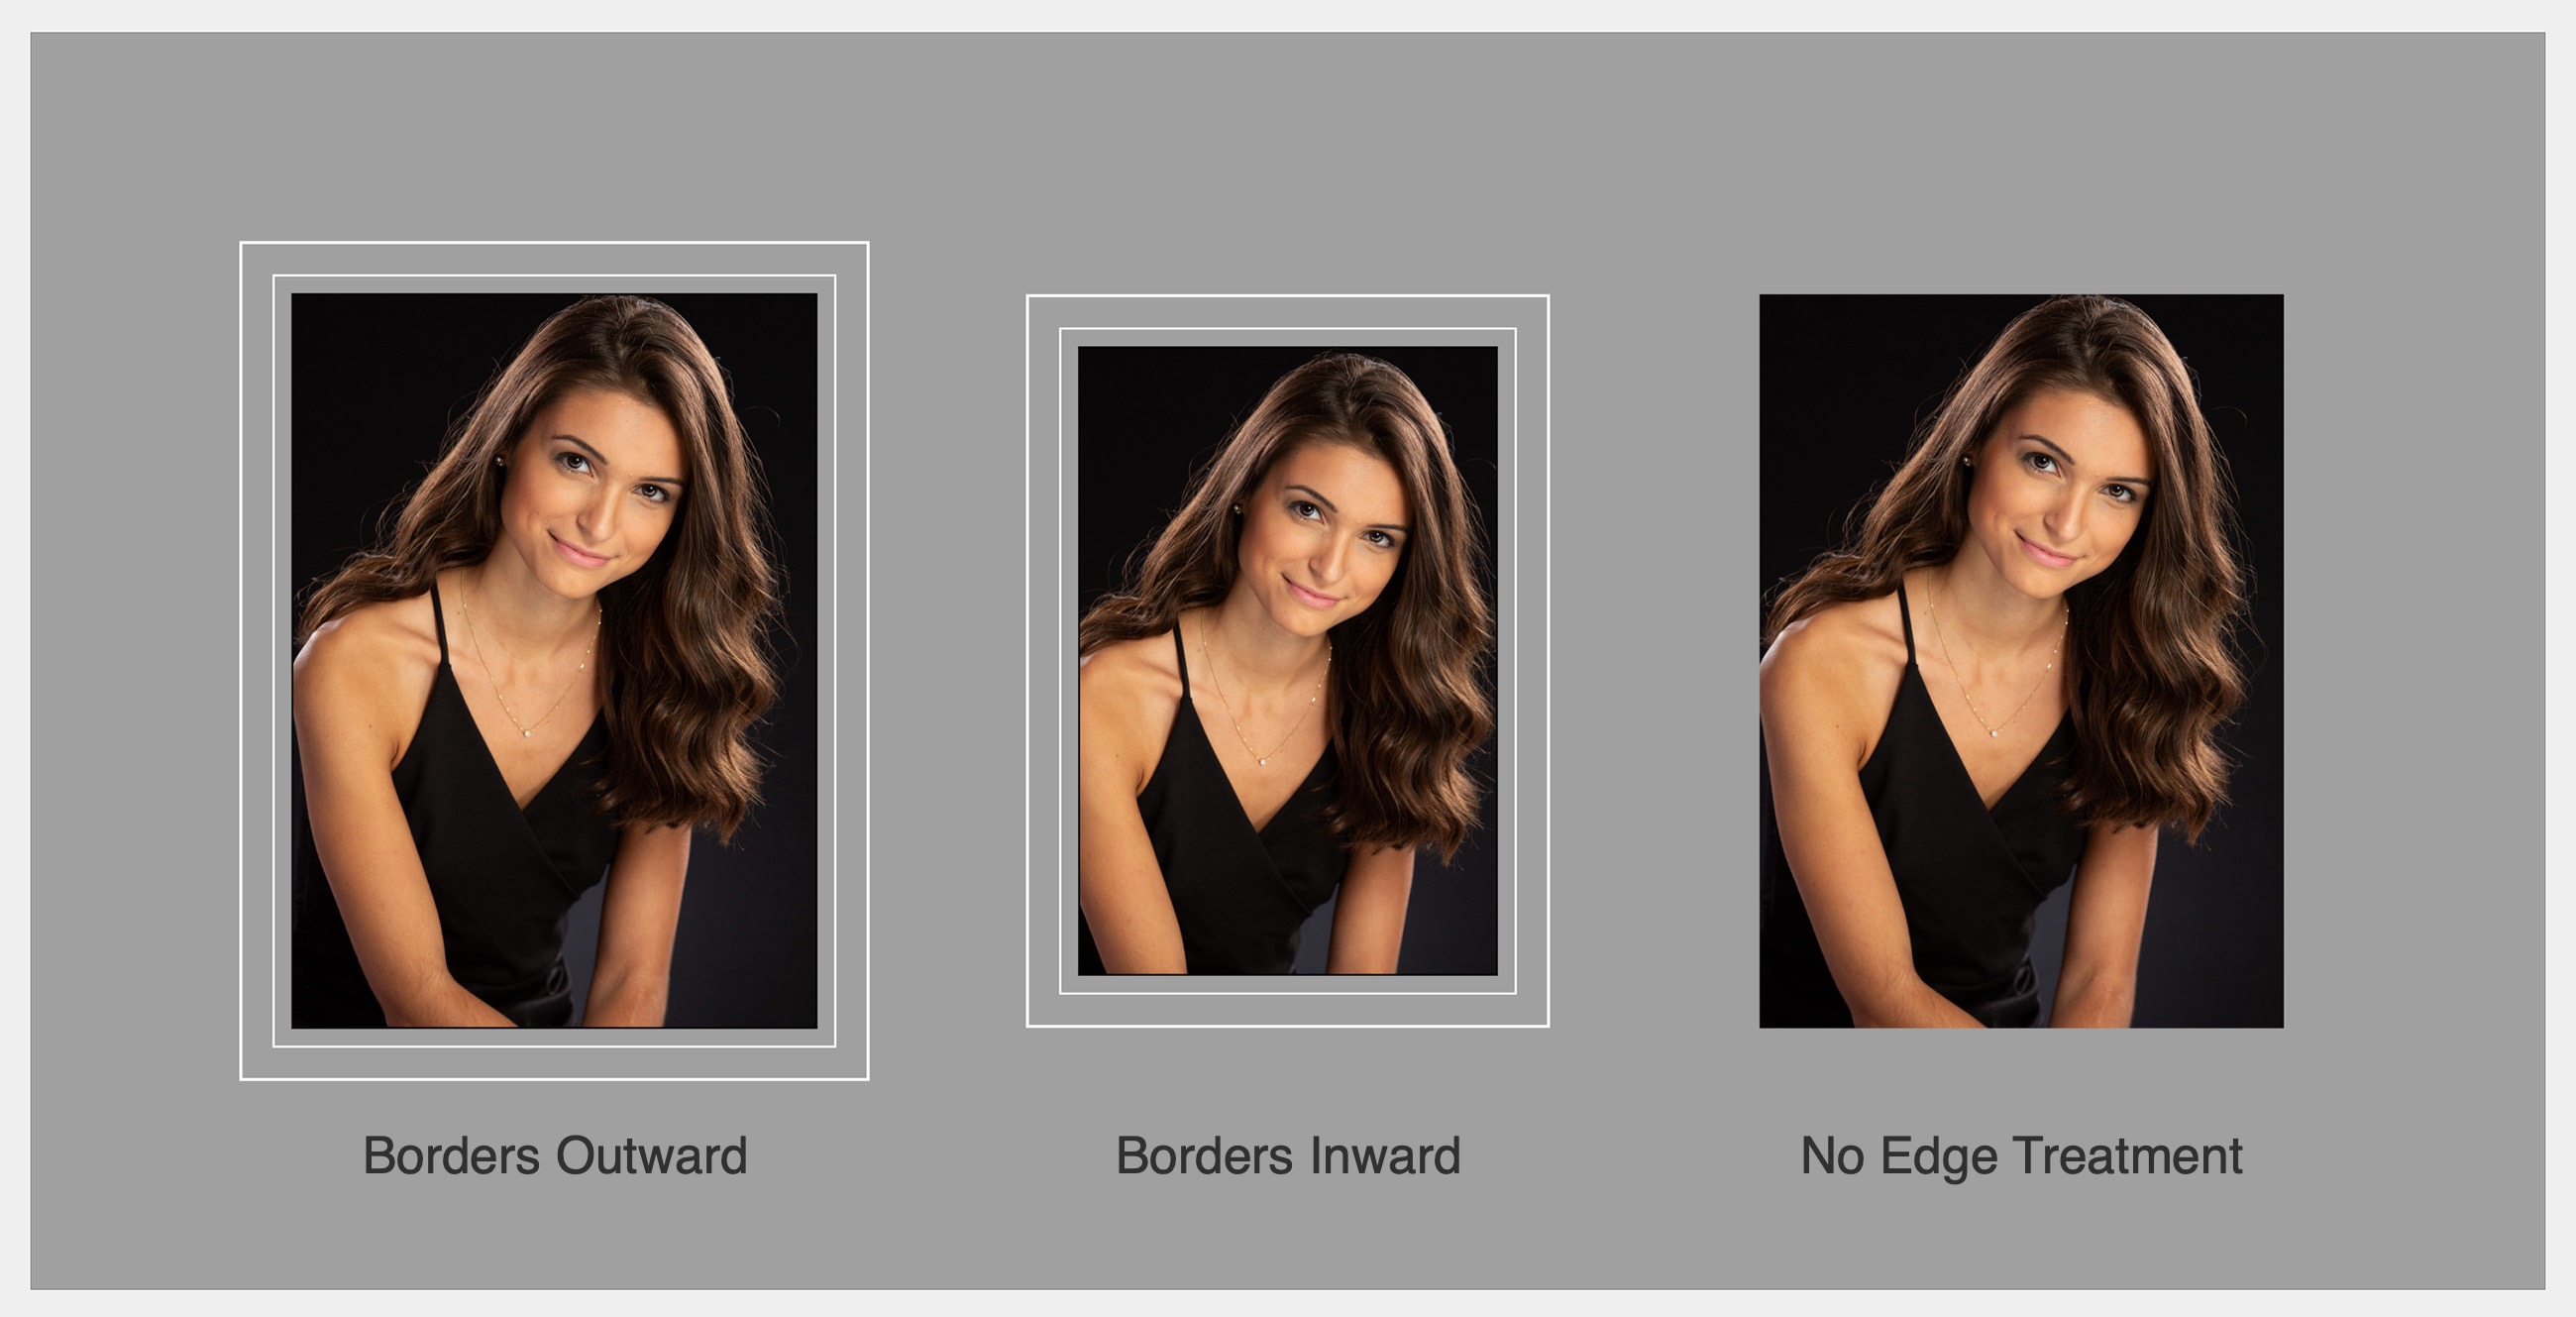
When applying a virtual style to a composite product, the default setting is "Borders Inwards." You have the option to switch this to "Borders Outwards," or "No Edge Treatment." Note that single-image prints will always use borders inwards.
- Apply a virtual style to your product using the Virtual Style tool
 .
. - Navigate to Show view.
- Select an opening, or multiple openings and right-click on the product.
- Click on the "Borders" drop-down arrow and select an option. The example below is a visual of what each selection will look like:

- Opening 1: Borders Outward - the keylines start from the outside edge of the opening and extend outward.
- Opening 2: Borders Inward - the keylines are moved into the opening area, resulting in a reduction of the visible image area and a change in aspect ratio.
-
Opening 3: No Edge Treatment - the keylines will not appear. The image will take up the entire opening.
