Ordering Digital Files
The ordering of digital files is done in Working with Images.
- Select an image or multiple images from the Display Area.
- Click on the Order Product tool
 (Shopping Cart).
 - At the bottom of the popup menu, click on the drop-down arrow next to "Digital Files" to reveal all digital file options.
- Select a digital file pricing option from the list. These are a direct reference to the pricing set up in the Product & Pricing Manager.
- The price is reflective of the number of images selected.
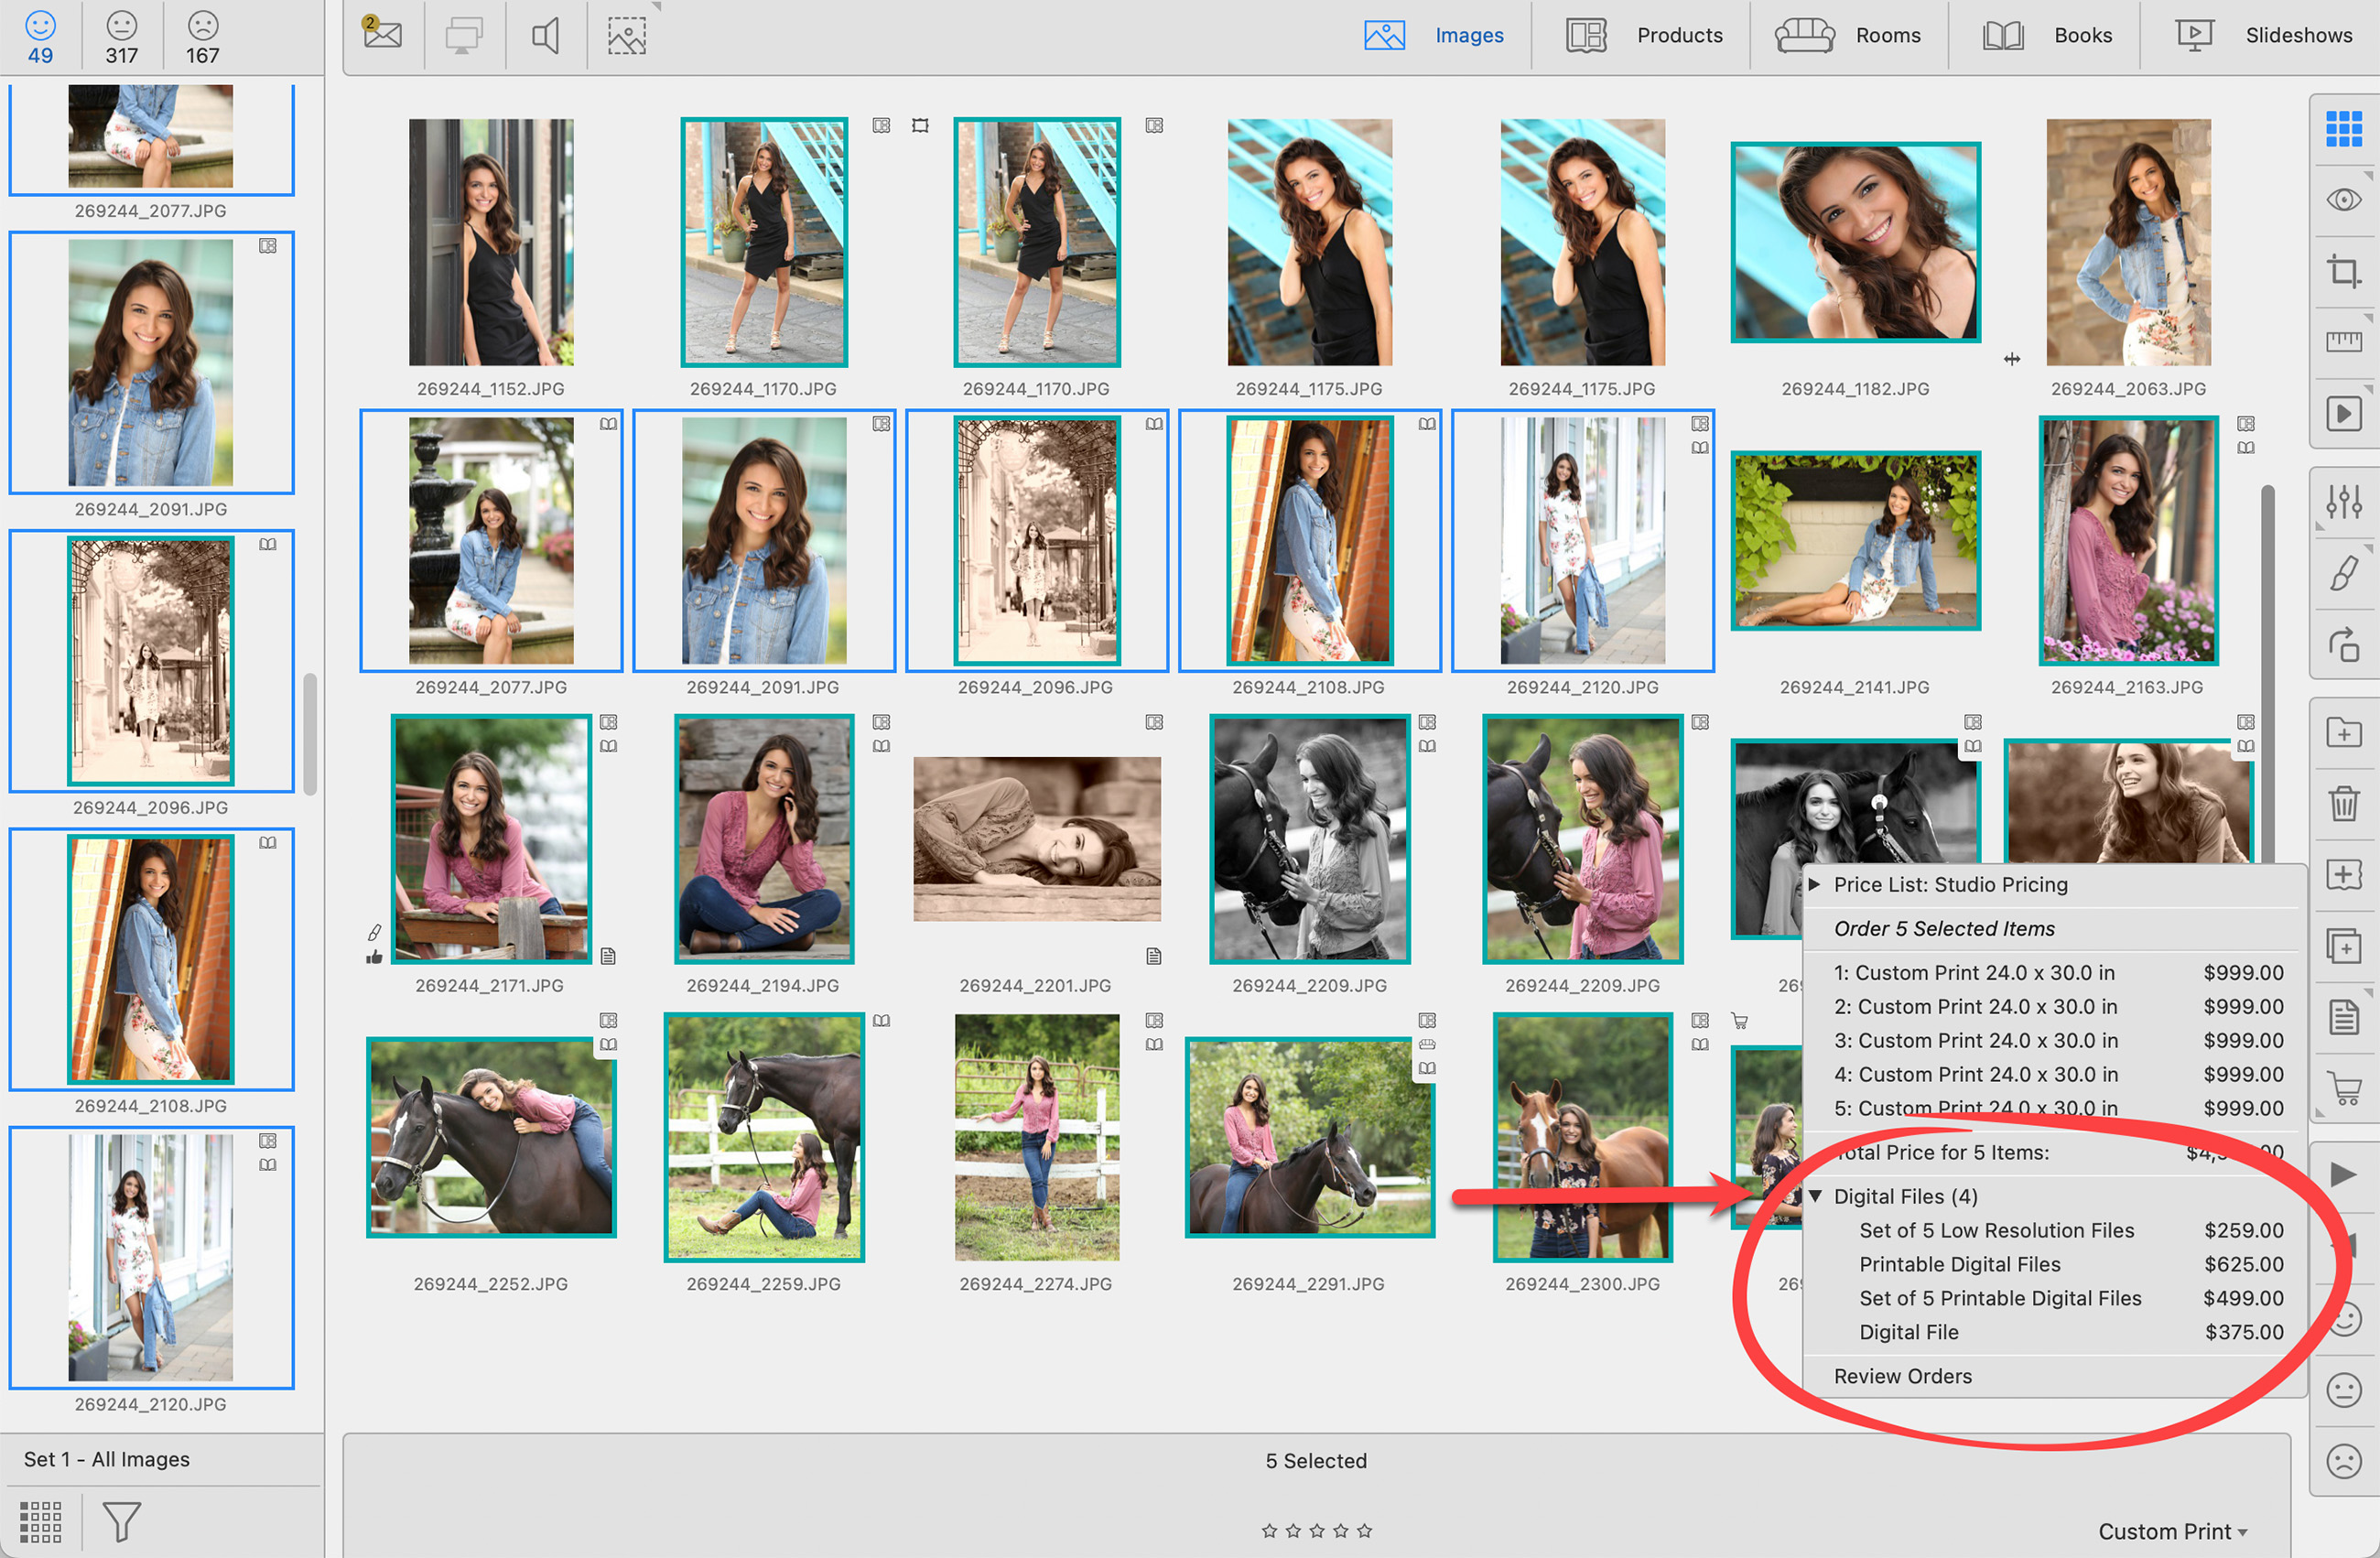
- Once a digital file has been ordered, a digital file tag will appear on the image thumbnail.
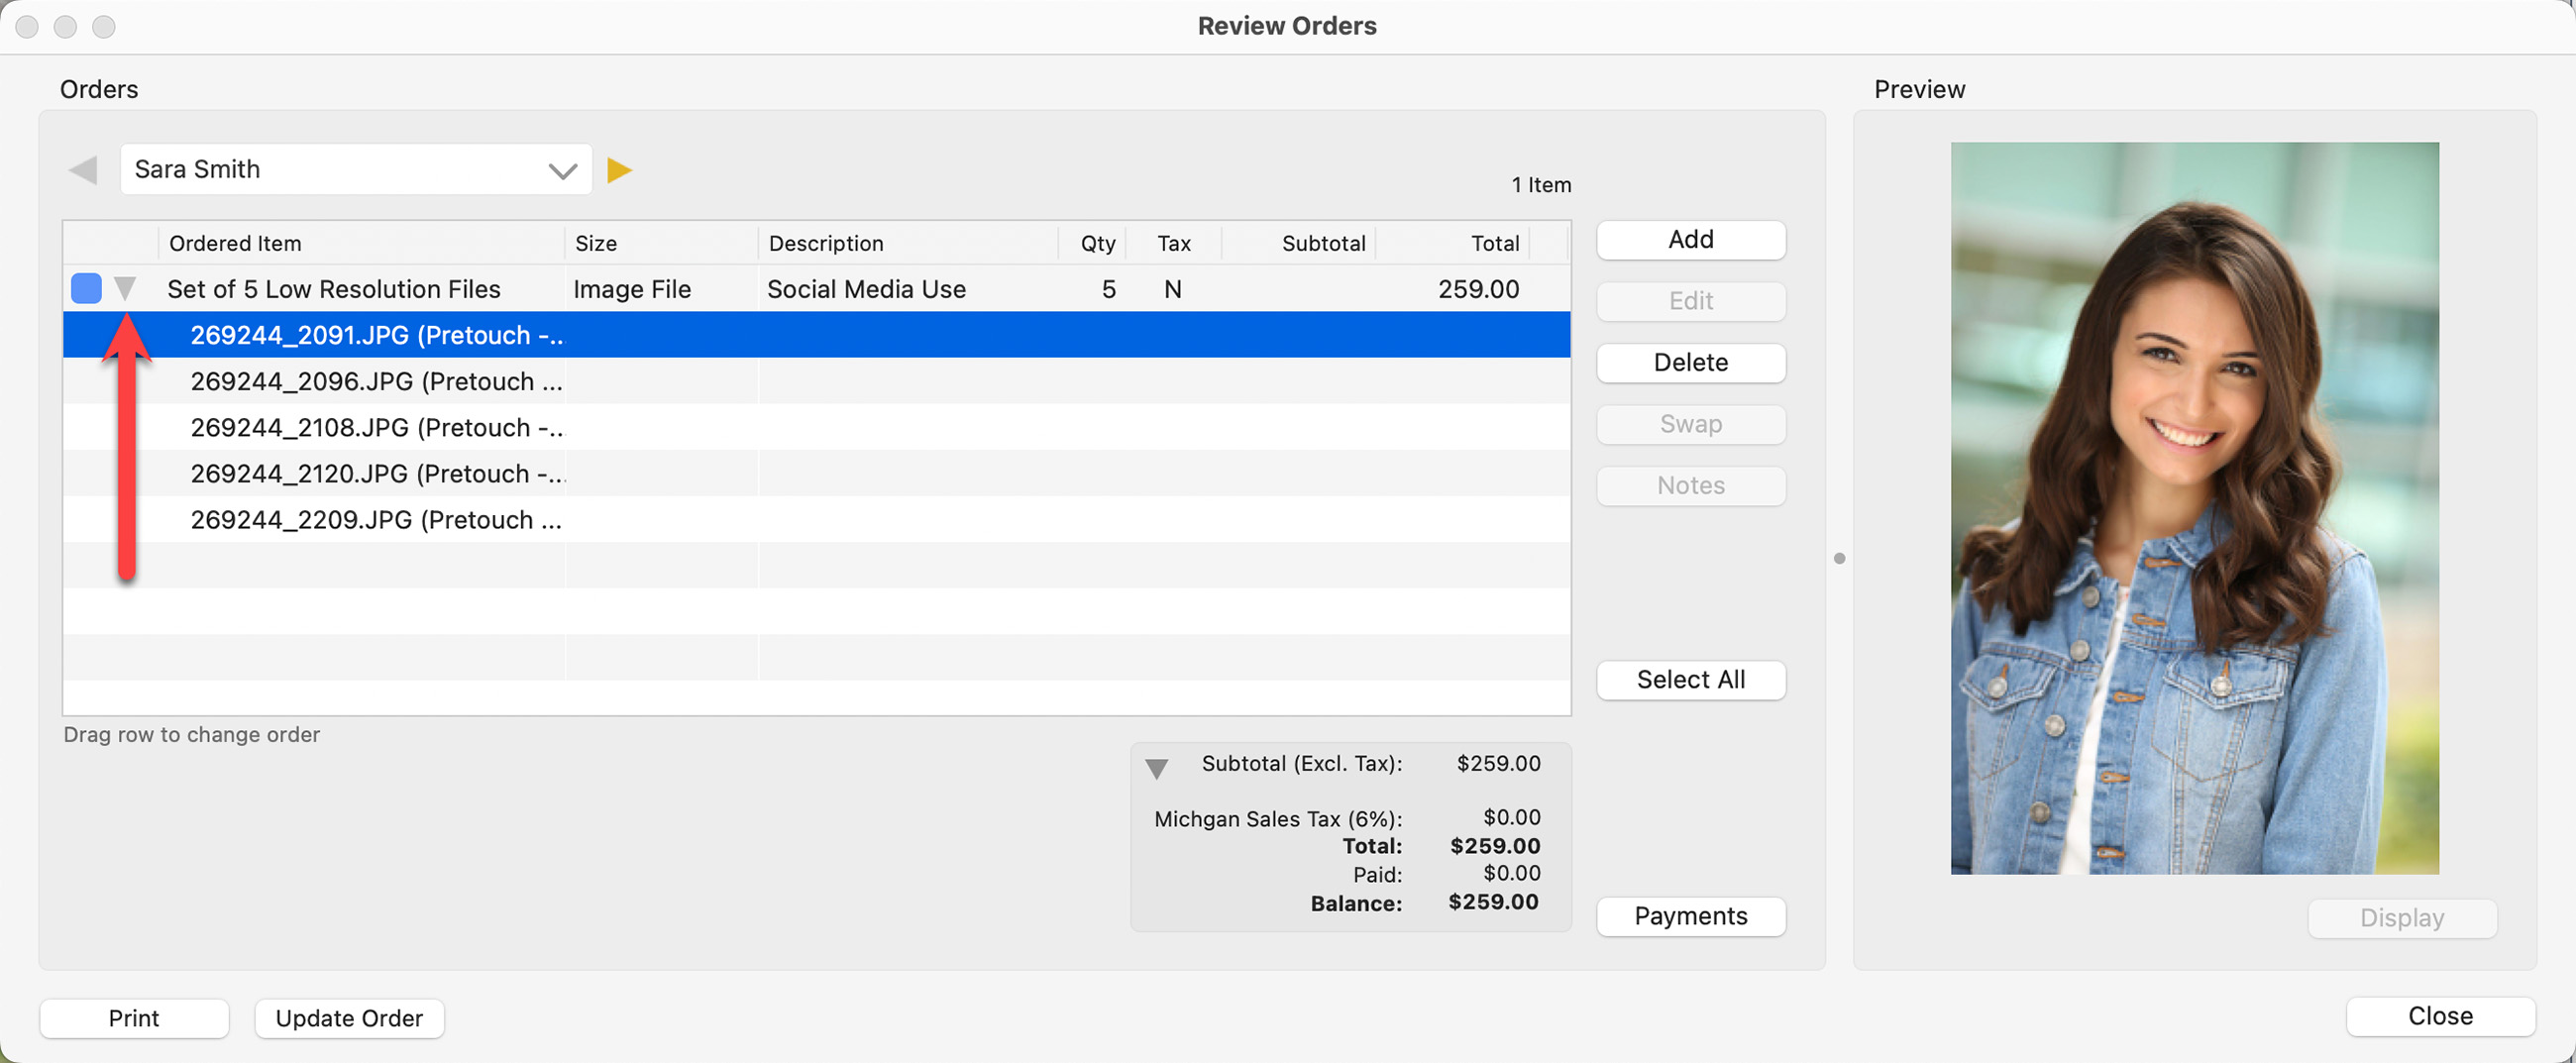
When you're in the Review Order window and want to see the digital files you've ordered with Group Pricing, click on the drop-down arrow. This will reveal a list of all the images that are part of the group.
- This approach applies to all digital files, whether they are priced individually or as part of Group Pricing.
Removing an image(s) from the group:
- Go to the Review Order window.
- Use the drop-down arrow to show all the images that are part of the group.
- Select the image(s) you want to remove and click the Delete button.
- Just the selected image(s) will be removed.
Adding an image(s) to the group:
- Back in Working with Images, select an image(s) and click on the Order Product tool (Shopping Cart).
- From the digital files list, select the digital file group.
- A dialog will appear where you can either create a new "Order Item Group" or add it to an existing one.
- Notice the group count in brackets next to the digital file group, (Group Count: 4). This will advise you of how many digital files are currently ordered in that group.
- Select the appropriate group and click OK.
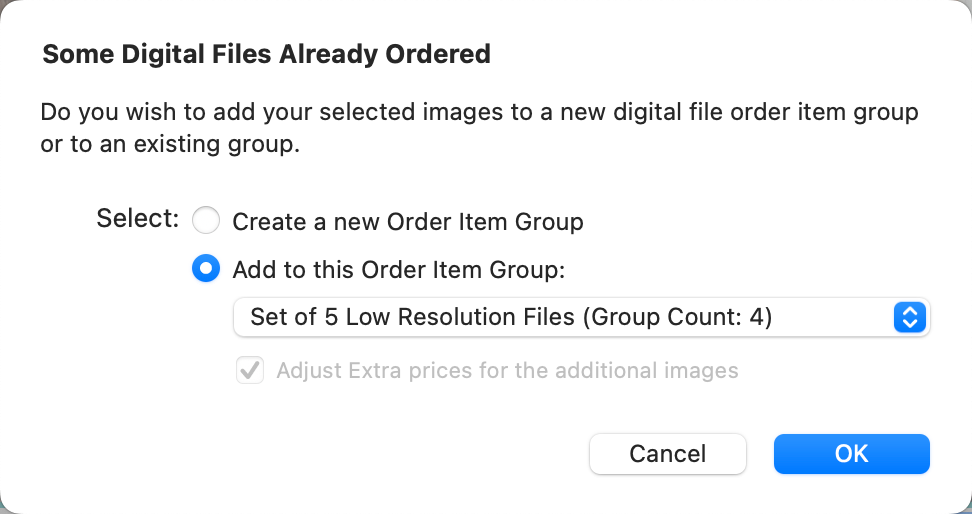
- The image(s) will be added to the selected group.
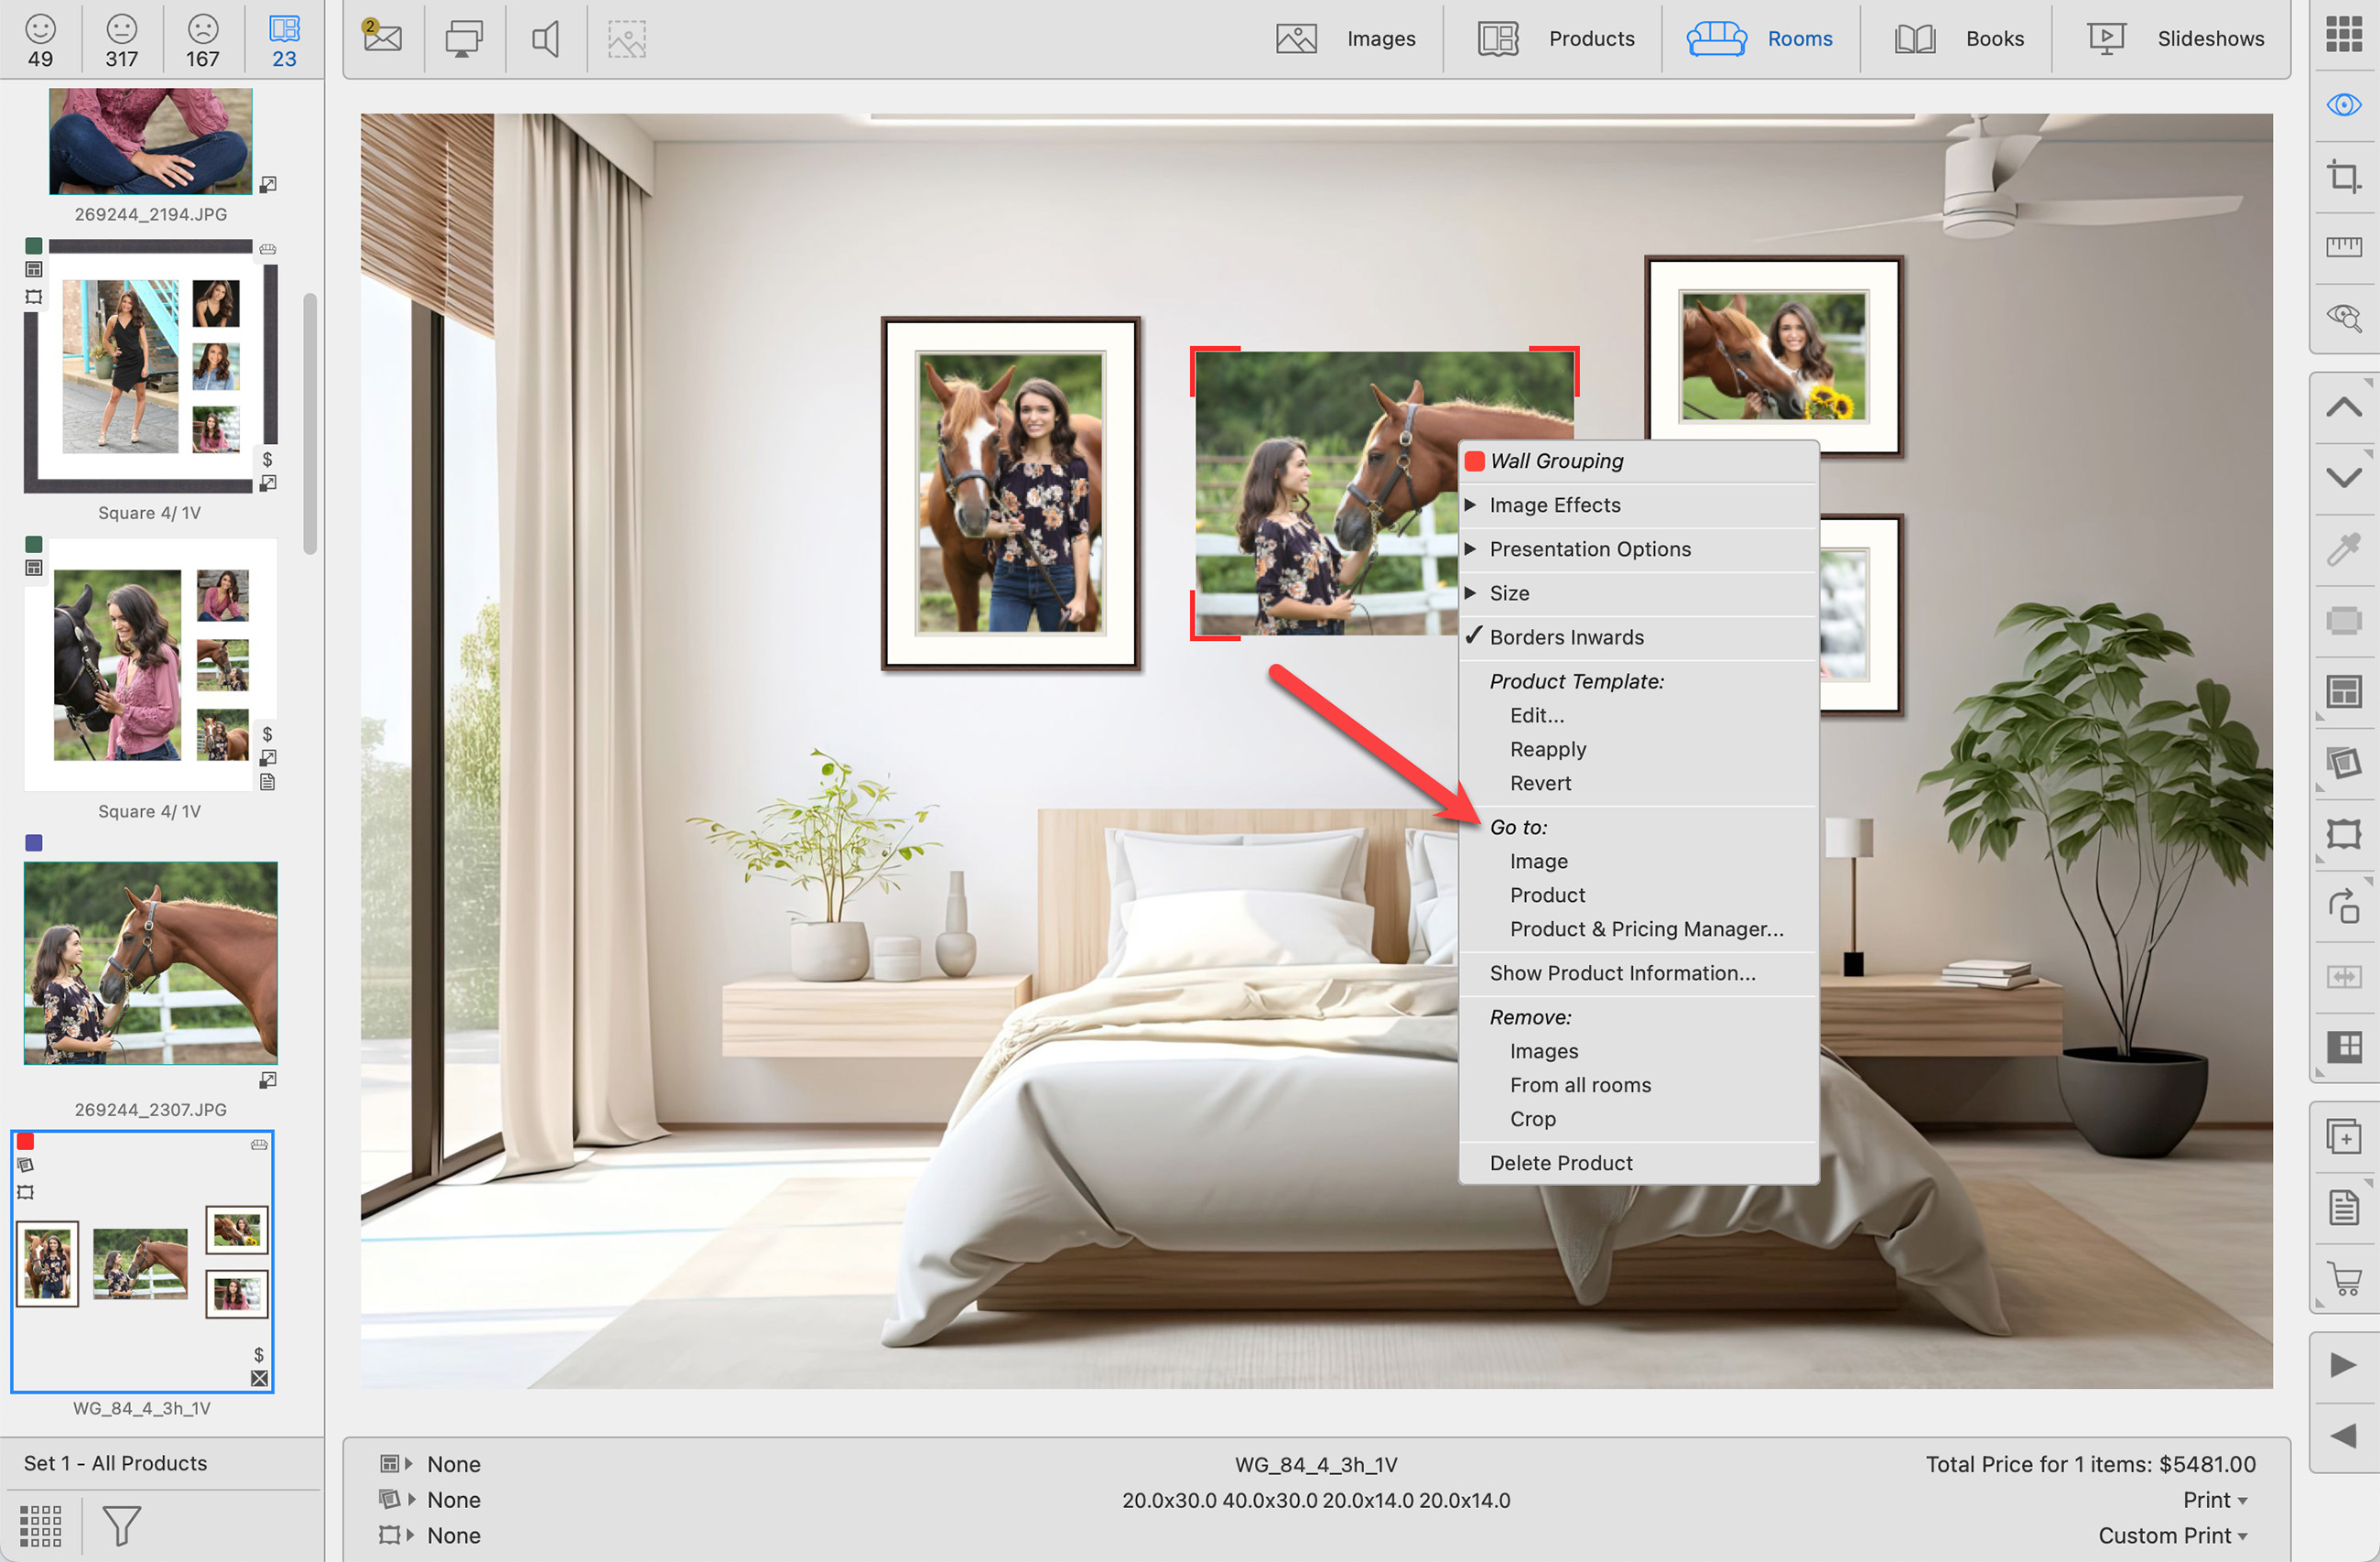
Right-click on an image in "Working with Products" or "Working with Rooms," and select "Go To Image" from the menu. This will take you to "Working with Images," where you can order the digital file.
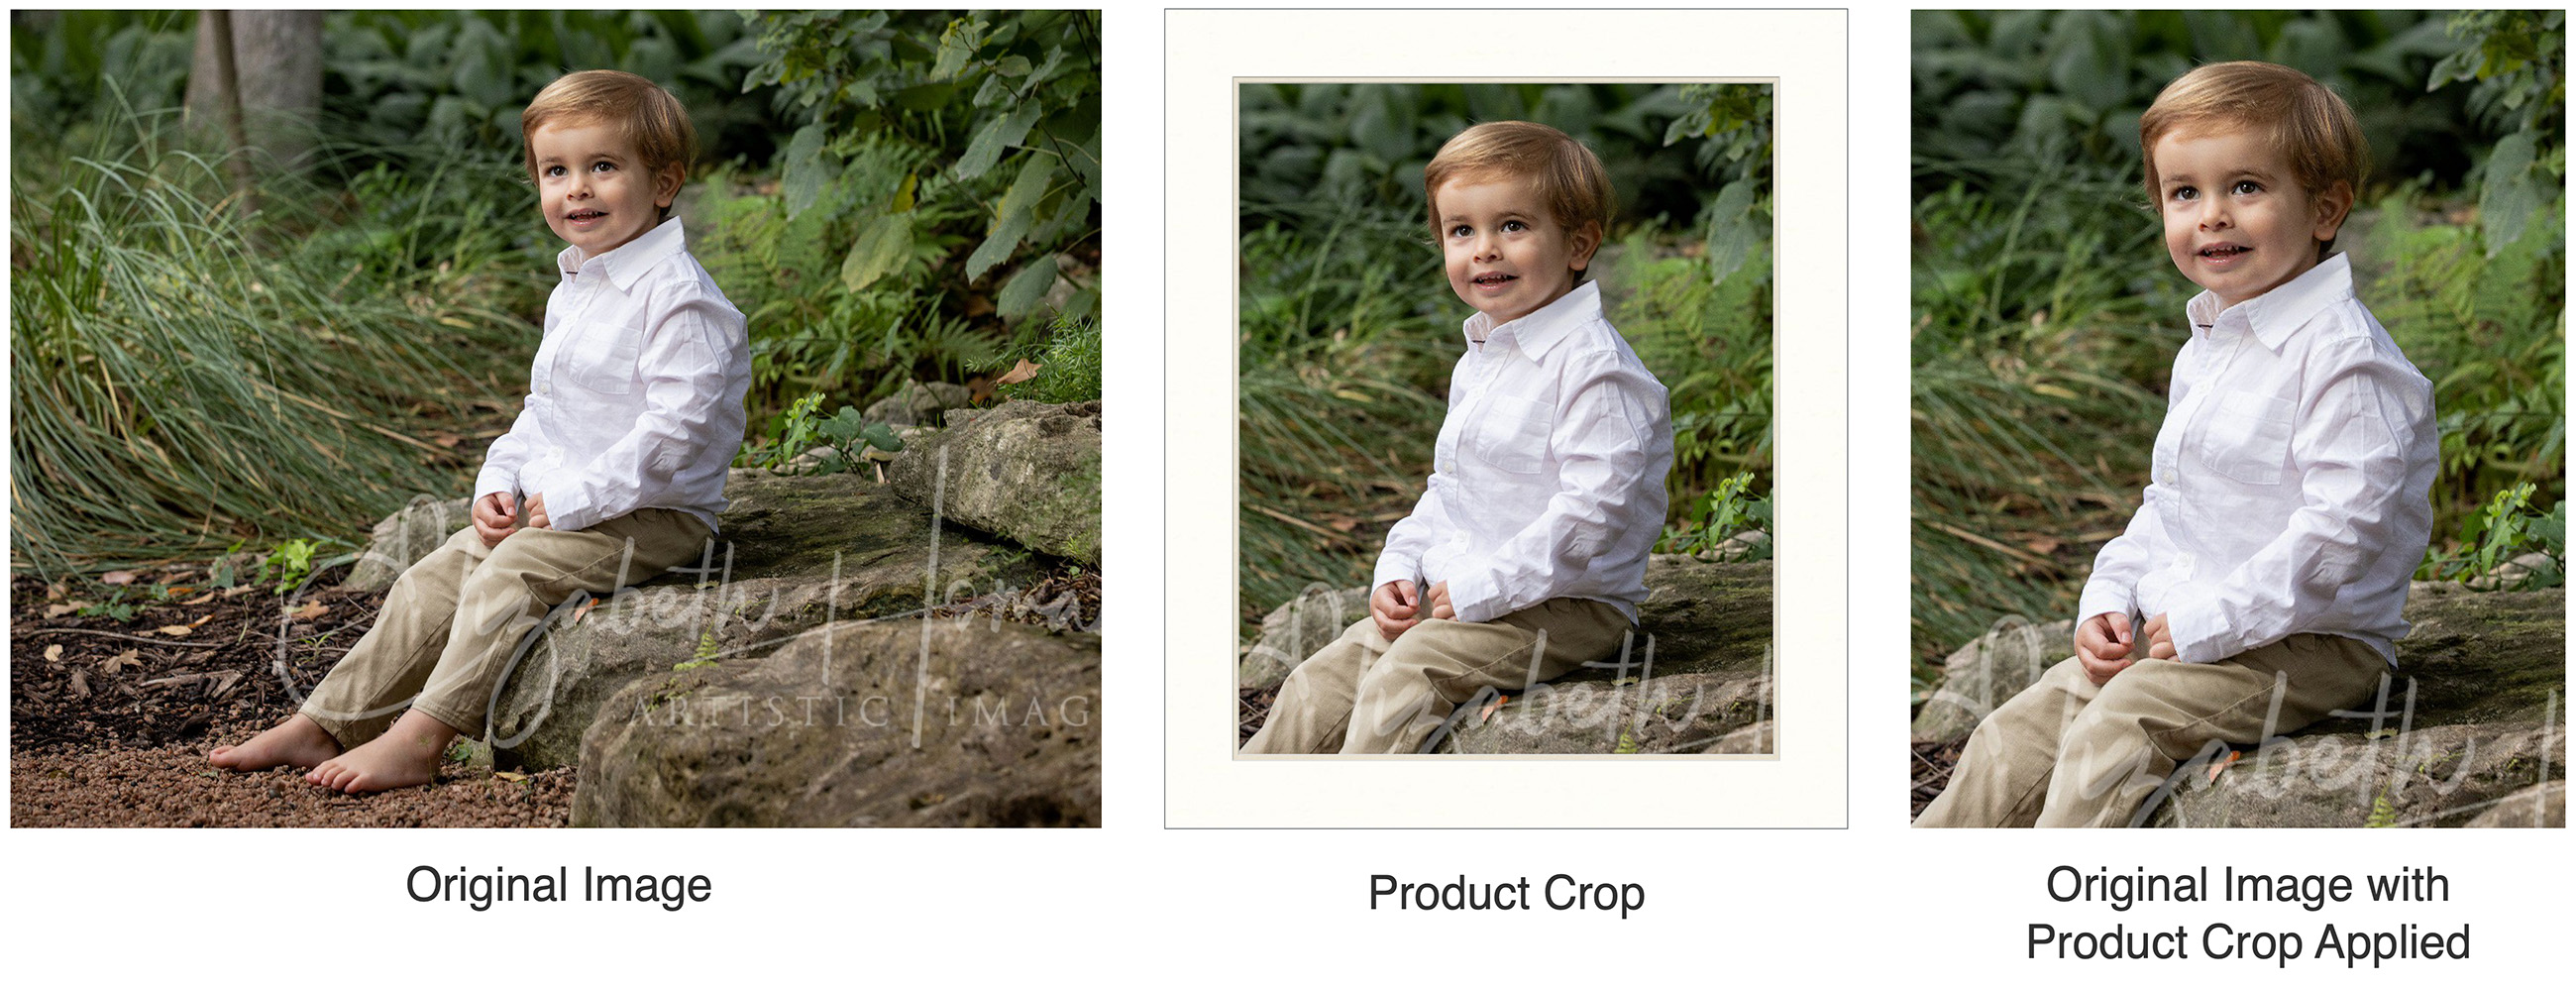
It is important to note, that because product cropping works independently from image cropping, the digital file may not exactly match what is seen in the product. To order the digital file with the exact product cropping, see Sync Product Crop with Original Image.
When you crop an image within a specific product in ProSelect, like a framed print or a layout, the crop only affects that particular product. This means the original image in your library remains unchanged, allowing you to customize how the image looks in different products without altering the original file.
However, you may want to add a digital file to the order whose cropping matches that of the product you created.
- Right-click on the product and choose "Apply Crop to Original Image."
- The original image will now be cropped to match the product.