Custom Products
When ordering a product, if the desired size or configuration isn't on the price list, you can create and order a "Custom Product" and set your own price on the spot. This avoids the need to clutter your price list with rarely ordered sizes. This is also a convenient way to add an Extra to the product.
Training Video
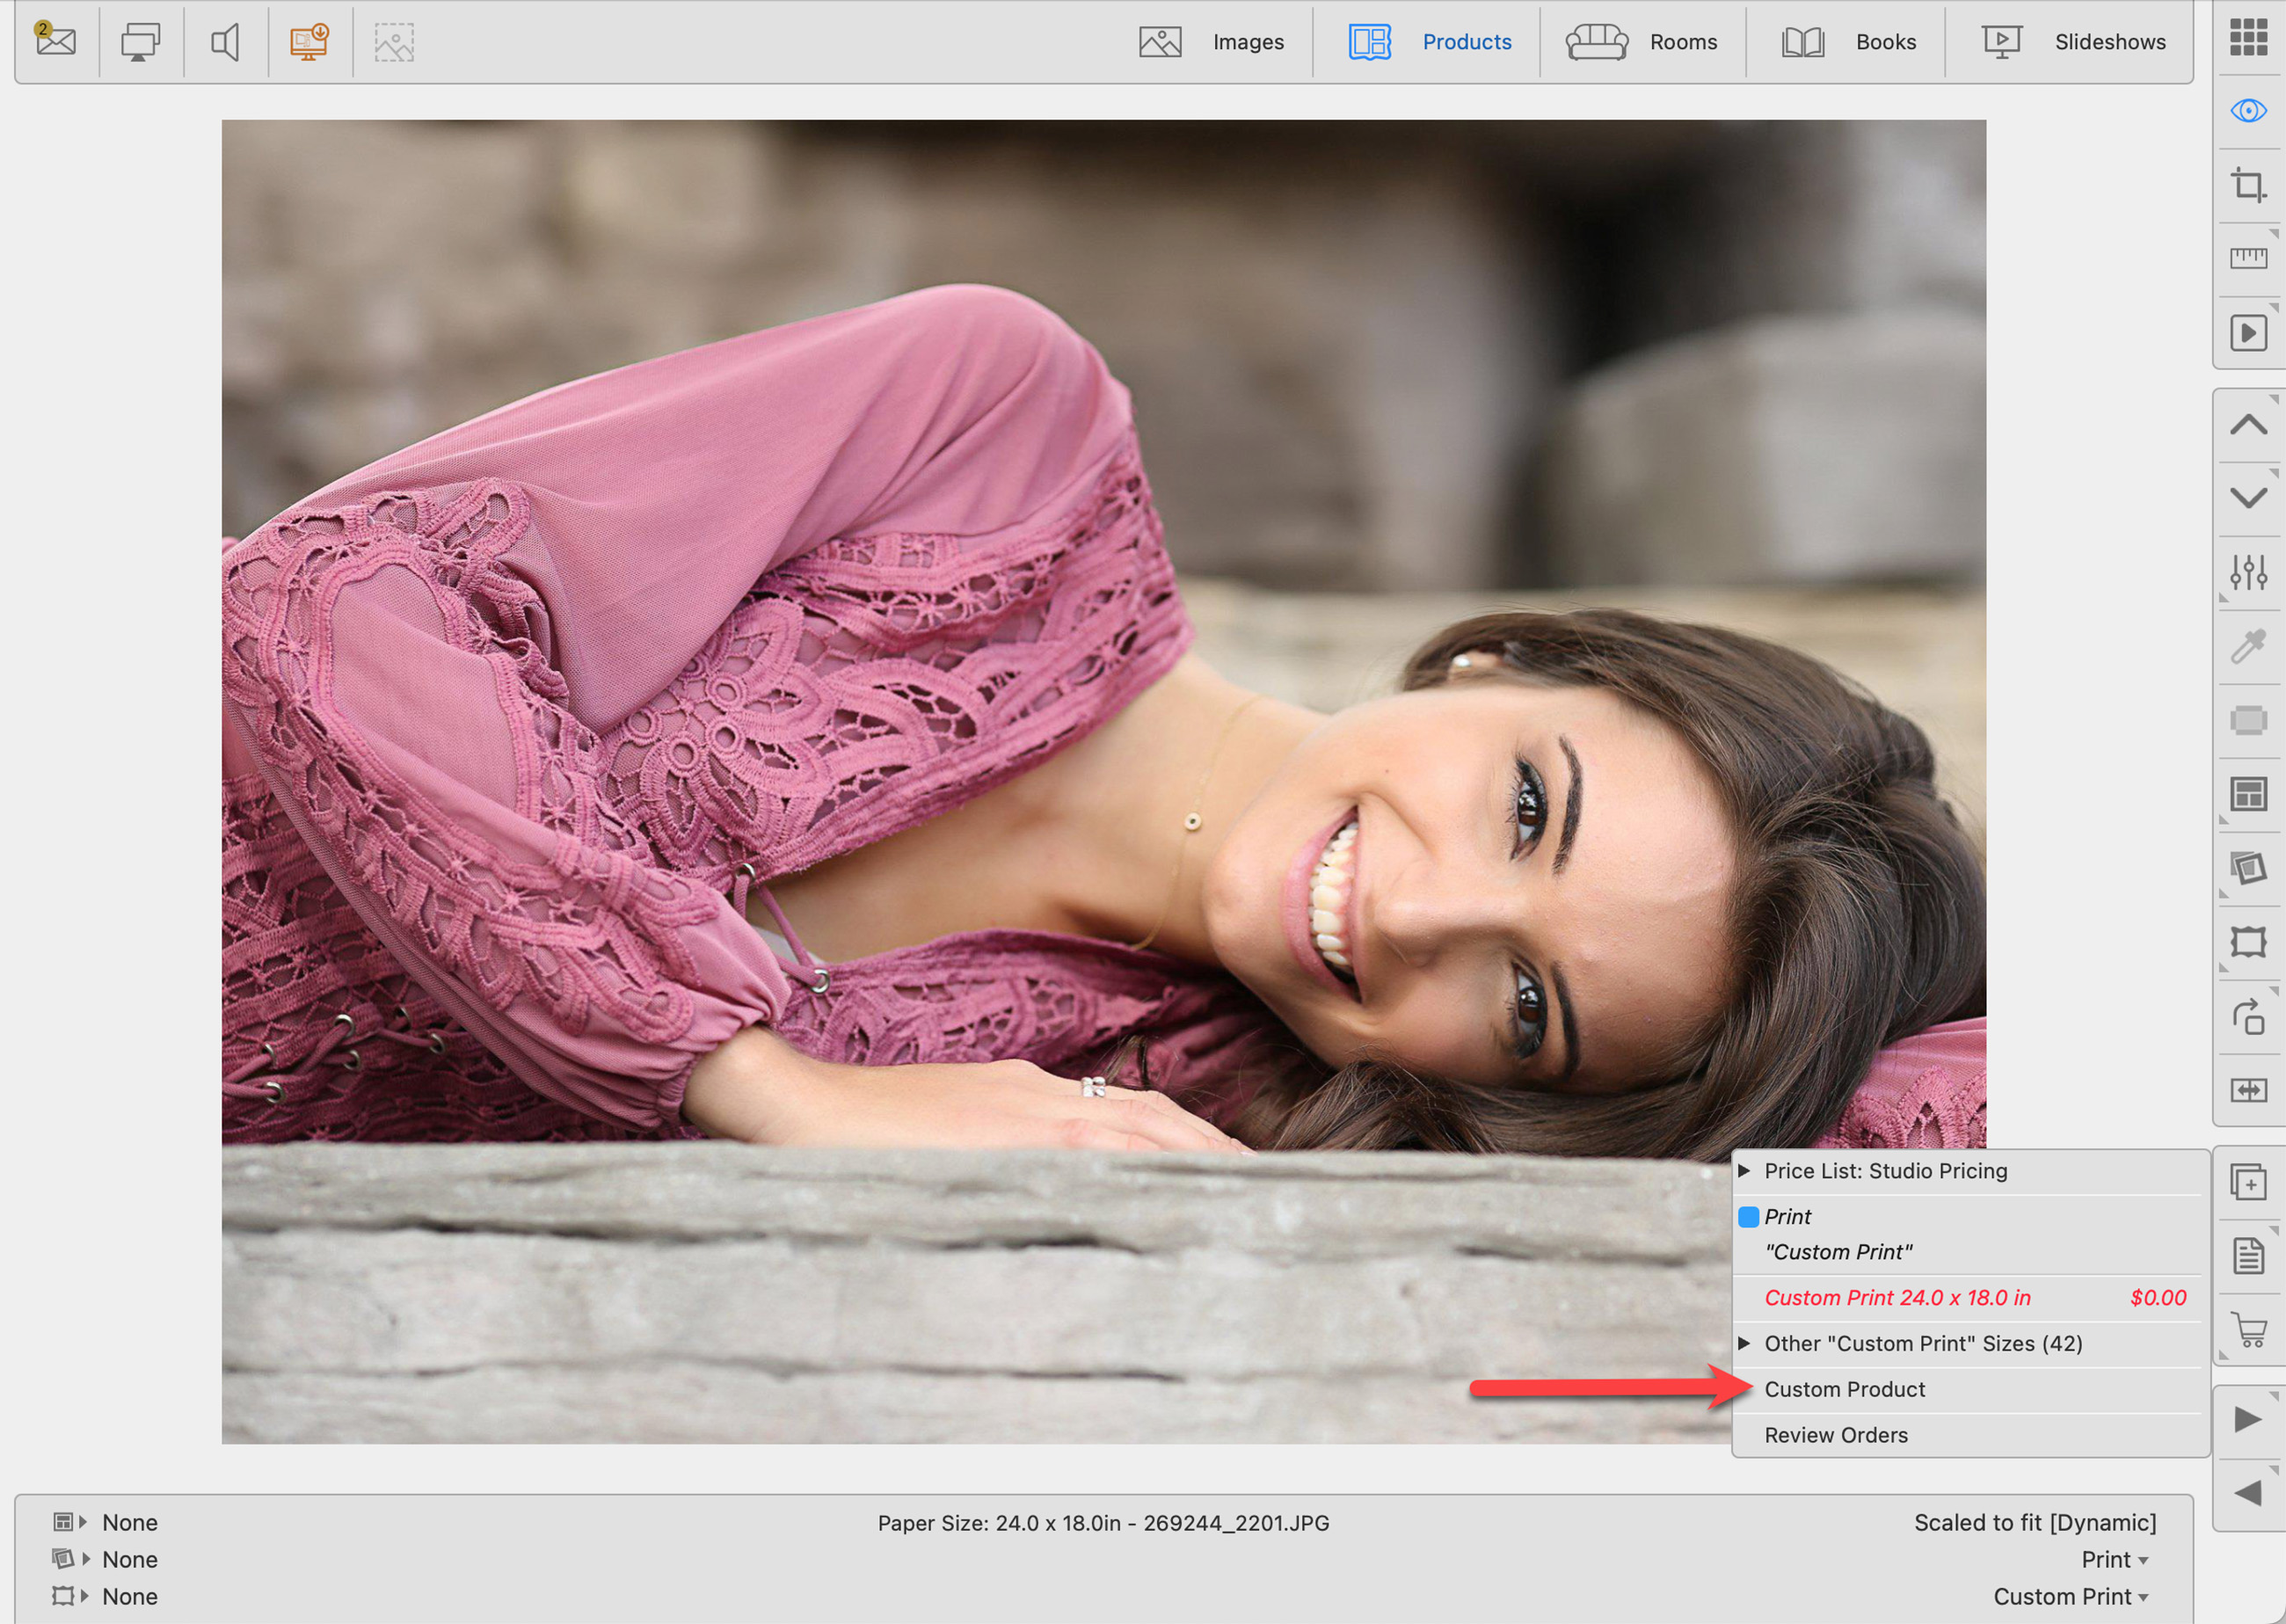
- Click on the shopping cart (Order Product tool)
 . Alternatively, use the keyboard shortcut "Q" to open the order menu.
 - Select "Custom Product" from the popup menu.

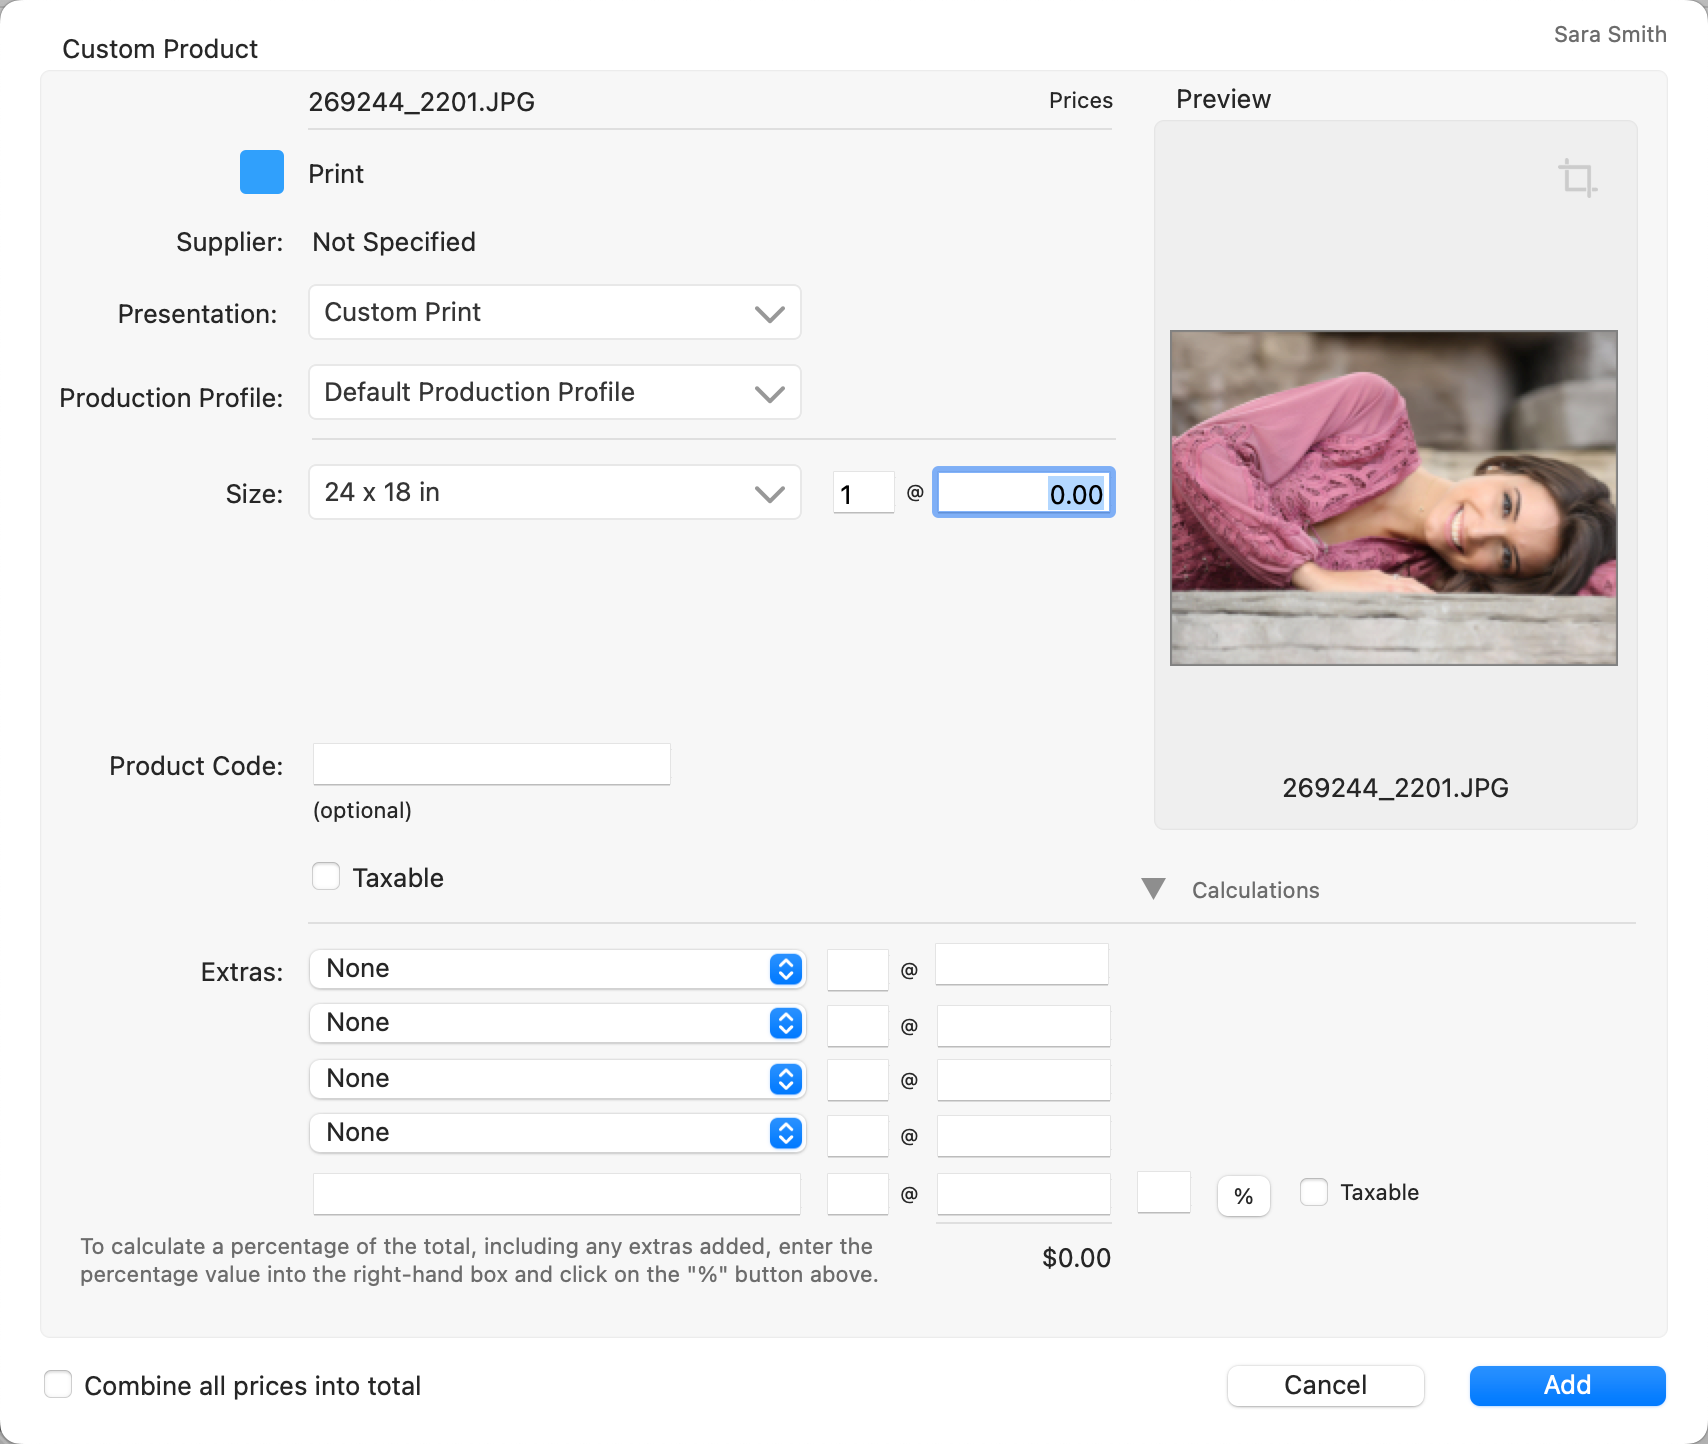
- The Custom Product dialog will appear.

- Choose a Presentation Option from the drop-down menu. It is important to note that if the product has a Supplier attached, only those presentation options available from that Supplier will appear as options. To access ALL presentation options, hold the OptionAlt key while clicking on the drop-down arrow.
- Choose a Production Profile (or use Default).
- Select a size from the drop-down menu. You can choose "manage" if you want to create a custom size.
- Enter a quantity and price.
- If Product Codes are enabled, enter one manually here. Because the "Custom Product" doesn't exist in the Product & Pricing Manager, one cannot be automatically generated.
- Add any "Extras" if applicable.
- Click on the Add button.
Applied Frames & Mats
- When ordering a custom product that includes a mat or frame, you may also need to set a price for these additional components.
- Mousing over the applied mat or frame will expose the calculations used to create the final price of the mat or frame (if your frame or mat is a fixed price, there is no calculation).

Adjusting the Cropping on a Custom Product
In the "Custom Product" dialog, the Cropping tool ![]() appears at the top-right of the image preview. Clicking this tool opens the "Working with Images, Cropping view" section, allowing you to adjust the image. In order to crop the image, a product must be created first.
appears at the top-right of the image preview. Clicking this tool opens the "Working with Images, Cropping view" section, allowing you to adjust the image. In order to crop the image, a product must be created first.

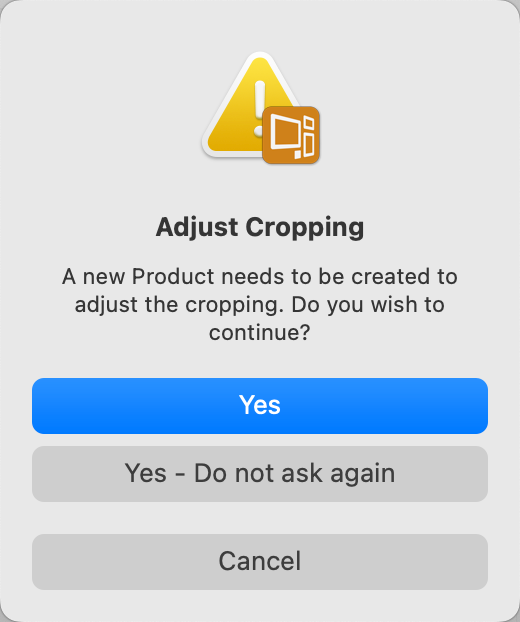
- Click "Yes" to create a new product and adjust the cropping.
- Remember, the product isn't ordered at this stage. After making adjustments, proceed to order the product.