Produce High-Res Images
ProSelect automates Photoshop to make high-resolution images for uploading to Labs. Use Production Profiles to customize your output files according to your lab's requirements.
- Prints with virtual styles applied: The final output file will combine both the print and its virtual style into a single image file.
- Products, Books, Wall Groupings, and Digital Files work in the same way as Prints, however, there are some minor variations in the workflow. Click here to learn more.
- Cropping is handled on a per-image basis. If an image is produced in multiple sizes or with varying effects, each version can have its own unique crop.
- Note that for digital files, the cropping used in Production is the cropping set in Working with Images.
- Retouching is required only once per image, regardless of its use in multiple tabs with different sizes and effects.
- Black & White and Special Tints may require a custom workflow.
The following steps should be done for each Product Tab.
- Verify your cropping. Use the Cropping tool
 to adjust the cropping of any images. *Cropping needs to be done within ProSelect, not an external Photo Editor. Once you have made cropping adjustments, right-click on the image and select "Go To Production" from the list. This will bring you back to the Production window.
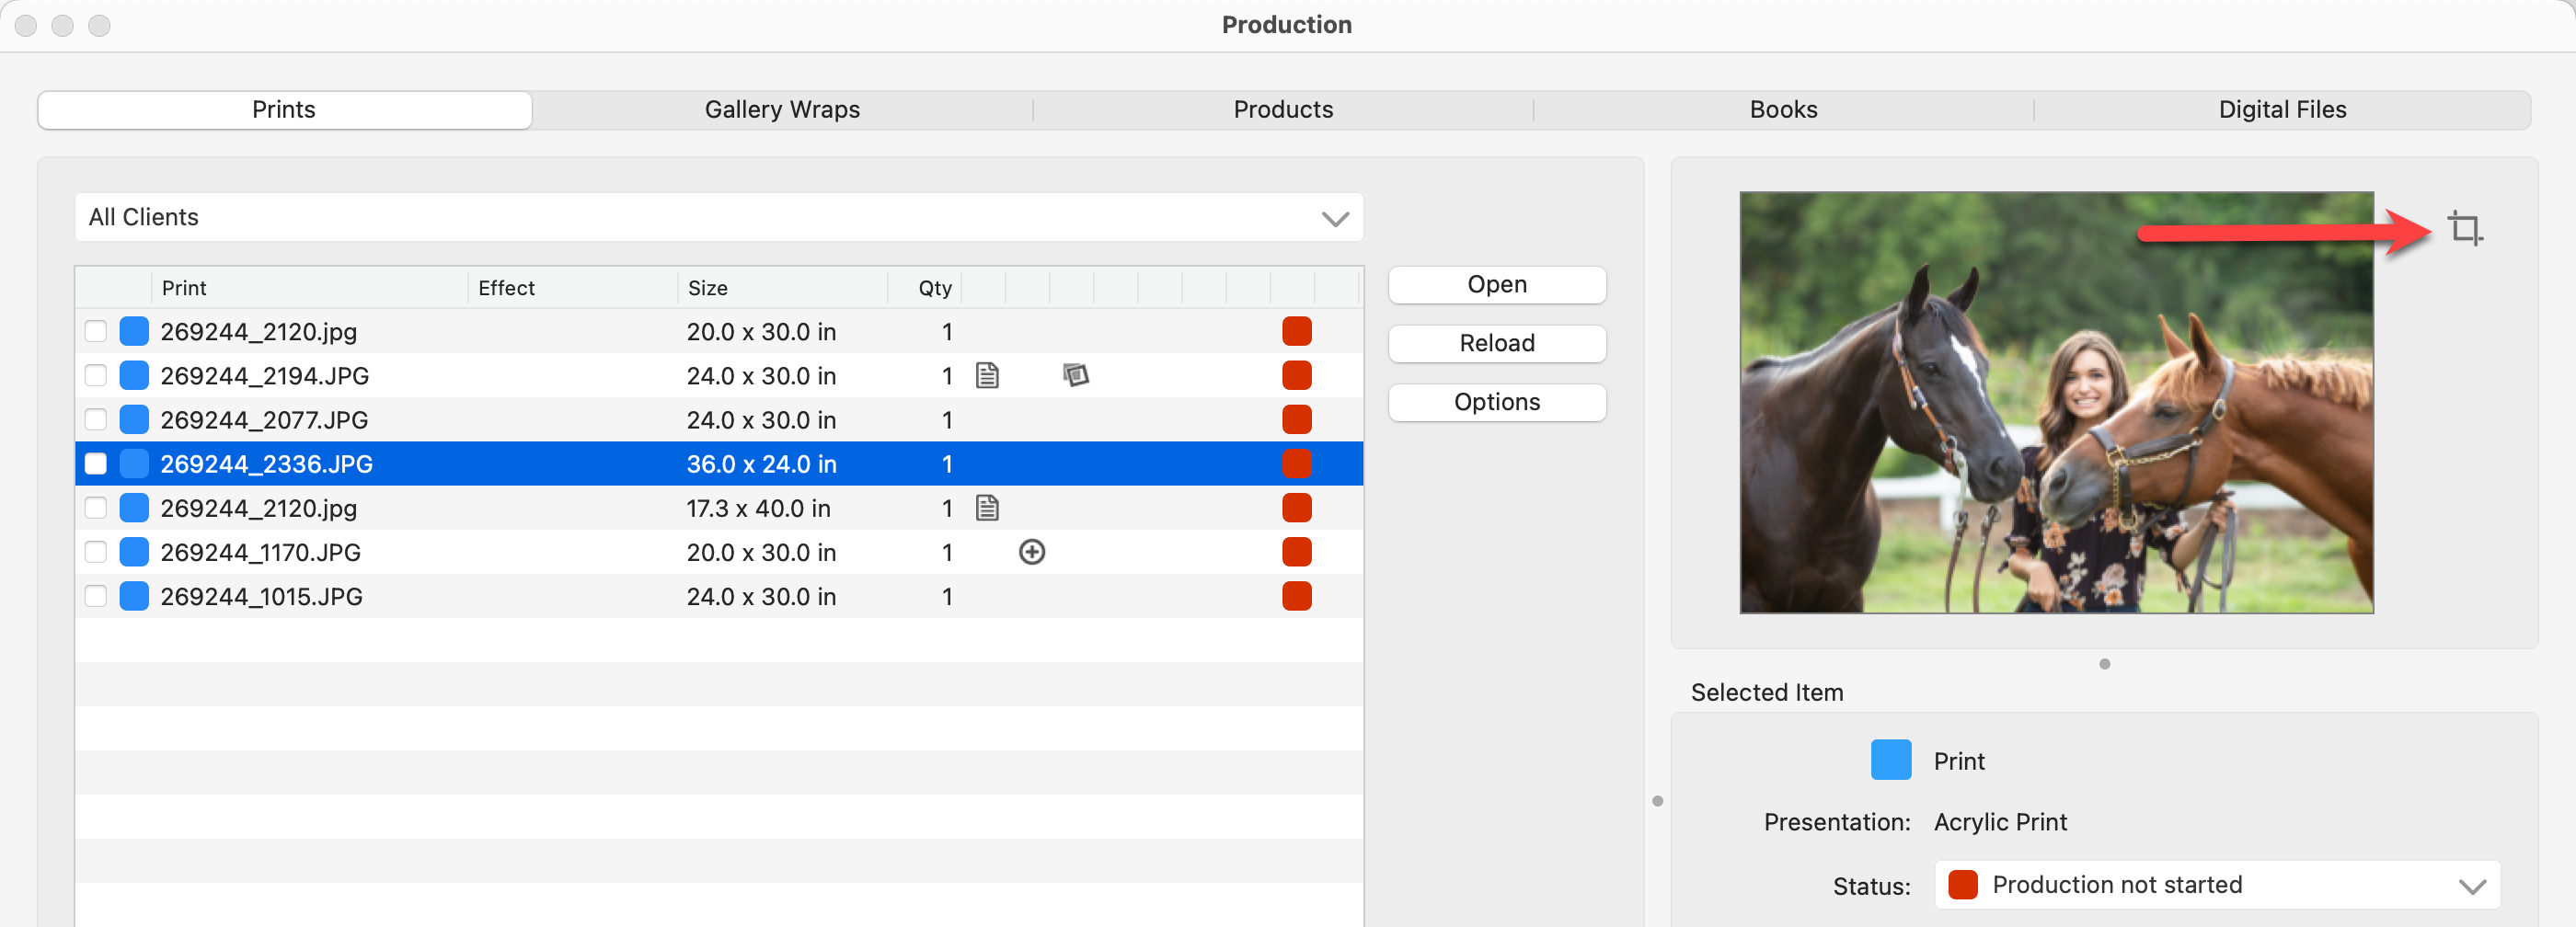
- If you have applied a Perfectly Clear Preset and do not wish to apply it during Production, uncheck the "Retouching: Apply Preset" box. By default, Presets are applied. See Handling Pretouching Presets for more information.
- Final Image editing. If your images have already been retouched, or don't require retouching, continue to step 5. Otherwise, use one of the following workflows to Retouch and Edit each of your images:
- Link and Reload Retouched Images into ProSelect.
- You can set the Status of each retouched image to
 Edited / Retouch Complete.
 - Make sure Photoshop is open and running on your computer. When you start production in ProSelect, it uses separate Photoshop windows to assemble the final images. Consequently, any other image windows that are already open in Photoshop will be automatically closed. If there are any unsaved image windows open at the time you begin production, ProSelect will prompt you to decide whether to proceed, ensuring you don’t lose any unsaved work.
- Check the boxes along the left-hand side for all images you wish to include when creating high-res images. You have the option to "Check All" or "Check None." Do this for each Product Tab. Alternatively, hold down the OptionAlt key while clicking the Check All button. This will check the boxes in ALL tabs.
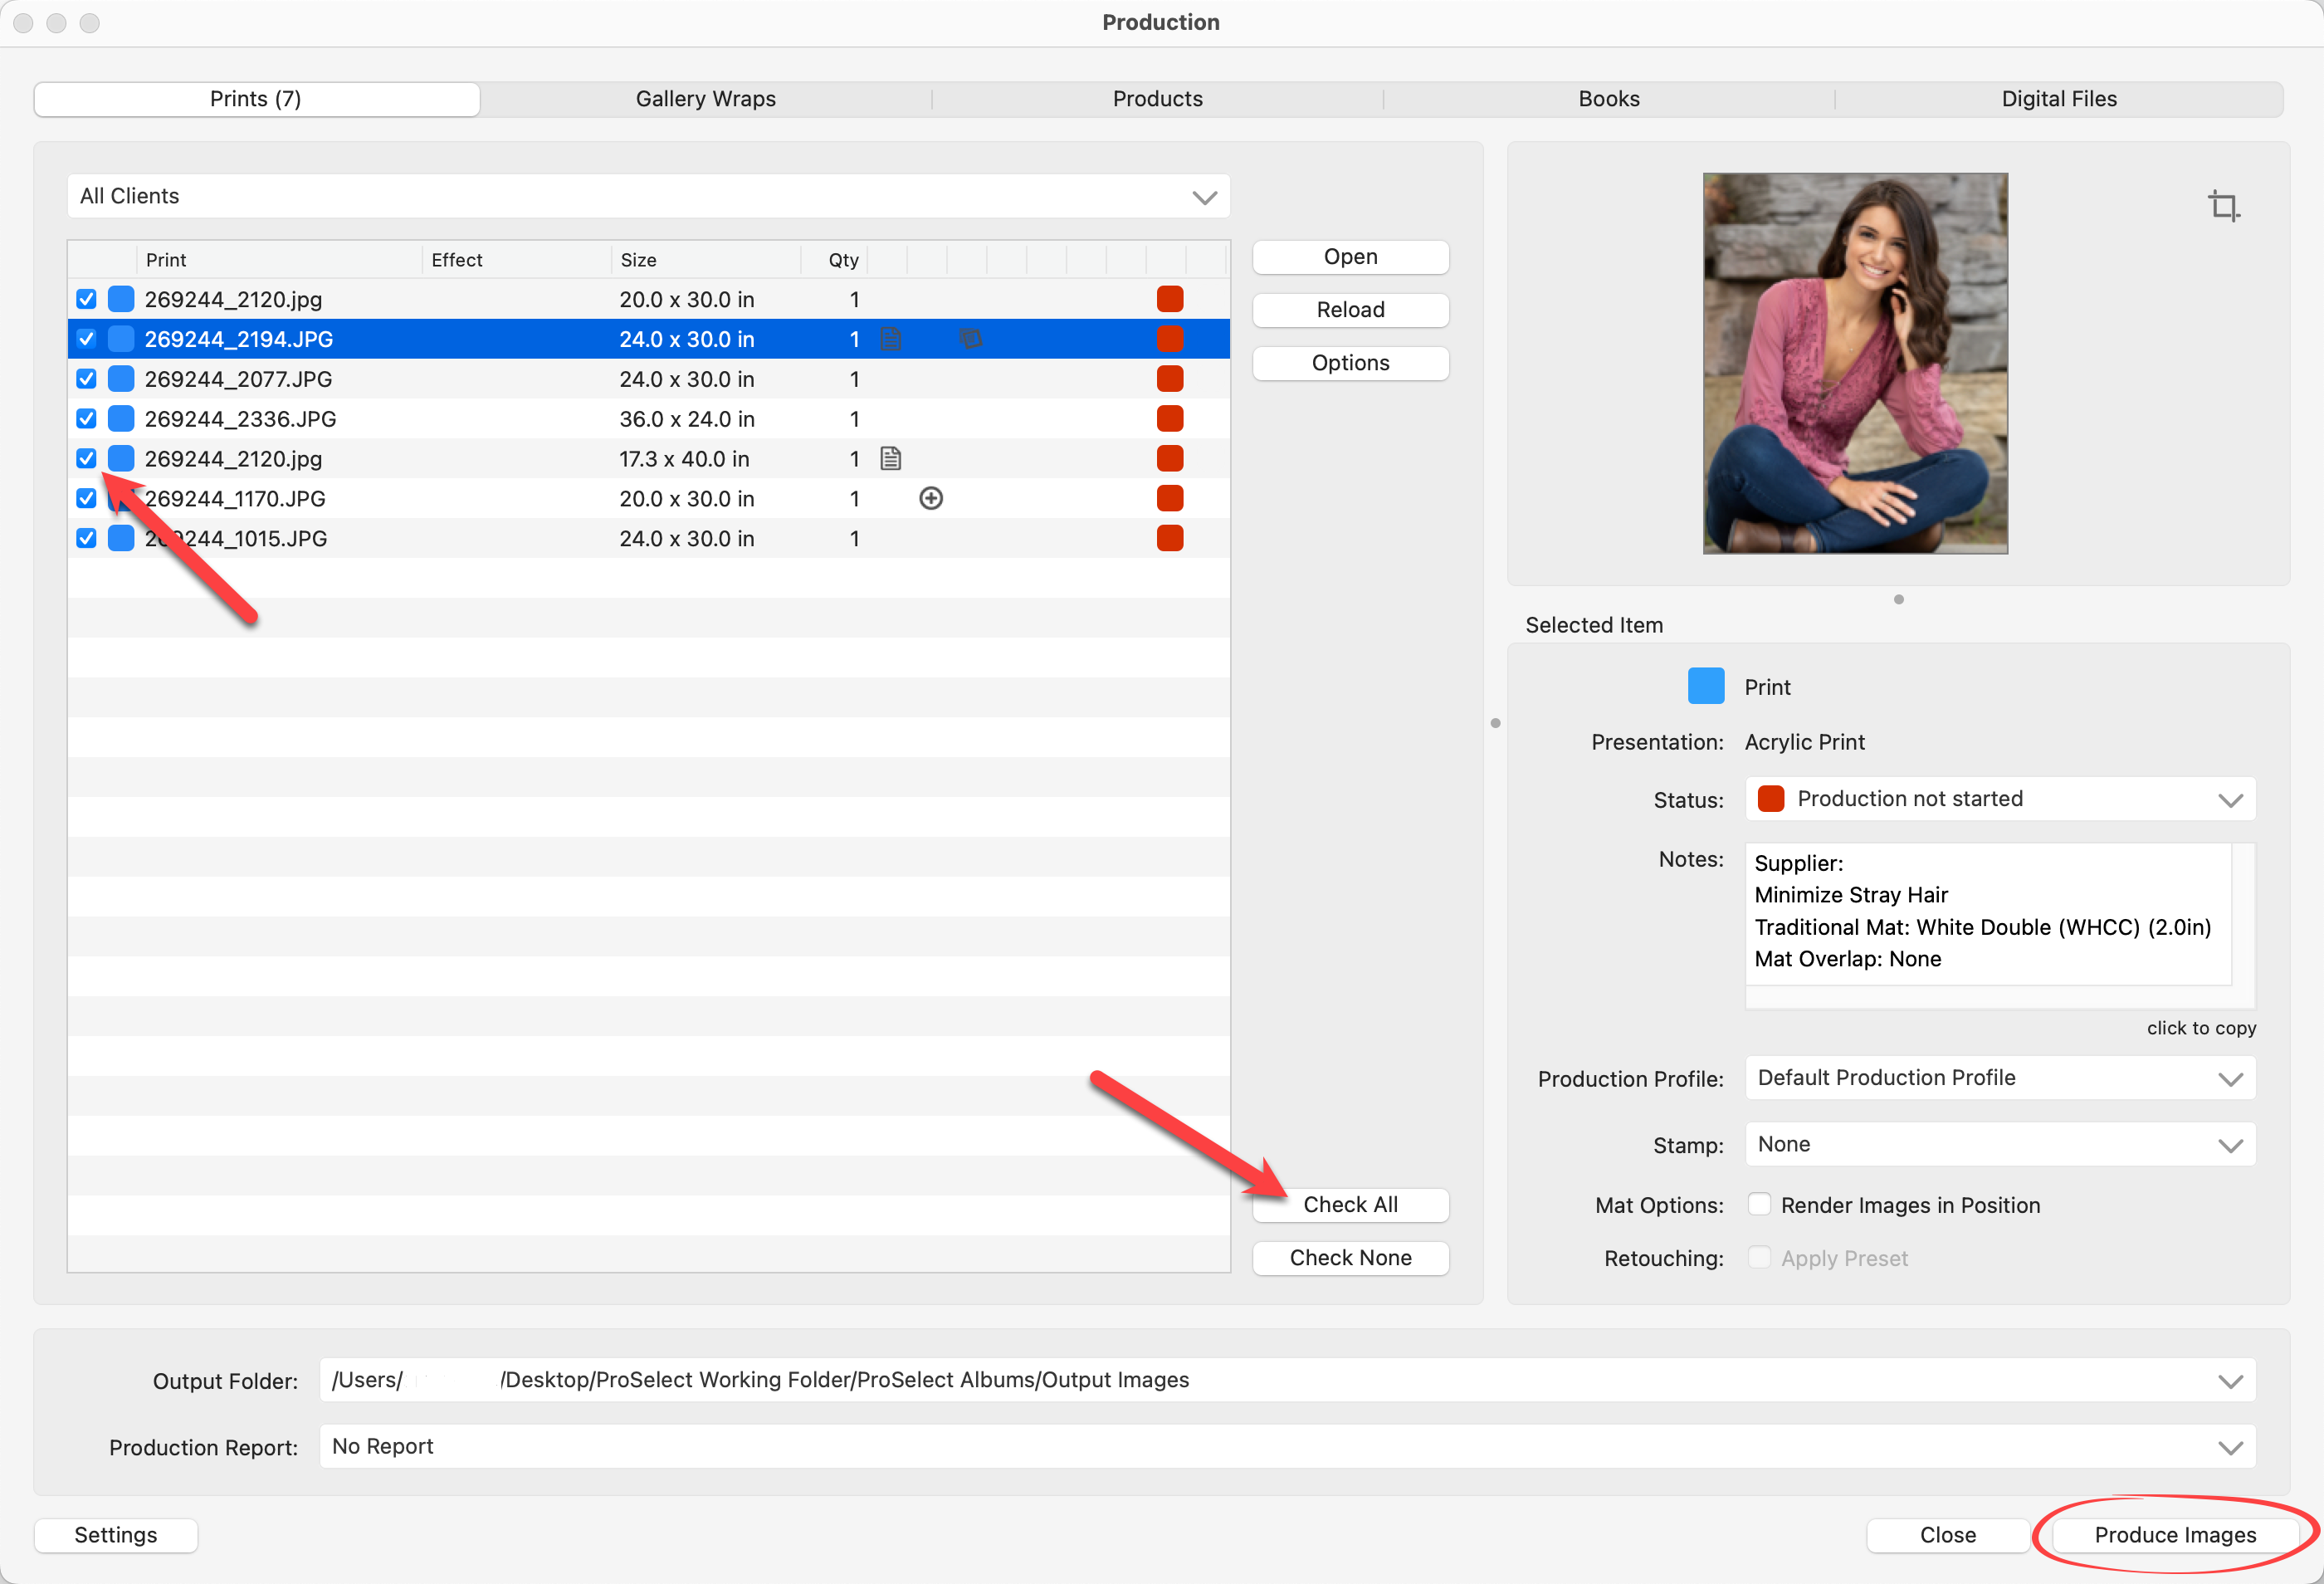
- Select the Output Folder location for the files (bottom-left corner of the Production window). This location is saved in each album file so the same location will be used each time. The Output Folder location is set in Settings > Pro Production > Output Settings. Use the drop-down list to select a different Output Folder location. Alternatively, you can reset to default (which is what is set in your settings).
- Choose whether to include a Production Report.
- Click the Produce Images button.
- ProSelect automates ALL Production Actions you have applied to the selected images.
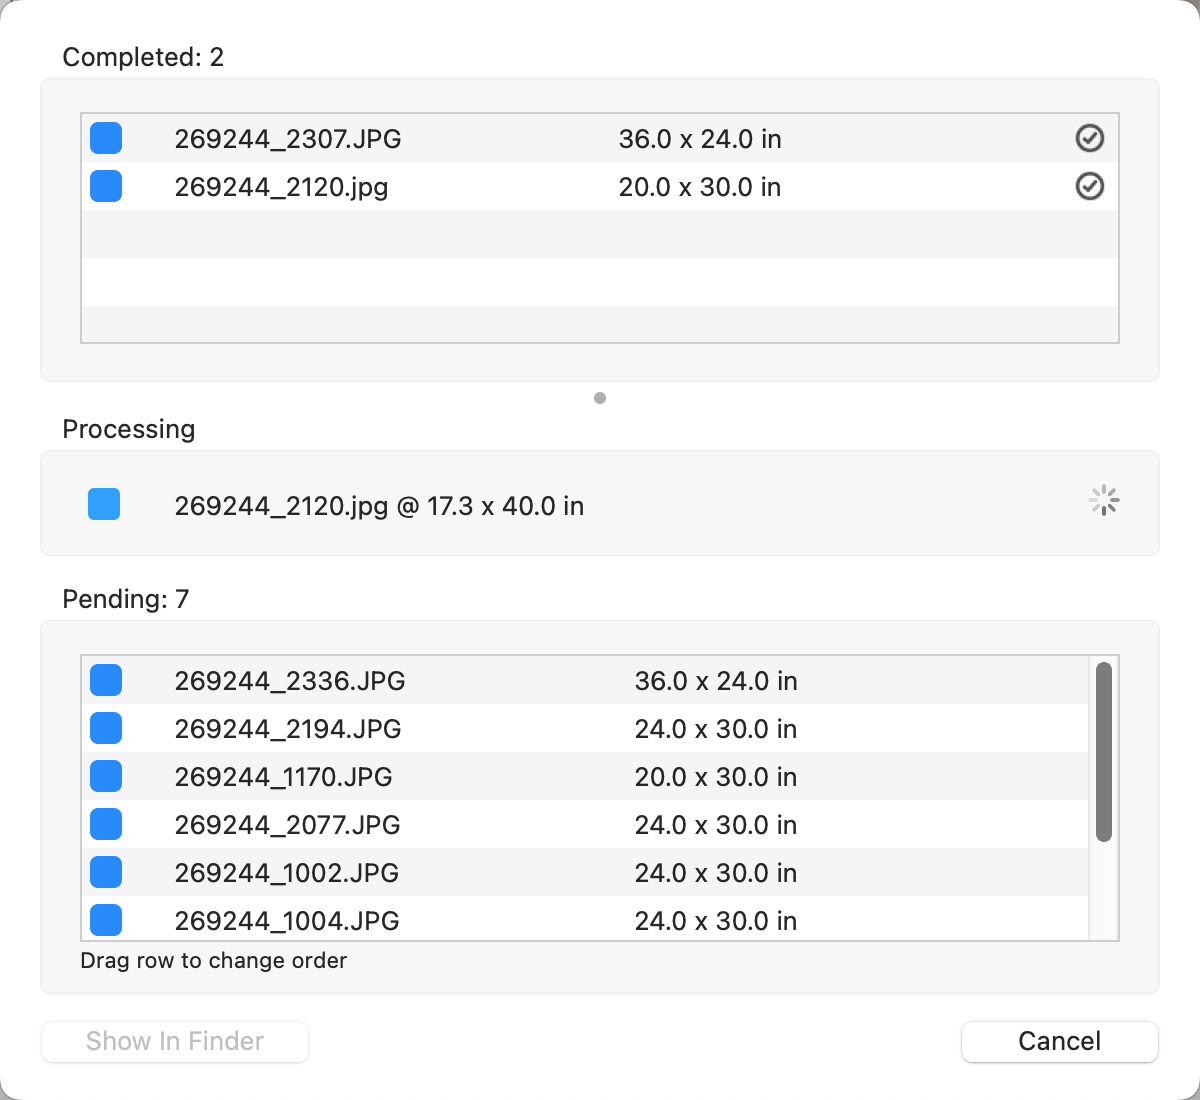
- The Processing dialog keeps track of all images being produced, and where they are in the cue. You can manually drag images to reorder them.
- Once complete, the Processing dialog remains open. You can close it, or select an image to view in FinderFile Explorer.
- High-Resolution images have now been created. The files will be located in your Output Folder location. The Completed Image Tag
 will now appear next to each image you have produced.
 - You can set the Status of each completed image to
 Approved for Final Production.