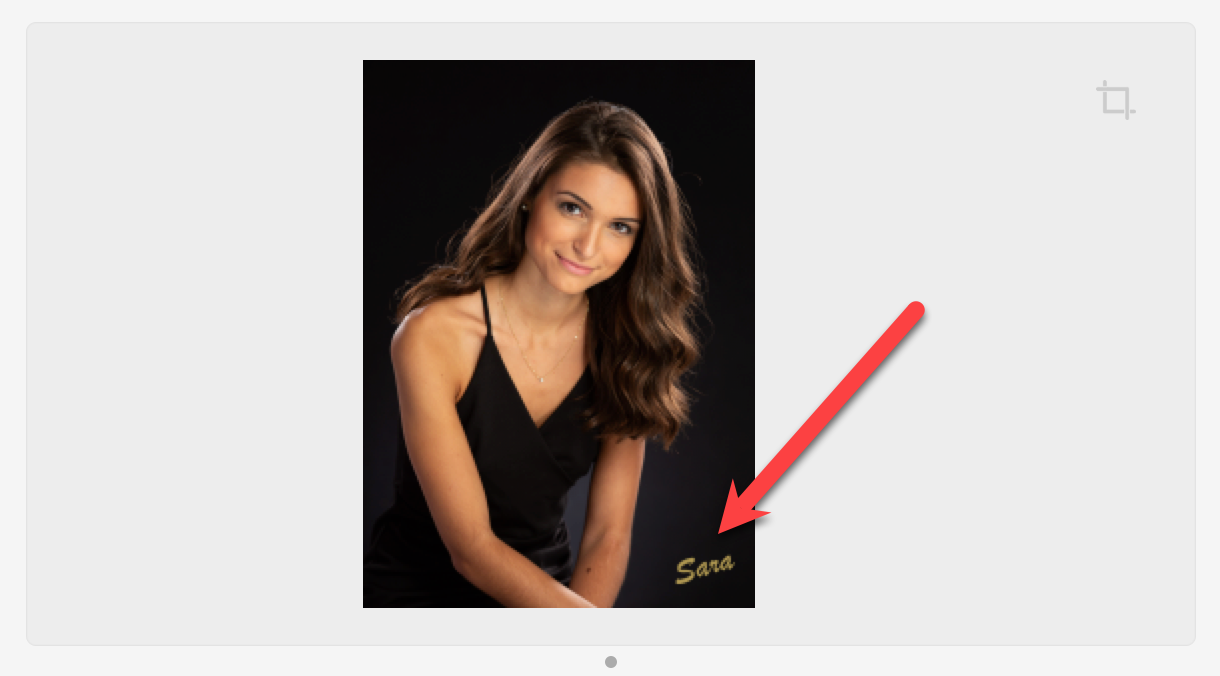
Applying a Stamp
In order to apply a stamp, one must first be created in Setup Stamps, Watermarks & Logos. Once your Stamps have been set up, you have the option to apply them by default on all or some of your images. Go to the top menu, ProSelectEdit > Settings > Pro Production > Workflow & Production Extras to set the defaults. Stamps will be visible when final production cropping is done. If you do not wish to see the stamps, toggle them off by going to the top menu, View > Show Production Stamps.
You have two options for applying stamps:
- Apply a single stamp: This can apply to prints or composites: The stamp applied defaults to the one set up for the overall print size, based on your settings. Go to the top menu, ProSelectEdit > Settings > Pro Production > Workflow & Production Extras to set the sizes.
- Apply individual stamps to each image within a product: This is ideal for Unit Templates designed for cutting into separate images or Traditional Matted products. Stamps are assigned based on the size of each image within the product.
For a single stamp:
- Select a print or composite to apply the stamp.
- Choose a stamp from the drop-down menu on the right-hand side. The available stamps are set up in Setup Stamps, Watermarks & Logos.
- Once a stamp has been applied, it will be reflected in the Preview.
- A stamp tag
 appears next to the product name.
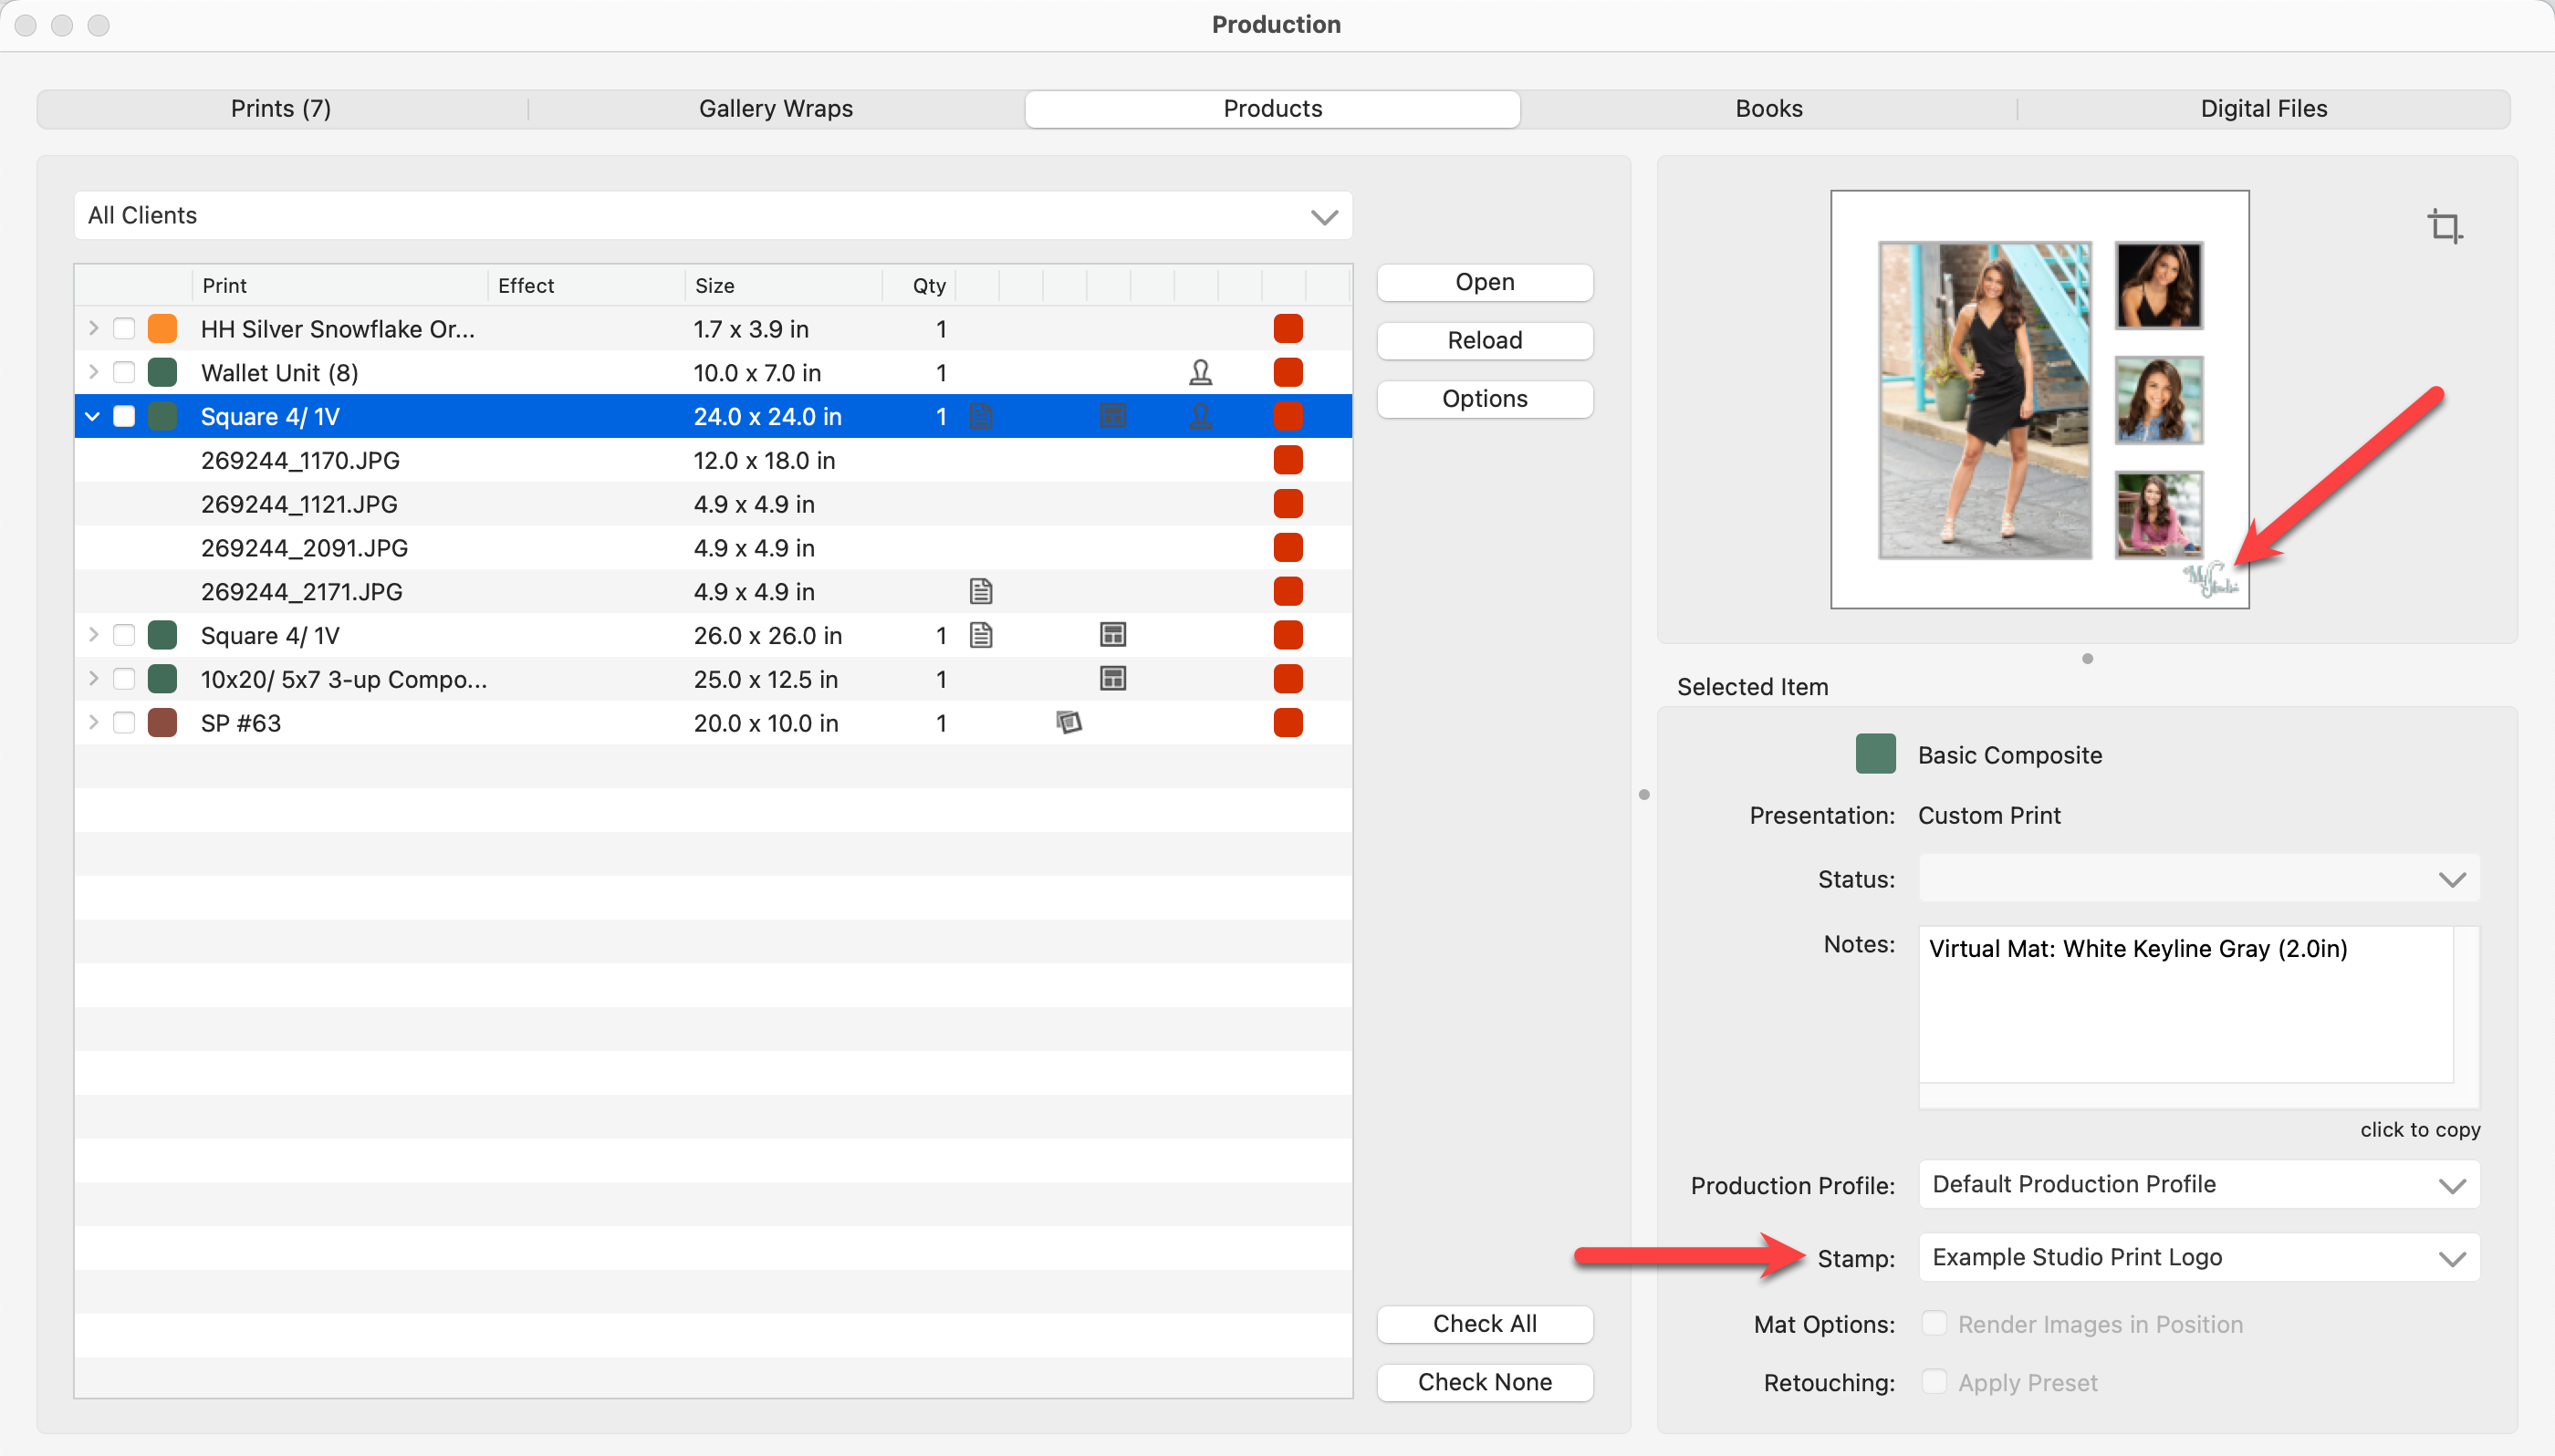
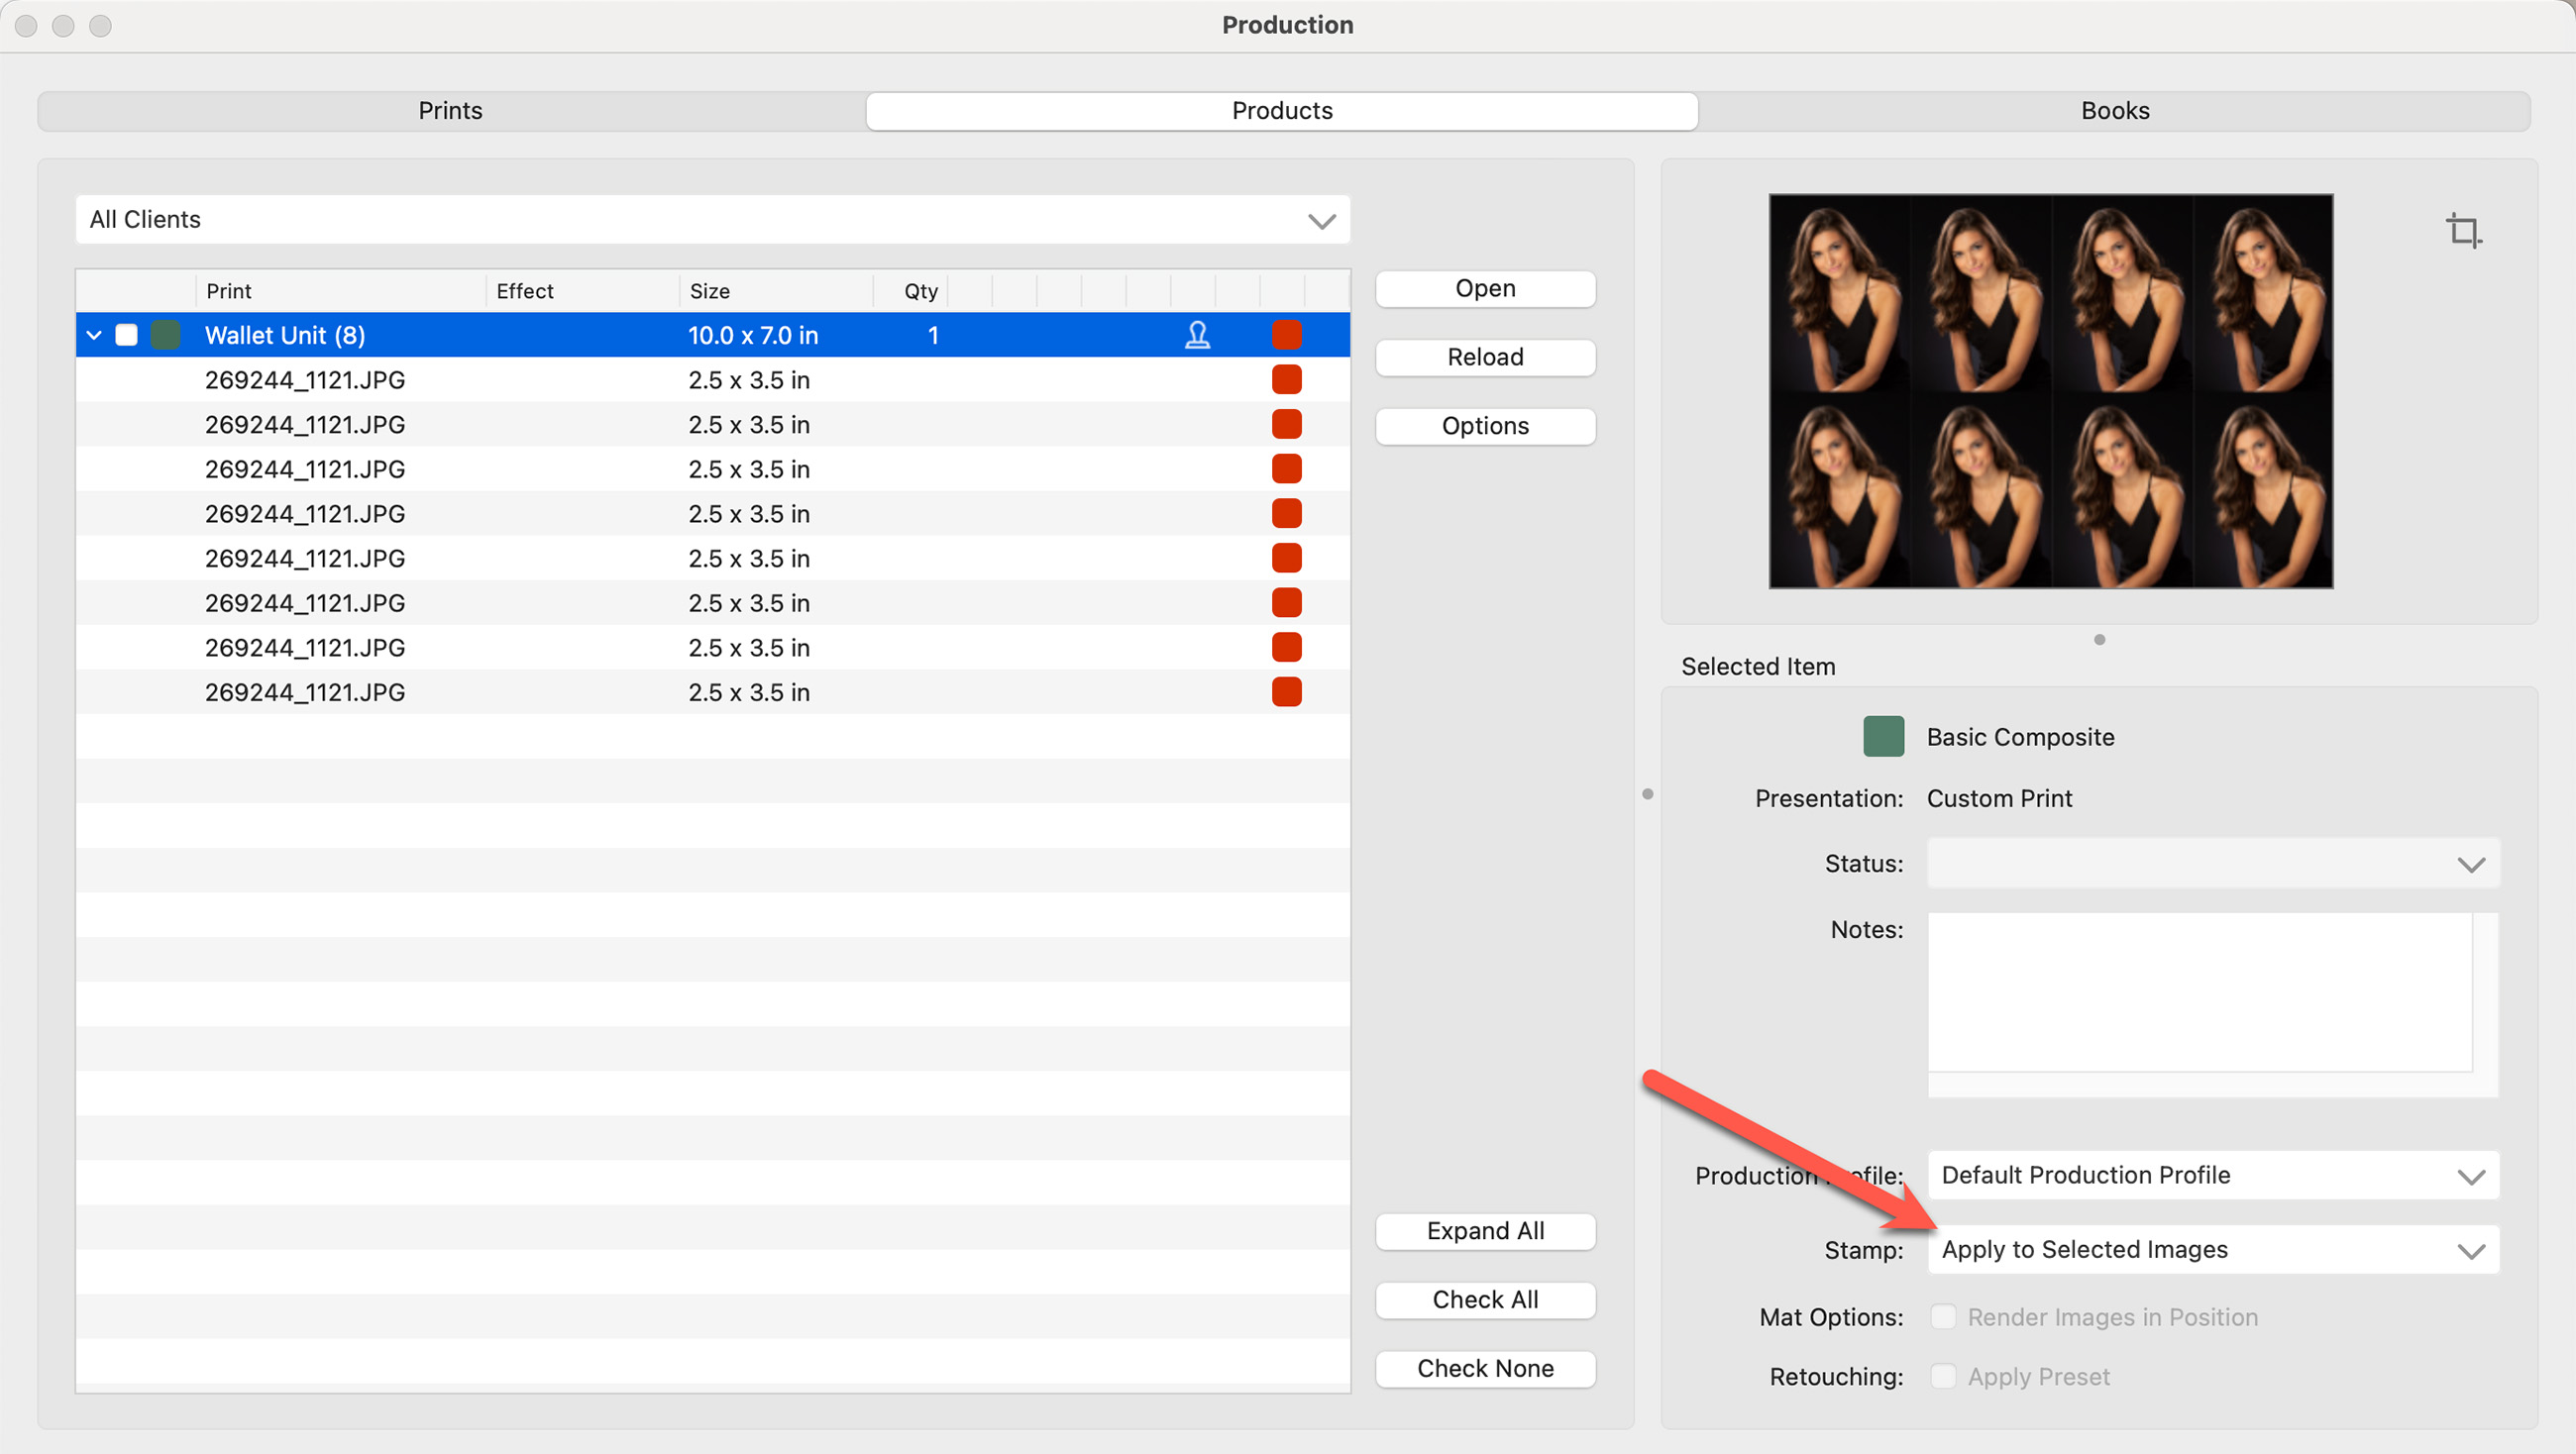
For separate stamps on each image:
- Select the composite you wish to apply the stamps.
- Choose "Apply to selected Images" from the Stamp: drop-down menu.
- Use the drop-down arrow on the composite's left side to view all the images within the template.
- Select all the images.
- Once all the images are selected, choose a stamp from the Stamp: drop-down menu.
- If size ranges are predefined in settings, the appropriate stamp is auto-assigned to each image, shown with a stamp tag next to the image name.
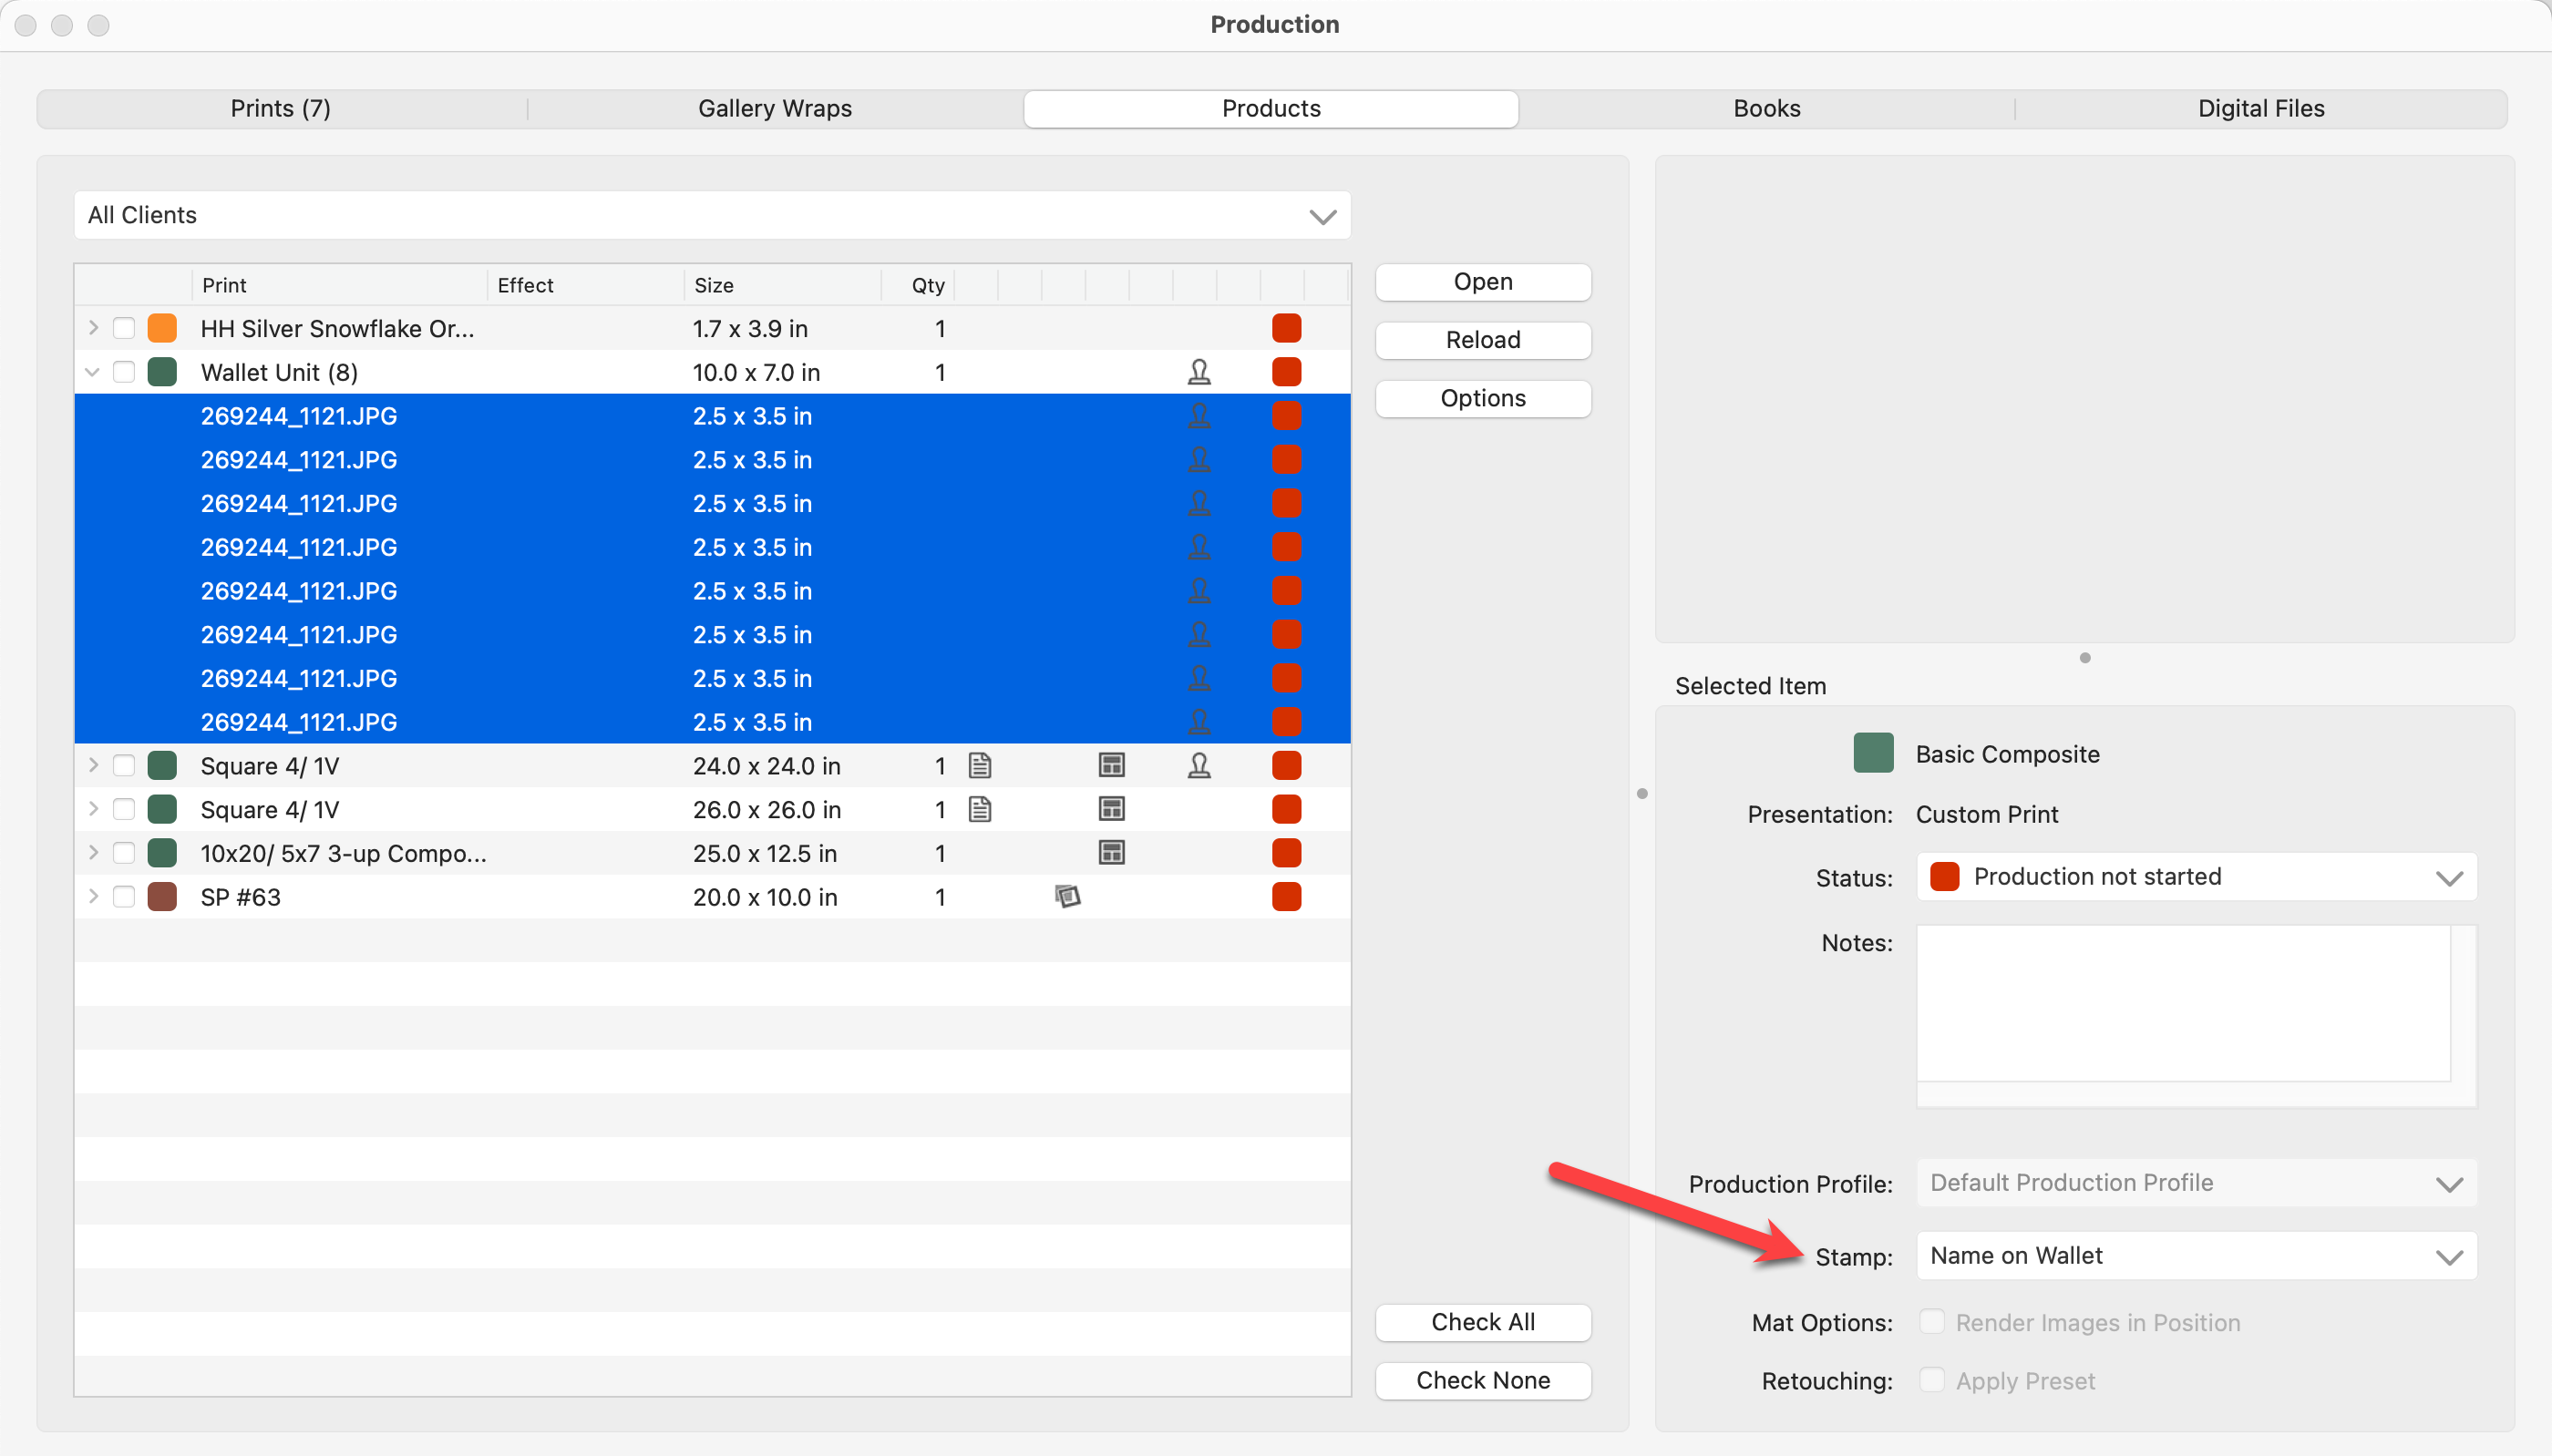
- When you select an image, the stamp now appears in the Preview area.