Black & White Workflow
ProSelect offers different workflows when creating Black & White (B&W) images. You can choose the workflow that best suits your needs depending on customer requirements. Special Tints are treated the same way.
For a simple B&W workflow, use the B&W effect built right into ProSelect.
The Black & White (B&W) and Special Tint effects are referred to as "Image Effects." These are a good, full-range B&W and Special Tint that underneath uses lab color conversion. They are run locally and do not engage Photoshop to be applied. You can quickly apply or remove these effects from your selected images using the Apply Effect tool ![]() on ProSelect's main display.
on ProSelect's main display.
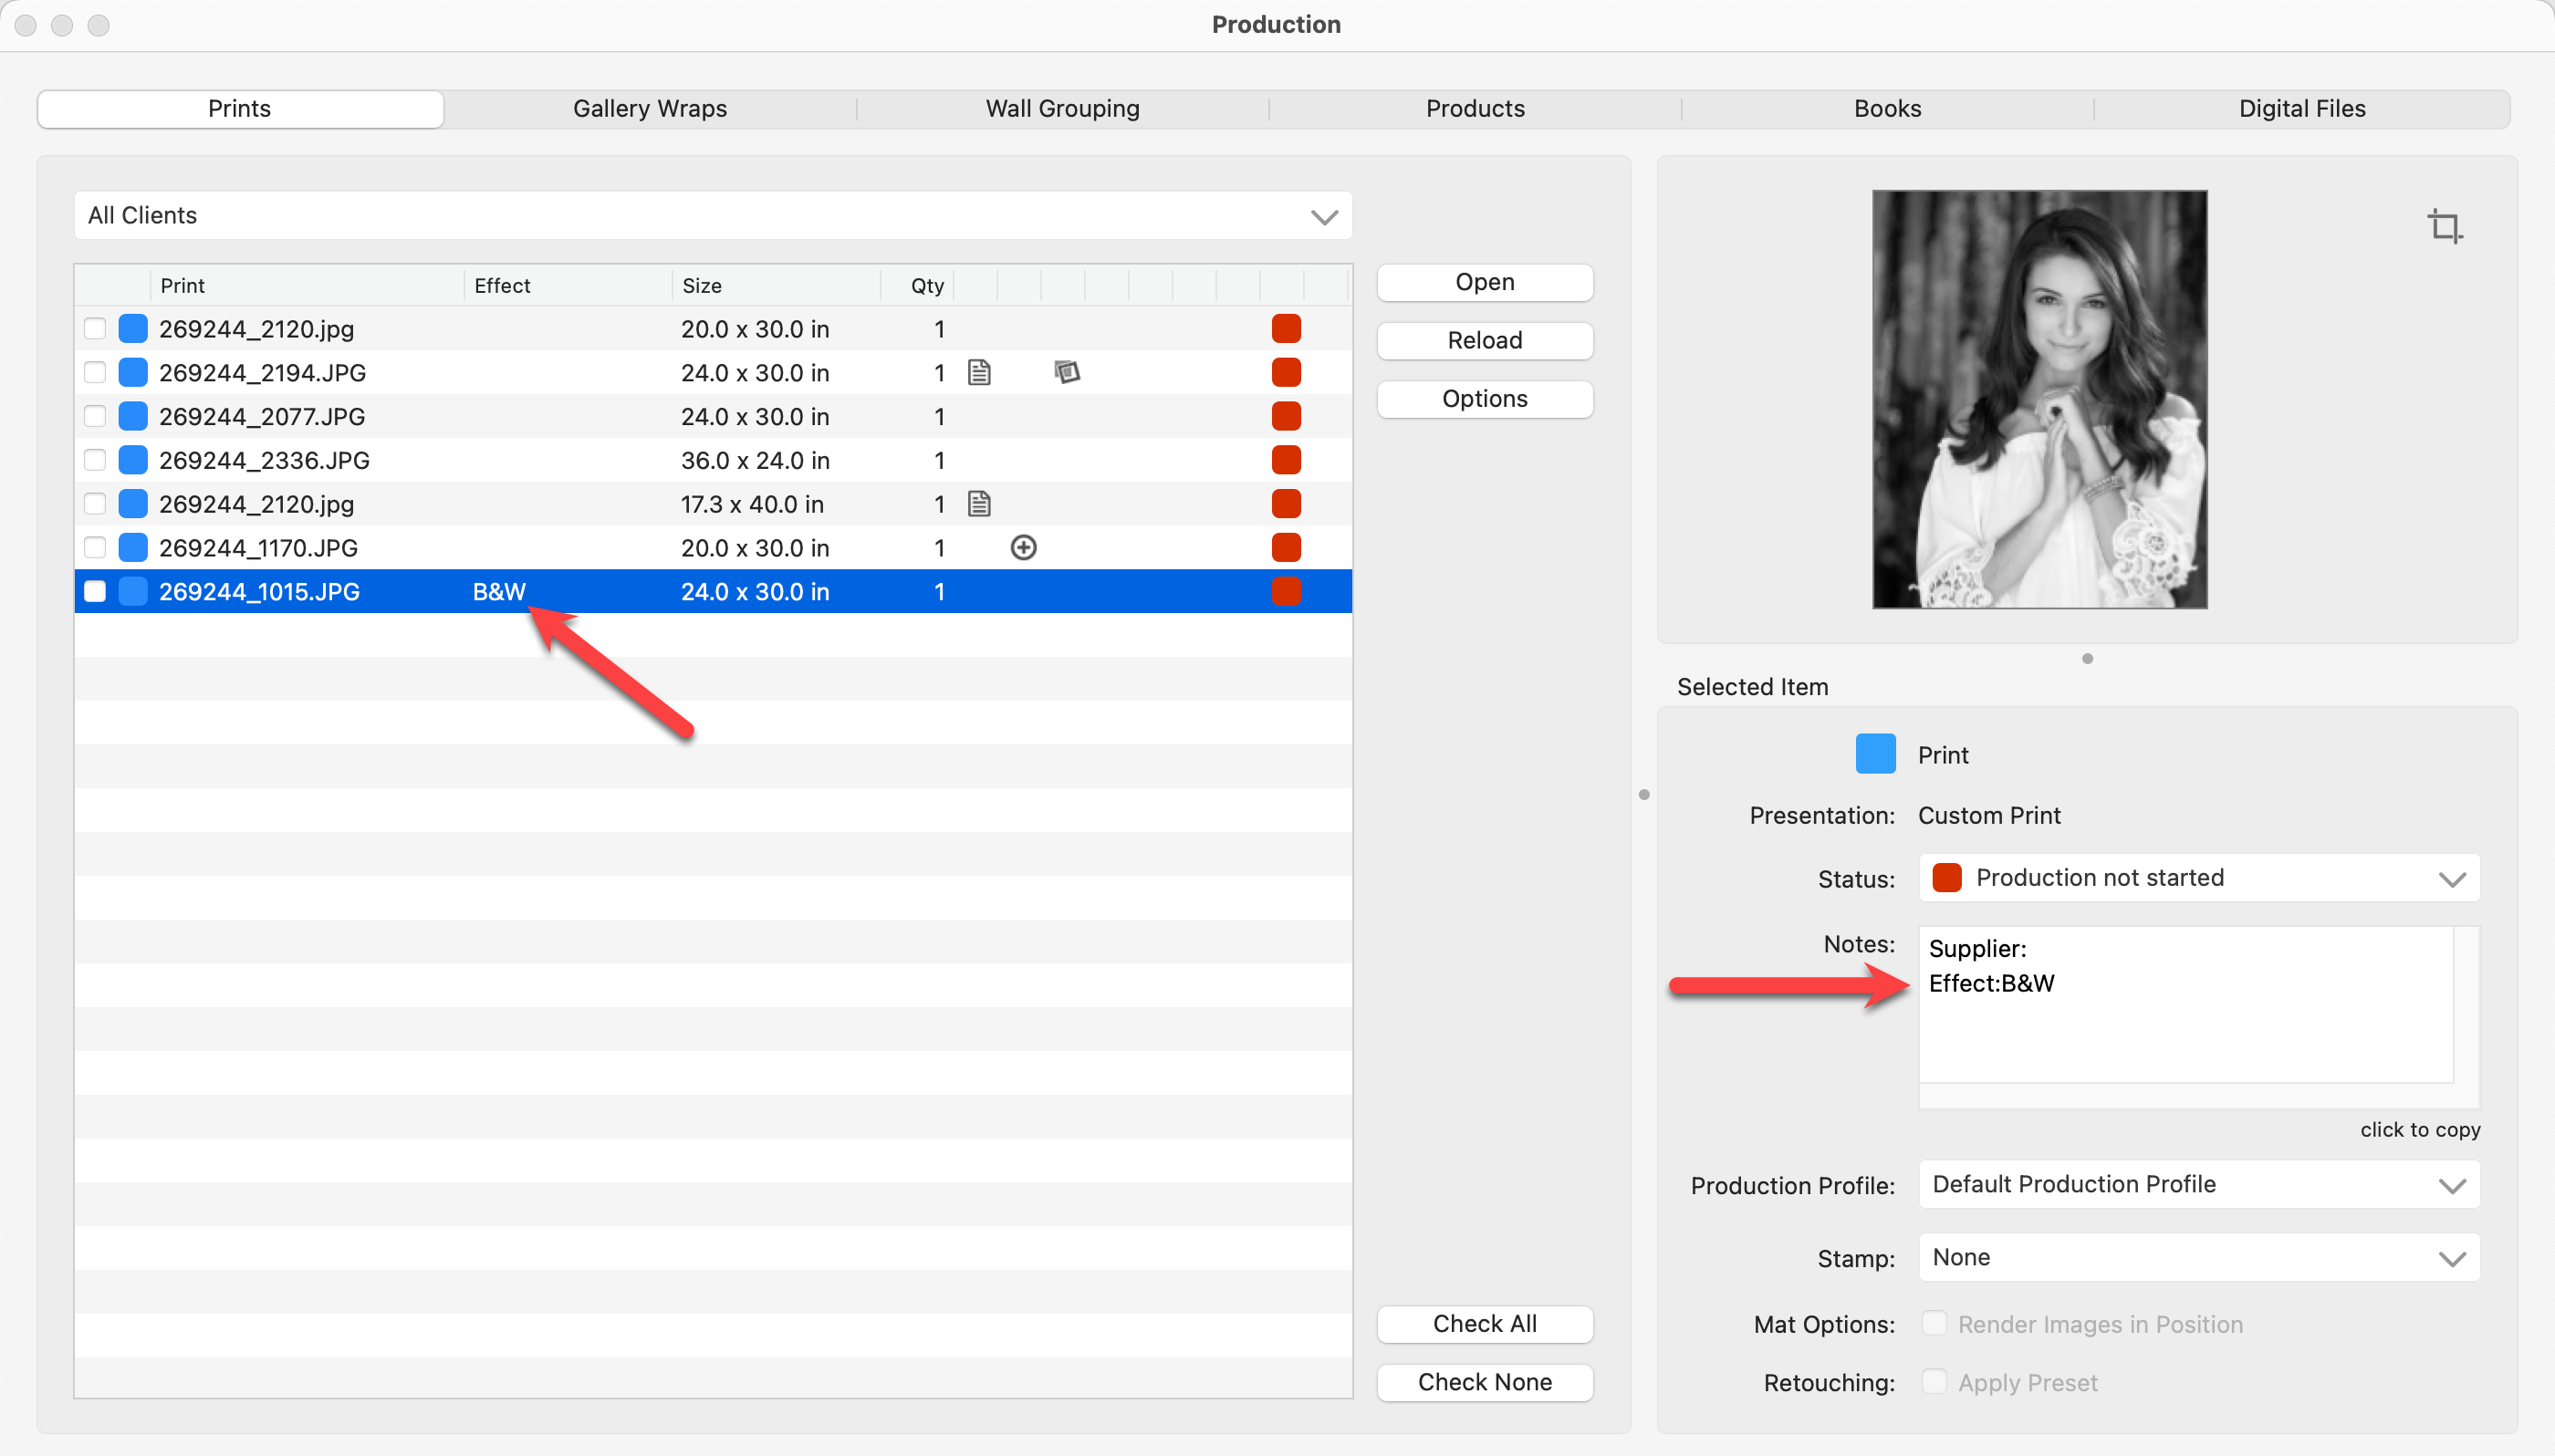
If an Image Effect has been applied, it will be listed in both the "Effects" column and the "Notes" area in the Production window.
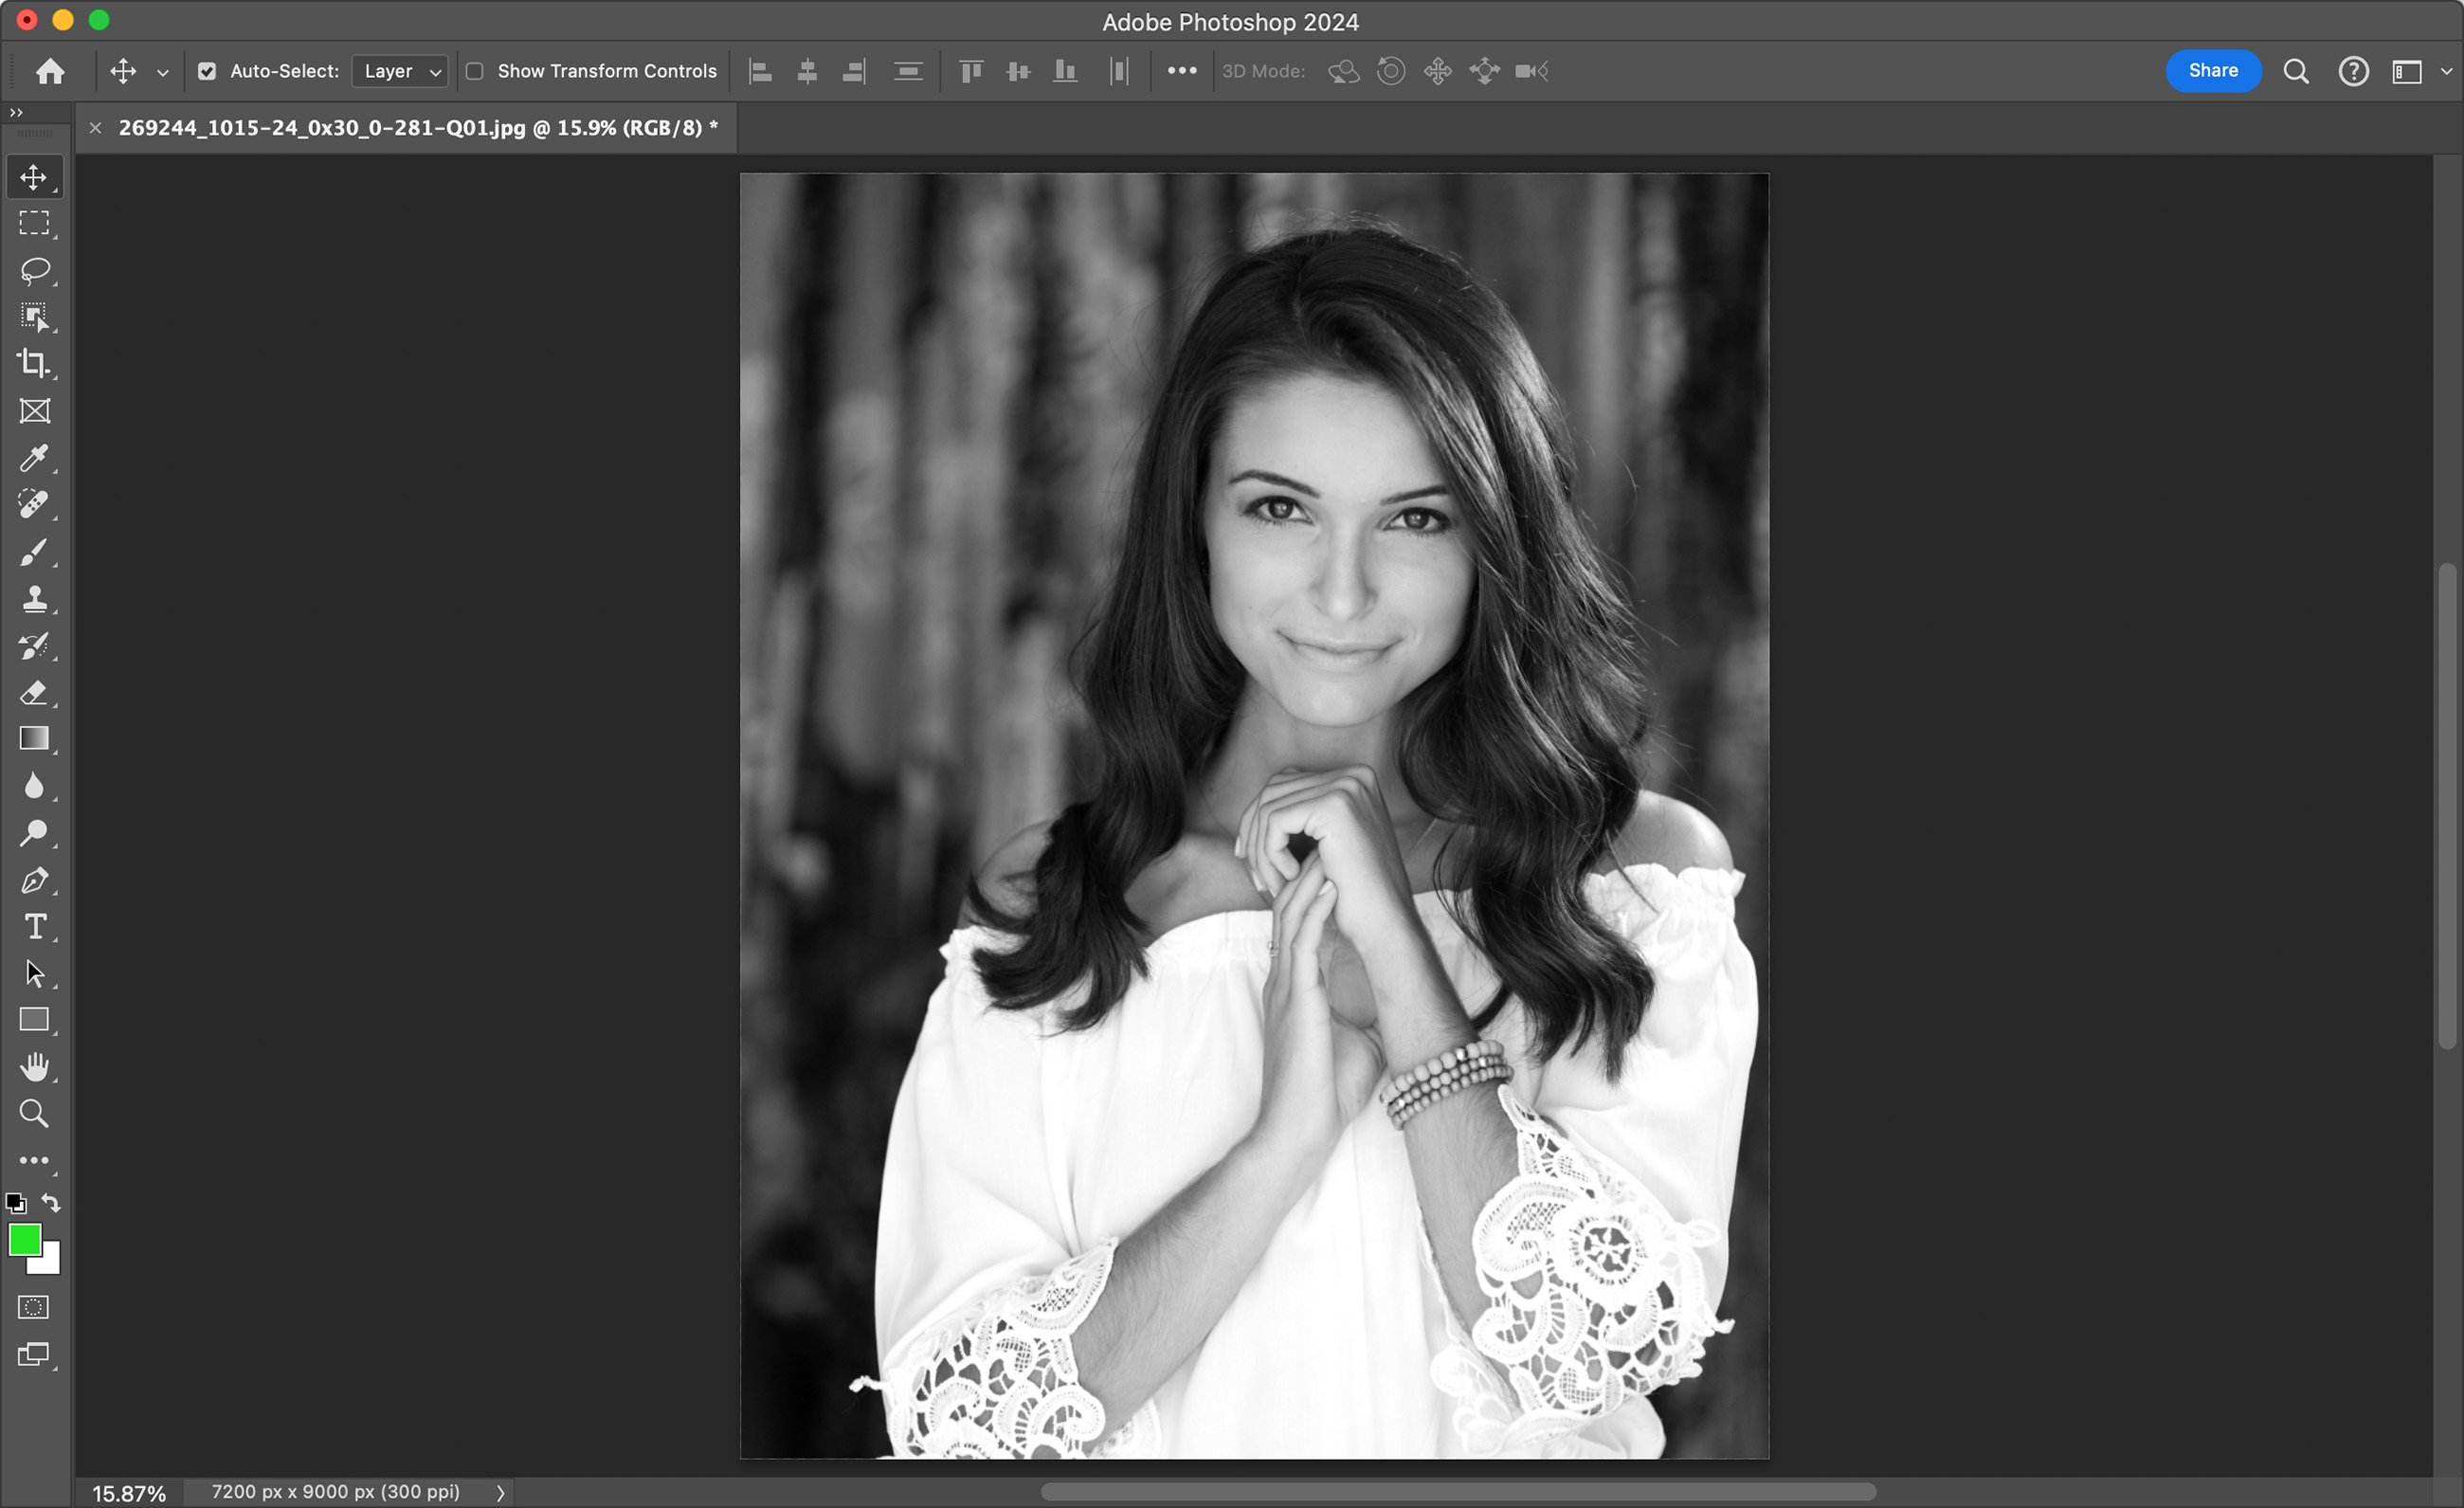
When Production is run on the image, Photoshop is then engaged and automated to create the B&W image.
If you prefer a more customized Photoshop effect for your B&W or Special Tint rather than the standard local effect, you can use ProSelect's built-in local effect as a placeholder. During production, you can set Photoshop to bypass the local effect and apply a replacement custom effect action instead.
The advantage of using a placeholder initially lies in efficiency. Running custom effects directly in Photoshop and updating the ProSelect preview can be time-consuming. Using the placeholder allows for a quicker preview within ProSelect, streamlining the workflow and saving time before committing to the more resource-intensive custom effects during the final production stage. You can modify the local effect to more closely match your replacement custom effect.
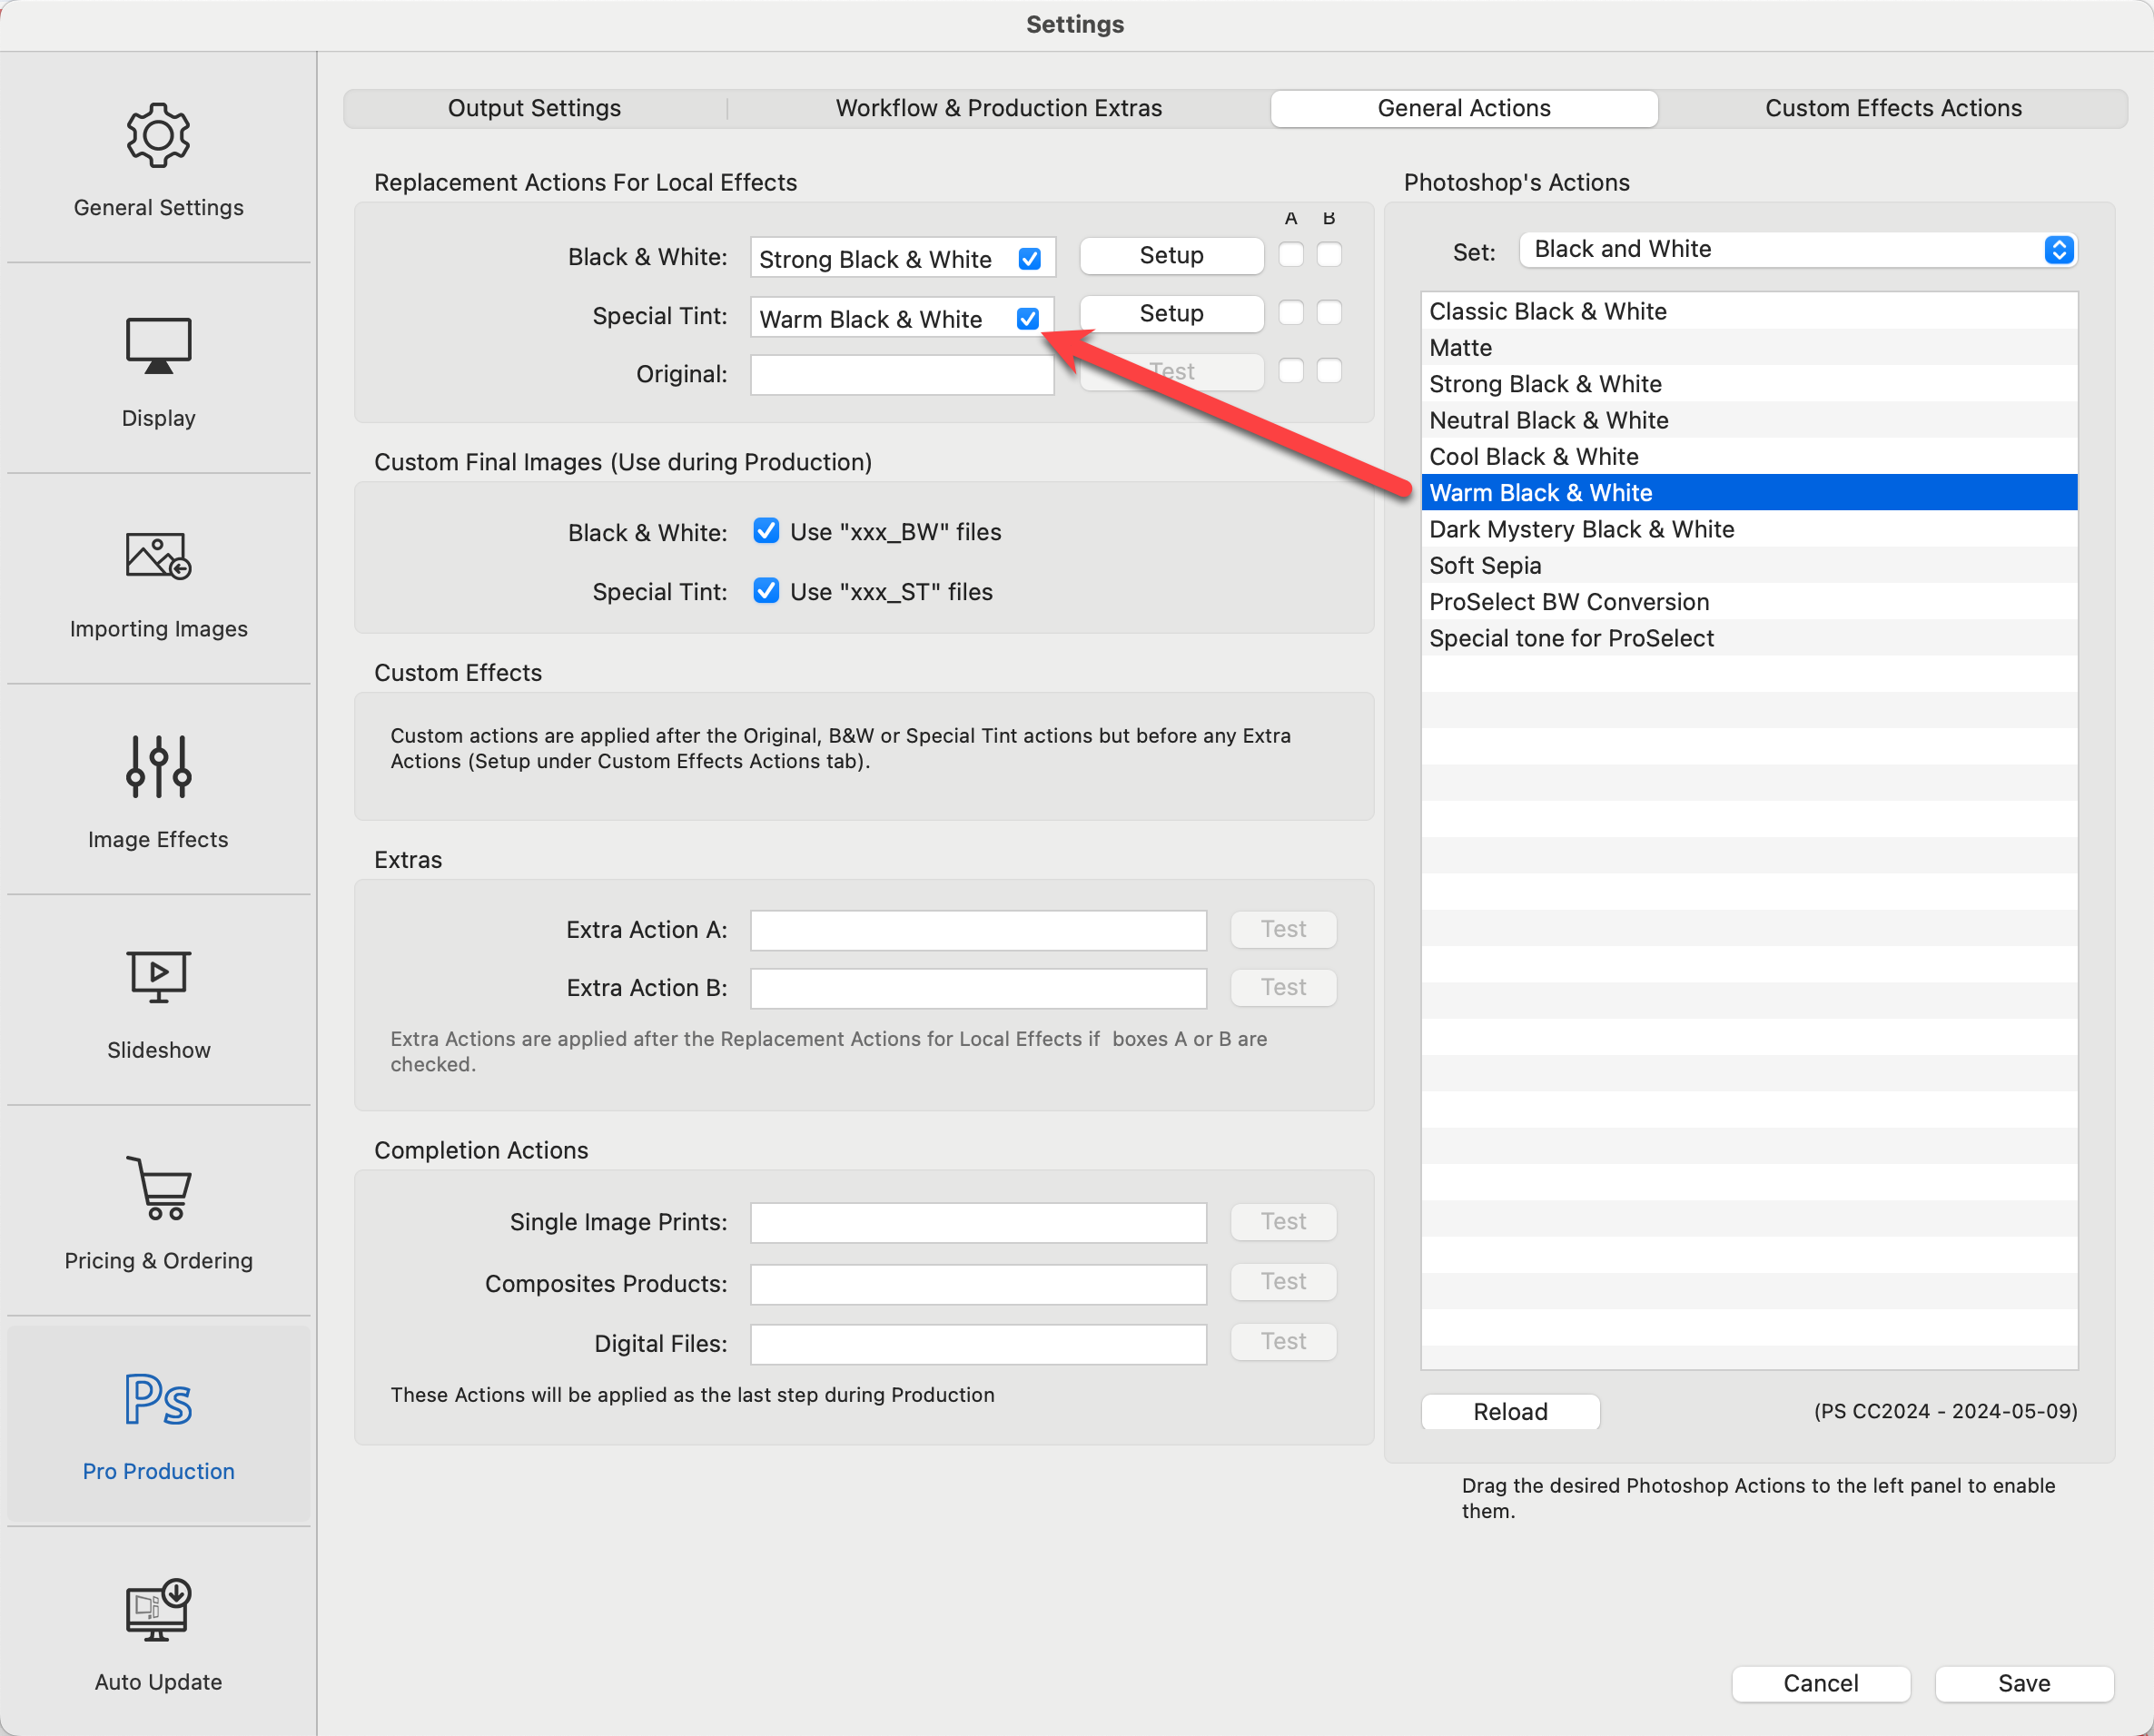
Follow these steps to set up a Replacement Action for Local B&W or Special Tint effects:
- Go to the top menu, ProSelectEdit > Settings > Pro Production > General Actions > Replacement/Completion Actions.
- From the list of available Photoshop Actions on the right, select the action you want to use and drag it into the designated box next to "Black & White" or "Special Tint." This action will then serve as the replacement for the default local effect.
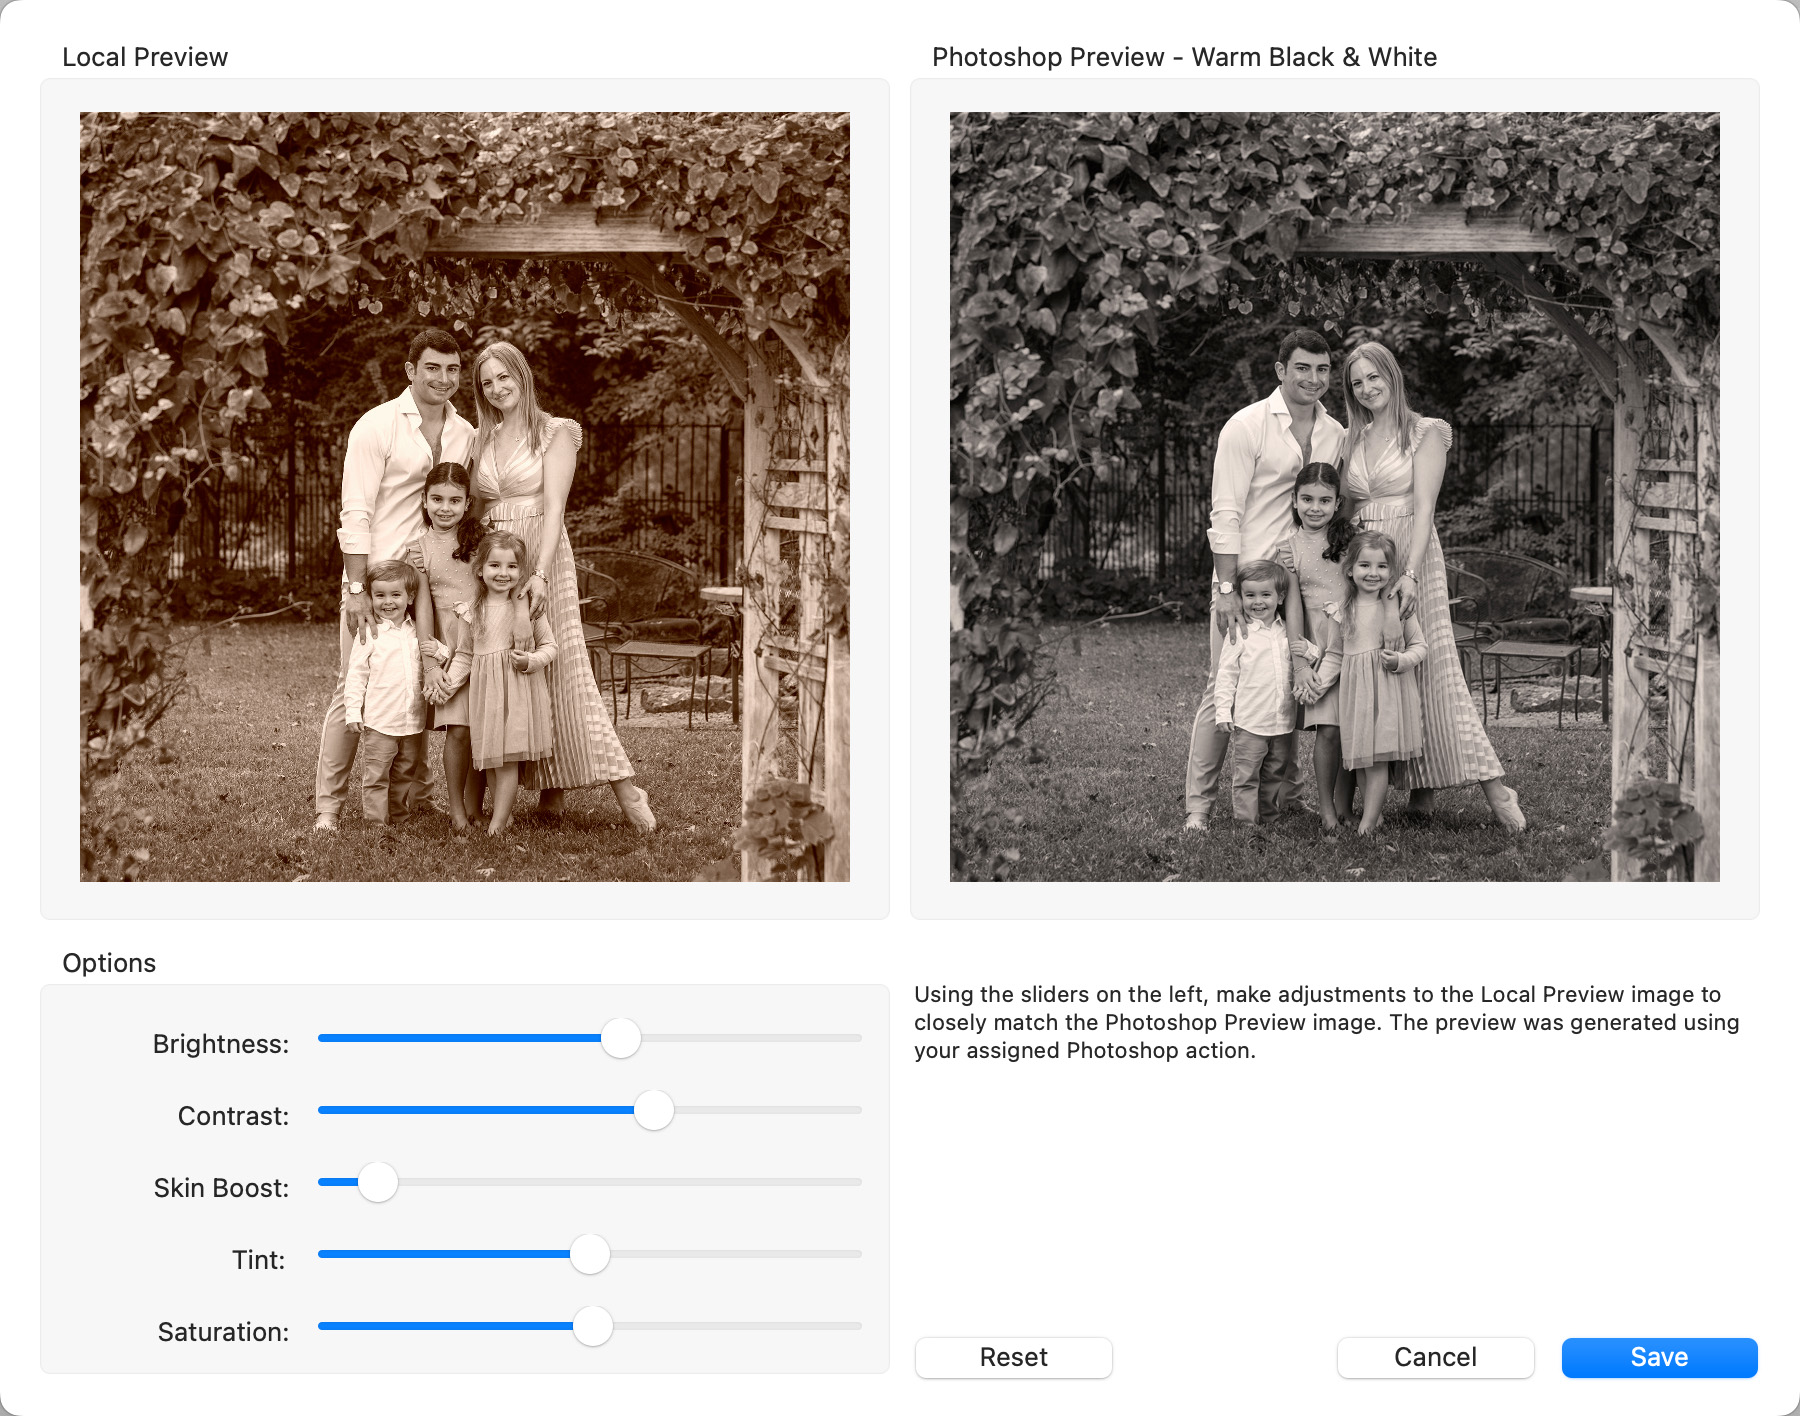
- Click on the Setup button.
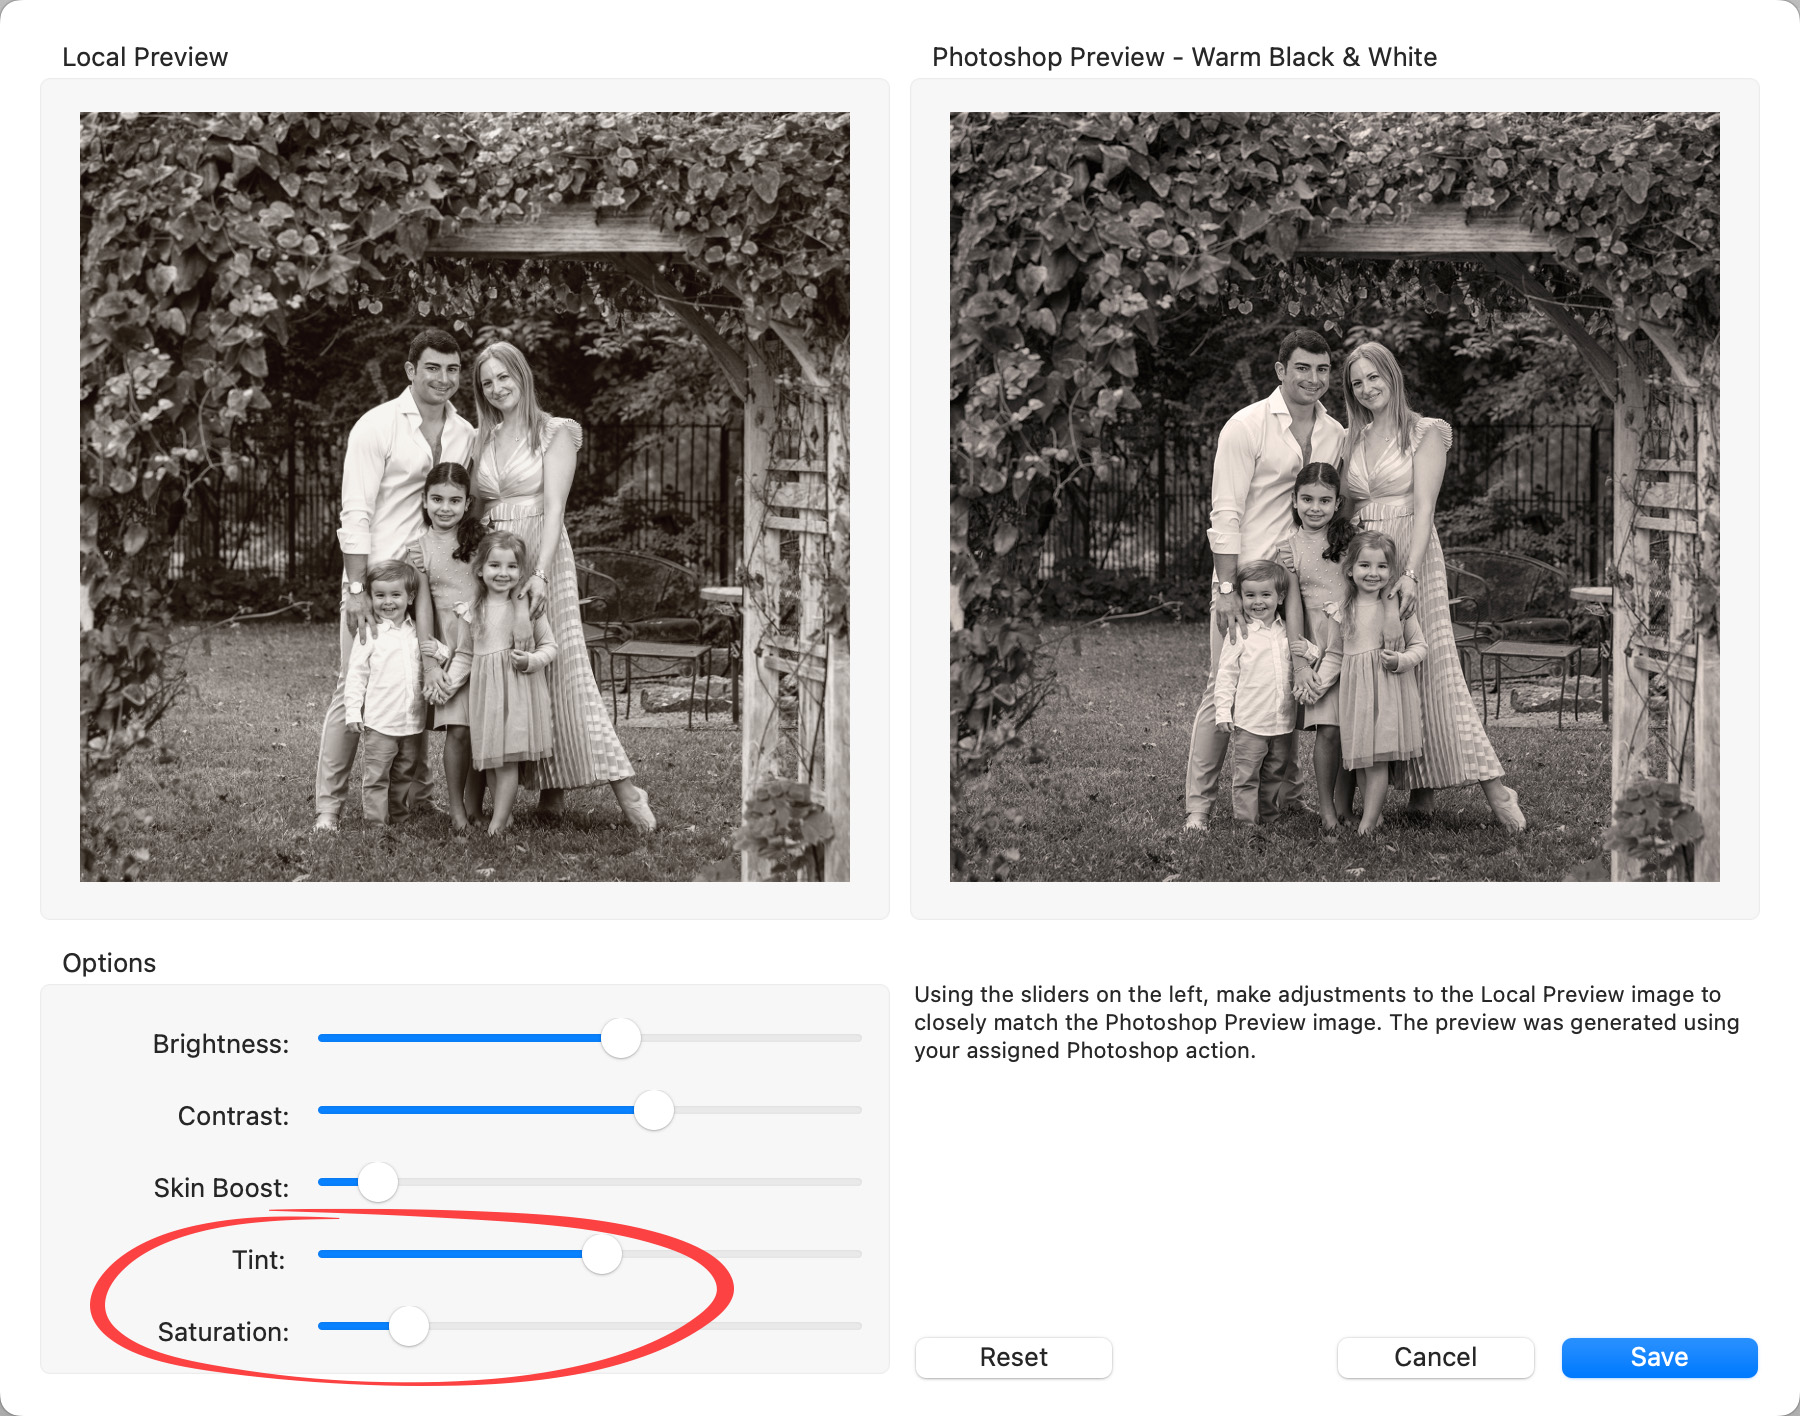
- The Setup dialog provides an option to fine-tune the local effect so that it more closely matches the replacement action to be applied during production. This adjustment ensures that the preview shown to clients more accurately reflects the final print, providing a more consistent and reliable representation of the finished product. Use the sliders to adjust the preview on the left (Local Preview) to match, as closely as you can, the preview on the right (Photoshop Preview).
- Before Adjustments:
- After Adjustments:
- Before Adjustments:
- Now that the Local Preview better matches the Photoshop Preview, click the Save button.
- Your replacement actions have now been set up. When you run Pro Production, ProSelect will bypass the local effect and instead apply your replacement custom effects action.
You may wish to customize each image individually when preparing images for Pro Production. This workflow is called "Custom Final Images." This approach also enables you to maintain an original, a B&W version, and a Special Tint version of the same image without them overwriting each other.
-
- Make sure the checkboxes are checked in the "Custom Final Images" area in Settings. Go to the top menu, ProSelectEdit > Settings > Pro Production > General Actions > Custom Final Images. It is also important to make sure Replacement Actions are turned off (either blank or unchecked).
- Open the original images in Photoshop or Lightroom using the Pro Production window's Open button.
- Manually convert images to B&W or apply your Special Tint.
- Save the edited image in the original folder with the same filename, but add _BW for B&W or _ST for Special Tint.
- Original filename: 269244_1015.jpg
- Save as: 269244_1015_BW.jpg
- Back in the Production window, select the image(s) and click the Reload button. Select "Refresh Custom Finals" from the list of options.
- The reloaded image filename will now be displayed in the Notes section on the right. If a local B&W or Special Tint effect was used as a placeholder, it will show as disabled.
- Proceed with Pro Production. ProSelect will produce the Custom Final Image.
When saving a Custom Final Image, it's crucial to append "_BW" to the filename for B&W images and "_ST" to the filename for Special Tint images. This ensures that the correct version of the image is used during the production process, avoiding any mix-ups with other versions.
- File Modification Date: The last modified date of the Custom Final Image must be newer than both the original color image and any retouched versions that have been re-linked.
- Disabling Effects: If Production detects one of these images, it automatically disables any local or custom effect actions for that image, assuming you've manually applied these effects yourself.
- Settings: Unchecking the "Custom final images" checkbox in Settings and reopening the Production window will cause the system to revert to using the original images and their associated actions.
- Status and Saving: The use and status of a Custom Final Image are not saved within the Album file. Instead, they are checked each time the Production window is opened or after the "Refresh Custom Finals" button is clicked in that window.
- File Management: Removing the Custom Final Image from its folder or updating the original image (or an edited version) so that it has a more recent modification date than the Custom Final Image will cause ProSelect to revert to using the most recently modified file. This ensures the most current and updated images are always used in production.