 About Mats
Mats are designed to enhance the presentation and ordering process for both prints and multi-image layouts. ProSelect comes equipped with a diverse selection of pre-designed mats, and users have the option to expand this collection by downloading additional mats from industry suppliers or by creating custom designs in the Mat Designs window. These mats are aligned with industry standards, ensuring compatibility with most suppliers and allowing for intricate features such as bevel cuts, reverse bevels, 8-ply bevels, bevel mounts, fillets, raised mats, and v-grooves, supporting up to three mat layers.
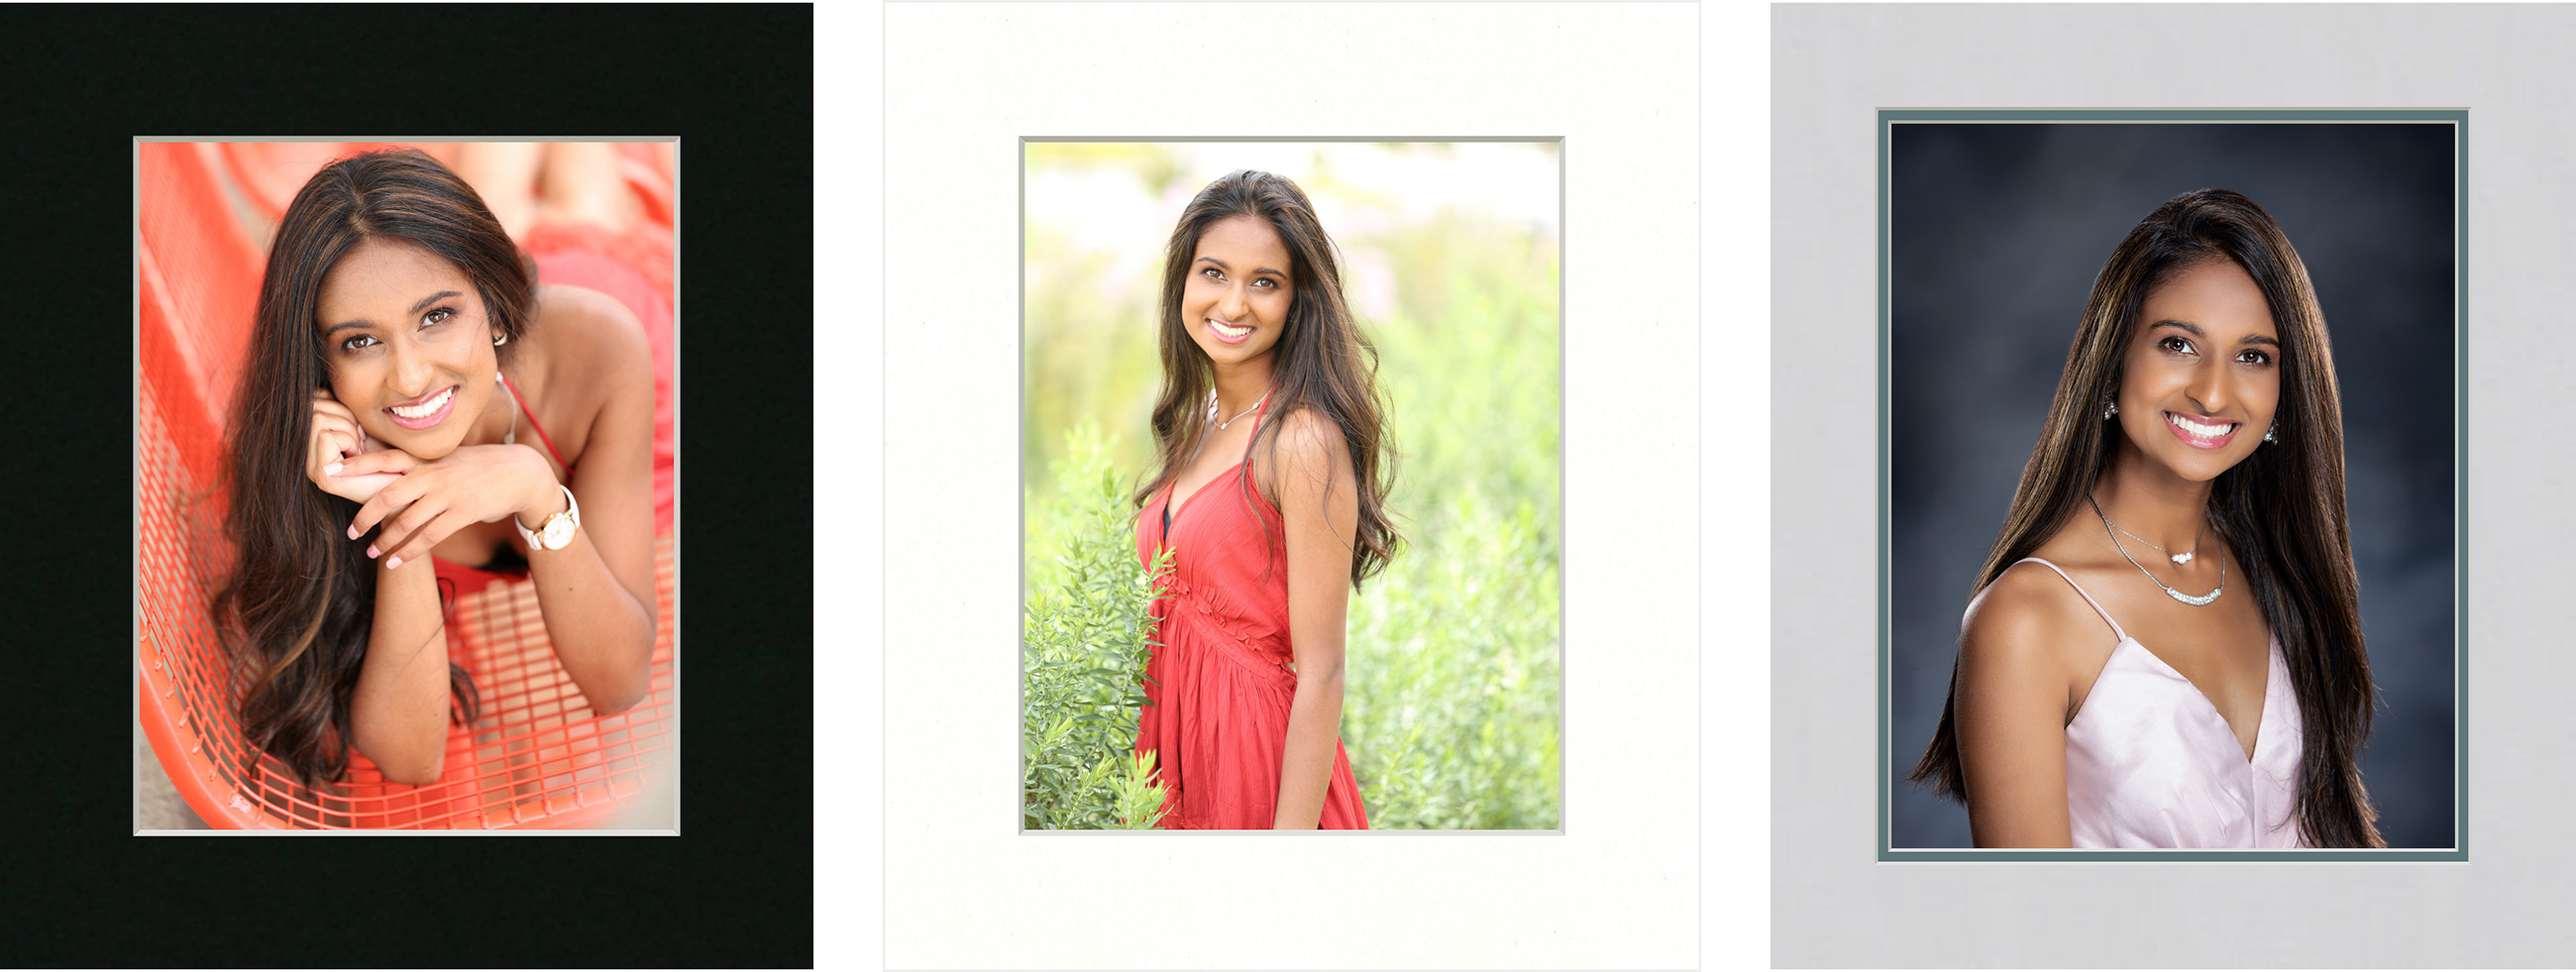
- Traditional Mats are physically cut mats included with the final product.
- Traditional Mats can be single-opening or multi-opening.
- ProSelect can generate detailed cutting dimensions to assist with manual or automated cutting of mats. See Ordered Mats Report to learn more.
- ProSelect allows Traditional Mats to be converted to a Virtual Style. Virtual Styles are digitally produced.
- There are several different ways to price mats. Click on Pricing Mats to learn more.
When creating either a Traditional Mat or a Virtual Style, you can include up to three levels of mats. Bevel Mounts are also an option that can be used with both Traditional Mats and Virtual Styles.
Single Mat
A single mat provides a uniform border around the image. They can support a bevel cut or reverse bevel cut along the inner edge.

Double Mat
A double mat provides a second layer to add depth and contrast. Each layer can support a bevel cut or reverse bevel cut along the edge.
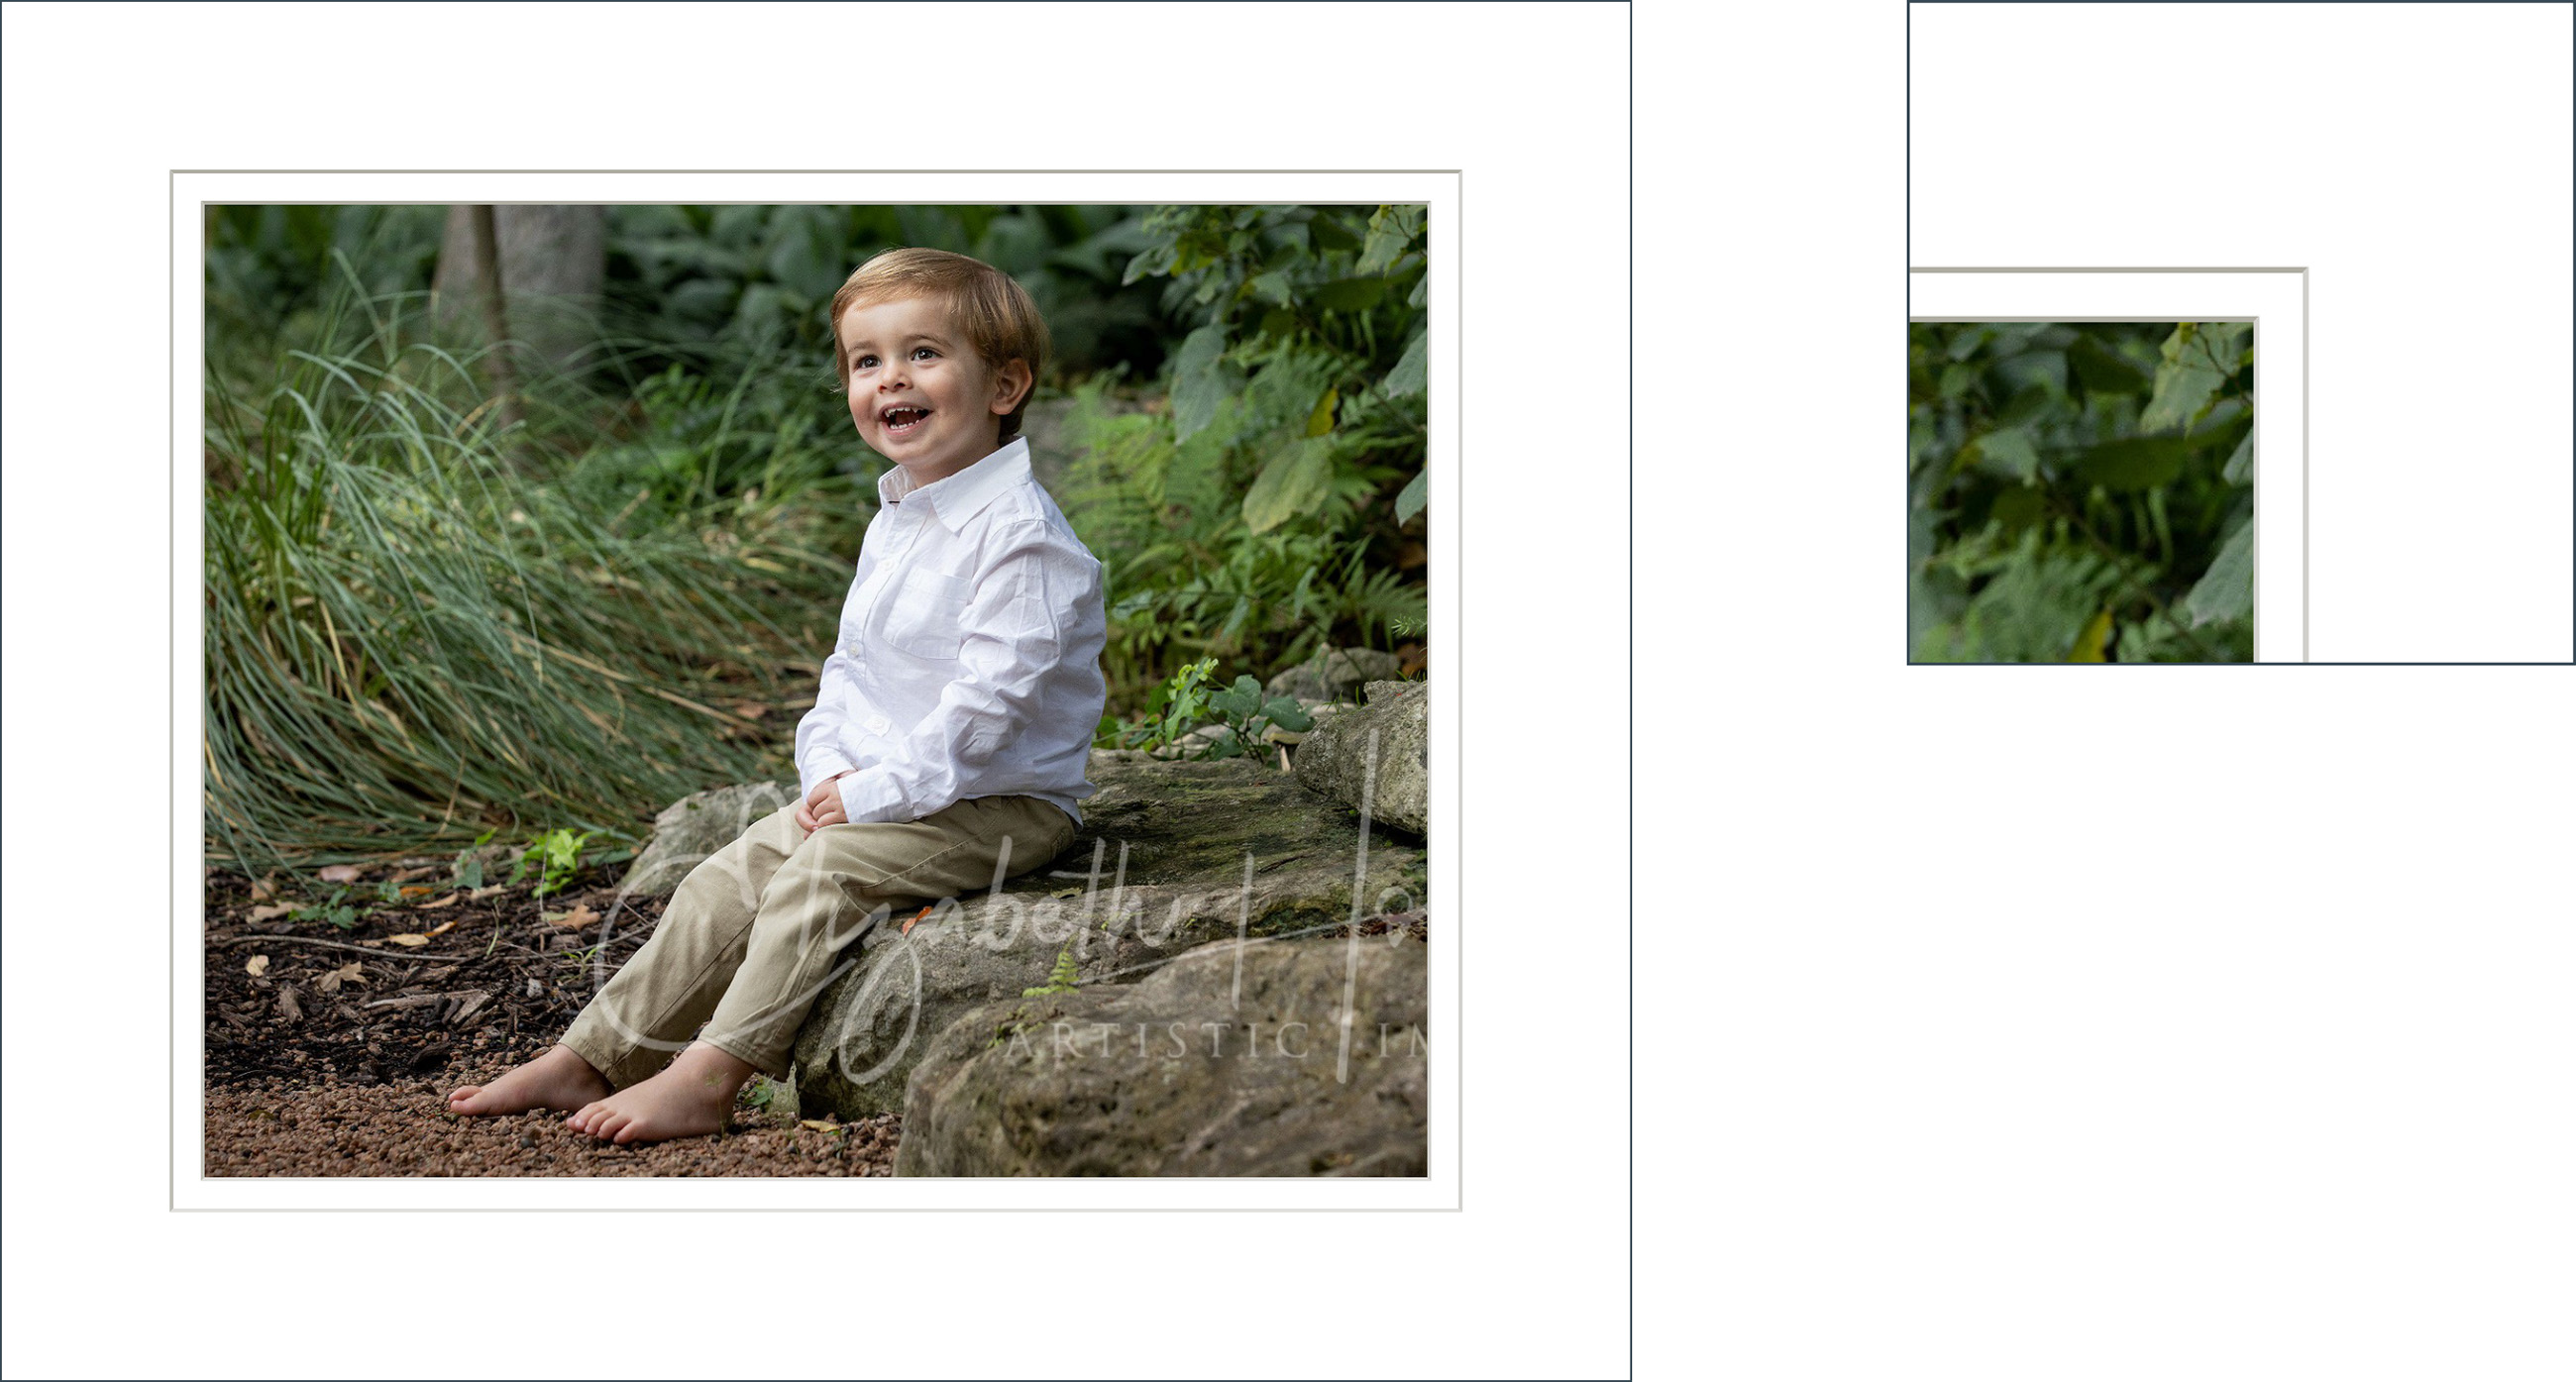
Triple Mat
A triple mat provides 3 mat layers to add depth and contrast. Each layer can support a bevel cut or reverse bevel cut along the edge.
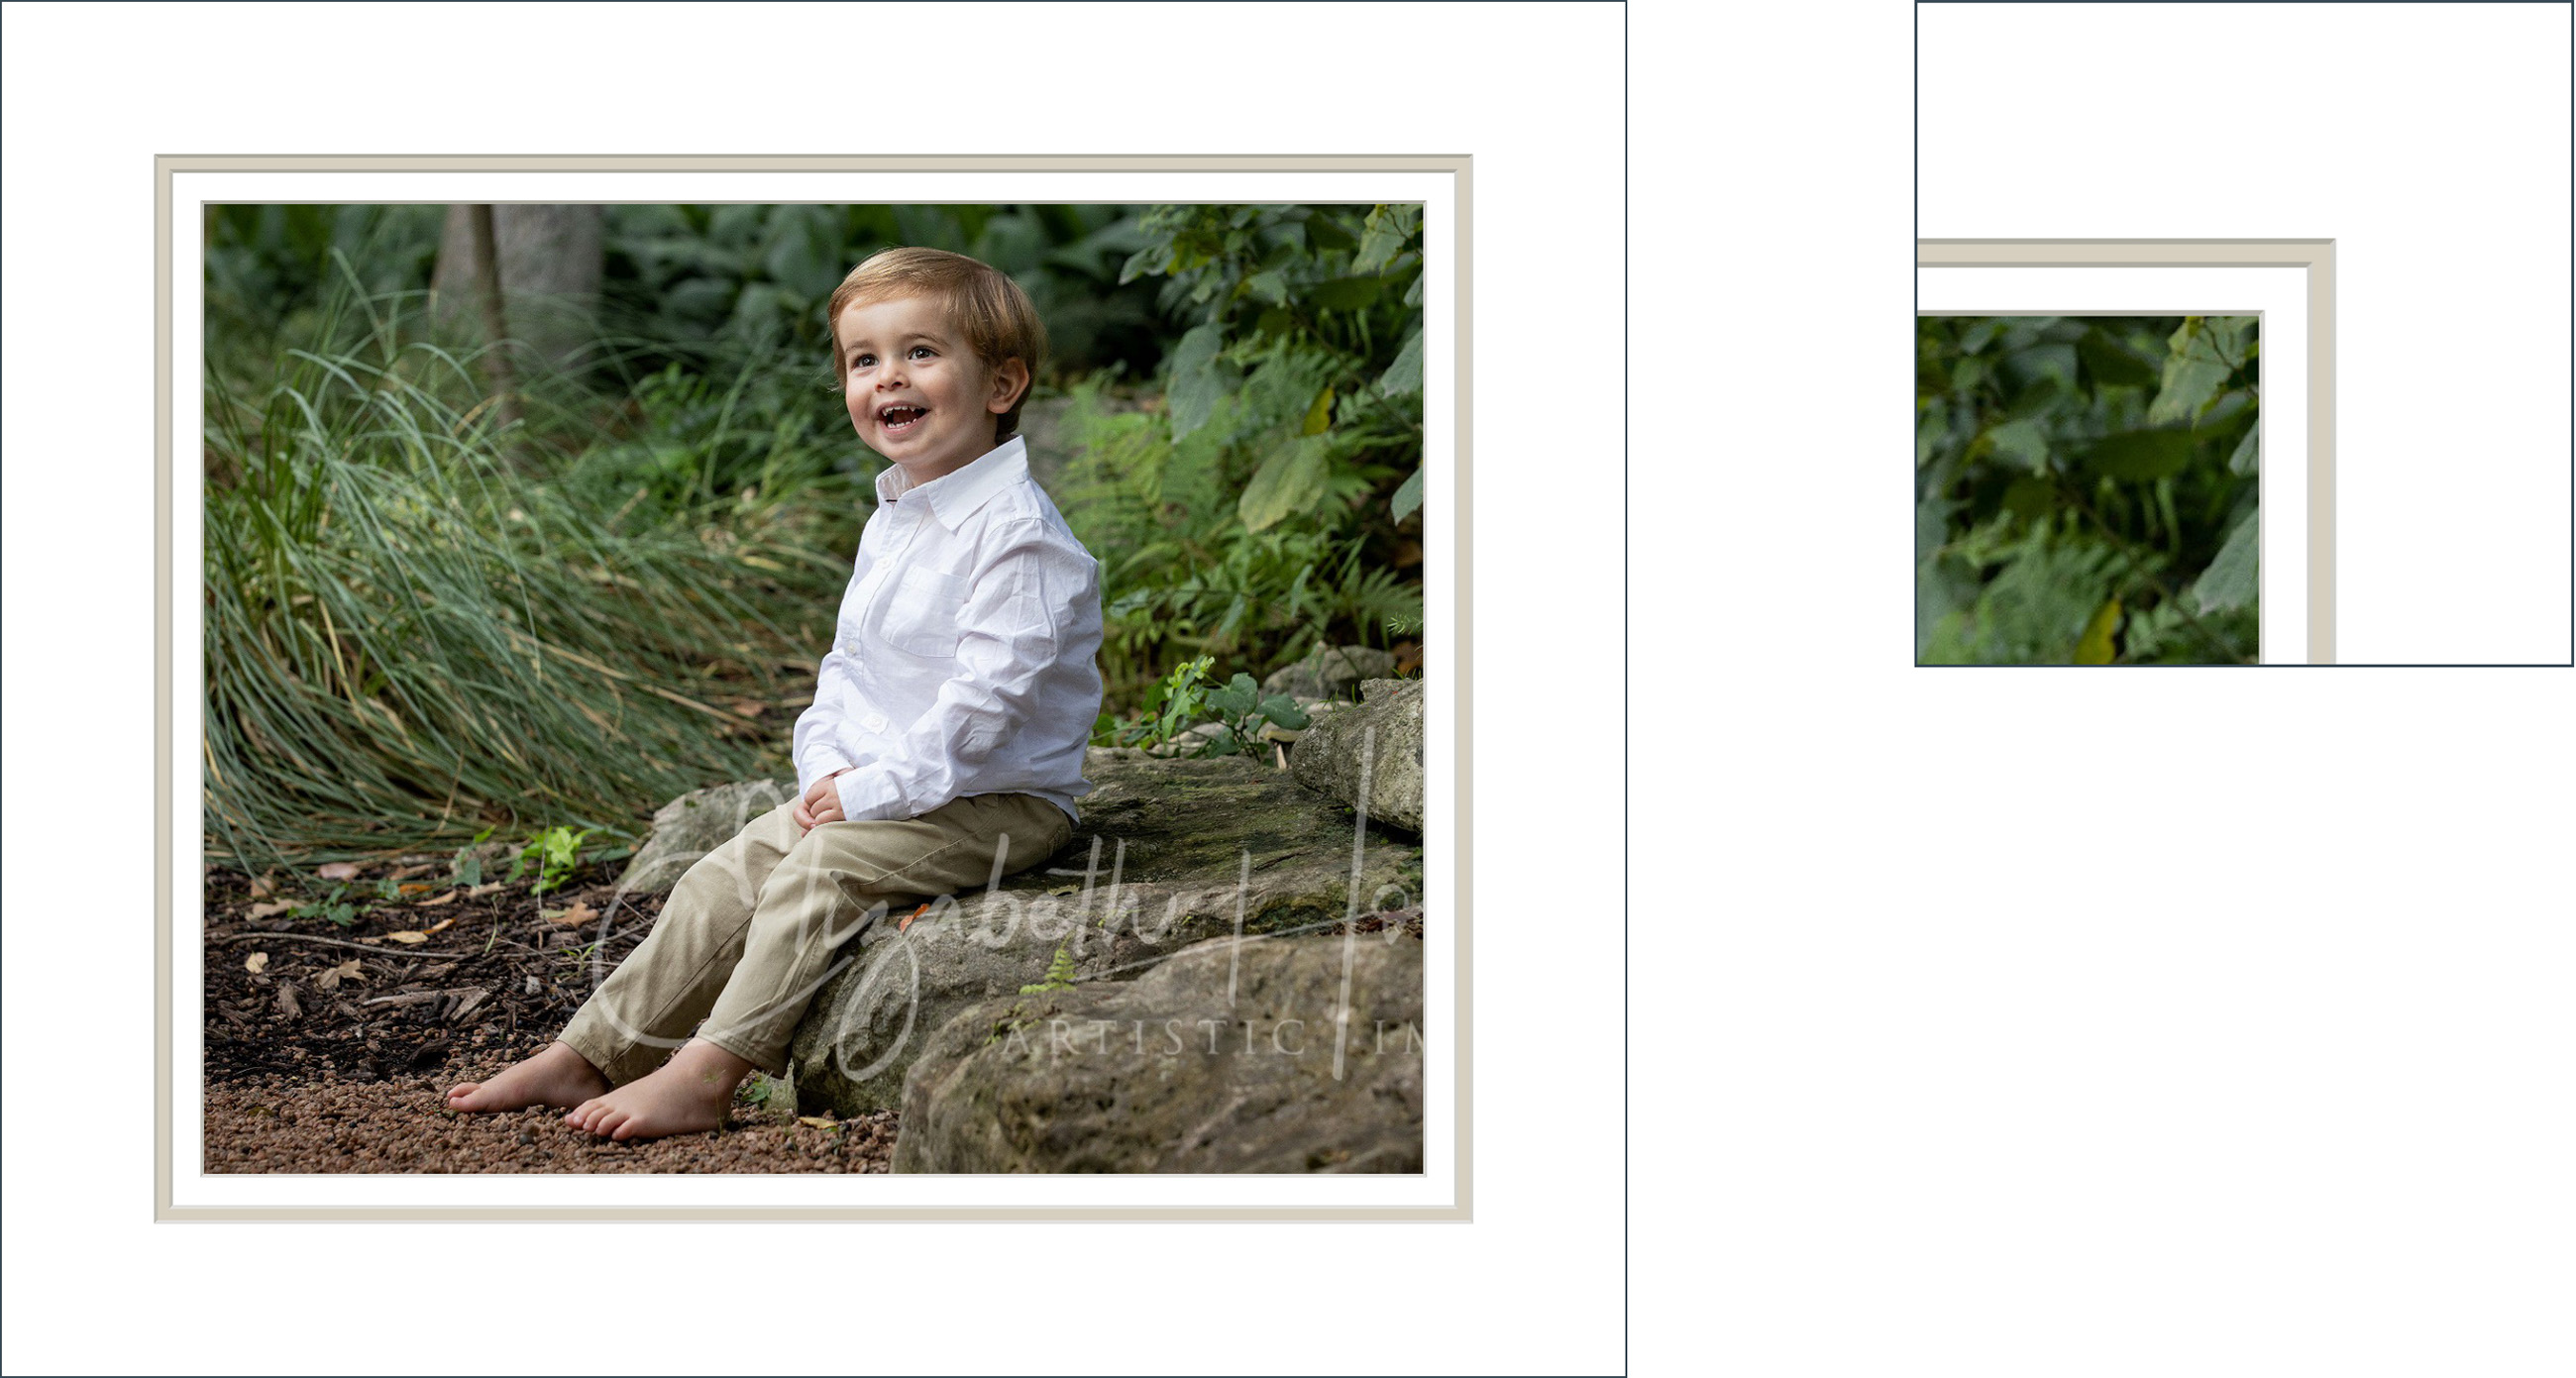
Bevel Mount
Beveled Mounts slope away from the print creating a slightly wider back than front for a formal mounted look.
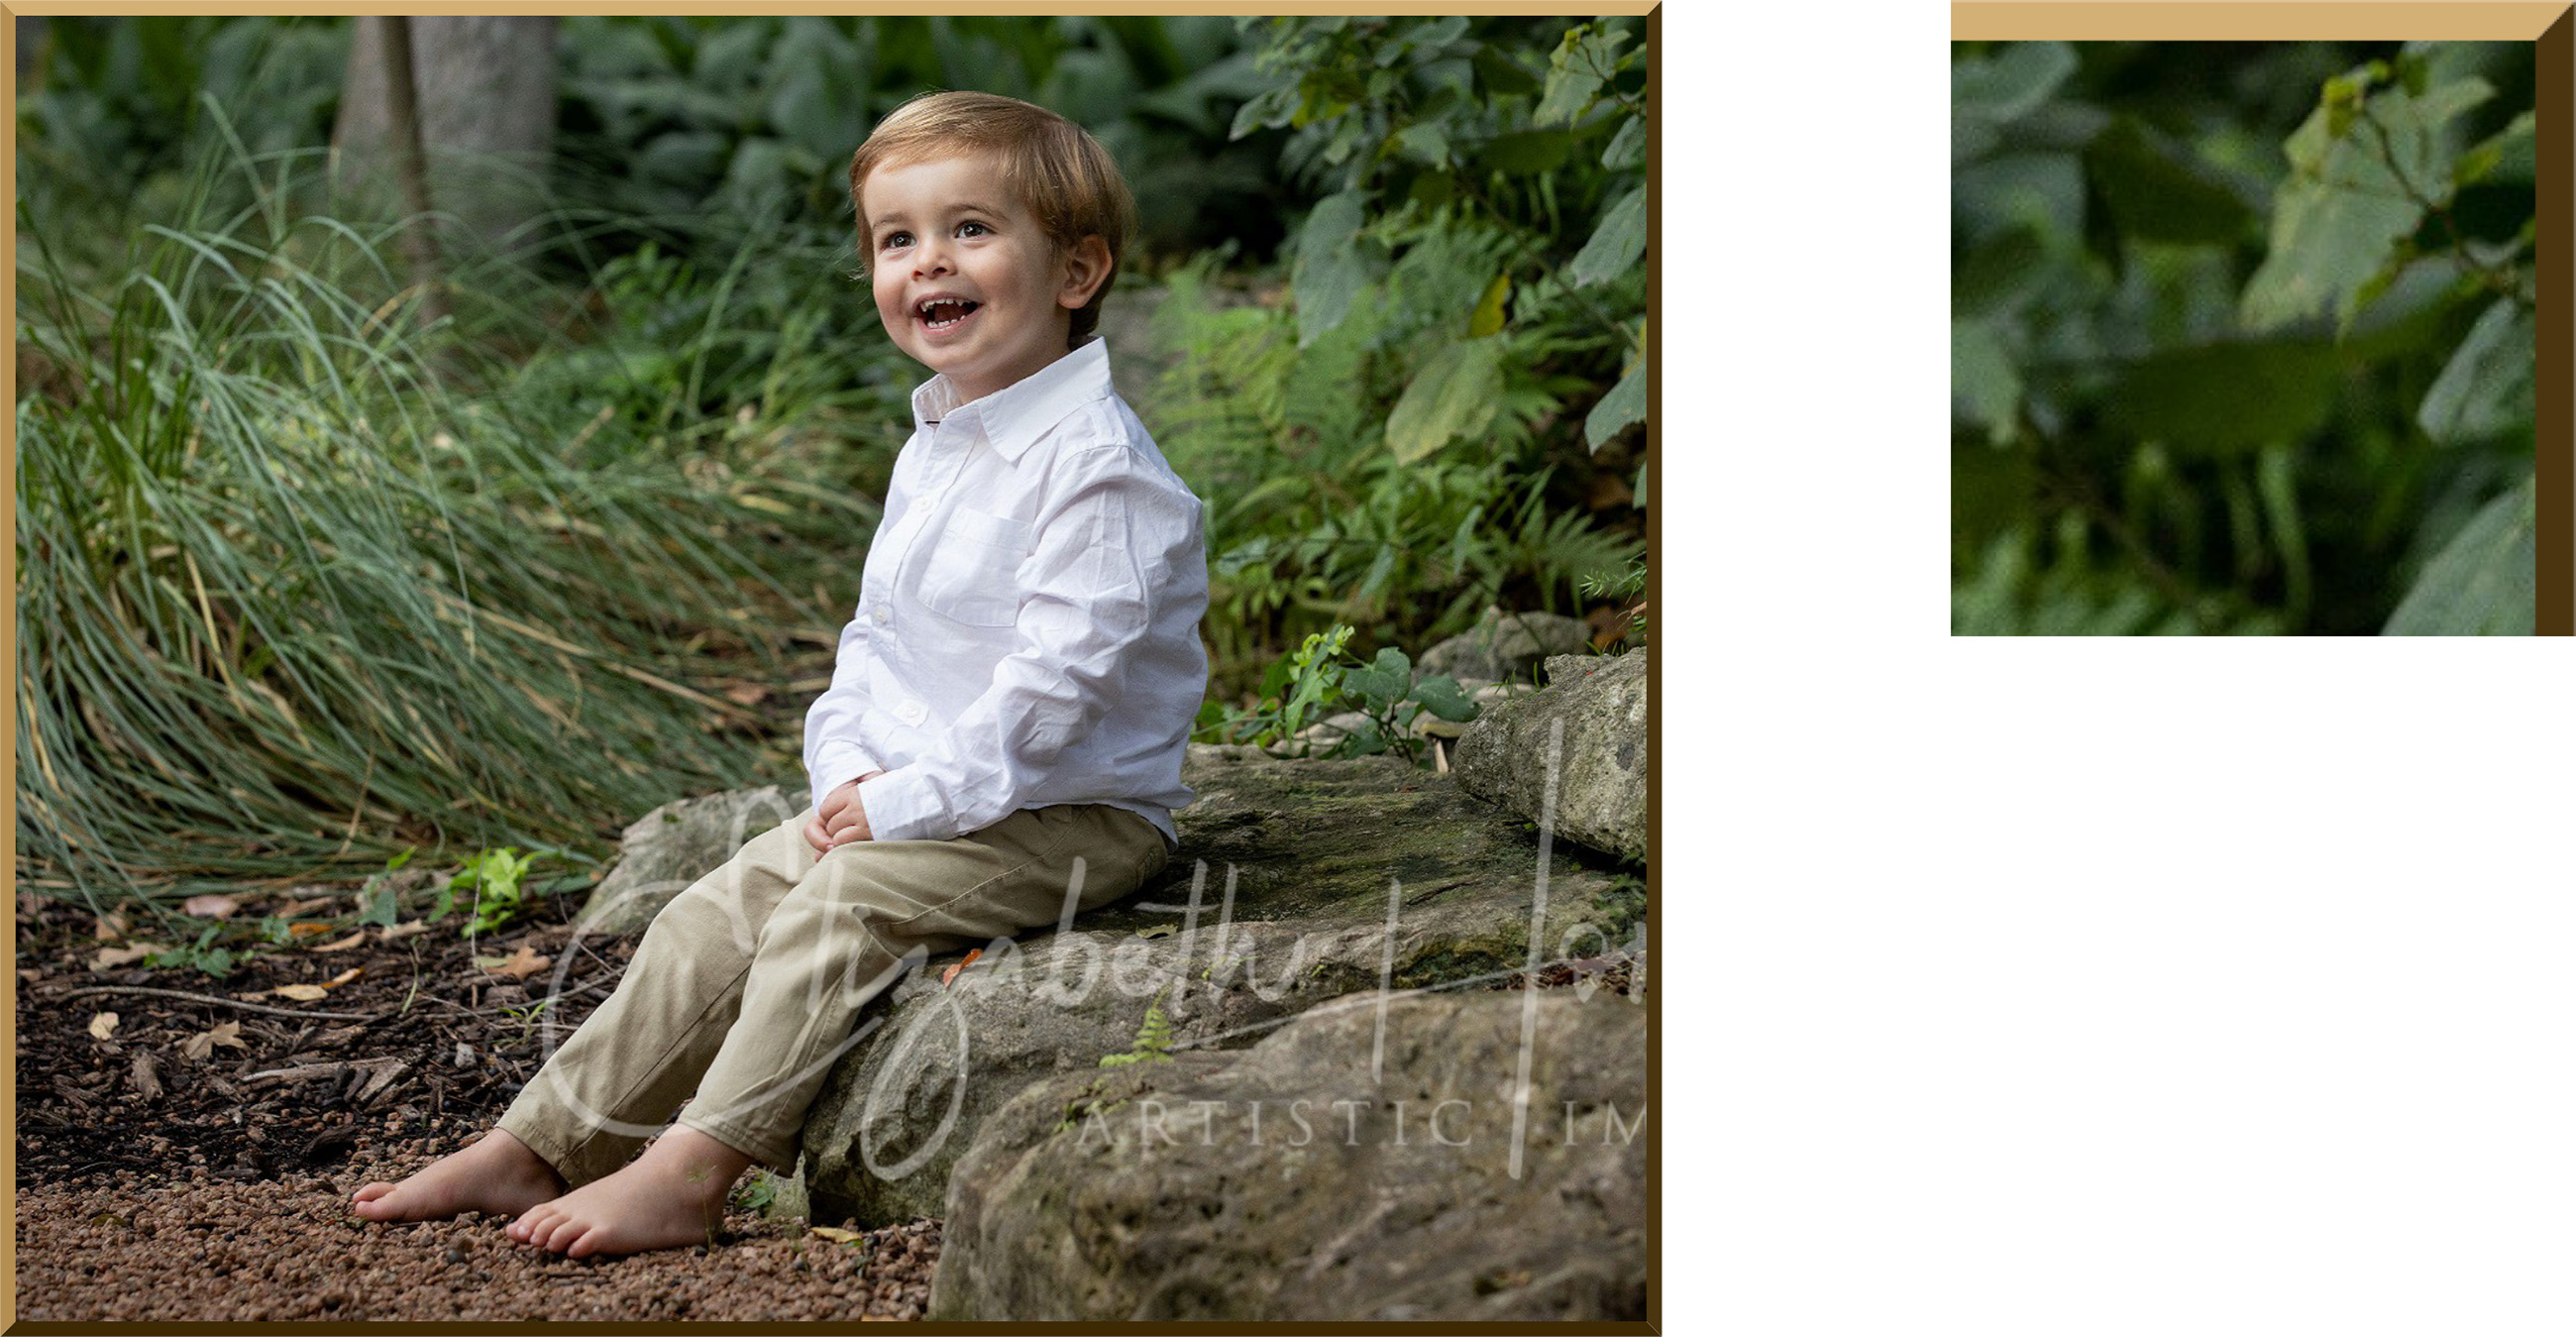
Traditional Mats can be used with both multi-opening templates and composite product templates.
- When you apply a mat to a Traditional Matted template, the mat is precisely cut around each opening.
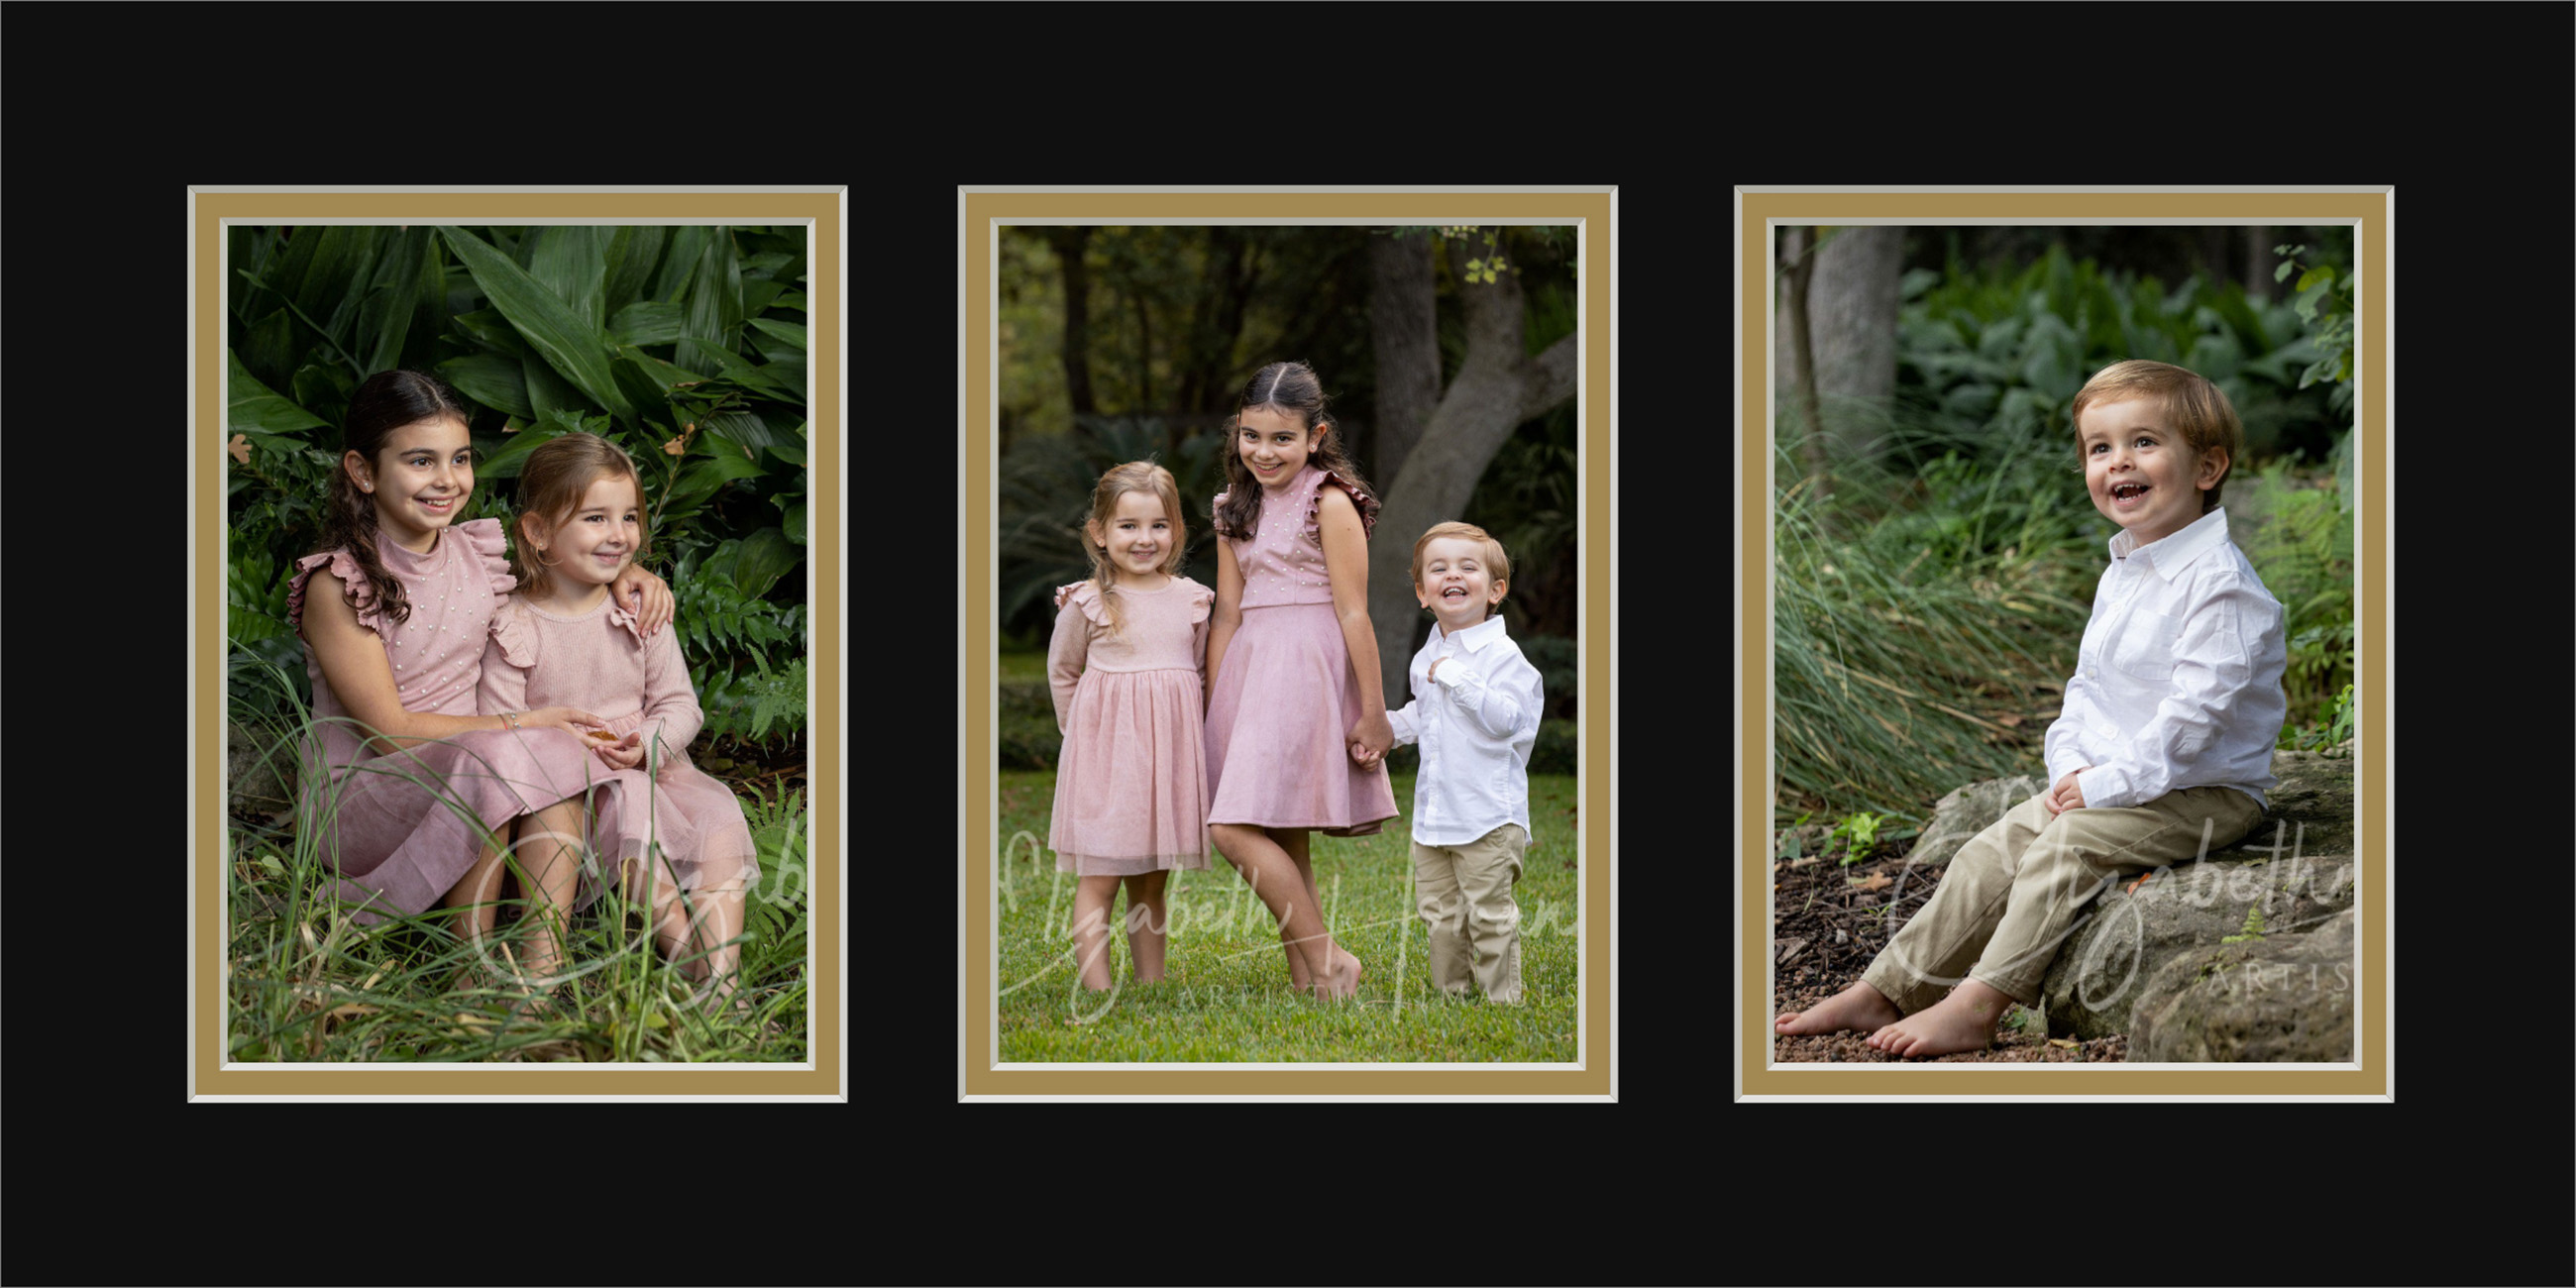
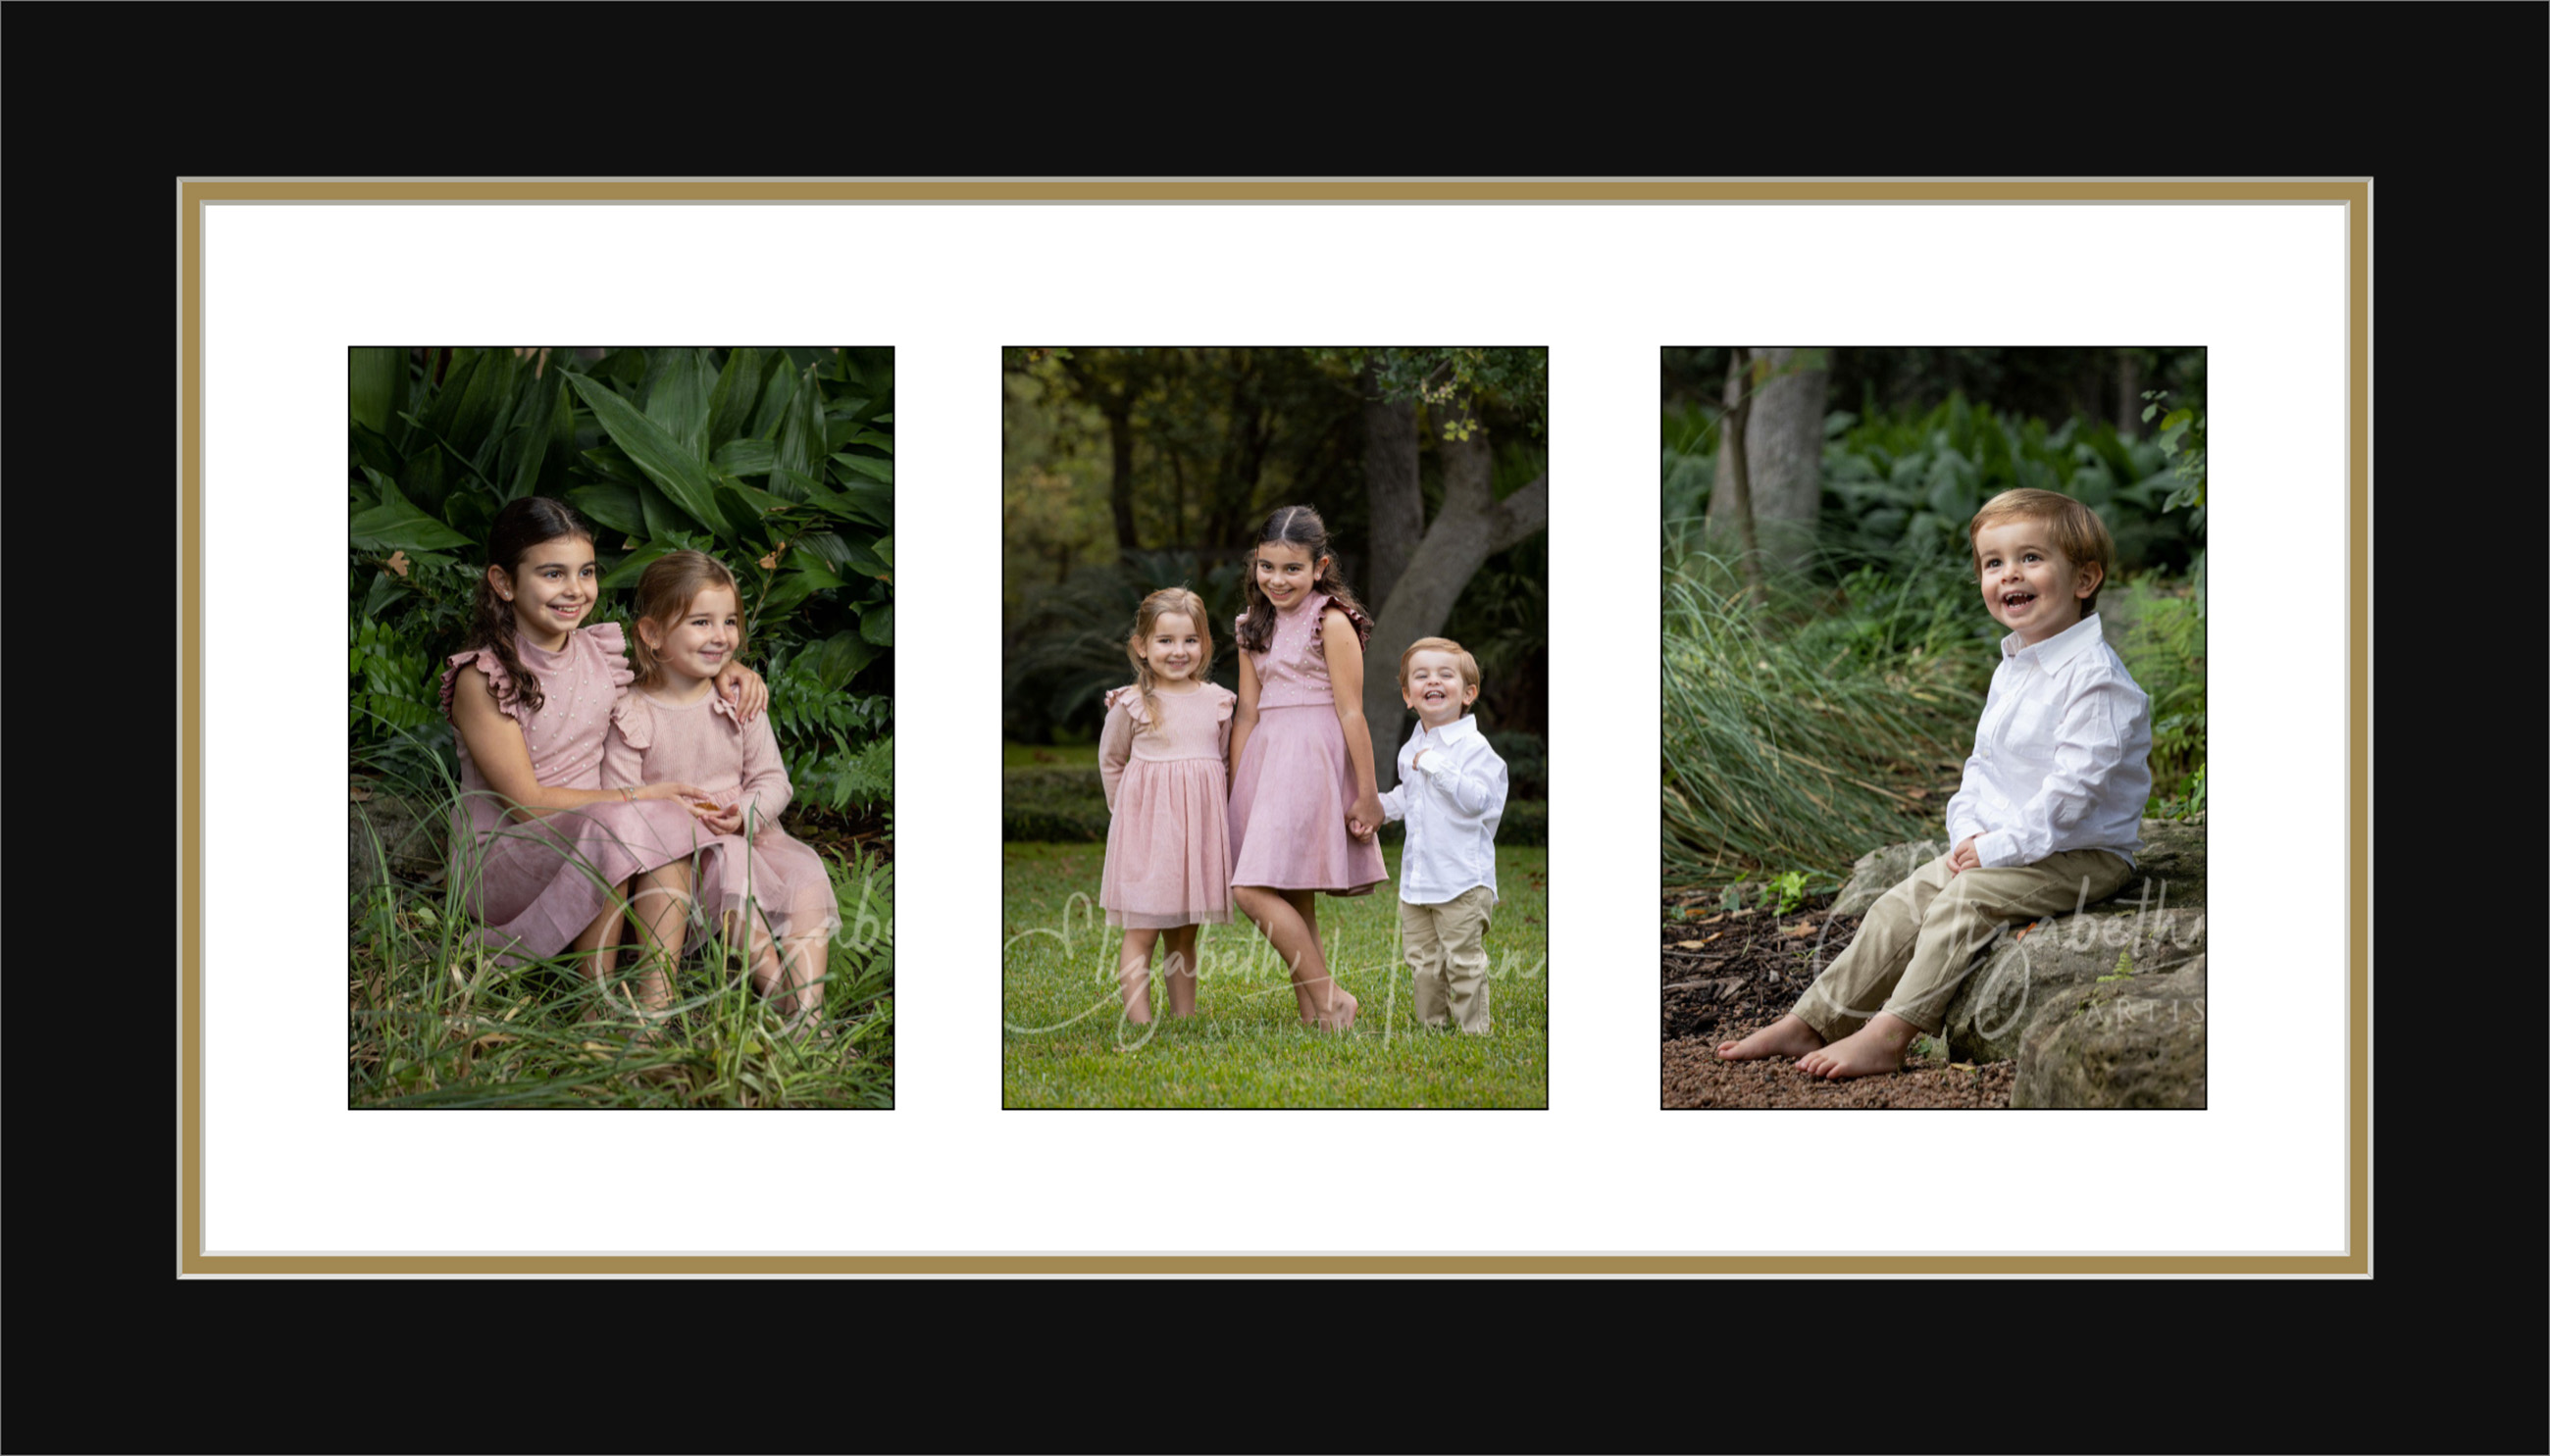
- In contrast, when you apply a mat to a composite product template, the mat will cover the entire layout as a single piece.
You can apply a Traditional Mat to products or traditionally matted book pages from any View mode. Click on the Traditional Mat tool in the toolbar to view the drop-down menu of available mats. Recently selected mats appear at the top. To remove a mat, select "none" from the list.
Mats are set up in the Mat Designs dialog. Go to the top menu, Products > Mats > Mat Designs. By default, ProSelect uses a standard mat overlap setting of 0.25" for sizes up to 30 inches. For larger sizes, a mat overlap of 0.375 is applied. To adjust these settings, go to the top menu, Products > Traditional Mats & Virtual Styles > Traditional Mat Overlap.
- The currently selected mat and mat overlap are shown in the left column of the Info Bar.
- The overall size, including the mat, is listed in the center column. Traditional Mats are set on top of the print, so the overall size of the product is the paper size + the mat size.
- If a mat has been applied to a product, the Traditional Mat tag
 will appear on the thumbnail.

- If you notice red mat tags
 next to your mats, a detailed explanation can be found by clicking Frame Validation - Frame and Mat Selection Tags.
 - To quickly close (or open) all mat folders, hold down the Shift key while clicking on the disclosure arrow.
You can remove all applied mats, frames, & virtual styles simultaneously by holding the OptionAlt key and then pressing the DeleteBackspace key on your keyboard.
Prints
You can apply traditional mats to a print using the Select Traditional Mat tool. Traditional Mats are created with a "mat width" value. For example, 2". These are sometimes referred to as a surrounding mat or outer mat. When applying a 2" mat to a print, the overall size of the print product will increase by the size of the mat. The print size as well as the overall size are visible in the center of the info bar. Information about the applied mat appears on the left side of the info bar. For example:
- If you take an 8"x10" print and apply a 2" mat, the overall product size becomes 12"x14."
- The bigger the mat width = the bigger your overall product becomes.

Matching a standard frame size to the overall size of the matted print can sometimes be challenging. Consider using a matted and framed product template. In the case of product templates, the mat width can be constrained to fit within the frame, without affecting the print size.
Composite Products
Composite products work in the same way as prints. You can apply traditional mats to a composite product using the Select Traditional Mat tool. Composite products are created using a template. Sometimes the template will already have a traditional mat applied. The mat will cover the entire layout as a single piece, regardless of the number of images (openings) in the template. In the following example, we are applying a double black traditional mat to a 3-image composite. The mat is applied as a single piece, around the composite as a whole.

Traditional Matted Products
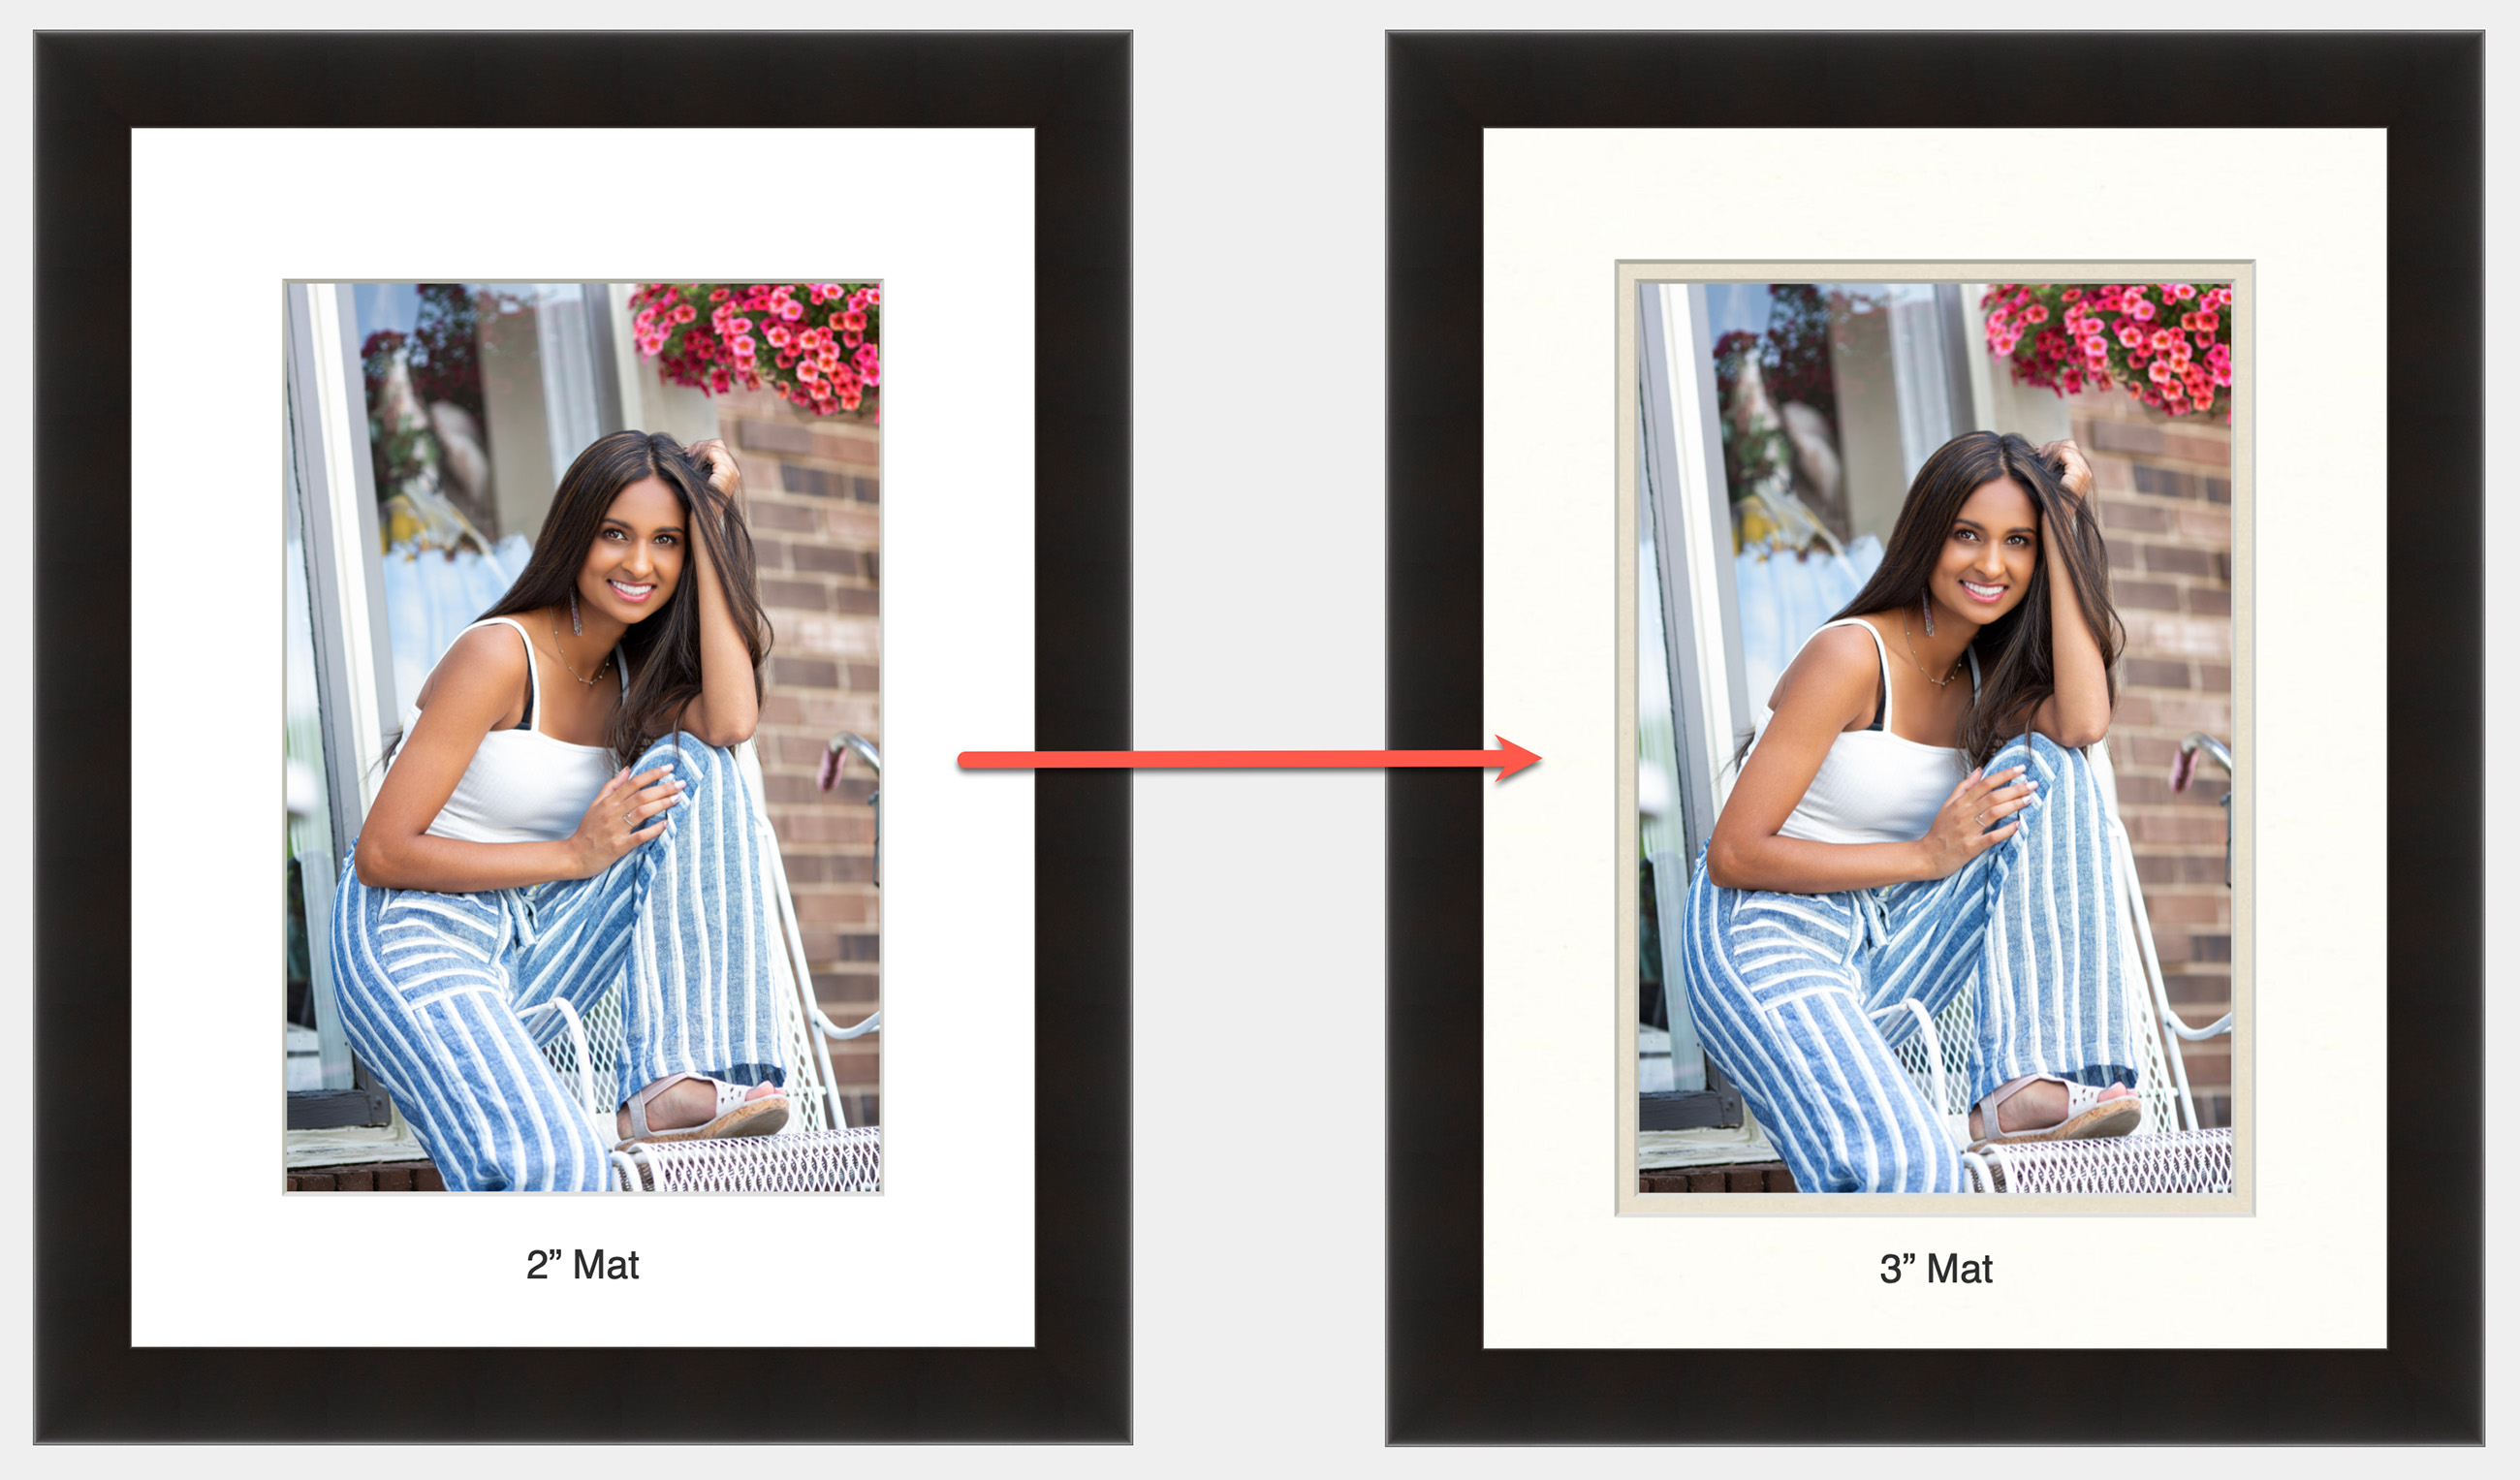
Traditional Matted Products work differently than prints and composites. These templates have predefined spaces allocated for mats, and any mat applied must conform to this space. If a template is designed to accommodate a 2" mat but a 3" mat is applied, the template will only show the inner 2" of the mat. The outer 1" of the mat, exceeding the space allocation, will not be visible. This means the mat is visually adjusted to fit within the template's constraints, drawing from the inside out and trimming any excess.
The product's overall size will not change when a mat is applied. This is especially useful if the template has a frame as well. If the mat were allowed to extend to 3" without constraint, it would not fit the frame properly.
- In the following example, we have an 8x12 framed traditional matted product. The overall mat size is 12x16, allowing for the frame, which brings our overall size to 14.5x18.5.
- A 2" bright white single mat has been applied to the first image. A 3" double mat has been applied to the second.
- When the 3" mat is applied, the overall product size remains the same. The 3" mat is constrained to fit within the template.
Multi-Opening Templates
When you apply a mat to a Traditional Matted template with multiple openings, the mat is precisely cut around each opening.

To adjust your default mat overlap settings, follow these steps:
- Go to the top menu, Products > Traditional Mats & Virtual Styles > Traditional Mat Overlap.
- In this dialog, you can enable or disable mat overlap and set different overlap sizes for various print size ranges.
- These settings are saved in the ProSelect Data file and can be shared between users.
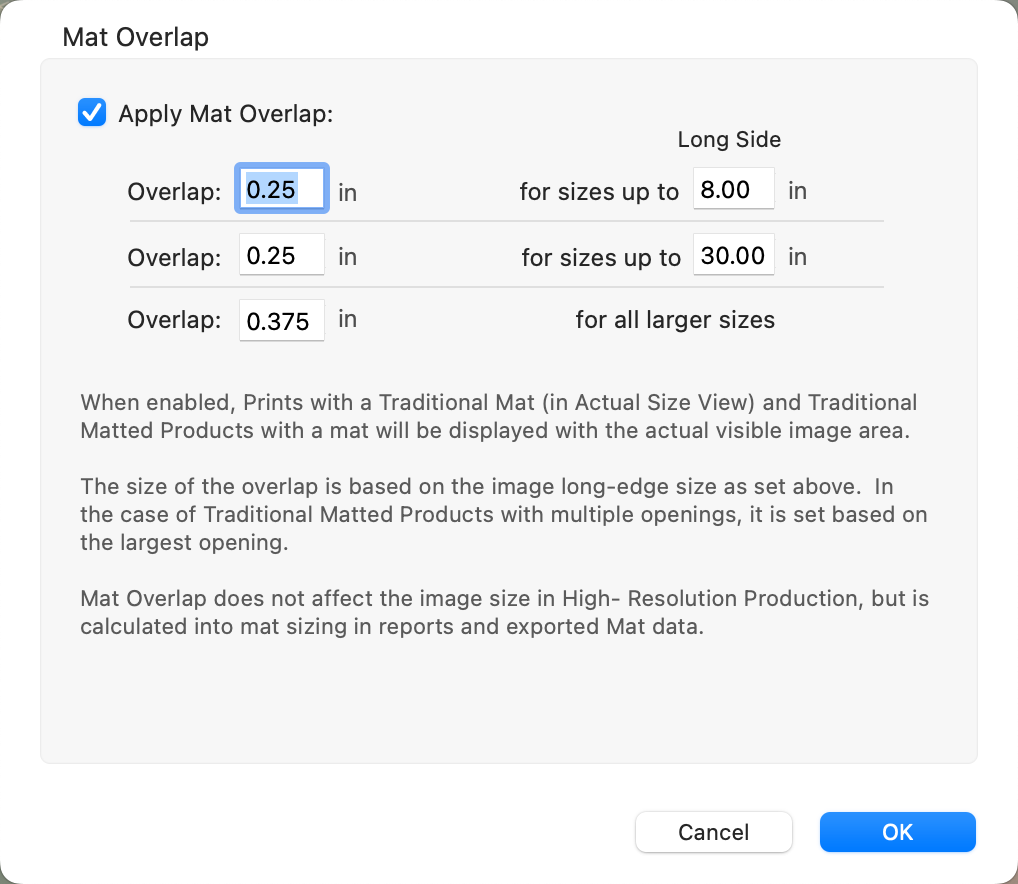
- The values and sizes displayed in the mat overlap settings are the default values. The maximum overlap value is 0.5 inches (12.5mm). If you have migrated from an earlier version of the software, these values will be copied from your previous Preferences file.