Paper Sizes
Paper sizes are fundamental to all sizing in ProSelect. They are used to build products in your price list and control what size of images and products are shown in Actual Size view and in a Room (when working with Rooms). They are also used to set the size of final images generated by Pro Production.
- When you open the Setup Paper Sizes window, you will notice a number of default paper sizes have already been added.
- You can add your own paper sizes or edit the ones already listed.
- You can also add a group of paper sizes.
Manage your paper sizes using the Setup Paper Sizes window. Go to the top menu, Products > Paper Sizes.
- Paper sizes can be displayed in either inches or centimeters. To change this, go to the top menu, ProSelectEdit > Settings > General Defaults > Working Units.
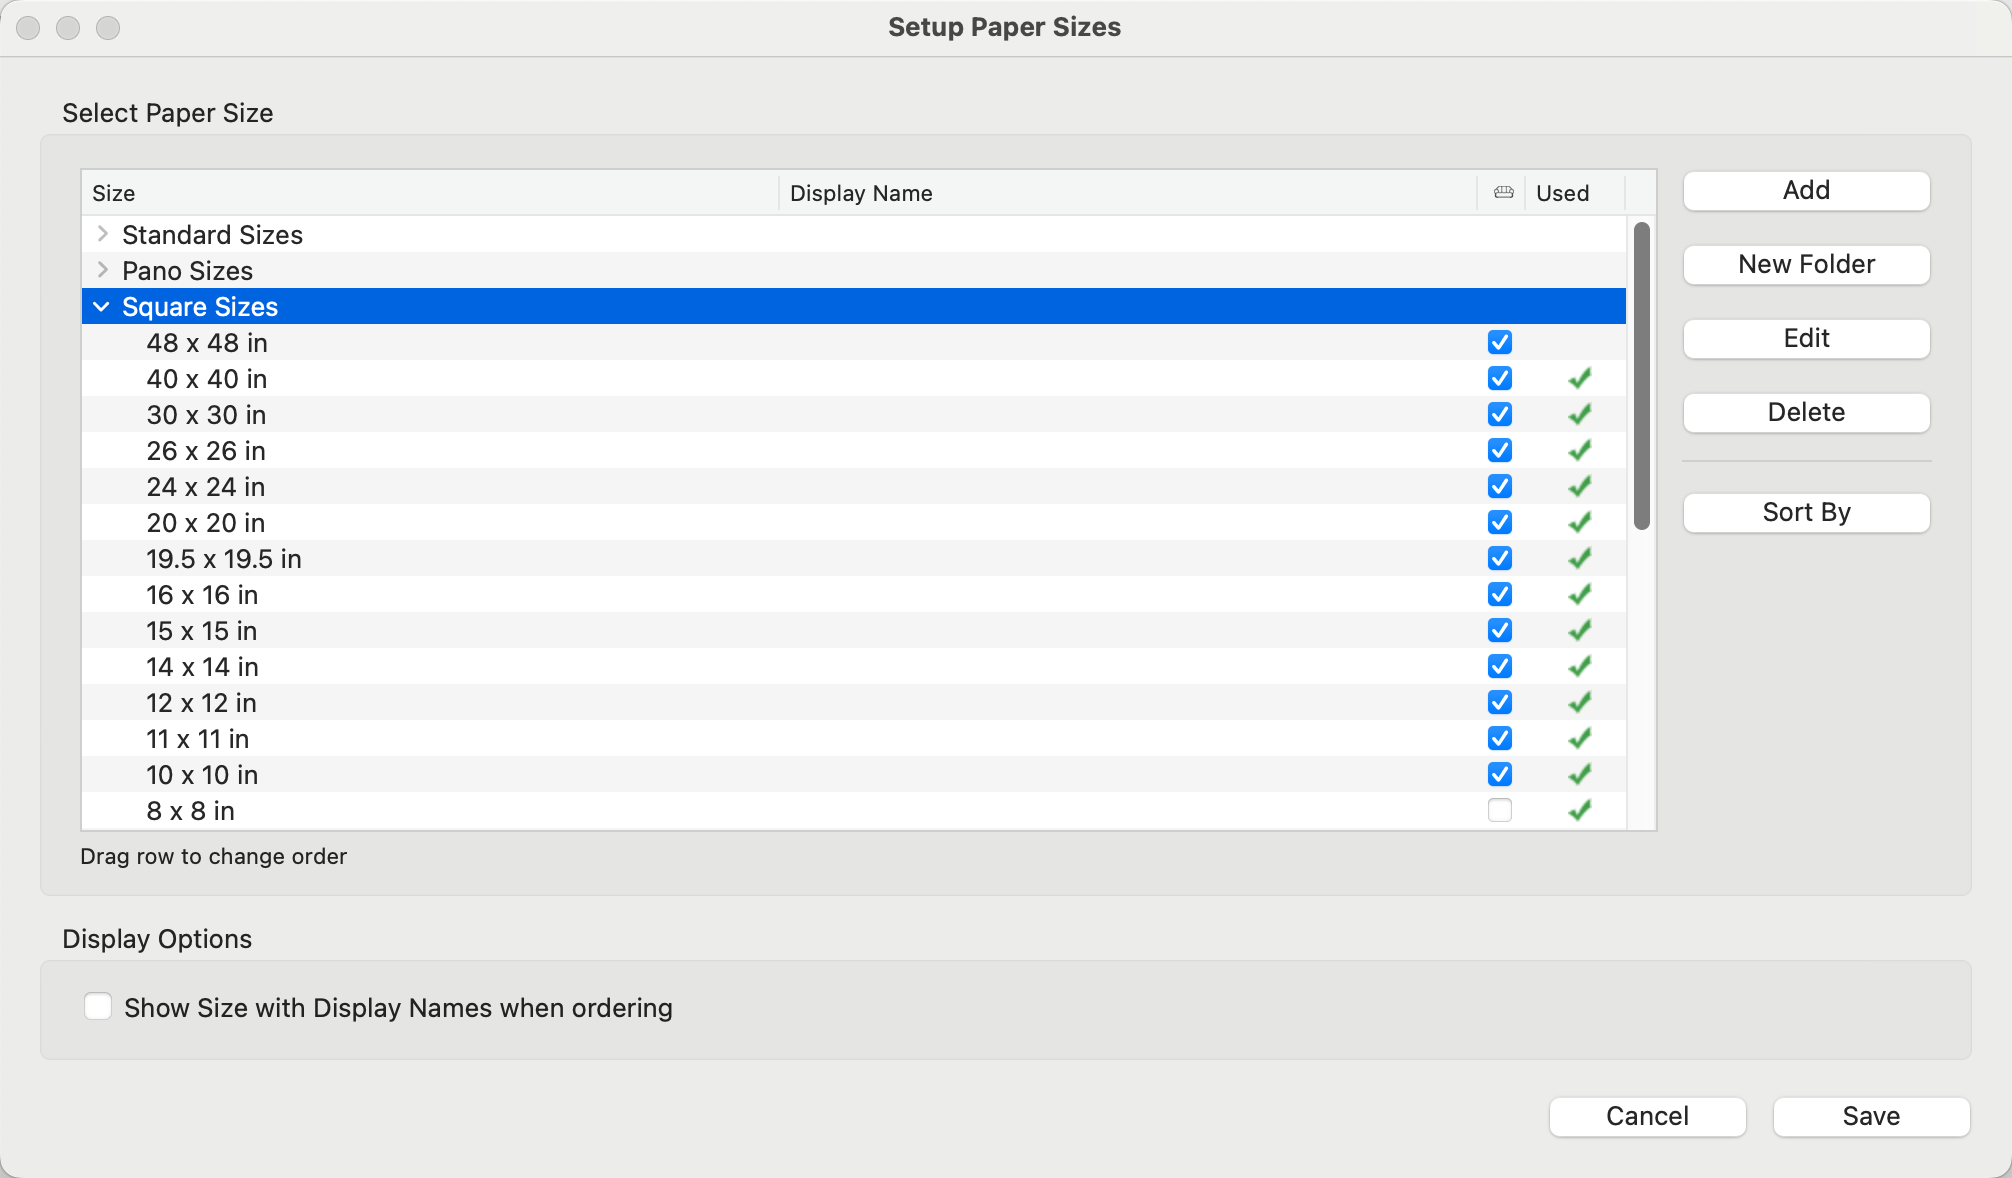
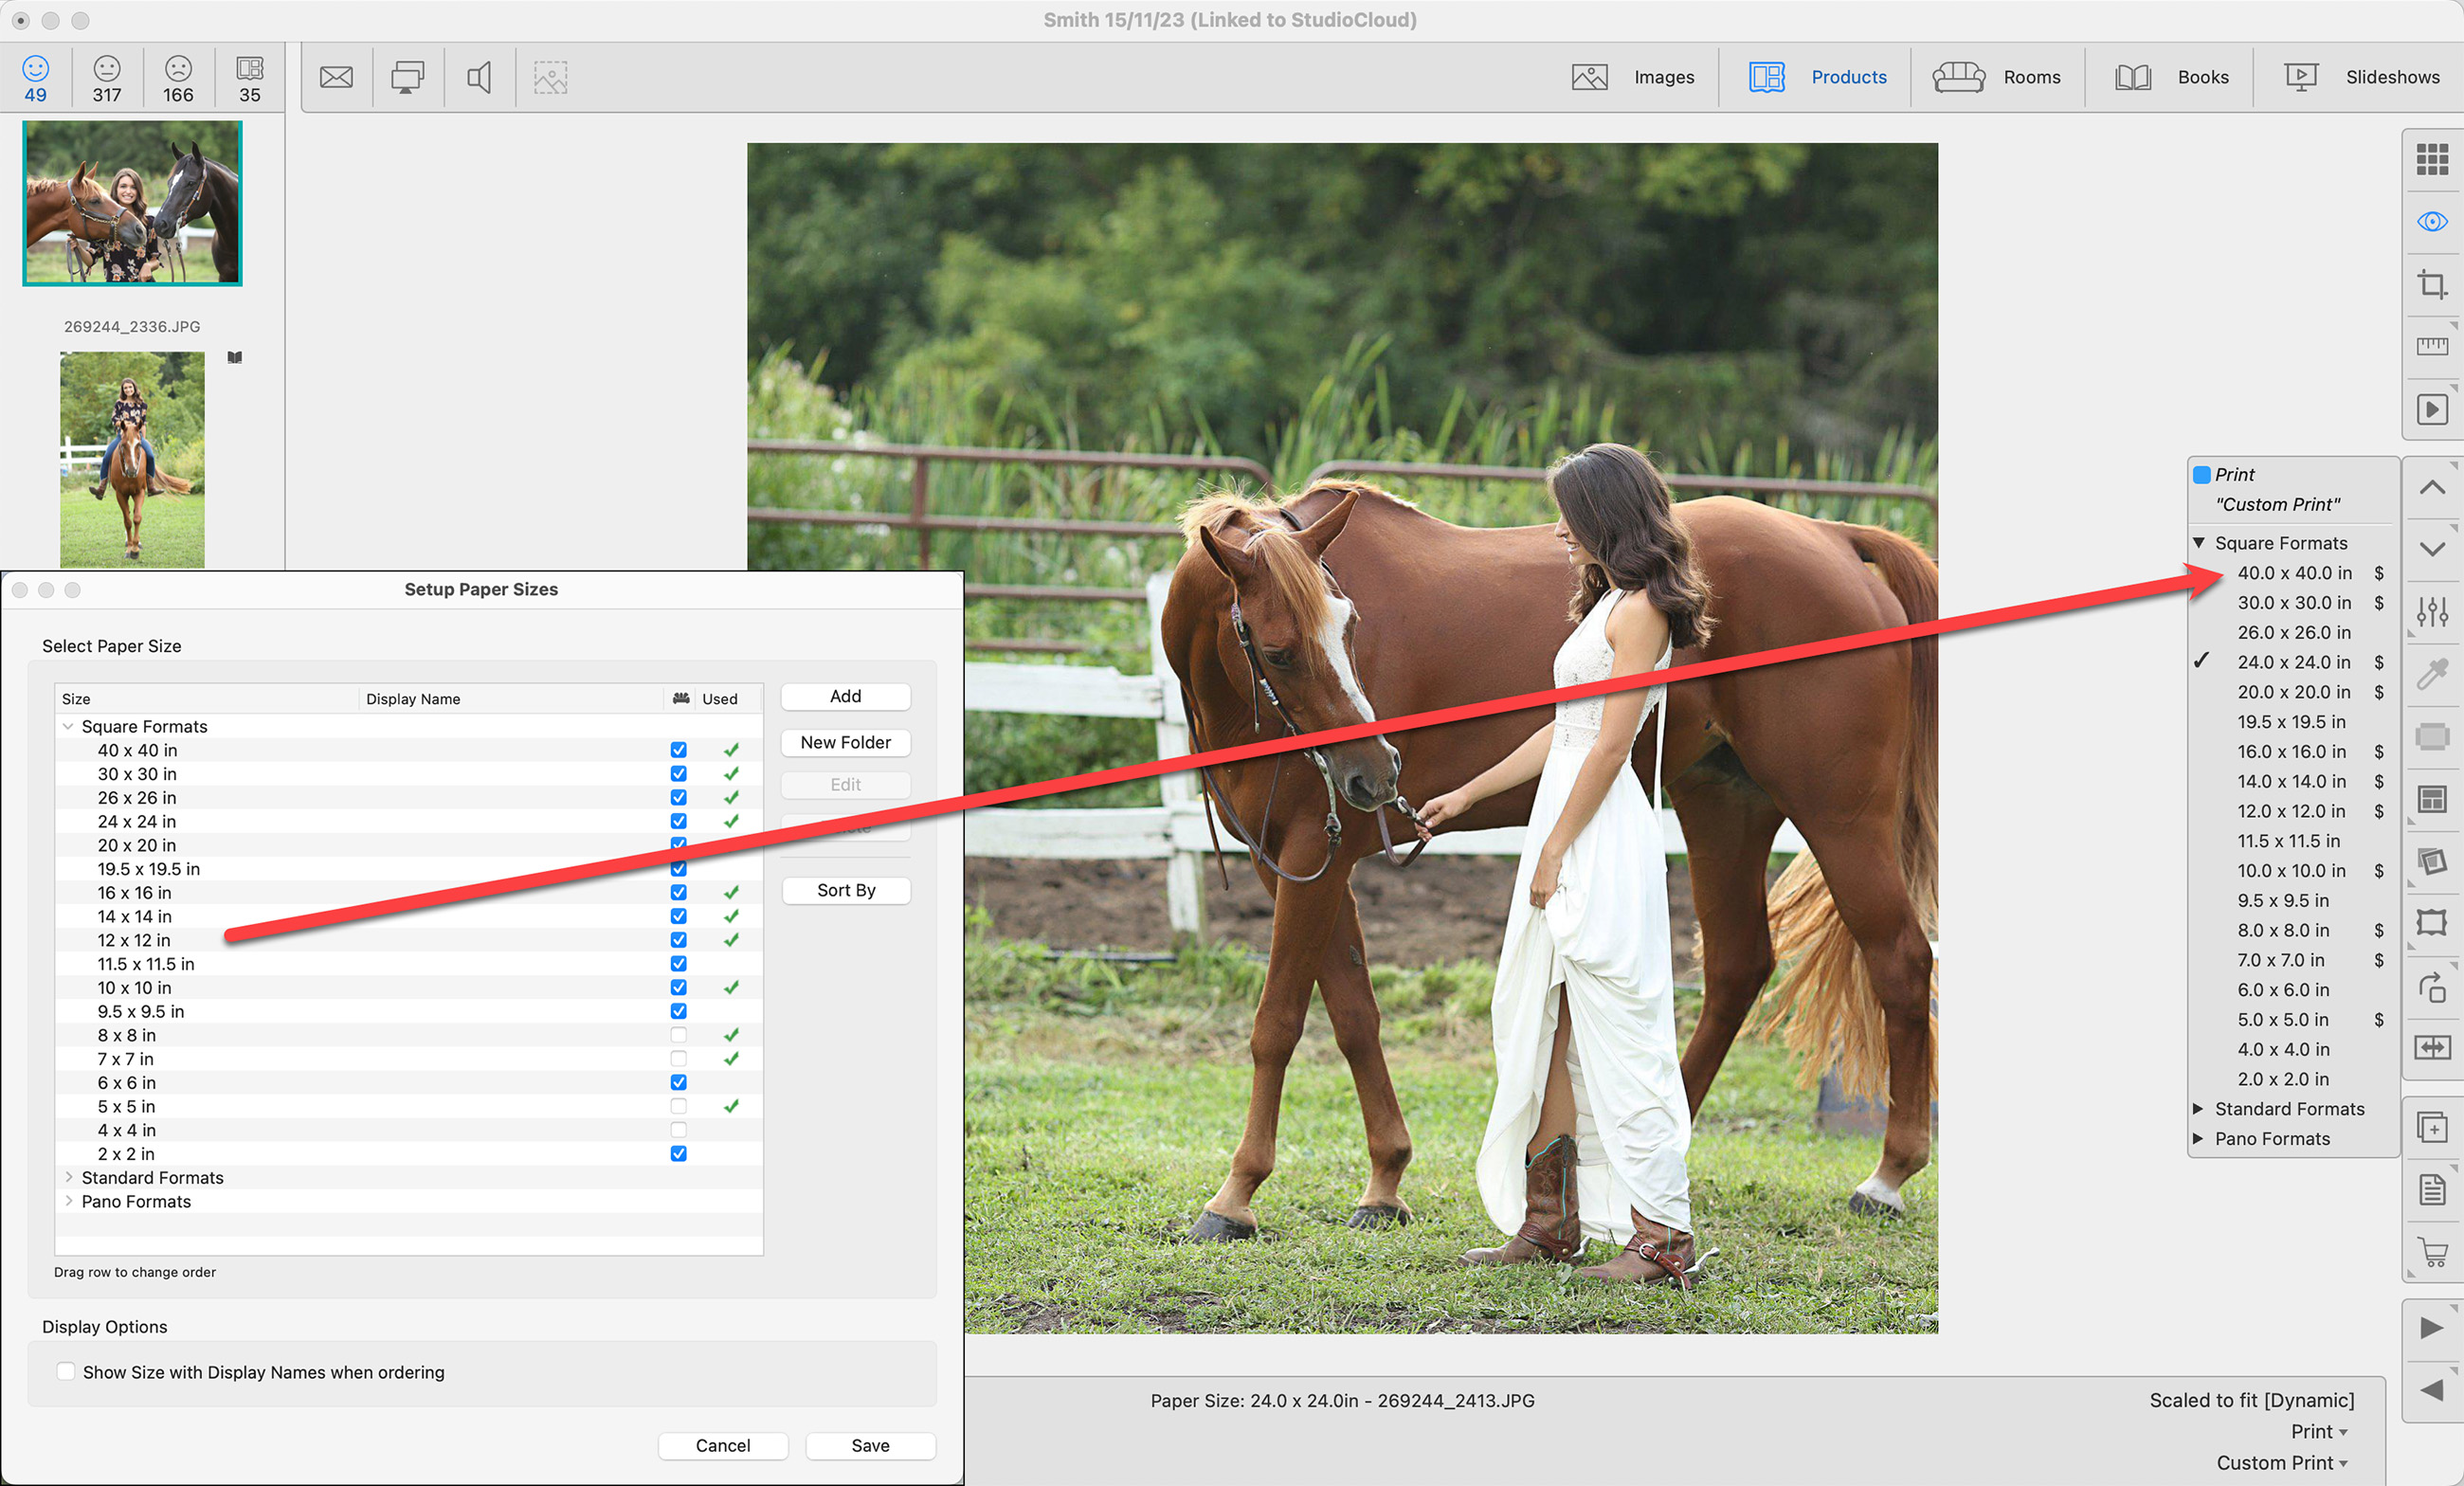
- Size: The paper size is listed in the first column. The drop-down arrow next to the folder name indicates this is a group of paper sizes. Click the arrow to reveal all the items within the folder.
- Display Name: For each paper size, you can optionally enter a display name which will be shown throughout ProSelect instead of the default size in inches (or centimeters).
- Supplier: Generally Suppliers are NOT assigned to Paper Sizes. We recommend this only if the paper size is unique to a specific supplier.
 : The Room tag represents usage in Working with Rooms. If the checkbox is checked, the selected paper size can be used in Rooms.
- Used : This column shows a green checkmark
 when the selected paper size is currently being used by a price list in the Product & Pricing Manager. Any changes you make here will be reflected in those price lists.
 - If you want to show the numeric size as well as the display name when ordering, check the Show Size with Display Names when Ordering box at the bottom of the window.
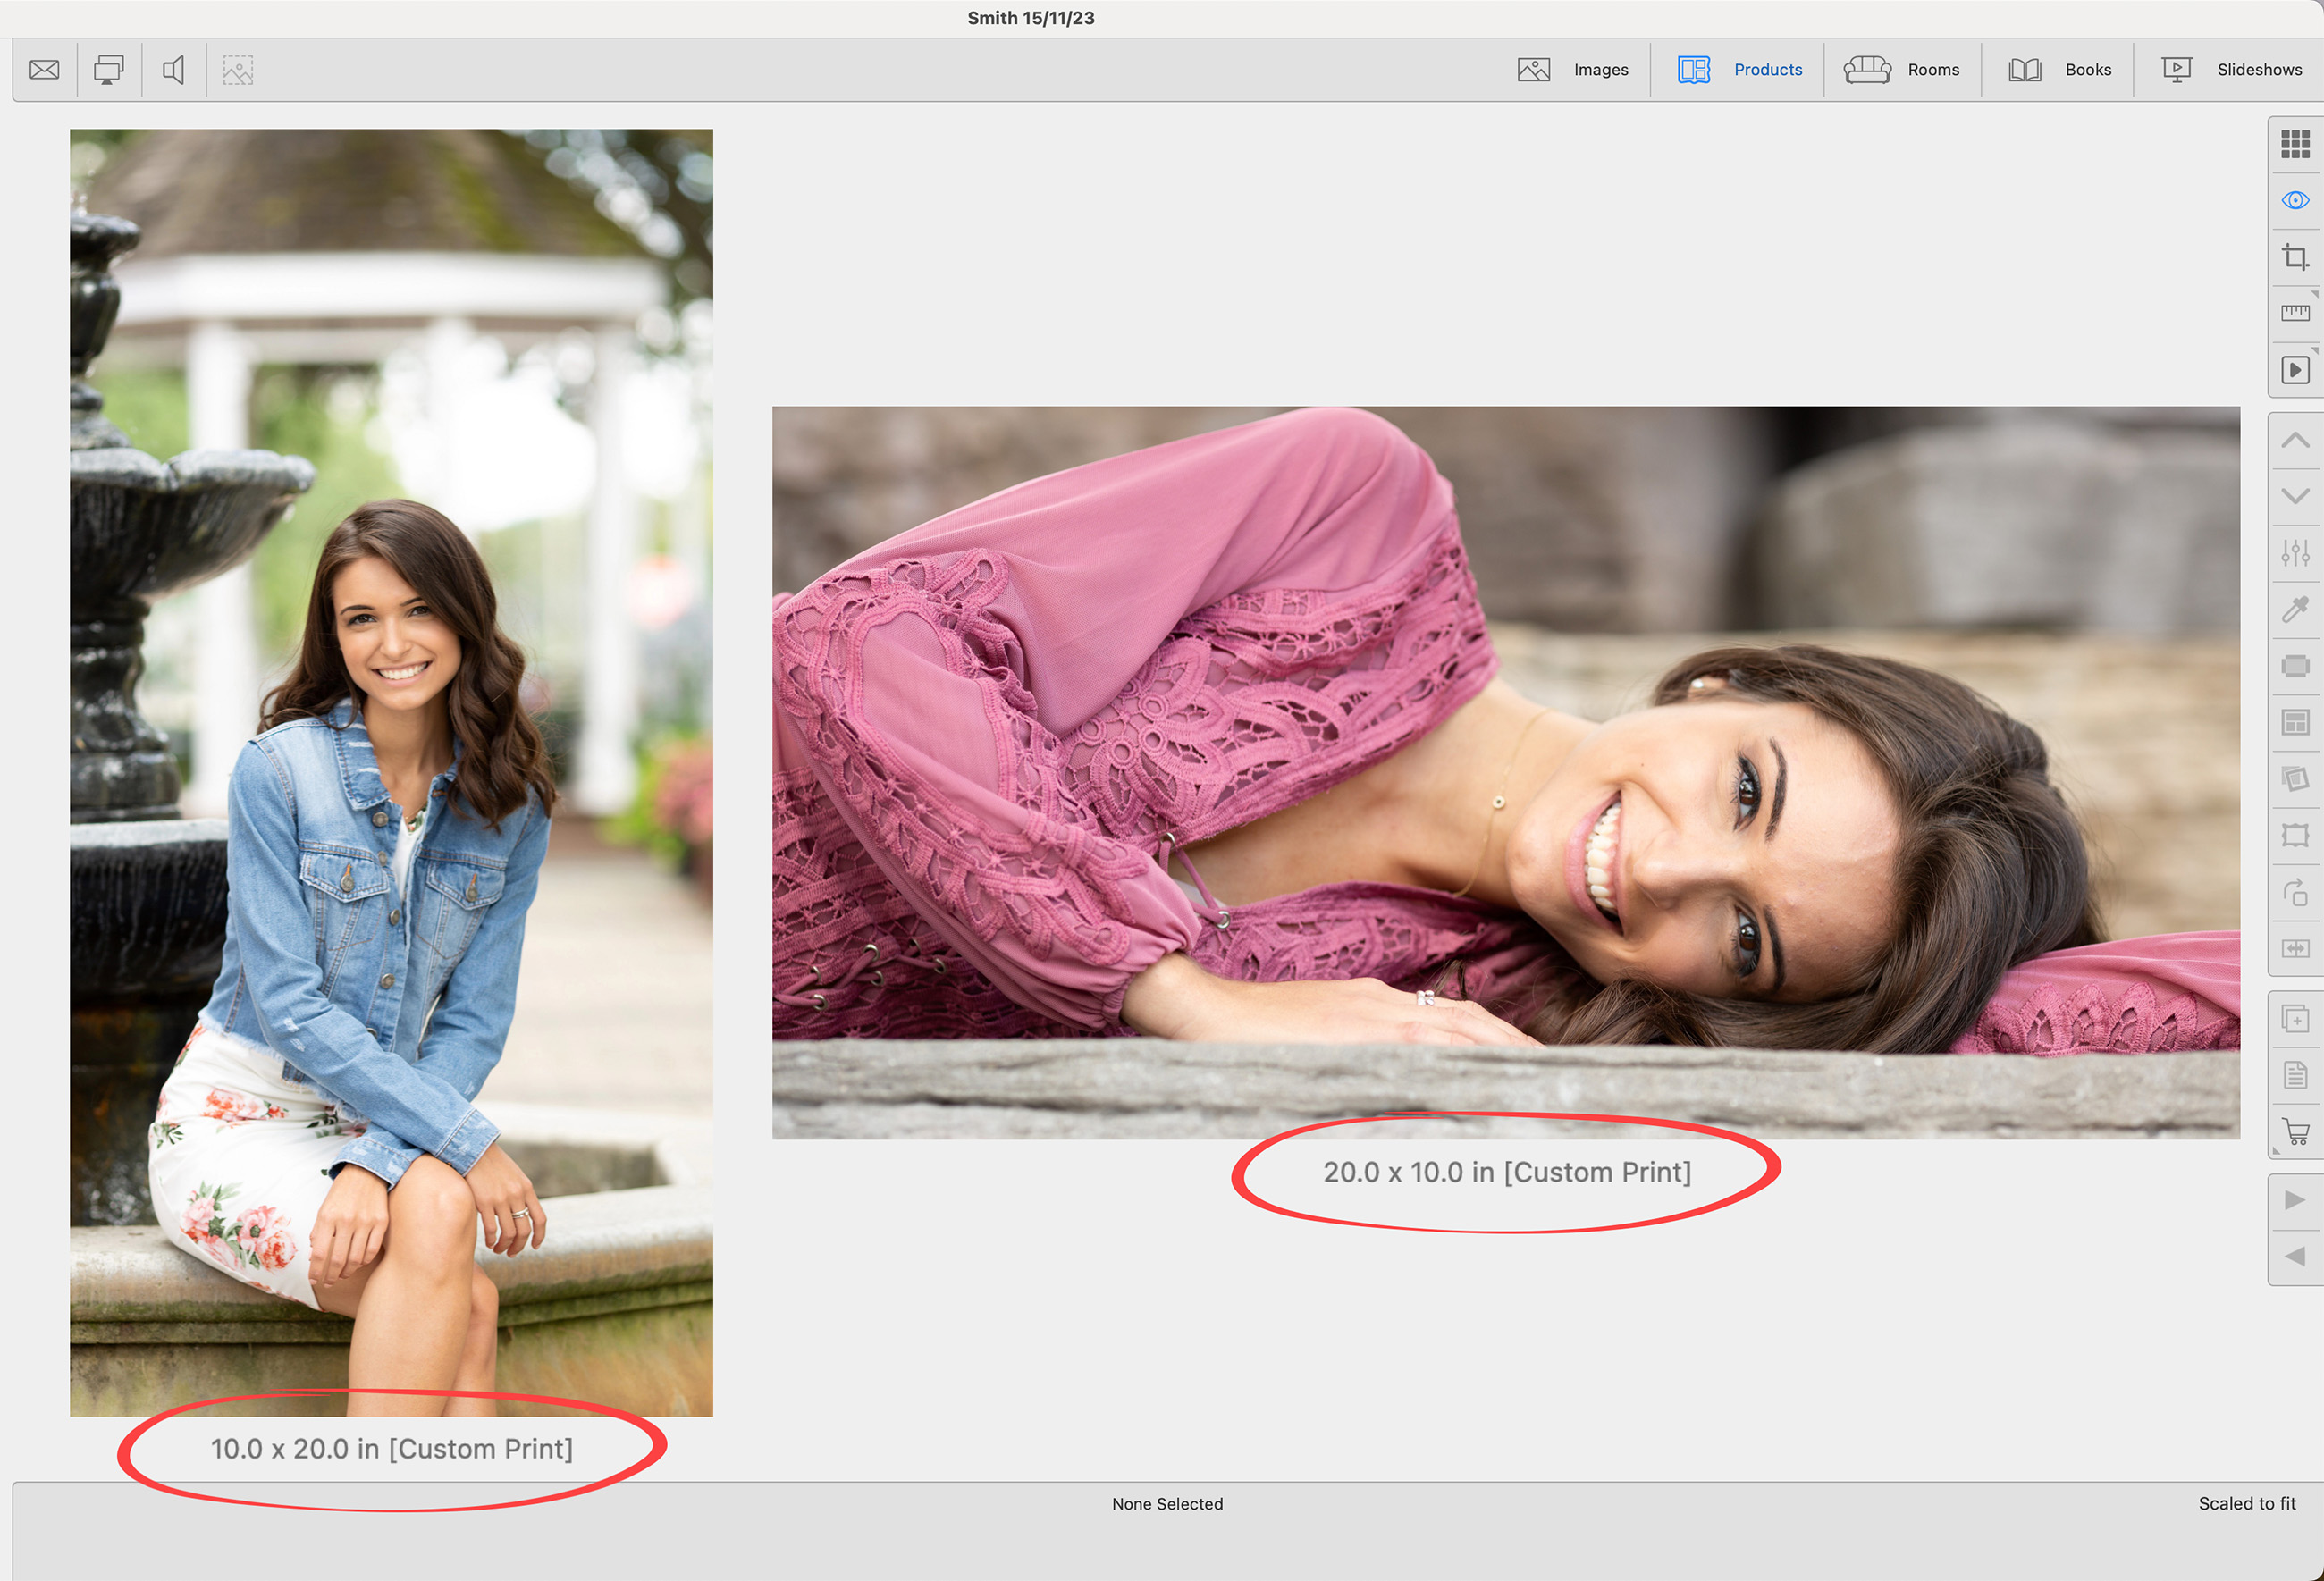
In ProSelect, paper sizes are always noted with the width first and the height second, listing the shorter dimension first to define the paper as being in portrait orientation. For instance, a panoramic paper size is listed as 10 x 20. However, ProSelect is also designed to consider the aspect ratio of the images you are working with. If you place a landscape-oriented image into a paper size initially defined as 10 x 20 (portrait orientation), ProSelect will automatically adjust and rotate the dimensions to match the orientation of your image, thus changing it to 20 x 10 to suit a landscape layout.
In the following example, both prints were assigned a 10 x 20 paper size. ProSelect automatically rotated the paper for the landscape oriented image.
- Select the folder you wish to add the paper size into.
- Click the Add button. The Paper Size dialog will appear.
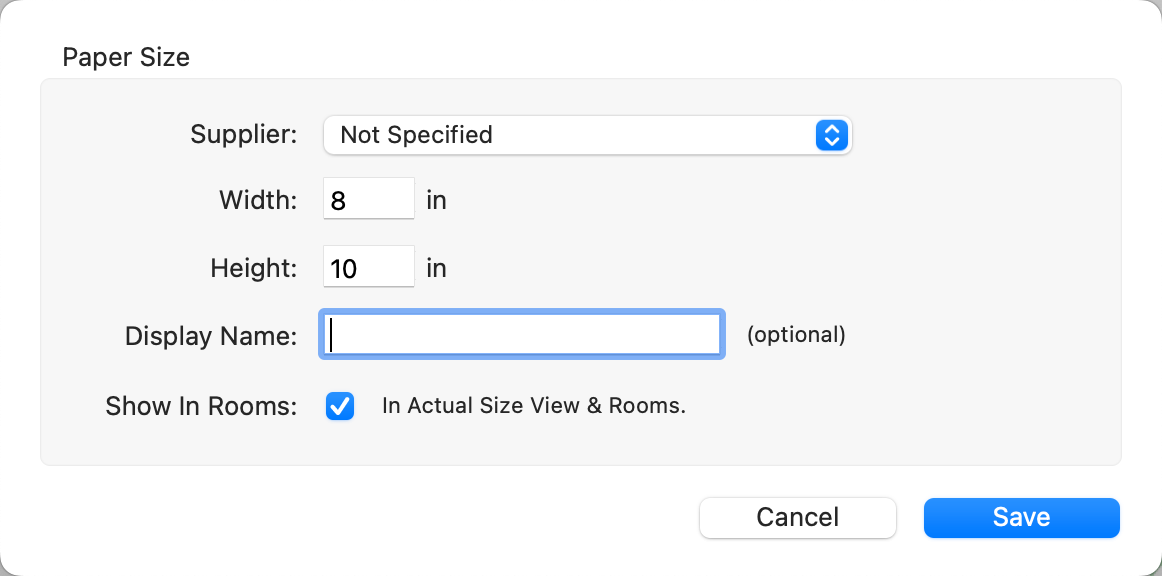
- Optionally choose a supplier if the size is unique to a specific supplier.
- Enter the width and height in the boxes.
- Optionally enter a Display Name.
- By default, the Show in Rooms box is checked. if you don't want the paper size to be available in Actual Size view and Rooms, uncheck this box.
- Click the Save button.
- Your new paper size will by default appear at the bottom of the list within your selected folder. You can select the paper size and move it to where you want it to be within the list.
- Click the New Folder button.
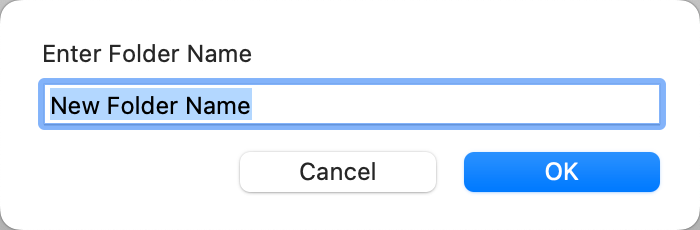
- Enter a name for the folder.
- Click OK.
- Your new folder will appear at the bottom of the paper sizes list. Click and drag the folder to where you want it.
- Move paper sizes into the folder by dragging, or select multiple paper sizes at once by holding the CmdCtrl key, then drag the entire selection into the Group.
You can select multiple paper sizes from the list by holding the CmdCtrl key or using the Shift key to highlight a selection. Then hold down the OptionAlt key while clicking the New Folder button. This will automatically move all those selected paper sizes into a new folder for you.
The order in which the sizes are displayed and used throughout ProSelect is determined by the order of the sizes in the Paper Sizes window. When changing the size of a dynamic product (using the toolbar tools or the up and down arrow keys), the image will scroll through your list of paper sizes. It is helpful to group your paper sizes by aspect ratio, this way the cropping stays the same on your image.
- You can sort the paper sizes by width or height using the Sort By button. This will sort your sizes in descending order (largest at the top, smallest at the bottom).
- To sort your sizes in ascending order (smallest at the top, largest at the bottom), hold the OptionAlt key while clicking the Sort By button.
- Create groups of paper sizes (such as aspect ratios or shapes) by using the Add Folder button.
- You can change the order by dragging rows up or down in the list.
The Paper Sizes available when sizing a print match the Paper Sizes created in the Setup Paper Sizes window.
To add a display name to a paper size, select the size first and click on the Edit button. Manually type in your desired display name.
- Display names can be used as an alternative to showing actual print sizes on invoices. They serve multiple purposes, including identifying sizes in unique pricing models. Examples of display names are Sofa Size, Mantle Size, Loveseat Size, and Desktop Size.
- In the case of long-dimension pricing, where the pricing is based on the longest dimension of the print, display names such as "50" Wall Portrait" and "40" Wall Portrait" can be used to represent different sizes. Similarly, in a group pricing model, display names like "Mini," "Small," "Standard," "Impact," and "Grand" can be utilized.
- It is important to note that in certain cases, the same display name may be associated with multiple sizes. For instance, the display name "50" Wall Portrait" might be used for prints with dimensions 40x50, 30x50, and 25x50. In those cases, it’s suggested to check the option to "Show Size with Display Names when ordering" in the Display Options area. This enables the display of actual sizes alongside the corresponding display names when placing an order.
Display Names as They Appear Throughout ProSelect:
Setup Paper Sizes window

On the Main Screen:
- When using the Previous and Next Size buttons.
- On the info bar.

Order Product Popup Menu

Review Orders Window

Order/Invoice Report

Like other price list items, the Display Name settings are saved with your ProSelect Data file and can be shared between computers.
- Select the size you wish to edit.
- Click the Edit button.
- Make any changes you wish to make to the selected paper size. This can include the paper width, height, Display Name, or its availability in Rooms.
- Click the Save button.
It is not recommended that you delete paper sizes. Paper Sizes provide a foundation for building products. This list will likely contain sizes that you may not offer. It’s better to leave the list intact as filtering of your offered sizes will be handled at the product level.
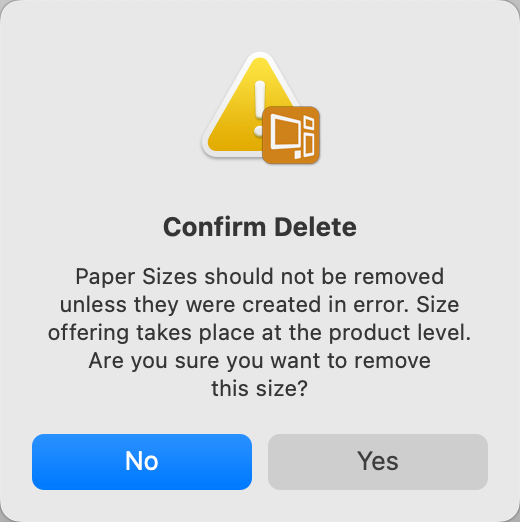
If you need to delete a paper size, Use the Delete button. You cannot delete a paper size that is currently being used in a price list. You must first remove the item that is using that paper size from the price list before deleting it. You will need to confirm the deletion of a paper size before deleting it.
If you import a Product or Supplier Collection that utilizes paper sizes you do not already have, they will automatically be added for you. New paper sizes appear at the bottom of your list, beneath your existing folders. It is important to organize these new paper sizes into the appropriate folders to maintain order. If not reorganized, they will appear out of sequence when you scroll through your paper sizes in the main ProSelect window, potentially disrupting your workflow.
When dealing with images that are non-standard sizes, you can pair a particular paper size you're working with to a corresponding lab size. Once paired, your images will be automatically centered on the chosen lab-size paper. This mapping is done in the Production Profile for the specific lab. Click on Production Profiles to learn more.
ISO-standard paper sizes (A0–A4) can be set up in ProSelect. Follow these steps to set up a dedicated ISO Paper Sizes folder.
- Go to the top menu, Products > Paper Sizes.
- Click on the New Folder button.
- Name the folder "ISO Paper Sizes."
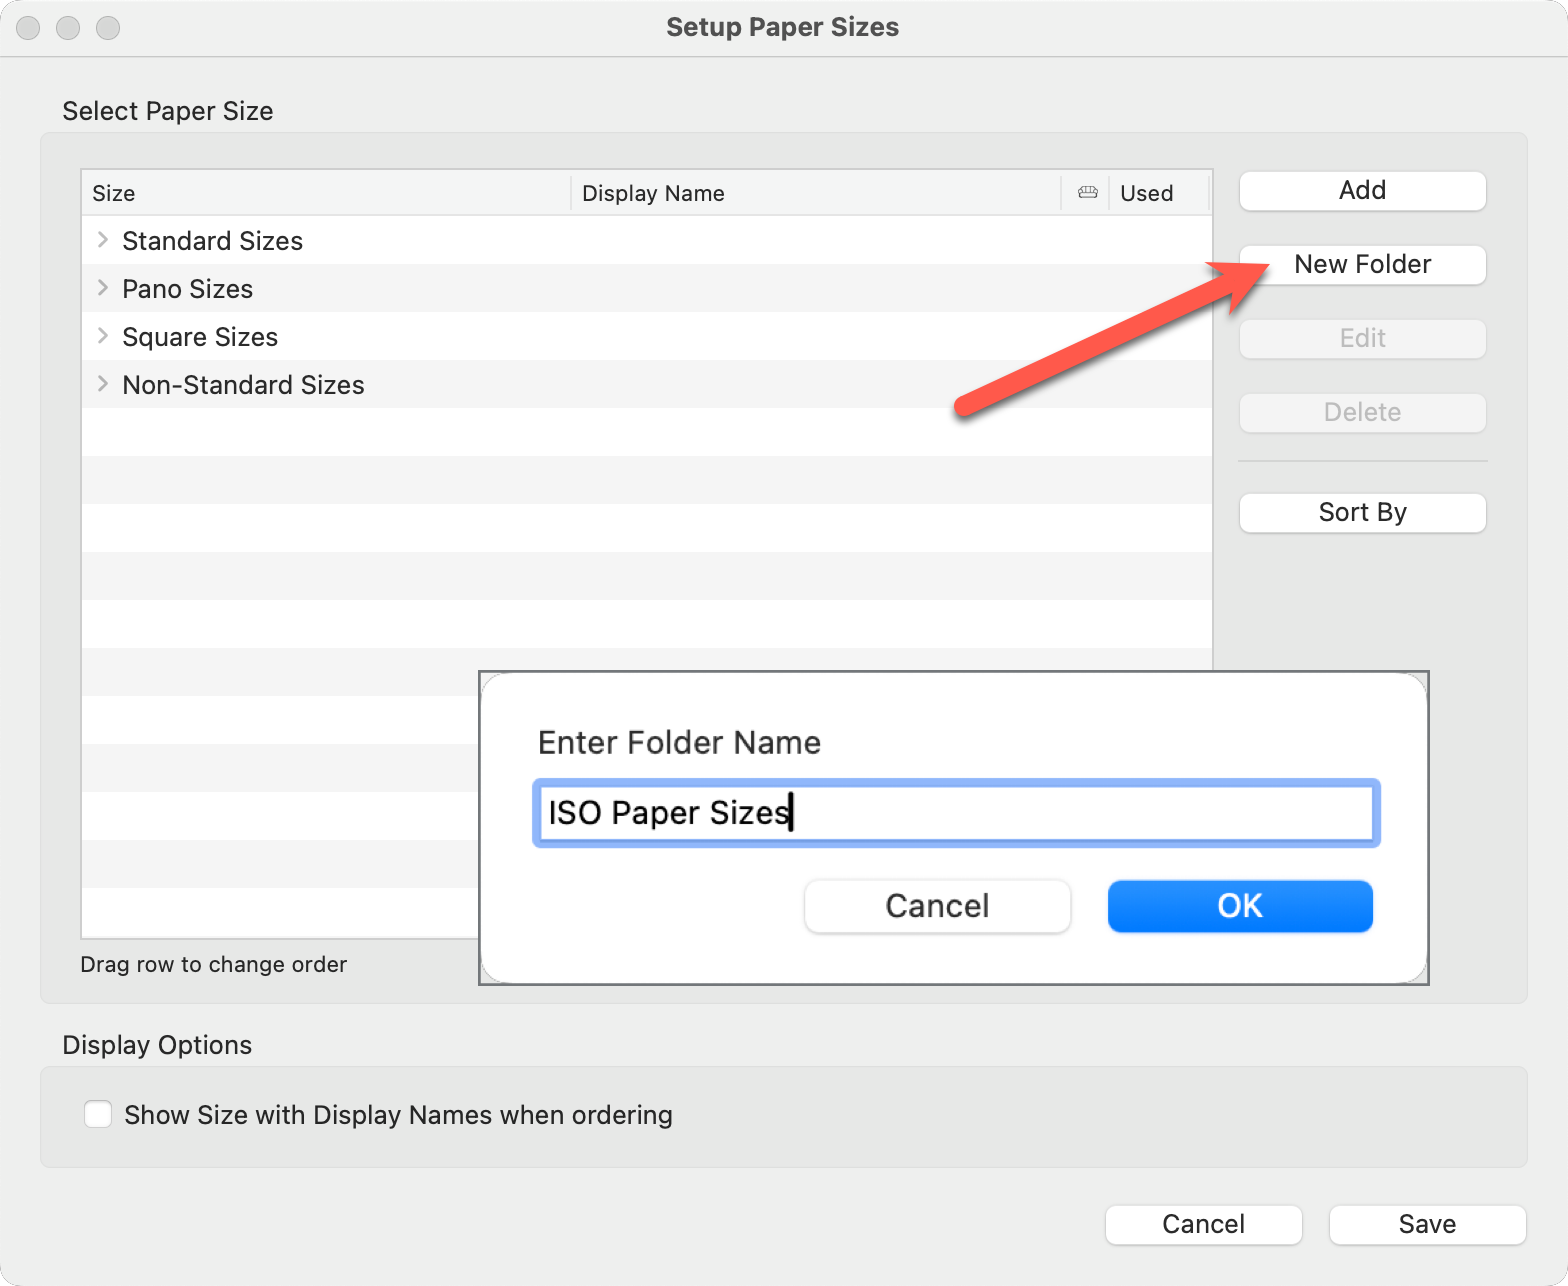
- With the "ISO Paper Sizes" folder selected, click the Add button.
- Enter the dimensions for the paper size. Use either inches or centimeters, depending on your ProSelect Units setting (Imperial or Metric).
- Example: Entering A0 Paper Size:
- Metric: 84.1 cm × 118.9 cm
- Imperial: 33.1 in × 46.8 in
- Enter A0 as the Display Name.

- Click Save.
- Repeat the above process for each additional ISO size.
- Click the Save button to close the dialog.
- These ISO sizes are now available for use in ProSelect.
ISO Paper Size Reference IMPERIAL
- A0: 33.1" x 46.8"
- A1: 23.4" x 33.1"
- A2: 16.5" x 23.4"
- A3: 11.7" x 16.5"
- A4: 8.3" x 11.7"
ISO Paper Size Reference METRIC
- A0: 84.1cm x 118.9cm
- A1: 59.4cm x 84.1cm
- A2: 42.0cm x 59.4cm
- A3: 29.7cm x 42.0cm
- A4: 21.0cm x 29.7cm
The units used depend on your system settings under Settings > General Settings > Working Units.
Paper Sizes provide a foundation for building products. This list will likely contain sizes that you may not offer. It’s better to leave the list intact as filtering of your offered sizes will be handled at the product level.
Non-standard paper sizes offer unique advantages, particularly when arranging Wall Groupings. The challenge can be the precise alignment of frames and mats, ensuring even spacing between each piece. By utilizing non-standard paper sizes, you have the flexibility to tailor the dimensions of prints, facilitating a perfect fit and alignment within the group. This customization allows for a more aesthetically pleasing wall display, as it accommodates the exact spacing needs of your arrangement.