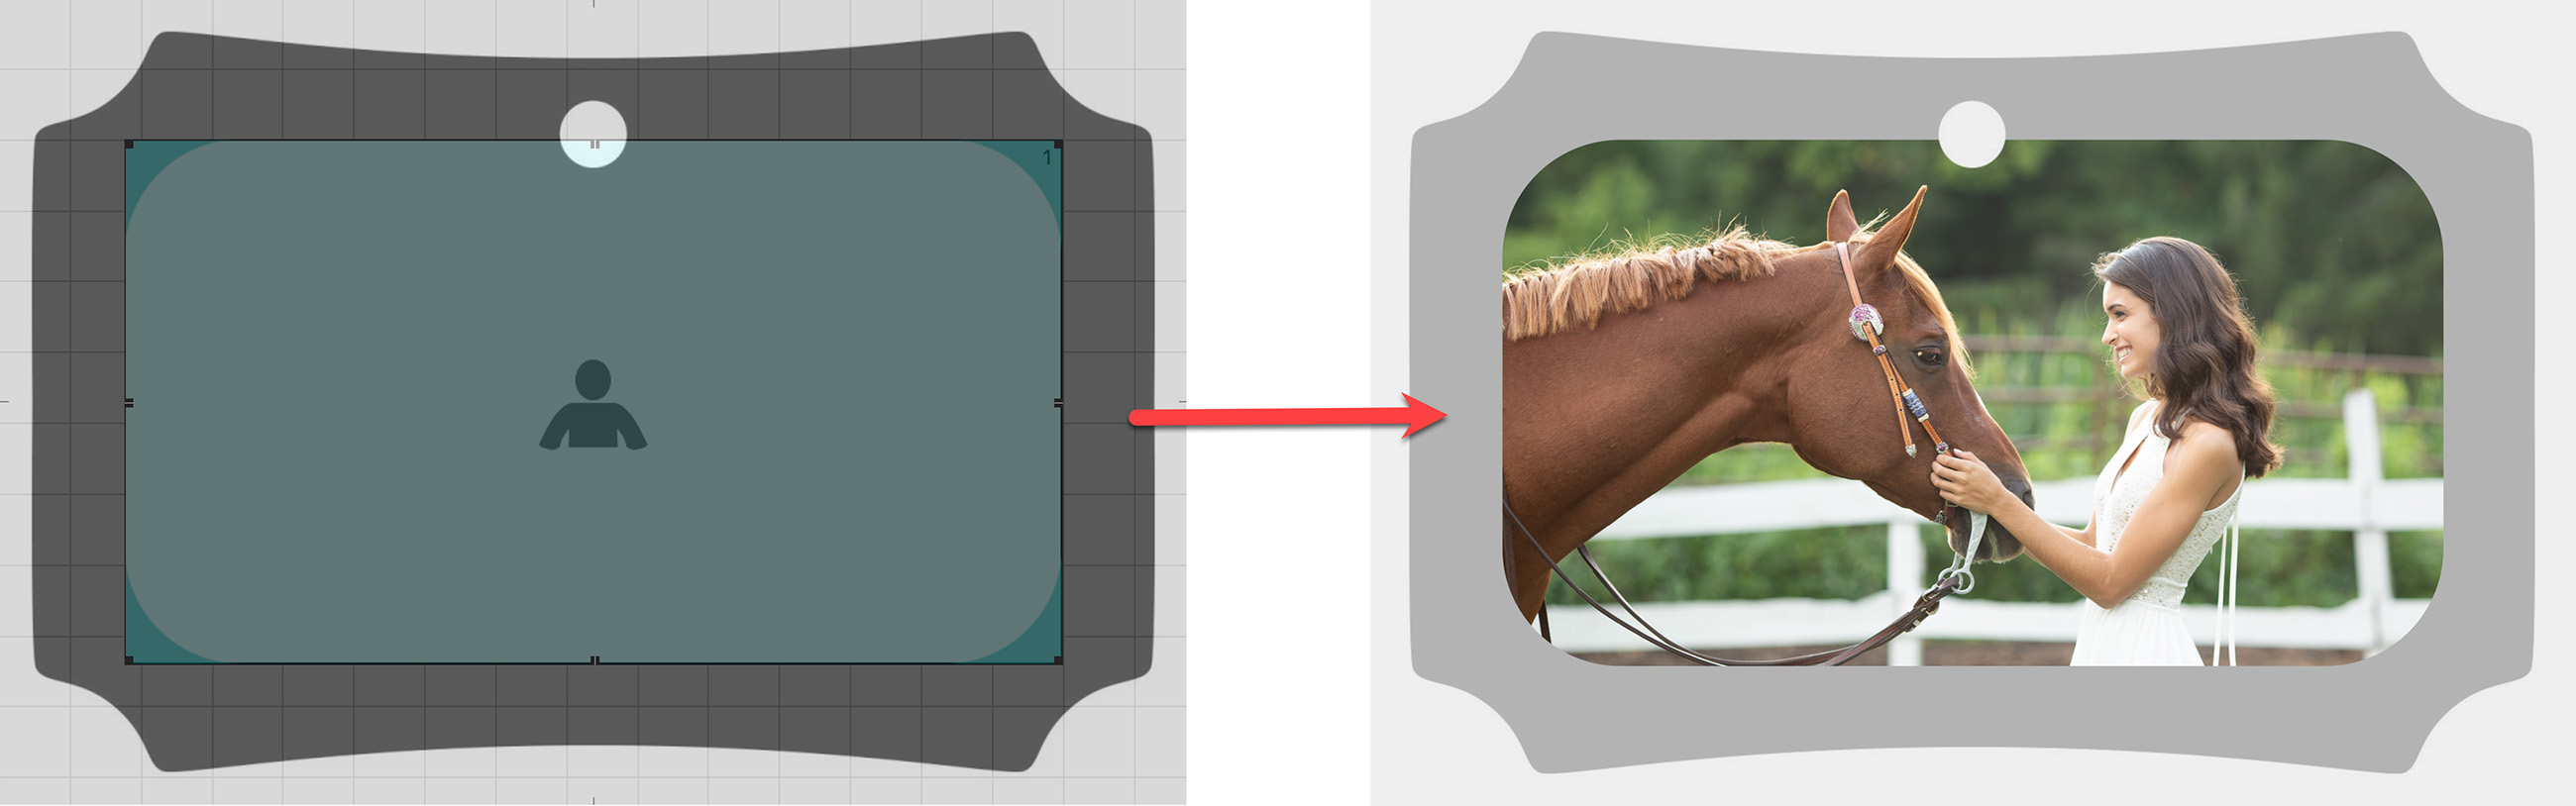
Shape Masks
Shape Masks can be utilized in advanced product and specialty templates to eliminate background elements, allowing for the presentation of irregular designs to showcase the product.
To define the shape, a black and white shape .jpg file is assigned to a product template. In this file, the white areas of the mask are transparent, while the black areas are opaque. Shape Masks can be applied with or without an overlay image, depending on the desired effect.
Images used for Shape Masks can be found in Resources. Go to the top menu, Resources > ProSelect Resources Folder > Manage Resource Images > Shapes. Direct access to this folder is rarely necessary, as the files are typically added within the Product Editor during the product creation process.
- When working with overlay images and shape files in ProSelect, it's advisable to use the same filename for both if they are associated with the same product template. This consistency allows ProSelect to effectively recognize and pair these files. When such paired files exist in the resources folder, ProSelect will display a PSD icon
 next to the filename, indicating the connection.
 - Adding a shape or overlay image to a template automatically links the corresponding file from the Template Overlays folder to the template, provided you haven't already chosen a different file. This automatic assignment simplifies the product template creation process.
- It's important to note that assigning a shape to a product template sets the sizing mode to a fixed size, which ensures the shape conforms correctly within the designated space.
- ProSelect also manages low-resolution copies of all shape masks utilized in any product templates within the Album file. If you update a shape mask that is already used in a product template, you should select "Update Album Resource Images" from the Resource menu. This action forces ProSelect to refresh the low-res copies in the album, ensuring that any changes are reflected across your project. This step is crucial for maintaining the integrity and consistency of your album's visual elements.
- Shape Prints are output as the full image, without the shape mask applied. Otherwise, if you produce an image with the shape mask, the file will have zero tolerance when added to lab ordering software.
- To keep the shaped version, open it in Photoshop or save it as a PSD file.
The Template Overlays (Shapes) dialog lists the filenames of all shape images. A preview of the selected shape appears on the right-hand side. The "Used In" area lists all the product templates currently using the selected shape image.
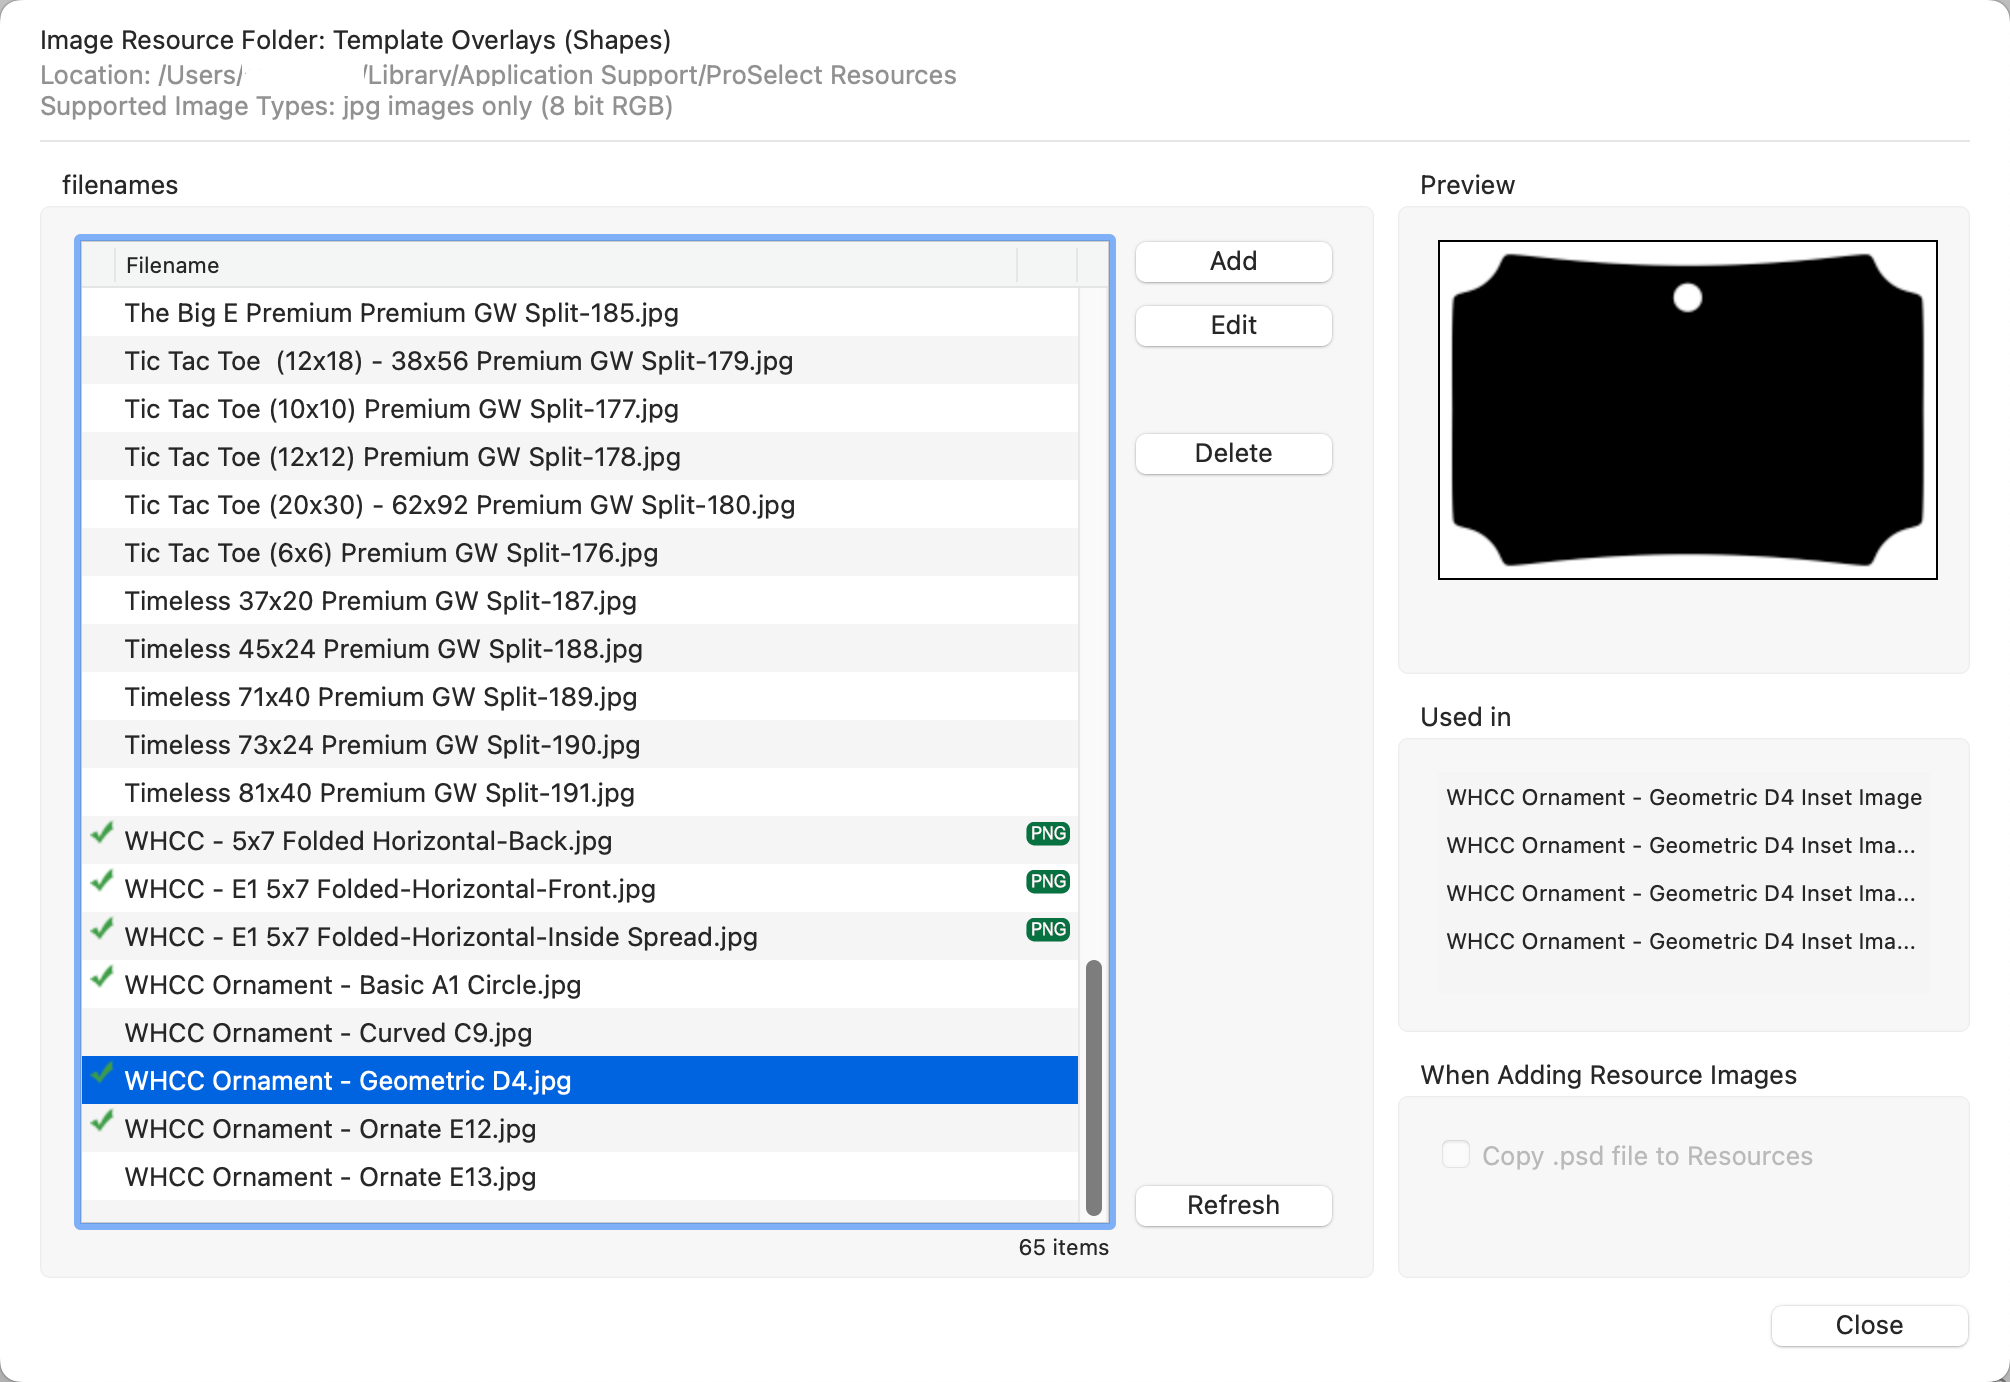
- Click the Add button to add an image to the resource folder. You can also drag and drop an image onto the list.
- Use the Edit button to open the image in Photoshop and make adjustments.
- To remove an image from the resource folder use the Delete button.
- When adding resource images in ProSelect, the "Copy .psd file to Resources" checkbox is enabled by default. It is recommended to keep this box checked to ensure that the .psd files are actually copied to your Resources, allowing you to make changes to the original file directly within ProSelect. Only consider unchecking this option if your Resources folder becomes too large, as unchecking means that the .psd files will only be referenced and no changes can be made to the originals within ProSelect. This setting helps manage file storage while maintaining flexibility in editing your resources.
Filenames
 A green checkmark indicates the image file is currently being used in a product template. The specific template(s) will be listed under Used in.
 : The PNG icon appears next to the filename if an associated and assigned overlay image file is in the Templates Overlay folder.
You can add Shape Masks to certain product types in the Product Editor. Click on Choosing a Product Template to view which types.
- In the Product Editor, scroll down to the Appearance box.
- Click "Select Shape Mask" from the Shape Mask drop-down menu.
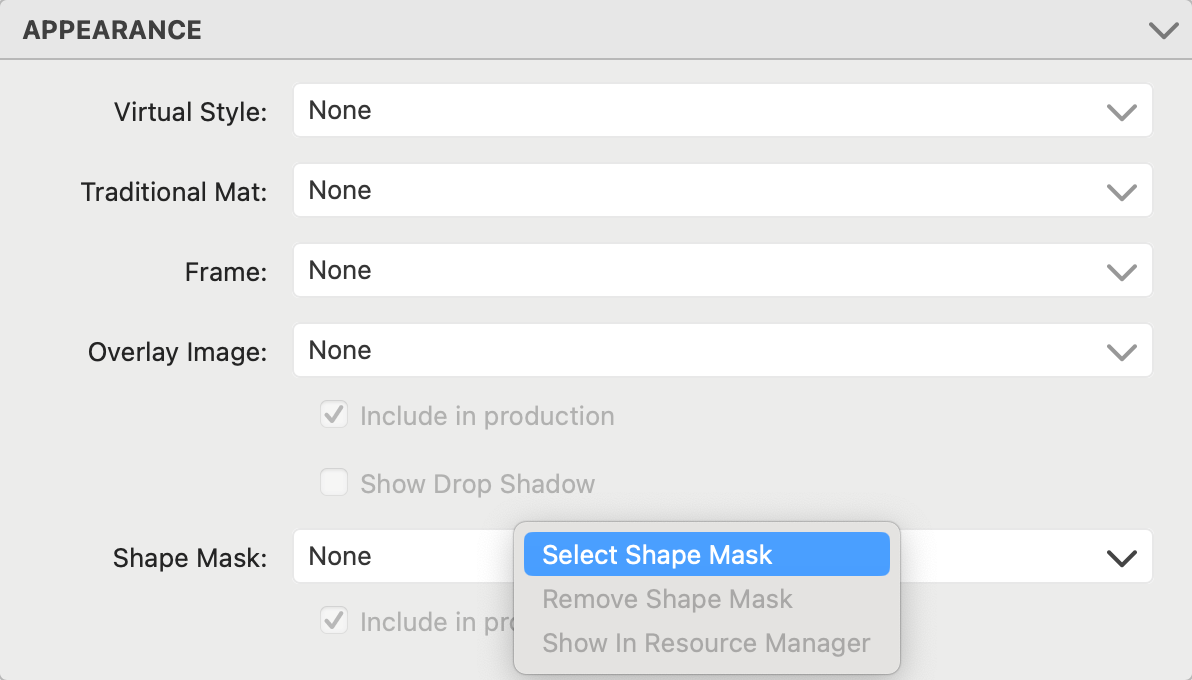
- You will be directed to the Template Overlays (Shapes) dialog. From here you can select a shape image to use in your product template.