Manage Templates
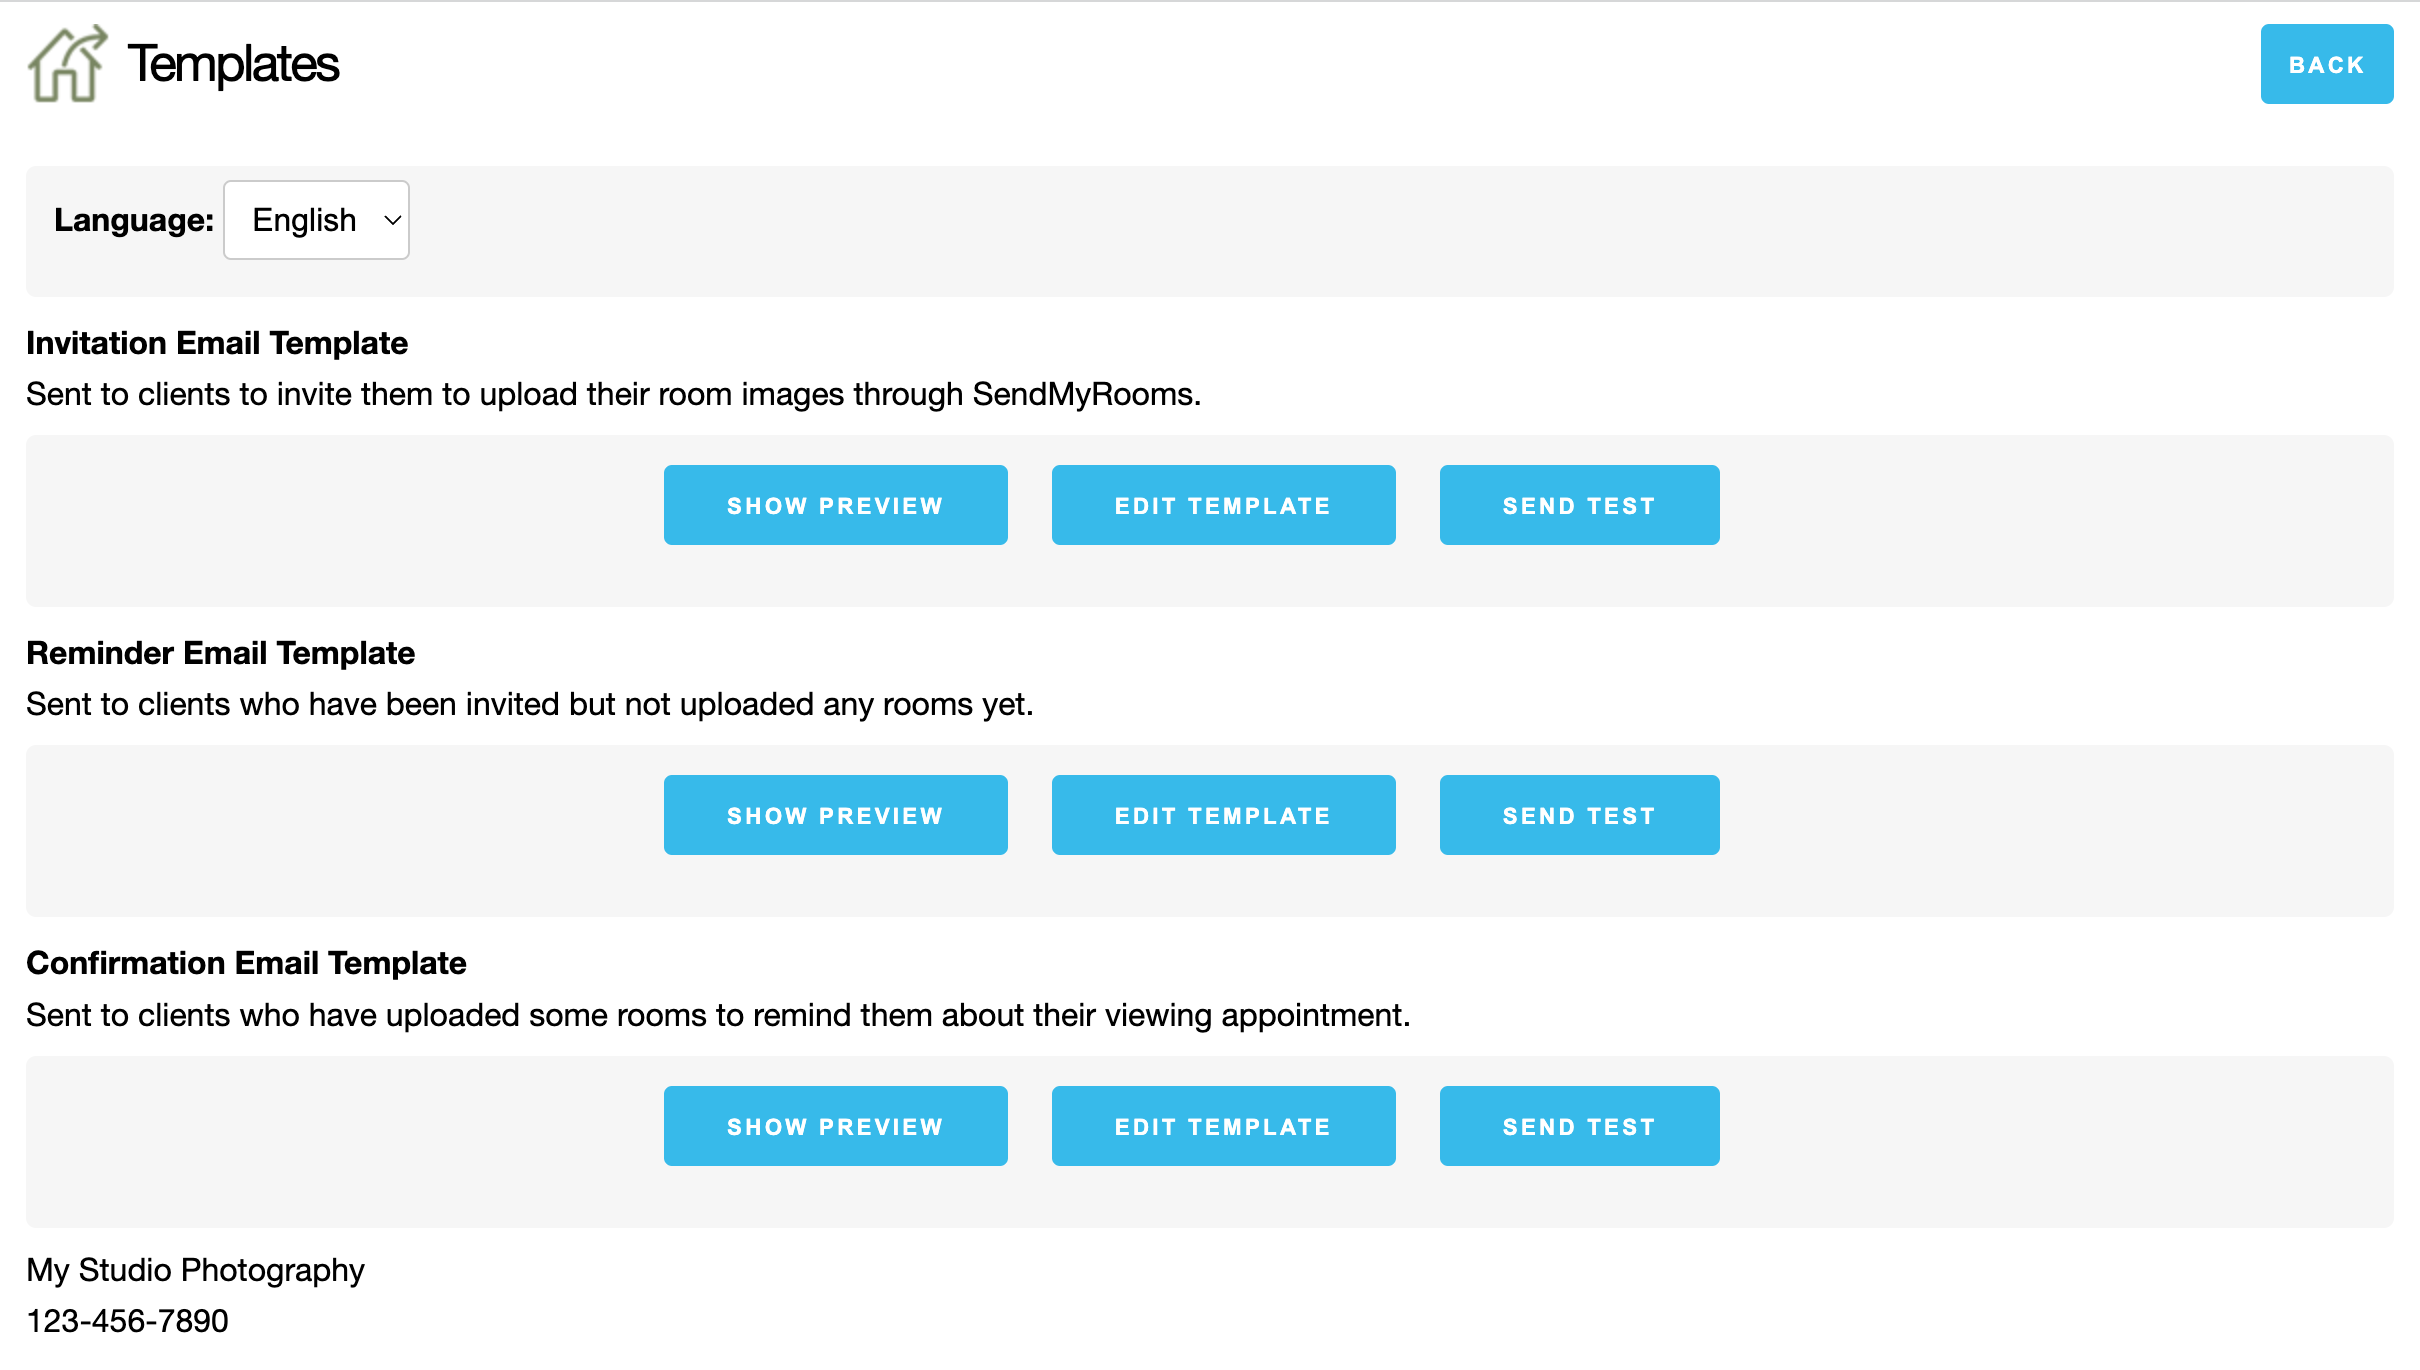
SendMyRooms™ comes with preset personalized email templates for the Invitation, Reminder, and Confirmation emails. You can preview, edit, and send a test email to yourself from the Templates page.
- Go to the SendMyRooms™ Management Page.
- Click on Settings.
- Click on Manage Templates (at the bottom).
- If you have changed the number of Invitation Templates in your Settings, then the additional Invitations will also be listed here.
- You can enable reminder and confirmation emails to be automatically sent to your clients. To activate this feature, configure the auto-send options in your settings.
- Multiple Language support will be available in the future.
- When you initially set up a connection with SendMyRooms™, three preset email templates are automatically configured for you. These templates come pre-filled with content that you can use right away or customize to suit your needs.
- If you make an error while modifying these templates, you can easily revert them to their original content. Use the "Reset to Default" button located at the bottom of the Template Editor page.
- Show Preview: Use this button to view the email as it will be sent to your Client. Any Text Tags will be replaced with the client's information.
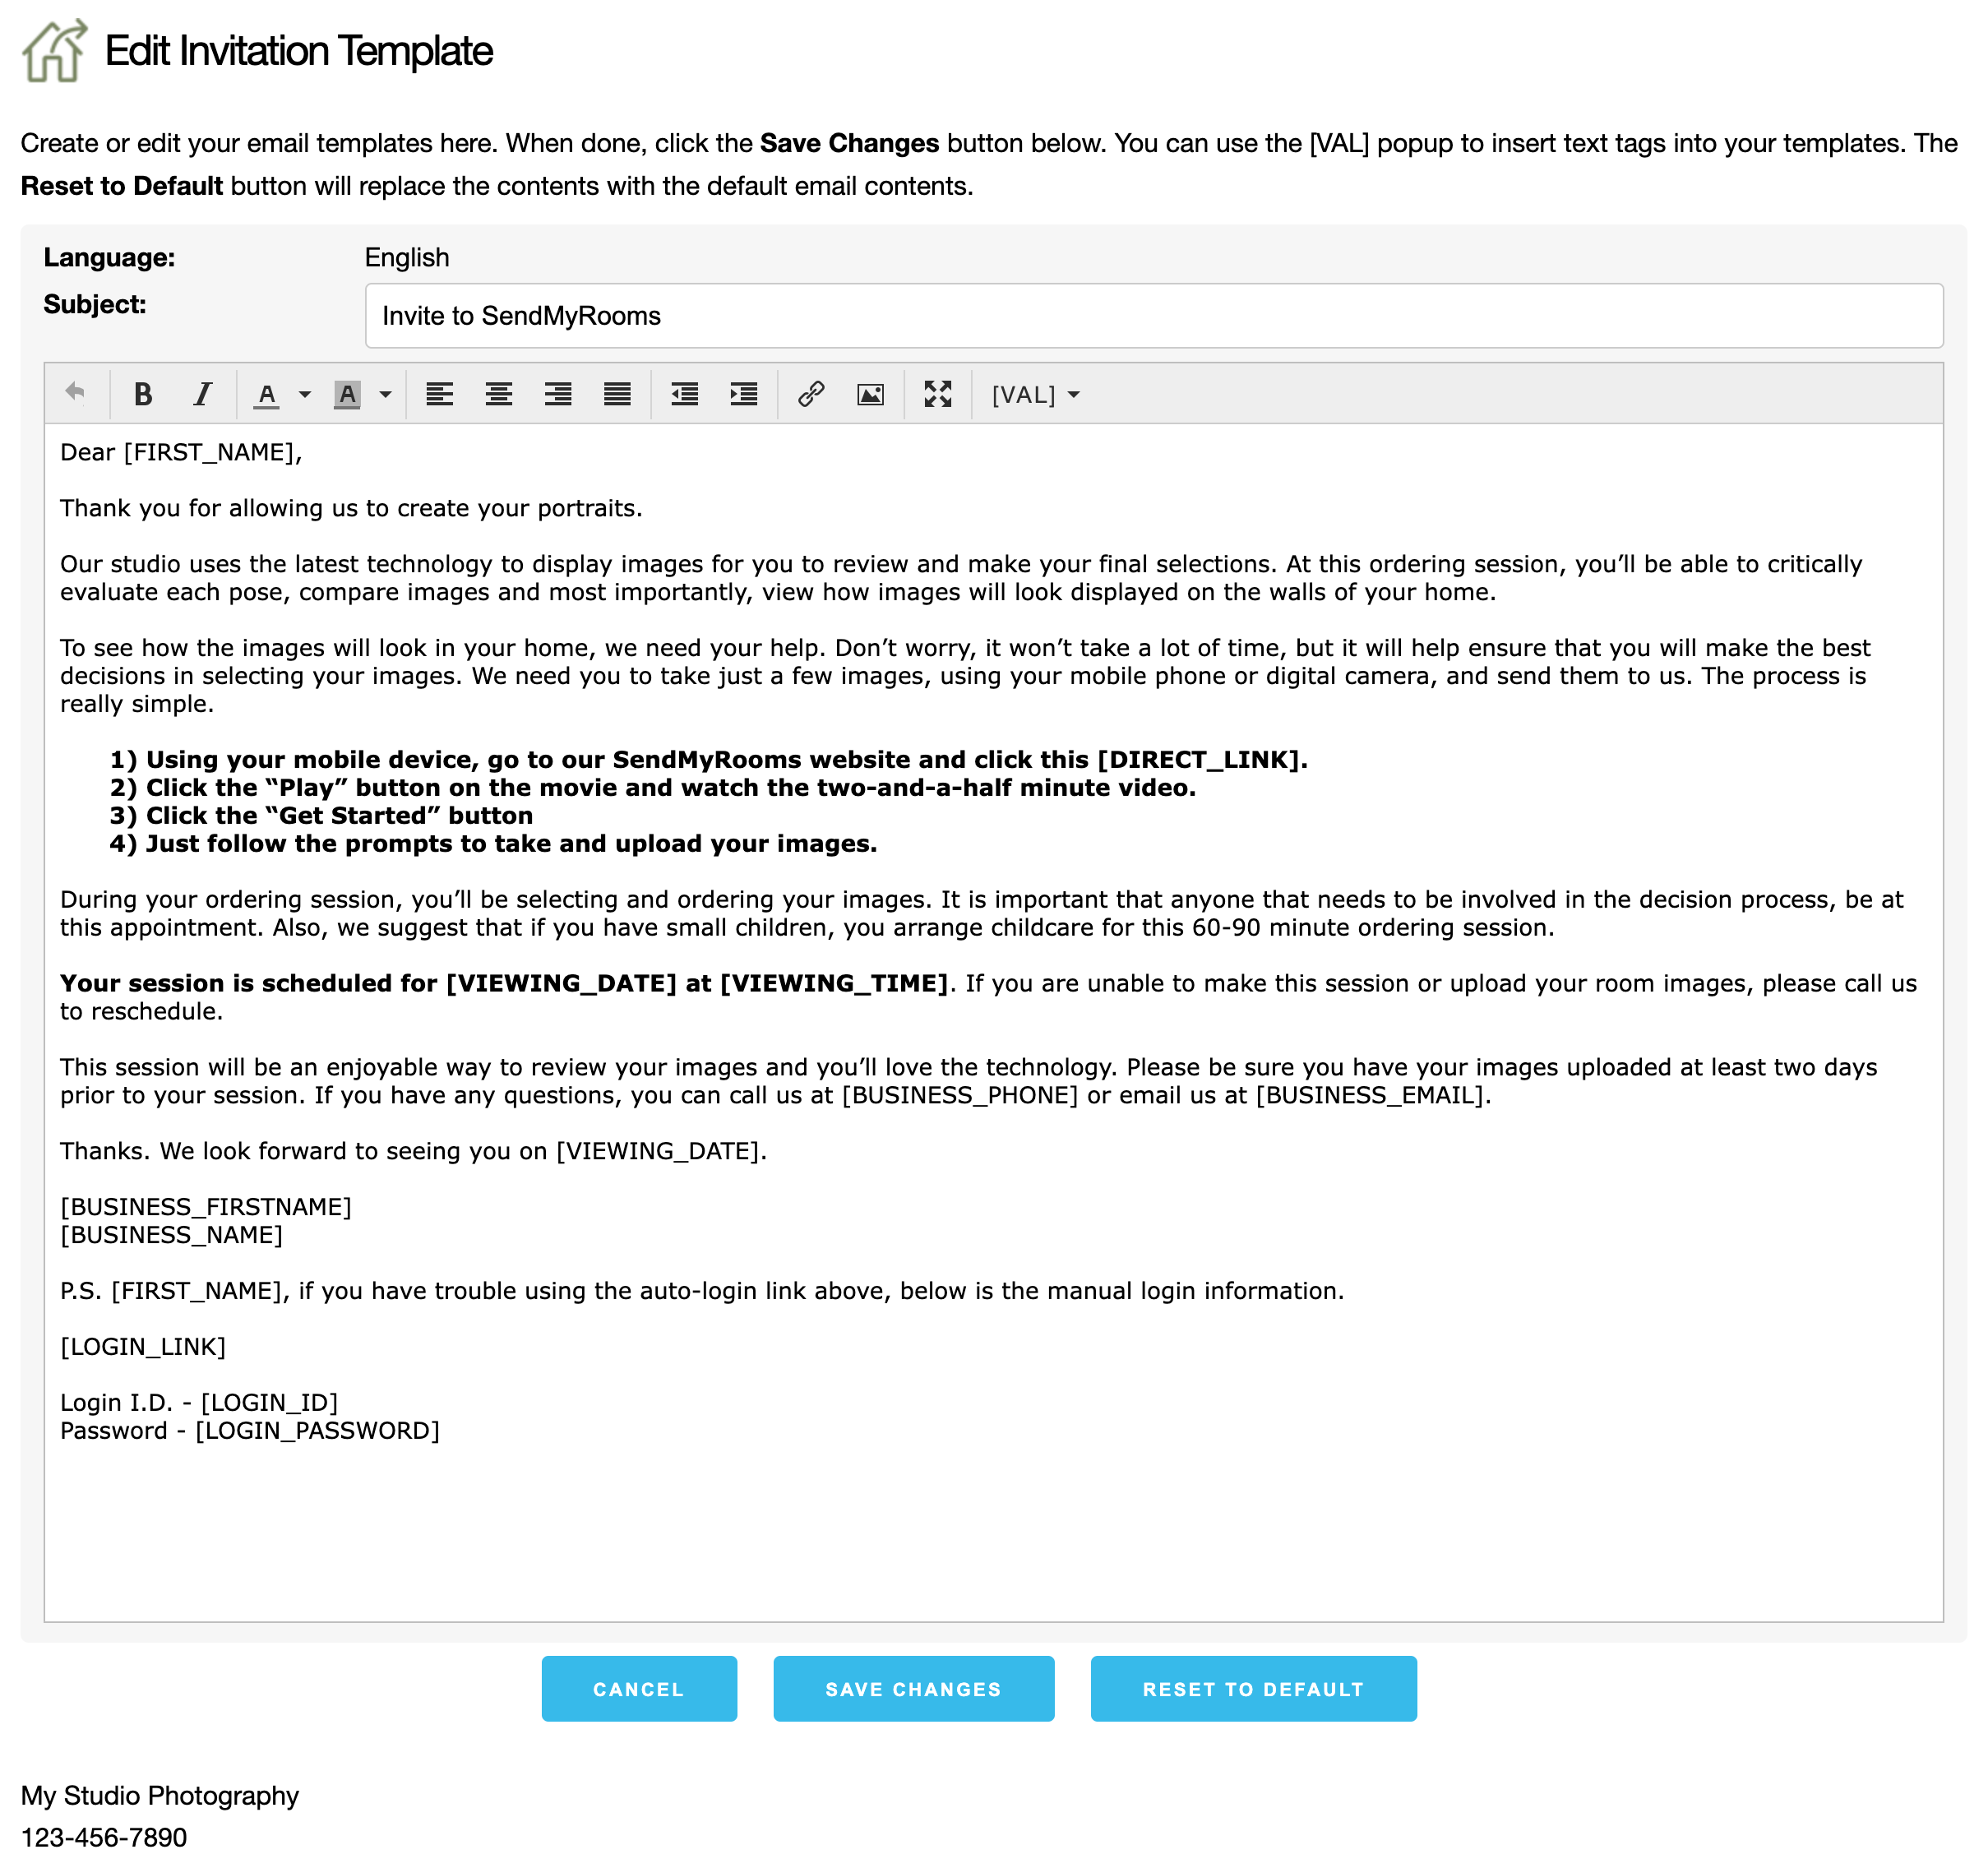
- Click the Edit Template button next to the email template you wish to customize.
- Customize the email template to your needs.
- Use the toolbar at the top to control formatting and character styles.
- Text Tags are an important part of customizing emails. Click on Text Tags to learn more.
- When finished, click Save Changes.
- To revert to the default template, click on the Reset to Default button.
Using Text Tags in Email Templates
Email templates can be personalized using Text Tags, which automatically substitute key information like your client’s name, studio name, and appointment time. This feature simplifies the process of sending customized emails.
How to Use Text Tags:
- Text Tags are placed within square brackets in your email templates, for example, [FIRST_NAME].
- To ensure accuracy, it's recommended to insert Text Tags using the [VAL] button rather than typing them manually, which helps prevent errors.
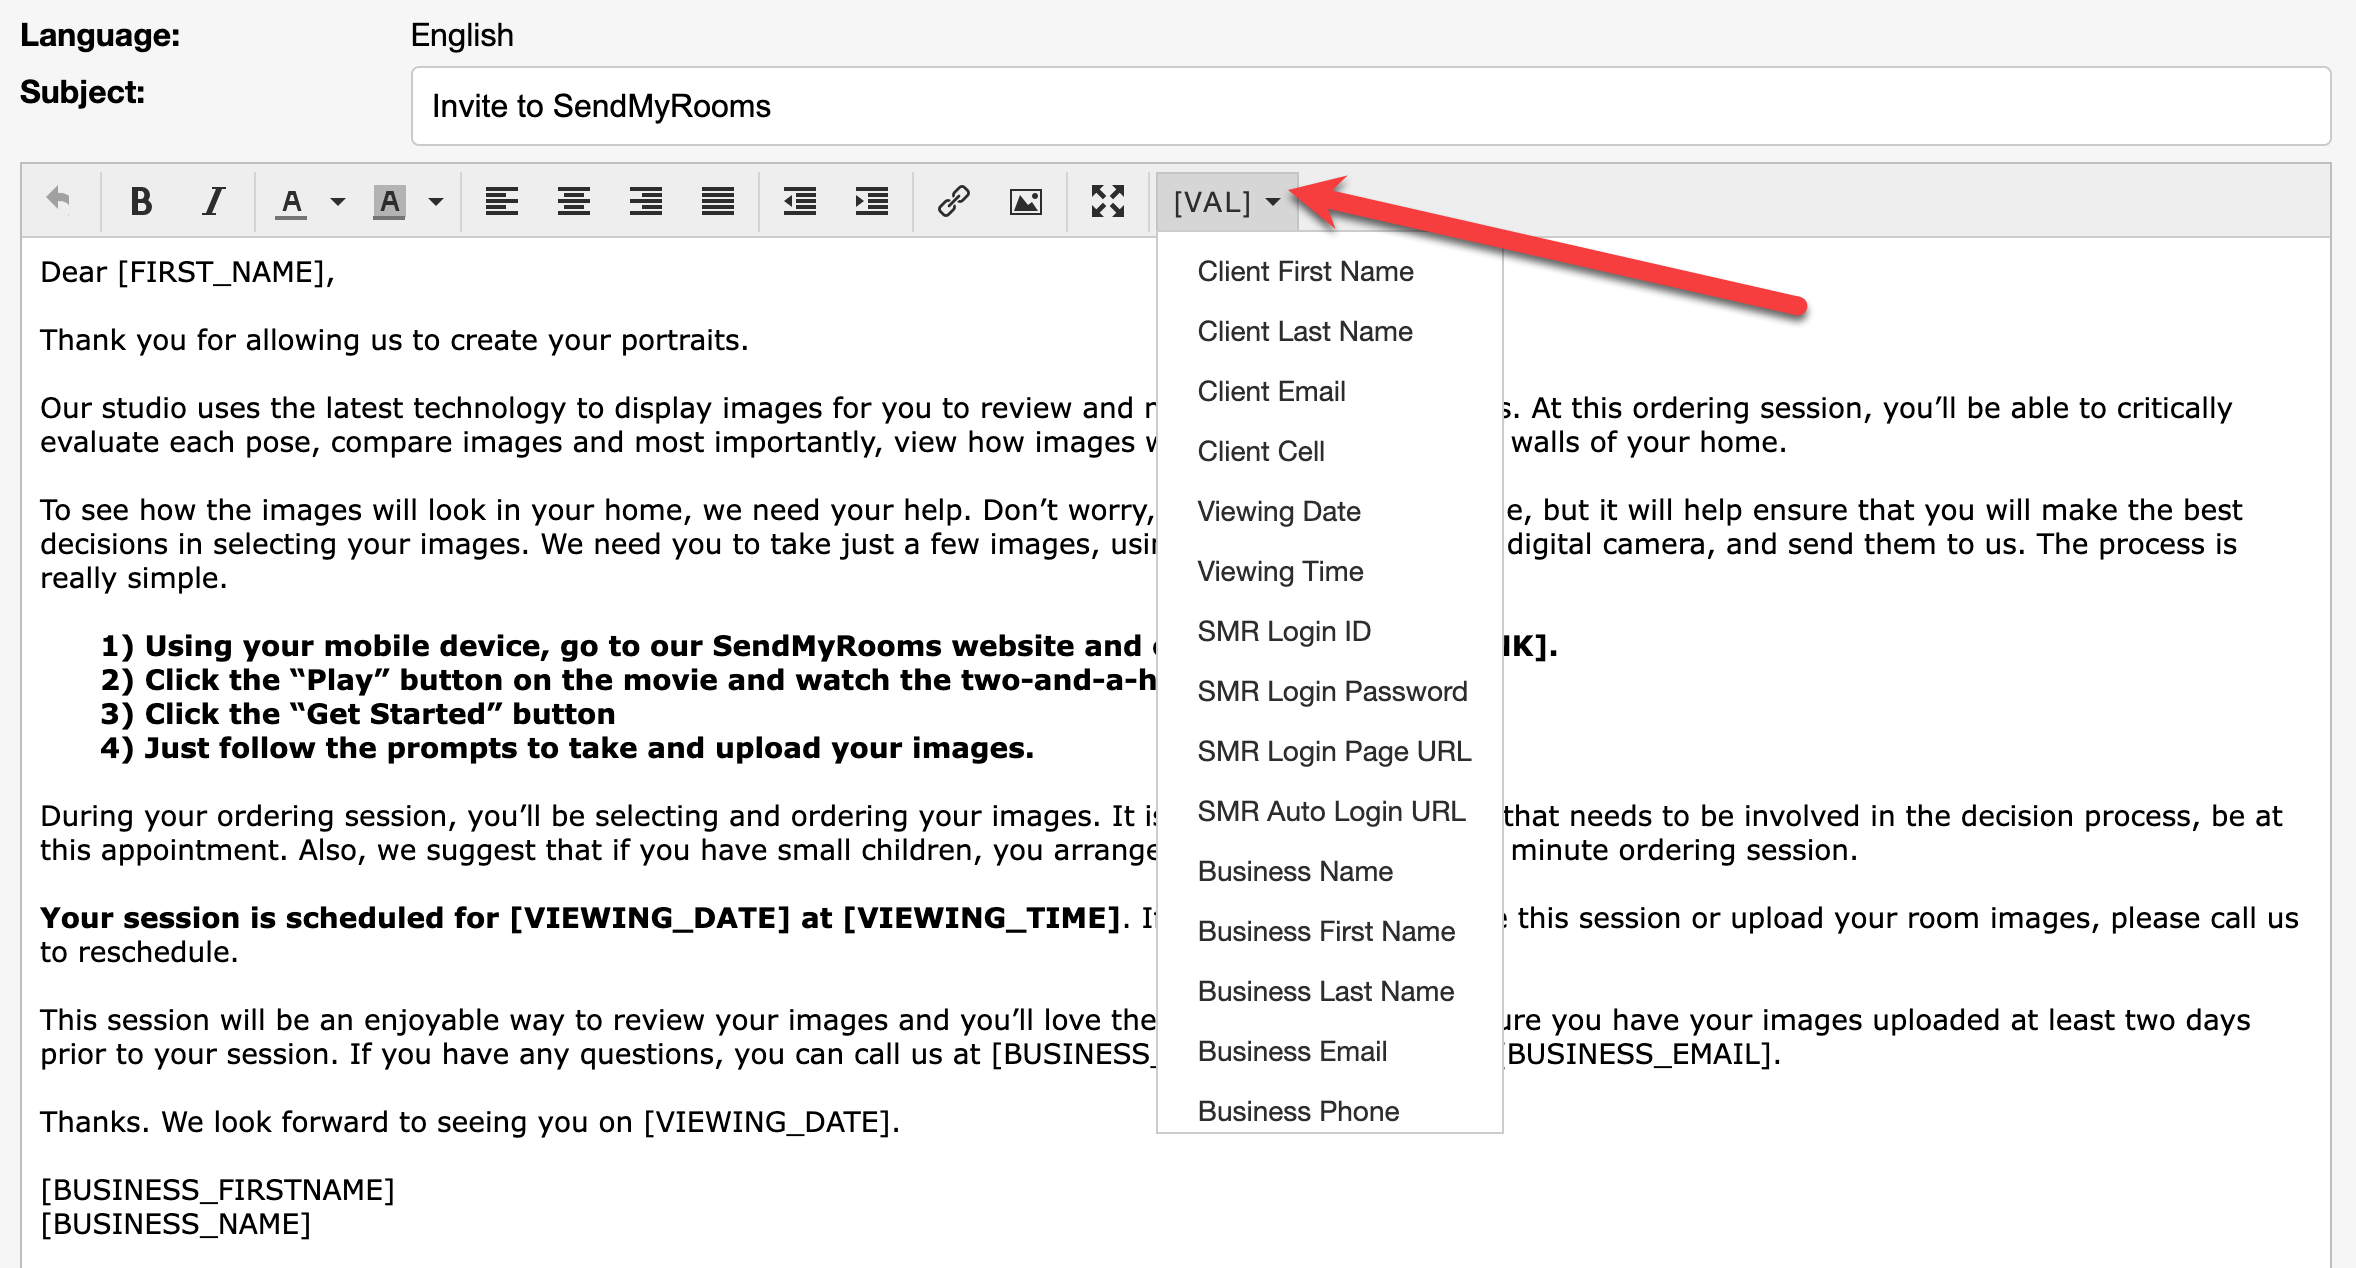
Inserting Text Tags:
- Place your cursor in the template where you want the tag to be.
- Click the [VAL] button.
- Select the desired tag from the drop-down menu.
This method ensures that the correct tags are used, allowing for seamless personalization of emails without manual input for each message.
Use the Show Preview button to view the email template with the text tag information replaced.
You can include your studio logo image (or any other images) into the email templates provided that image is located somewhere on the internet (such as on your website).
- Click on the insert/edit image icon at the top.

- Enter the full URL for the image in the Source box.
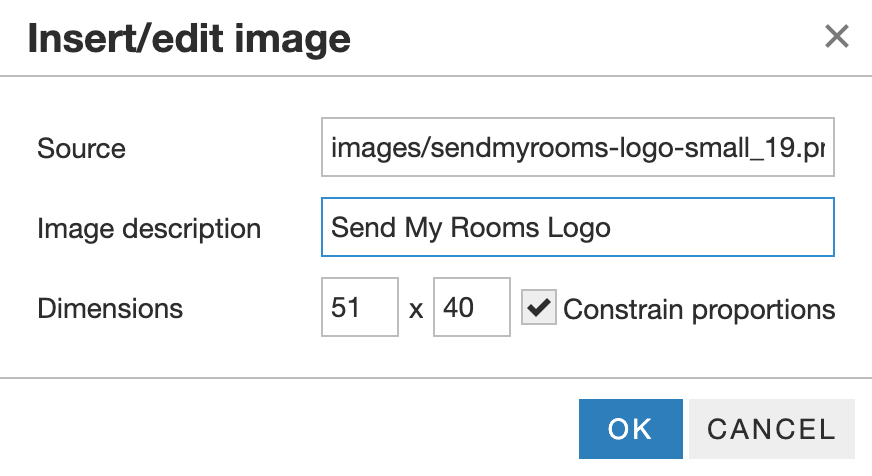
- Enter an Image Description (for example, Send My Rooms Logo).
- The Dimensions will autofill at actual size. To scale the image down, enter a smaller number in either the width (left box) or height (right box).
- It’s best to leave Constrain proportions checked, so the image is not distorted.
- After inserting the image, you can select and drag it to where you want it placed in the invite template. Use the corner handles to resize it.
- To remove an image, select it then click the Insert Image URL button and delete the contents of the Source box. Then click OK.