Importing Room Images into ProSelect
Uploaded client room images can be directly downloaded into ProSelect as “Album Rooms” which are saved within the client’s album file. Open ProSelect and follow these steps:
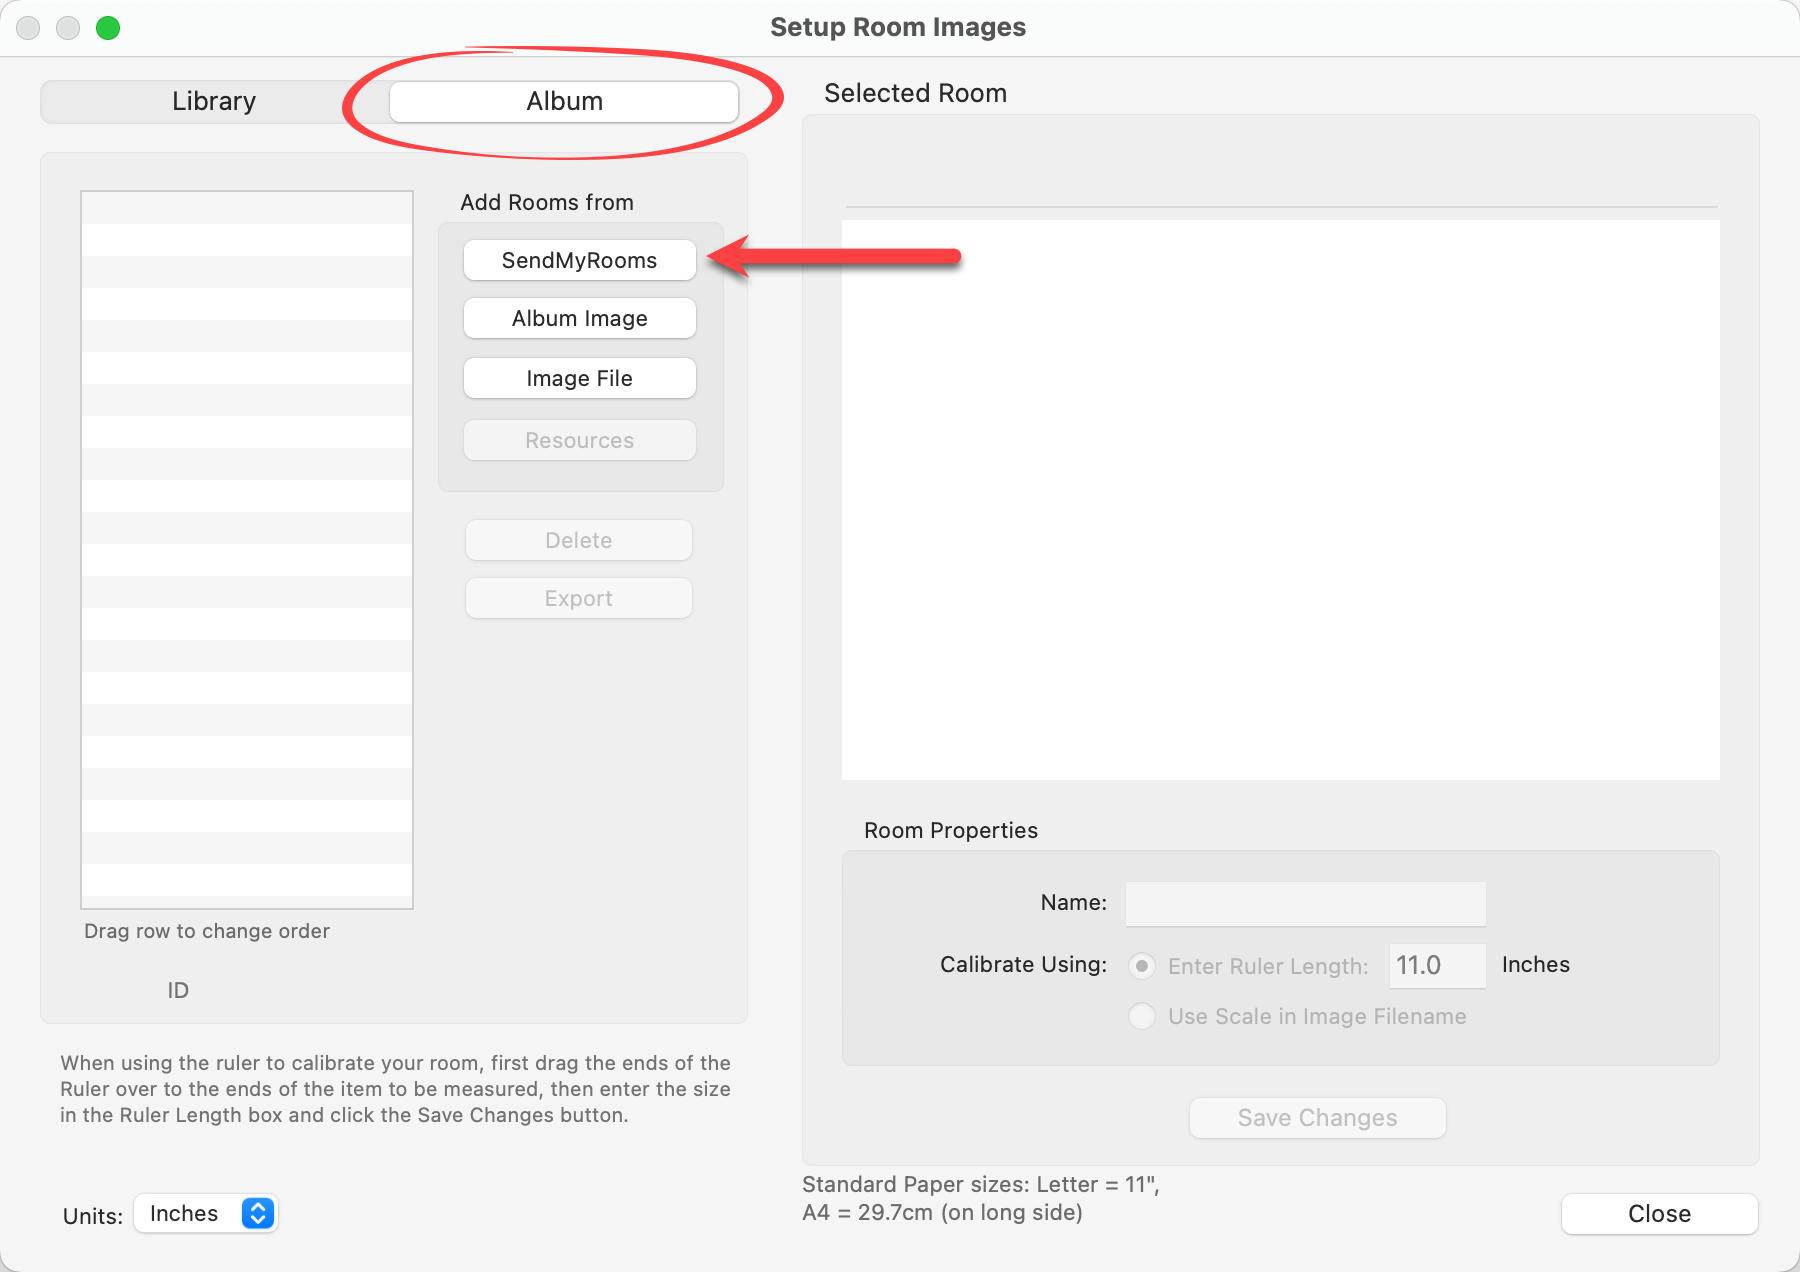
- Open the Setup Room Images window by going to Resources > Setup Rooms.
- Select the Album Tab at the top.
- Click on the SendMyRooms button.
- Using the Search SendMyRooms.com window, you can search for a client's images in three different ways:
- All Viewings: All clients will be listed. Click the Search button. The results will be displayed below.
- Client from this album: If you have already entered one or more client’s names for this album (using the Setup Clients window), you can select their name from the drop-down menu. Click the Search button. The results will be displayed below.
- Another Name: Enter a full or partial name into the search boxes. Click the Search button. The results will be displayed below.
- In the results box on the left, click on a client name to preview the room images that they have uploaded.
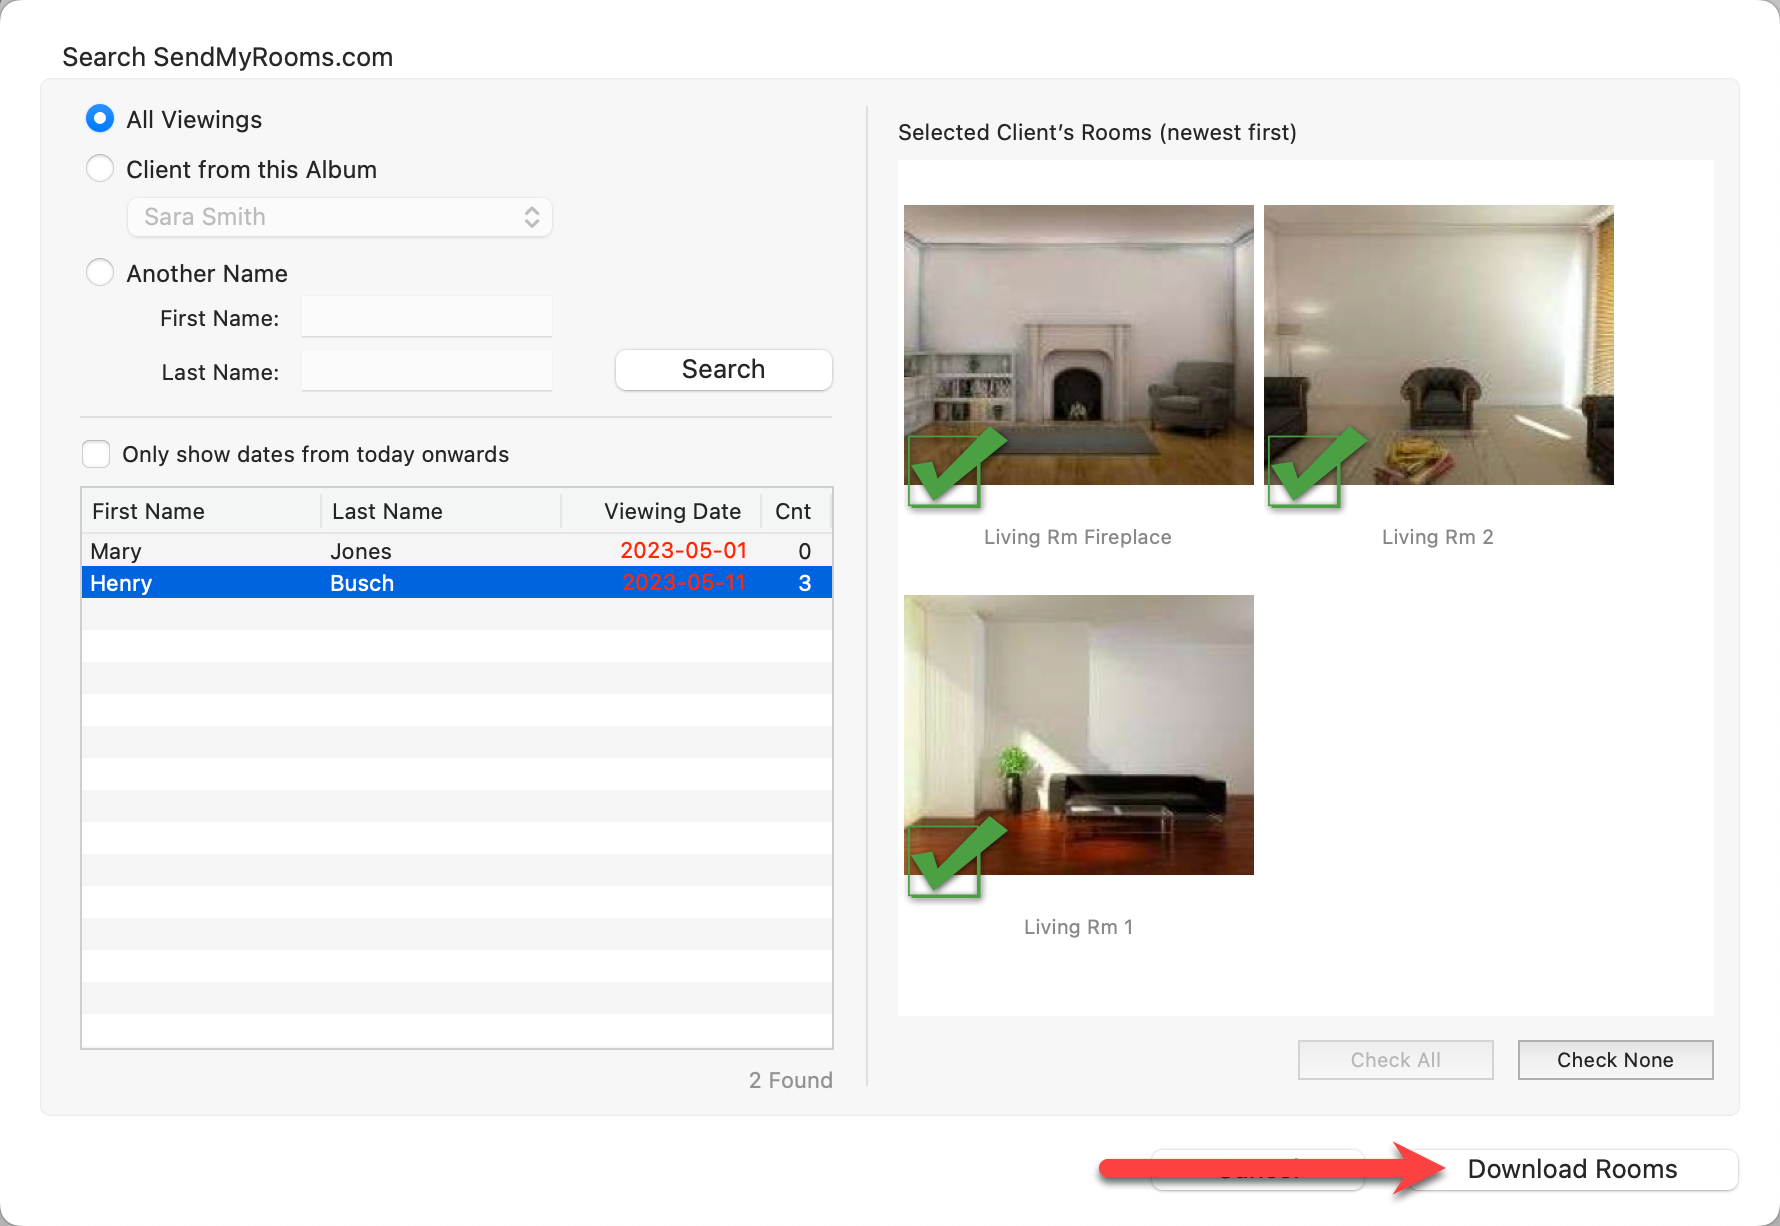
- Click on some or all of the images to select them (or use the Check All button to select all room images).
- Click the Download Rooms button to add the room images to your currently open ProSelect Album file.
- The rooms have now been downloaded into the Client Album. Follow the calibration steps as you would for an Album room.